
Macrame plant hangers bring natural elegance into your home while showcasing your favorite greenery. Whether you’re a complete beginner or an experienced crafter, these 20 stunning patterns offer something for everyone.
From simple three-strand designs to intricate multi-tiered creations, you’ll discover step-by-step instructions for each macrame plant hanger. This comprehensive guide covers everything you need to know about materials, techniques, and finishing touches.
Ready to transform your space with handmade beauty? Let’s explore these gorgeous DIY macrame plant hanger patterns that will elevate your home décor.
Transparency Notice: This post may contain affiliate links. When you purchase through these links, we may earn a small commission at no additional cost to you. We only recommend supplies and materials we genuinely use and trust for our own macrame projects.
Table of Contents
Essential Supplies for Your Macrame Plant Hanger Journey
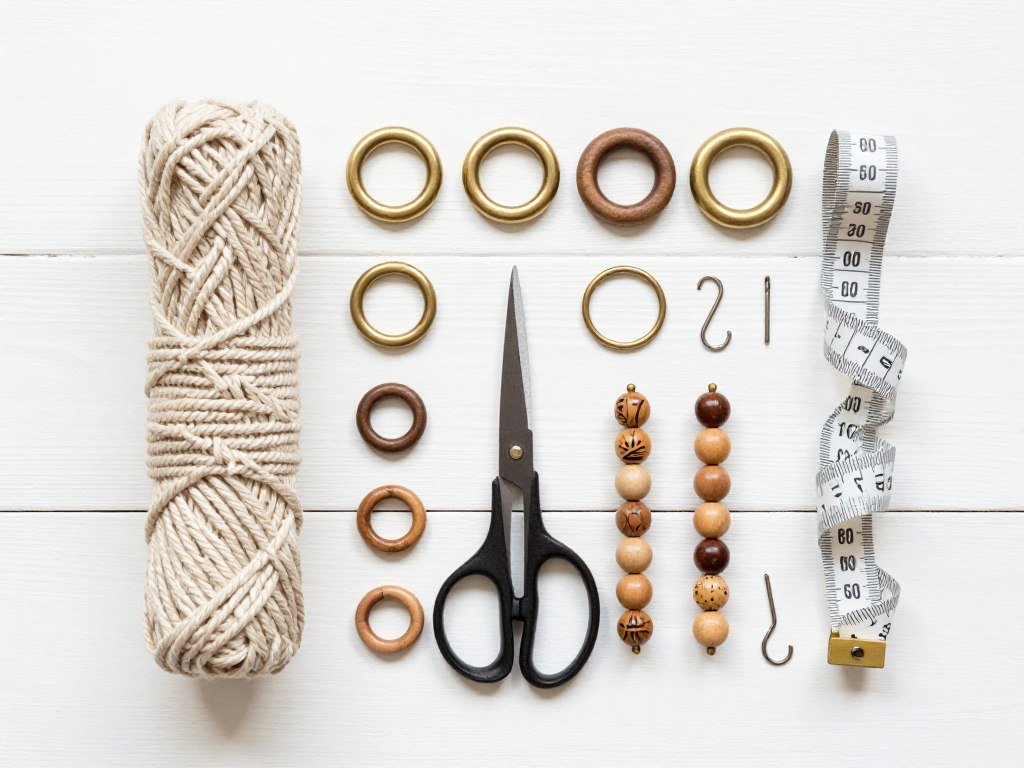
Before diving into these beautiful patterns, you’ll need the right materials. Having quality supplies makes the entire process easier and produces better results.
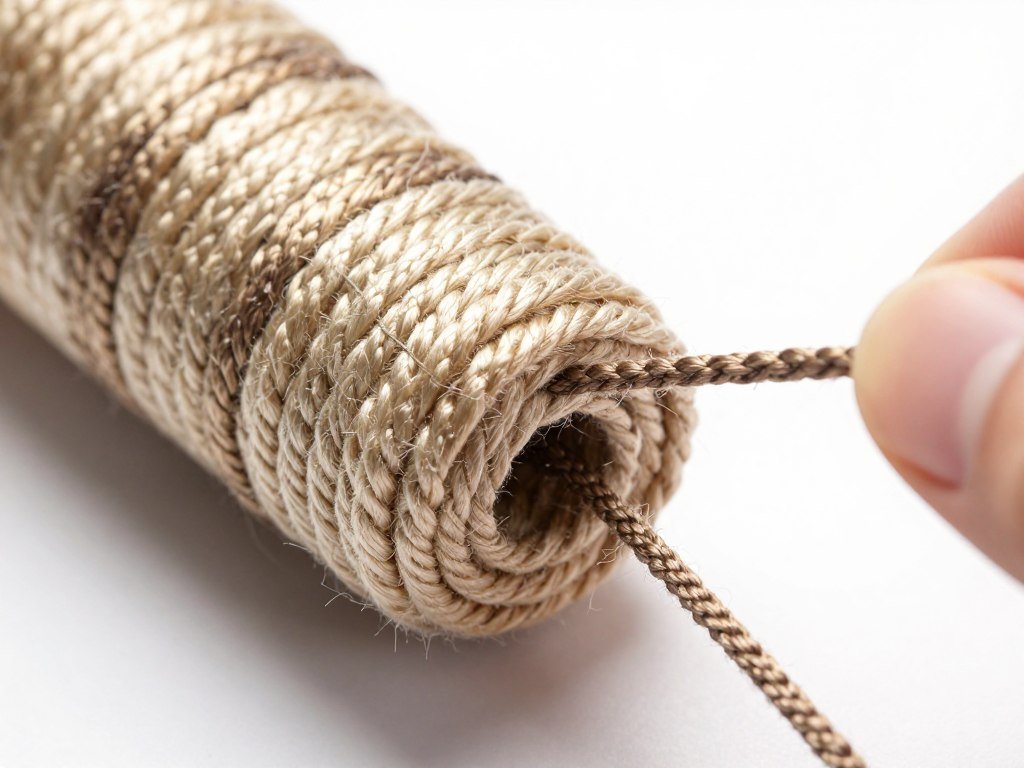
The type of cord you choose significantly impacts your final macrame plant hanger. Cotton cord remains the most popular choice for its softness, durability, and natural appearance.
Basic Materials Needed
- Macrame cord (3mm to 6mm diameter)
- Metal or wooden rings (1 to 2 inches)
- Scissors or cord cutting tool
- Measuring tape
- S-hooks or ceiling hooks
- Plant pot (for sizing reference)
Optional But Helpful Tools
- Macrame board or clipboard
- T-pins for securing work
- Comb for fringing ends
- Beads or wooden accents
- Fabric stiffener spray
- Wire brush for texture
Get Your Complete Macrame Starter Kit
Everything you need to create all 20 patterns in one convenient bundle. Includes premium cotton cord, assorted rings, and our exclusive pattern guide PDF.
Beginner-Friendly DIY Macrame Plant Hanger Patterns
Starting your macrame journey shouldn’t feel overwhelming. These first seven patterns use basic knots and simple techniques that build your confidence.
Each beginner pattern focuses on mastering fundamental skills. You’ll learn square knots, spiral knots, and gathering knots that form the foundation for more complex designs.
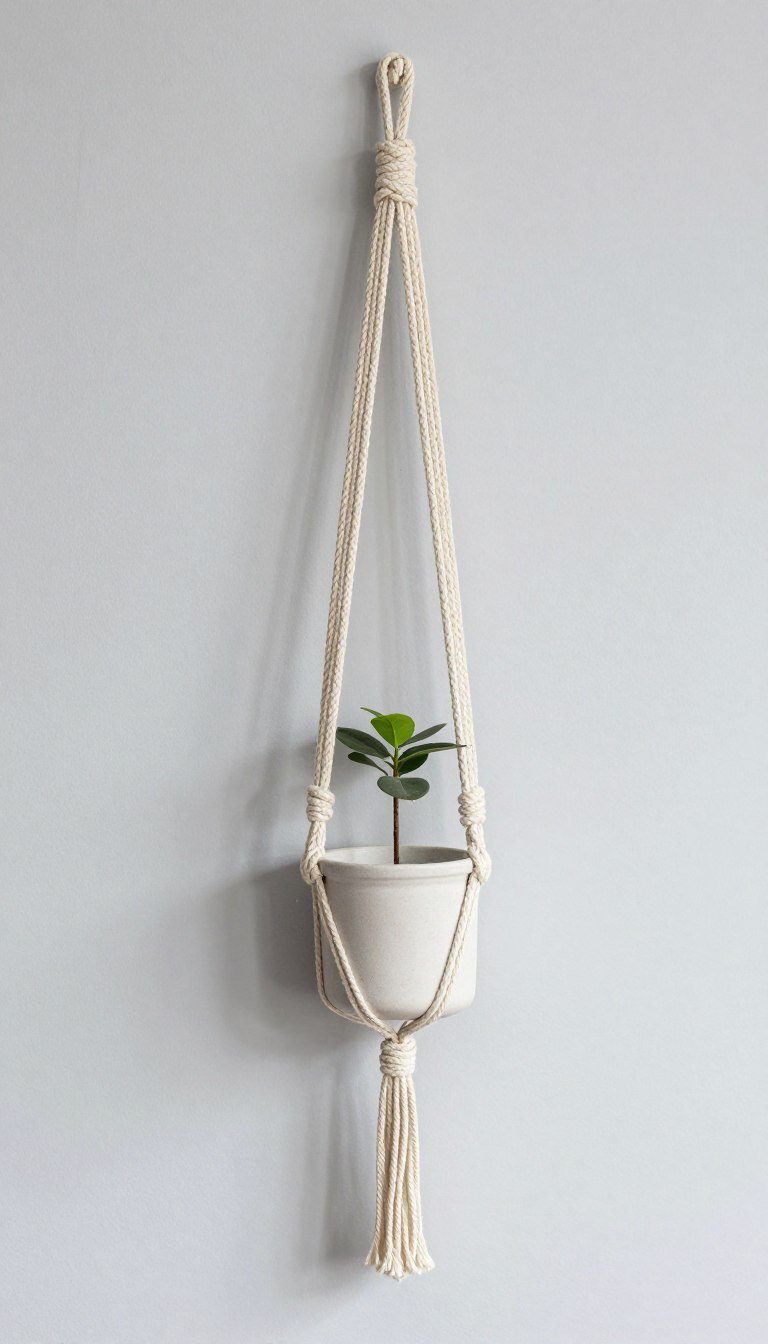
Pattern 1: Classic Three-Strand Simple Hanger
This timeless design requires just four pieces of cord and one metal ring. It’s perfect for your very first macrame plant hanger project.
Materials needed: Four 10-foot lengths of 5mm cotton cord, one 2-inch metal ring, scissors.
Step-by-Step Instructions
- Fold all four cord lengths in half and attach to the ring using a gathering knot
- Divide the eight working cords into four pairs
- Measure down 12 inches from the ring and tie a square knot with each pair
- Continue making square knots every 3 inches for the desired length
- At the bottom, gather all eight cords and tie a gathering knot
- Trim ends to your preferred length and unravel for a tassel effect
Difficulty: Beginner | Time Required: 45 minutes | Cord Used: 40 feet total
Pattern 2: Basic Spiral Knot Hanger
The spiral knot creates a beautiful twisted effect that looks complex but remains surprisingly easy. This pattern teaches you how the half square knot naturally spirals.
Materials needed: Four 12-foot lengths of 4mm cord, one 1.5-inch wooden ring.
Creating the Spiral Effect
- Attach all four cords to the ring with a gathering knot
- Separate into two groups of four cords each
- With each group, designate two center cords as anchor cords
- Make continuous half square knots (always tying from the same side)
- Watch the spiral form naturally after 6-8 half square knots
- Continue spiral knots for 18-20 inches
- Create a basket section with square knots from adjacent groups
- Finish with a gathering knot and trimmed tassel
Difficulty: Beginner | Time Required: 1 hour | Cord Used: 48 feet total
Pro Tip: Keep consistent tension on your anchor cords to ensure even spiral knots throughout your plant hanger. Loose anchor cords create irregular spirals.
Pattern 3: Simple Square Knot Design
This pattern focuses entirely on perfecting the square knot. Mastering this fundamental knot opens doors to countless macrame plant hanger variations.
Materials needed: Six 9-foot lengths of 5mm cord, one 2-inch metal ring.
- Fold six cords in half and attach to ring (creating 12 working cords)
- Divide into three groups of four cords
- In each group, make a square knot 8 inches below the ring
- Continue making square knots every 2 inches down for 16 inches
- Split groups and recombine: take two cords from adjacent groups
- Make square knots with these new combinations 3 inches below the last row
- Repeat the process one time to create the plant basket
- Gather all cords and tie a gathering knot at the desired length
Difficulty: Beginner | Time Required: 1.5 hours | Cord Used: 54 feet total
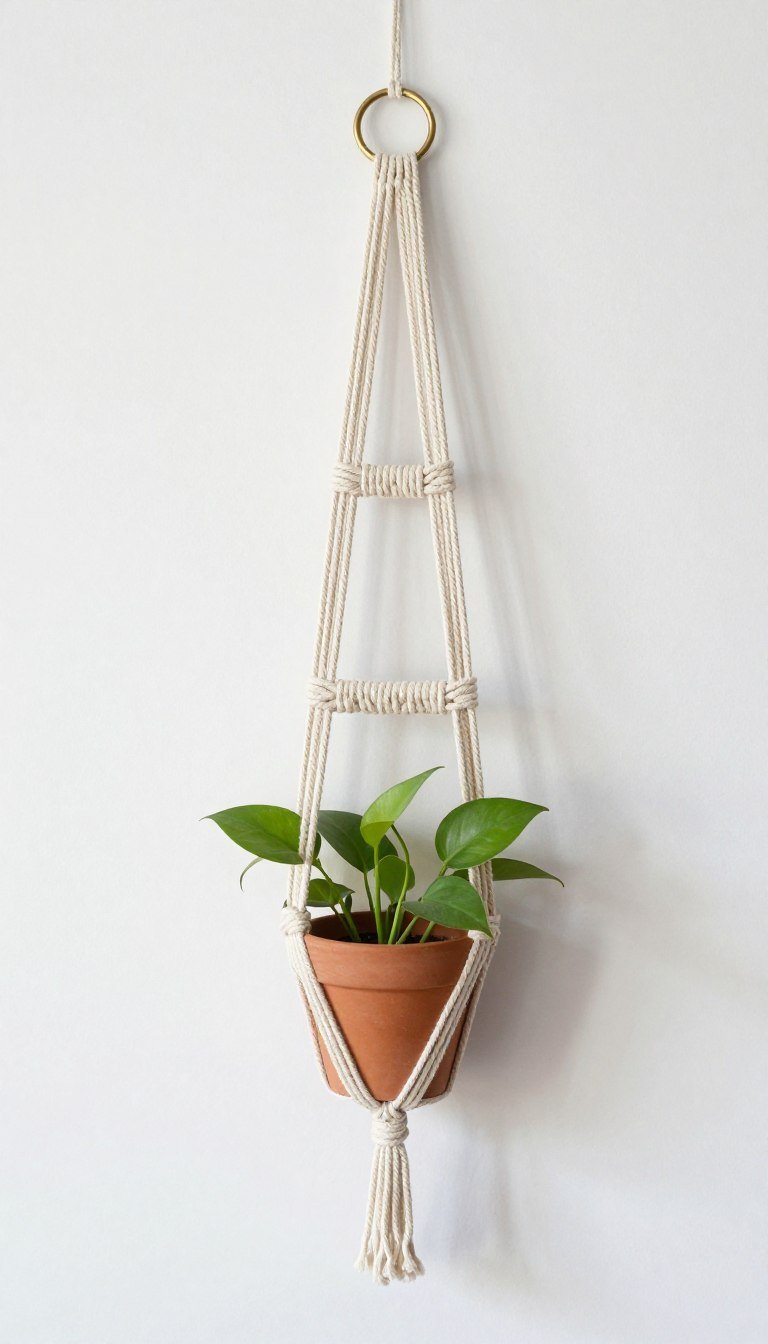
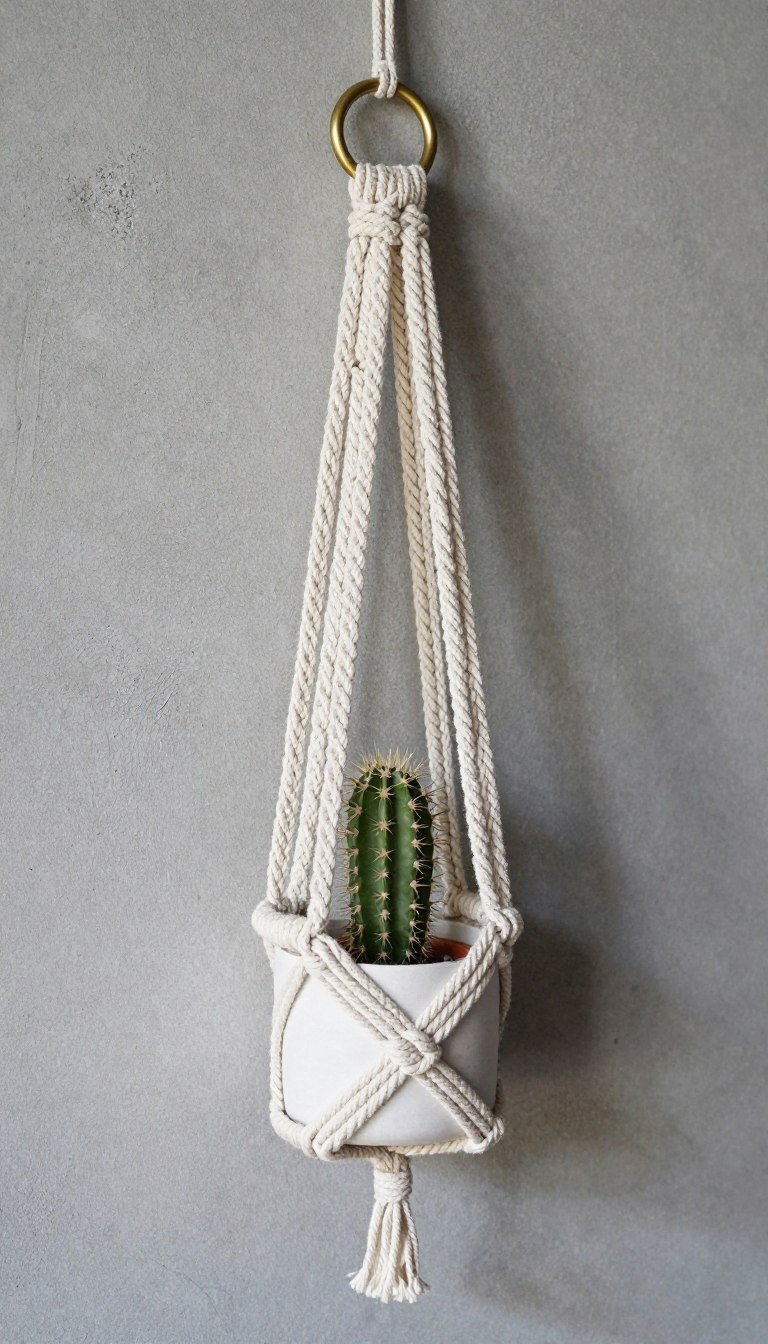
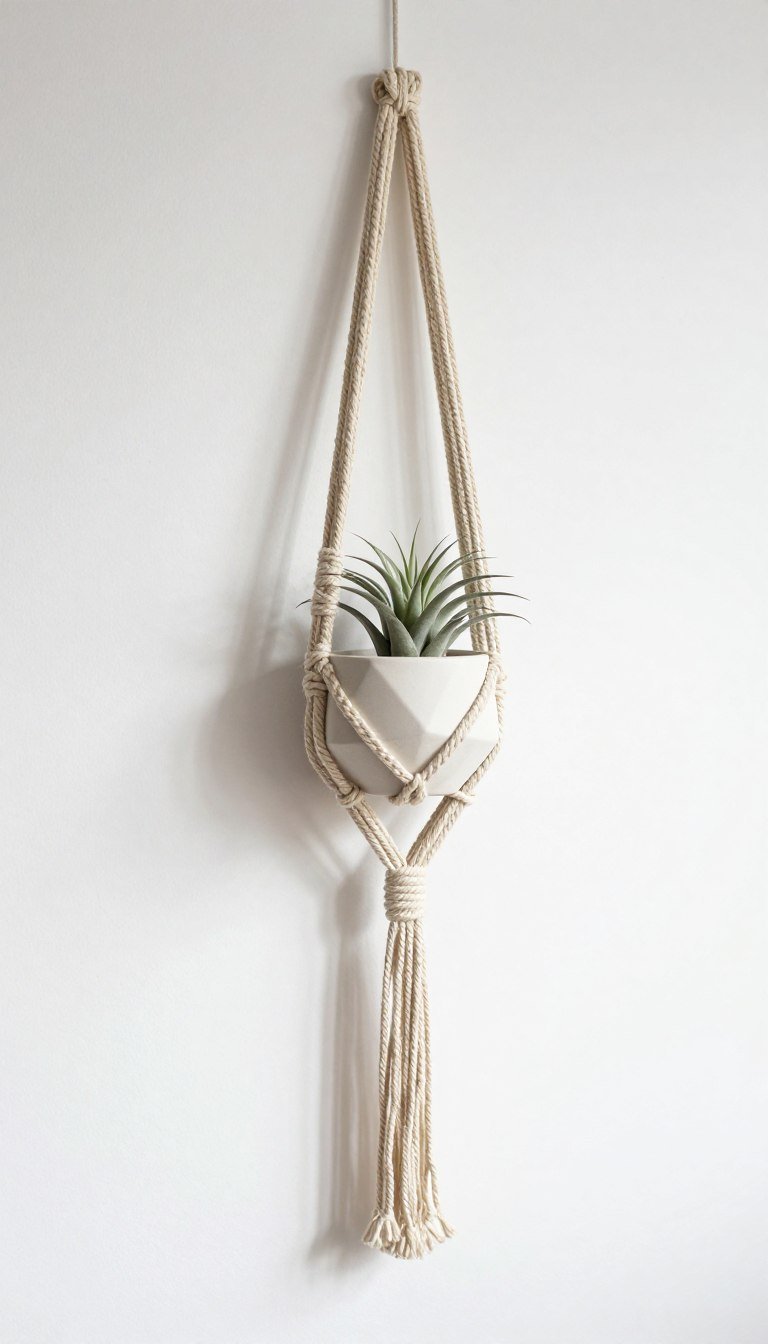
Pattern 4: Minimalist Single-Tier Hanger
Clean lines and simple construction define this modern macrame plant hanger. It suits contemporary spaces perfectly while remaining easy to make.
Materials needed: Four 8-foot lengths of 6mm cord, one 1.5-inch brass ring.
- Attach four cords to the brass ring using the gathering knot method
- Leave 20 inches of unknotted cord below the ring for a modern look
- At the 20-inch mark, tie two square knots with each pair of cords
- Drop down 4 inches and create another row of square knots
- Form the basket by connecting adjacent cords with square knots
- Finish with a gathering knot 6 inches below the basket
- Trim ends cleanly without fringing for a modern aesthetic
Difficulty: Beginner | Time Required: 40 minutes | Cord Used: 32 feet total
Pattern 5: Easy Beaded Accent Hanger
Adding wooden beads elevates a simple macrame plant hanger into something special. This pattern introduces decorative elements while maintaining beginner-friendly techniques.
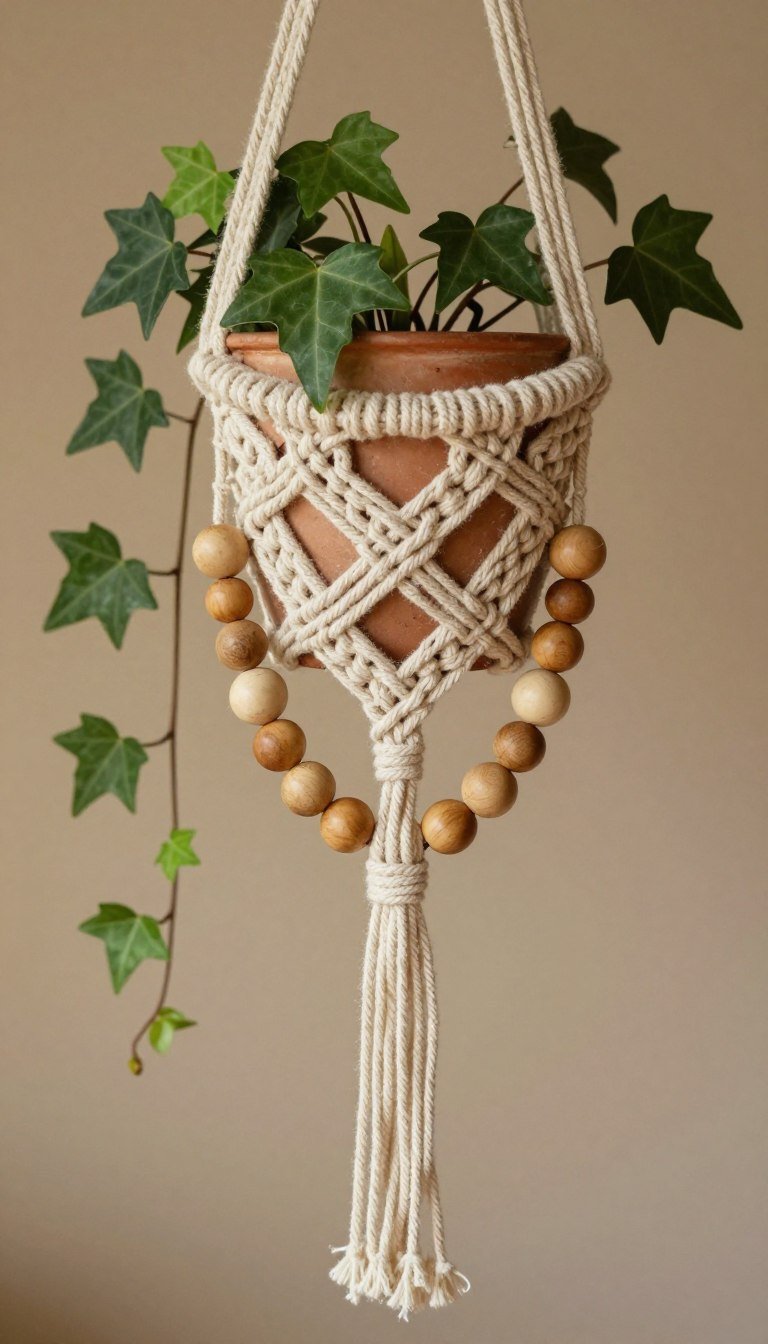
Materials needed: Four 10-foot lengths of 4mm cord, one 2-inch ring, eight large wooden beads.
- Attach cords to ring and create initial section of square knots
- Thread one bead onto each pair of working cords
- Tie a square knot immediately below each bead to secure it
- Continue alternating sections of square knots and beads
- Make sure to space beads evenly for visual balance
- Create the basket section with connecting square knots
- Add final beads before the gathering knot if desired
- Finish with gathering knot and trimmed ends
Difficulty: Beginner | Time Required: 1 hour | Cord Used: 40 feet total
Bead Selection Tip: Choose beads with holes large enough to fit two strands of your cord. Test before starting your project to avoid frustration mid-process.
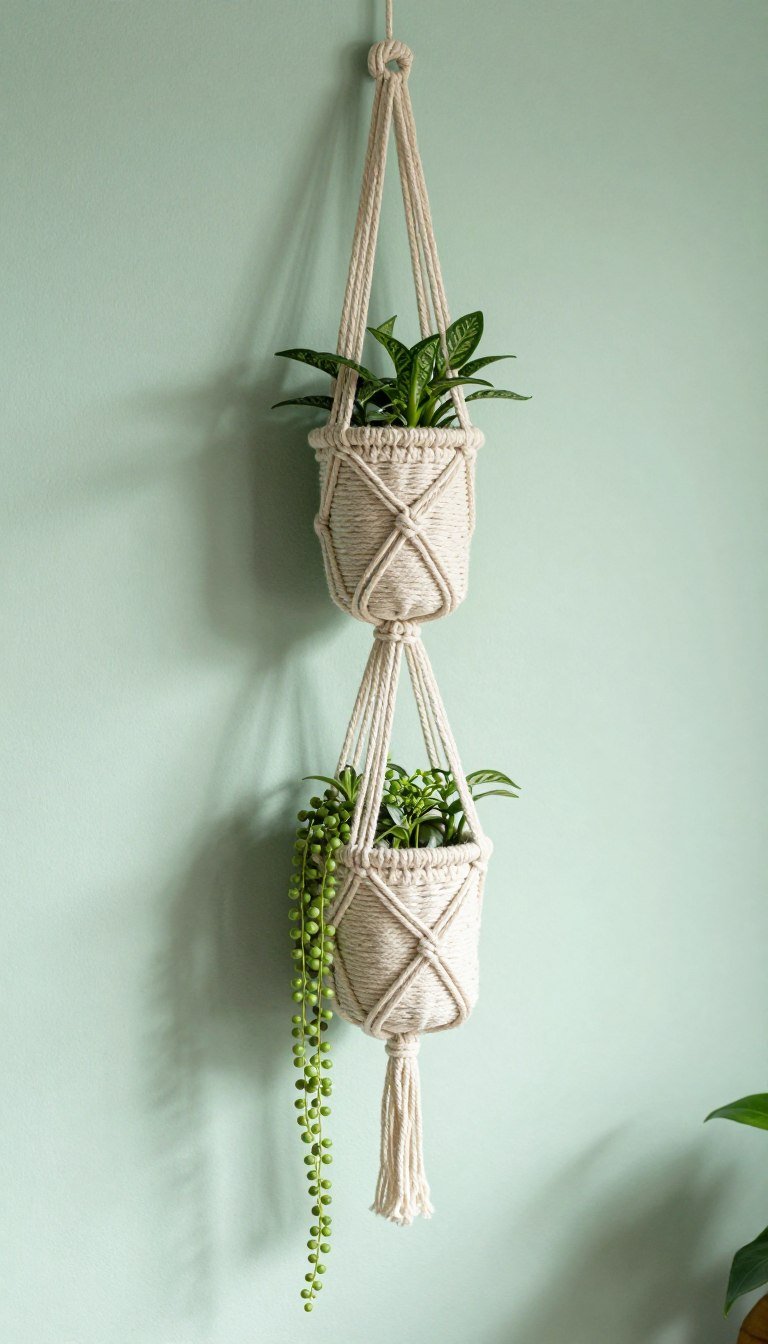
Pattern 6: Basic Double-Tier Design
This pattern introduces the concept of multi-tiered hangers. You’ll create two plant cradles at different heights using the same fundamental knots.
Materials needed: Six 14-foot lengths of 5mm cord, two 2-inch rings.
- Create the top tier following the simple three-strand pattern
- Instead of finishing with a gathering knot, continue cords downward
- Drop 12 inches below the first basket and begin the second tier
- Use the same square knot pattern for consistency
- Make the second basket slightly smaller than the first
- Finish the bottom tier with a gathering knot
- Add fringe or beaded details to the tassel end
Difficulty: Beginner | Time Required: 2 hours | Cord Used: 84 feet total
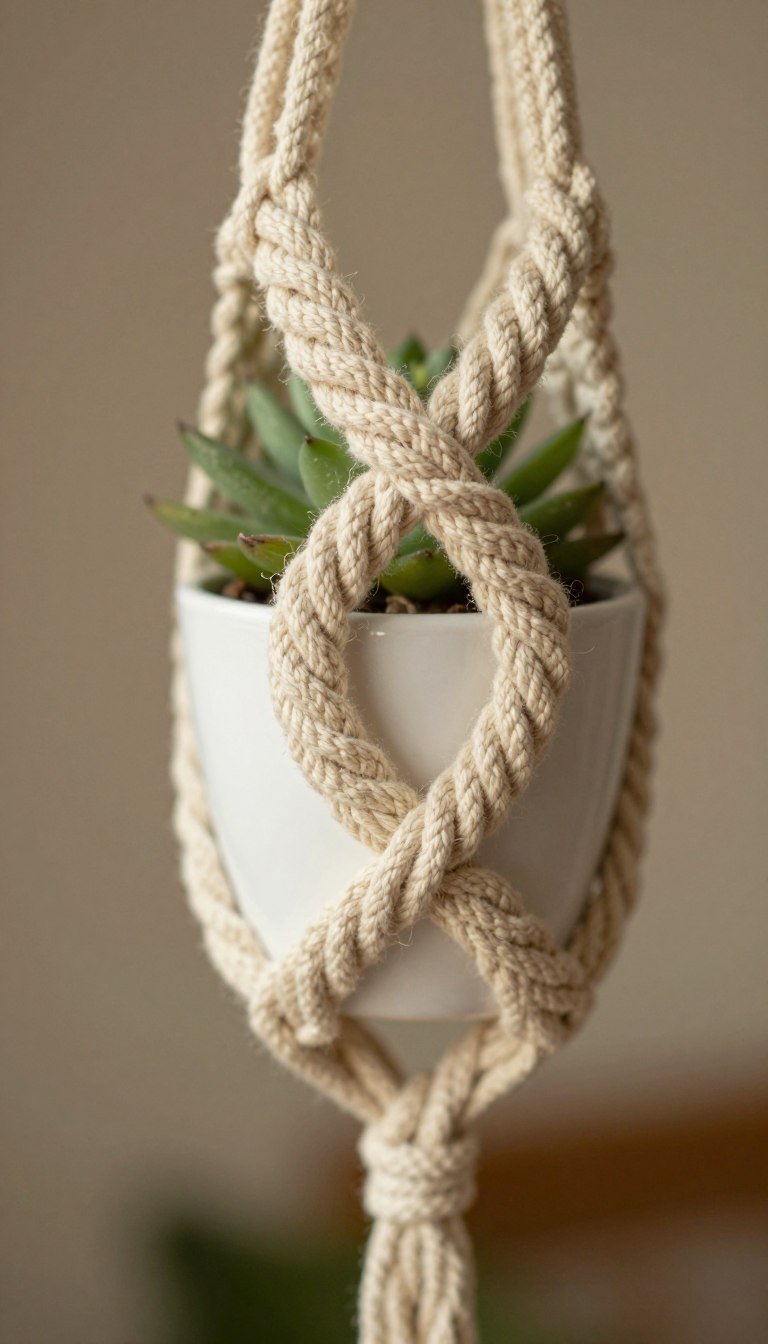
Pattern 7: Twisted Strap Hanger
Creating twisted straps adds visual texture without complex knotting. This technique produces elegant results that look impressive but remain beginner-appropriate.
Materials needed: Four 11-foot lengths of 6mm cord, one 2-inch ring.
- Attach all cords to the ring with a gathering knot
- Divide into four groups of two cords each
- Twist each pair tightly in the same direction for 18 inches
- Secure the twist with a tight square knot at the end
- Connect twisted sections with square knots to form basket
- Complete basket with additional connecting square knots
- Tie gathering knot and finish with a decorative tassel
Difficulty: Beginner | Time Required: 1 hour | Cord Used: 44 feet total
Intermediate Macrame Plant Hanger Patterns
Ready to challenge yourself? These intermediate patterns introduce new knot combinations and more intricate basket designs that showcase your growing skills.
You’ll work with alternating square knots, diagonal patterns, and multi-layer constructions. Each pattern builds on techniques from the beginner section while adding complexity.
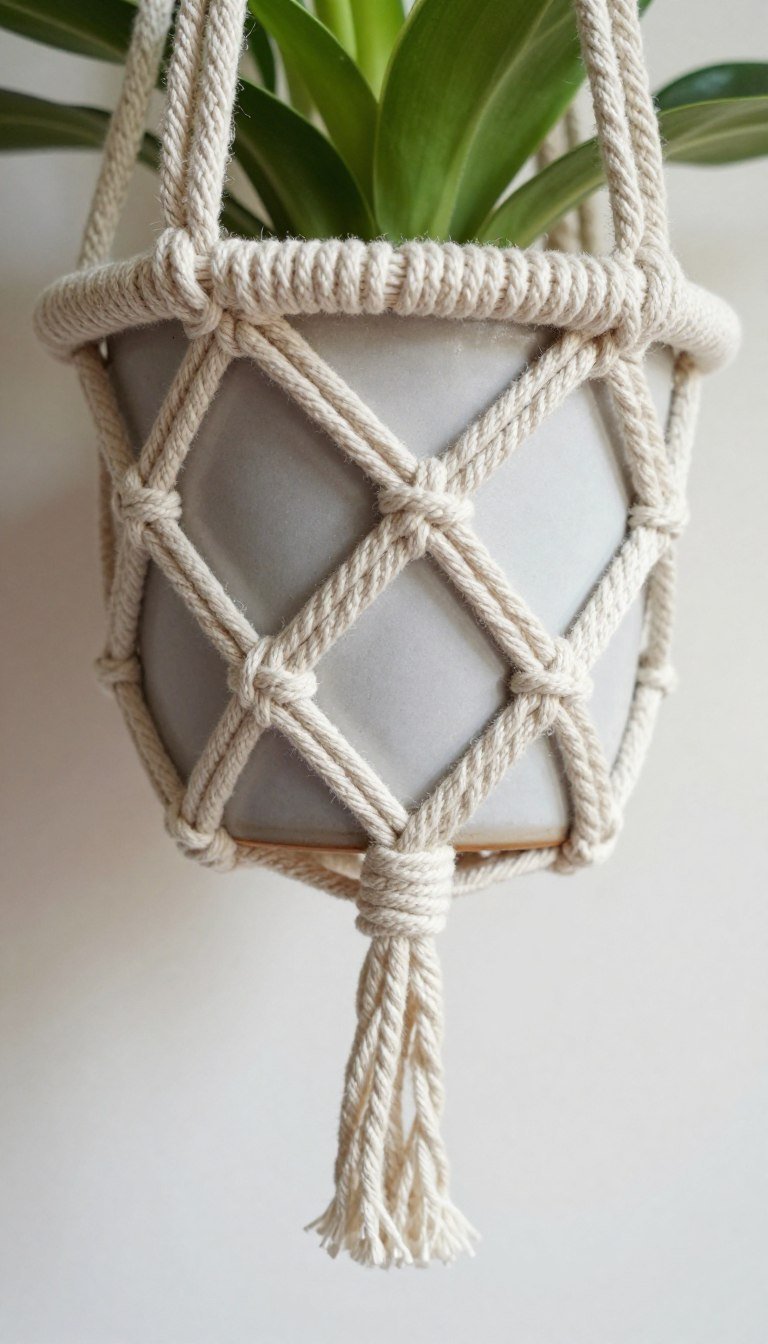
Pattern 8: Diamond Pattern Hanger
Alternating square knots create beautiful diamond shapes throughout this macrame plant hanger. The geometric pattern adds visual interest without excessive difficulty.
Materials needed: Eight 10-foot lengths of 4mm cord, one 2-inch ring.
- Attach eight cords to ring creating 16 working strands
- Divide into four groups and tie square knots 6 inches below ring
- Drop 3 inches and tie square knots with alternating cord groups
- Repeat the process one time to create diamond shapes
- Continue alternating pattern for 18 inches total length
- Form basket by connecting all groups with square knots
- Add a second row of basket knots for extra support
- Complete with gathering knot and decorative fringe
Difficulty: Intermediate | Time Required: 2.5 hours | Cord Used: 80 feet total
Pattern 9: Spiral Column Hanger
Four spiral columns create dramatic vertical lines in this eye-catching design. The continuous spiral knot technique produces uniform twisted columns.
Materials needed: Eight 12-foot lengths of 5mm cord, one 2-inch metal ring.
- Attach cords to ring and separate into four groups of four
- In each group, use two center cords as anchors
- Create continuous half square knot spiral on each group
- Maintain consistent tension for uniform spiral columns
- Continue spiral knots for 20 inches on all four columns
- Connect spiral columns with square knots to form basket
- Weave additional square knots for a sturdy plant cradle
- Finish with gathering knot and trimmed tassel
Difficulty: Intermediate | Time Required: 3 hours | Cord Used: 96 feet total
Important: Count your half square knots in each spiral column to ensure all four columns match in length. Uneven spirals will create a lopsided plant hanger.
Pattern 10: Wrapped Gathering Knot Design
This pattern emphasizes decorative gathering knots wrapped with contrasting cord. The wrapped sections add professional polish to your macrame plant hanger.
Materials needed: Four 11-foot lengths of 5mm main cord, two 6-foot lengths of 3mm accent cord, one 2-inch ring.
- Attach main cords to ring with standard gathering knot
- Create sections of square knots down to basket level
- At key points, wrap accent cord tightly around grouped cords
- Secure wrapped sections by threading cord end through wraps
- Make sure wrapping is tight and evenly spaced for clean appearance
- Form basket with square knots between wrapped sections
- Add final wrapped gathering knot at the bottom
- Trim and finish ends with decorative fringe or beads
Difficulty: Intermediate | Time Required: 2 hours | Cord Used: 56 feet total
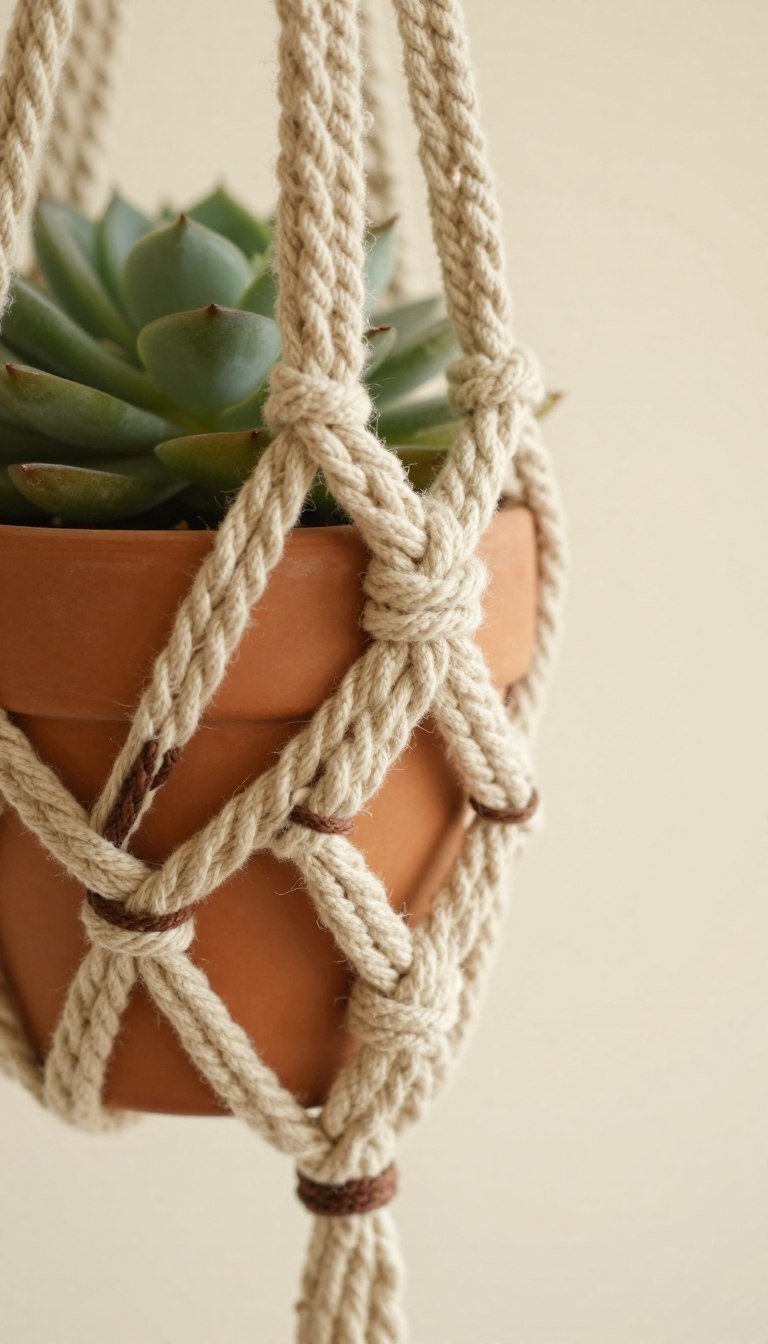
Pattern 11: Cross-Knot Basket Hanger
Crossing cord groups creates a woven appearance in the basket section. This technique produces a more secure cradle for heavier plant pots.
Materials needed: Six 12-foot lengths of 5mm cord, one 2-inch ring.
- Attach cords and create upper section with square knots
- At basket level, cross right-side cords over to left groups
- Cross left-side cords over to right groups simultaneously
- Tie square knots with these crossed cord combinations
- Repeat process one time creating a woven basket effect
- Add third row of crossed knots for extra security
- Pull ends through center and tie gathering knot below basket
- Finish with fringe or leave smooth for modern look
Difficulty: Intermediate | Time Required: 2.5 hours | Cord Used: 72 feet total
Pattern 12: Berry Knot Accent Hanger
Berry knots create three-dimensional bobbles that add texture and charm. These decorative knots look complex but follow a simple repetitive pattern.
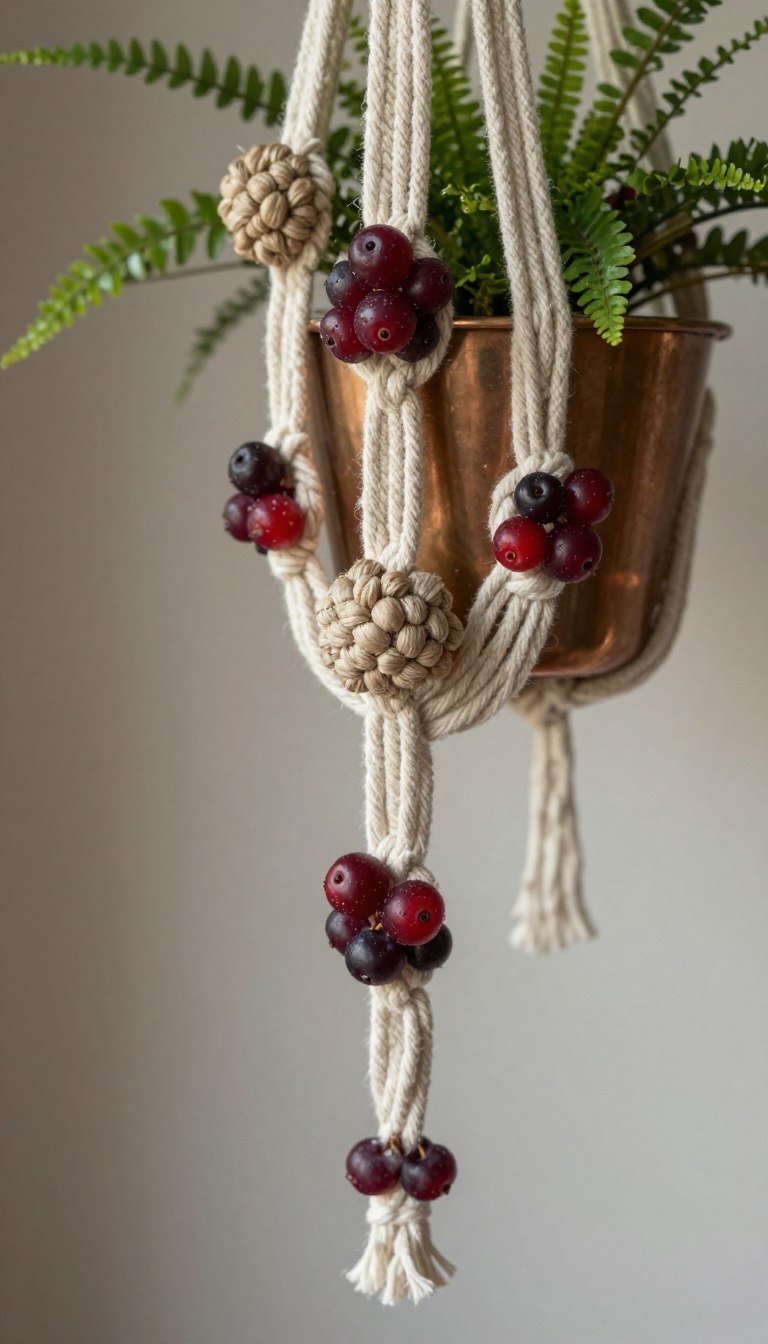
Materials needed: Six 11-foot lengths of 4mm cord, one 1.5-inch ring.
- Attach cords and divide into three groups for berry knot sections
- Create berry knot by making loop with working cord around core
- Pass cord through loop multiple times creating rounded shape
- Pull tight to form spherical knot and secure in place
- Space berry knots evenly down the length of hanger
- Alternate berry knots with sections of square knots
- Form basket with traditional square knot connections
- Complete with gathering knot and trimmed ends
Difficulty: Intermediate | Time Required: 3 hours | Cord Used: 66 feet total
Berry Knot Tip: Keep consistent tension as you wrap cord around the core. Loose wrapping creates saggy berry knots while too tight makes them difficult to shape properly.
Pattern 13: Asymmetrical Modern Hanger
Breaking from traditional symmetry, this contemporary design features intentionally uneven elements. Perfect for modern spaces that celebrate artistic irregularity.
Materials needed: Five 10-foot lengths and three 8-foot lengths of 5mm cord, one 2-inch ring.
- Attach cords to ring with varied spacing (not evenly distributed)
- Create square knots at different heights on each side
- Leave some sections unknotted for minimalist effect
- Place basket opening off-center intentionally
- Use fewer knots on one side than the other
- Vary cord lengths at the bottom for asymmetrical fringe
- Tie gathering knot off to one side rather than center
Difficulty: Intermediate | Time Required: 2 hours | Cord Used: 74 feet total
Pattern 14: Triple-Tier Cascading Hanger
This ambitious intermediate project creates three levels of plant cradles. The cascading effect makes a stunning statement while displaying multiple plants.
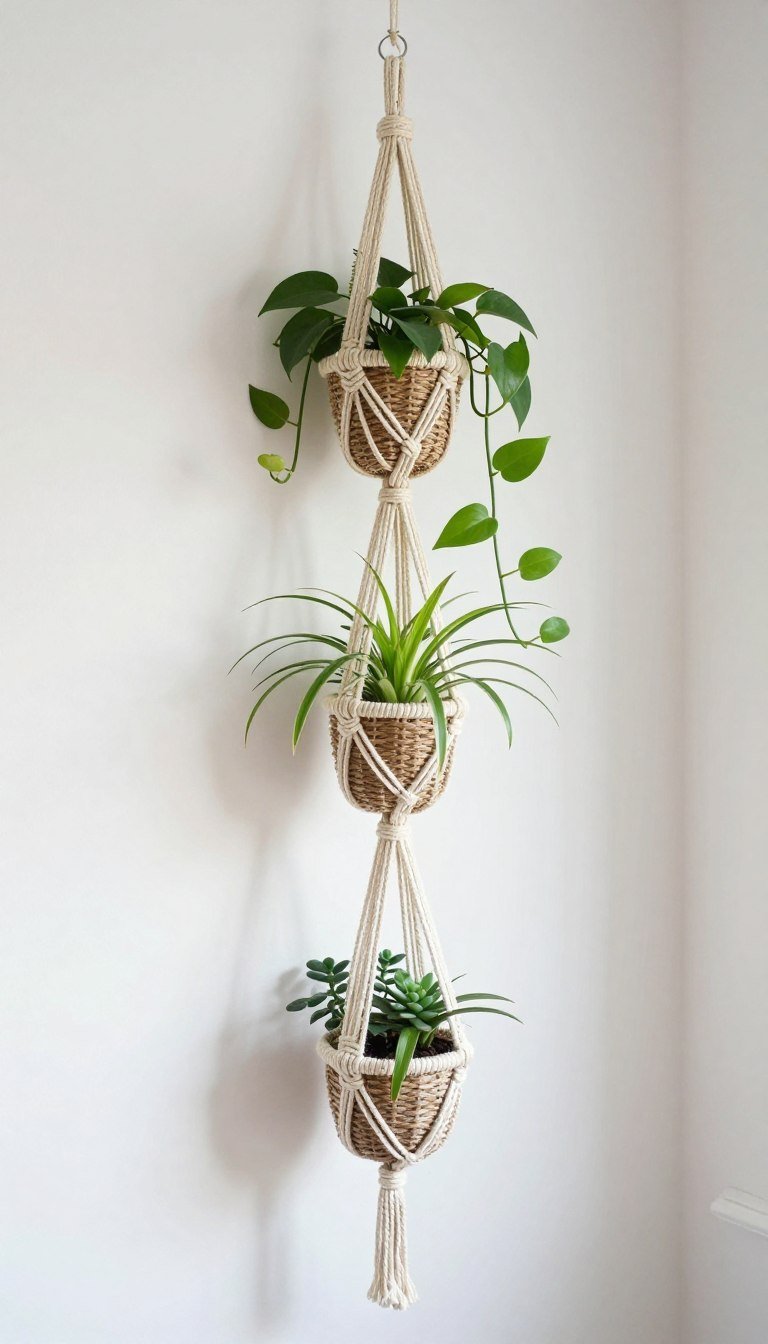
Materials needed: Eight 16-foot lengths of 5mm cord, three 2-inch rings.
- Create first tier using basic square knot pattern at top
- Continue cords 10 inches below first basket to second tier
- Form second basket slightly smaller than the first
- Drop another 10 inches and create third smallest tier
- Maintain visual balance by graduating basket sizes
- Ensure each tier uses same knot pattern for cohesion
- Finish bottom tier with gathering knot and long tassel
- Adjust tier spacing based on plant sizes and desired look
Difficulty: Intermediate | Time Required: 4 hours | Cord Used: 128 feet total
Advanced DIY Macrame Plant Hanger Patterns
These sophisticated patterns challenge experienced macramé artists with complex knot combinations and intricate constructions. Each design creates a true statement piece.
You’ll master advanced techniques including detailed net patterns, sculptural elements, and multi-dimensional designs. These projects require patience and precision but deliver stunning results.
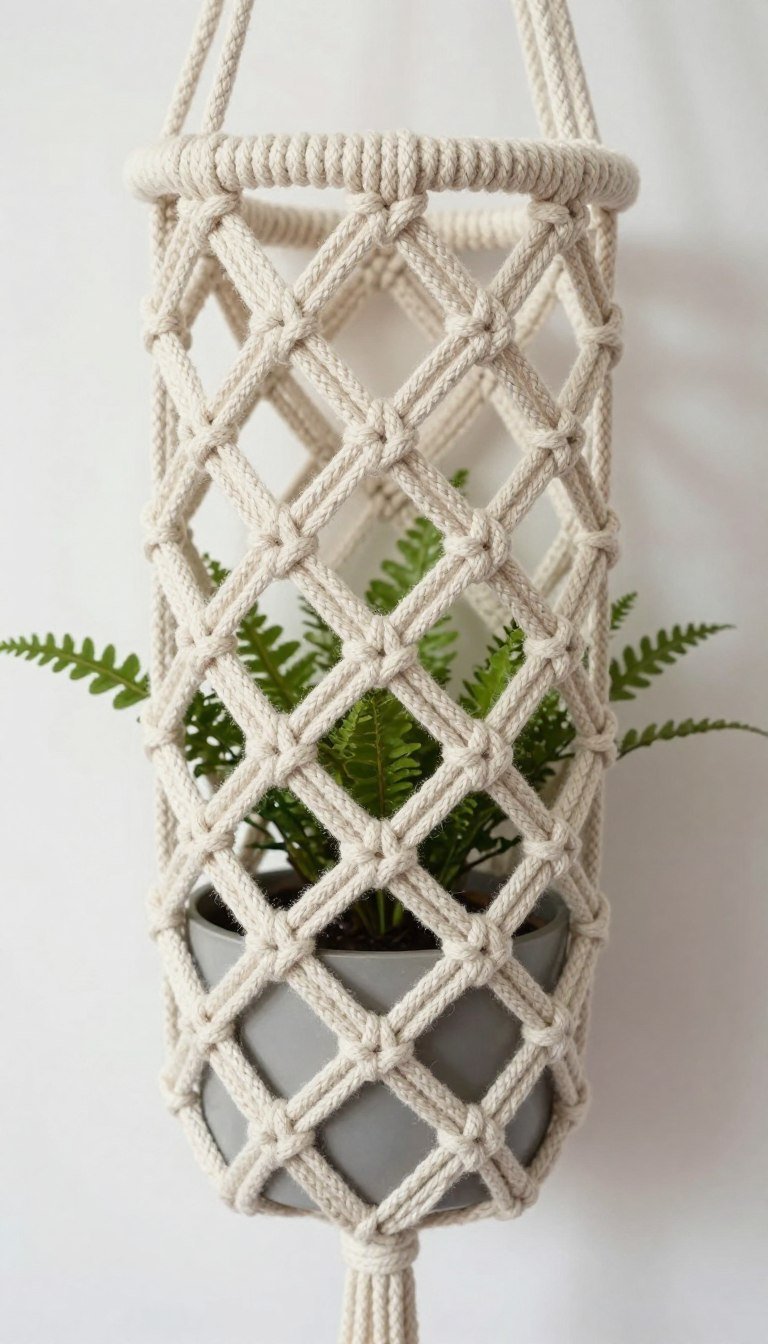
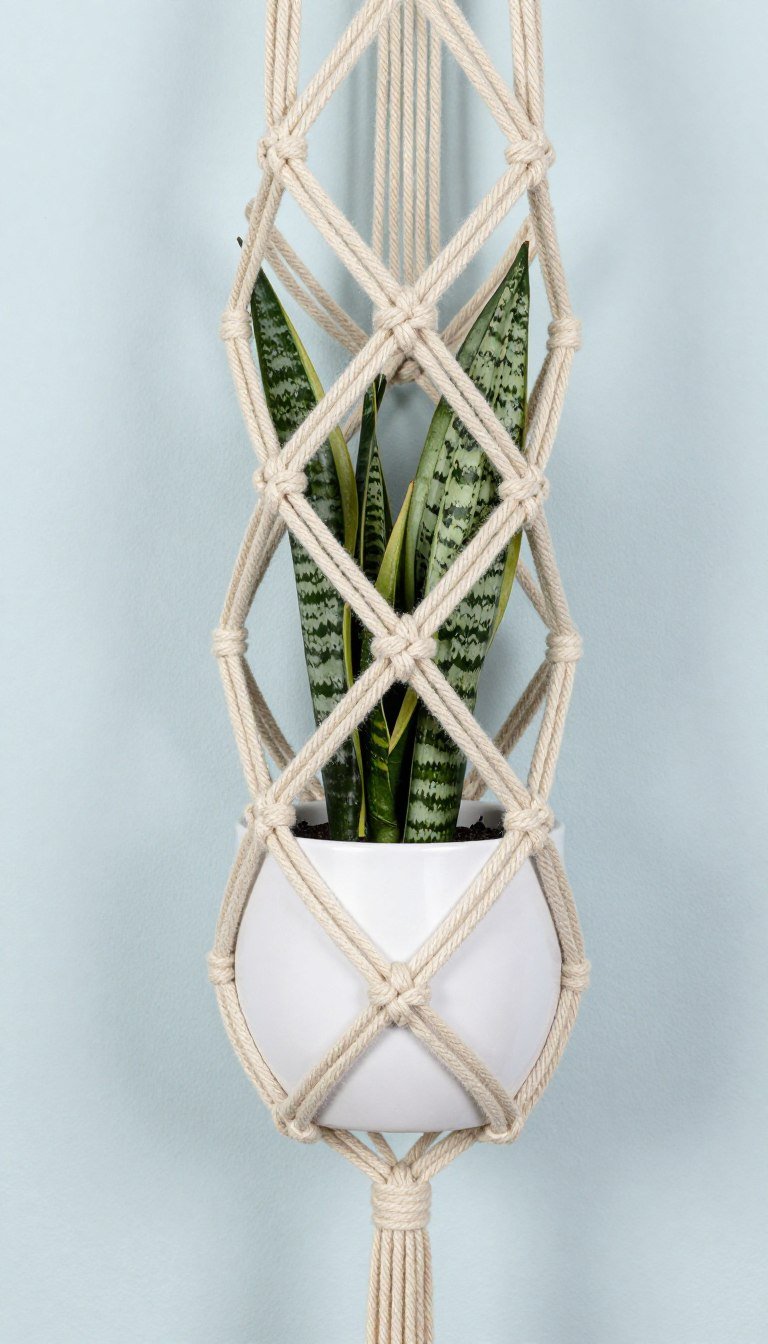
Pattern 15: Intricate Net Pattern Hanger
Delicate netting surrounds your plant in this elegant macrame plant hanger. The open network requires careful attention to tension and spacing.
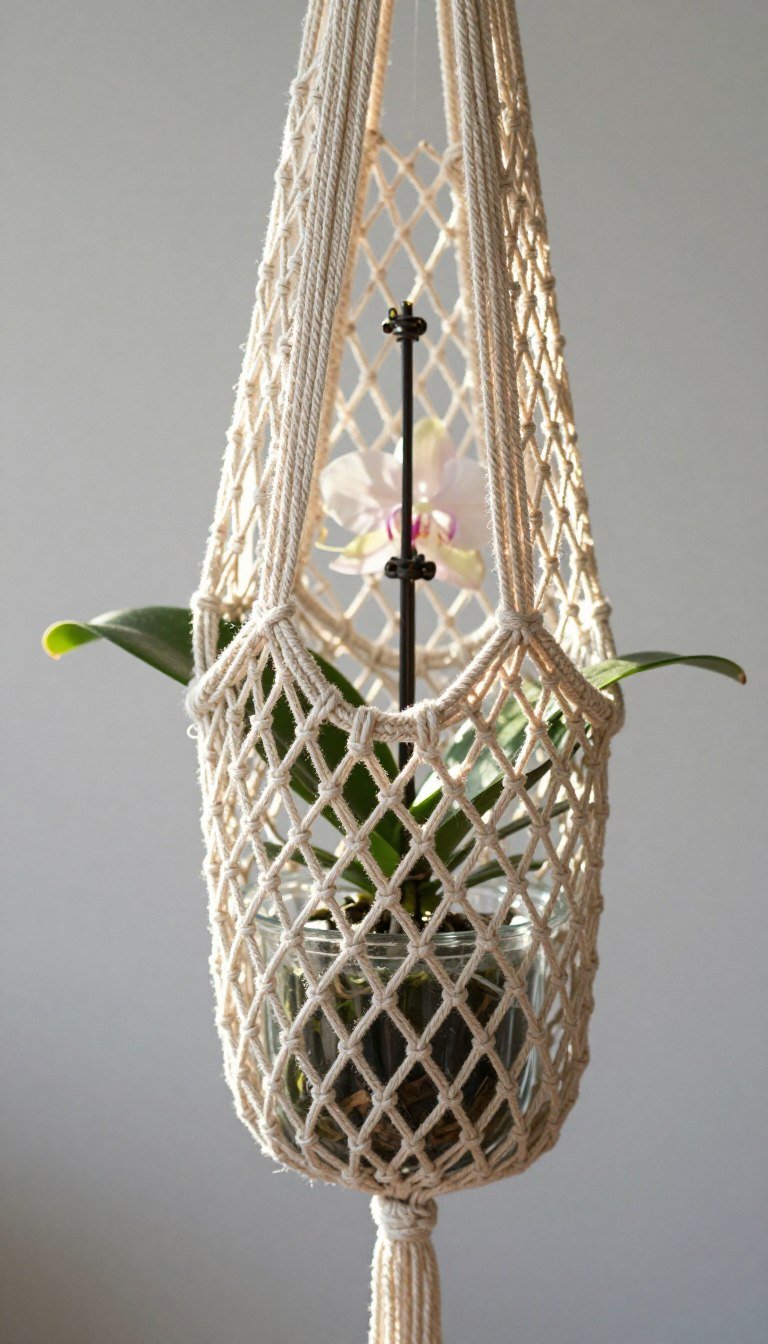
Materials needed: Ten 14-foot lengths of 3mm cord, one 2-inch ring.
- Attach all ten cords to ring creating 20 working strands
- Create first row of square knots with groups of four
- Alternate and connect with half square knots forming net pattern
- Continue alternating rows creating consistent diamond mesh
- Maintain equal tension throughout for uniform net appearance
- Form basket by tightening net pattern at desired length
- Add reinforcing row of square knots around basket opening
- Gather all cords below basket with wrapped gathering knot
Difficulty: Advanced | Time Required: 5 hours | Cord Used: 140 feet total
Precision Required: Net patterns show every inconsistency in tension and spacing. Work slowly and check your pattern frequently to maintain uniformity throughout the piece.
Pattern 16: Sculptural Wave Pattern Hanger
Undulating waves created through varied knot placement give this hanger organic movement. The flowing design mimics water or fabric draping.
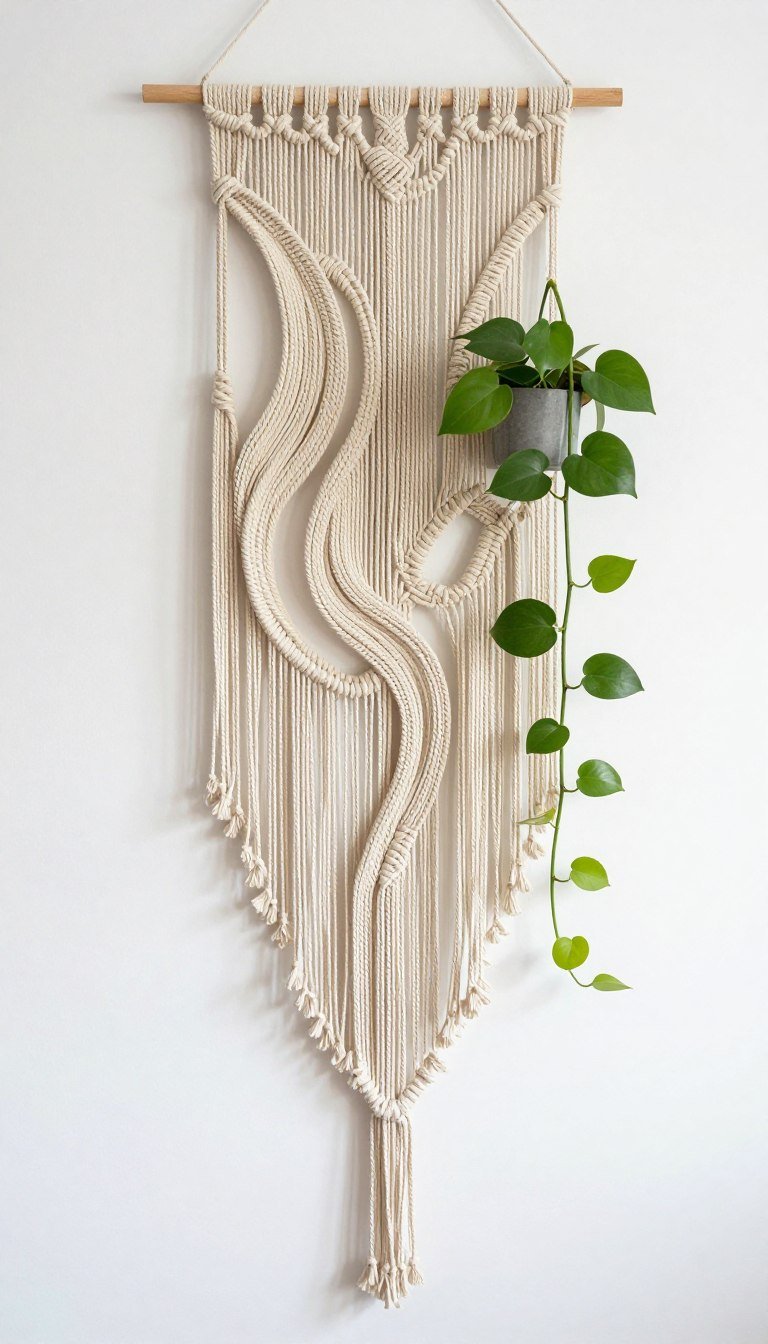
Materials needed: Eight 15-foot lengths of 5mm cord, one 2.5-inch ring.
- Attach cords and plan wave pattern before beginning knots
- Create first wave by tying knots closer on one side
- Gradually increase spacing as you move to opposite side
- Reverse the pattern to create wave flowing back
- Repeat wave pattern multiple times down the length
- Ensure waves flow smoothly without abrupt transitions
- Form basket maintaining wave aesthetic in construction
- Complete with elegant wrapped gathering knot at bottom
Difficulty: Advanced | Time Required: 4.5 hours | Cord Used: 120 feet total
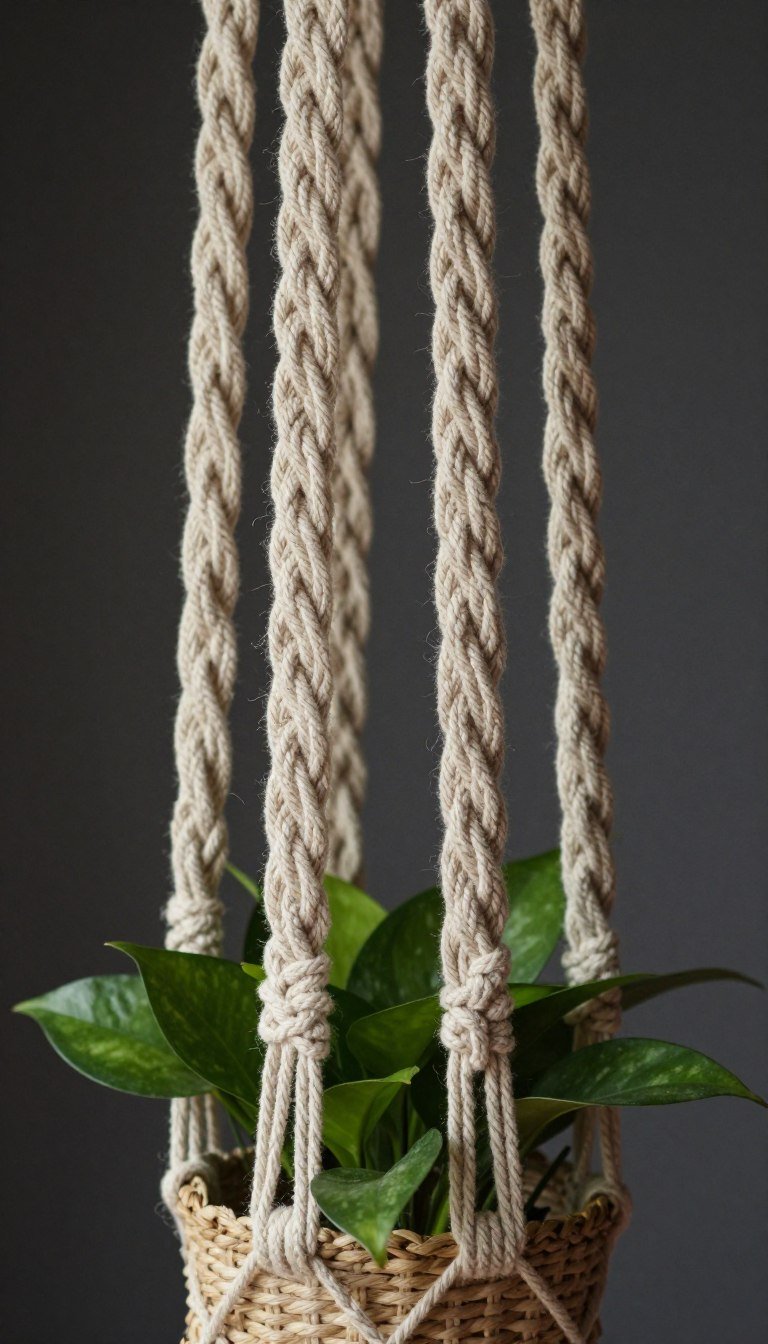
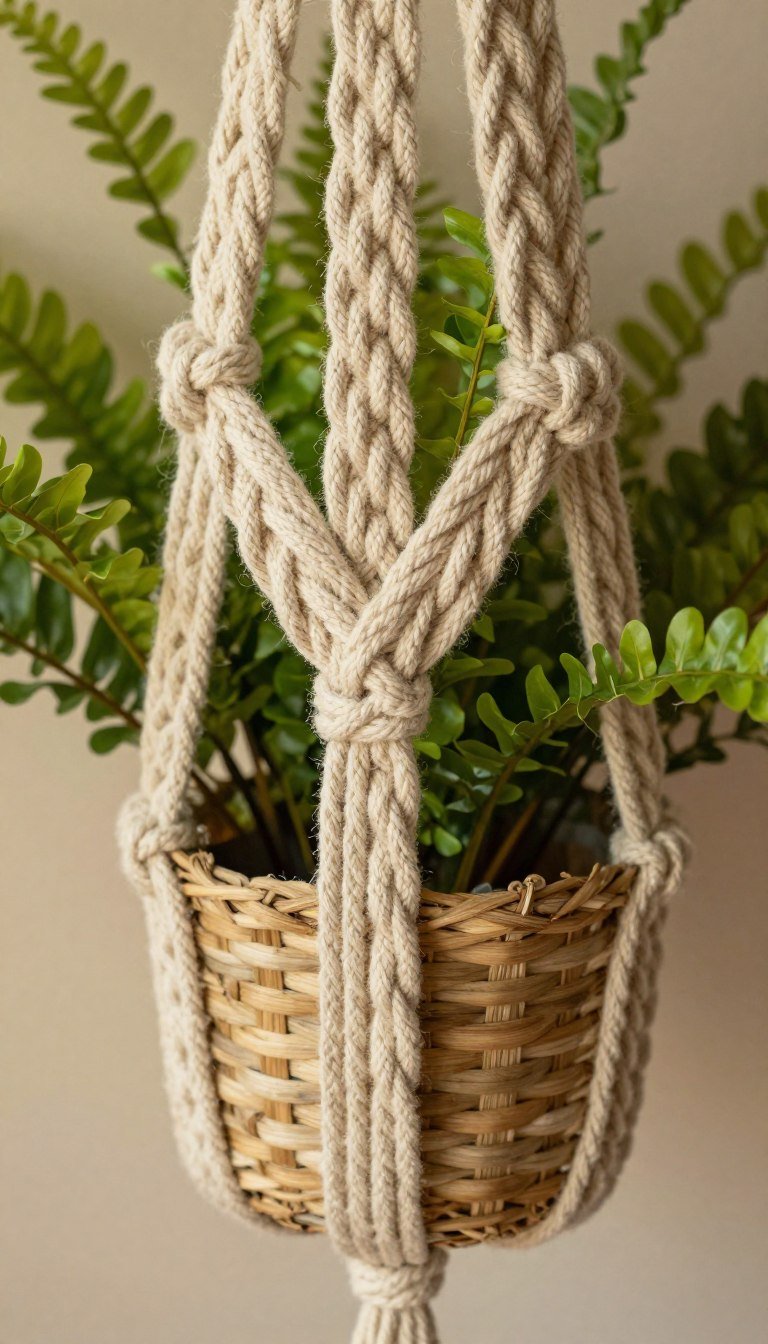
Pattern 17: Multi-Strand Braided Hanger
Intricate braiding techniques create rope-like strands in this sophisticated macrame plant hanger. The braided sections require coordination and practice.
Materials needed: Twelve 12-foot lengths of 4mm cord, one 2-inch ring.
- Divide cords into four groups of six strands each
- Create four-strand round braids with each group
- Maintain consistent tension for uniform braid thickness
- Braid for 18 inches ensuring all four match in length
- Secure each braid end with tight square knot
- Connect braids with elaborate square knot basket pattern
- Add decorative wrapped sections where braids meet basket
- Finish with multi-strand tassel featuring additional braiding
Difficulty: Advanced | Time Required: 5 hours | Cord Used: 144 feet total
Pattern 18: Detailed Chevron Design
Chevron patterns angle across this hanger creating bold geometric impact. The V-shaped motifs require precise knot placement and consistent tension.
Materials needed: Ten 13-foot lengths of 5mm cord, one 2-inch ring.
- Attach cords and map out chevron pattern placement
- Start chevron points at center and work outward
- Create angled lines using diagonal double half hitch knots
- Mirror knot pattern on opposite side to complete chevron
- Repeat chevron motifs stacking them vertically
- Maintain sharp points and clean angles throughout
- Form basket incorporating chevron elements into design
- Complete with gathering knot and geometric trim
Difficulty: Advanced | Time Required: 5.5 hours | Cord Used: 130 feet total
Chevron Success Tip: Mark your center point and measure carefully before tying each angled row. Even small deviations accumulate quickly and distort the chevron pattern.
Pattern 19: Bohemian Feather Detail Hanger
Feathered fringe elements add whimsical bohemian flair to this artistic macrame plant hanger. Creating realistic feather shapes requires advanced brushing techniques.
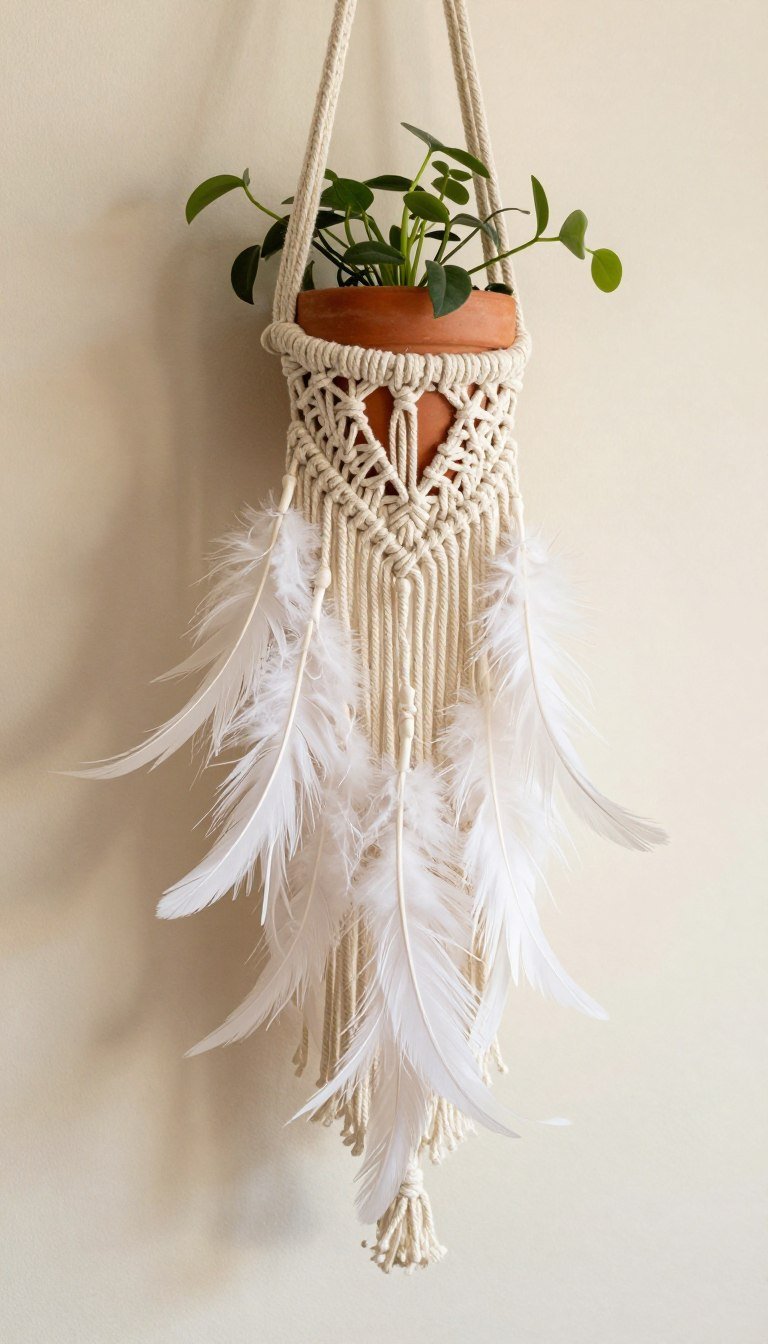
Materials needed: Eight 14-foot lengths of 5mm cord, one 2-inch ring, wire brush.
- Create upper section with your choice of knot patterns
- Leave extra length at bottom for feather creation
- Separate individual cord strands for feather bases
- Brush out strands with wire brush to create feathery texture
- Trim brushed strands into feather shapes with pointed tips
- Create central spine by leaving some strands unbrished
- Layer feathers at varying lengths for dimensional effect
- Add beads or wrapped details as feather accents
Difficulty: Advanced | Time Required: 4 hours | Cord Used: 112 feet total
Pattern 20: Grand Four-Tier Statement Piece
This ambitious masterpiece features four cascading tiers creating a dramatic floor-to-ceiling display. The ultimate advanced project showcases your complete macrame skill set.
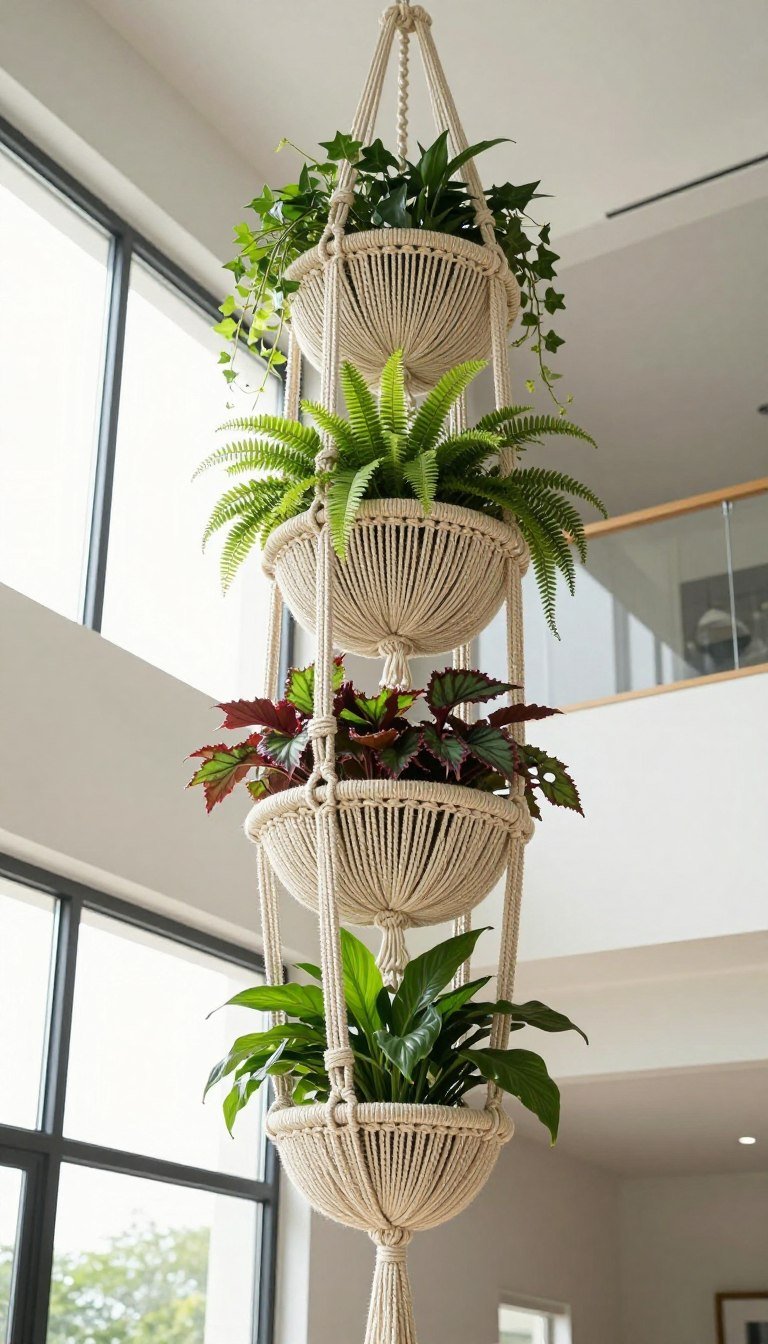
Materials needed: Twelve 20-foot lengths of 6mm cord, four 2-inch rings.
- Plan tier spacing based on ceiling height and plant sizes
- Create first tier at top using advanced pattern of choice
- Continue cords 12-15 inches to second tier construction
- Repeat pattern making second basket slightly smaller
- Progress to third tier maintaining design consistency
- Create fourth tier as smallest cradle at bottom
- Ensure structural integrity throughout entire length
- Finish with elaborate wrapped gathering knot and long tassel
- Test weight capacity before adding all four plants
Difficulty: Advanced | Time Required: 8-10 hours | Cord Used: 240 feet total
Structural Alert: This large hanger requires secure ceiling mounting. Use appropriate hardware rated for the combined weight of all four plants plus the substantial cord weight.
Mastering Essential Macrame Techniques
Understanding fundamental techniques ensures success with any macrame plant hanger pattern. These core skills apply across all difficulty levels.
Taking time to perfect basic knots creates better finished projects. Each knot serves a specific purpose in plant hanger construction.
The Square Knot Foundation
The square knot forms the backbone of most macrame plant hanger designs. This fundamental knot requires four cords: two outer working cords and two inner anchor cords.
Square Knot Steps
- Cross right working cord over anchor cords to left
- Bring left working cord over the right cord
- Pass left cord under anchor cords and through right loop
- Pull tight to complete half the square knot
- Cross left cord over anchors to right side
- Bring right cord over left cord
- Pass right cord under anchors and through left loop
- Pull tight completing full square knot
Common Square Knot Mistakes
- Reversing the second half creates granny knots
- Uneven tension produces lopsided results
- Loose anchor cords create wobbly knots
- Pulling too tight distorts the square shape
- Inconsistent knot size throughout project
- Not keeping working cords flat and untwisted
Spiral Knot Technique
The spiral knot (half square knot) creates beautiful twisted rope effects. Unlike the square knot, you only complete the first half and repeat from the same side.
The natural twisting occurs after 4-6 half square knots. Continue making half square knots from the same side and watch the spiral develop.
Spiral Direction Control: Starting from the right side creates clockwise spirals. Starting from the left produces counterclockwise spirals. Choose one direction and maintain consistency.
Gathering Knot Mastery
The gathering knot bundles multiple cords together at the top or bottom of your macrame plant hanger. This essential knot requires a separate wrapping cord.
Creating Perfect Gathering Knots
- Form a loop with separate wrapping cord along bundle
- Wrap the working end tightly around all cords
- Make 8-10 tight wraps moving up the cord bundle
- Thread the working end through the loop at top
- Pull the bottom loop end to draw loop under wraps
- Pull both ends tight to secure gathering knot
- Trim excess wrapping cord close to knot
- Hide cord ends inside the wrapped section
Gathering knots should feel firm and secure. Loose gathering knots allow cords to slip and compromise your plant hanger’s structure.
Measuring and Cutting Cord
Accurate cord measurement prevents running short mid-project or wasting expensive materials. Most patterns require cord length three to four times the finished hanger length.
For a plant hanger finishing at 40 inches, start with cord pieces measuring 120-160 inches (10-13 feet). Complex patterns with many knots require longer initial lengths.
Cord Length Formula: Measure your desired finished length, multiply by 4, then add 20% extra for safety. Example: 36-inch hanger × 4 = 144 inches + 20% = 173 inches (about 14.5 feet per cord).
Complete Materials and Tools Guide
Selecting appropriate materials dramatically affects your macrame plant hanger’s appearance and durability. Different cord types suit different projects and aesthetics.

Cord Material Options
Cotton cord dominates macrame plant hanger projects for good reason. It’s soft, strong, and available in various thicknesses and constructions.
Cotton Cord Types
- Single strand: Smooth, tight twist, clean appearance
- 3-ply twisted: Classic macrame look, easy to work with
- Braided: Decorative texture, very strong
- Combed: Soft, can be brushed for fringe
Cotton works well indoors and accepts natural dyes beautifully. It’s the best choice for most macrame plant hanger patterns.
Alternative Materials
- Jute: Rustic appearance, rough texture, outdoor use
- Hemp: Extremely strong, eco-friendly, natural brown
- Nylon: Weatherproof, smooth, modern aesthetic
- Polyester: Durable, colorfast, outdoor suitable
Each material creates different aesthetics and has unique working properties to consider for your project.
Choosing Cord Thickness
Cord diameter affects both appearance and working time. Thicker cord creates bold, chunky hangers that work up quickly but show every imperfection.
- 3mm cord: Delicate appearance, intricate patterns, longer work time
- 4mm cord: Versatile medium weight, most popular choice, balanced results
- 5mm cord: Substantial look, faster projects, strong plant support
- 6mm+ cord: Bold statement pieces, quickest to complete, modern aesthetic
Beginners should start with 4-5mm cord. This thickness forgives small mistakes while creating satisfying results in reasonable time.
Rings and Mounting Hardware
The ring or mounting hardware tops your macrame plant hanger and bears all the weight. Choose sturdy materials rated for your plant’s size.
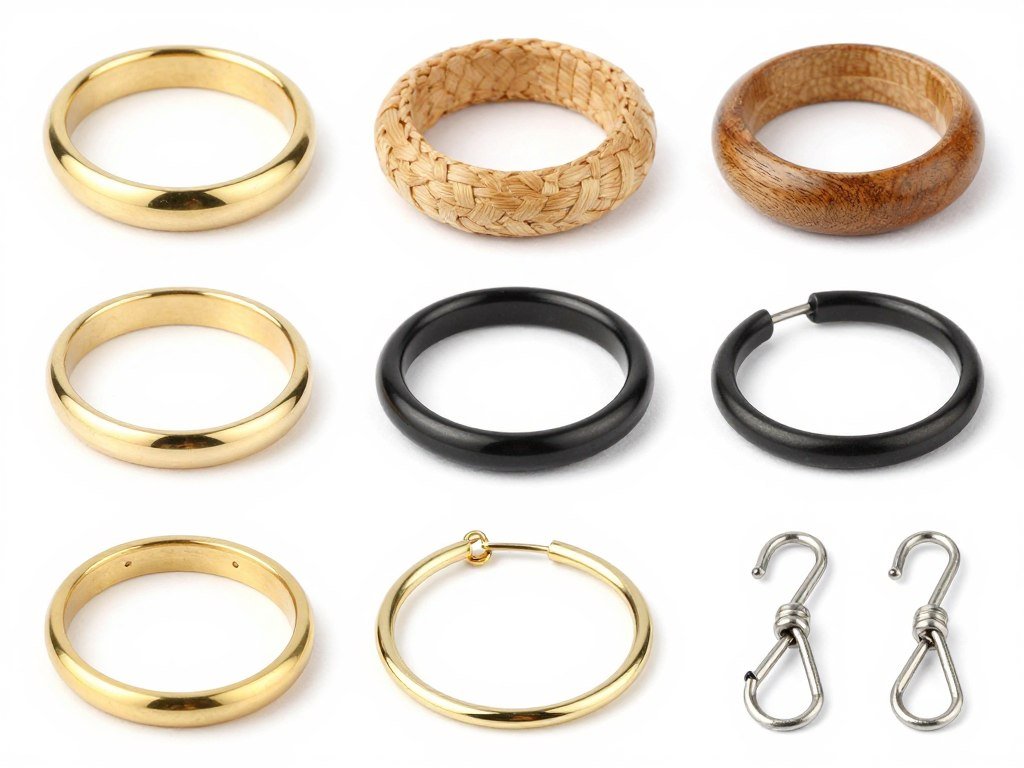
Metal Rings
Brass, copper, or steel rings offer strength and modern appeal. They won’t absorb moisture from watering.
Choose welded rings over split rings for maximum security when supporting heavy plants.
Wooden Rings
Natural wood adds warmth and bohemian charm to your macrame plant hanger. Hardwood rings resist warping.
Seal wooden rings with polyurethane to protect against water damage and extend lifespan.
Size Selection
Ring diameter typically ranges from 1 to 3 inches. Larger rings suit thicker cord and heavier plants.
Small rings (1-1.5 inches) work for delicate hangers while large rings (2.5+ inches) support substantial designs.
Complete Macrame Supply Kit – Everything You Need
Save time and money with our curated supply kit containing premium 4mm and 5mm cotton cord, assorted rings in three sizes, scissors, measuring tape, and our exclusive 20-pattern guide book. Perfect for completing all projects in this article.
Troubleshooting Common Problems
Even experienced crafters encounter challenges when making macrame plant hangers. Understanding common problems helps you fix issues quickly and improve your technique.
Most problems stem from tension inconsistency, incorrect measurements, or rushing through steps. Taking your time produces better results.
Lopsided or Uneven Hangers
Uneven plant hangers result from inconsistent knot tension or unequal cord lengths. This frustrating problem has several causes and solutions.
Causes of Uneven Work
- Pulling some square knots tighter than others
- Measuring cord lengths inaccurately at start
- Working on some sections more than others
- Inconsistent anchor cord tension throughout
- Not checking symmetry during construction
Prevention and Fixes
- Measure and mark knot placement before tying
- Count knots in each section to ensure matching
- Step back frequently to check overall symmetry
- Maintain consistent tension with each knot
- Use a clipboard or board to secure work

Running Out of Cord
Nothing frustrates more than running short of cord before completing your macrame plant hanger. Prevent this problem with proper planning and measurement.
Prevention Strategy: Always cut cord pieces 20-30% longer than the pattern recommends. Extra cord costs little compared to restarting an entire project. You can always trim excess but cannot add length easily mid-project.
If you must add cord, join new pieces at inconspicuous locations using secure square knots. Work the joining knot into the pattern where it will be least visible.
Knots Coming Loose or Slipping
Loose knots compromise structural integrity and ruin the appearance of your plant hanger. Proper technique prevents this common issue.
- Pull each knot snug immediately after tying it
- Make sure gathering knots have 8-10 tight wraps minimum
- Use appropriate cord type (smooth cord slips more than textured)
- Check that square knots are true squares, not granny knots
- Secure critical knots with tiny dabs of fabric glue if needed
- Test structural knots by tugging before proceeding
Cord Tangling and Twisting
Long cord lengths inevitably tangle during work. Managing cords efficiently saves frustration and time on your macrame plant hanger project.
Cord Management Tip: Bundle each working cord into a butterfly wrap or use cord bobbins. This prevents tangling and makes the cord easier to work with throughout your project. Unwrap only as much cord as you need for the next section.
Caring for Your Finished Macrame Plant Hanger
Proper care extends the life of your handmade creation. Macrame plant hangers require minimal maintenance but benefit from occasional attention.

Regular Cleaning Methods
Dust accumulates on macrame plant hangers over time, especially in the textured knots. Regular dusting maintains appearance and prevents buildup.
Routine Maintenance
- Dust weekly with soft brush or duster
- Vacuum gently on low setting with brush attachment
- Shake outdoors to remove loose dust and debris
- Spot clean spills immediately with damp cloth
- Rotate occasionally to ensure even aging
Deep Cleaning Process
- Remove plant and pot from hanger completely
- Hand wash in cool water with gentle detergent
- Avoid wringing or twisting the macrame plant hanger
- Rinse thoroughly to remove all soap residue
- Press between towels to remove excess water
- Reshape and air dry completely before rehanging
Protecting from Water Damage
Plant watering inevitably drips onto macrame plant hangers. Taking precautions prevents water staining and deterioration of natural fibers.
- Use saucers or trays under pots to catch drips
- Remove plants for watering when possible
- Blot drips immediately with absorbent cloth
- Allow complete drying between waterings
- Apply fabric protector spray for water resistance
- Consider synthetic cord for high-moisture locations

Storage and Seasonal Care
Proper storage during seasonal changes or moves protects your macrame plant hanger investment. Natural fibers need protection from moisture and pests.
Storage Best Practices: Clean thoroughly before storing. Wrap in acid-free tissue paper or breathable cotton fabric. Store in a cool, dry location away from direct sunlight. Add cedar blocks or lavender sachets to deter moths. Check periodically for any signs of moisture or pests.
Design and Styling Tips for Maximum Impact
Beyond construction techniques, thoughtful styling elevates your macrame plant hanger from craft project to design statement. Consider these professional touches.
The relationship between your hanger, plant selection, and surrounding décor creates cohesive visual appeal. Small details make significant differences in overall impact.
Choosing the Right Plants
Plant selection affects both aesthetics and practicality. Consider growth habits, weight, and care requirements when pairing plants with your macrame plant hanger.
Trailing Plants
- Pothos (Devil’s Ivy)
- String of Pearls
- Spider Plant
- Philodendron
- English Ivy
Cascading foliage emphasizes vertical lines and creates dramatic draping effect below the hanger.
Upright Plants
- Snake Plant
- Air Plants
- Succulents
- Peace Lily
- Ferns
Compact growth suits minimalist hangers and modern spaces. Lower maintenance for busy plant parents.
Statement Plants
- Boston Fern
- Staghorn Fern
- Orchids
- Prayer Plant
- Begonia
Colorful foliage or flowers create focal points. Match plant drama to hanger complexity.

Color and Texture Coordination
While natural cotton dominates macrame, color choices impact your space’s overall aesthetic. Consider dyed cord for contemporary or bold looks.
Match cord colors to your room’s palette or create intentional contrast. Earthy tones suit bohemian spaces while stark white fits modern minimalist design.
Texture Mixing: Combine different cord constructions in one space. Pair tightly twisted cord with loosely braided or combed fringe. The textural variety adds depth without clashing colors or patterns.
Height and Placement Strategy
Strategic placement maximizes your macrame plant hanger’s impact. Consider ceiling height, light sources, and traffic patterns in your space.
- Hang at varying heights to create visual rhythm and movement
- Place near windows for plant health but avoid direct harsh sunlight on cord
- Group odd numbers (3, 5, 7) for professional designer look
- Leave adequate clearance for plant growth and air circulation
- Position away from high-traffic areas to prevent bumping
- Use ceiling hooks rated for combined plant and hanger weight

Creating Your Macrame Plant Hanger Legacy
These 20 stunning DIY macrame plant hanger patterns offer endless creative possibilities for every skill level. From simple beginner designs to advanced masterpieces, you now have comprehensive instructions to bring your vision to life.
Start with patterns matching your current abilities and gradually challenge yourself with more complex designs. Each completed macrame plant hanger builds your confidence and refines your technique.
Remember that every expert crafter started exactly where you are now. The journey from your first simple hanger to intricate multi-tier creations happens one knot at a time.

The beauty of macrame lies in its accessibility. With basic materials, patience, and these detailed patterns, you’ll create functional art that enhances your home for years to come.
Your handmade macrame plant hangers tell a story of creativity, patience, and connection to traditional craft. Each piece becomes a conversation starter and treasured element of your personal space.
Begin your macrame journey today. Choose your first pattern, gather your supplies, and discover the meditative joy of creating something beautiful with your own hands.