
There is something truly special about receiving a handmade birthday card from a friend. Unlike store-bought options, these personalized creations carry heartfelt messages and show the time you invested in making someone feel loved on their special day. Whether you’re looking to surprise your best friend or put together something unique for a colleague, handmade cards offer endless possibilities for creativity.
Creating birthday cards at home doesn’t require advanced artistic skills. With simple materials like paper, markers, and a few embellishments, anyone can craft beautiful cards that friends would love to receive. The beauty of DIY birthday cards lies in their personal touch and the fun you’ll have while making them.
This guide walks you through 20 easy handmade birthday card ideas that work perfectly for friends of all ages and interests. Each idea includes clear instructions, material lists, and tips for adding your personal flair. Plus, we’ve got free printable templates to make your card-making journey even easier.
Table of Contents
Essential Materials for Handmade Birthday Cards
Before diving into specific card ideas, gathering the right supplies will make your crafting experience smoother and more enjoyable. Most materials are affordable and available at local craft stores or online retailers.
Basic Supplies You’ll Need
Paper and Cardstock
Quality cardstock forms the foundation of any good birthday card. Choose medium-weight paper that folds cleanly without cracking. White, cream, and pastel colors work well as base colors, while bright hues add personality to your designs.
- White or colored cardstock for card bases
- Patterned scrapbook paper for decorative elements
- Tissue paper for texture and layering
- Metallic or glitter paper for special accents
Adhesives and Tools
The right adhesive prevents your card elements from falling apart over time. Different projects call for different bonding methods, so having variety helps you tackle any design idea.
- Double-sided tape for clean, invisible bonding
- Glue sticks for paper-on-paper applications
- Foam tape for dimensional elements
- Scissors and craft knife for precise cutting
Decorative Elements
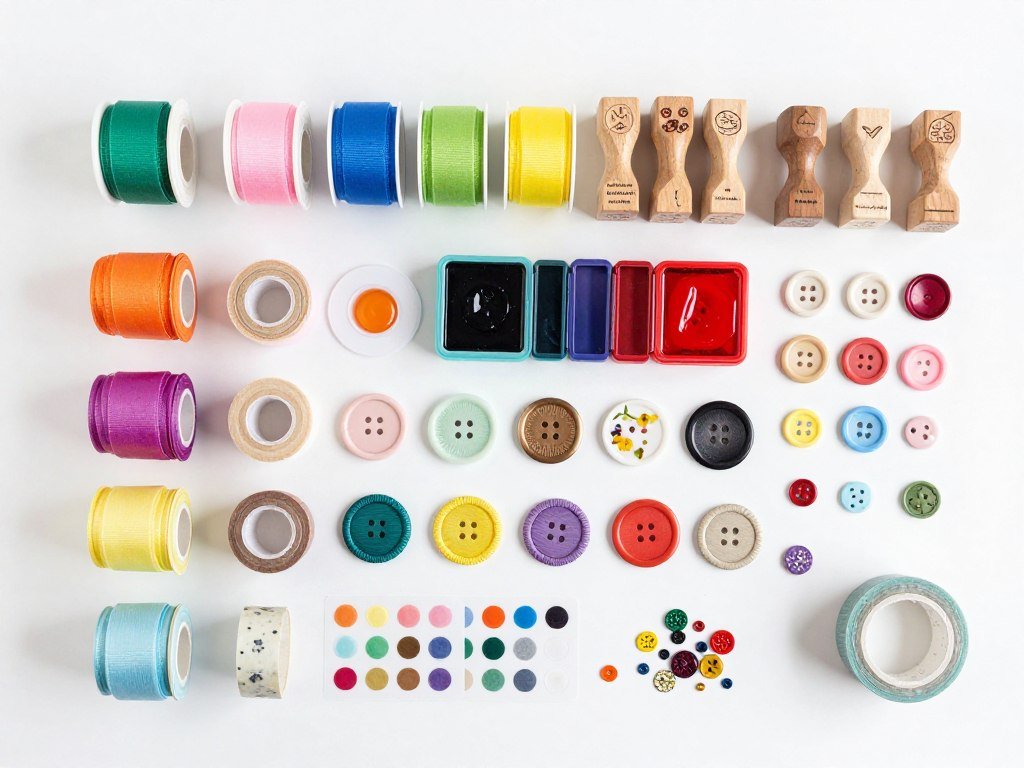
Embellishments transform simple cards into memorable keepsakes. Stock up on versatile decorations that match different birthday themes and your friend’s personality. Small details make each card feel custom-made.
- Ribbons and twine in various colors and widths
- Buttons, sequins, and rhinestones for sparkle
- Rubber stamps and ink pads for patterns
- Washi tape for colorful borders and frames
- Stickers with birthday themes and messages
- Markers, colored pencils, and gel pens
Pro Tip: Start with basic supplies and gradually build your collection. Many beautiful birthday cards require only paper, scissors, and markers. As you gain confidence, you can experiment with specialty items.
1. Watercolor Balloon Card
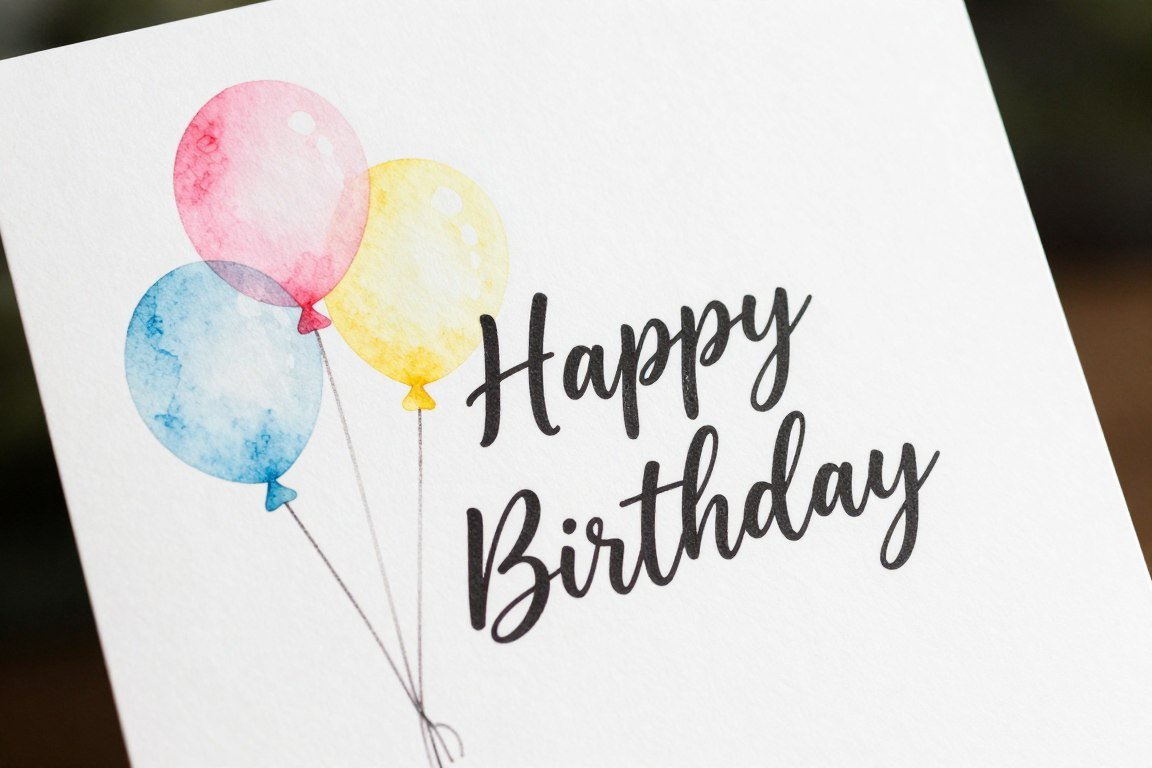
Watercolor balloons create a dreamy, artistic look that friends absolutely love. This technique works beautifully even for beginners because the loose, flowing nature of watercolors is forgiving and encourages creativity.
Materials Needed
- White cardstock base
- Watercolor paper or thick white paper
- Watercolor paints in birthday colors
- Thin paintbrush and water container
- Black fine-tip marker or pen
- Optional: metallic thread for balloon strings
Step-by-Step Instructions
- Fold your cardstock in half to create the card base and set aside to dry completely.
- On watercolor paper, lightly sketch balloon shapes using a pencil, varying sizes for visual interest.
- Paint each balloon with diluted watercolors, allowing colors to blend naturally on wet paper for a soft effect.
- Let the paint dry fully, then outline balloon shapes with a black fine-tip marker for definition.
- Draw or attach thin strings connecting balloons, using metallic thread for added dimension.
- Write your birthday message inside and add the painted balloon panel to the card front.
Personalization Tips
Choose colors that reflect your friend’s favorites or match a birthday party theme. Add small details like confetti dots or sparkle accents around the balloons. You can also paint one balloon in a different color to represent the birthday person standing out from the crowd.
2. Photo Collage Memory Card
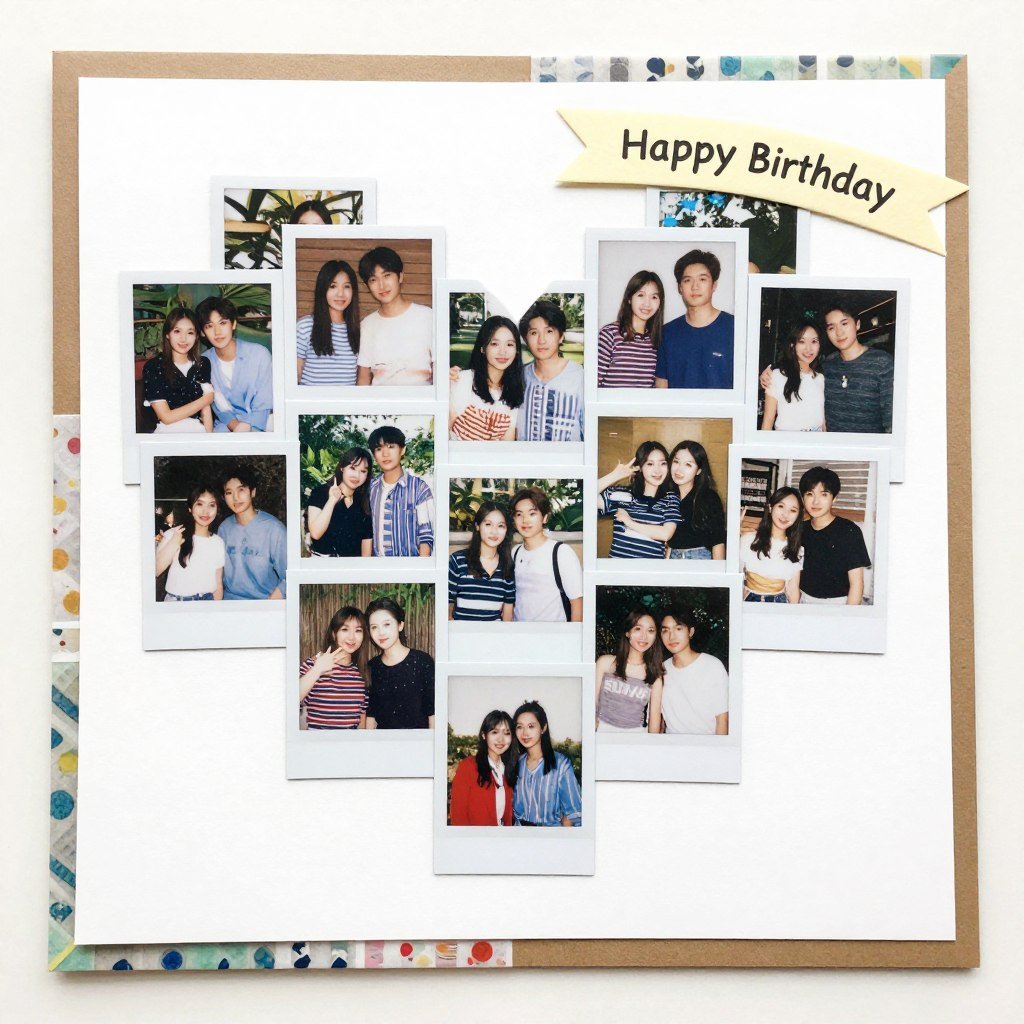
Nothing says “I cherish our friendship” quite like a photo collage birthday card. This sentimental approach lets you celebrate shared memories while creating something your friend will treasure long after their birthday party ends.
Materials Needed
- Cardstock in neutral or favorite colors
- Printed photos of you and your friend
- Scissors or paper trimmer
- Double-sided tape or photo-safe adhesive
- Decorative elements like stickers or washi tape
- Markers for captions and messages
Step-by-Step Instructions
- Select photos that capture special moments, funny times, or meaningful experiences you’ve shared together.
- Print photos in small sizes and trim them into squares, circles, or polaroid-style rectangles.
- Arrange photos on the card front in an appealing pattern before gluing anything down.
- Secure photos with adhesive, leaving small gaps between images for visual breathing room.
- Add decorative frames around photos using markers or washi tape borders.
- Write short captions under select photos and include a heartfelt birthday message inside the card.
Personalization Tips
Create a timeline of your friendship by arranging photos chronologically. Add small handwritten notes describing what made each memory special. Consider using a specific color scheme that matches your friend’s aesthetic preferences.
3. Pop-Up Birthday Cake Card

Pop-up cards never fail to delight recipients with their surprise element. A birthday cake pop-up looks impressive but follows a simple construction technique that anyone can master with a little patience.
Materials Needed
- Two pieces of cardstock for base and insert
- Colored paper for cake layers
- Scissors and ruler
- Glue stick
- Markers or colored pencils
- Optional: glitter glue for candle flames
Step-by-Step Instructions
- Fold both cardstock pieces in half to create the outer card and inner pop-up mechanism.
- On the inner piece, make two parallel cuts about one inch apart in the center fold.
- Push the cut section forward to create a step that will hold your birthday cake design.
- Cut cake layers from colored paper, making each layer slightly smaller to create a tiered effect.
- Glue cake layers onto the pop-up step, starting with the largest at the bottom.
- Add candles on top using thin paper strips with small flame shapes, and secure the pop-up insert inside the outer card.
Personalization Tips
Match the number of candles to your friend’s age or use their favorite colors for the cake layers. Add decorative elements like frosting swirls drawn with markers or tiny paper flowers. Write a special birthday message on the cake layers themselves for an extra surprise.
4. Minimalist Typography Card

Sometimes less truly is more. Minimalist cards with bold typography make powerful statements through simplicity and thoughtful design. This style works especially well for friends who appreciate modern aesthetics.
Materials Needed
- Neutral-colored cardstock
- Black fine-tip markers or calligraphy pens
- Ruler for straight lines
- Pencil for initial sketching
- Optional: metallic pen for accent details
Step-by-Step Instructions
- Choose a neutral card base in white, cream, or soft gray for a clean foundation.
- Lightly sketch your birthday message layout in pencil, experimenting with different text placements.
- Write your message using consistent letterforms, focusing on clean lines and balanced spacing.
- Add one simple graphic element like a line, dot pattern, or small geometric shape for visual interest.
- Erase any visible pencil marks carefully once the ink has dried completely.
- Keep the inside message equally simple and heartfelt to maintain the minimalist theme throughout.
Personalization Tips
Use your friend’s name in decorative lettering as the focal point. Experiment with different font styles or mix uppercase and lowercase letters intentionally. A single pop of color in an otherwise monochrome design creates striking visual impact.
5. Confetti Shaker Card
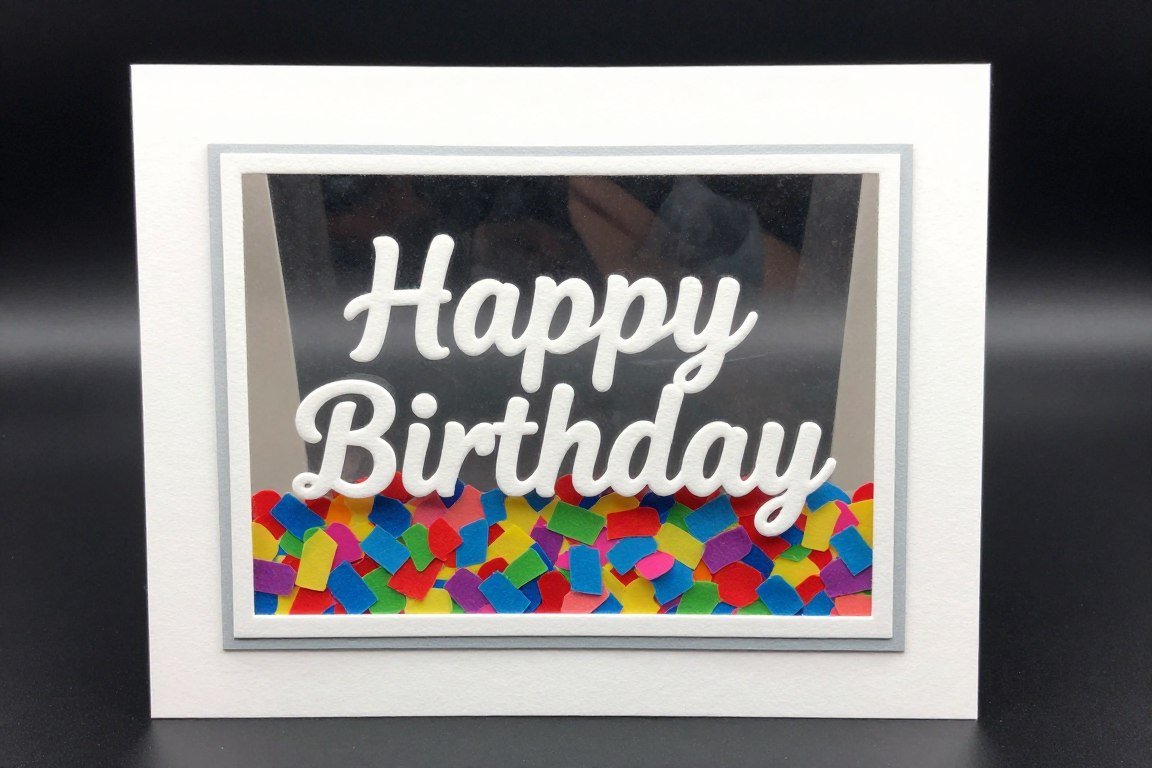
Shaker cards bring interactive fun to birthday greetings. The satisfying sound and movement of confetti inside a clear window makes these cards real conversation starters that recipients would love to display.
Materials Needed
- Cardstock for base and frame
- Clear acetate sheet or transparent packaging
- Foam tape or foam squares
- Sequins, confetti, or small beads
- Strong adhesive
- Cutting tool for window opening
Step-by-Step Instructions
- Cut a window opening in your card front, leaving a frame border of at least half an inch on all sides.
- Attach clear acetate behind the window opening using strong adhesive around all edges.
- Create a foam tape frame around the window on the inside, building up thickness for the shaker chamber.
- Add confetti, sequins, or small beads into the framed area before sealing.
- Cover the back of the shaker element with another cardstock panel, sealing all edges completely.
- Decorate the frame area with birthday messages and embellishments to complete the festive look.
Personalization Tips
Choose confetti colors that match your friend’s favorite palette or their birthday party theme. Add small letter beads that spell their name among the confetti. Mix different sizes and textures of shaker elements for more visual interest when the card moves.
6. Washi Tape Candle Card

Washi tape offers endless pattern possibilities and requires zero artistic skill to create stunning designs. Birthday candle cards made with washi tape are quick to assemble yet look professionally crafted.
Materials Needed
- White or light-colored cardstock
- Assorted washi tape patterns and colors
- Markers or colored pencils
- Scissors
- Optional: gold or silver marker for flame accents
Step-by-Step Instructions
- Fold your cardstock to create the card base and determine candle placement on the front.
- Apply vertical strips of different washi tape patterns to represent birthday candles.
- Trim the top of each tape strip at a slight angle to create the candle top shape.
- Draw small flame shapes above each candle using markers or colored pencils.
- Add details like melting wax drips or sparkles around flames for extra realism.
- Write a birthday message below the candles or inside the card using complementary colors.
Personalization Tips
Use one special washi tape pattern that represents your friend’s interests or hobbies. Arrange candles in the shape of their age number for a playful touch. Add tiny “smoke” swirls above the flames using a light gray marker.
7. String Art Birthday Message Card

String art brings texture and dimension to flat cards while creating eye-catching patterns. This technique might take a bit more time but produces results that look like they came from a boutique card shop.
Materials Needed
- Thick cardstock or lightweight cardboard
- Embroidery thread or thin yarn
- Push pin or needle for making holes
- Pencil for pattern marking
- Foam mat or thick cardboard for punching surface
- Tape for securing thread ends
Step-by-Step Instructions
- Lightly sketch your birthday message or design on the card front using pencil guidelines.
- Place card on foam mat and use a push pin to create evenly-spaced holes along your design lines.
- Thread your needle with embroidery thread and secure the starting end with tape on the back.
- Weave thread through holes following your pattern, creating the string art effect as you work.
- Experiment with different threading patterns to fill in letters or create decorative borders.
- Secure the ending thread with tape on the back and trim excess for a clean finish.
Personalization Tips
Choose thread colors that complement your friend’s style or match their home decor. Create initials instead of full words for a more personalized approach. Combine string art with other techniques like watercolor backgrounds for mixed-media appeal.
8. Pressed Flower Garden Card
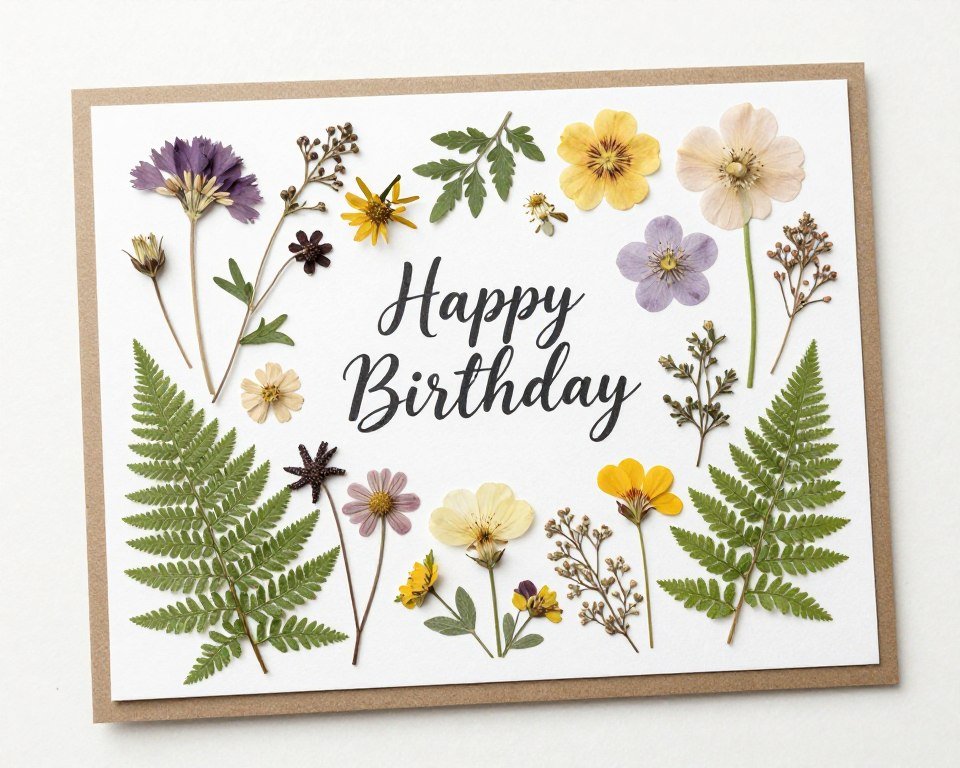
Pressed flowers add natural beauty and a touch of garden charm to birthday cards. This timeless technique creates one-of-a-kind cards because no two flowers press exactly the same way.
Materials Needed
- Cardstock base in neutral colors
- Pressed flowers and leaves
- Tweezers for delicate handling
- Clear-drying craft glue
- Optional: clear contact paper or laminating sheet for protection
- Fine-tip marker for message
Step-by-Step Instructions
- Press flowers at least one week before card-making by placing them between heavy book pages.
- Plan your flower arrangement on the card before applying any adhesive.
- Use tweezers to carefully position pressed flowers, handling them gently to prevent breakage.
- Apply tiny dots of clear glue to flower backs and press gently onto cardstock.
- Allow glue to dry completely before adding any message or moving the card.
- Optionally cover the flower arrangement with clear contact paper for durability and protection.
Personalization Tips
Choose flowers that hold special meaning or match your friend’s birth month flower. Create a wreath shape with small flowers around the birthday message. Include a small tag identifying the flower types for an educational and personal touch.
9. Geometric Pattern Card
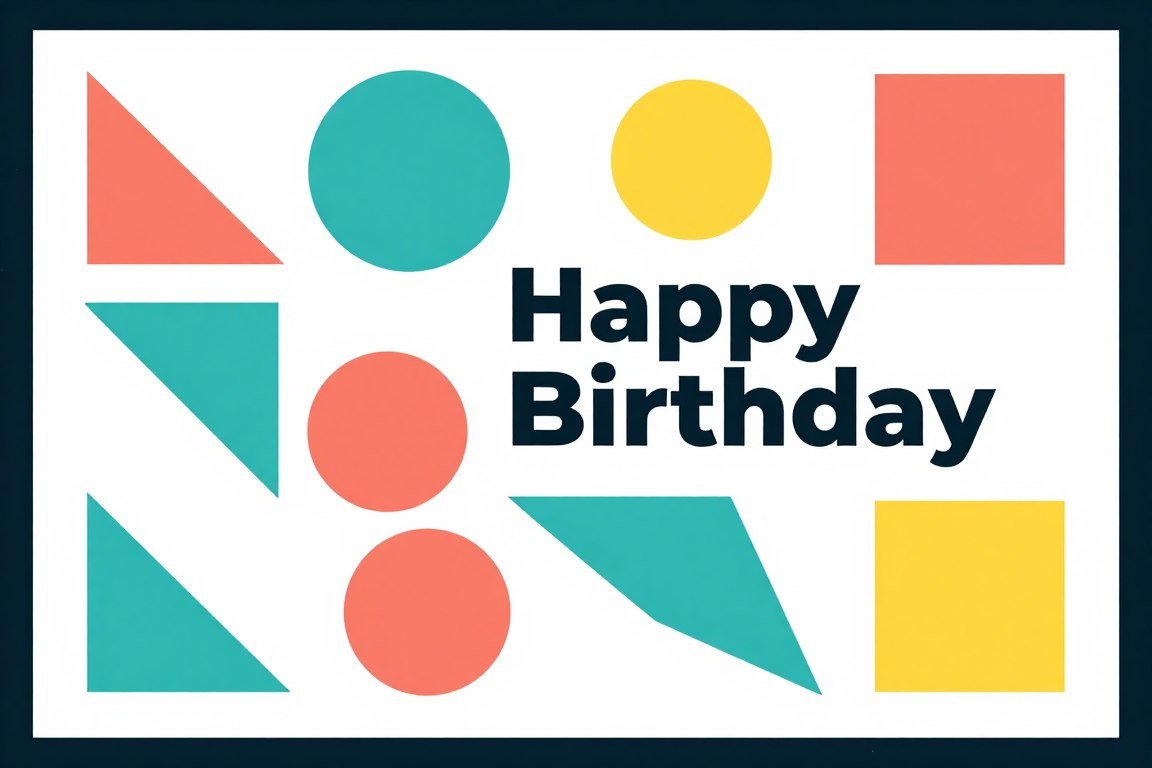
Geometric patterns create modern, graphic cards that appeal to design-loving friends. Using basic shapes, you can build complex-looking designs that are actually quite simple to execute.
Materials Needed
- Cardstock in multiple colors
- Ruler and pencil
- Scissors or craft knife
- Glue stick
- Optional: circle and shape templates
- Markers for details
Step-by-Step Instructions
- Select a color palette of three to five colors that work well together and create visual harmony.
- Cut basic shapes like triangles, circles, squares, or hexagons from colored cardstock.
- Arrange shapes on your card base in a pleasing pattern, experimenting with overlapping and spacing.
- Once satisfied with your arrangement, glue shapes down one at a time from background to foreground.
- Add fine details like dots, lines, or patterns within shapes using markers if desired.
- Write your birthday message in a clear space or create a small label to overlay on the design.
Personalization Tips
Use shapes to create recognizable images like a birthday cake made of triangles or a balloon formed from circles. Choose geometric patterns that reflect your friend’s favorite design styles. Add metallic or glitter paper shapes for extra celebration vibes.
10. Stamped Pattern Birthday Card
Rubber stamps make pattern-building easy and enjoyable. You can create professional-looking repeated designs without needing drawing skills, making this approach perfect for little ones and adults alike.
Materials Needed
- Plain cardstock base
- Rubber stamps with birthday or geometric designs
- Ink pads in various colors
- Scrap paper for testing stamps
- Markers for adding details
- Optional: embossing powder for raised designs
Step-by-Step Instructions
- Test your stamps on scrap paper to get a feel for ink coverage and pressure needed.
- Plan your stamping pattern, deciding whether you want organized rows or random placement.
- Press stamps firmly into ink pads, ensuring even coverage across the entire stamp surface.
- Stamp designs onto your card, reinking between impressions for consistent color saturation.
- Allow stamped images to dry completely before adding any hand-drawn details or messages.
- Use markers to add connecting elements, highlights, or birthday messages between stamped images.
Personalization Tips
Create an ombre effect by stamping with gradually lighter or darker ink colors across the card. Combine multiple stamp designs to tell a visual story about your friend’s interests. Add the birthday person’s age using number stamps surrounded by decorative elements.
11. Quilled Paper Birthday Card

Paper quilling transforms simple paper strips into elaborate curled designs. While this craft takes practice, even basic quilled shapes add impressive dimension and artistry to birthday cards that friends cherish.
Materials Needed
- Cardstock base
- Quilling paper strips or cut paper strips
- Quilling tool or toothpick
- Craft glue
- Tweezers
- Template or pattern for guidance
Step-by-Step Instructions
- Cut paper into thin strips if using regular paper instead of pre-cut quilling strips.
- Roll paper strips tightly around your quilling tool or toothpick to create basic coil shapes.
- Let coils relax slightly and pinch ends to create shapes like teardrops, leaves, or hearts.
- Arrange quilled shapes on card front in your desired pattern before gluing anything down.
- Apply small dots of glue to the edge of each quilled piece and position on card carefully.
- Hold each piece briefly until glue sets, building your design one element at a time.
Personalization Tips
Create quilled flowers in your friend’s favorite colors or their birth flower. Form quilled shapes into their initials for a personalized monogram. Combine quilling with flat elements for a mixed-media card that balances dimension with negative space.
12. Kraft Paper Rustic Card
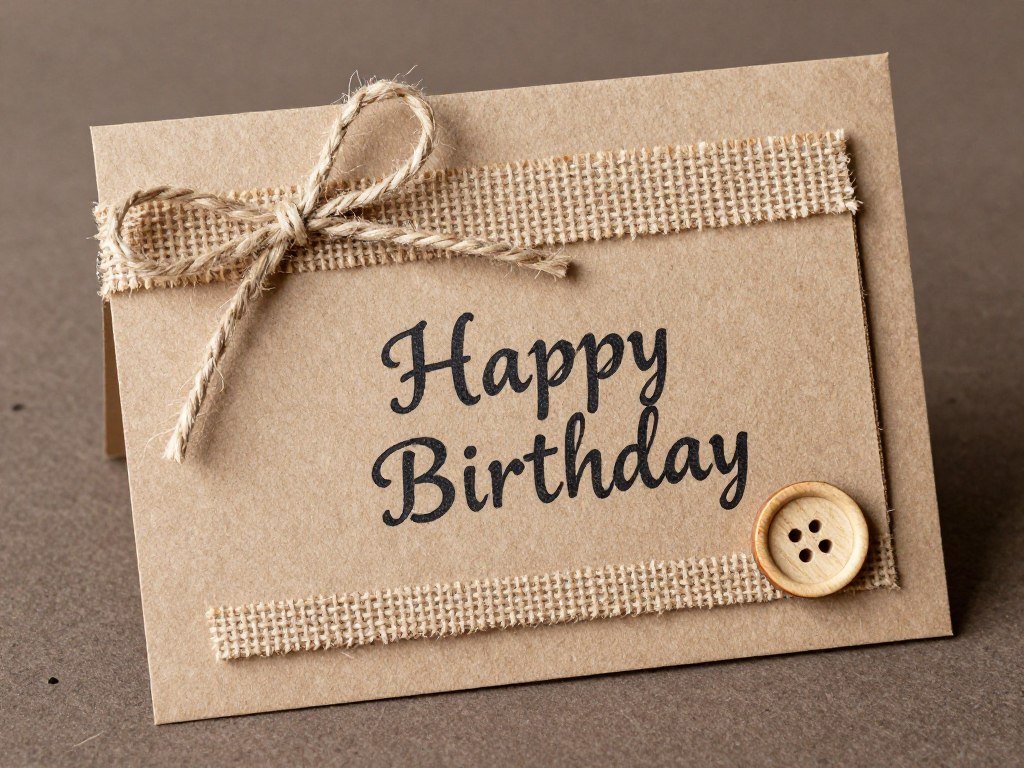
Kraft paper creates warm, rustic cards perfect for nature-loving friends. The neutral brown background makes colorful elements pop while maintaining an organic, handcrafted appearance.
Materials Needed
- Kraft paper cardstock
- Twine or jute string
- Buttons, burlap, or natural elements
- White or colored markers
- Stamps and dark ink pads
- Optional: dried flowers or leaves
Step-by-Step Instructions
- Fold kraft cardstock to create a sturdy card base with natural texture and color.
- Wrap twine around the card front or tie a simple bow as a rustic accent.
- Add natural embellishments like buttons, small dried flowers, or fabric scraps in earth tones.
- Use white or light-colored markers to write your birthday message for contrast against brown paper.
- Stamp simple designs using dark ink that shows well against the kraft paper background.
- Layer different natural textures like burlap ribbon with smooth paper elements for visual interest.
Personalization Tips
Attach a small dried flower bundle tied with twine for garden enthusiasts. Use wood-burned designs or stamps featuring outdoor themes like trees, mountains, or animals. Write a nature-inspired birthday poem that complements the rustic aesthetic.
13. Ombre Painted Background Card
Ombre backgrounds create stunning visual effects that make simple birthday messages stand out beautifully. This painting technique looks complex but becomes easy once you understand the blending process.
Materials Needed
- Watercolor or mixed media cardstock
- Acrylic paints or watercolors
- Sponge or wide brush
- Water container
- Paper towels
- White or metallic pen for message
Step-by-Step Instructions
- Choose two or three colors that blend well together, such as blue to purple or pink to orange.
- Apply your darkest color to one edge of the card using a damp sponge or brush.
- Quickly apply your lightest color to the opposite edge while the first color is still wet.
- Blend the middle section where colors meet by gently dabbing and brushing until smooth transitions form.
- Let the background dry completely before adding any text or embellishments to prevent smudging.
- Write your birthday message in white or metallic ink that contrasts beautifully with the painted background.
Personalization Tips
Use color gradients that match your friend’s favorite color palette or their birth month colors. Create sunset or sunrise ombre effects for friends who love nature photography. Add small splatter details in metallic paint once the ombre dries for extra sparkle.
14. Embossed Texture Birthday Card
Embossing adds sophisticated texture that recipients can both see and feel. This technique elevates simple cards into elegant creations that feel expensive and thoughtfully crafted.
Materials Needed
- Cardstock base
- Embossing folders or stencils
- Embossing tool or die-cut machine
- Ink pads and embossing powder (for heat embossing)
- Heat gun (for raised embossing)
- Markers or stamps for decoration
Step-by-Step Instructions
- For dry embossing, place cardstock inside an embossing folder and run through a die-cut machine.
- For heat embossing, stamp your design with embossing ink and immediately sprinkle embossing powder over it.
- Tap off excess powder and use a heat gun to melt the powder until it creates a raised, glossy surface.
- Add color to embossed areas using markers or leave the texture in monochromatic tones for elegance.
- Combine embossed elements with flat stamped or written messages for dimensional contrast.
- Mount embossed panels on contrasting cardstock to make the texture more visible and impactful.
Personalization Tips
Emboss patterns that relate to your friend’s hobbies, like musical notes for music lovers or floral patterns for gardeners. Use metallic embossing powder in gold or silver for a luxurious finish. Create borders with embossed designs framing a central birthday message.
15. Chalkboard Style Card

Chalkboard cards bring vintage cafe charm to birthday greetings. The contrast between dark backgrounds and light lettering creates striking visual appeal that catches everyone’s eye.
Materials Needed
- Black or dark cardstock
- White gel pen or chalk marker
- White colored pencil for shading
- Ruler for guidelines
- Optional: actual chalk for authentic texture
- Fixative spray to prevent smudging
Step-by-Step Instructions
- Start with black or very dark cardstock as your base to mimic a chalkboard surface.
- Lightly sketch your birthday message layout using a white colored pencil that can be erased if needed.
- Use white gel pens or chalk markers to create lettering that mimics hand-drawn chalk writing.
- Add decorative elements like banners, flourishes, or borders using the same white writing tools.
- Create dimension by adding light shading with white colored pencils around letters and decorations.
- Spray finished card lightly with fixative to prevent white elements from smudging during handling.
Personalization Tips
Draw menu-style birthday messages listing all the fun activities planned for the special day. Include coffee cup or cake illustrations for foodie friends. Add subtle color accents using colored chalk or pencils for a modern twist on traditional chalkboard art.
16. Ribbon Bow Celebration Card
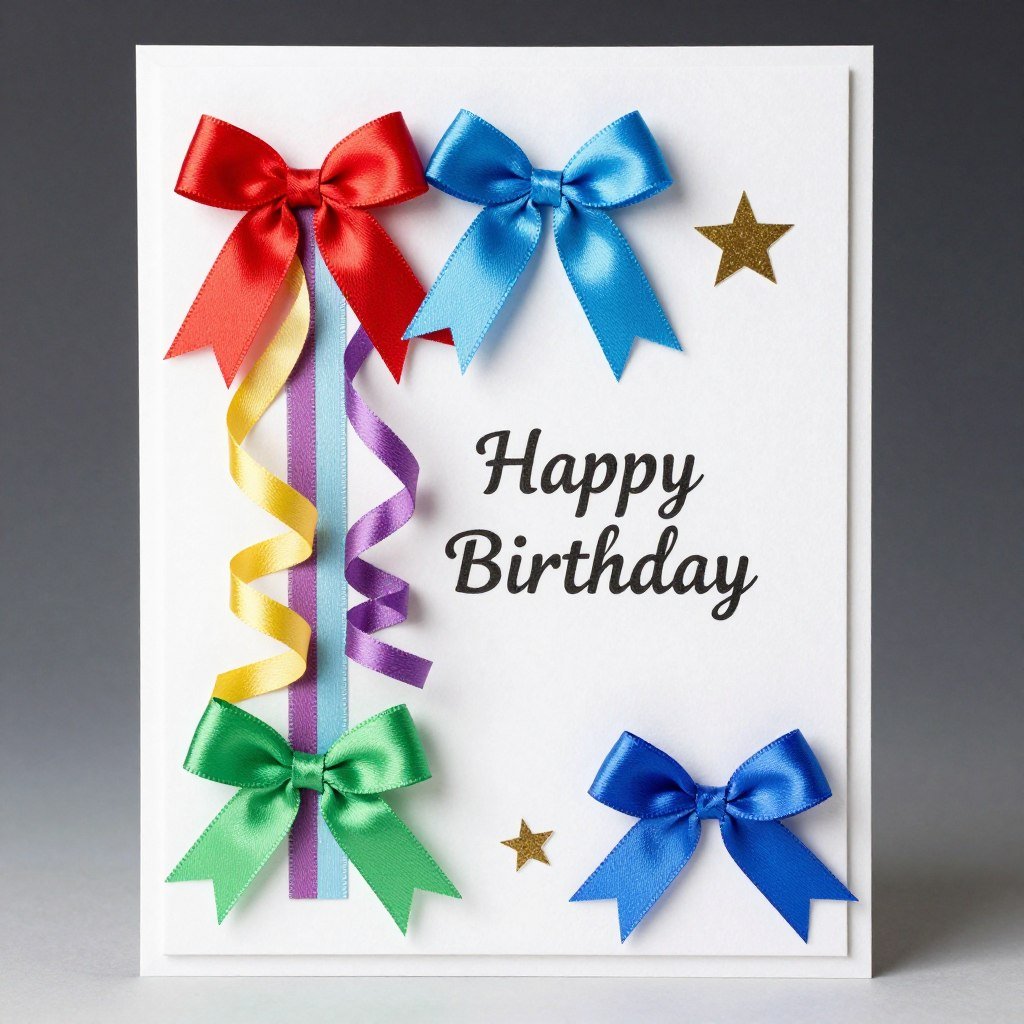
Ribbon bows add instant celebration to any birthday card. These dimensional embellishments create gift-like cards that feel as special as wrapped presents your friend would love to receive.
Materials Needed
- Cardstock base
- Satin or grosgrain ribbon in various widths
- Scissors
- Double-sided tape or glue dots
- Optional: decorative adhesive gems
- Markers for message
Step-by-Step Instructions
- Cut ribbon pieces for creating bows, allowing extra length for loops and tails.
- Form basic bows by creating two loops and securing in the center with thread or thin wire.
- Attach bows to card front using strong adhesive like glue dots that hold dimensional elements securely.
- Add ribbon streamers or tails flowing from bows for additional movement and visual interest.
- Layer different ribbon widths and textures for a more complex, professional-looking arrangement.
- Write your birthday message in spaces between ribbons or inside the card for clean composition.
Personalization Tips
Use ribbon colors that match your friend’s favorite hues or their birthday party color scheme. Create a large statement bow as the card focal point with smaller accent bows around it. Add a small tag hanging from one ribbon with a personal note or the birthday person’s name.
17. Fingerprint Balloon Card
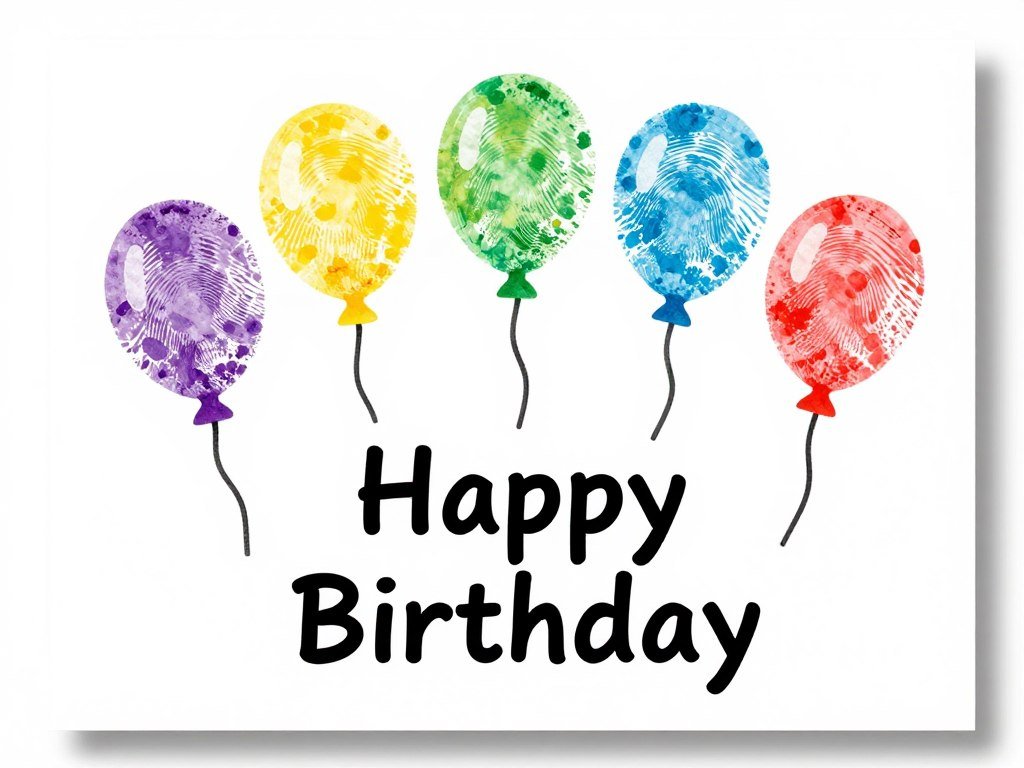
Fingerprint art creates wonderfully personal cards with a handmade quality that store-bought options can never match. This fun technique works for all ages and produces unique results every time.
Materials Needed
- White or light cardstock
- Washable ink pads or paints in multiple colors
- Fine-tip markers
- Baby wipes for cleanup
- Optional: small sponge for blending
- Clear workspace protection
Step-by-step Instructions
- Press your fingertip firmly onto an ink pad or into paint to coat the pad evenly.
- Press inked finger onto card where you want balloon shapes, creating oval impressions.
- Repeat with different colors to create a bunch of fingerprint balloons floating upward.
- Let fingerprints dry completely before adding any drawn elements to prevent smudging.
- Use fine-tip markers to draw strings connecting balloons and add small details like highlights.
- Write your birthday message below the balloon cluster or have balloons “carry” a banner message.
Personalization Tips
Use fingerprints from multiple family members or friends to create a “group gift” card. Arrange fingerprints in the shape of your friend’s age number. Add tiny details inside each fingerprint balloon using metallic pens for extra sparkle and dimension.
18. Die-Cut Window Card
Window cards create anticipation by revealing glimpses of colorful surprises inside. The peek-through effect adds an interactive element that makes opening the card extra special.
Materials Needed
- Two coordinating cardstock pieces
- Die-cut machine and window dies
- Patterned paper for inside layer
- Double-sided adhesive
- Decorative elements for framing
- Optional: acetate for window covering
Step-by-Step Instructions
- Cut a window shape in the front panel using a die-cut machine or craft knife with template.
- Choose colorful patterned paper or create a design that will show through the window opening.
- Attach the patterned paper inside the card so it appears centered in the window when closed.
- Optionally add clear acetate over the window opening for a glossy, protected finish.
- Decorate around the window frame with stamped images, washi tape, or drawn embellishments.
- Write birthday wishes inside the card where they won’t be visible through the window.
Personalization Tips
Cut window shapes that match your friend’s interests, like stars for space enthusiasts or hearts for romantics. Layer multiple colored papers inside for a more complex revealed image. Add the birthday person’s photo behind the window for a personalized surprise element.
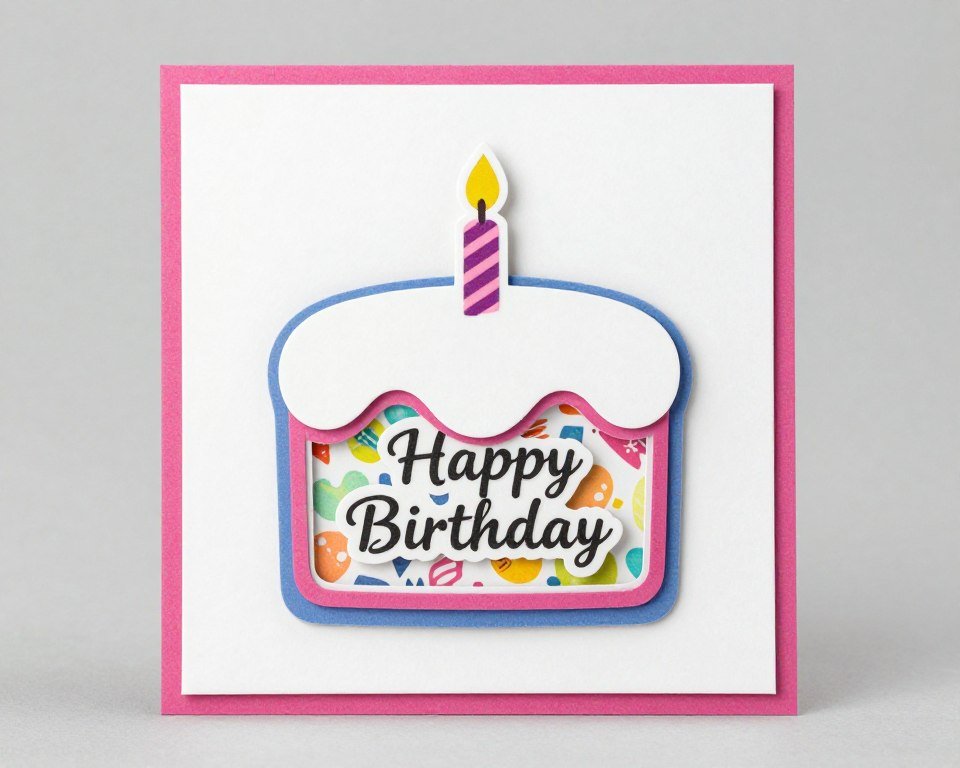
19. Layered Paper Cake Card
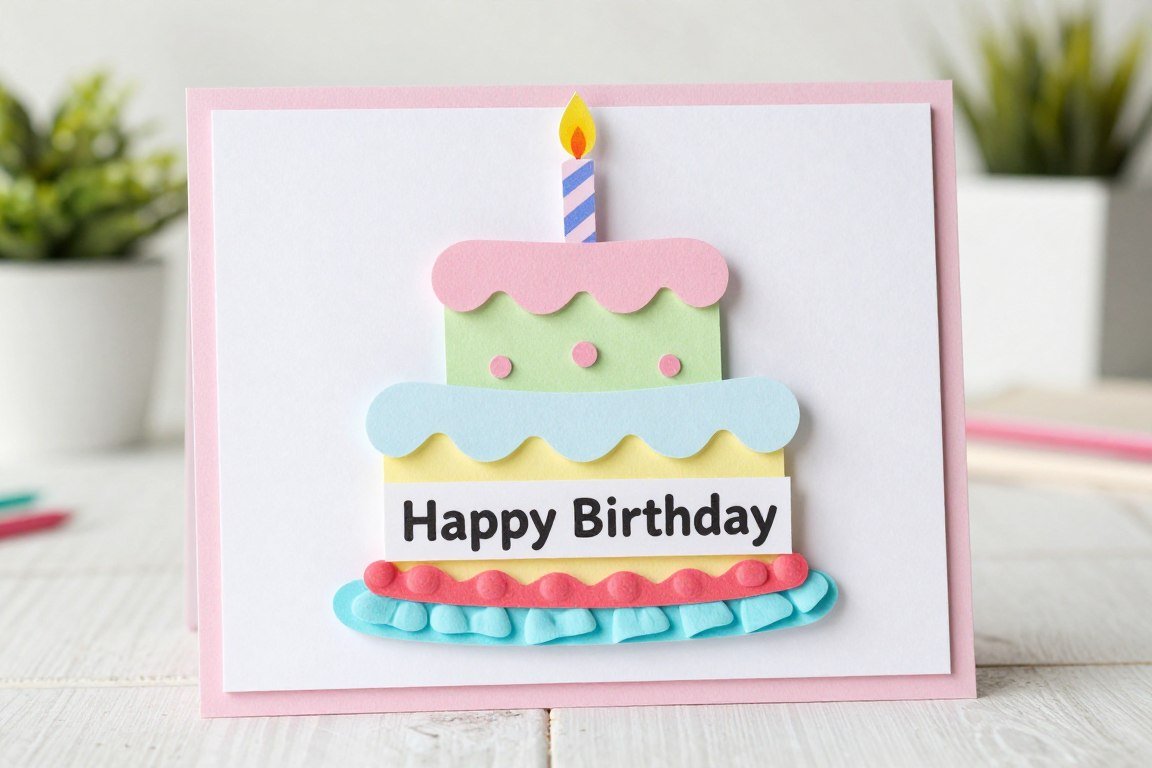
Layered paper techniques create dimensional birthday cakes that practically jump off the card. Using foam tape between layers gives depth that makes your card stand out in any birthday card collection.
Materials Needed
- Cardstock in cake colors
- Foam mounting tape or dots
- Scissors or paper trimmer
- Patterned paper for decoration
- Small embellishments for candles
- Markers for details
Step-by-Step Instructions
- Cut progressively smaller rectangles from different colored cardstock to represent cake tiers.
- Add decorative patterns or details to each cake layer using markers, stamps, or patterned paper strips.
- Attach foam tape to the back of each layer, stacking from largest at bottom to smallest on top.
- Mount the layered cake assembly onto your card front, ensuring all layers align properly.
- Add small paper or embellishment candles on top of the cake using additional foam tape for dimension.
- Draw frosting details, sprinkles, or other cake decorations to complete the celebratory dessert scene.
Personalization Tips
Create cake tiers in your friend’s favorite color combinations or their actual birthday cake flavors. Add the correct number of candles representing their age. Include tiny “frosting” details using dimensional paint or glitter glue for realistic texture.
20. Mixed Media Collage Card

Mixed media cards let you combine all your favorite techniques into one spectacular creation. This approach celebrates creative freedom and produces truly unique birthday cards that showcase your personal artistic style.
Materials Needed
- Sturdy cardstock base
- Various paper scraps and patterned papers
- Paints, markers, stamps, ink pads
- Fabric scraps, ribbon, buttons
- Adhesives suitable for different materials
- Any other craft supplies you love
Step-by-Step Instructions
- Start with a background technique like painting, stamping, or collaging paper scraps onto your card base.
- Layer additional elements once the background dries, building up texture and visual interest gradually.
- Combine different techniques such as watercolor with stamping, or fabric with paper elements freely.
- Add dimensional elements like buttons, ribbons, or folded paper to create depth and touchable texture.
- Balance busy areas with negative space so the design doesn’t feel overwhelming to the eye.
- Include your birthday message as an integrated design element rather than an afterthought addition.
Personalization Tips
Incorporate materials that represent inside jokes or shared memories with your friend. Use their favorite colors as the dominant palette throughout the mixed media composition. Include meaningful symbols, quotes, or small items that tell the story of your friendship journey together.
Making Your Birthday Cards Extra Special
The difference between a good handmade card and a great one often lies in thoughtful personalization. These finishing touches show your friend how much you truly care about making their special day memorable.
Adding Personal Touches
Message Personalization
Generic birthday wishes miss opportunities to connect meaningfully with your friend. Crafting personalized messages makes your card as unique as your relationship.
- Reference specific memories you’ve shared together this past year
- Include inside jokes that only your friend would understand and appreciate
- Write about qualities you admire in them beyond generic compliments
- Mention future plans or experiences you’re looking forward to sharing
Visual Personalization
Tailoring the card’s appearance to match your friend’s personality creates instant recognition and shows attention to detail they’ll love.
- Choose colors that match their home decor or favorite clothing palette
- Include symbols related to their hobbies, career, or passions
- Add small details that reference their pets, favorite places, or interests
- Use design styles they gravitate toward, whether minimalist or maximalist
Presentation Ideas
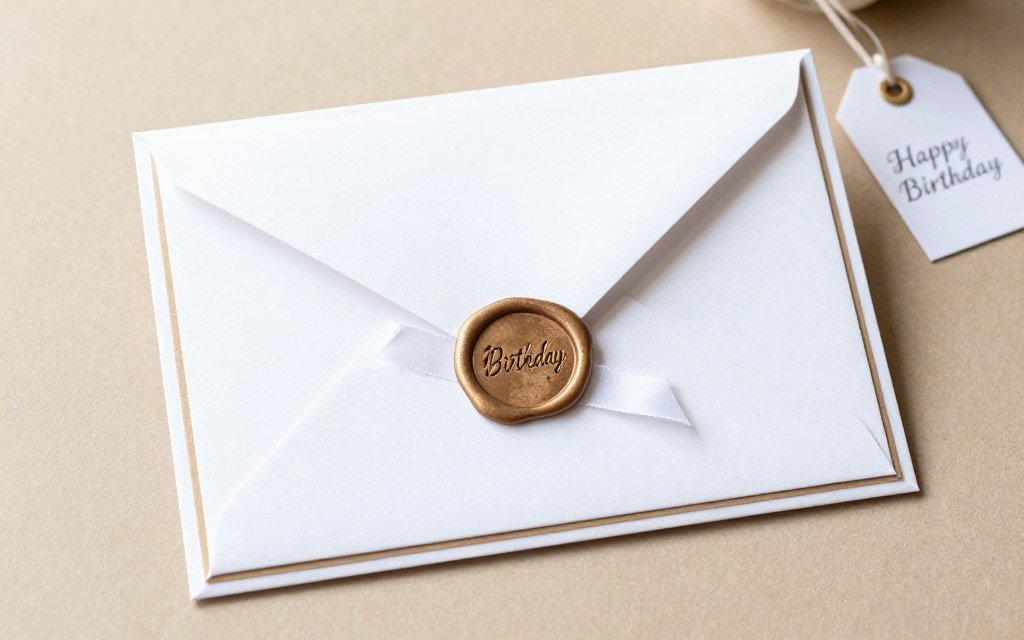
How you present your handmade birthday card matters almost as much as the card itself. Thoughtful packaging elevates the entire gift-giving experience and builds anticipation before your friend even opens the envelope.
- Create matching decorated envelopes using coordinating papers and embellishments
- Add wax seals for an elegant, vintage-inspired finishing touch
- Include small extras like confetti, pressed flowers, or tea bags inside the envelope
- Hand-deliver cards when possible to see your friend’s immediate reaction
- Attach cards to small gifts using ribbon so the card becomes part of the presentation
Remember: The time and thought you put into creating a handmade birthday card speaks volumes. Even simple designs become treasured keepsakes when they come from the heart and reflect genuine care for the birthday person.
Common Card-Making Challenges and Solutions
Every crafter encounters obstacles when making handmade birthday cards. Understanding how to troubleshoot common issues helps you create better cards with less frustration along the way.
Adhesive Issues
Problem: Elements Won’t Stick
Nothing dampens creative enthusiasm like embellishments that keep falling off your carefully designed birthday card. Different materials require specific adhesive types for secure bonding.
- Use glue dots for heavy embellishments like buttons and charms
- Apply liquid glue sparingly to prevent warping and buckling
- Choose photo-safe adhesives for cards you want preserved long-term
- Let adhesives cure fully before handling or mailing cards
Problem: Glue Shows or Creates Mess
Visible adhesive or sticky fingerprints ruin the professional appearance of handmade cards. Prevention and proper application techniques maintain clean finishes.
- Apply glue from the center outward to prevent oozing at edges
- Keep baby wipes nearby for immediate cleanup of adhesive mistakes
- Use adhesive runners for invisible, mess-free bonding on flat elements
- Test adhesives on scrap materials before applying to final card
Design Challenges
Creating Balanced Compositions
Visual balance makes cards pleasing to look at and prevents designs from feeling lopsided or chaotic. Understanding basic design principles helps even beginners create professional-looking birthday cards.
Design Tip: Use the “rule of thirds” by dividing your card into nine equal sections. Place focal points where grid lines intersect for naturally balanced compositions that draw the eye effectively.
- Distribute visual weight evenly across the card surface
- Balance busy patterned areas with calm negative space
- Use odd numbers of elements for more dynamic, interesting arrangements
- Step back periodically to view your card from a distance
- Take photos to see design issues more clearly before committing with glue
Material and Technical Issues
Do These Things
- Pre-score cardstock along fold lines for crisp, professional creases
- Use bone folders or rulers to create sharp, clean folds
- Store finished cards flat in protective sleeves until giving them
- Test markers on scrap paper to prevent bleed-through
- Work in good lighting to see colors and details accurately
Avoid These Mistakes
- Don’t use lightweight paper that buckles under wet adhesives
- Avoid over-embellishing, which makes cards bulky and hard to mail
- Don’t skip planning your layout before gluing elements permanently
- Avoid mixing too many design styles in one card
- Don’t forget to sign and date your handmade creations
Organizing Your Card-Making Supplies
A well-organized craft space makes card creation more enjoyable and efficient. Knowing where everything is saves time and keeps your creative flow uninterrupted when inspiration strikes.
Storage Solutions That Work
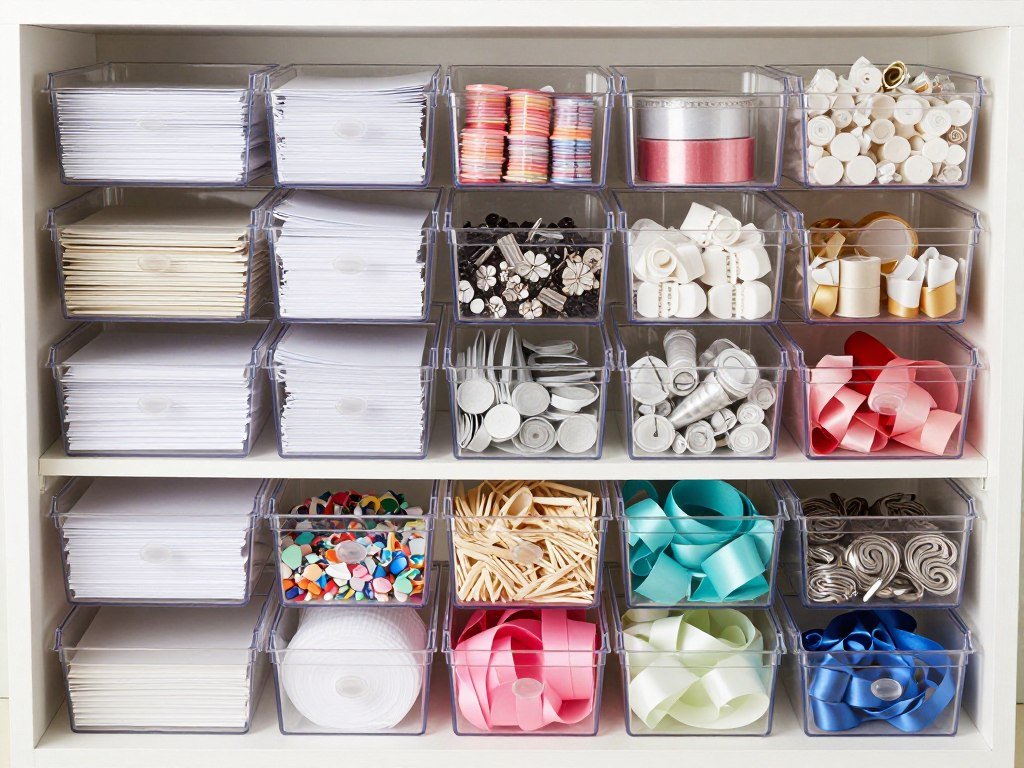
Paper Organization
Cardstock and patterned papers stay in better condition when stored properly. Categorizing by color or theme helps you find exactly what you need quickly.
- Use vertical file holders for cardstock sheets
- Sort papers by color in labeled folders
- Store scraps in clear containers by size
- Keep special papers in sheet protectors
Embellishment Storage
Small items like buttons and sequins easily get lost without dedicated organization. Transparent storage lets you see options at a glance without digging through containers.
- Use divided plastic containers for small items
- Store ribbons on spools or rolled in jars
- Keep stamps in clear cases by theme
- Organize washi tape on dowels or racks
Tool Management
Keeping tools accessible yet protected extends their life and makes crafting sessions more productive. Dedicated spaces for each tool prevent loss and damage.
- Store scissors in holders or magnetic strips
- Keep adhesives in sealed containers
- Organize markers by color in caddies
- Store cutting tools safely out of reach
Creating an Inspiring Workspace
Your crafting environment impacts creativity and enjoyment. Even small spaces can become productive card-making areas with thoughtful organization and setup.
- Ensure adequate lighting to see true colors and fine details clearly
- Keep your most-used supplies within arm’s reach for easy access
- Display inspiring cards or artwork to spark new ideas
- Maintain a clean work surface to prevent accidental damage to projects
- Store works-in-progress safely where they won’t get damaged between sessions
Mailing Your Handmade Birthday Cards
Creating beautiful handmade birthday cards means little if they arrive damaged or delayed. Understanding postal requirements helps ensure your card reaches your friend in perfect condition on time for their special day.
Envelope Selection and Preparation
Standard envelopes work for most flat cards, but dimensional designs need special consideration. Choosing appropriate packaging protects your handwork during transit.
- Use padded envelopes for cards with dimensional embellishments
- Choose envelope sizes that accommodate cards without forcing or folding
- Secure loose elements like confetti in sealed plastic before inserting cards
- Add “Hand Cancel” requests for delicate or bulky cards
Postage and Timing
Extra thickness from layers and embellishments often requires additional postage beyond standard letter rates. Planning ahead prevents last-minute rushes and ensures on-time delivery.
- Weigh cards at the post office to determine correct postage amounts
- Mail cards at least one week before birthdays for domestic delivery
- Consider upgrading to tracking for valuable or irreplaceable handmade cards
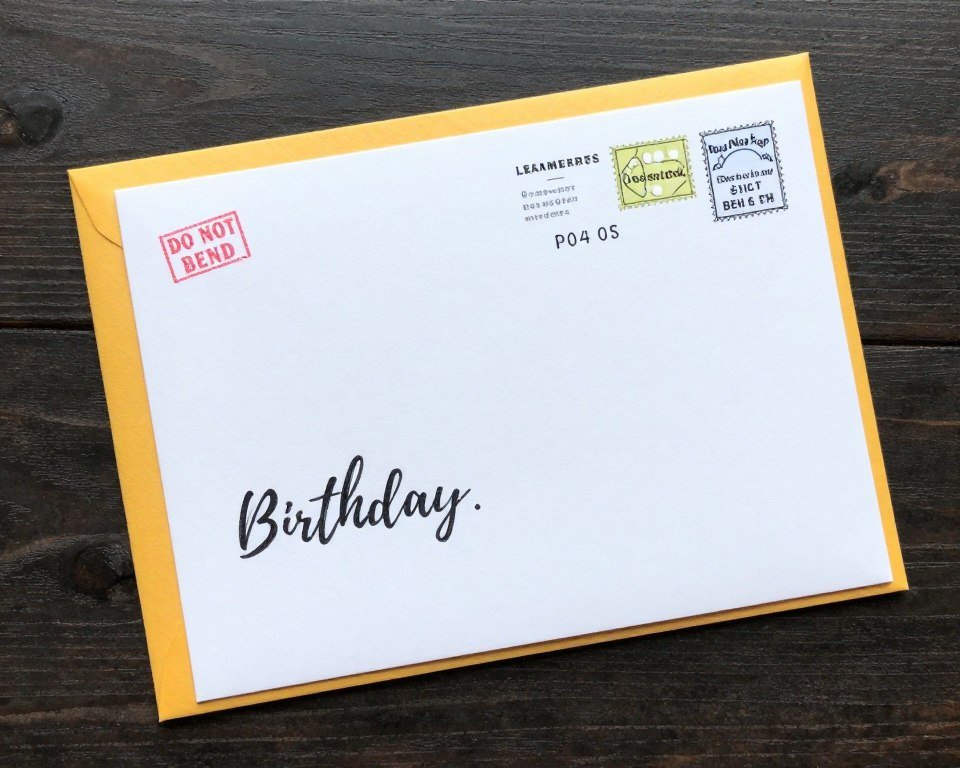
- Use “Do Not Bend” stamps or markings on envelopes containing special cards
- Account for weekend and holiday delays when calculating mailing timelines
Important: Cards thicker than one-quarter inch or containing rigid elements may require package rates rather than letter postage. Check with postal workers to avoid return or additional postage due situations.
Eco-Friendly Card Making Practices
Creating beautiful birthday cards doesn’t mean sacrificing environmental responsibility. Sustainable crafting choices reduce waste while still producing cards friends would love to receive and keep.
Sustainable Material Choices

Many craft supplies come in eco-friendly versions that perform just as well as conventional options. Making conscious choices about materials benefits the environment without compromising your creative vision.
Recycled and Repurposed Materials
- Use recycled cardstock and papers for card bases and elements
- Repurpose old greeting cards, magazines, and catalogs for collage elements
- Save fabric scraps from sewing projects for card embellishments
- Collect natural items like leaves and flowers for organic decorations
Minimal Waste Techniques
- Save paper scraps for future projects instead of discarding them
- Plan designs to minimize excess material cutting and waste
- Use vegetable-based inks and water-soluble adhesives when possible
- Choose plantable seed paper for cards that grow into flowers
Reducing Environmental Impact
Beyond material choices, how you approach card making overall affects your environmental footprint. Small changes in habits create meaningful positive impacts over time.
- Buy supplies in bulk to reduce packaging waste from frequent small purchases
- Share supplies with friends family to maximize use and minimize duplication
- Choose quality tools that last years instead of disposable craft items
- Support companies committed to sustainable and ethical manufacturing practices
- Create digital designs when appropriate instead of always defaulting to physical cards
Creating Meaningful Birthday Cards for Friends
Handmade birthday cards carry special meaning that purchased options simply cannot match. The time you invest in creating personalized cards demonstrates genuine care and thoughtfulness that friends appreciate and remember long after their special day passes.
These 20 easy handmade birthday card ideas offer something for every friendship and skill level. Whether you prefer simple minimalist designs or elaborate mixed-media creations, each technique can be adapted to reflect your unique relationship with the birthday person. The beauty of DIY birthday cards lies not in perfection but in the personal touch and love embedded in every hand-cut shape and written message.
Start with techniques that appeal to your current skill level and gradually experiment with more complex designs as your confidence grows. Remember that even the simplest handmade card made with care outshines the most expensive store-bought option. Your friends will treasure these heartfelt creations because they represent the gift of your time, creativity, and friendship.
Gather your supplies, choose a card idea that resonates with your friend’s personality, and enjoy the creative process. The joy of making handmade birthday cards extends beyond the finished product to include the fun you have while crafting and the smile you put on your friend’s face when they receive something made especially for them.