
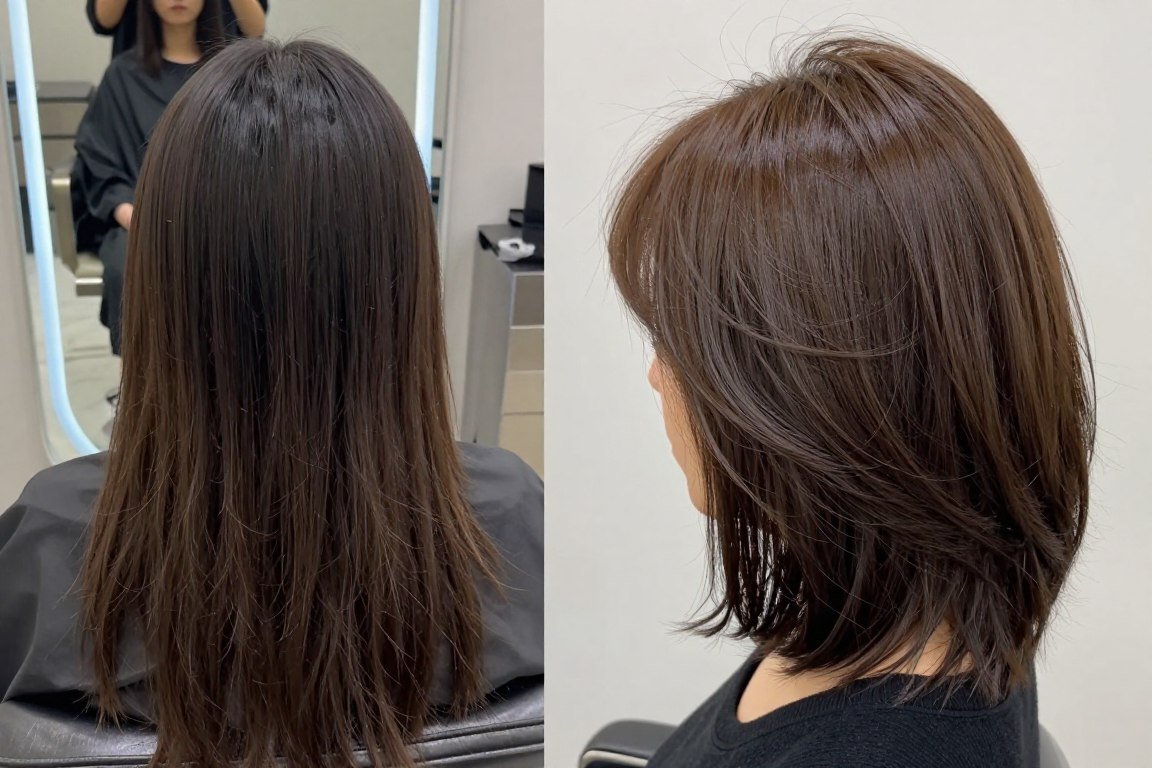
This comprehensive guide explores 20 stunning bob styles specifically designed for thin hair. Each style addresses common concerns while maximizing volume, movement, and dimension. From sleek, polished looks to tousled, textured finishes, you’ll discover the perfect bob to enhance your fine hair.
Table of Contents
Finding Your Perfect Bob Style
Not every bob works for every hair type. Your hair texture, face shape, and lifestyle all influence which style will give you the best results. Understanding these factors helps you make an informed decision before your salon visit.
A consultation with an experienced stylist can save you from haircut regret. They assess your hair’s natural movement, density, and growth patterns. This professional evaluation ensures your chosen bob complements your unique features.
Understanding Thin Hair and Bob Haircuts
Fine hair has a smaller diameter than medium or thick hair strands. This natural characteristic affects how hair holds shape and volume. Many people confuse fine hair with thin hair, but they’re different.
Fine hair refers to strand thickness, while thin hair describes density. You can have fine hair that’s densely packed, or thick strands that are sparse. Understanding your specific hair situation helps you choose the right bob style.
Why Bobs Work Wonderfully for Thin Hair
Bob haircuts remove weight from the ends. This reduction in weight allows hair to lift at the roots naturally. The shorter length also prevents hair from being pulled down by gravity.
Layering within a bob creates movement and texture. These layers catch light differently, creating the illusion of density. Strategic placement of layers can enhance specific areas where you need more volume.
Key Benefits of Bobs for Fine Hair
- Removes excess weight that pulls hair flat
- Creates natural lift at the roots
- Reduces styling time significantly
- Makes hair appear thicker instantly
- Offers versatile styling options
- Requires less product to achieve volume
- Maintains shape between salon visits
- Works with various face shapes
Hair Texture Considerations
Your natural hair texture influences which bob variation suits you best. Straight hair benefits from blunt cuts that create clean lines. Wavy texture adds natural movement that enhances layered styles.
Even minimal natural texture can be enhanced with the right cut. A skilled stylist works with your hair’s inherent qualities rather than against them. This approach ensures your bob looks great even on days you skip styling.

1. Classic Blunt Bob for Thin Hair
The blunt bob features a straight, even cut across all ends. This creates a strong horizontal line that makes hair look fuller. The weight line sits at one level, preventing any tapering that could reveal thinness.
This style works exceptionally well for straight hair. The blunt cut reflects light uniformly, creating the illusion of density. Keeping length between chin and shoulders provides the most flattering proportions for fine hair.
Styling Tips for the Blunt Bob
Start with a volumizing mousse on damp hair. Apply it at the roots and work through to the ends. This product creates lift without weighing down fine strands.
Blow dry with a round brush, directing hair away from the scalp at the roots. This technique builds volume where you need it most. Finish with a flat iron for sleek, polished ends that emphasize the blunt line.
Best For
- Straight to slightly wavy hair texture
- Those seeking a polished, professional look
- Women with oval or heart-shaped faces
- People who prefer minimal styling time
Maintenance Requirements
- Trim every 6-8 weeks to maintain blunt line
- Daily styling with heat tools recommended
- Regular deep conditioning treatments
- Heat protectant spray essential
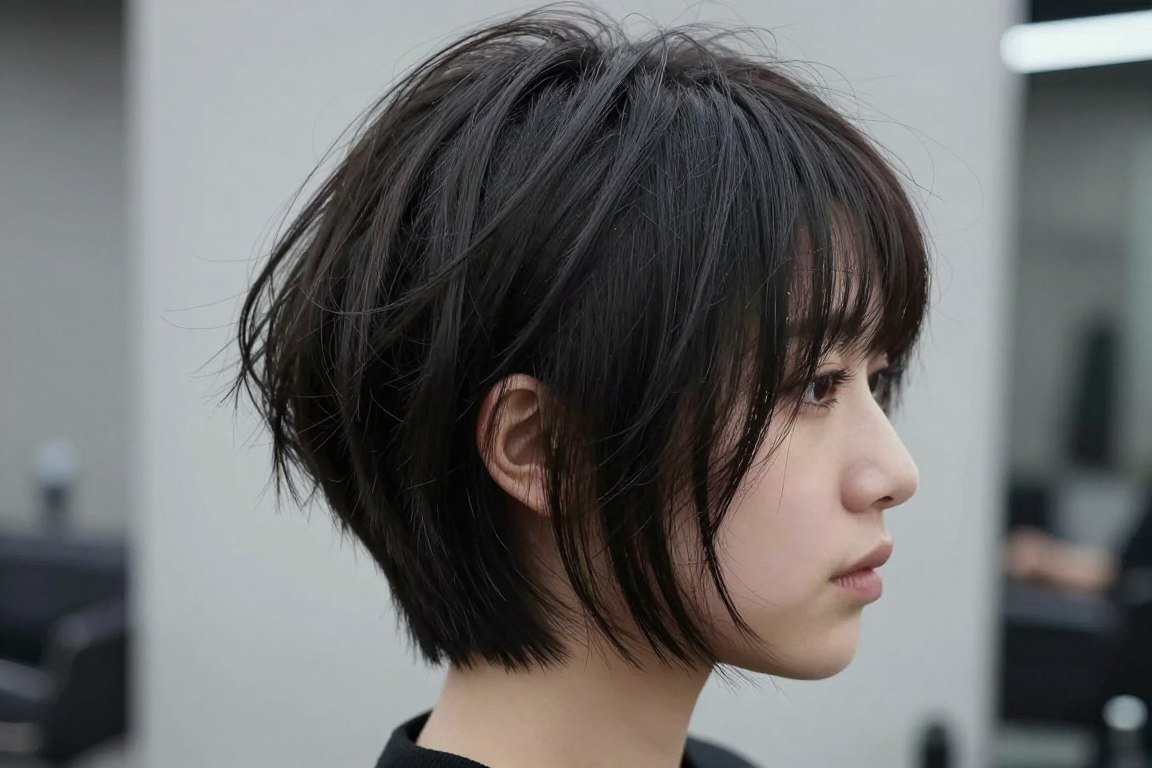
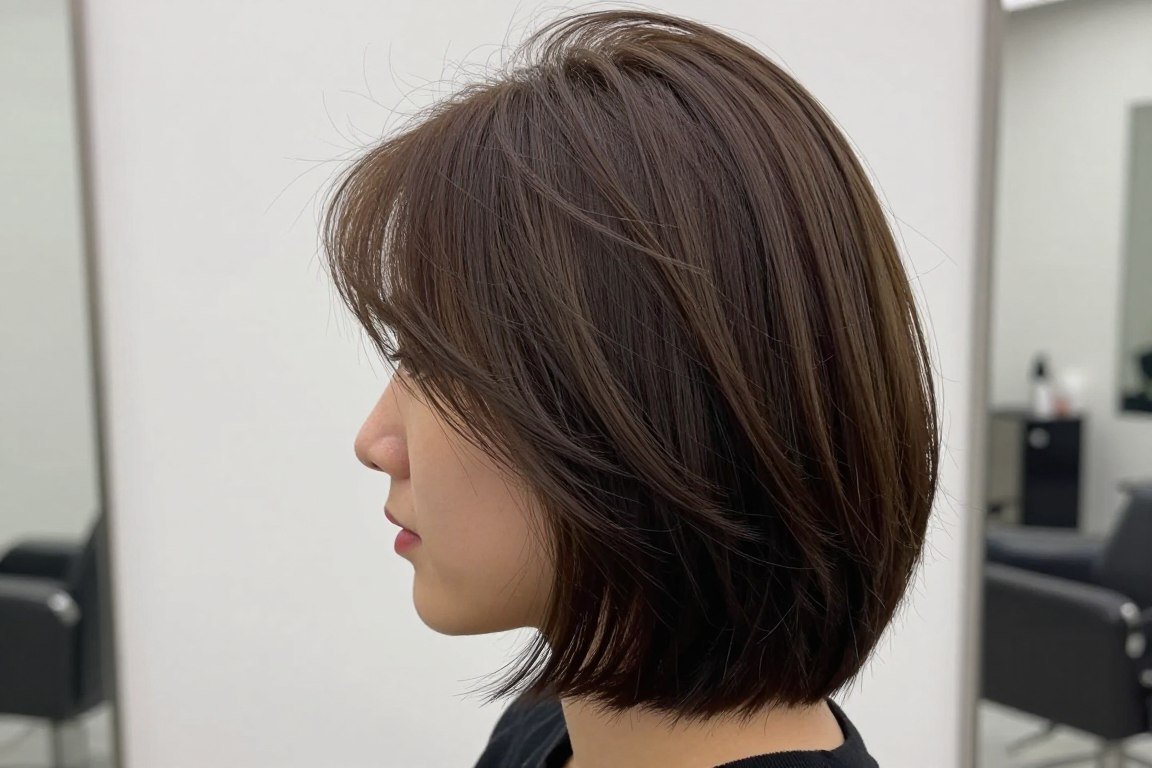
2. Layered Bob with Soft Texture
Layered bobs introduce different lengths throughout the cut. These variations create movement that makes hair look fuller. The layers work together to build dimension and prevent flat appearance.
Soft layers differ from choppy cuts in their blended transitions. A stylist uses point-cutting techniques to create seamless layer connections. This approach gives thin hair body without creating obvious separation between lengths.
Layer Placement Strategy
The longest layers should frame your face beautifully. Mid-length layers create body through the crown area. Shorter interior layers add lift at the roots without disrupting the overall shape.
Your stylist determines optimal layer placement based on your face shape. Layers around the jawline can soften angular features. Crown layers address flatness at the top of the head where thin hair struggles most.
Styling Your Layered Bob
Apply a root-lifting spray before blow drying. Focus the product where your hair parts, as this area tends to lie flattest. Use your fingers to massage the product into your scalp for better distribution.
Dry hair upside down to maximize volume at the roots. Once hair is 80% dry, flip it back and use a round brush to direct the layers. A medium-barrel curling iron adds soft bends that enhance the layered effect.
Essential Round Brush
A medium-barrel round brush creates perfect volume without overwhelming fine strands. Ceramic barrels distribute heat evenly for smoother results.
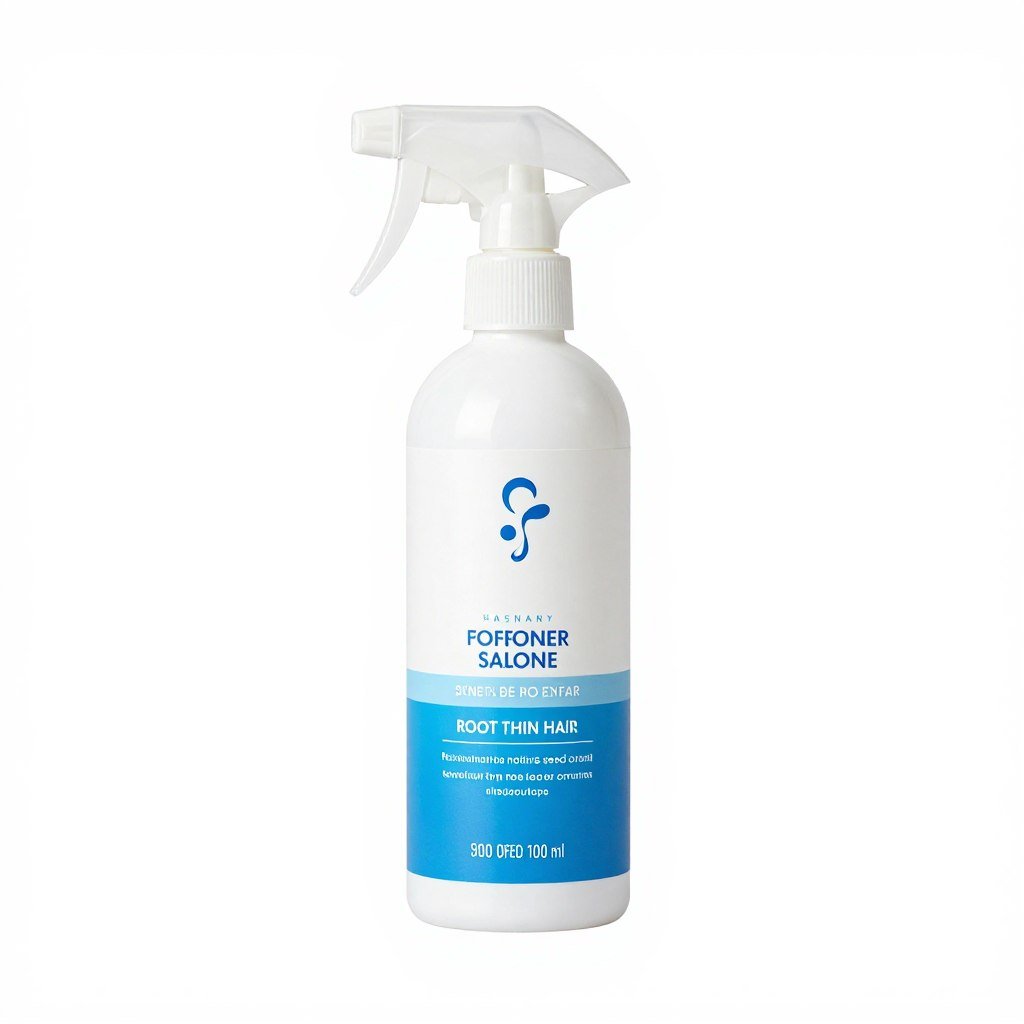
Root Lifting Spray
Lightweight formulas lift hair at the roots without sticky residue. Look for products containing volumizing polymers that create lasting lift.
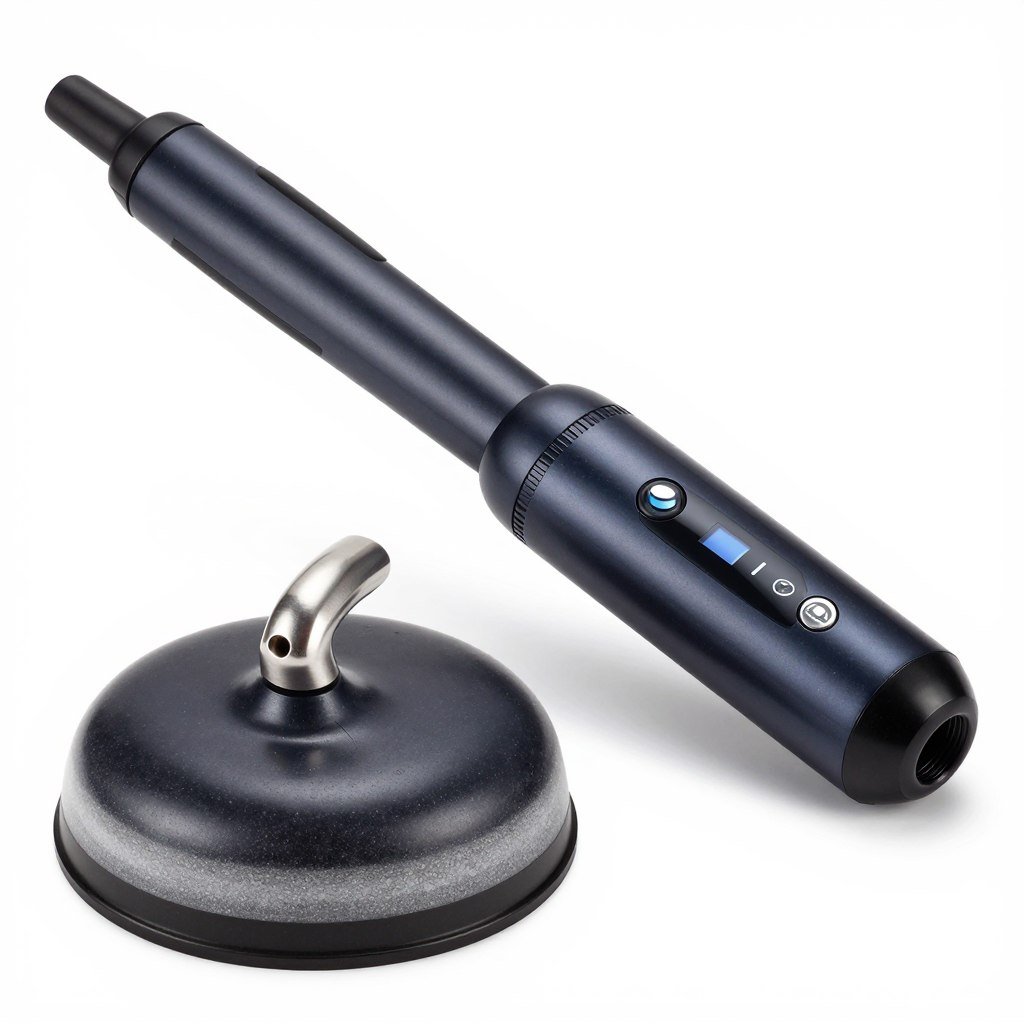
Medium Barrel Curling Iron
A 1-inch barrel creates soft waves that add dimension to layered bobs. Adjustable temperature settings protect fine hair from heat damage.
3. Angled Bob with Longer Front
The angled bob features shorter back sections with longer front pieces. This graduated cut creates a dramatic silhouette that draws attention forward. The angle adds visual interest while maintaining weight where it matters.
Longer front strands frame your face and create the illusion of thickness. The shorter back removes bulk from the nape area. This combination prevents the heavy, triangular shape that can occur with thin hair.
Understanding the Angle
The angle’s severity determines the bob’s drama level. A subtle angle of one to two inches creates a sophisticated look. More dramatic angles of three to four inches make a bold statement.
Your face shape influences the ideal angle degree. Round faces benefit from steeper angles that elongate. Longer faces look balanced with gentler angles that add width.
Advantages
- Elongates round face shapes effectively
- Creates movement and dimension naturally
- Reduces bulk at the nape area
- Frames face with flattering front pieces
- Offers versatile styling possibilities
Considerations
- Requires precise cutting technique
- Needs regular trims every 5-6 weeks
- May require more styling time initially
- Back sections can be challenging to style alone

Styling the Angled Bob
The angled bob requires strategic blow drying. Start at the nape and work forward, directing hair down and slightly under. This technique emphasizes the angle while creating smooth texture.
Use a small round brush for back sections. Switch to a larger brush for longer front pieces. This variation in brush sizes helps maintain the graduated shape while building volume where needed.
4. Textured Choppy Bob
Choppy bobs feature intentionally uneven ends and piece-y texture. This edgy style creates separation between strands that makes hair look thicker. The disconnected pieces catch light differently, adding depth and dimension.
Point-cutting and razor techniques create the choppy effect. These methods produce varied lengths that stack and layer naturally. The result is a lived-in, effortless appearance that works beautifully with thin hair.
Creating Texture in Fine Hair
Texture spray is essential for choppy bobs on thin hair. Apply it to damp hair before styling. The spray provides grip that helps hair hold the piece-y separation throughout the day.
Avoid heavy pomades or waxes that weigh down fine strands. Instead, use lightweight texturizing pastes sparingly. Focus product on the ends where you want the most separation and definition.
Daily Styling Routine
Start with dry shampoo at the roots on day-old hair. This adds grit and volume that helps the choppy style hold better. Spray from six inches away, focusing on the crown and part line.
Use a flat iron to create subtle bends in random sections. Alternate the direction of these bends for a more natural look. Finish by scrunching texture spray into the ends to enhance separation.
Morning Styling Steps
- Apply dry shampoo to roots and massage in
- Spray texture spray throughout lengths
- Use flat iron to create random bends
- Scrunch ends with fingers to separate
- Finish with light-hold hairspray
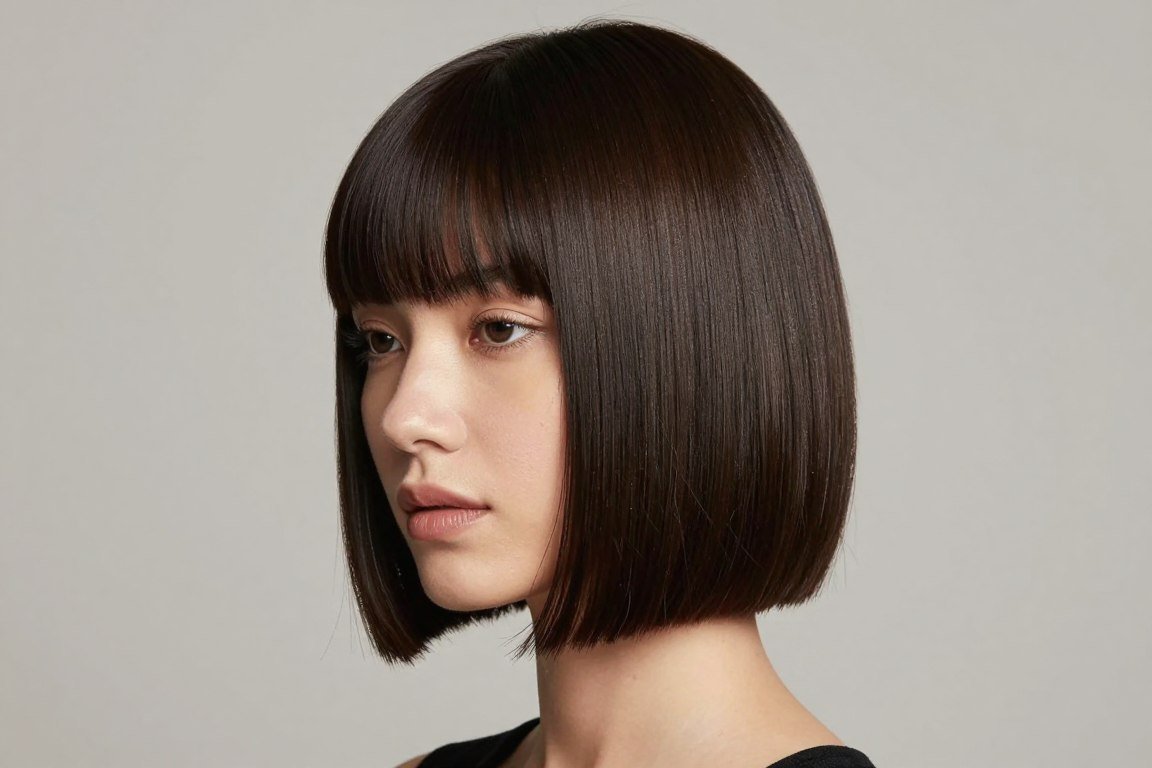
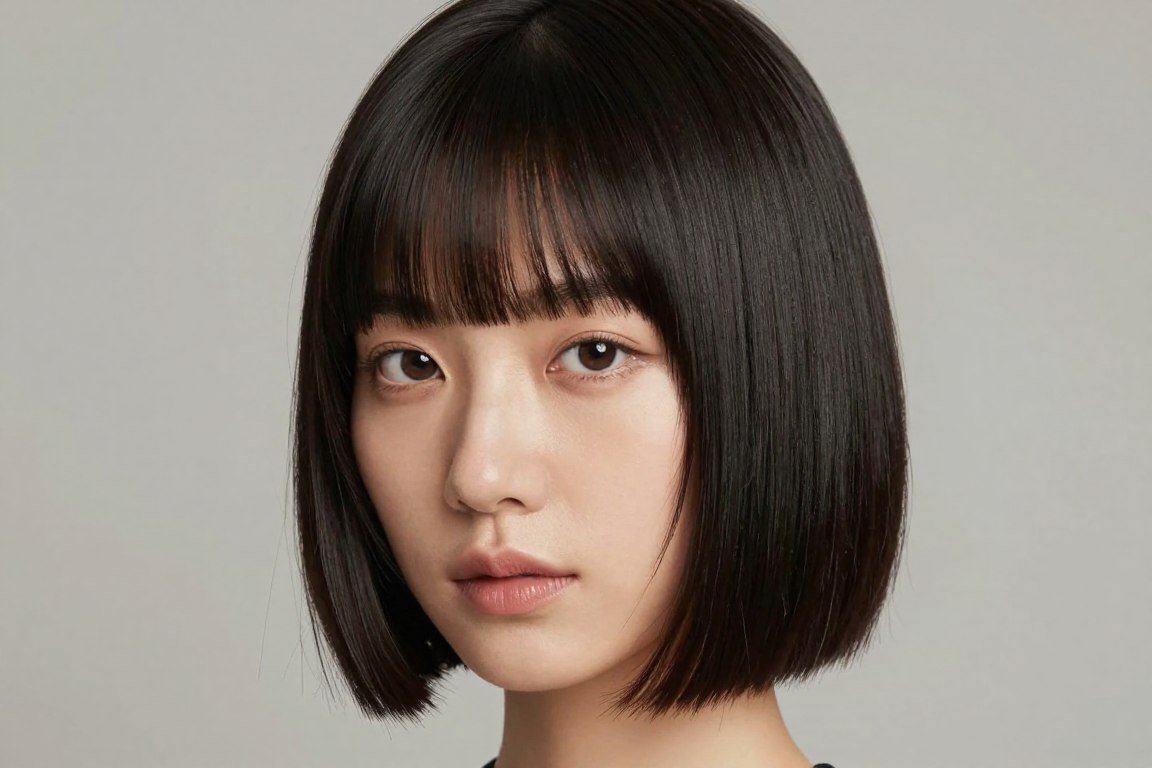
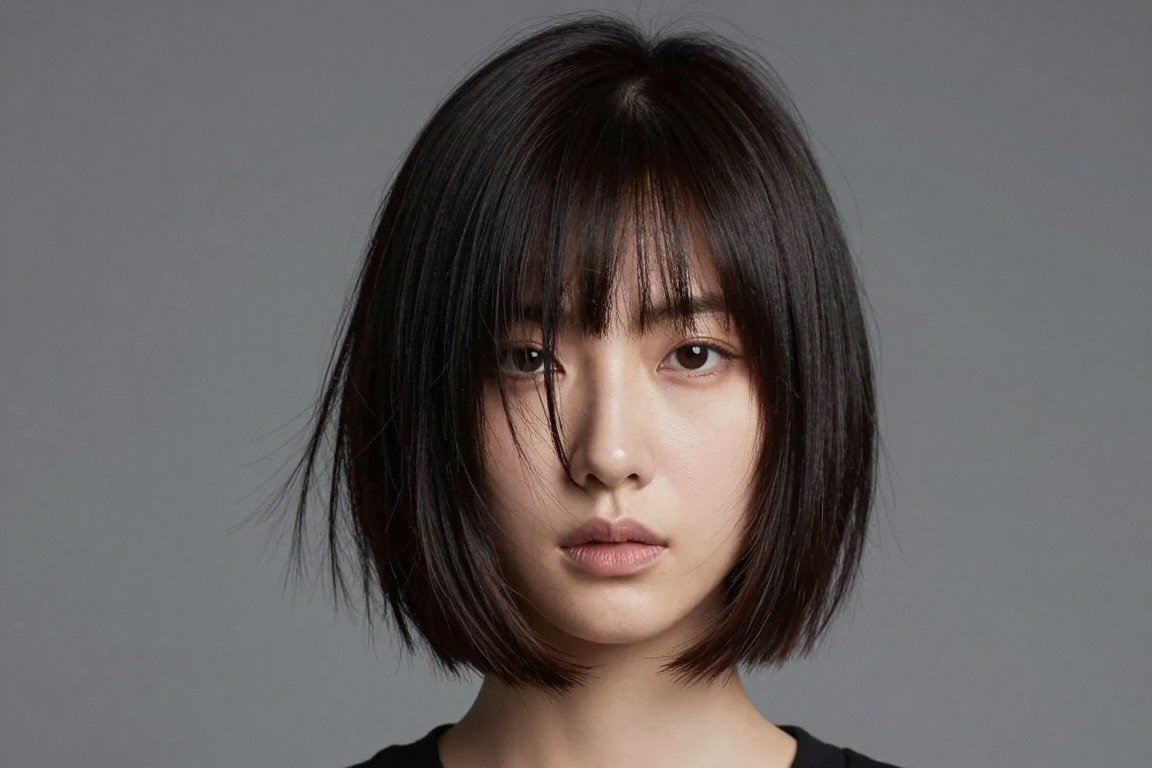
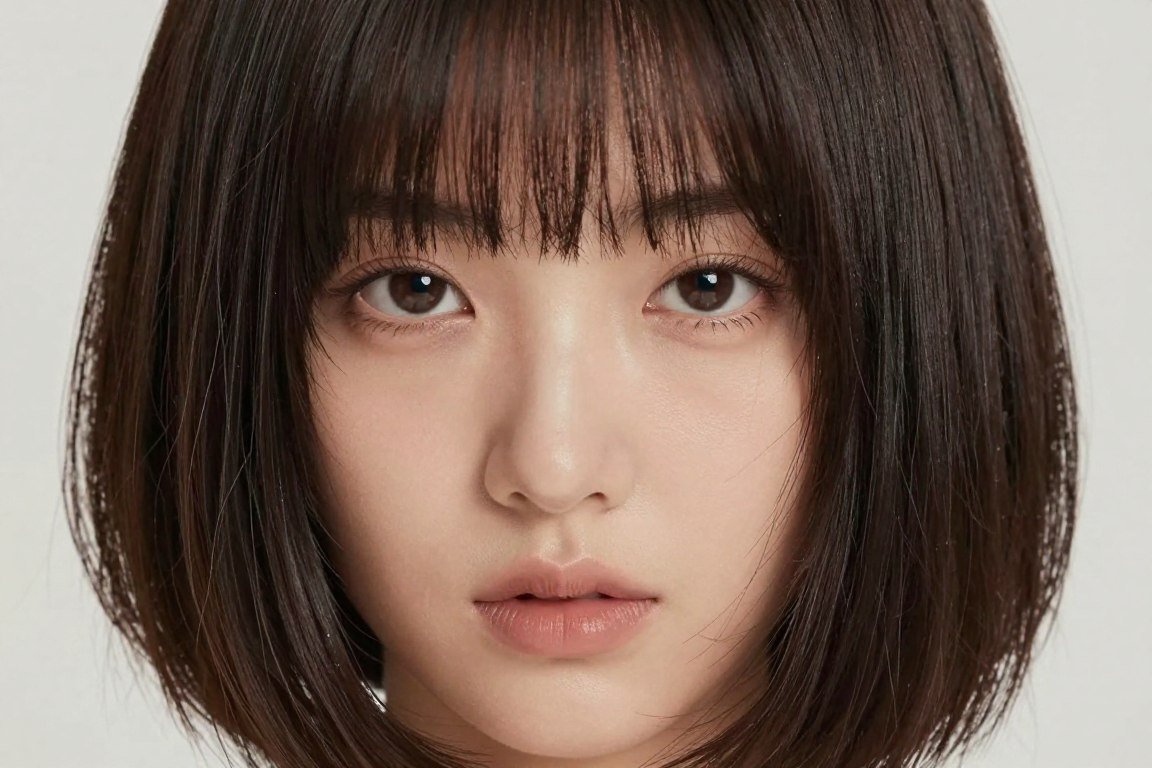
5. Blunt Bob with Bangs
Adding bangs to a blunt bob creates a polished, fashion-forward look. The fringe draws attention to your eyes while the blunt cut emphasizes density. This combination works exceptionally well for thin hair seeking maximum impact.
Bangs add fullness at the front without requiring extra styling effort. The weight of the fringe helps balance the overall cut. This creates a cohesive shape that looks intentional and thick.
Bang Styles for Thin Hair
Full, straight-across bangs create the strongest impact. They should start deep enough on your head to provide adequate thickness. Shallow bangs can look sparse and unflattering on fine hair.
Side-swept bangs offer a softer alternative. They require less thickness to look full because the diagonal line creates visual interest. Blunt-cut side bangs work better than heavily layered versions for thin hair.
Straight-Across Bangs
- Maximum impact and drama
- Best for oval and heart-shaped faces
- Requires daily styling commitment
- Creates strong horizontal line
- Needs trimming every 3-4 weeks
Side-Swept Bangs
- Softer, more versatile appearance
- Flatters most face shapes
- Easier to grow out gradually
- Requires less precise maintenance
- Can be styled multiple ways
Curtain Bangs
- Frames face with center part
- Works well with textured bobs
- Lower maintenance option
- Creates soft, romantic look
- Blends seamlessly as they grow

Bang Maintenance and Styling
Bangs require specific attention during styling. Use a small round brush to direct them forward and slightly under. This creates a subtle curve that sits nicely on your forehead.
Dry shampoo helps bangs maintain volume between washes. Apply it at the roots and brush through to distribute. This prevents the flat, greasy appearance that can develop by midday.
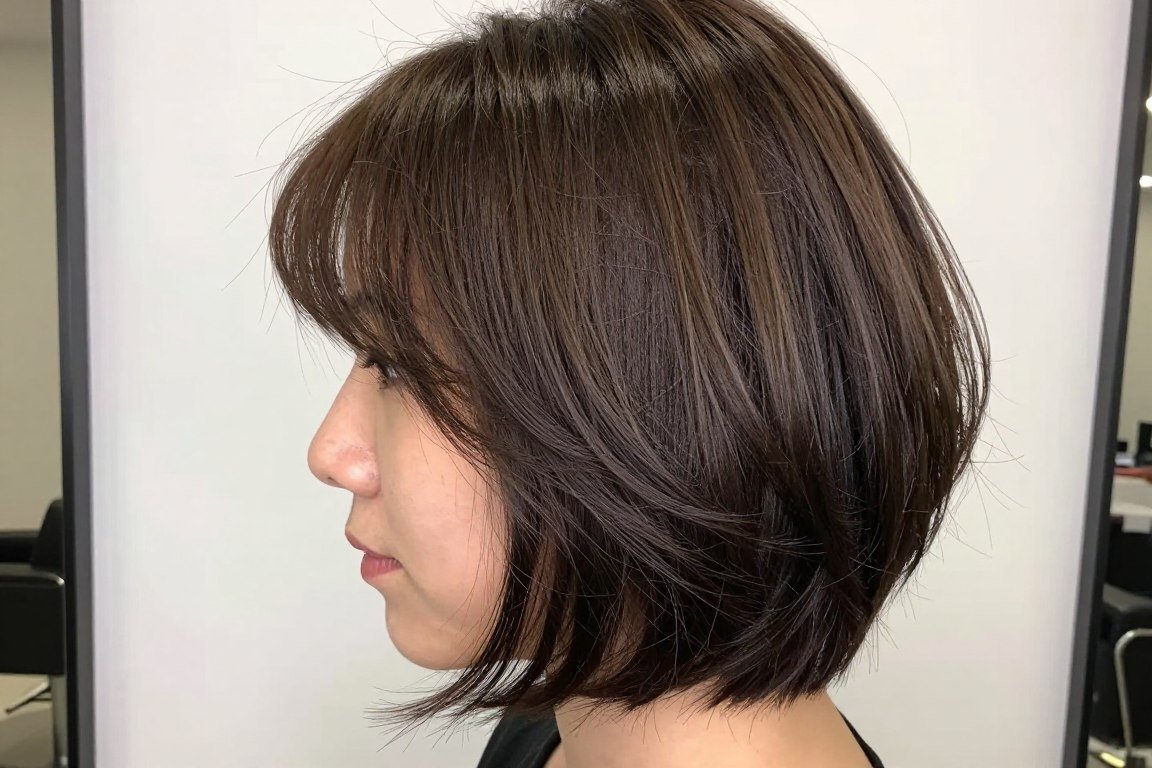
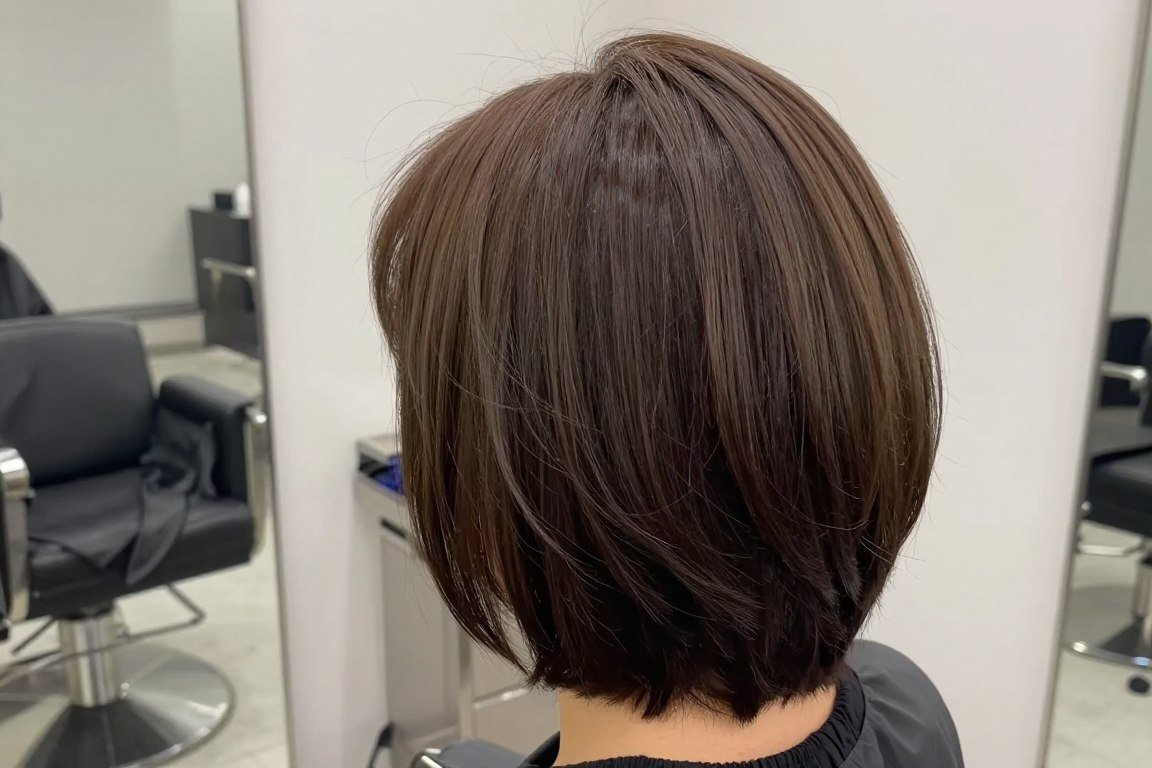
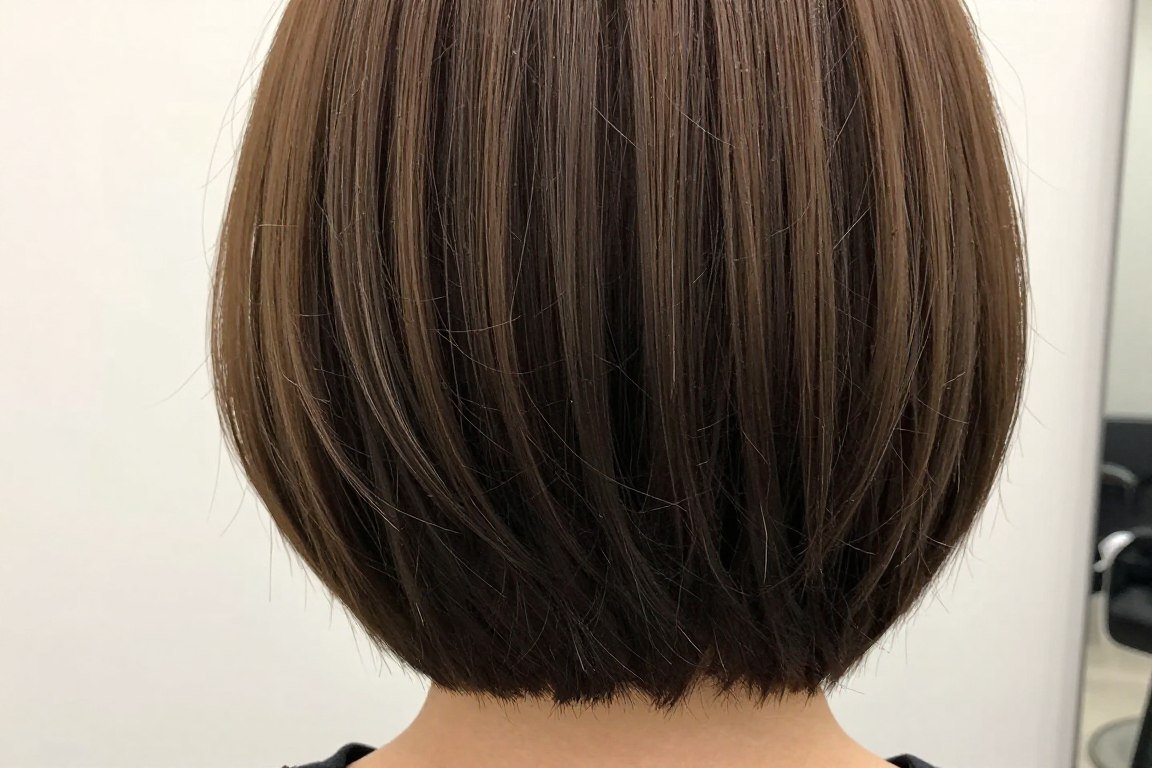
6. Stacked Bob with Volume
The stacked bob features graduated layers at the back that create height. Short layers at the nape build up to longer pieces at the crown. This architectural shape makes hair look thicker through dimensional stacking.
The stacked technique removes weight while building volume where thin hair needs it most. The rounded shape at the back creates a youthful, bouncy appearance. This cut maintains its shape well between salon visits.
The Science of Stacking
Stacking creates the illusion of fullness through clever engineering. Short layers underneath support longer top layers, pushing them outward. This creates a rounded silhouette that appears thick and healthy.
The key is precise graduation between layers. Each layer should be slightly longer than the one beneath it. This methodical approach builds volume progressively from the nape upward.
Best Stacking Techniques for Thin Hair
Your stylist should use a combination of techniques for optimal stacking. Point-cutting creates texture at the ends. Slide-cutting removes bulk without losing length. These methods work together to build a dimensional shape.
The graduation angle determines how much volume the stack creates. Steeper angles produce more dramatic height. Gentler angles create subtle lift suitable for professional environments.
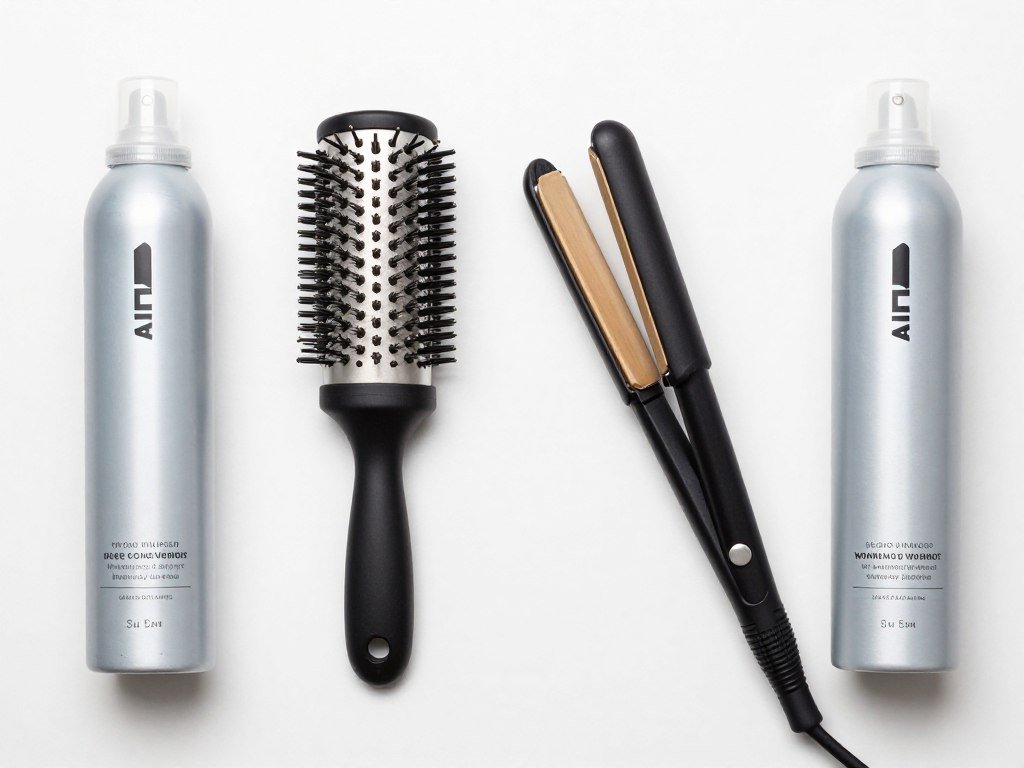
Essential Styling Tools for Your Bob
The right tools make styling your bob effortless. Quality implements protect fine hair while delivering professional results. Investing in proper equipment saves time and prevents damage that thin hair can’t afford.
Heat tools with temperature control are non-negotiable for fine strands. Lower heat settings prevent breakage while still providing styling power. Ceramic and tourmaline technologies distribute heat evenly for consistent results.
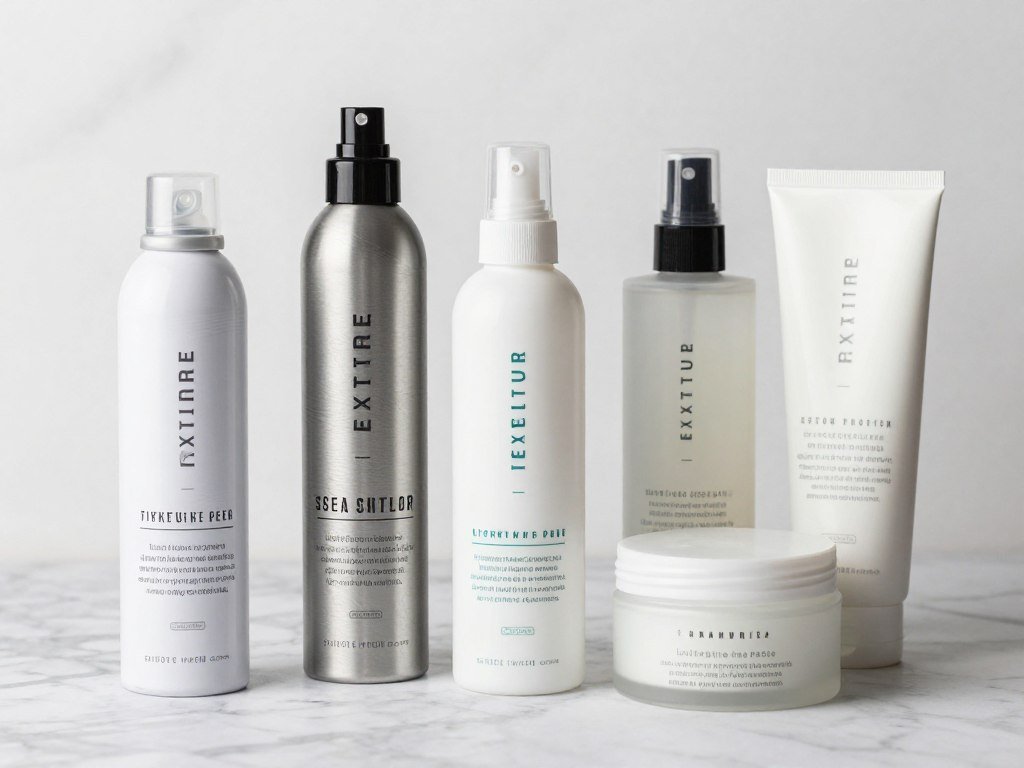
Essential Tools to Style Your Perfect Bob
These professional-grade tools help you achieve salon-quality results at home. Each has been selected specifically for its effectiveness on thin hair, providing volume without damage.

Ionic Blow Dryer
Ionic technology reduces frizz and adds shine to fine hair. Multiple heat settings let you customize drying temperature to prevent damage while building volume at the roots.
- Reduces drying time by 50%
- Minimizes heat damage with controlled temps
- Concentrator nozzle for precision styling
- Cool shot button sets your style
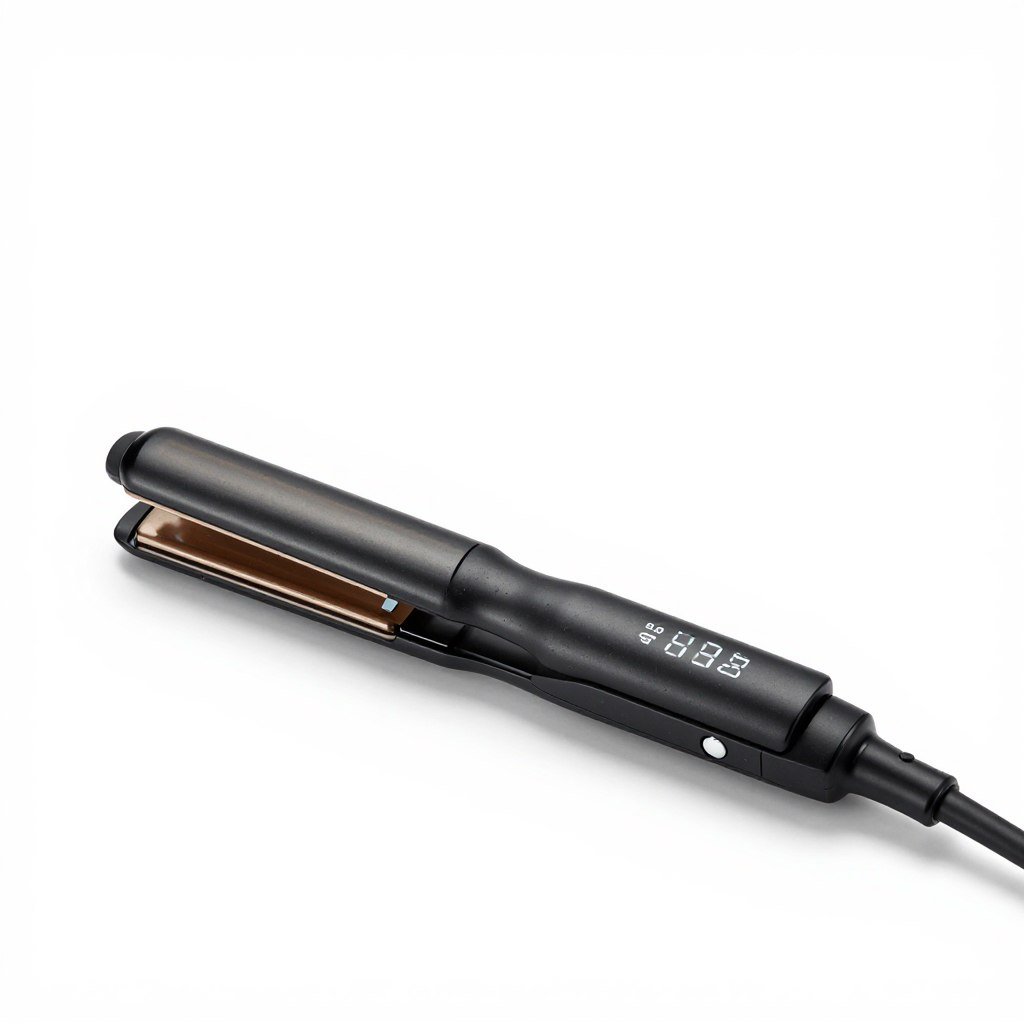
Ceramic Flat Iron
Smooth ceramic plates glide through fine hair without snagging. Adjustable temperature ensures you use the lowest effective heat, protecting delicate strands from unnecessary damage.
- Precise temperature control 250-450°F
- 1-inch plates ideal for bob lengths
- Even heat distribution prevents hot spots
- Quick heat-up saves styling time
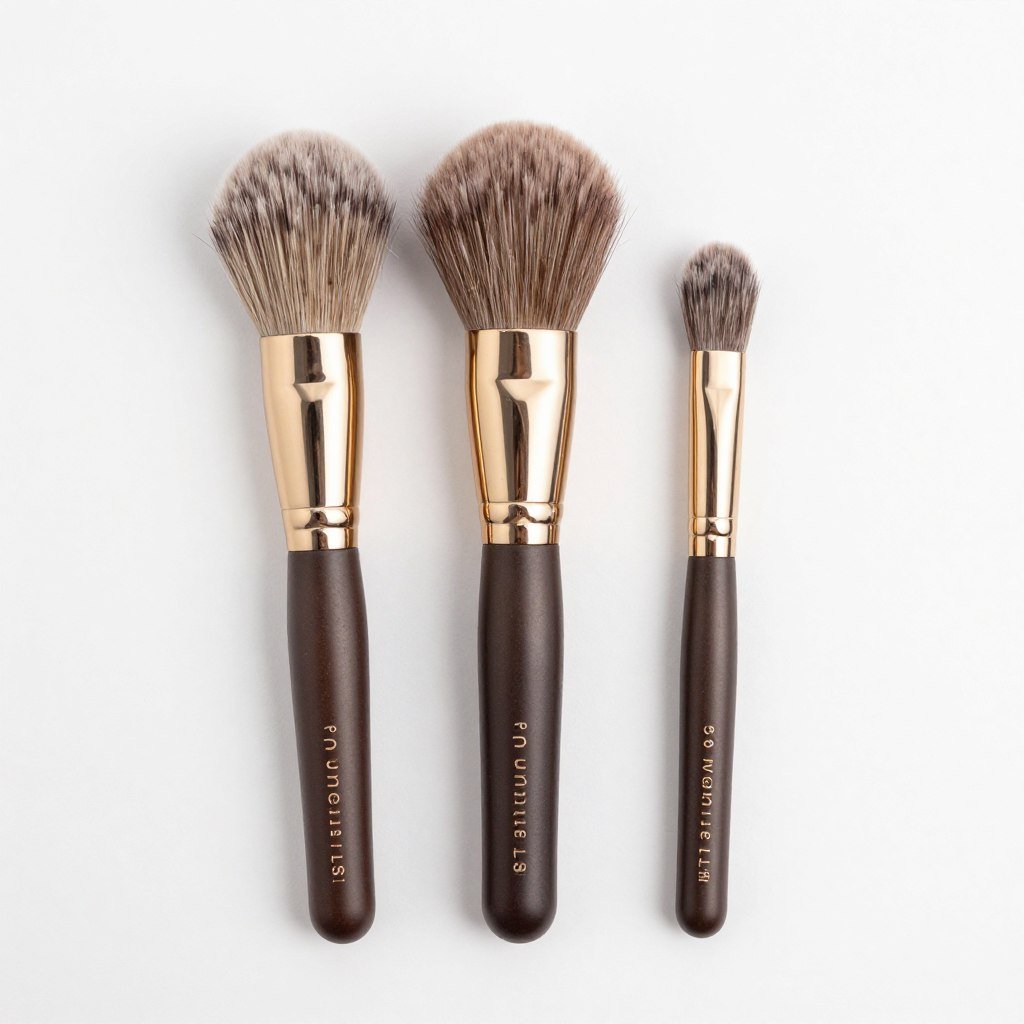
Round Brush Set
Multiple brush sizes let you create different effects throughout your bob. Smaller brushes work the nape and create curl, while larger ones smooth and volumize longer sections.
- Three sizes for complete versatility
- Ceramic barrels enhance heat styling
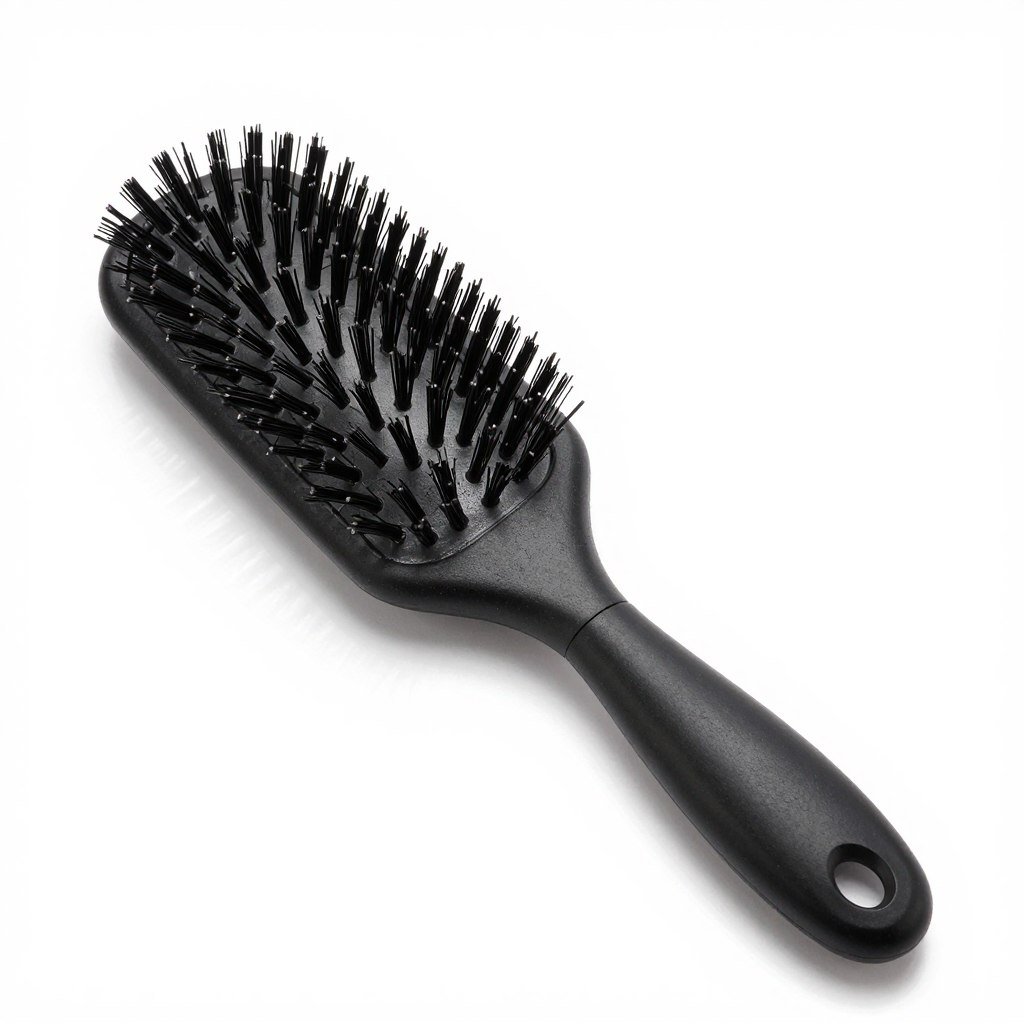
- Boar bristles add natural shine
- Ergonomic handles reduce hand fatigue
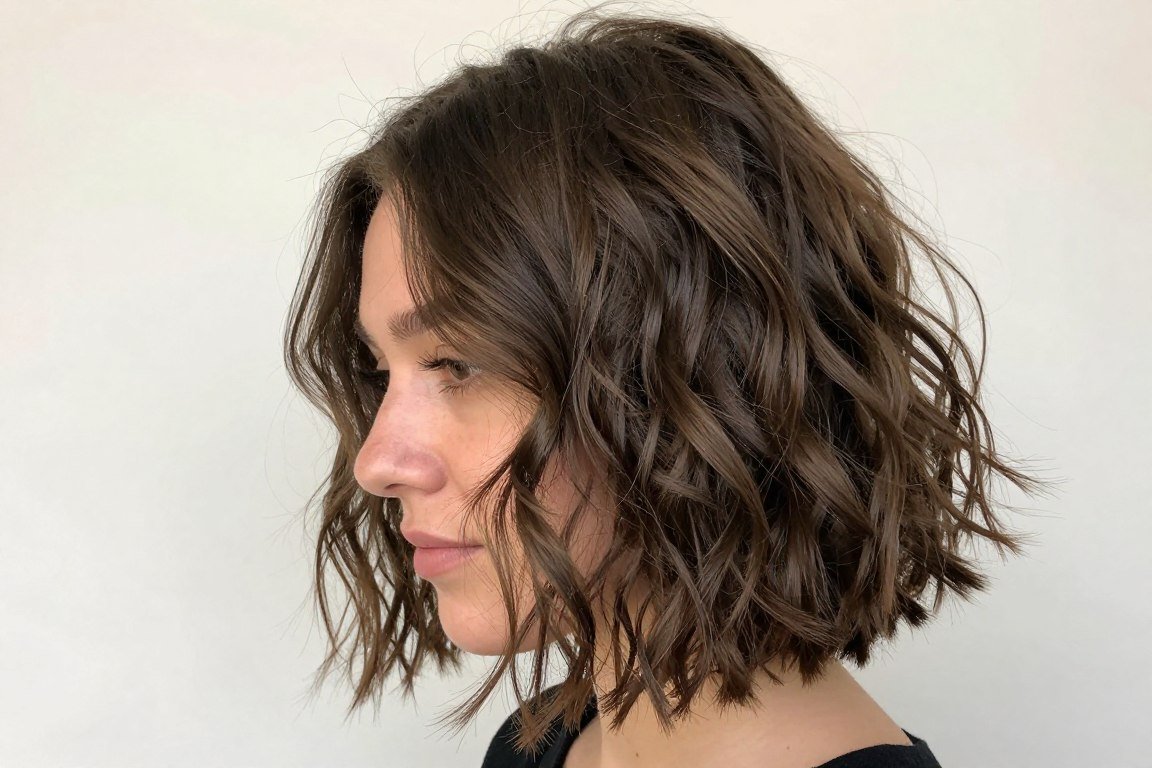
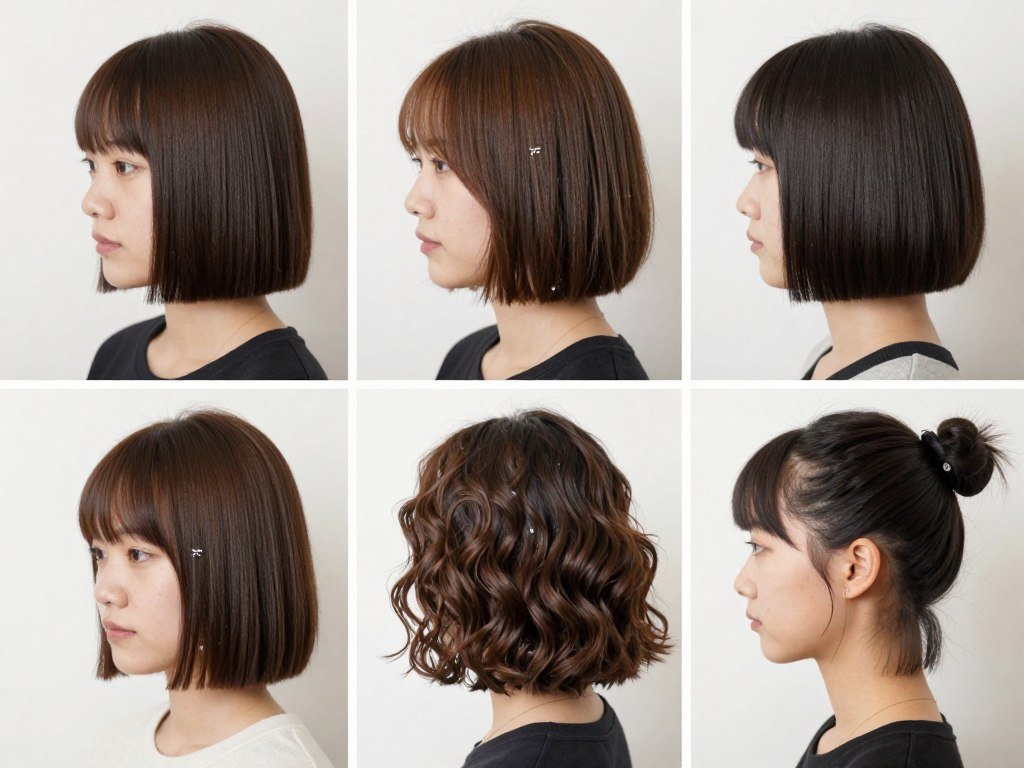
7. Wavy Bob with Natural Texture
Embracing your hair’s natural texture creates effortless, beautiful bobs. Wavy hair adds automatic movement that thin hair desperately needs. The key is cutting specifically for your wave pattern rather than fighting it.
Natural texture makes hair appear fuller without any styling effort. Waves create peaks and valleys that catch light differently. This dimensional effect gives the illusion of density that straight, flat hair lacks.
Cutting for Wave Patterns
Your stylist should cut wavy hair when dry. This allows them to see exactly how your natural texture falls. Wet cutting can result in unexpected shorter pieces when hair dries and shrinks.
The cut should enhance your natural wave pattern, not create new ones. Layers placed at wave peaks maintain the organic flow. This strategic approach makes styling easier and more predictable.

Enhancing Your Natural Waves
Wave-enhancing products work with your hair’s natural movement. Apply them to damp hair, scrunching upward to encourage wave formation. Avoid brushing wavy hair when dry, as this disrupts the pattern and creates frizz.
Air drying produces the most natural results for wavy bobs. If you’re short on time, use a diffuser attachment on low heat. Cup sections of hair in the diffuser and hold until dry, maintaining the wave pattern.
Wave-Enhancing Routine
- Wash with sulfate-free shampoo designed for waves
- Apply wave cream to soaking wet hair
- Scrunch hair upward from ends to roots
- Microfiber towel or t-shirt dry gently
- Air dry or diffuse on low heat setting
- Scrunch out the crunch once fully dry
- Refresh with water spray on subsequent days
8. Asymmetrical Bob with Edge
Asymmetrical bobs feature dramatically different lengths on each side. One side might graze your shoulder while the other sits at your ear. This bold style creates visual interest that draws eyes away from hair thinness.
The contrast between sides makes a strong fashion statement. This edgy cut works particularly well for creative professionals or those wanting to stand out. The asymmetry adds dimension that fine hair benefits from immensely.
Planning Your Asymmetry
The length difference can range from subtle to extreme. A two-inch difference creates noticeable asymmetry without being overwhelming. Four or more inches creates a dramatic, high-fashion effect.
Consider your lifestyle when choosing the degree of asymmetry. Extreme versions require confident styling and regular maintenance. Subtle asymmetry offers uniqueness with easier daily management.
Important Consideration: Asymmetrical cuts can be challenging to grow out. If you’re unsure about committing, start with a subtle asymmetry that can easily transition to a symmetrical bob if desired.
Styling Your Asymmetrical Bob
The longer side typically gets more styling attention. Curl or wave this section to add volume and interest. The shorter side can be slicked back or textured for contrast.
Play with your part placement to emphasize the asymmetry. A deep side part on the longer side makes the difference more pronounced. Center parts minimize the asymmetrical effect if you want a subtler look for certain occasions.
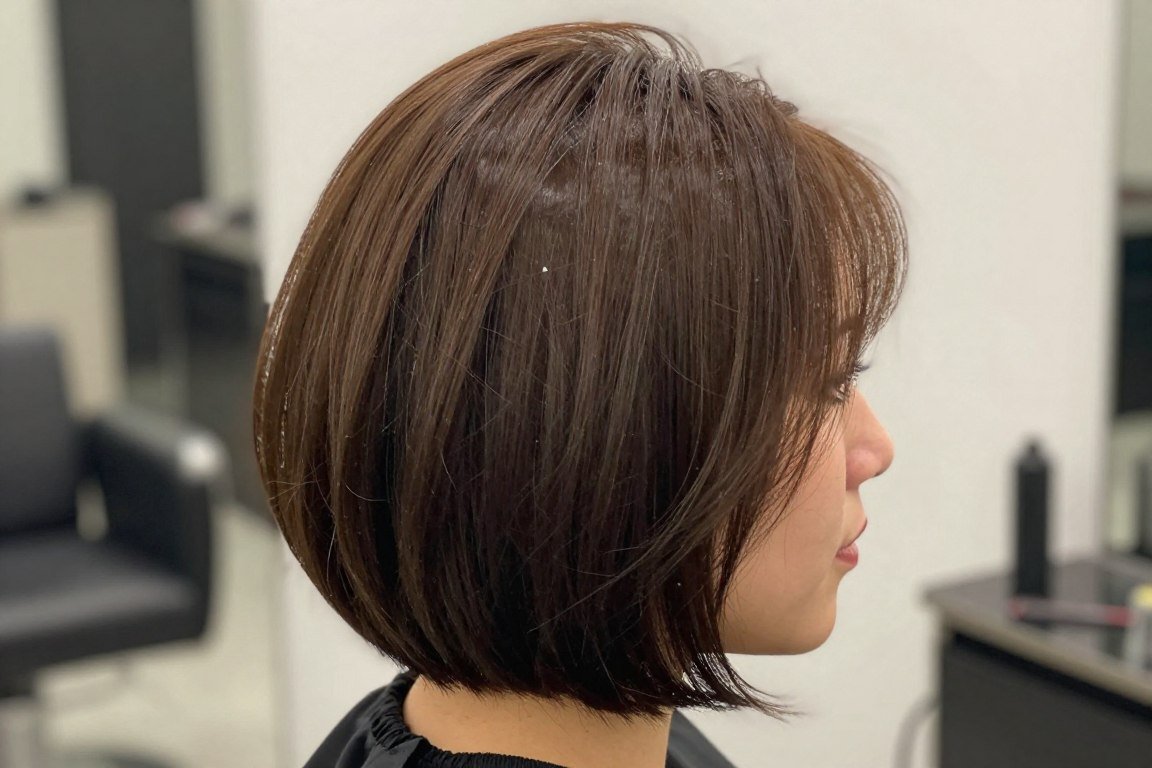
9. Curved Bob with Rounded Shape
The curved bob follows the natural shape of your head. Layers create a rounded silhouette that’s fuller at the crown and temples. This shape flatters most face types while adding dimension to thin hair.
The curve is achieved through careful layering and graduation. Hair is slightly shorter in the back, gradually lengthening toward the front. This creates a gentle arc that frames your face beautifully.
Creating the Curve
Your stylist uses a combination of techniques to create the curve. Horizontal sections help establish the rounded base. Point-cutting softens the edges for a natural, flowing finish.
The curve should be most pronounced at the back of your head. This area tends to fall flat on thin hair, so building shape here makes a significant difference. The front pieces frame your face with gentle movement.

Maintaining the Rounded Shape
The curved bob holds its shape remarkably well between cuts. The strategic layering prevents the flat, grown-out look that other cuts develop. Touch-ups every 6-8 weeks maintain the ideal curve.
Daily styling focuses on enhancing the natural roundness. Blow dry with a round brush, following the curve as you work from back to front. This reinforces the shape your cut creates.
10. Inverted Bob with Stacked Back
Inverted bobs combine angling with stacking for maximum impact. The back is stacked high with graduated layers while the front features long, face-framing pieces. This creates dramatic dimension perfect for thin hair.
The inversion creates a wedge shape that’s fuller at the back. This architectural cut makes fine hair look intentionally voluminous. The contrast between short back and long front creates interesting angles and lines.
The Inverted Bob Structure
Understanding the structure helps you communicate with your stylist. The back features short, stacked layers that create height. These layers graduate outward, building the characteristic wedge shape.
The front pieces can be dramatically long or moderately extended. Longer fronts create more contrast and visual interest. Your face shape and personal style determine the ideal front length.
Styling the Inverted Bob
The stacked back requires attention during styling. Use a small round brush to lift and direct hair backward and upward. This maintains the height and prevents the back from falling flat.
Front pieces benefit from smooth, sleek styling. Use a flat iron to create perfect straightness that contrasts with the textured back. This juxtaposition makes the entire style more interesting and dynamic.
Pro Tip: Take photos of your inverted bob from all angles right after your salon visit. These serve as reference guides when styling at home, helping you recreate the professional look.
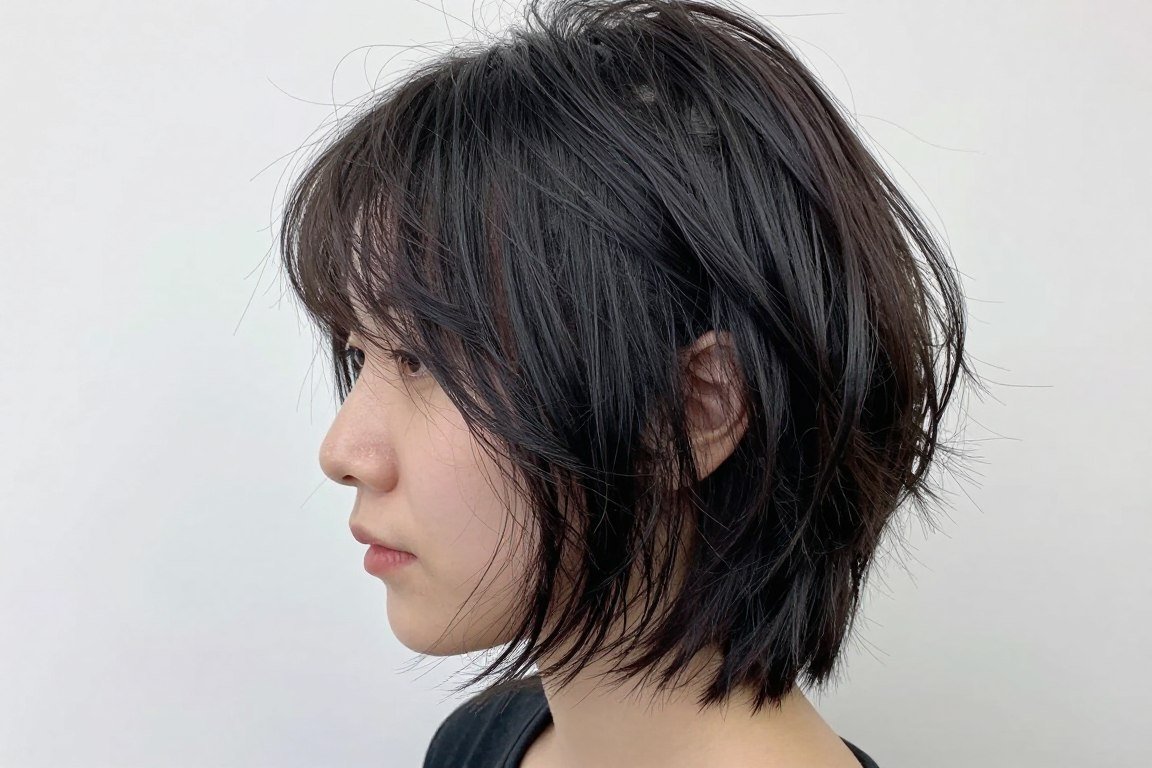
11. Shaggy Bob with Piece-y Layers
The shaggy bob brings retro vibes with modern execution. Multiple choppy layers create texture throughout the entire cut. This style makes thin hair look intentionally piece-y rather than sparse.
Shag cuts work exceptionally well for fine hair because they create movement at every level. The disconnected layers prevent hair from lying flat. Each piece catches light independently, creating depth and fullness.
Shag Layer Placement
Shag layers start at the crown and continue through the ends. This creates an overall feathered effect that’s soft yet structured. The layers should be varied in length to avoid a uniform, helmet-like appearance.
Face-framing layers add to the shaggy aesthetic. These pieces should be shorter and wispy, falling around your cheekbones and jawline. They create movement that draws attention to your features.

Achieving the Shaggy Look
Texture is everything with shaggy bobs. Apply texturizing spray to damp hair before styling. This gives fine strands the grip they need to hold the piece-y separation all day.
Blow dry with your fingers rather than a brush. Scrunch sections as you dry to encourage natural texture. This casual approach creates the effortless, lived-in look that defines the shag style.
Daily Shag Styling Routine
- Apply volumizing mousse to damp hair from roots to ends
- Spray sea salt or texture spray throughout for grip
- Rough dry with fingers, scrunching and tousling
- Use a curling iron to add random bends in different directions
- Apply lightweight styling paste to ends for separation
- Shake head and use fingers to break up any uniformity
- Finish with flexible-hold hairspray to maintain texture
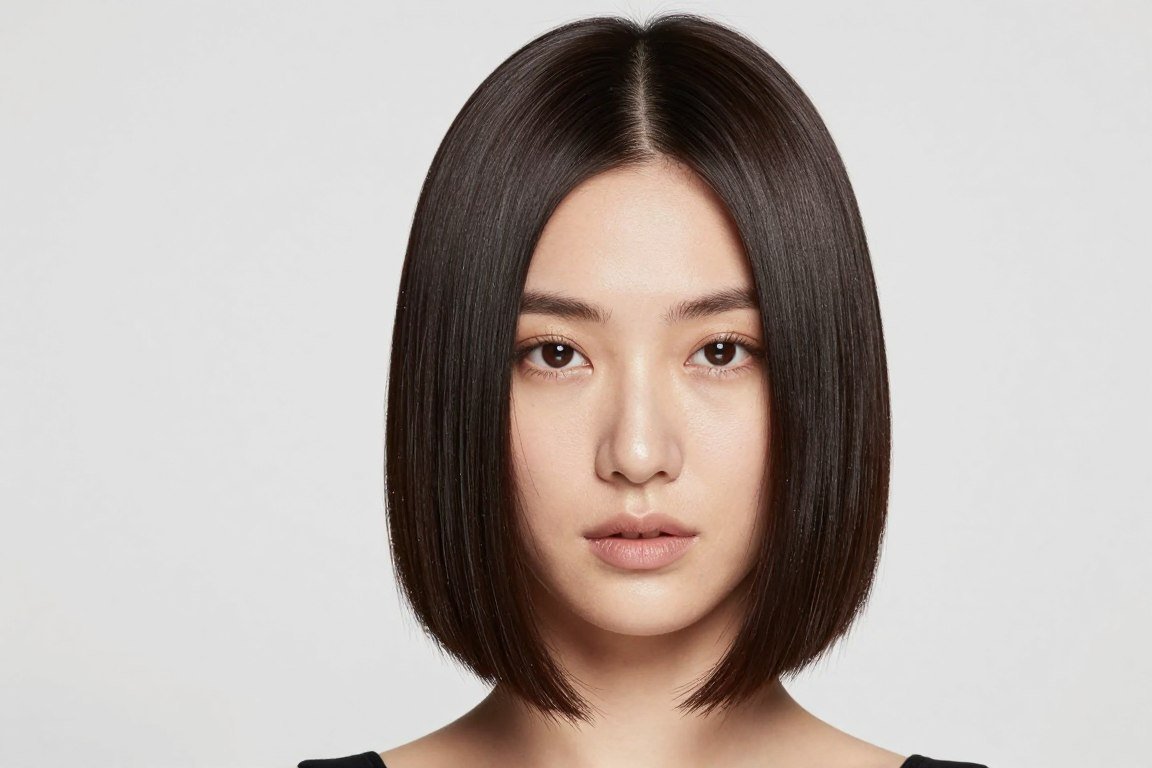
12. Sleek Center-Part Bob
The sleek center-part bob exudes sophistication and minimalism. Hair is parted precisely down the center and styled completely smooth. This classic look works beautifully when executed properly on thin hair.
The symmetry of a center part creates balance and elegance. The sleek finish reflects light uniformly, making hair appear glossy and healthy. This style particularly suits those with strong, symmetrical facial features.
Creating the Perfect Center Part
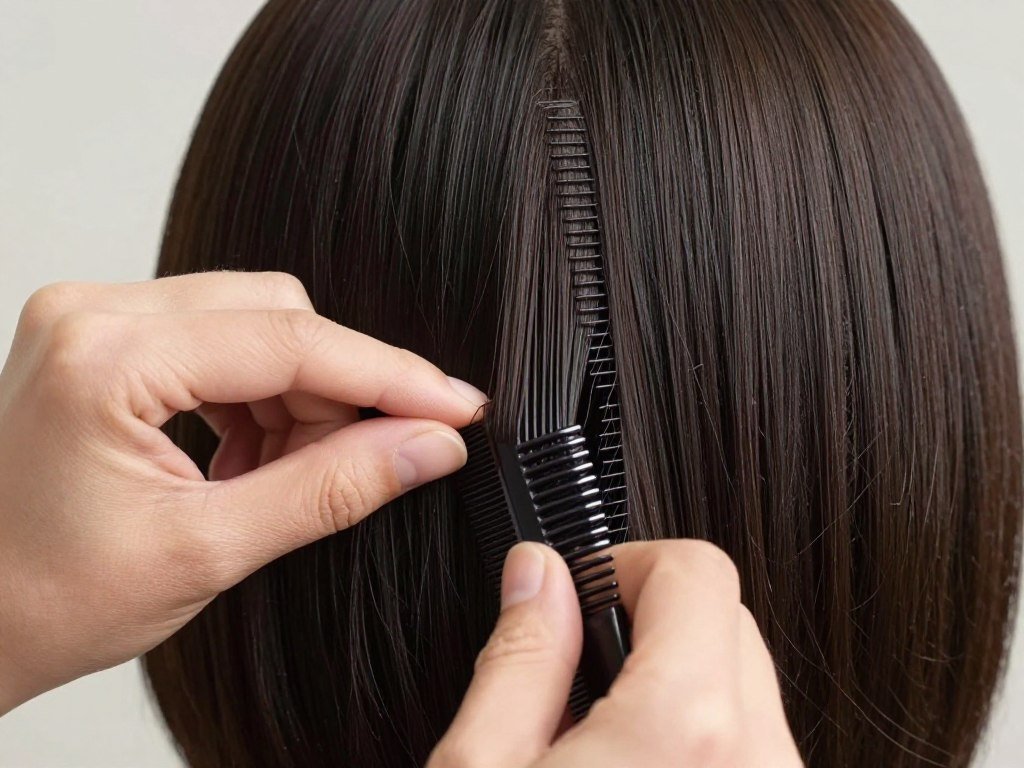
A true center part aligns with the center of your nose. Use a fine-tooth comb to create a precise line from hairline to crown. This attention to detail makes the entire style look polished and intentional.
Some faces look better with an off-center part that’s close to center. This subtle shift can balance facial asymmetry while maintaining the overall sleek aesthetic. Experiment with placement to find your most flattering position.
Maintaining Sleekness Throughout the Day
Sleek styles on thin hair can fall victim to oil and flatness. Use a shine serum sparingly, focusing on ends rather than roots. This adds gloss without weighing down hair or making it appear greasy.
Carry blotting papers to absorb excess oil at the scalp during the day. A quick touch-up with a flat iron at the part line refreshes the sleek look. These small maintenance steps keep your bob looking salon-fresh.
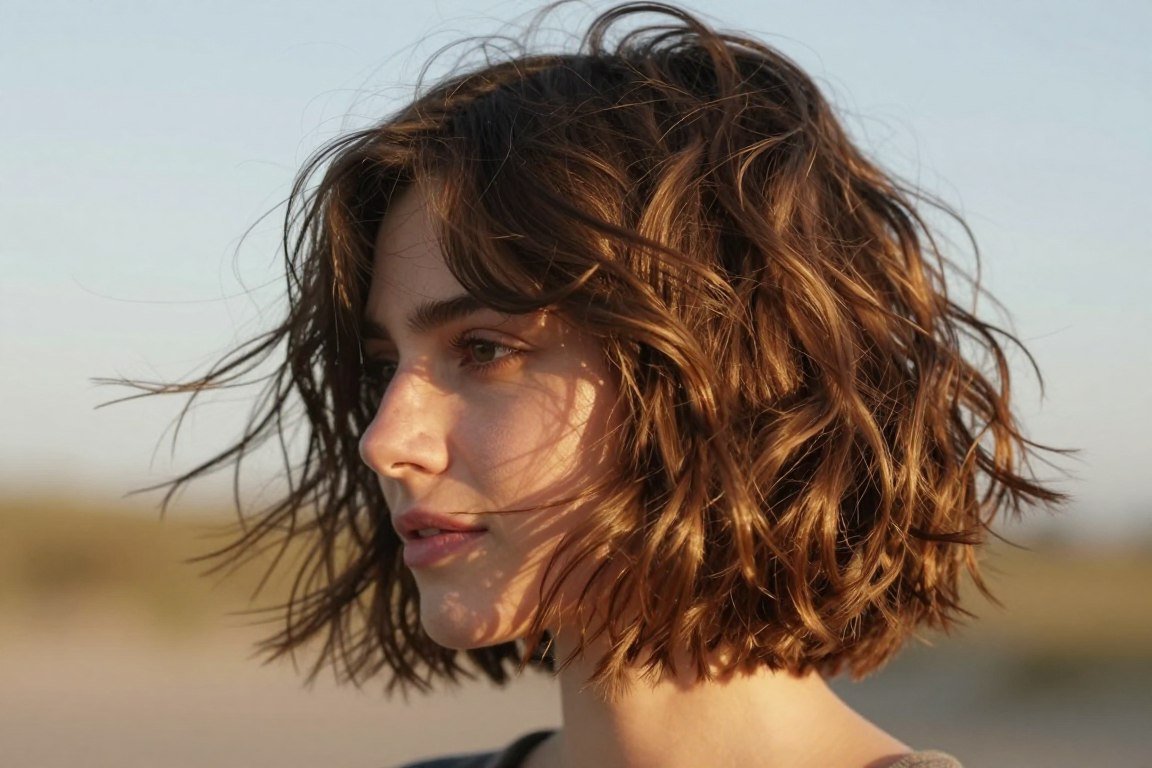
13. Tousled Bob with Beachy Waves
The tousled bob captures carefree beach vibes year-round. Loose, undone waves create texture that makes thin hair look fuller. This relaxed style works for both casual and dressed-up occasions.
Beach waves add the illusion of density through dimensional texture. The waves create peaks and valleys that catch light at different angles. This natural-looking style requires minimal daily maintenance once you master the technique.
Creating Beach Waves on Thin Hair
Sea salt spray is your best friend for beachy texture. Apply it to damp hair and scrunch upward. The salt creates grip and texture that helps fine hair hold waves without feeling crunchy or stiff.
Use a curling iron with a larger barrel, around 1.5 inches. Wrap sections around the barrel loosely, leaving ends out. Alternate the direction of curls for a more natural, tousled appearance.
Beach Wave Styling Method
- Spray sea salt spray on damp hair and scrunch
- Rough dry hair until 80% dry using fingers
- Section hair into manageable pieces
- Wrap sections around curling iron, alternating directions
- Leave the last inch of ends straight
- Let curls cool completely before touching
- Run fingers through to break up waves
- Spray texture spray and scrunch for definition
Products for Lasting Beach Texture
The right products make beach waves last all day on thin hair. Start with a volumizing mousse at the roots before any styling. This creates lift that prevents waves from falling flat as the day progresses.
Finish with a texturizing spray rather than traditional hairspray. Texturizing sprays add grit and hold without stiffness. They allow hair to move naturally while maintaining the tousled, beachy appearance.
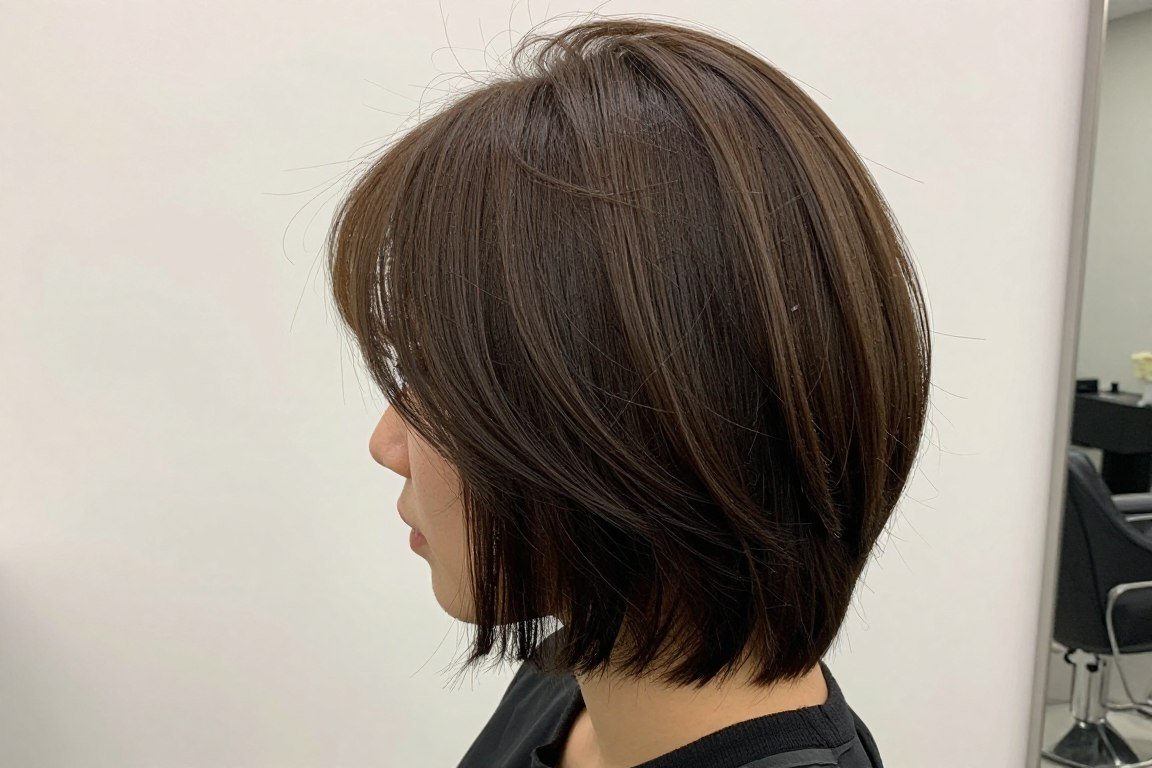
14. Graduated Bob with Movement
Graduated bobs feature subtle layering that creates seamless movement. Unlike stacked bobs with obvious layers, graduated cuts blend smoothly. This refined approach adds body to thin hair without harsh lines.
The graduation is achieved through careful angling of the cut. Hair is slightly shorter at the back, gradually lengthening toward the front. This creates natural movement that enhances fine hair beautifully.
Understanding Graduation Techniques
Graduation differs from traditional layering in its subtlety. Each section is cut at a slight angle rather than dramatic steps. This creates internal support that builds volume without obvious layer lines.
The angle of graduation determines the amount of movement created. Gentle angles produce soft, flowing movement. Steeper angles create more pronounced lift and body throughout the cut.

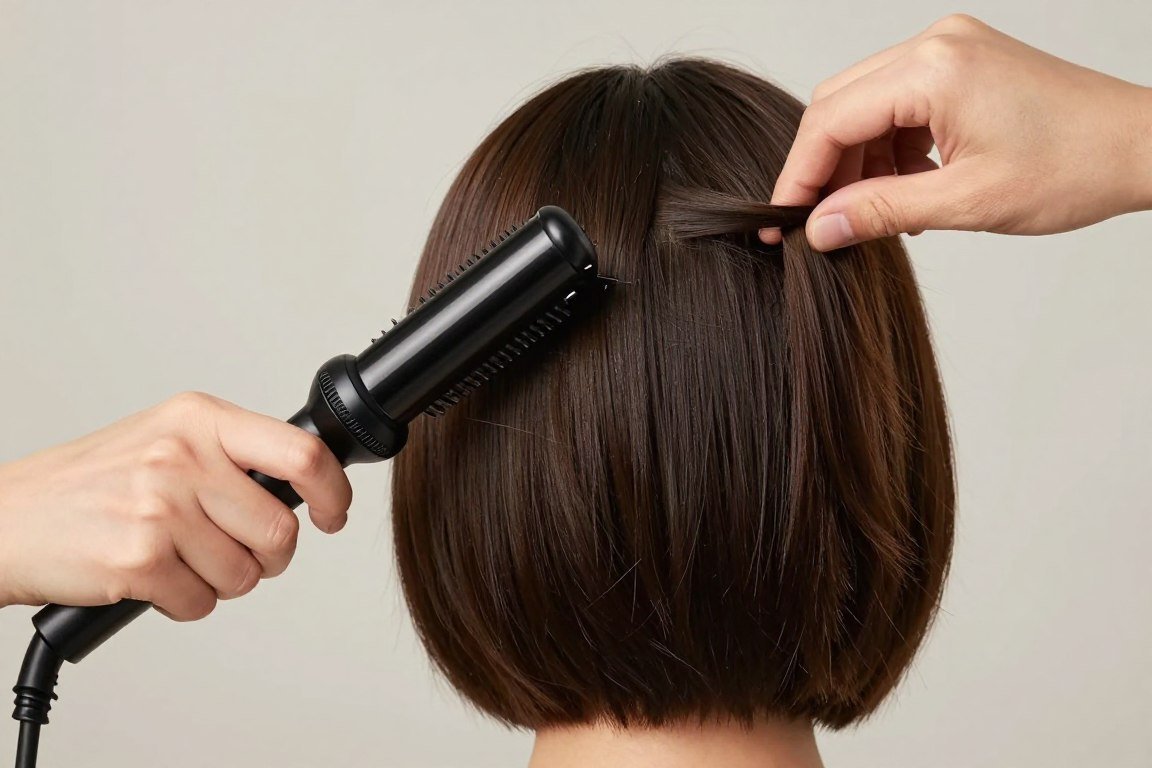
Styling for Maximum Movement
The graduated bob shines when styled with volume at the roots. Use a root-lifting spray before blow drying. Focus the product where your hair parts, as this area shows the most noticeable flatness on thin hair.
Blow dry using a round brush, directing hair up and away from your scalp. This technique works with the graduation to create natural-looking body. The result is a bob that moves beautifully with every turn of your head.
15. Micro Bob for Bold Statement
The micro bob sits above the jawline, often at ear length or shorter. This daring cut makes a strong fashion statement. While unconventional, it can work wonderfully for thin hair when executed correctly.
Shorter length removes all weight from fine strands. This allows hair to achieve maximum volume and body. The micro bob proves that thin hair can carry bold, short styles successfully.

Considerations for Going Micro
A micro bob requires confidence and the right face shape. It emphasizes facial features more than longer cuts. This can be flattering for those with delicate, symmetrical features or strong bone structure.
Neck length and shape become more visible with micro bobs. If you’re self-conscious about your neck, this may not be your ideal choice. However, the right styling can create elongating effects even at this short length.
Micro Bob Benefits
- Maximum volume from minimal weight
- Ultra-fast styling and drying time
- Fashion-forward, statement-making look
- Shows off earrings and necklines beautifully
- Requires very little product
- Creates illusion of thickness instantly
Important Considerations
- Requires frequent maintenance every 4-5 weeks
- Limited styling versatility compared to longer bobs
- Emphasizes facial features prominently
- Growing out can be challenging
- May not suit all professional environments
- Exposes neck and ears fully
Styling Your Micro Bob
Micro bobs benefit from texture and piece-y separation. Apply a small amount of pomade or wax to your fingertips. Work through dry hair, creating definition and separation at the ends.
Experiment with different parting positions. Side parts create asymmetry that adds interest. Deep side parts create drama and height on one side. Even slicked-back styles work beautifully with micro bobs.
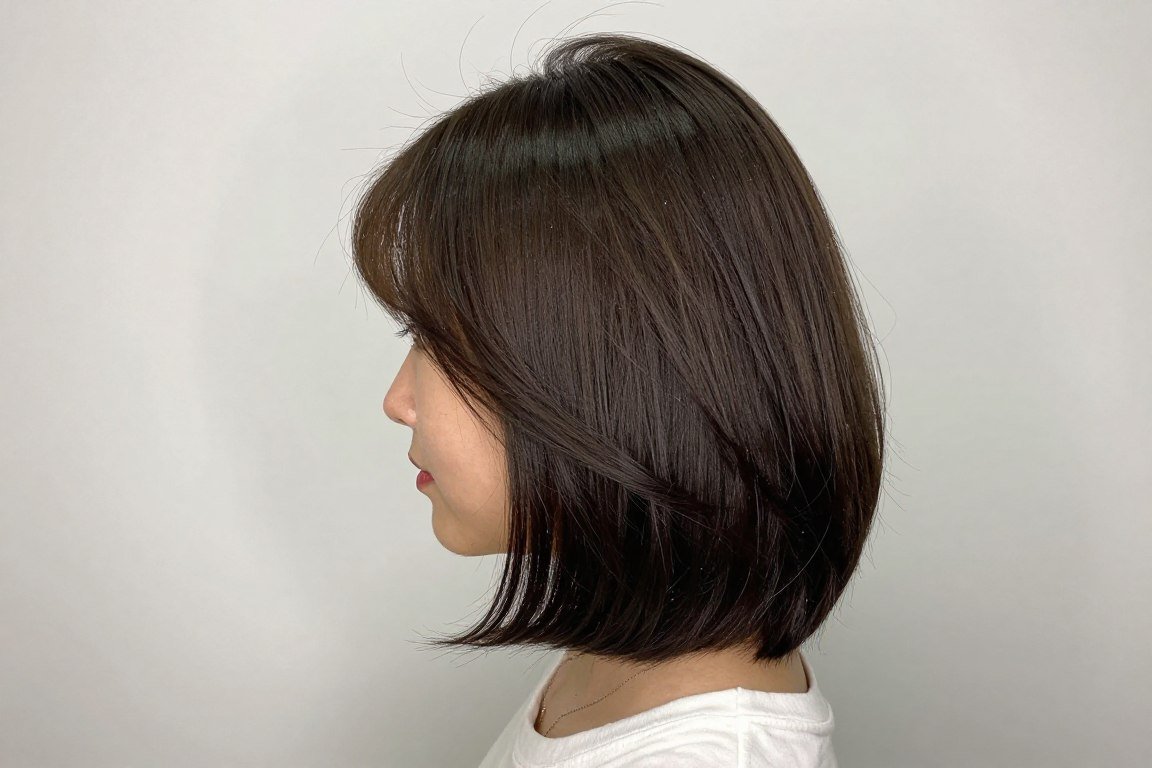
16. Rounded Bob with Soft Edges
The rounded bob features soft, curved edges rather than blunt lines. This feminine style creates a gentle, approachable appearance. The rounded perimeter makes hair look fuller through soft, continuous curves.
Point-cutting techniques create the soft edges that define this style. Rather than cutting straight across, your stylist uses scissors to create gentle texture at the ends. This prevents harsh lines that can emphasize thinness.
Creating Softness in the Cut
The rounded effect comes from careful perimeter shaping. Your stylist cuts the outline in a gentle arc rather than a straight line. This creates a curved hemline that follows the natural shape of your head.
Interior softness comes from point-cutting throughout the lengths. This technique removes weight while creating movement. The result is a bob that moves fluidly rather than sitting heavily.

Styling for Softness
The rounded bob looks best with some bend or movement. Use a large round brush while blow drying to create subtle curves that follow the cut’s shape. This enhances the natural roundness built into the style.
Avoid over-straightening, which can flatten the intentional curves. Instead, embrace gentle movement that makes the rounded edges more apparent. A light finishing cream adds definition to the soft texture without weight.
17. Layered Bob with Feathered Ends
Feathered ends create a light, airy finish perfect for thin hair. This technique involves cutting ends at an angle so they taper to fine points. The feathering creates movement and prevents blunt heaviness.
Combined with layers throughout, feathered ends make hair look thicker and more dimensional. The tapered tips catch and reflect light beautifully. This creates visual interest that draws attention away from fine hair texture.
Feathering Techniques for Thin Hair
Feathering requires precision and skill. Your stylist uses either scissors or a razor to create the tapered effect. Scissors provide more control, while razors create softer, more diffused ends.
The amount of feathering should be carefully calibrated for thin hair. Too much can make ends look wispy and sparse. The right amount creates beautiful movement while maintaining adequate thickness at the perimeter.
Caution: Excessive feathering or razor work can damage fine hair and create split ends. Ensure your stylist uses sharp tools and doesn’t over-feather. Regular trims every 6-8 weeks maintain healthy, feathered ends.
Maintaining Feathered Ends
Feathered ends require proper care to stay healthy. Use a moisturizing conditioner focusing on the last few inches of hair. This prevents dryness that can make feathered tips look frizzy rather than soft.
Apply a small amount of lightweight oil or serum to ends after styling. This smooths the feathered texture while adding shine. Use only a tiny amount to avoid weighing down fine hair.
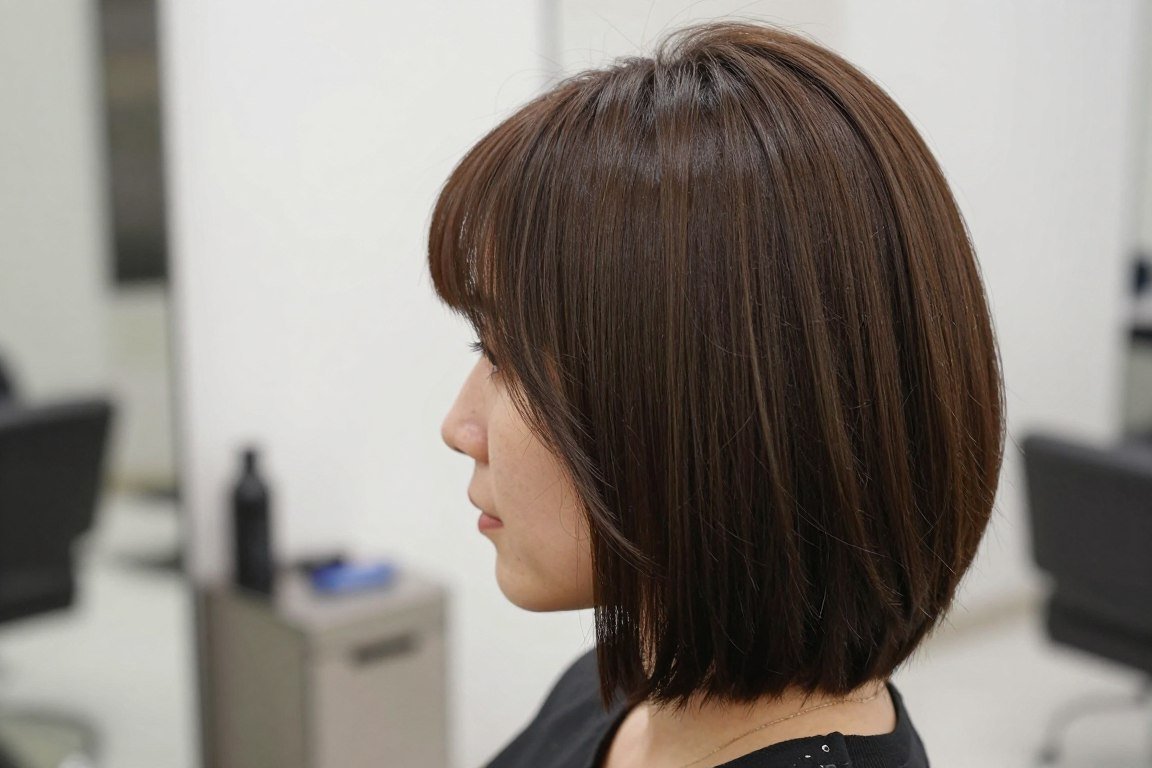
18. Chin-Length Bob with Face-Framing Layers
The chin-length bob is universally flattering and timeless. Adding face-framing layers elevates this classic cut. Shorter pieces around your face create dimension while the overall length provides versatility.
Face-framing layers draw attention to your best features. They can be cut to emphasize cheekbones, soften a strong jawline, or create the illusion of a longer face. This customization makes the style work for various face shapes.
Strategic Layer Placement
Face-framing layers should start at your cheekbones or slightly higher. This creates a flattering frame that highlights your eyes. The layers gradually blend into the main length, preventing harsh demarcation lines.
The degree of layering depends on your desired effect. Subtle layers create soft framing that’s barely noticeable. More pronounced layers make a statement and add significant movement around your face.
Styling Face-Framing Layers
- Use a small round brush to curl layers toward your face
- Curling iron creates more defined face-framing
- Straightening layers creates sleek, modern framing
- Side part emphasizes layers on one side
- Tuck one side behind ear for asymmetrical look
- Texturizing spray adds grip to thin face-framing pieces
Daily Styling Versatility
Face-framing layers offer multiple styling options. Curl them inward for a classic, polished look. Flip them outward for a playful, retro vibe. Straighten them completely for modern, sleek styling.
These layers can also be pinned back when you want a different look. Bobby pins or small clips secure them behind your ears. This versatility makes the chin-length bob with face-framing layers an excellent choice for thin hair.
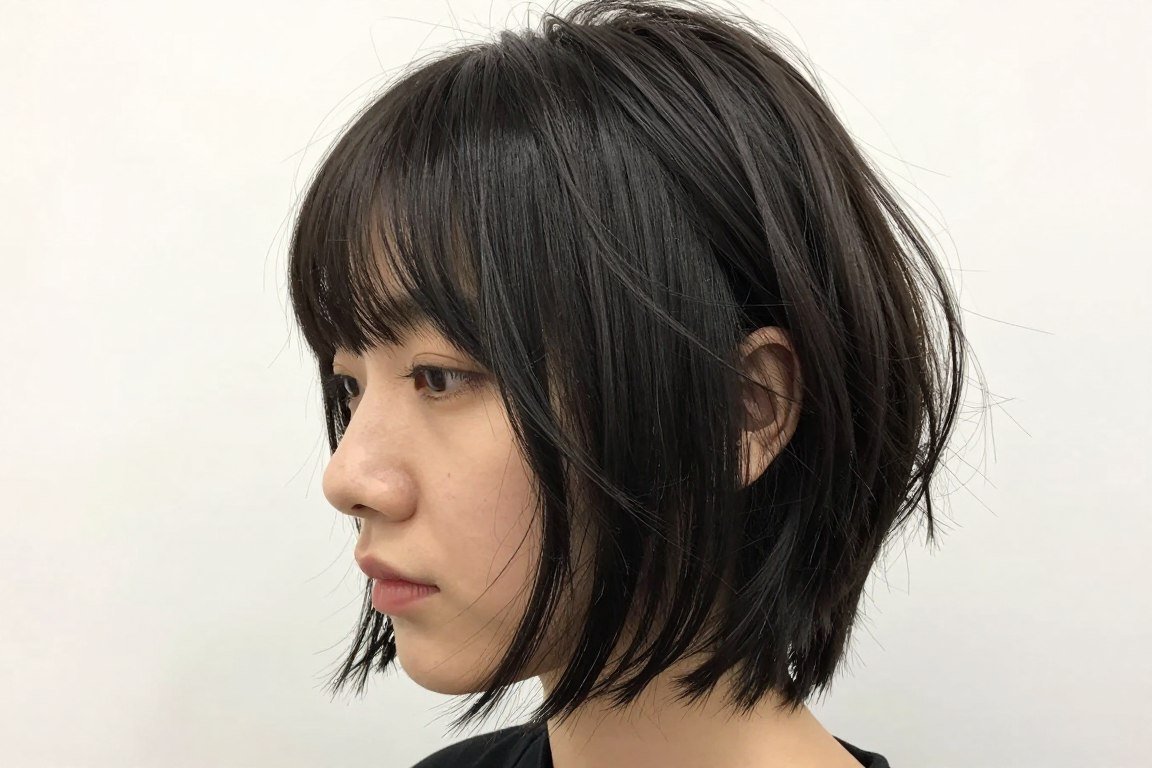
19. Textured Bob with Piecey Bangs
Combining a textured bob with piecey bangs creates an edgy, modern look. The textured body adds dimension while bangs frame your face. Piecey bangs differ from blunt bangs in their separated, individualized strands.
This combination works exceptionally well for thin hair. The texture throughout creates fullness, while piecey bangs add interest without requiring thick hair. The separated bang pieces look intentional rather than sparse.
Creating Piecey Bangs
Piecey bangs are achieved through point-cutting and texturizing. Your stylist cuts into the bangs vertically rather than straight across. This creates separation and prevents the solid line that can look too heavy on thin hair.
The length of piecey bangs can vary. Longer versions graze your eyebrows and can be swept to the side. Shorter pieces sit above the brows for a more daring look. Both options work with various face shapes.
Styling Textured Bobs with Piecey Bangs
Texture spray is essential for this style. Apply it to damp hair throughout the bob and bangs. This creates the grip needed for separation and piece-y definition that lasts all day.
Style bangs with your fingers rather than a brush. Work a small amount of pomade between your fingertips and separate individual pieces. This creates the piecey effect while adding definition and control.
Piecey Bang Styling Technique
- Start with damp bangs and apply texture spray
- Blow dry bangs forward using just your fingers
- Apply tiny amount of pomade to fingertips
- Separate individual bang pieces by twisting and pulling down
- Use flat iron on low heat to create subtle bends in some pieces
- Avoid touching bangs once styled to prevent oil transfer
- Refresh with dry shampoo at roots if bangs get oily
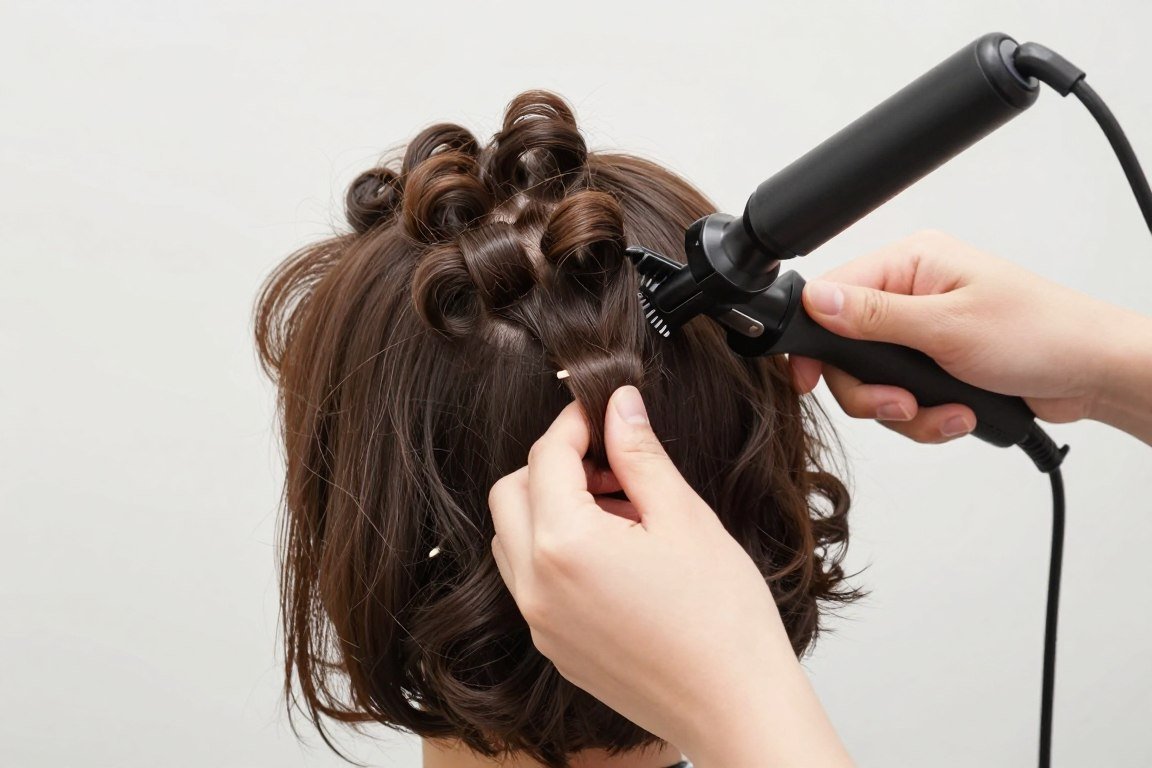
20. Voluminous Curled Bob
The voluminous curled bob maximizes fullness through intentional curling. This glamorous style makes thin hair look incredibly thick and luxurious. Large, bouncy curls create the ultimate illusion of density and body.
This style works beautifully for special occasions or when you want maximum impact. The curls add dimension, movement, and apparent thickness that straight styles can’t match. With the right technique, even fine hair can achieve this voluminous look.

Creating Volume Through Curling
Use a large-barrel curling iron, at least 1.5 inches in diameter. Larger curls create more volume than tight spirals. Wrap thick sections around the barrel, holding for just a few seconds to avoid damaging fine strands.
Curl direction matters for maximum volume. Alternate the direction of curls rather than curling everything the same way. This creates a more natural, voluminous result that doesn’t look too uniform or styled.
Voluminous Curling Method
- Apply heat protectant to completely dry hair
- Section hair into workable pieces
- Start with bottom sections, working upward
- Use large-barrel curling iron on medium heat
- Wrap thick sections, leaving ends out slightly
- Alternate curl direction section by section
- Pin each curl to your head while it cools
- Once all curls are cool, remove pins gently
- Flip head upside down and shake gently
- Use fingers to separate and arrange curls
- Set with flexible-hold hairspray
Products for Long-Lasting Volume
Start with volumizing mousse on damp hair before any heat styling. This creates a foundation of body that supports the curls. Allow hair to dry completely before curling, as damp hair won’t hold curls effectively.
After curling, use a lightweight volumizing powder at the roots. Sprinkle small amounts onto your part line and massage into the scalp. This adds texture and lift that keeps volume from falling flat.

Maintaining Curled Volume
Sleep with curls pinned up loosely to preserve them overnight. Use large, soft hair clips that won’t create dents. In the morning, release the clips and gently refresh with your fingers.
Avoid brushing curled bobs, as this destroys the volume and definition. Instead, use your fingers to separate and fluff. A light mist of dry texture spray refreshes curls and adds back any volume lost overnight.
Choosing the Right Bob for Your Face Shape
Face shape significantly influences which bob style flatters you most. Understanding your face shape helps narrow down the options. This ensures you choose a cut that enhances your natural features.
Most faces fall into one of several common categories. Oval, round, square, heart, and long faces each benefit from specific bob variations. The right cut balances proportions and highlights your best features.
Bobs for Different Face Shapes
Oval Face Shape
Oval faces are well-balanced and can wear almost any bob style. This versatile shape looks great with blunt cuts, layered styles, or asymmetrical options. Focus on choosing a style that reflects your personal aesthetic rather than worrying about proportions.
Round Face Shape
Round faces benefit from bobs that create length and angles. Angled bobs with longer front pieces elongate the face. Avoid chin-length blunt cuts that emphasize roundness. Side parts create asymmetry that adds apparent length.
Square Face Shape
Square faces look best with soft, rounded bobs that contrast angular features. Curved shapes and soft layers soften strong jawlines. Avoid blunt, straight-across cuts that emphasize the square shape. Textured styles with movement work beautifully.
Heart Face Shape
Heart-shaped faces have wider foreheads and narrower chins. Bobs with volume at the jawline balance these proportions. Chin-length cuts with face-framing layers add width where needed. Avoid very short bobs that emphasize the narrow chin.
Long Face Shape
Long faces need width rather than length. Blunt bobs with minimal layering add horizontal lines that shorten the face. Bangs significantly reduce face length. Avoid long, angled bobs that make the face appear even longer.
Diamond Face Shape
Diamond faces have narrow foreheads and chins with wider cheekbones. Chin-length bobs with soft layers balance the proportions. Side-swept bangs add width to the narrow forehead. Avoid very short styles that emphasize cheekbone width.

Maintaining Your Bob Haircut
Regular maintenance keeps your bob looking fresh and styled. Thin hair bobs require specific care to maintain shape and prevent damage. Following these guidelines ensures your cut always looks salon-perfect.
Trimming Schedule
Bobs need more frequent trims than longer hairstyles. Plan for salon visits every 6-8 weeks. This maintains the shape and prevents the grown-out, unkempt appearance that develops quickly with bobs.
Some bob styles require even more frequent maintenance. Stacked, inverted, and micro bobs may need trims every 4-6 weeks. Factor this time and expense into your decision when choosing a bob style.
| Bob Style | Trim Frequency | Maintenance Level | Styling Time |
| Classic Blunt Bob | 6-8 weeks | Medium | 15-20 minutes |
| Layered Bob | 6-8 weeks | Medium | 20-25 minutes |
| Angled Bob | 5-6 weeks | High | 20-30 minutes |
| Textured Choppy Bob | 6-8 weeks | Low | 10-15 minutes |
| Stacked Bob | 4-6 weeks | High | 20-25 minutes |
| Wavy Bob | 6-8 weeks | Low | 10-20 minutes |
| Inverted Bob | 4-6 weeks | Very High | 25-30 minutes |
| Micro Bob | 4-5 weeks | Very High | 15-20 minutes |
Hair Care for Thin Hair Bobs
Use products specifically formulated for fine hair. Volumizing shampoos and lightweight conditioners prevent buildup that weighs hair down. Avoid heavy moisturizing products designed for thick or curly hair.
Deep conditioning treatments should be used sparingly on thin hair. Apply them only to the ends, avoiding the roots and mid-lengths. This prevents the lank, oily appearance that can develop when fine hair is over-conditioned.
Essential Hair Care Steps
- Wash hair with volumizing shampoo every 2-3 days
- Use lightweight conditioner on ends only
- Rinse thoroughly to prevent product buildup
- Apply leave-in treatments sparingly
- Use dry shampoo between washes for volume
- Get regular trims to maintain health
- Protect hair from heat with quality products
- Avoid over-brushing which can cause breakage
Protecting Your Bob from Damage
Heat styling takes a toll on thin hair. Always use a heat protectant spray before blow drying, flat ironing, or curling. Set tools to the lowest effective temperature, typically between 300-350°F for fine hair.
Give your hair breaks from heat styling when possible. Embrace air-dried styles a few days per week. This rest period allows hair to recover and maintain its health and strength.
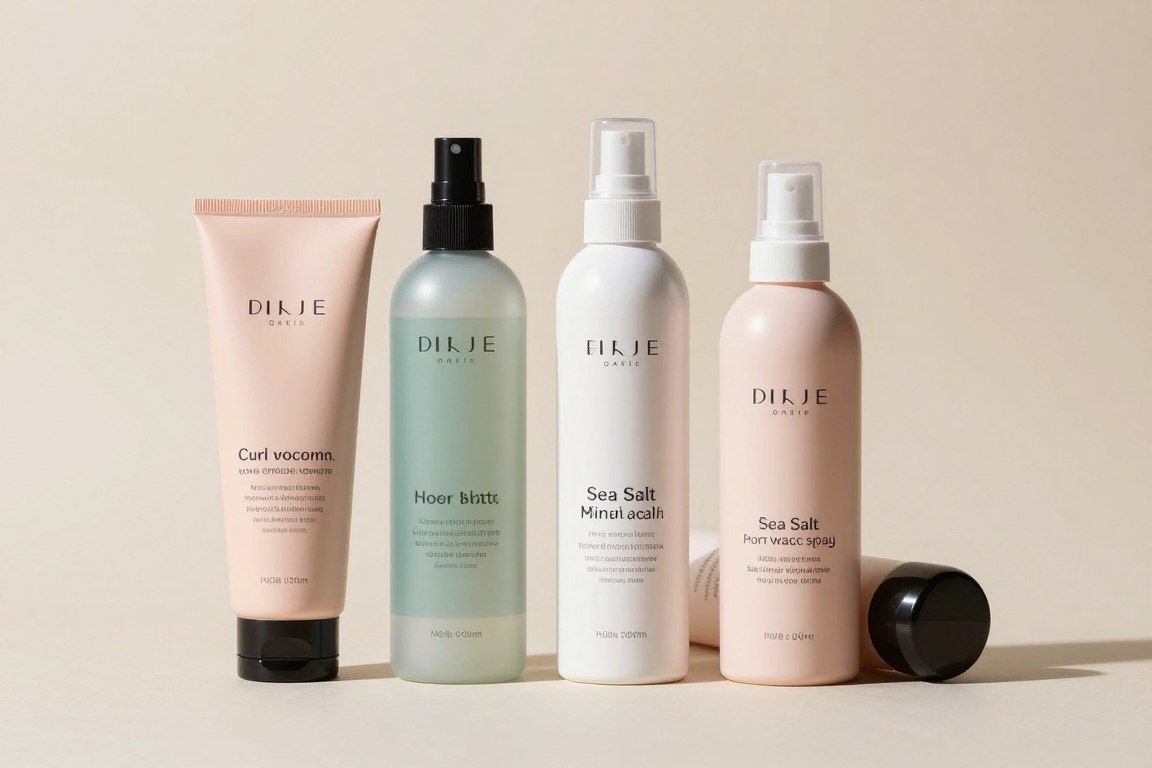
Best Styling Products for Thin Hair Bobs
The right products make all the difference in styling thin hair successfully. Heavy products weigh down fine strands, while the right formulas add body and texture. Understanding product types helps you build an effective styling routine.
Product Categories and Their Uses
Volumizing Mousses
Lightweight foams that add body without weight. Apply to damp hair before blow drying for maximum lift at the roots and throughout lengths.
Texture Sprays
Add grip and separation to fine strands. Perfect for creating piece-y, textured looks. Use on dry hair for definition and hold.
Root Lifters
Concentrated formulas that target flatness at the scalp. Apply directly to roots before styling for targeted volume where you need it most.
Dry Shampoos
Absorb oil while adding volume and texture. Essential for extending time between washes and refreshing day-old styles with renewed body.

Products to Avoid
Heavy oils and thick serums weigh down thin hair quickly. Avoid products marketed for thick, coarse, or curly hair. These contain ingredients that provide more moisture than fine strands need.
Strong-hold gels and pomades can make thin hair look greasy and flat. Choose lightweight alternatives with flexible hold. These provide styling power without the weight and stiffness that ruins fine hair styles.
Product Application Tip: Always start with less product than you think you need. You can add more if necessary, but removing excess product from fine hair is nearly impossible. Start with a dime-sized amount and build up gradually.
Frequently Asked Questions About Bobs for Thin Hair
Will a bob make my thin hair look thinner?
No, when cut correctly, a bob actually makes thin hair look fuller. Removing length eliminates weight that pulls hair flat. Strategic layering and texturizing create movement and dimension that enhance the appearance of thickness. The key is choosing the right bob variation for your specific hair texture and working with a skilled stylist who understands fine hair.
How often should I wash my bob if I have thin hair?
Washing every 2-3 days is ideal for most people with thin hair. This schedule removes oil buildup without stripping natural oils that protect hair. Use dry shampoo between washes to absorb excess oil and add volume. Over-washing can actually cause your scalp to produce more oil, while under-washing leads to flat, greasy-looking hair.
What’s the best length bob for thin hair?
Chin-length to shoulder-length bobs work best for most thin hair types. This length range removes enough weight to create volume while providing enough length for styling versatility. Very short bobs can work well too, as they maximize lift. The ideal length depends on your face shape, neck length, and personal style preferences.
Should I get layers in my bob if I have thin hair?
Yes, but strategic layering is key. Subtle, well-placed layers add movement and dimension without creating gaps or making hair look sparse. Avoid heavy, choppy layers that remove too much density. Work with your stylist to plan layer placement that enhances your hair’s natural movement while maintaining fullness.
Can I still put my bob in a ponytail?
It depends on the length. Longer bobs at shoulder length can typically be secured in a small ponytail or half-up style. Shorter bobs won’t have enough length for traditional ponytails. However, you can use clips, pins, and accessories to create pulled-back looks even with shorter bobs. Many women find they don’t miss ponytails once they discover the styling versatility of bobs.
What products should I avoid if I have thin hair?
Avoid heavy oils, thick serums, and products containing silicones that build up on fine strands. Stay away from strong-hold gels and pomades that weigh hair down. Products marketed for thick, coarse, or very curly hair typically contain too much moisture for thin hair. Instead, choose lightweight, volumizing formulas specifically designed for fine hair.
How can I add volume to my thin hair bob at home?
Start with volumizing products on damp hair, focusing on roots. Blow dry upside down or use a round brush to create lift. Try velcro rollers at the crown while you finish getting ready. Use dry shampoo or root-lifting powder at the part line. Curling or waving your bob adds dimension that creates the illusion of fullness. Finish with lightweight texture spray for lasting volume.
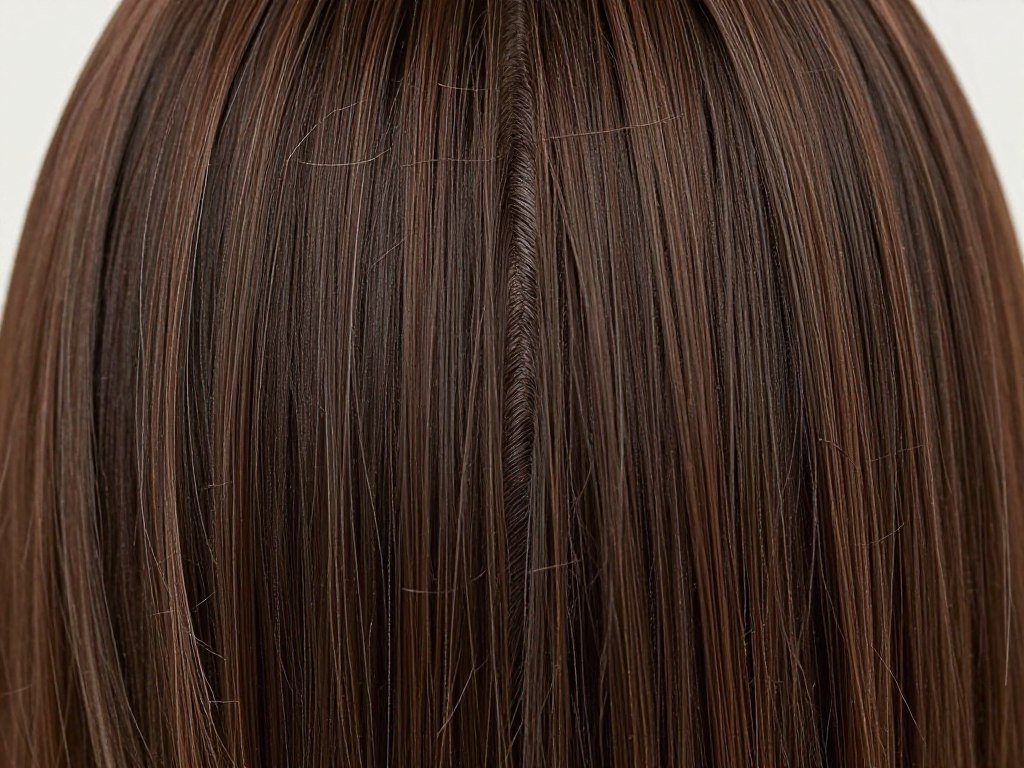
Will coloring help my thin hair look thicker?
Yes, strategic coloring can create the illusion of thickness. Highlights and lowlights add dimension that makes hair appear fuller. The variation in color creates depth that flat, single-tone color lacks. Balayage and dimensional coloring techniques work particularly well for thin hair. Consult with a colorist who understands how to use color to enhance fine hair texture.
Is it better to air dry or blow dry a bob with thin hair?
Blow drying typically produces better volume for thin hair bobs. Air drying often results in flatness, especially at the roots. Use heat protectant and blow dry on medium heat with a round brush to build body. However, give your hair occasional breaks from heat by air drying when you don’t need maximum volume. The key is using proper technique and products regardless of drying method.
Can I get bangs with my bob if I have thin hair?
Absolutely. Bangs can actually work wonderfully with thin hair when cut properly. The key is ensuring your stylist cuts bangs deep enough into your hairline to provide adequate thickness. Avoid wispy, see-through bangs that emphasize thinness. Blunt bangs, side-swept styles, or curtain bangs all work well with thin hair when executed correctly.
Transform Your Thin Hair with the Perfect Bob
Thin hair is no longer a limitation when it comes to beautiful, stylish haircuts. These 20 bob variations prove that fine strands can look voluminous, dimensional, and stunning. The right cut works with your hair’s natural texture rather than fighting against it.
Each bob style offers unique benefits for thin hair. Blunt cuts create the illusion of density through clean lines. Layered styles add movement and dimension. Textured bobs make fine strands look intentionally piece-y and full.
The key to success lies in three critical factors. First, choose a style that complements your face shape and lifestyle. Second, work with a skilled stylist who understands how to cut thin hair. Third, use appropriate products and techniques for daily styling.
Volume doesn’t require thick hair. Strategic cutting, proper products, and smart styling create fullness that rivals naturally thick hair. Bob haircuts excel at maximizing the potential of fine strands through length removal and shape creation.
Don’t let thin hair hold you back from the bob of your dreams. Whether you prefer sleek sophistication or tousled texture, there’s a perfect bob waiting for you. The versatility of bob cuts means you can experiment with different variations as your style evolves.
Regular maintenance keeps your bob looking fresh and intentional. Plan for trims every 4-8 weeks depending on your chosen style. Invest in quality styling tools that protect fine hair while delivering professional results. Build a product collection focused on volumizing without weight.
Your journey to a stunning bob starts with a consultation. Discuss your hair concerns, lifestyle needs, and style preferences with your stylist. Bring photos of bobs you love but remain open to professional guidance about what will work best for your specific hair texture.
Thin hair possesses unique qualities that make certain styles even more beautiful. Embrace your hair’s natural characteristics and choose a bob that celebrates fine texture. The right cut transforms perceived weakness into undeniable strength and beauty.