
Creating a stunning cupcake display doesn’t require expensive store-bought stands. With simple materials and creativity, you can craft beautiful DIY cupcake stands that wow guests at any party or celebration. These homemade stands save money while adding personal touches that match your event theme perfectly.
This guide shares 25 unique cupcake stand ideas for 2026. Each project includes materials needed and easy instructions. Whether you plan a birthday party, wedding, or casual gathering, these designs work for any occasion and skill level.
Table of Contents
Budget-Friendly Dollar Tree DIY Cupcake Stand Designs
Dollar Tree offers amazing supplies for creating elegant cupcake stands on a tight budget. These designs use inexpensive items you can find at any Dollar Tree store. With just hot glue and a few minutes, you’ll have a professional-looking stand ready for your party.
1. Classic Three-Tier Glass Plate Stand
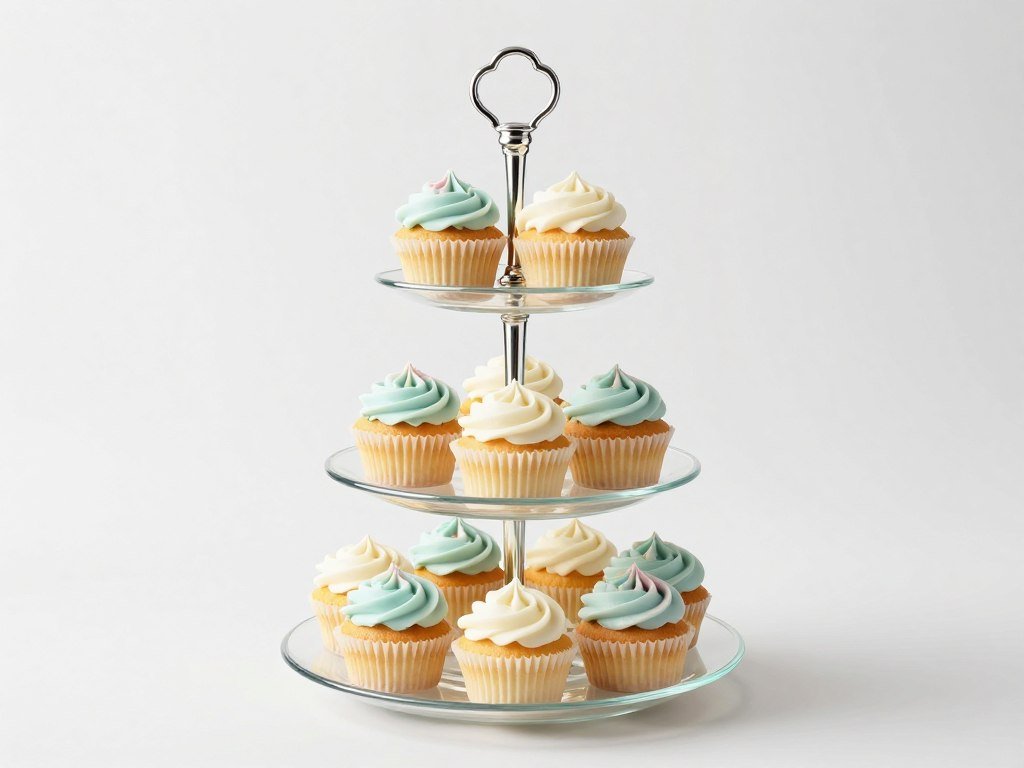
This timeless design uses glass plates and candle holders from Dollar Tree. The transparent look works for weddings, showers, and formal events. You can customize the height by choosing different candle holder sizes.
Materials needed:
- Three clear glass plates (different sizes from Dollar Tree)
- Two glass candle holders or candlesticks
- Hot glue gun and glue sticks
- Rubbing alcohol for cleaning surfaces
Instructions: Clean all glass surfaces with rubbing alcohol. Apply hot glue around the top edge of the tallest candle holder. Center it on the bottom of your medium plate and press firmly. Hold for 30 seconds. Repeat with the second candle holder, attaching it to the medium plate’s bottom and the small plate’s center. Let the glue dry for 10 minutes before adding cupcakes.
2. Rustic Wood Slice Tower
Create a farmhouse-style stand using wood slices and Dollar Tree supplies. This natural look suits outdoor parties, barn weddings, or rustic-themed celebrations. The wood adds warmth and texture to your dessert table.
Materials needed:
- Three wooden circles or cutting boards from Dollar Tree
- Two plastic candle holders (spray painted)
- Hot glue and hot glue gun
- Sandpaper for smoothing edges
Sand any rough edges on your wood pieces. Spray paint the plastic candle holders in bronze or copper for a rustic finish. Once dry, use hot glue to attach candle holders to wood bases. Stack from largest to smallest, making sure each layer sits stable.
3. Colorful Melamine Plate Stack
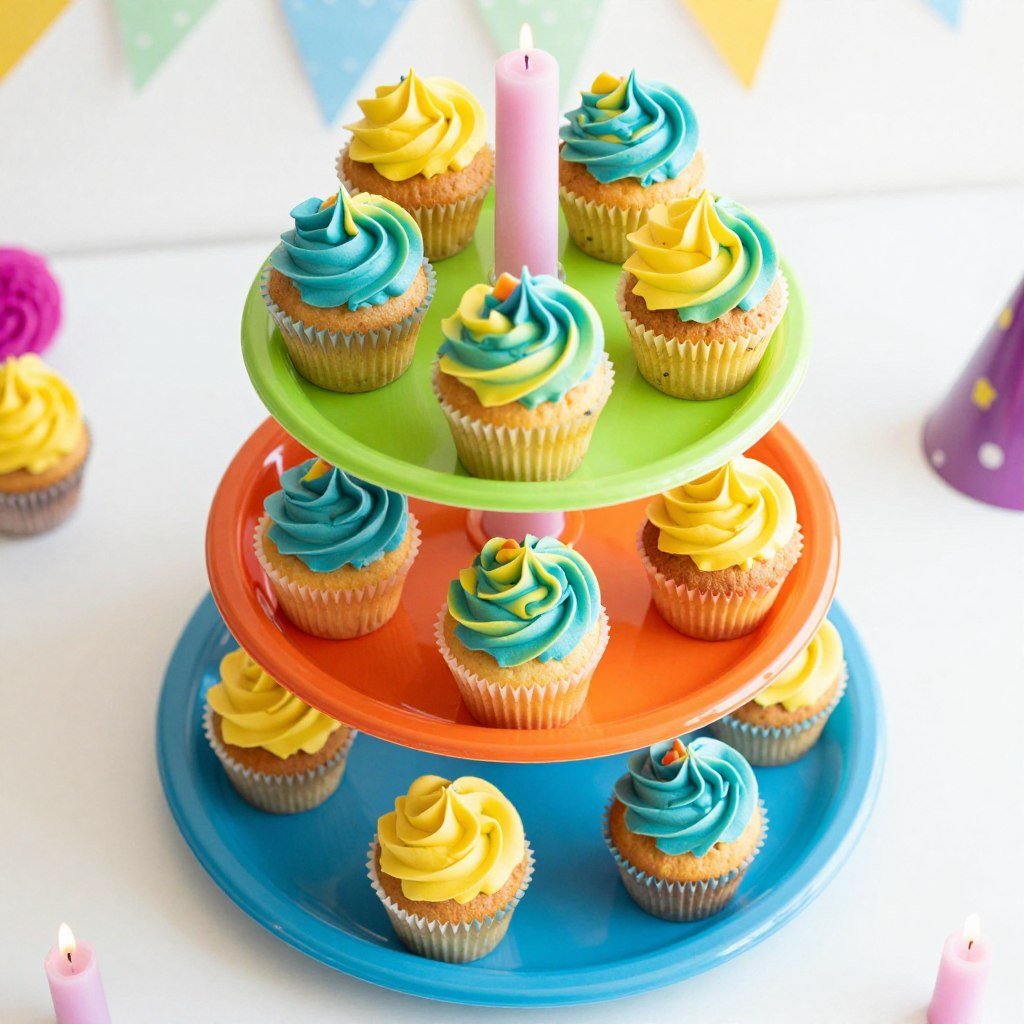
Dollar Tree’s melamine plates come in fun colors perfect for kids’ parties. Mix and match bright hues to create a playful stand that matches any party theme. These plastic plates are lightweight and durable for outdoor use.
Materials needed:
- Melamine plates in coordinating colors
- Plastic cups or containers as risers
- Hot glue gun
- Washi tape or ribbon for decoration
Turn plastic cups upside down to create risers between plates. Wrap cups with washi tape or ribbon before gluing. This adds extra decoration and hides the cup surface. Hot glue cups to plate centers, building your tower from base to top.
4. Mirror-Base Glamour Stand
Small Dollar Tree mirrors create a glamorous foundation for cupcake displays. The reflective base makes cupcakes look more abundant and adds sparkle to dessert tables. This design works beautifully for elegant events and photo backdrops.
Materials needed:
- Round mirrors from Dollar Tree
- Silver or gold candle holders
- Clear glass plates
- Hot glue gun and glue sticks
Place mirrors as your bottom layer. Attach candle holders to mirror surfaces with hot glue, making sure they’re centered. Stack glass plates on top. The mirror reflection doubles the visual impact of your cupcake arrangement.
5. Tiered Basket Display
Metal or wicker baskets from Dollar Tree make charming rustic stands. This design offers a casual, homey feel perfect for picnics, potlucks, or country-themed parties. Baskets also work great for outdoor events since they’re stable in breezy conditions.
Materials needed:
- Three baskets in graduated sizes
- Sturdy cardboard circles
- Hot glue and craft paint (optional)
- Ribbon or twine for embellishment
Cut cardboard circles to fit inside basket bottoms for stability. Paint baskets if desired and let dry completely. Stack baskets using hot glue, placing largest on bottom. Add cupcake wrappers or decorative paper inside baskets before arranging cupcakes.
6. Cake Pan Tower

Dollar Tree cake pans stack perfectly to create an industrial-chic stand. This approach costs just minutes to put together and holds many cupcakes securely. The aluminum surface catches light beautifully at evening events.
Materials needed:
- Three aluminum cake pans (varying sizes)
- Plastic containers or jars as spacers
- Hot glue gun
- Decorative ribbon or trim
Make sure all pans are clean and dry. Use plastic containers turned upside down between layers. Hot glue containers to pan centers. Cover visible plastic with ribbon or decorative trim. This project takes only 15 minutes from start to finish.
Essential Dollar Tree Craft Supplies
Save time and money by getting all your DIY cupcake stand materials in one shopping trip. These Dollar Tree basics work for nearly every project in this guide.
- Hot glue gun and extra glue sticks (always have backups)
- Variety pack of plates in different sizes
- Glass and plastic candle holders in various heights
- Spray paint in metallic finishes
- Decorative ribbon and washi tape
- Craft mirrors and wooden pieces
Elegant DIY Cupcake Stand Ideas for Special Occasions
Special events deserve beautiful presentations. These sophisticated designs elevate your dessert display with elegant touches. From weddings to milestone birthdays, these stands make cupcakes look bakery-quality without the professional price tag.
7. Crystal Chandelier-Inspired Stand
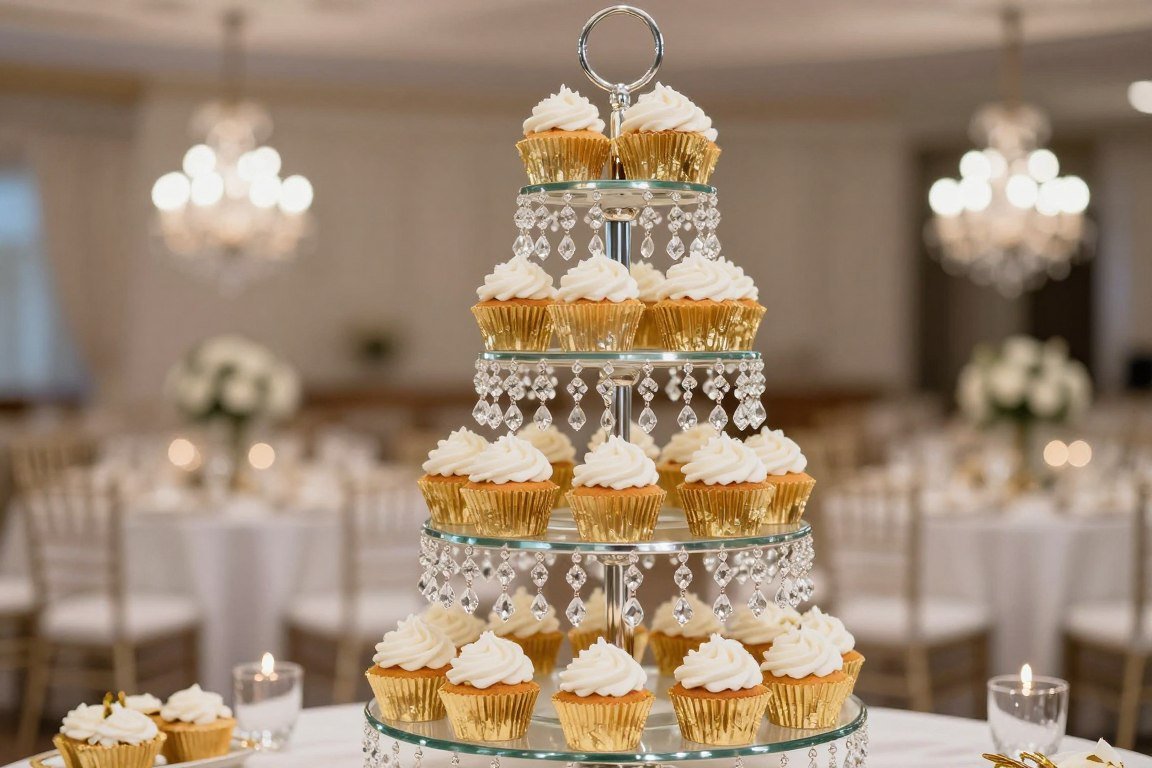
Add glamour with crystal beads hung from tier edges. This design creates a chandelier effect that catches light beautifully. The sparkling details make ordinary cupcakes look extraordinary at upscale events.
Materials needed:
- Glass cake stands or plates
- Crystal bead strands or garland
- Clear fishing line
- Hot glue gun
- Small hooks or wire
Create your base stand using glass plates and candle holders. Measure fishing line to hang crystal strands between tiers. Hot glue small hooks around plate edges. Attach crystal garland, adjusting length for even draping. The finished look resembles expensive crystal fixtures.
8. Gold Leaf Accented Stand
Gold leaf transforms plain stands into luxurious showpieces. This technique requires patience but delivers stunning results. The metallic finish catches candlelight perfectly at evening receptions and formal dinners.
Materials needed:
- Plain white or clear cake stand base
- Gold leaf sheets and adhesive
- Soft brush for application
- Sealant spray
Apply gold leaf adhesive to stand edges in your desired pattern. Let adhesive become tacky (about 5 minutes). Carefully press gold leaf sheets onto adhesive. Brush away excess with a soft brush. Seal with clear spray once complete. Allow 24 hours to cure before use.
9. Floral-Wrapped Pedestal
Fresh or silk flowers wrapped around stand bases add romantic elegance. This design works wonderfully for garden weddings, spring parties, and bridal showers. Choose flowers that match your event colors for a coordinated look.
Materials needed:
- Basic tiered stand
- Floral wire and tape
- Fresh or silk flowers
- Greenery and filler flowers
Create small floral garlands using wire and tape. Wrap garlands around pedestal bases, securing with additional wire. Add greenery to fill gaps. For fresh flowers, mist lightly with water and assemble close to party time. Silk flowers can be prepared days ahead.
10. Lace-Covered Victorian Stand
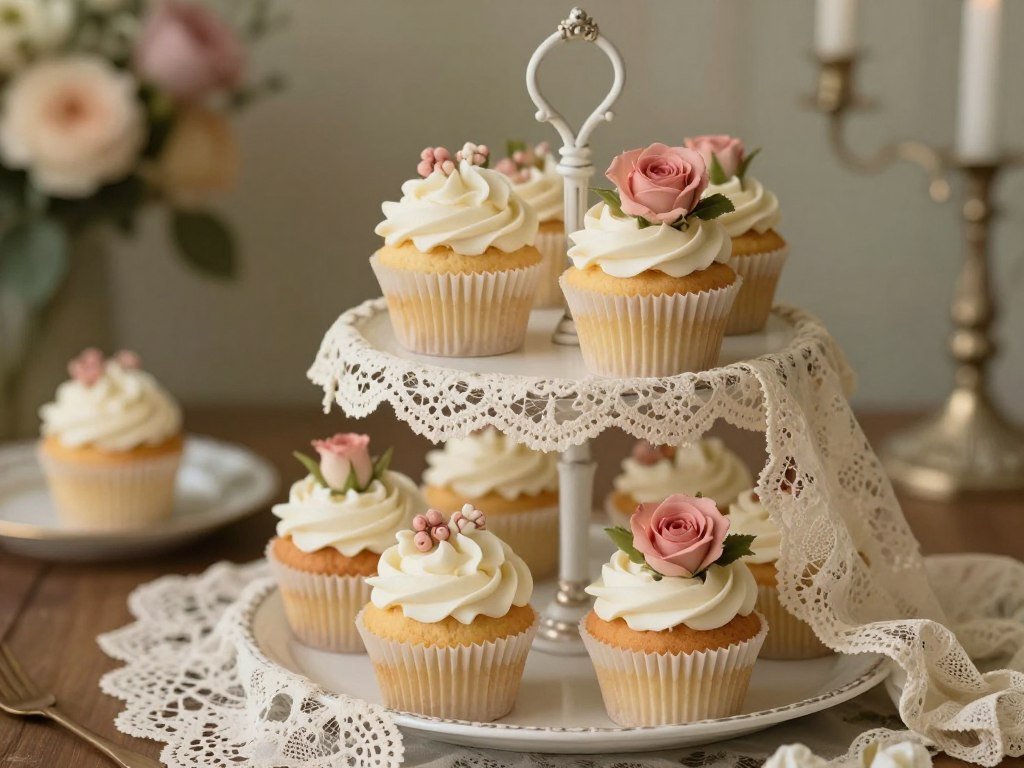
Vintage lace creates a shabby-chic or Victorian aesthetic perfect for tea parties and vintage weddings. Layer different lace patterns for added texture and visual interest. This approach works with any base stand material.
Materials needed:
- Plain stand structure
- Vintage or new lace fabric
- Fabric glue or hot glue
- Scissors and measuring tape
- Pearl or rhinestone accents
Measure lace pieces to drape around each tier. Cut with a one-inch overlap. Apply fabric glue to stand edges and press lace into place. Smooth out wrinkles. Add pearl pins or rhinestone accents at lace seams. Let glue dry overnight before handling.
11. Marble-Effect Minimalist Tower
Modern marble patterns create sophisticated minimalist stands. This contemporary design suits trendy celebrations and modern home décor. The marble look costs pennies to create with contact paper or spray paint techniques.
Materials needed:
- Plain white stands or plates
- Marble contact paper or marble-effect spray paint
- Craft knife and ruler
- Sealant (if using paint)
For contact paper: Measure each plate surface. Cut marble contact paper to size. Apply carefully, smoothing out bubbles. For painted marble: Use feather-like strokes with gray and black paint over white base. Spray with clear sealant. Both methods create stunning marble effects.
12. Ribbon-Tier Elegant Stack
Wide satin or grosgrain ribbon wrapped around tier edges adds polish and color. This simple technique transforms basic stands dramatically. Choose ribbon colors matching your party palette for a custom designer look.
Materials needed:
- Assembled basic stand
- Wide decorative ribbon (2-3 inches)
- Hot glue gun
- Fabric scissors
Measure ribbon to wrap completely around each plate edge with slight overlap. Cut pieces. Apply hot glue to ribbon backs and press onto plate rims. Make sure seams align at stand backs. Add ribbon bows at seam points for extra elegance.
Creative Themed DIY Cupcake Stand Designs
Themed stands add personality and fun to celebrations. These creative designs match specific party themes, from kids’ birthdays to holiday gatherings. Custom stands become conversation starters and photo-worthy focal points.
13. Storybook Tower for Kids’ Parties

Stack old hardcover books to create whimsical stands for children’s parties. This design celebrates reading while providing stable cupcake platforms. Choose books matching your party theme or favorite childhood stories.
Materials needed:
- Three to five hardcover books in graduated sizes
- Clear acrylic sheets or cake boards
- Hot glue gun
- Decorative paper or fabric book covers
Cover books with decorative paper if desired. Stack books with largest on bottom, alternating orientations for stability. Hot glue acrylic sheets or cake boards to book tops. The clear surface protects books while providing food-safe platforms for cupcakes.
14. Beach-Themed Sand and Shell Display
Bring beach vibes to summer parties with sand-covered bases and seashell decorations. This tropical design works perfectly for pool parties, beach weddings, or summer birthday celebrations. The natural elements create relaxed coastal atmosphere.
Materials needed:
- Basic stand structure
- Craft sand and Mod Podge
- Seashells and starfish
- Hot glue gun
- Clear sealant spray
Paint stand bases with Mod Podge. Sprinkle craft sand over wet adhesive, covering completely. Let dry. Shake off excess sand. Hot glue seashells and starfish to stand edges and bases. Spray with sealant to prevent sand shedding. The beach look transports guests to seaside paradise.
15. Rustic Log Slice Stand
Natural wood log slices create authentic rustic stands for outdoor and barn weddings. The organic wood texture adds earthy charm. Each stand looks unique thanks to natural wood grain variations.
Materials needed:
- Large wood log slices (3 to 4 inches thick)
- Small wood rounds or dowels as spacers
- Wood glue or hot glue
- Sandpaper and wood sealant
Sand all wood surfaces smooth. Apply wood sealant and let dry completely. This protects wood and makes cleanup easier. Stack slices using wood dowels or small rounds as spacers. Secure with wood glue. The natural bark edges add authentic rustic character.
16. Sports-Themed Trophy Stand

Craft stands resembling trophies for sports banquets and team celebrations. Spray paint stands gold or silver to mimic awards. Add team colors through ribbon or paint accents matching uniforms.
Materials needed:
- Basic stand or stacked cups
- Gold or silver spray paint
- Team color ribbon
- Printable trophy plaques
- Clear sealant spray
Spray paint entire stand gold or silver. Let dry completely between coats. Wrap team color ribbon around tier edges. Print mini trophy plaques with team names and hot glue to stand base. Seal with clear spray for durability.
17. Garden Tea Party Teacup Tower
Stack vintage teacups and saucers for charming tea party stands. This design works beautifully for bridal showers, baby showers, or afternoon tea events. Mix and match floral patterns for eclectic vintage appeal.
Materials needed:
- Vintage teacups and saucers (thrift store finds work great)
- Small plates or saucers
- Strong adhesive or epoxy glue
- Threaded rod and nuts (for extra stability)
Drill small holes through teacup bottoms and saucer centers if using rod method. Thread cups and plates onto rod, securing with nuts between layers. Alternatively, hot glue cups upside down to saucer centers, stacking as you go. Handle carefully as teacup stands are delicate.
18. Halloween Spooky Stand
Create eerie cupcake displays for Halloween parties using dark colors and spooky decorations. Black stands with orange accents capture classic Halloween spirit. Add plastic spiders, bats, or tombstone decorations for extra fright.
Materials needed:
- Black spray painted stand
- Orange and purple ribbon
- Plastic Halloween decorations
- Hot glue gun
- Fake spider webbing
Paint stand base black. Let dry completely. Wrap orange and purple ribbon in spirals around pedestals. Hot glue small plastic bats, spiders, or skulls to stand edges. Drape fake webbing between tiers for spooky effect. This stand sets perfect Halloween party mood.
Top Craft Supply Sources for DIY Stands
Finding quality materials at affordable prices makes DIY projects more enjoyable. These retailers offer everything you need for creative cupcake stand projects.
- Dollar Tree – Budget plates, candle holders, and basic supplies
- Michaels – Specialty craft items and seasonal decorations
- Home Goods – Unique plates and serving pieces at discount prices
- Thrift stores – Vintage finds for unique character pieces
- Amazon – Bulk craft supplies and specialty tools
Unique Material DIY Cupcake Stand Projects
Think beyond traditional materials for truly original stands. These inventive designs use unexpected items to create memorable displays. Experiment with different textures and surfaces for one-of-a-kind results.
19. Inverted Wine Glass Pedestals
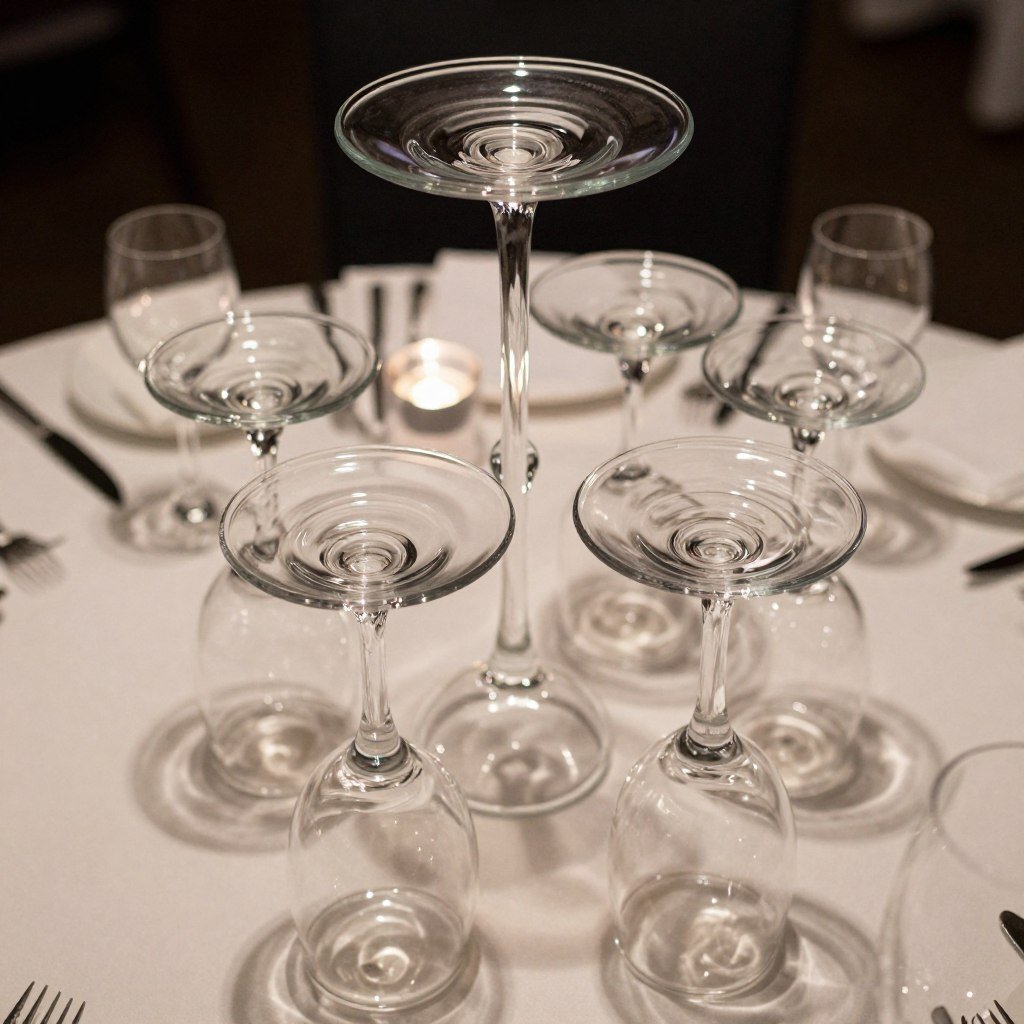
Turn wine glasses upside down to create instant elegant pedestals. This brilliant hack requires zero crafting skills. The stems become decorative elements while glasses provide stable bases.
Materials needed:
- Clear wine glasses (various heights)
- Round glass or acrylic plates
- Hot glue or museum putty
- Decorative items to place inside glasses
Place wine glasses upside down. Fill glass bowls (now on bottom) with decorative elements like flowers, candy, or LED lights. Hot glue or use museum putty to secure plates to glass bases. This creates illuminated or decorated pedestals that wow guests.
20. Terra Cotta Pot Tower
Stack painted terra cotta pots and saucers for a garden-inspired stand. This earthy design suits outdoor parties and garden weddings perfectly. Paint pots in any color to match your theme or leave natural for rustic charm.
Materials needed:
- Terra cotta pots in graduated sizes
- Terra cotta saucers or plastic plates
- Acrylic craft paint
- Hot glue gun
- Sealant spray
Paint pots in desired colors. Let dry completely. Seal with spray sealant. Turn pots upside down. Hot glue saucers or plates to pot bottoms. Stack from large to small, gluing between layers. The drainage holes add decorative detail to the design.
21. Cardboard Circle Platform Stand
Corrugated cardboard circles covered in decorative paper create lightweight portable stands. This budget option costs almost nothing and works great for outdoor picnics or children’s parties where breakage concerns exist.
Materials needed:
- Heavy corrugated cardboard
- Decorative paper or contact paper
- Paper towel tubes or PVC pipe
- Hot glue gun
- Scissors or craft knife
Cut cardboard into circles using large plates as templates. Cover circles completely with decorative paper, wrapping edges smoothly. Cut support tubes to desired heights. Hot glue tubes between cardboard layers. Despite lightweight materials, proper construction creates surprisingly sturdy stands.
22. Acrylic Sheet Modern Stand
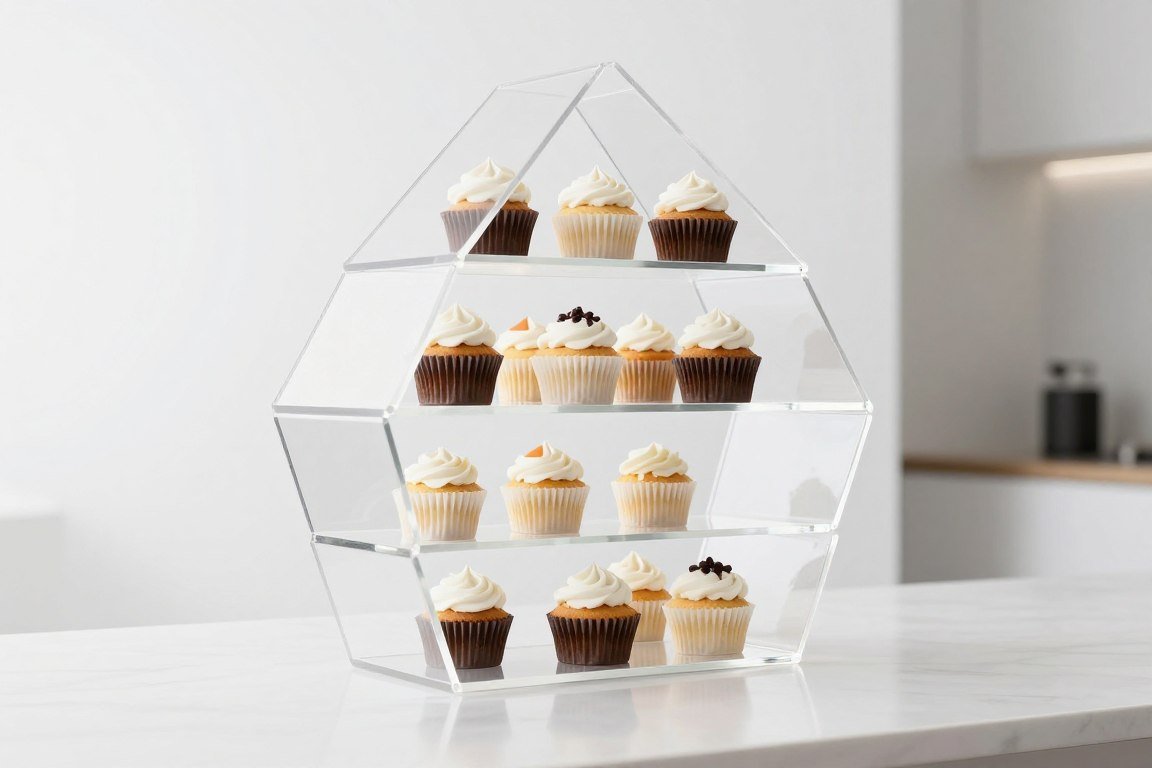
Clear acrylic sheets create modern geometric stands with contemporary flair. Hardware stores cut acrylic to your specifications. The transparent material looks sophisticated and works with any décor style.
Materials needed:
- Clear acrylic sheets (cut to size)
- Acrylic cement or strong adhesive
- Measuring tape and level
- Soft cloth for cleaning
Design your stand geometry on paper first. Have hardware store cut pieces to specifications. Clean all acrylic edges. Apply acrylic cement at joints. Hold pieces firmly until cement sets. The finished stand has a sleek, professional gallery look.
23. Bamboo Steamer Basket Stack
Asian bamboo steamer baskets make unique natural stands. This design brings global flair to your dessert display. Stack steamers in their traditional tiered arrangement for authentic aesthetic appeal.
Materials needed:
- Bamboo steamer basket set
- Food-safe paper or parchment liners
- Decorative Asian-inspired ribbon
- Fresh flowers or greenery
Line each steamer level with parchment paper circles. This protects cupcakes and bamboo. Stack steamers as designed. Wrap ribbon around bases or tuck fresh flowers between tiers. The natural bamboo adds organic texture and worldwide sophistication.
24. Repurposed Ladder Shelf Display
Small decorative ladders create vertical cupcake displays with tons of visual impact. This design showcases many cupcakes in a small footprint. Perfect for parties with limited table space or outdoor events.
Materials needed:
- Small decorative ladder
- Wood boards or trays to fit rungs
- Paint or stain
- Hot glue or small brackets
- Decorative fabric or paper
Paint ladder in desired color. Let dry. Cut boards to rest securely on ladder rungs. Secure with hot glue or small brackets for stability. Cover boards with decorative paper or fabric. Arrange cupcakes on each ladder level, creating a vertical dessert display tower.
25. Paper Mâché Sculptural Stand
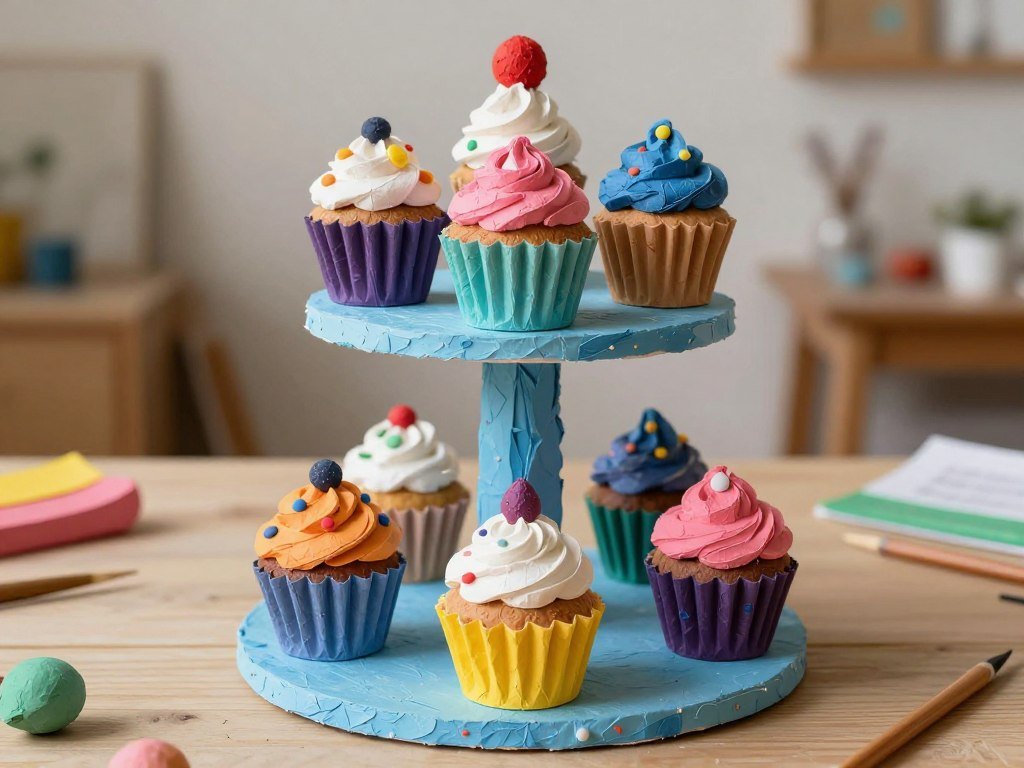
Paper mâché techniques let you sculpt any shape imaginable. Create fantasy designs, animal shapes, or abstract art pieces. This method requires time but produces completely custom results impossible to buy.
Materials needed:
- Newspaper strips and paper mâché paste
- Balloons or forms for shaping
- Acrylic paint and brushes
- Clear plates or cake boards
- Sealant spray
Build forms using balloons or cardboard frameworks. Apply paper mâché layers, letting each dry completely. Build up desired height and shape. Once dry, pop balloons and remove supports. Paint with acrylics in any design. Seal thoroughly. Hot glue plates to top surfaces for food-safe cupcake platforms.
Expert Tips for Perfect DIY Cupcake Stands
These professional techniques help your homemade stands look polished and function flawlessly. Learn insider tricks that make construction easier and results more impressive. Small details make big differences in finished quality.
Stability Secrets
Wobbly stands ruin displays and risk toppled cupcakes. Use these tips for rock-solid construction every time.
- Test weight capacity before decorating – stack heavy plates to check
- Use museum putty between tiers for removable but stable connections
- Add felt pads to stand bottoms preventing slips on smooth surfaces
- Center weight carefully when stacking each tier level
Hot Glue Mastery
Proper glue gun technique creates strong bonds that last through entire events without failures.
- Clean all surfaces with rubbing alcohol before gluing for maximum adhesion
- Apply glue in circular patterns rather than single dots for better coverage
- Work quickly as hot glue sets in just 30 to 60 seconds
- Use high-temperature glue for heavy materials like glass and metal
Food Safety Matters
Keep cupcakes safe and delicious with these important food handling considerations for DIY stands.
- Always use food-safe barriers between food and non-food surfaces like wood or painted items
- Line stands with parchment paper circles cut to exact plate sizes
- Avoid materials that may leach chemicals or absorb moisture from frosting
- Store stands in clean, dry areas between uses to prevent contamination
Professional Finishing
These finishing touches elevate amateur projects to professional-looking masterpieces worth photographing.
- Seal painted surfaces with clear spray for protection and shine
- Hide glue marks with ribbon, trim, or decorative elements
- Use washi tape for clean paint lines and perfect edges
- Add small embellishments like rhinestones or pearls for extra sparkle
Pro Tip: Make stands several days before your event. This allows glue to fully cure and gives you time to fix any issues. Test stands with weighted plates matching your actual cupcake load. Better to discover problems at home than at your party venue!
Transporting Stands Safely

Moving stands to party venues requires careful planning. Protect your hard work with proper packing methods. These transport tips prevent damage and stress.
- Disassemble multi-tier stands if possible, packing pieces separately wrapped in bubble wrap
- Place stands in boxes with crumpled paper filling empty spaces to prevent shifting during transport
- Transport cupcakes separately and assemble displays at the venue for best results
- Bring emergency supplies including extra glue sticks, tape, and ribbon for quick repairs
- Take photos of your stand setup at home as reference for reassembly at the venue
- Arrive early to set up displays before guests arrive and cupcakes need placing
Cleaning and Storage Solutions
Proper care extends stand life for multiple uses. Store stands carefully to prevent damage between events. Many designs last for years with correct maintenance.
- Wipe glass and acrylic surfaces with glass cleaner and soft cloths immediately after parties
- Remove food-contact papers and liners, replacing them fresh for each use
- Store painted pieces wrapped in tissue paper preventing scratches and chips
- Keep glued stands in sturdy boxes with protective padding around delicate parts
- Label storage boxes with photos of stands for easy identification before events
- Inspect stands before each use, making repairs as needed to maintain safety
Benefits of DIY Cupcake Stands
- Significant cost savings compared to store-bought stands
- Complete customization matching any party theme or color scheme
- Unique designs that become conversation pieces and photo backdrops
- Fun creative projects enjoyable to make with family or friends
- Reusable for multiple events with different decoration changes
- Pride of accomplishment displaying your handmade creations
Challenges to Consider
- Time investment required for construction and decorating
- Need basic crafting supplies and tools like hot glue guns
- Some designs require practice to perfect techniques
- Durability may not match commercial stands for heavy use
- Storage space needed between events for larger stands
- Mistakes in construction may require starting over
Creating Your Perfect DIY Cupcake Stand

These 25 DIY cupcake stand ideas prove you don’t need expensive equipment to create stunning dessert displays. From budget-friendly Dollar Tree projects to elegant special occasion designs, there’s a perfect stand for every skill level and event type. The key is choosing materials and styles matching your party theme while staying within your comfort zone.
Start with simpler designs like the classic three-tier glass plate stand. As your confidence grows, experiment with more creative projects using unique materials. Remember that homemade stands add personal touches store-bought versions can never match. Your guests will appreciate the extra effort and creativity you put into every party detail.
Most importantly, have fun with these projects. DIY crafting should be enjoyable, not stressful. Gather your supplies, set aside some time, and create beautiful displays that showcase your delicious cupcakes perfectly. Your handmade stand will be the centerpiece everyone remembers long after the last cupcake disappears.