
Small bedrooms demand smart solutions. A loft bed transforms wasted vertical space into functional living area. You gain room underneath for a desk, storage, or cozy reading nook.
Building your own loft bed saves money. It lets you customize dimensions to fit your exact space. These 20 DIY bed loft ideas offer creative designs for every skill level.
Each project includes materials needed and practical building steps. You’ll discover space-saving tricks that make the most of limited square footage. Let’s explore modern loft bed designs perfect for 2026.
Table of Contents
Classic Twin Loft Bed With Desk Space
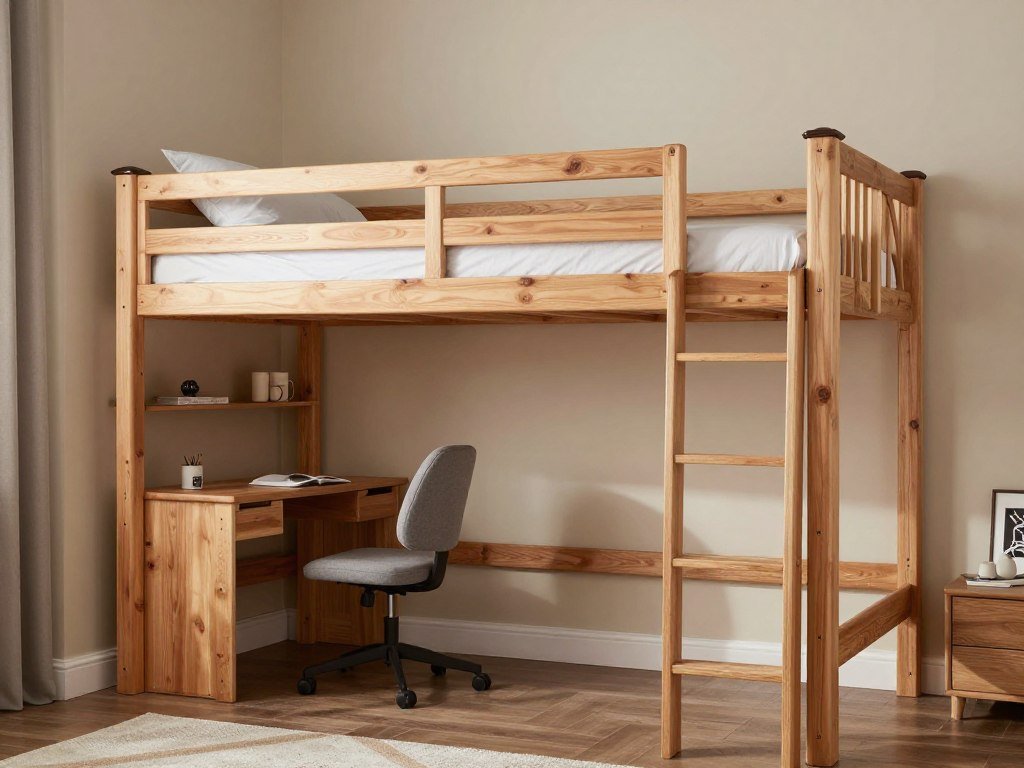
This traditional design elevates a twin mattress five feet off the ground. The frame uses standard 2×6 lumber for strength. You build it with basic tools in one weekend.
The space underneath accommodates a full desk and chair. Four sturdy posts support the bed frame. Cross braces add stability at multiple points.
Materials You’ll Need
Frame Components
- Eight 2×6 boards cut to length for posts
- Four 2×6 pieces for side rails
- Two 2×6 end pieces for headboard and footboard
- Plywood sheets for mattress platform
Hardware & Tools
- 3-inch wood screws for joints
- Corner brackets for reinforcement
- Drill with bit set
- Circular saw or miter saw
Ladder & Safety
- Two 2×4 boards for ladder sides
- Four 1×4 pieces for ladder rungs
- Sandpaper for smooth edges
- Wood stain or paint finish
Building Steps
Cut all lumber pieces to your desired length. Measure twice before each cut. This prevents costly mistakes with expensive wood.
Assemble the frame on a flat surface. Drill pilot holes before driving screws. This stops the wood from splitting at connection points.
Attach the ladder to one side of the bed frame. Make sure each rung sits level. Sand all edges smooth to prevent splinters.
Industrial Pipe Loft Bed Design
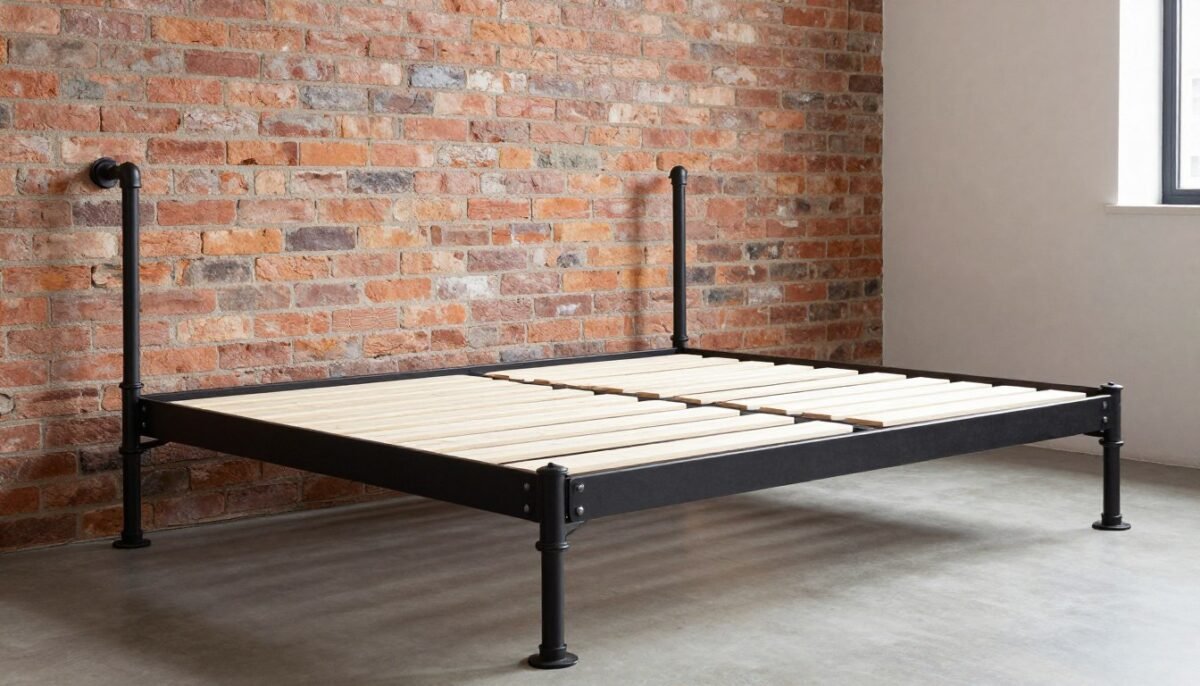
Metal pipes create an edgy industrial look. This loft bed uses black iron pipes for posts and rails. The design works perfectly in modern or urban-style rooms.
Pipe fittings connect at each corner and joint. You adjust the bed height by changing pipe lengths. The metal frame supports heavy weight without wobbling.
Pipe Framework Essentials
Purchase threaded black iron pipes from hardware stores. Get flanges to attach pipes to the wall and floor. Elbows and tees connect pipes at different angles.
- Four vertical pipes for corner posts at chosen height
- Horizontal pipes for top frame rails around mattress edge
- Floor flanges to secure bottom of each post
- Pipe wrenches to tighten all fittings securely
- Wood boards for the mattress platform base
Assembly Process
Start by marking exact spots on the floor. Use a level to make sure posts stand straight. Attach floor flanges with heavy-duty screws into floor joists.
Thread pipes into flanges hand-tight first. Check alignment before final tightening. Add the top frame pieces one by one.
Lay wood slats across the top frame. Space them evenly for mattress support. The industrial pipes need no paint since raw metal looks authentic.
Corner Loft Bed Space Maximizer
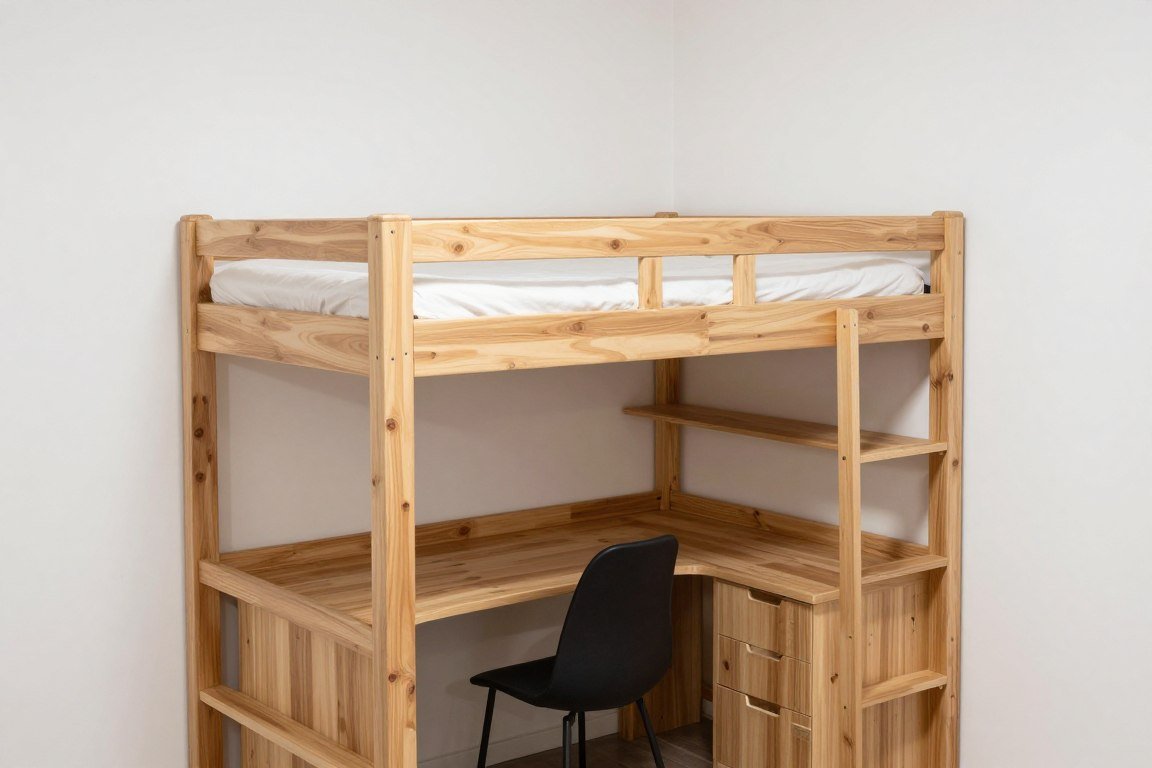
This design fits snugly into a room corner. Two walls provide natural support. You only build two freestanding posts instead of four.
The corner placement opens up floor space. It creates an efficient room layout. This option works great for tight bedrooms with awkward dimensions.
Wall-Mounted Support System
Attach ledger boards directly to wall studs. These horizontal pieces support the bed frame back edge. You must locate studs accurately for safety.
Use a stud finder to mark positions. Drill through the wall into solid wood. Lag bolts provide the strongest hold for weight-bearing connections.
Wall Attachment Points
Install one ledger board along each wall. Position them at the same height. Level them carefully before securing with bolts.
- Two 2×6 ledger boards mounted to studs
- Lag bolts every 16 inches minimum
- Heavy-duty L-brackets at corners
Front Post Installation
Build two sturdy posts for the front corner. These carry half the bed weight. Reinforce them with diagonal braces.
- Two 4×4 posts from floor to ceiling
- Cross bracing between posts
- Connection plates to ledger boards
Low Profile Loft For Lower Ceilings
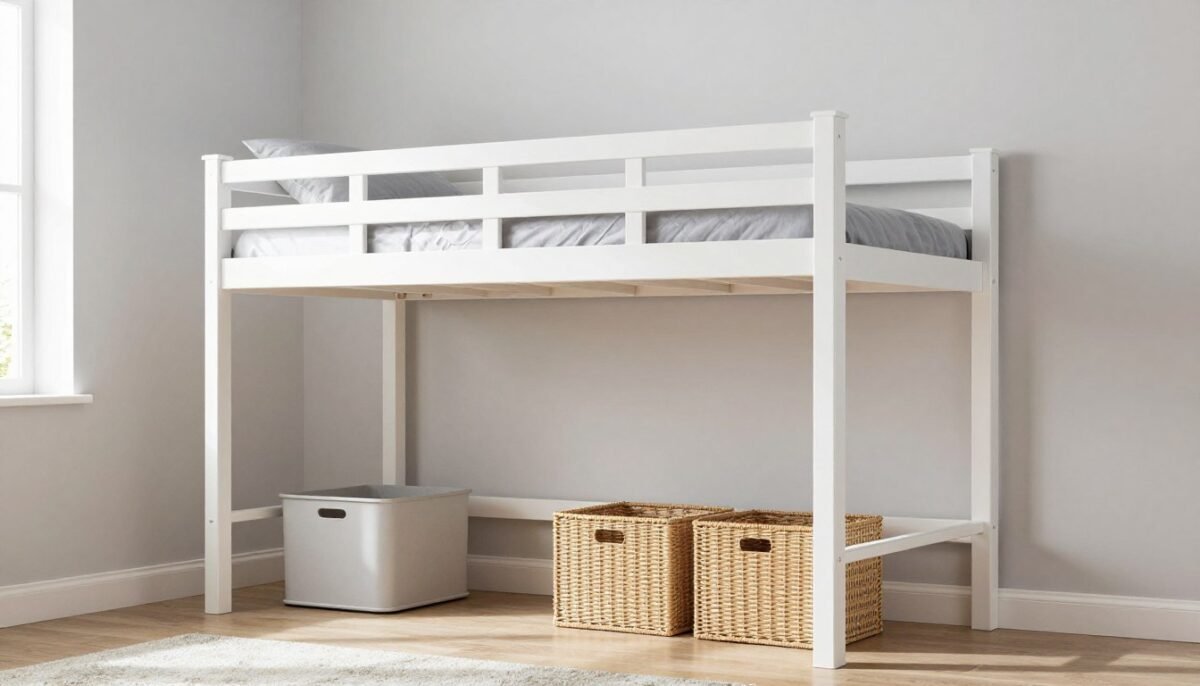
Not every room has tall ceilings. This loft bed sits just three feet off the ground. You still gain storage space underneath.
The lower height feels safer for children. It works in rooms with standard eight-foot ceilings. You avoid the cramped feeling of higher designs.
Compact Build Specifications
Keep the mattress platform 36 to 40 inches high. This allows space for storage bins underneath. Use shorter posts to match the reduced height.
- Measure your mattress thickness before setting platform height
- Calculate headroom needed when sitting on bed
- Cut posts to exact length with precision
- Build a sturdy frame despite lower profile
- Add side rails for safety at reduced height
The shorter ladder takes up less wall space. Install it at a comfortable angle. Each step should feel easy to climb.
Built-In Storage Loft Bed System
This project combines a loft bed with closet space. Built-in shelves sit underneath the mattress. Drawers slide out from the base frame.
Every bit of vertical space becomes useful. No separate furniture pieces clutter the room. One structure serves multiple purposes efficiently.
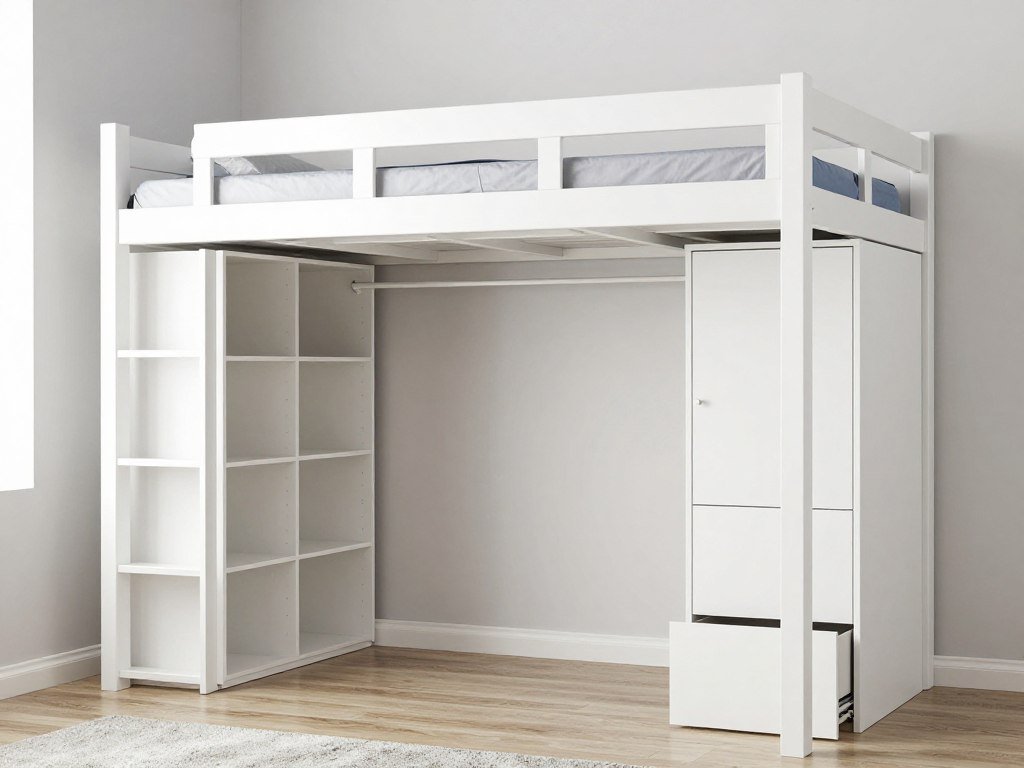
Storage Configuration Options
Shelving Units
Add open shelves on one side. Use adjustable brackets for flexibility. Store books, decorations, or folded clothes.
Drawer System
Build rolling drawers on the opposite side. Install drawer slides for smooth operation. Perfect for clothing or linens.
Closet Space
Hang a rod for hanging clothes. Add a curtain for a hidden closet. Maximize the vertical storage area.
Construction Details
Frame the storage units as part of the bed structure. Use plywood for shelf dividers. Build drawer boxes with solid wood sides.
Install the shelving before lifting the bed frame. Secure everything to the loft posts. Make sure drawers clear the frame when opened.
Floating Minimalist Loft Platform
This sleek design appears to float against the wall. Hidden brackets provide invisible support. The minimalist look suits modern bedroom aesthetics perfectly.
No visible posts interrupt the clean lines. The frame attaches directly to wall studs. This creates an open, airy feeling in small spaces.
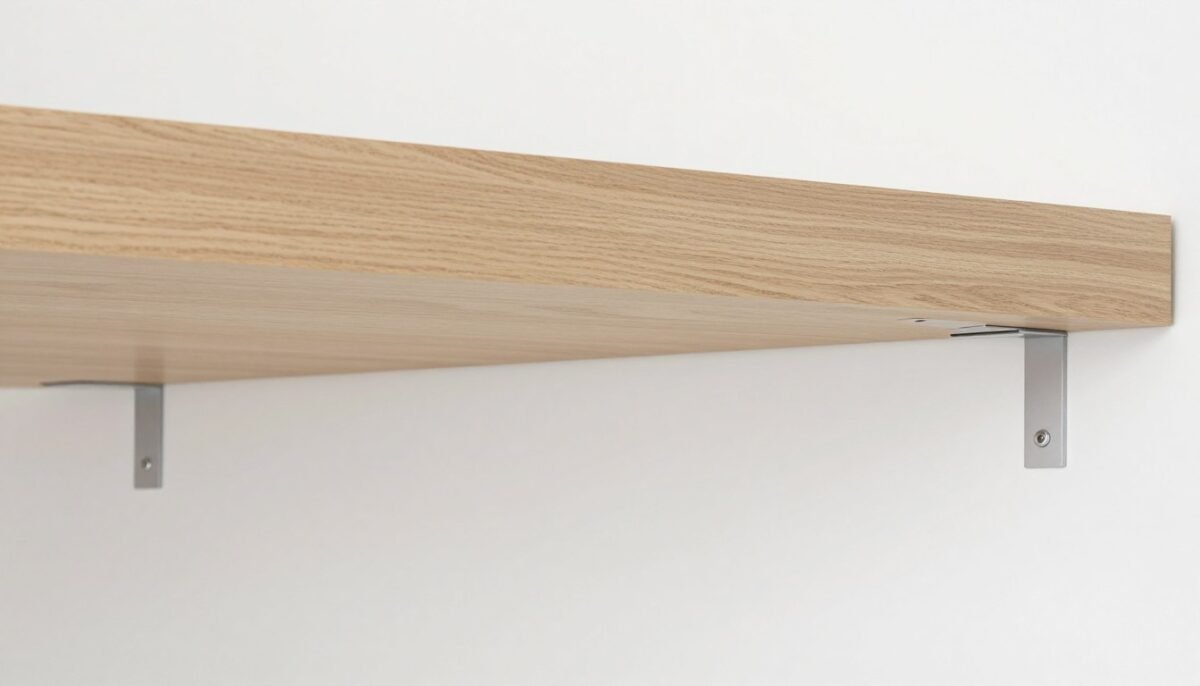
Hidden Bracket Installation
Heavy-duty steel brackets bolt into wall studs. Each bracket supports several hundred pounds. You need at least four brackets for a twin bed.
Mount brackets at exactly the same height. Use a laser level for precision. The platform boards rest on top of these hidden supports.
- Steel wall brackets rated for bed weight plus occupant
- Lag bolts penetrating deep into solid studs
- Platform frame sitting flush on bracket tops
- Optional front support beam for added stability
Loft Bed With Built-In Staircase
Replace the ladder with real stairs. Each step offers more stability and safety. The stairs themselves provide drawer storage inside.
This design works better for young children. It feels less intimidating than a vertical ladder. Adults appreciate the easier access too.
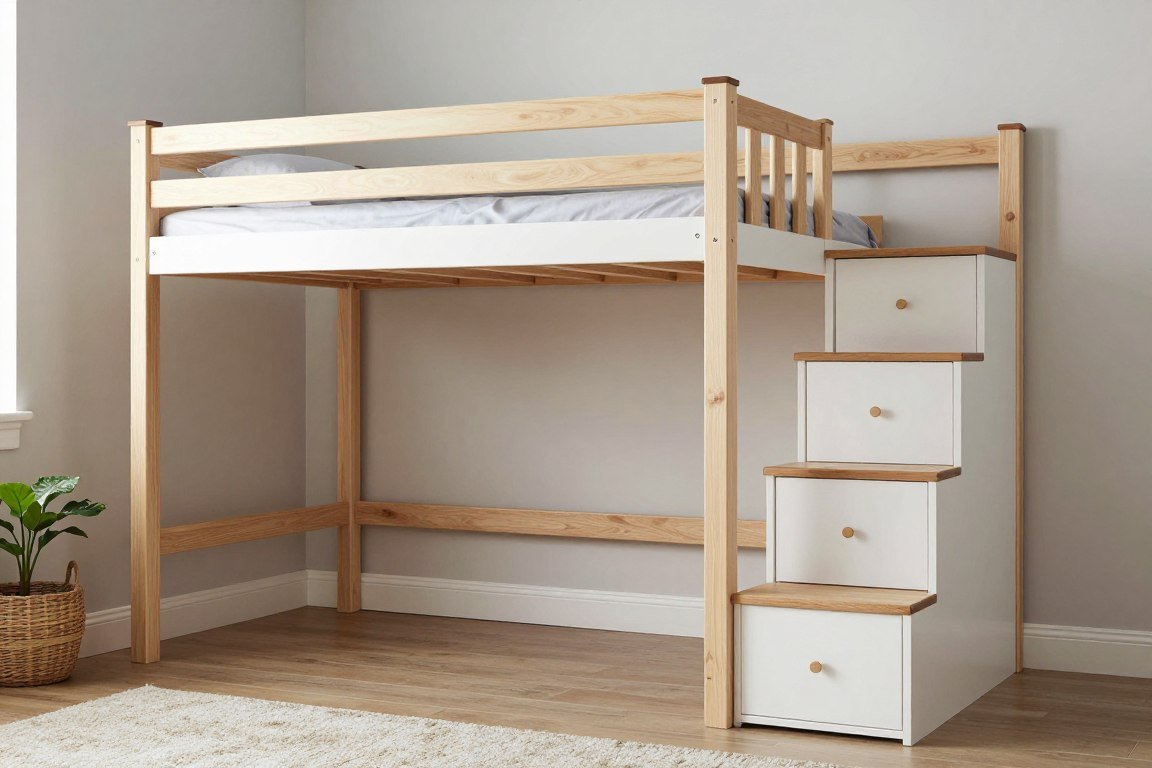
Staircase Construction Method
Build a staircase frame with stringers. Cut notches for each tread to rest on. Attach the entire unit to the bed frame side.
Stair Specifications
Calculate rise and run for comfortable steps. Standard rise measures 7 to 8 inches. Tread depth should be at least 10 inches.
- Three to four steps for typical loft height
- Sturdy stringers on both sides
- Handrail for safety grip
Storage Integration
Hollow out space under each tread. Install drawer fronts and slides. Use the staircase volume efficiently.
- Drawer boxes sized to fit step dimensions
- Soft-close slides for quiet operation
- Handles matching bed frame finish
Bunk Bed Style Double Loft
Stack two loft beds vertically. This design suits siblings sharing one room. Each person gets their own private sleeping space.
The bottom bunk sits at loft height. Storage or a desk fits underneath. The top bunk elevates higher with its own ladder.
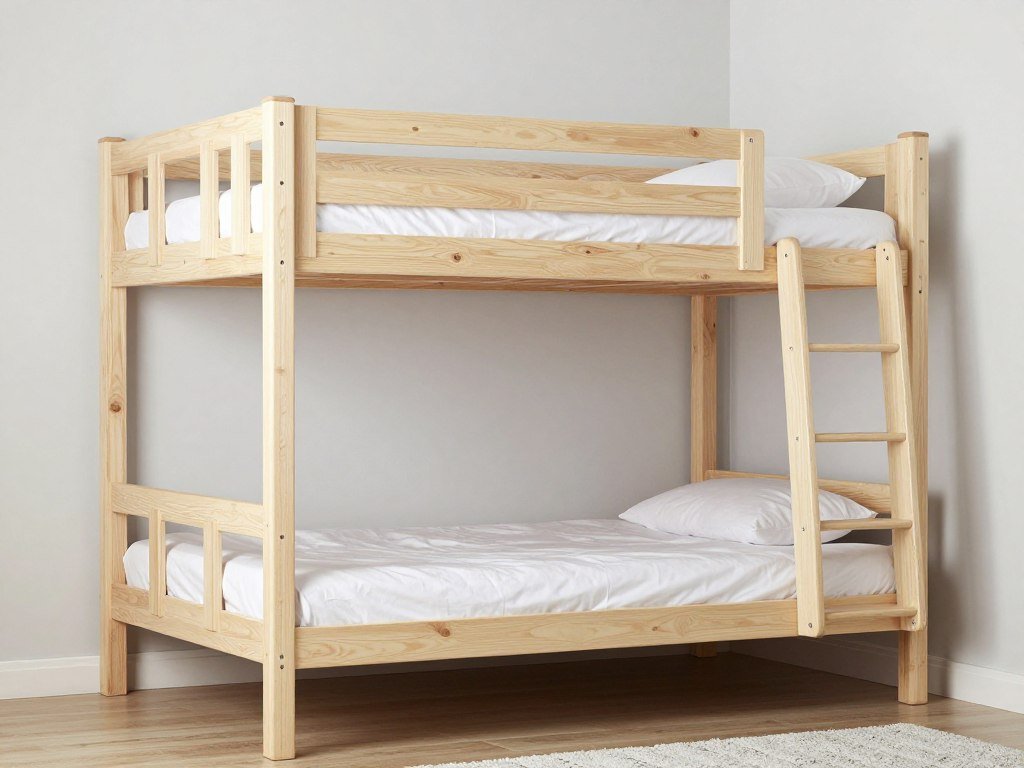
Safety Requirements
The top bunk needs guardrails on all sides. Make rails at least five inches above the mattress. Leave a gap only where the ladder attaches.
Use extra-strong lumber for upper supports. The frame carries twice the normal weight. Reinforce all joints with metal brackets.
- Check ceiling height allows proper headroom on top bunk
- Build lower bunk first as foundation structure
- Add vertical posts extending to top bunk level
- Install guardrails before allowing anyone to sleep on top
- Test stability by applying pressure to frame
Murphy Bed Loft Hybrid Design
This clever build folds up against the wall. When down, it functions as a regular loft bed. When up, the entire floor space opens.
Heavy-duty hinges attach the frame to a wall plate. Gas springs assist with lifting. This project requires more advanced carpentry skills.
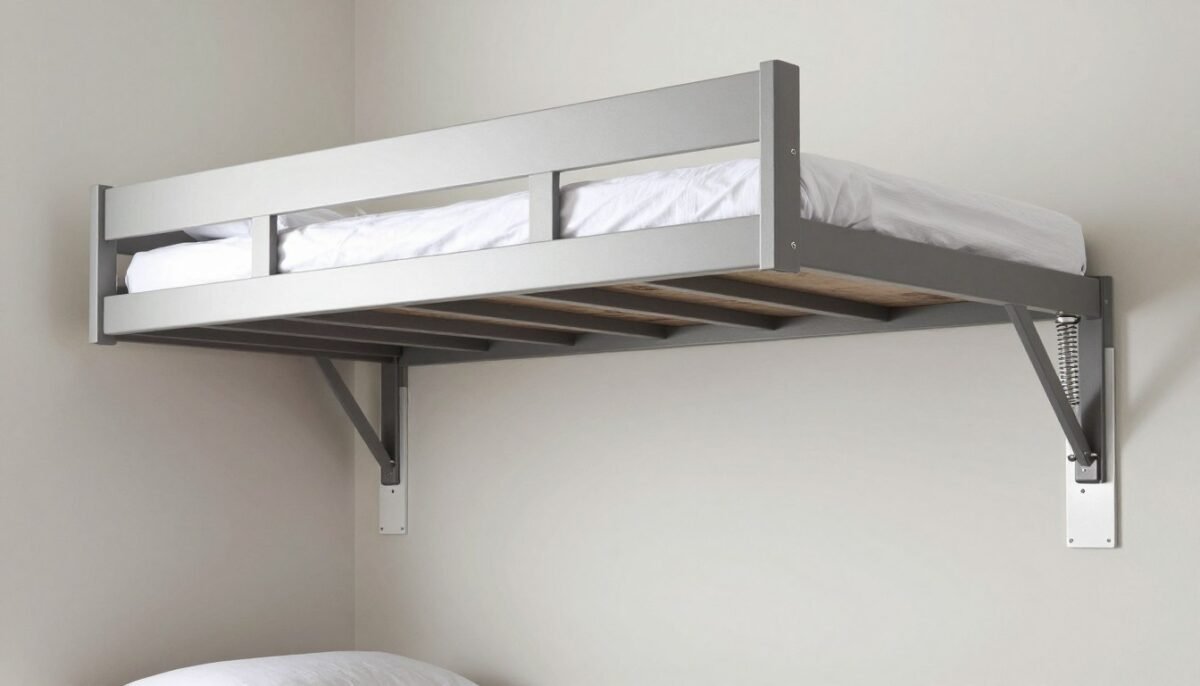
Mechanical Components
Purchase a murphy bed hardware kit. These include tested hinges and springs. Follow manufacturer weight ratings carefully.
Wall Mounting System
- Steel wall plate bolted to multiple studs
- Heavy-duty piano hinge rated for bed weight
- Safety latch to prevent accidental folding
Lifting Mechanism
- Pneumatic gas springs for smooth operation
- Spring tension matched to bed weight
- Safety straps to prevent over-rotation
Attach the bed frame to the hinge mechanism. Balance the weight distribution evenly. Test the folding motion before adding the mattress.
Simple Platform Loft For Beginners
This basic design requires minimal tools. Four posts support a simple platform. Any beginner can complete this project in one day.
Use pre-cut lumber from the hardware store. This eliminates complex measuring and cutting. Just assemble the pieces with screws.
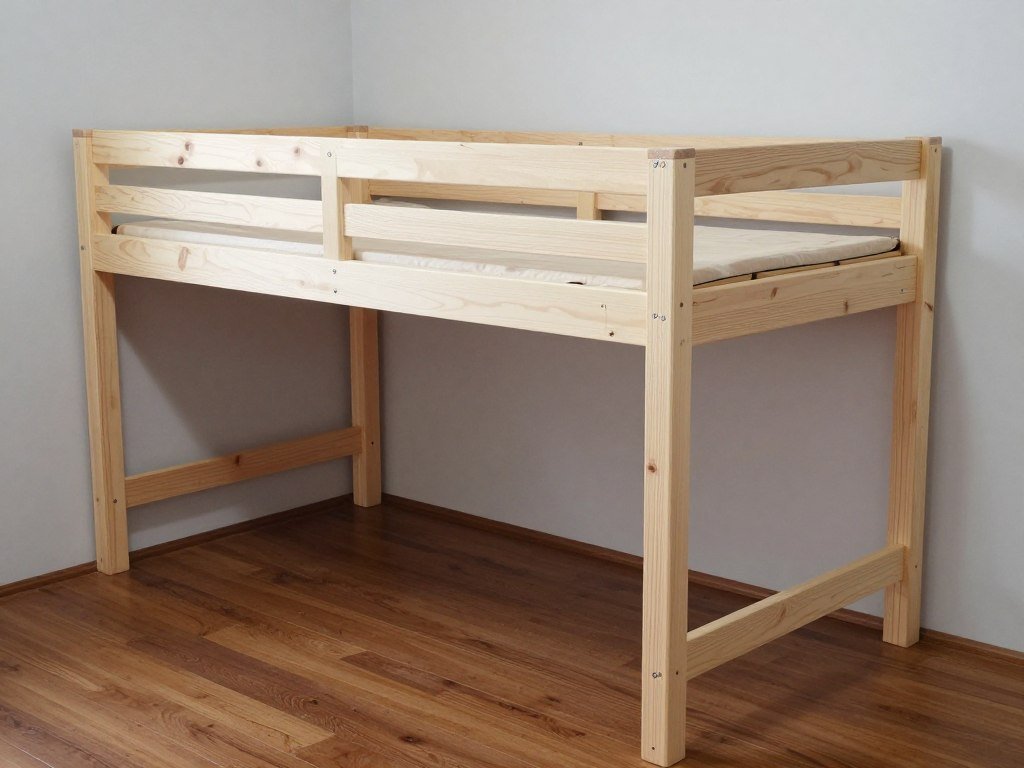
Beginner-Friendly Process
Start with four identical posts. Make them all the exact same length. Stand them upright in the corner positions first.
Attach horizontal rails between posts. Use a drill and screws at each joint. Add diagonal braces for stability once rails are in place.
- Pre-measure and mark all screw hole locations
- Assemble frame on its side before standing upright
- Use a helper to hold pieces during assembly
- Check for square and level at each step
- Add the ladder as the final piece
Loft Bed With Cozy Reading Nook Below
Turn the space underneath into a reading corner. Add cushions, pillows, and soft lighting. The elevated bed creates a private retreat below.
This design works wonderfully for book lovers. The enclosed feeling makes a perfect quiet spot. Install small shelves for storing favorite books.
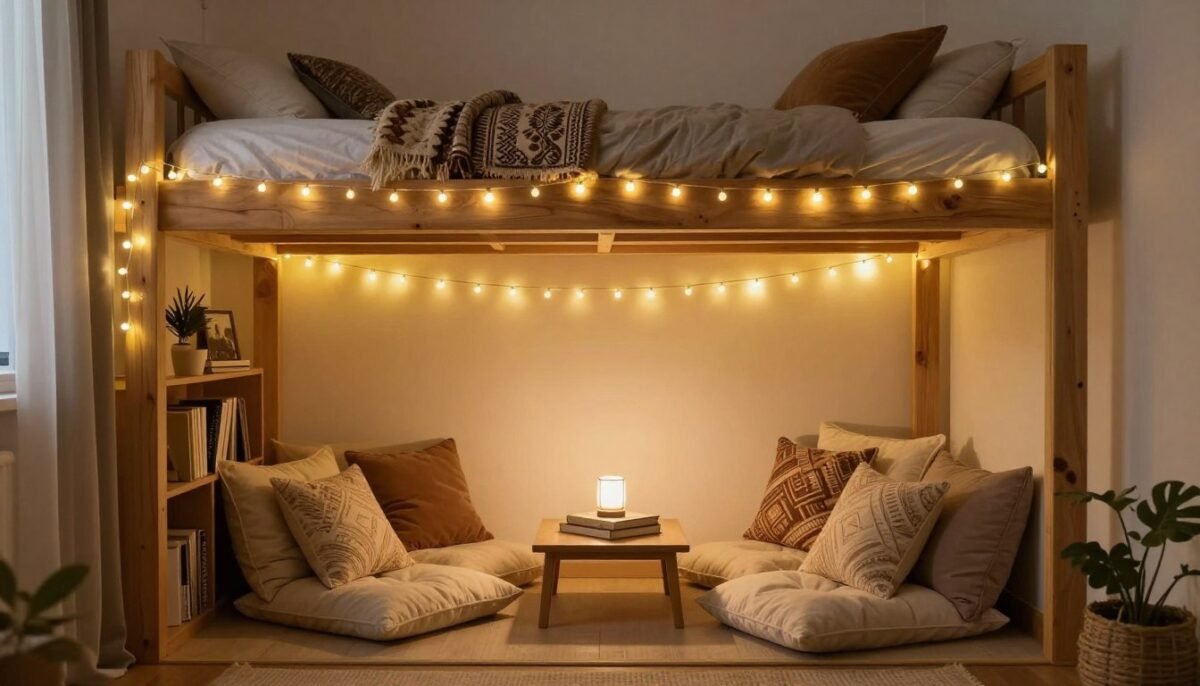
Creating the Perfect Reading Space
Leave one or two sides open for easy access. Enclose the back with curtains for privacy. Add LED strip lights along the bed frame bottom.
Seating Setup
Place floor cushions or a small futon. Add plenty of throw pillows. Make it comfortable for long reading sessions.
Lighting Design
Install reading lights at eye level. Use warm LED bulbs for ambiance. Add dimmer switches for control.
Book Storage
Mount small floating shelves to posts. Keep favorite books within reach. Organize by genre or color.
Gaming Station Loft Bed Setup
Design the underneath area for gaming. Place a desk with room for monitors. Route cables neatly through the frame structure.
This setup appeals to teenagers and young adults. The loft bed keeps the sleeping area separate. The gaming zone stays organized and functional.

Cable Management Solutions
Drill holes through bed posts for cable routing. Use cable clips along frame edges. Keep wires hidden and organized from the start.
- Install power strips mounted under the desk surface
- Use cable sleeves to bundle multiple cords together
- Label each cable at both ends for easy identification
- Leave slack in cables for equipment adjustments
- Add RGB lighting to match gaming aesthetic
Rustic Log Cabin Loft Bed
Use natural logs for posts and supports. This creates an authentic cabin feel. The rough-hewn wood adds character to the room.
Sand and seal the logs before assembly. Remove any loose bark pieces. The natural wood grain becomes a design feature.
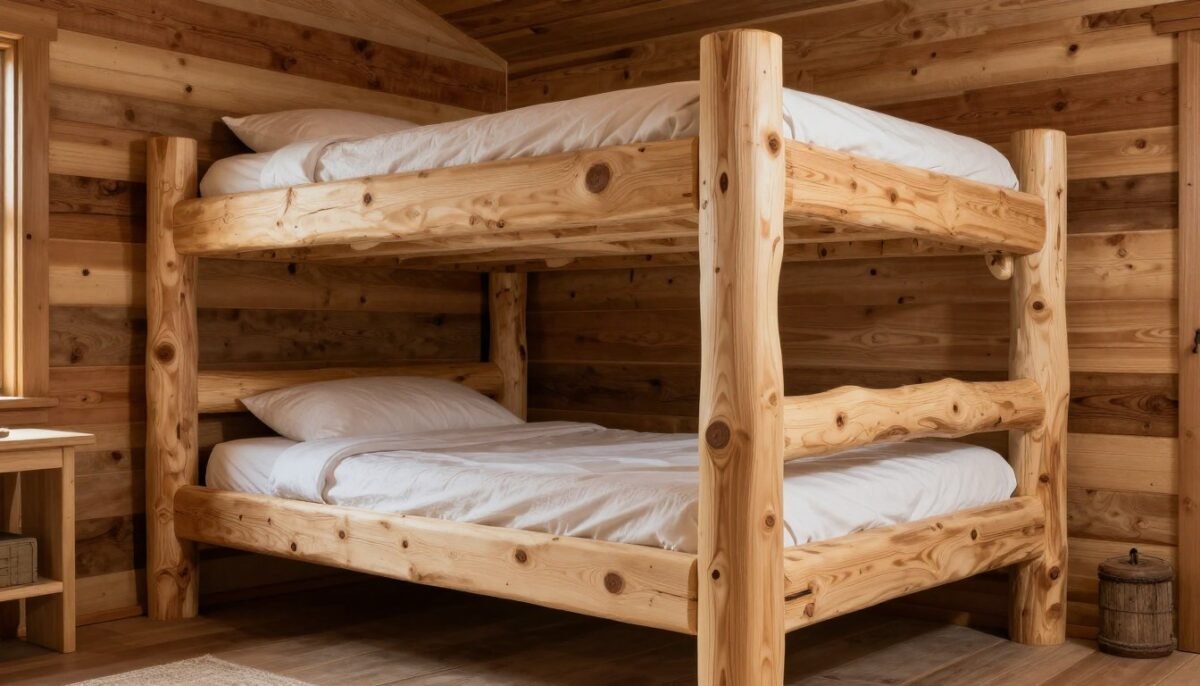
Working With Natural Logs
Select straight logs with minimal taper. Measure the diameter at both ends. Choose pieces with consistent thickness for posts.
Cut notches where logs intersect. This creates stronger joints than screws alone. Use timber screws designed for log construction.
Log Preparation
Remove all bark and sand smooth. Apply wood preservative to prevent insects. Seal with clear finish to highlight grain.
Assembly Techniques
Cut saddle notches for tight log joints. Drill pilot holes to prevent splitting. Use washers under screw heads.
Metal Frame Modern Loft Bed
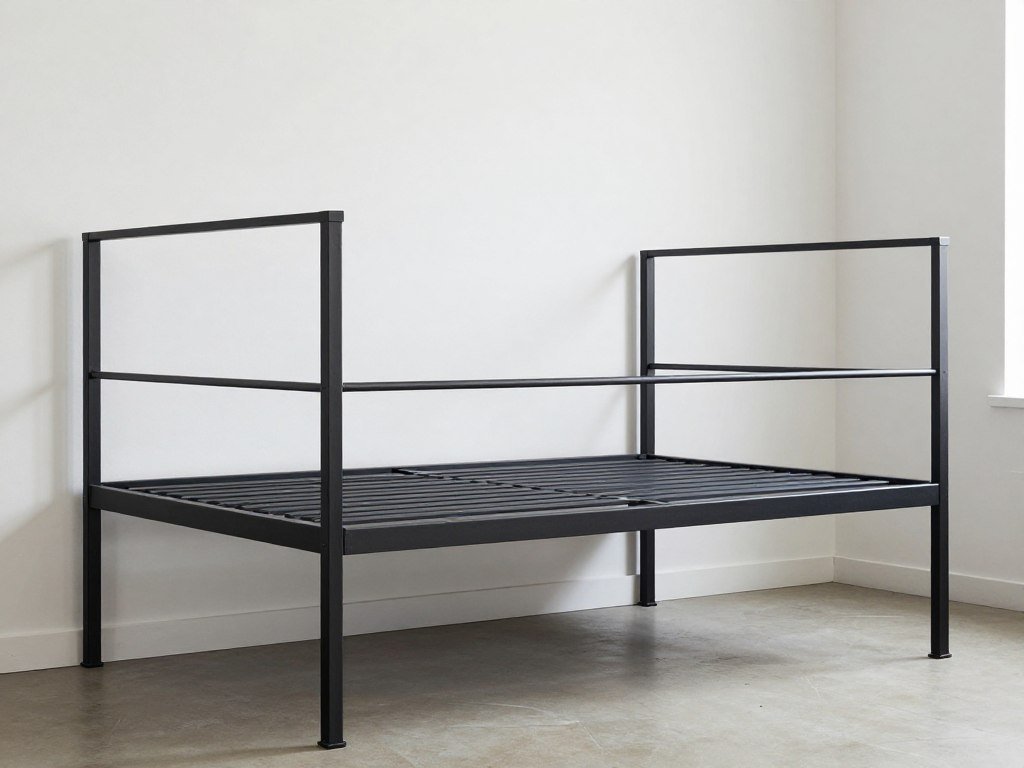
Construct the frame from square steel tubing. Weld or bolt connections for strength. Paint the metal in trendy colors like matte black.
Metal frames look sleek and contemporary. They support more weight than wood. The industrial style fits modern bedroom themes.
Metal Working Basics
Measure and cut steel tubing to exact lengths. Use a metal chop saw or angle grinder. Deburr all cut edges for safety.
- Design the frame layout on paper first with all dimensions
- Cut all pieces before beginning any assembly work
- Tack weld corners to check fit and alignment
- Complete all welds once satisfied with positioning
- Grind welds smooth and apply rust primer coat
- Finish with durable enamel paint in chosen color
Bolt metal brackets to the frame for the wood platform. This allows easier disassembly than welding everything. The mixed materials create visual interest.
Wardrobe Integration Loft Design
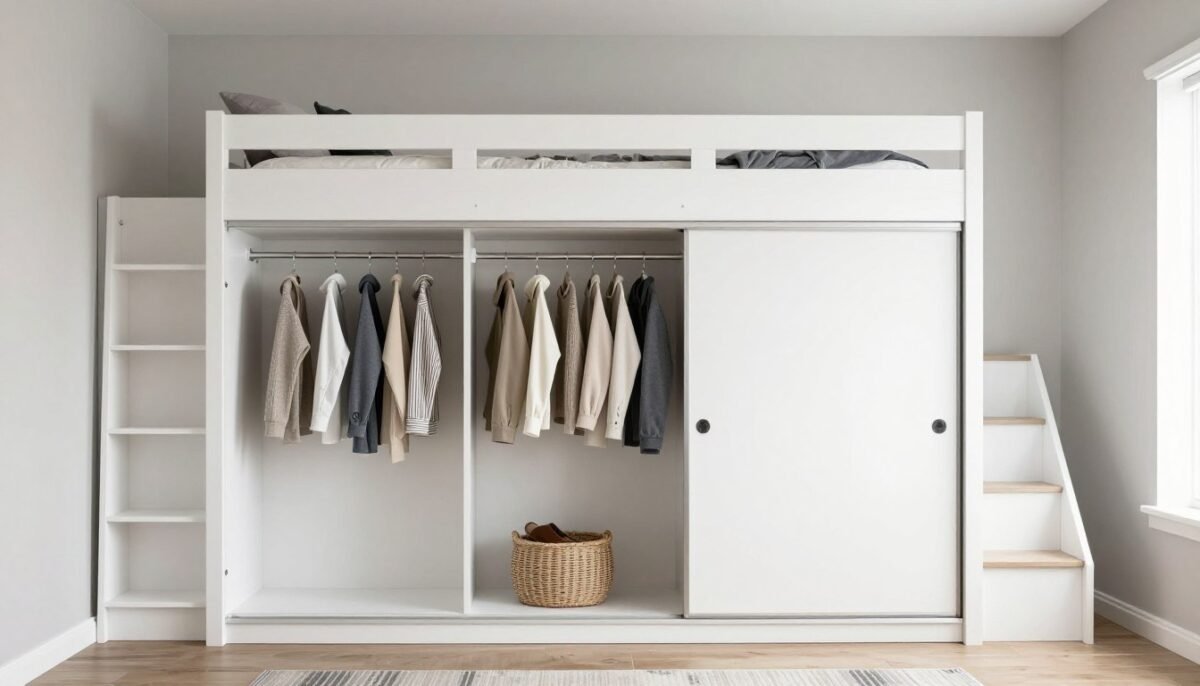
Build a full wardrobe system under the loft. Include hanging rods, shelves, and drawers. The bed frame posts double as wardrobe supports.
This all-in-one solution eliminates the need for a separate dresser. Everything stays organized in one compact footprint. Small bedrooms benefit from this efficiency.
Wardrobe Component Planning
Hanging Section
Install a sturdy rod for hanging clothes. Make it at least 48 inches wide. Add a second lower rod for shorter items.
Shelf Units
Build adjustable shelving on one side. Use shelf pins for flexibility. Store folded sweaters and accessories.
Drawer Bank
Add a set of drawers opposite the hanging area. Include dividers for socks and undergarments. Use quality drawer slides.
Add doors or curtains to hide the wardrobe. Sliding doors save space in tight rooms. This creates a clean, finished appearance.
Adjustable Height Loft Bed System
Build a loft bed that grows with your child. The frame adjusts to multiple height settings. Move it higher as the child gets older.
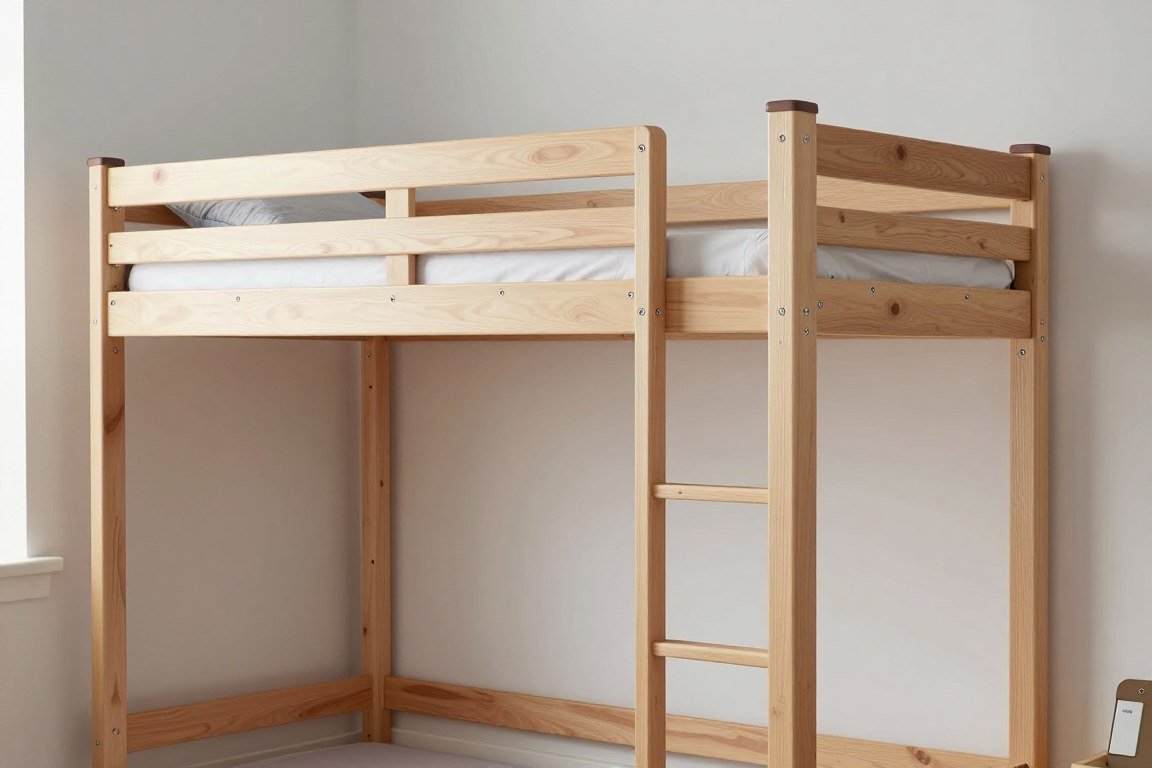
This design uses slotted posts with removable bolts. Reposition the platform to different levels. You avoid building a new bed every few years.
Adjustment Mechanism Design
Cut slots in the posts at regular intervals. Each slot corresponds to a height setting. Use carriage bolts that slide through slots.
- Space slots 6 inches apart vertically for multiple options
- Reinforce slot areas with metal plates to prevent weakening
- Use locking nuts that won’t vibrate loose over time
- Mark height measurements beside each slot position
- Create a leveling guide to ensure even platform placement
Adjust all four corners to the same height. Double-check level before tightening bolts. This flexibility extends the bed’s useful life significantly.
Fun Slide Loft Bed For Kids
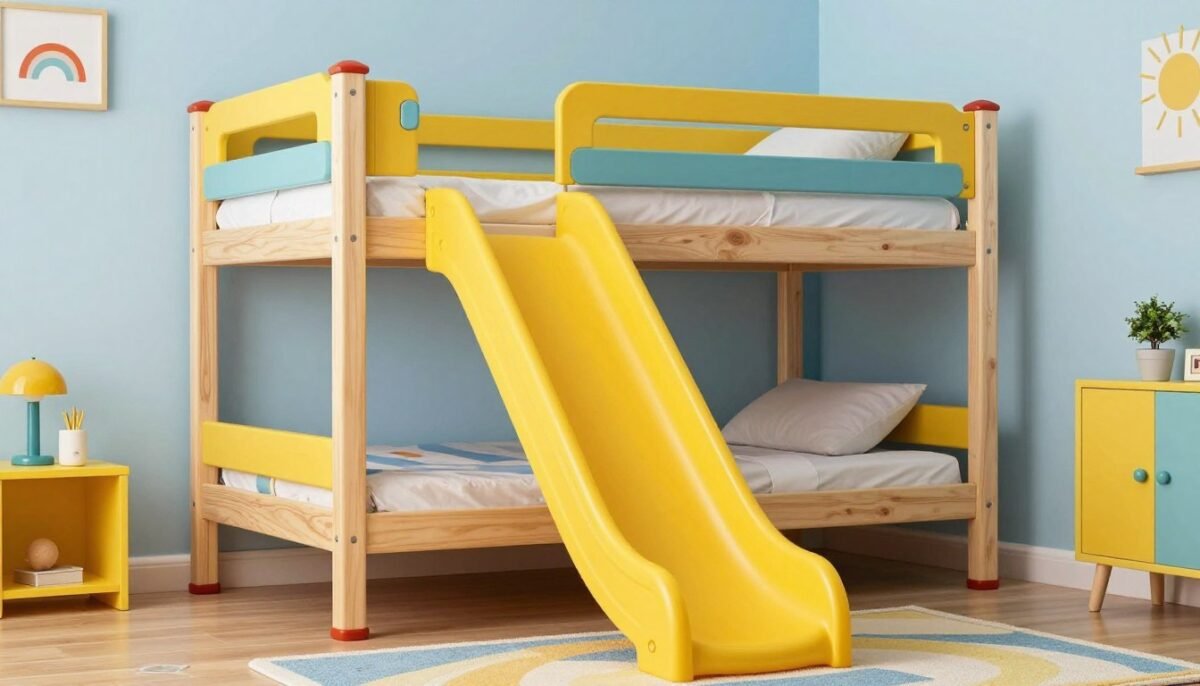
Add a playground slide instead of a ladder. Kids love the exciting exit from bed. This turns bedtime into an adventure.
Attach a plastic slide to one side of the frame. Position soft mats at the bottom. This design works best for younger children who need motivation at bedtime.
Slide Installation Safety
Buy a manufactured slide designed for indoor use. These meet safety standards for residential installation. Avoid makeshift slide constructions.
Secure the slide top firmly to the bed platform. Use heavy-duty bolts through the slide mounting brackets. Test the connection thoroughly before allowing use.
Safety Note: Always place protective padding at the slide exit point. Ensure adequate clearance around the bottom. Supervise young children during initial use to teach proper sliding technique.
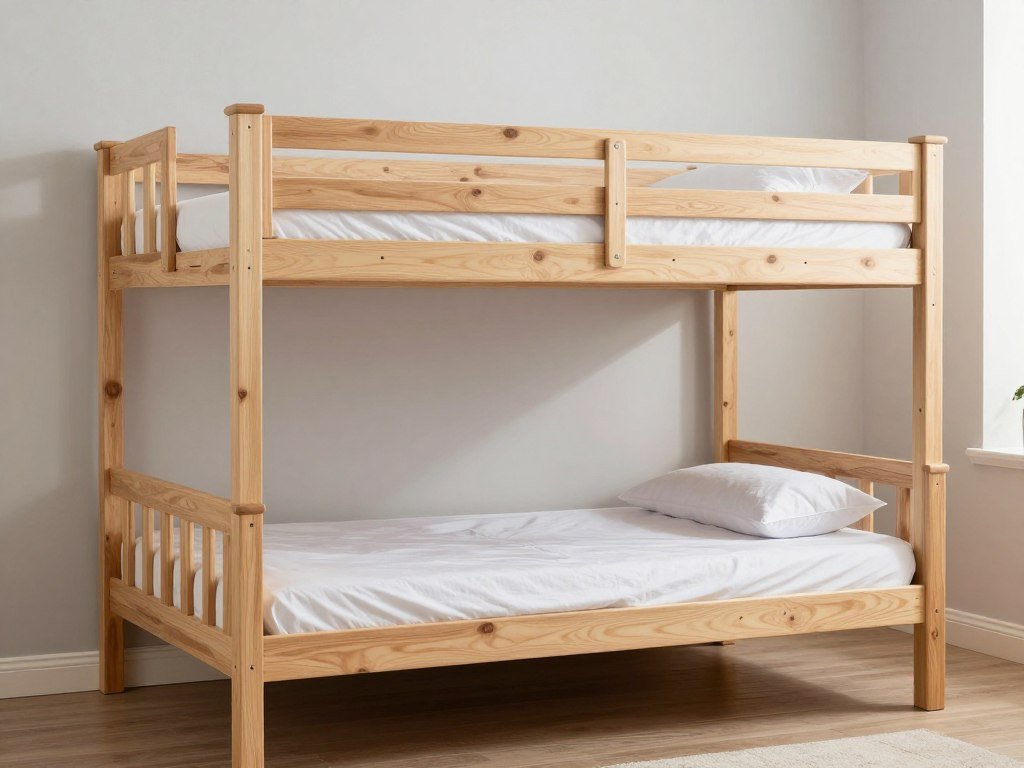
Twin Over Full Loft Configuration
Place a twin mattress on top with a full mattress below. This asymmetrical design offers flexibility. Parents can sleep on the bottom when needed.
The larger bottom mattress provides more space. Guest rooms benefit from this arrangement. It accommodates different sleeping preferences in one frame.
Building for Different Mattress Sizes
Frame the bottom section for a full mattress first. This creates the wider base. Build the top platform to twin dimensions centered above.
The posts must support both levels. Make them from 4×4 lumber minimum. Add extra cross bracing between the two platforms.
- Measure each mattress before cutting platform boards
- Leave one inch clearance around each mattress edge
- Build separate ladder access for the top bunk
- Install guardrails on exposed sides of upper bed
- Test weight capacity at both levels before regular use
Home Office Loft Bed Combination
Create a complete office underneath the loft. Install a large desk surface with file storage. This setup suits small apartments where space is premium.
The separated sleeping and working areas improve work-life balance. The office feels distinct from the bedroom. Remote workers appreciate this division.
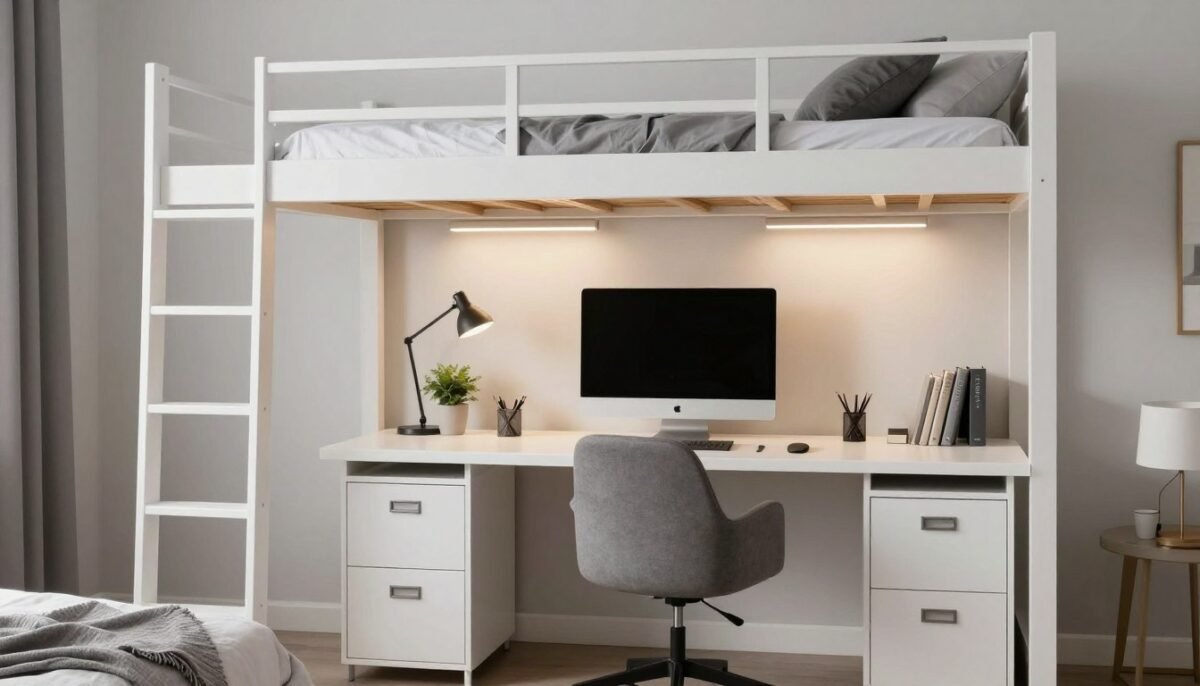
Office Layout Planning
Position the desk to receive natural window light. Add task lighting above the work surface. Create dedicated zones for different office functions.
Desk Configuration
Build an L-shaped desk for maximum surface area. One leg can attach to the bed frame posts. This saves floor space while providing ample room.
- Desktop height at 29 inches for comfortable typing
- Keyboard tray for ergonomic positioning
- Monitor shelf to elevate screen to eye level
Storage Solutions
Add file cabinets under the desk. Install floating shelves on the bed frame posts. Keep office supplies organized and accessible.
- Vertical file organizers mounted to wall
- Drawer units on wheels for flexibility
- Cable management for computer equipment
Loft Bed With Lounge Seating Below
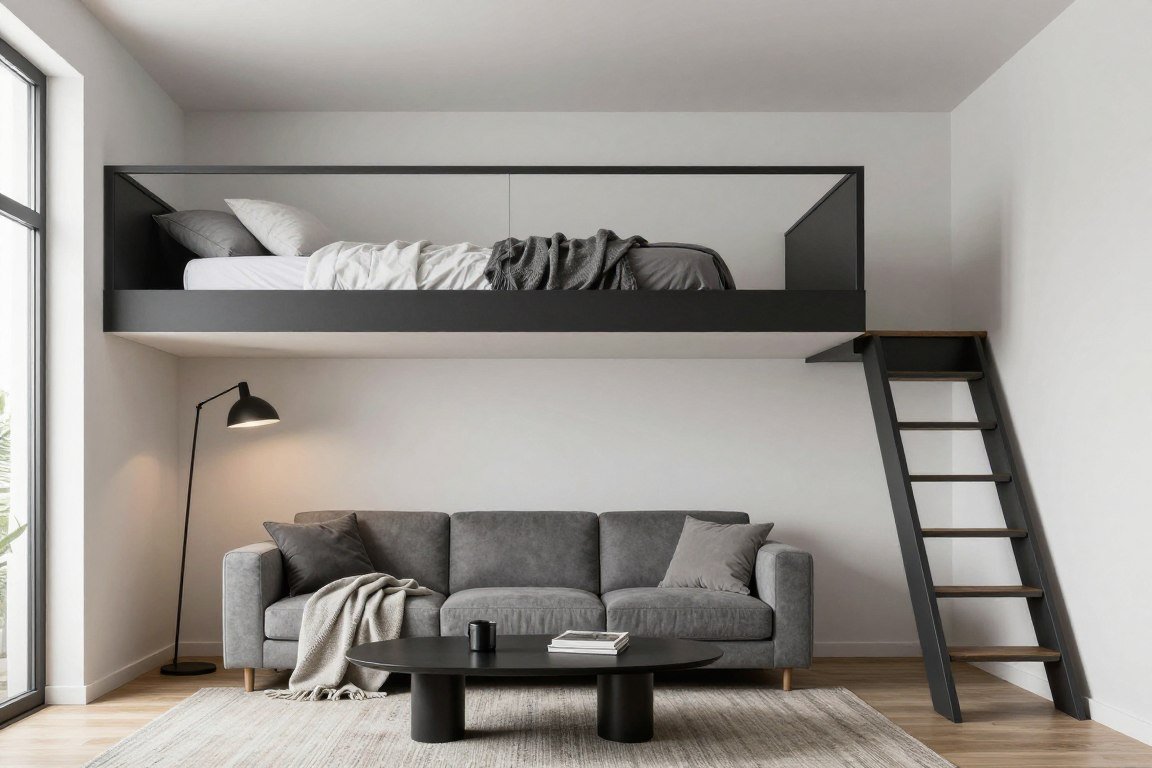
Turn the lower area into a small living room. Add a futon or sofa that folds out. This dual-purpose space works for studio apartments.
During the day, the area serves as a sitting room. At night, the futon provides extra sleeping space. One piece of furniture solves multiple needs.
Lounge Area Essentials
Choose low-profile seating that fits the loft height. Leave at least 48 inches of clearance for sitting. Add a small coffee table or side tables.
- Measure loft clearance before purchasing furniture pieces
- Select a futon or sleeper sofa for guest accommodations
- Add area rug to define the lounge zone visually
- Install wall-mounted TV to save floor space if desired
- Use decorative curtains to separate sleeping and lounge areas
Craft Room Loft Bed Design
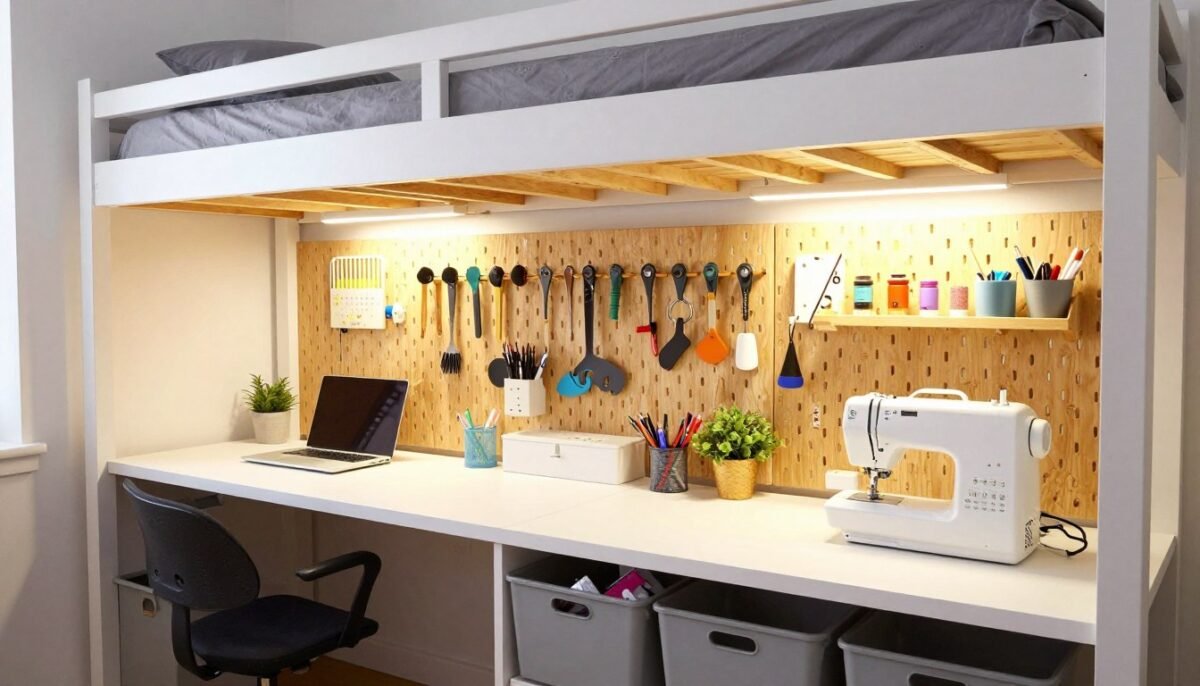
Dedicate the underneath space to crafting and hobbies. Install a long worktable with good lighting. Add storage for supplies and materials.
The elevated bed keeps sleeping separate from creative work. Messy projects stay contained in one area. This design suits artists, sewers, and makers.
Craft Space Organization
Work Surface
Install a countertop-height table. Make it as large as the space allows. Use a durable surface that resists scratches.
Supply Storage
Add rolling carts for portable storage. Install pegboard on walls for tools. Use clear bins to see contents easily.
Lighting Setup
Mount bright LED panels overhead. Add adjustable desk lamps. Ensure the entire work area has even illumination.
Keep frequently used items within arm’s reach. Store seasonal supplies higher up. A well-organized craft space increases productivity and enjoyment.
Essential Finishing Touches For Your DIY Loft Bed
Sand every surface smooth before applying finish. Start with coarse grit sandpaper and progress to fine. Remove all dust with a tack cloth.
Choose a finish that matches your room decor. Paint offers unlimited color options. Stain highlights natural wood grain beautifully.
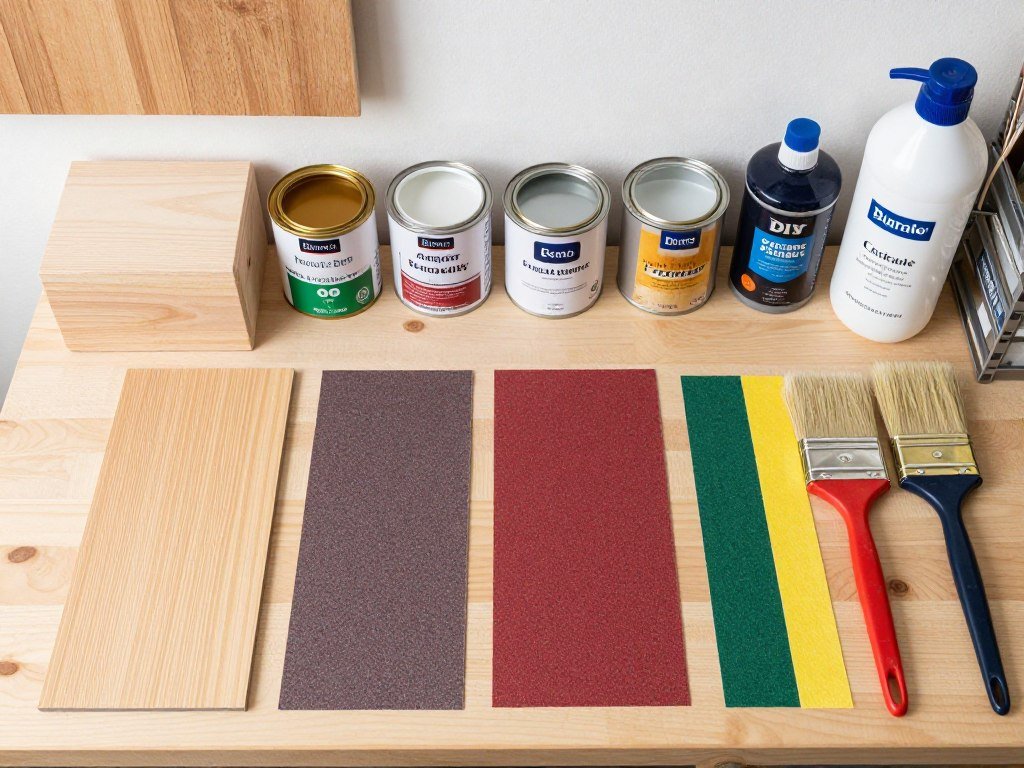
Finish Application Steps
- Apply wood conditioner on soft woods like pine to prevent blotching
- Use a foam brush for even stain application without brush marks
- Wipe excess stain with clean rags following the grain direction
- Allow first coat to dry completely per manufacturer instructions
- Lightly sand between coats with fine 220-grit paper
- Apply at least two coats of protective polyurethane finish
Safety Features to Add
Install guardrails on all open sides of the bed. Rails should extend five inches above the mattress top. Sand rail edges round to prevent injuries.
Secure the ladder firmly to the frame. Add non-slip tape to ladder rungs. Make sure the bed frame cannot tip or wobble.
Pro Tip: Test the entire structure by having an adult climb on it. Push against the frame from different angles. Any movement indicates joints need reinforcement before use.
Complete Tools And Materials Guide
Having the right tools makes any DIY project easier. You don’t need professional-grade equipment. Quality basic tools produce excellent results.
Essential Power Tools
Cordless Drill/Driver
The most important tool for loft bed construction. Choose one with at least 18 volts of power. Get an extra battery for longer work sessions.
- Variable speed trigger control
- Clutch settings for different screw sizes
- Includes drill bit and driver bit set
Circular Saw
Makes straight cuts through dimensional lumber quickly. A 7.25-inch blade handles all common wood thicknesses. Use a guide for perfectly straight cuts.
- Laser guide for accurate cutting lines
- Electric brake for safety
- Includes carbide-tipped blade
Random Orbital Sander
Smooths wood surfaces faster than hand sanding. The random motion prevents swirl marks. Essential for achieving a professional finish.
- Variable speed control
- Dust collection bag attachment
- Assorted sandpaper grits included
Hand Tools Required
Supplement power tools with quality hand tools. These provide precision for fine adjustments. Keep them organized in a tool belt during assembly.
- 24-inch level for checking frame alignment and plumb
- Tape measure with 25-foot length minimum for room measurements
- Combination square for marking perfect right angles on wood
- Hammer for persuading stubborn joints into position
- Adjustable wrench set for tightening bolts and nuts
- Chisel set for cleaning up notches and joints
- Safety glasses and hearing protection for every task
Hardware and Fasteners
Buy more fasteners than your plans specify. Running out mid-project wastes time. Organize screws by length in labeled containers.
Structural Fasteners
- 3-inch exterior wood screws for main frame connections
- 2.5-inch screws for plywood platform attachment
- Lag bolts with washers for wall-mounted components
- Corner brackets in various sizes for reinforcement
Specialty Hardware
- Bed rail fasteners for removable connections
- Heavy-duty L-brackets for guardrail attachment
- Furniture glides to protect floor from posts
- Wood glue for additional joint strength
Budget Planning For Your Loft Bed Project
Loft bed costs vary based on design complexity. A basic frame costs between 150 and 300 dollars in materials. Elaborate designs with storage reach 500 to 800 dollars.
Lumber represents the biggest expense. Shop for sales at home improvement stores. Buy in bulk when possible for better pricing.
Cost Breakdown by Component
| Component | Quantity Needed | Average Cost | Notes |
| 2×6 Dimensional Lumber | 12-16 pieces | $8-12 each | Main frame posts and rails |
| 3/4″ Plywood Sheets | 2 sheets | $45-60 each | Platform and headboard |
| Wood Screws (1 lb box) | 2 boxes | $8-10 each | Various lengths needed |
| Metal Brackets | 8-12 pieces | $3-5 each | Corner and L-brackets |
| Ladder Materials | Varies by design | $25-50 total | 2x4s and rungs |
| Finish (Stain or Paint) | 1 gallon | $25-40 | Includes protective topcoat |
Money-Saving Tips
Look for seconds and reject lumber at discounted prices. Minor cosmetic flaws don’t affect structural integrity. These pieces work fine for hidden frame components.
- Buy lumber in longer lengths and cut to size yourself
- Use free pallet wood for non-structural decorative elements
- Borrow specialty tools from friends instead of purchasing
- Shop end-of-season sales for paint and finishing supplies
- Compare prices between big box stores and local lumberyards
Critical Safety Considerations
Safety must come first in any loft bed project. The structure supports a person’s full weight every night. Poor construction creates serious injury risk.
Follow building codes for your area. Some jurisdictions require permits for built-in furniture. Check local regulations before starting construction.
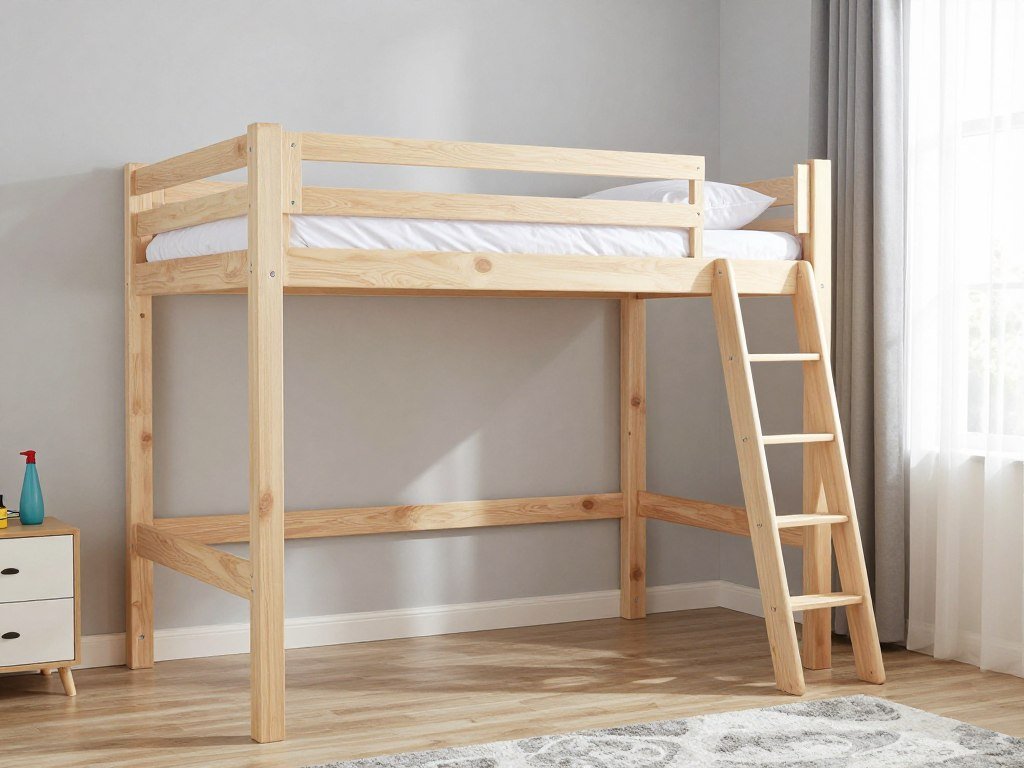
Weight Capacity Planning
Design your bed to support at least 300 pounds. This accounts for the mattress, bedding, and occupant. Add extra capacity for safety margin.
Safe Construction Practices
- Use larger lumber sizes than minimum requirements
- Double up frame members in high-stress areas
- Install diagonal bracing to prevent racking motion
- Attach to wall studs when possible for stability
- Test load capacity before regular use begins
Dangerous Shortcuts to Avoid
- Using damaged or cracked lumber pieces anywhere
- Skipping guardrails to save time or money
- Overtightening screws causing wood to split
- Placing bed where ceiling fan could strike occupant
- Ignoring manufacturer weight limits on hardware
Guardrail Specifications
Install guardrails on any side higher than 30 inches off the floor. Rails must extend at least five inches above the mattress top. Space vertical slats no more than 3.5 inches apart.
- Measure mattress thickness before setting rail height precisely
- Attach rails to bed frame posts with through-bolts not just screws
- Sand all rail surfaces smooth to prevent splinter injuries
- Leave opening only where ladder provides access point
- Test rail strength by applying outward pressure at center
Long-Term Maintenance and Care
Check all fasteners every six months. Wood expands and contracts with humidity changes. Screws can loosen over time from normal use.
Tighten any loose connections immediately. Look for cracks developing in joints. Address small issues before they become major problems.
Regular Inspection Checklist
- Examine each screw and bolt for tightness and condition
- Check wooden joints for gaps or separation developing
- Look for cracks forming in high-stress lumber areas
- Inspect guardrails for stability and secure attachment
- Test ladder rungs for solid connection to sides
- Verify wall-mounted components remain firmly attached to studs
- Watch for any wobbling or movement in frame structure
Finish Maintenance
Refinish the wood every few years. This protects against moisture damage. Lightly sand the surface before applying fresh finish.
Clean the bed frame with mild soap and water. Avoid harsh chemicals that damage the finish. Wipe up spills promptly to prevent staining.
Maintenance Tip: Keep a small container with extra screws and hardware stored with your tools. This makes tightening loose connections quick and easy when needed.
Transform Your Small Bedroom Today
These 20 DIY bed loft ideas solve small bedroom challenges. You gain valuable floor space by building up. Each design offers unique benefits for different needs and styles.
Start with a simple project if you’re new to woodworking. The basic platform loft teaches fundamental skills. More experienced builders can tackle complex designs with integrated storage.
Measure your room carefully before choosing a design. Consider ceiling height and available floor space. Select a project that matches your skill level and budget.
The right loft bed transforms how you use your bedroom. You create distinct zones for sleeping, working, and storage. Small spaces feel larger and more organized.
Gather your materials and tools this weekend. Follow the safety guidelines throughout construction. Soon you’ll enjoy the benefits of your custom DIY loft bed built perfectly for your space.