
The Kentucky Derby and other prestigious racing events call for extraordinary headwear. Creating your own derby hat offers a unique way to express personal style while staying within budget. This comprehensive guide presents 20 distinctive DIY derby hat ideas that transform basic materials into shows topping fascinators and hats.
Whether you’re attending your first derby or you’re a seasoned racegoer, handcrafted hats provide an opportunity to stand out. The designs range from simple fascinators requiring minimal time to elaborate creations that showcase advanced crafting skills.
Table of Contents
Essential Materials for Derby Hat Creation
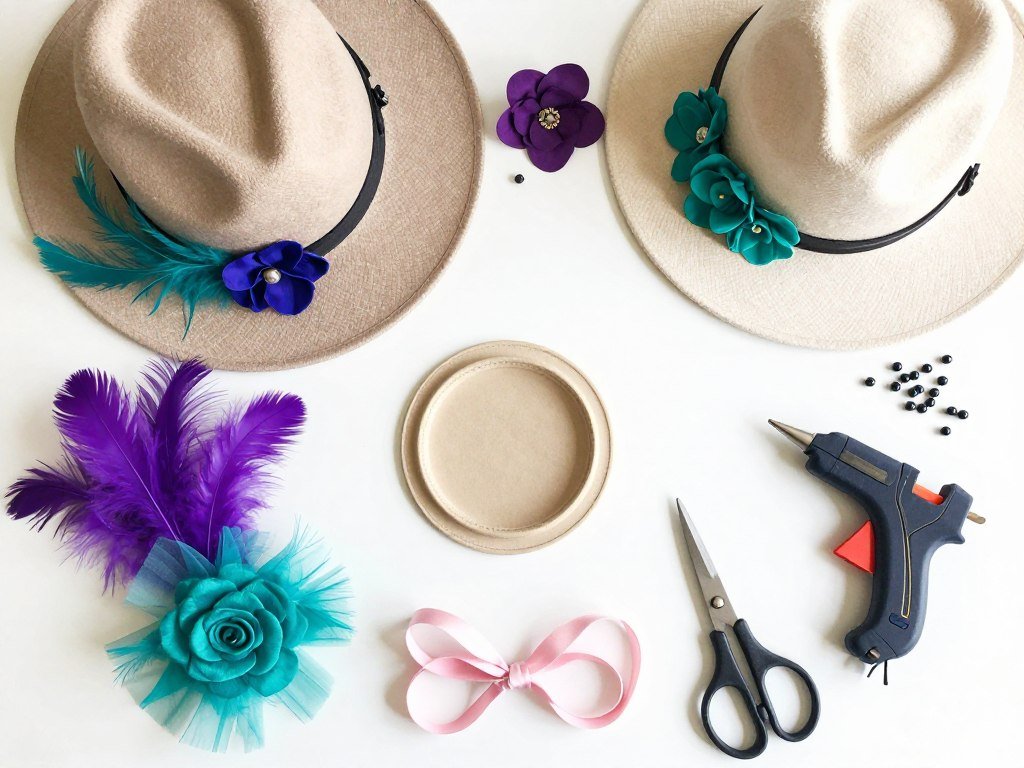
Before diving into specific hat designs, gathering the right materials sets the foundation for success. Most DIY derby hats share common supplies that serve as building blocks for various styles.
Base Materials
The base of your hat provides structure and determines the overall silhouette. Common options include pre-made fascinator bases, felt hat forms, wide-brim straw hats, and simple headbands. Each base offers different styling possibilities and comfort levels.
Fascinator bases work exceptionally well for women seeking lightweight options. These small hat bases attach securely to the head without the bulk of traditional hats. Felt and straw provide more coverage and suit those who prefer classic derby hat styles.
Decorative Elements
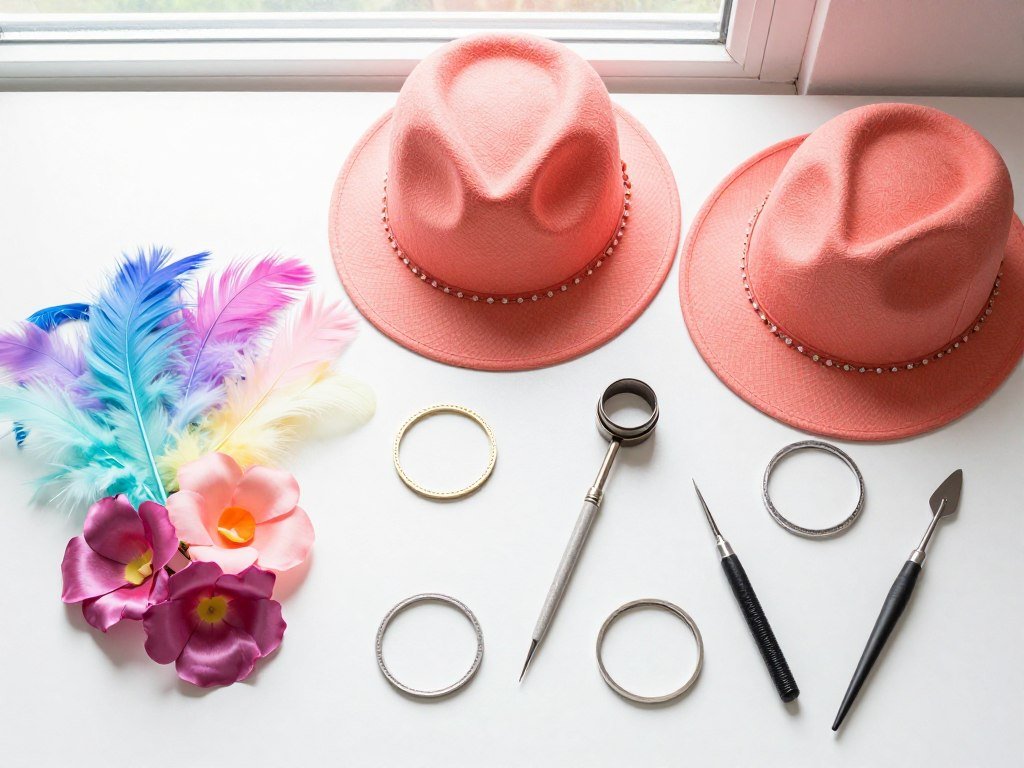
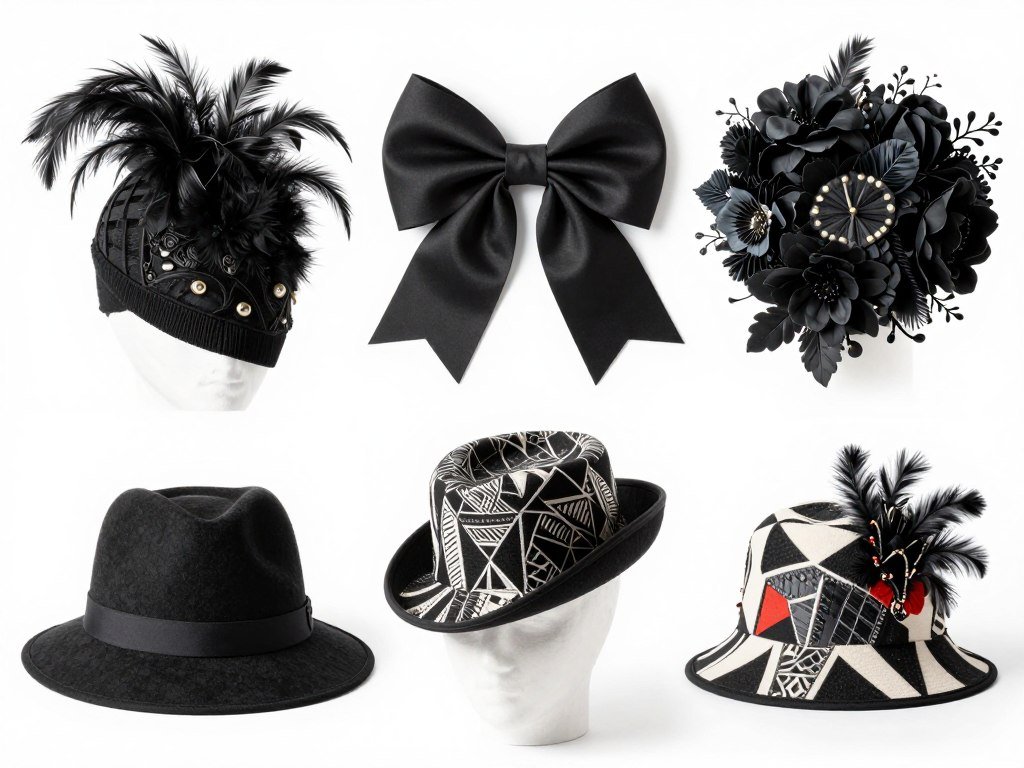
Decorative elements bring personality and color to derby hats. Feathers remain the most popular choice, adding movement and drama. Artificial flowers provide a fresh, garden-party aesthetic that complements spring racing events perfectly.
Netting and tulle create volume and texture without adding significant weight. Ribbons, beads, and brooches serve as focal point embellishments that catch the eye. These elements combine in countless ways to achieve unique looks.
Tools and Adhesives
The right tools make the hat-making process smooth and enjoyable. A hot glue gun serves as the primary attachment method for most elements. This tool provides strong bonds that withstand wear throughout a full day at the races.
Sharp scissors designed for fabric ensure clean cuts through delicate materials like tulle and ribbons. Needle-nose pliers help manipulate wire stems on artificial flowers. Wire cutters become necessary when working with feather spines or creating custom wire shapes for structure.
- Hot glue gun with extra glue sticks
- Fabric scissors for precise cutting
- Wire cutters for trimming stems
- Needle and thread for fabric bases
- Measuring tape for sizing accuracy
- Pins for temporary placement testing
Beginner-Friendly Derby Hat Ideas
Starting with simpler designs builds confidence and develops fundamental skills. These five hat ideas require minimal experience and can be completed in under two hours each.
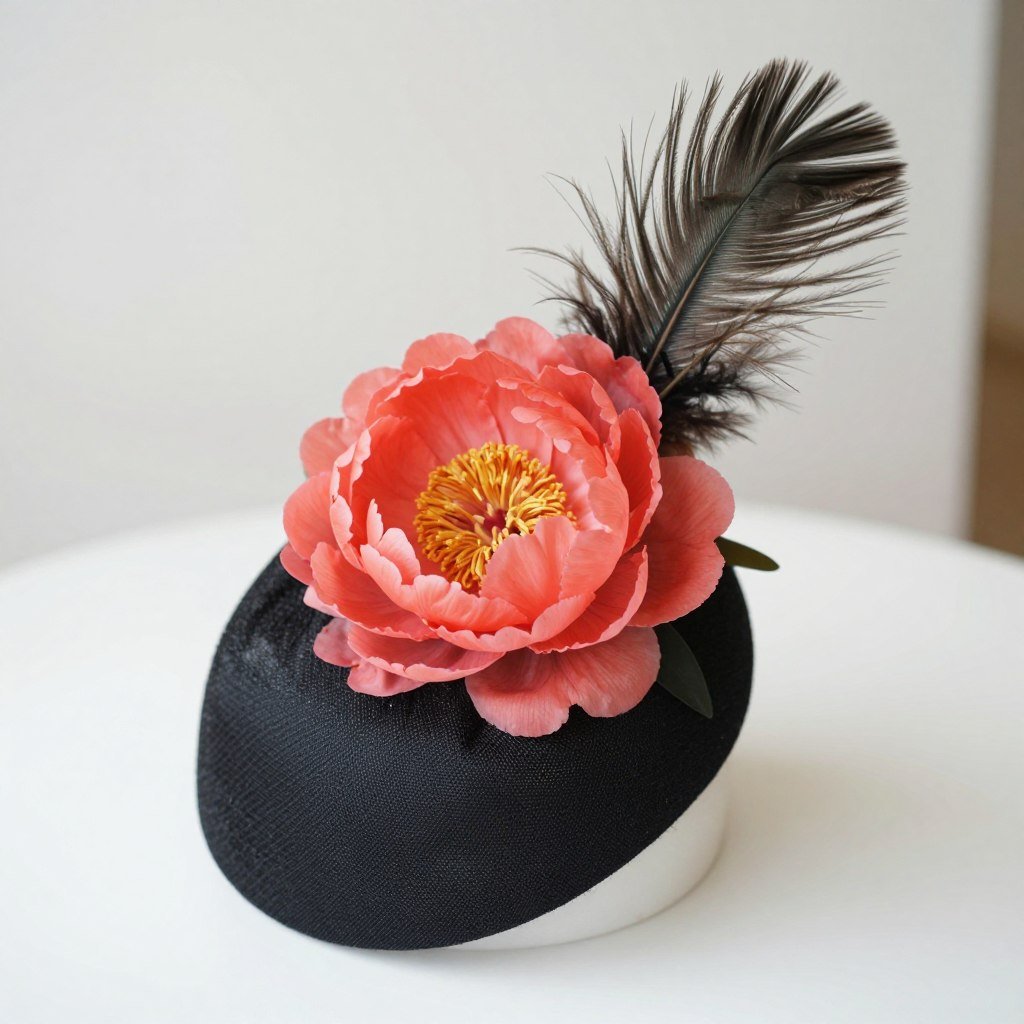
1. Classic Flower Fascinator
The classic flower fascinator represents the perfect entry point into derby hat making. This design centers around one statement flower as the focal point with minimal additional decoration.
Select a large artificial flower in your preferred color. Roses, peonies, and dahlias work beautifully for this style. Remove the flower from its stem using wire cutters, leaving about one inch of stem attached for easier gluing.
Position the flower slightly off-center on your fascinator base. This asymmetrical placement creates more visual interest than centering. Apply hot glue to the stem and press firmly onto the base, holding for 30 seconds until secure.
Add one or two feathers behind the flower to create height and movement. Pheasant or peacock feathers complement most flower colors. Secure with hot glue at the base of the feather spine.
Difficulty Level: Beginner
Time Required: 45 minutes
Estimated Cost: $15-25

2. Ribbon and Bow Elegance
Ribbon-based designs offer endless color combinations and require only basic bow-tying skills. This style works particularly well on wide-brim base hats or as a band around fedora-style hat forms.
Choose a high-quality ribbon at least three inches wide. Grosgrain and satin ribbons both provide structure for bows that hold their shape throughout the day. Purchase three yards to ensure enough material for a generous bow.
Wrap the ribbon around the hat base where the crown meets the brim. Secure the starting point with a small dab of hot glue on the inside. Continue wrapping, slightly overlapping each pass, until you complete the circle.
Create a classic bow or more elaborate multi-loop bow with the remaining ribbon. Position the bow on one side of the hat at a slight angle. This placement creates visual interest and follows traditional derby hat styling conventions.
Consider adding a small piece of netting or tulle beneath the bow for added dimension. Cut the netting into a circle about six inches in diameter. Gather the center and secure with glue before attaching the bow on top.
Difficulty Level: Beginner
Time Required: 1 hour
Estimated Cost: $20-30
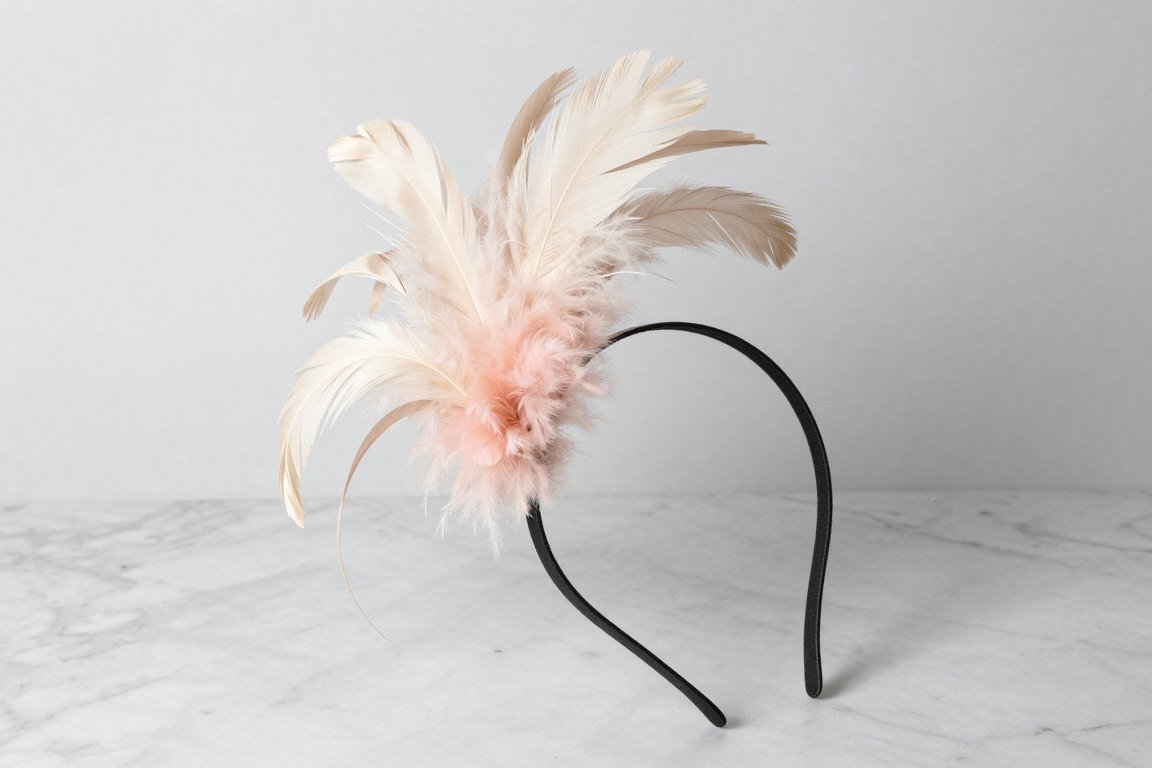
3. Feather Spray Headband
This lightweight option provides maximum impact with minimal construction. A feather spray headband suits those who prefer subtler headwear while still embracing derby tradition.
Start with a simple padded headband in a neutral color that matches your hair. Black, brown, or blonde options blend seamlessly. The padding provides a comfortable base for attaching embellishments.
Select five to seven feathers in coordinating colors. Mix different feather types for texture variation. Combine fluffy marabou feathers with sleek stripped coque feathers and a few curled goose feathers.
Arrange feathers in your hand to visualize the final spray design. Longer feathers should fan outward from a central point, creating a peacock-tail effect. Shorter feathers fill in gaps near the base.
Bundle the feather bases together and wrap tightly with floral wire. Apply hot glue generously to the wrapped section and press onto the side of the headband. Hold until completely set, about one minute.
Difficulty Level: Beginner
Time Required: 30 minutes
Estimated Cost: $12-18
4. Vintage Veil Accent
Vintage-inspired veiling adds mysterious elegance to any hat base. This technique works on both fascinator bases and full hats, creating instant sophistication.
Purchase a piece of birdcage netting or Russian veiling in black or ivory. This specialized netting features larger holes than standard tulle, creating the distinctive vintage look. A piece measuring 9 by 12 inches provides ample material.
Fold the netting in half to create a double layer. Position the fold along one edge of your hat base. The netting should drape forward, potentially covering part of the forehead and eyes for dramatic effect.
Secure the folded edge with hot glue along the hat base. Space glue dots every inch for a secure hold. Allow the netting to fall naturally rather than forcing a specific shape.
Add a small cluster of flowers or a decorative brooch where the netting attaches to the base. This element disguises the glue line and serves as a beautiful focal point for the design.
Difficulty Level: Beginner
Time Required: 40 minutes
Estimated Cost: $18-25
5. Simple Tulle Puff
A tulle puff creates impressive volume with very little effort. This fun and playful design suits those who want a modern take on derby style.
Cut tulle into strips measuring six inches wide and three feet long. You will need approximately six strips for a full, dramatic puff. Choose tulle in a color that complements your derby outfit.
Layer all strips on top of each other. Find the center point and gather the tulle together, creating a bunched effect. The gathered center should be tight while the ends remain loose and fluffy.
Wrap the gathered center section with thin wire or strong thread, cinching tightly. This creates the base of your puff that will attach to the fascinator base.
Apply hot glue to the wrapped section and press firmly onto your fascinator base. Fluff and arrange the tulle ends to create an even, cloud-like shape. Add a decorative button or brooch to the center to hide the gathering point.
Difficulty Level: Beginner
Time Required: 35 minutes
Estimated Cost: $10-15
Intermediate Derby Hat Designs
These five intermediate designs introduce more complex techniques while remaining achievable for crafters with basic skills. Each project builds upon fundamental methods learned in beginner projects.

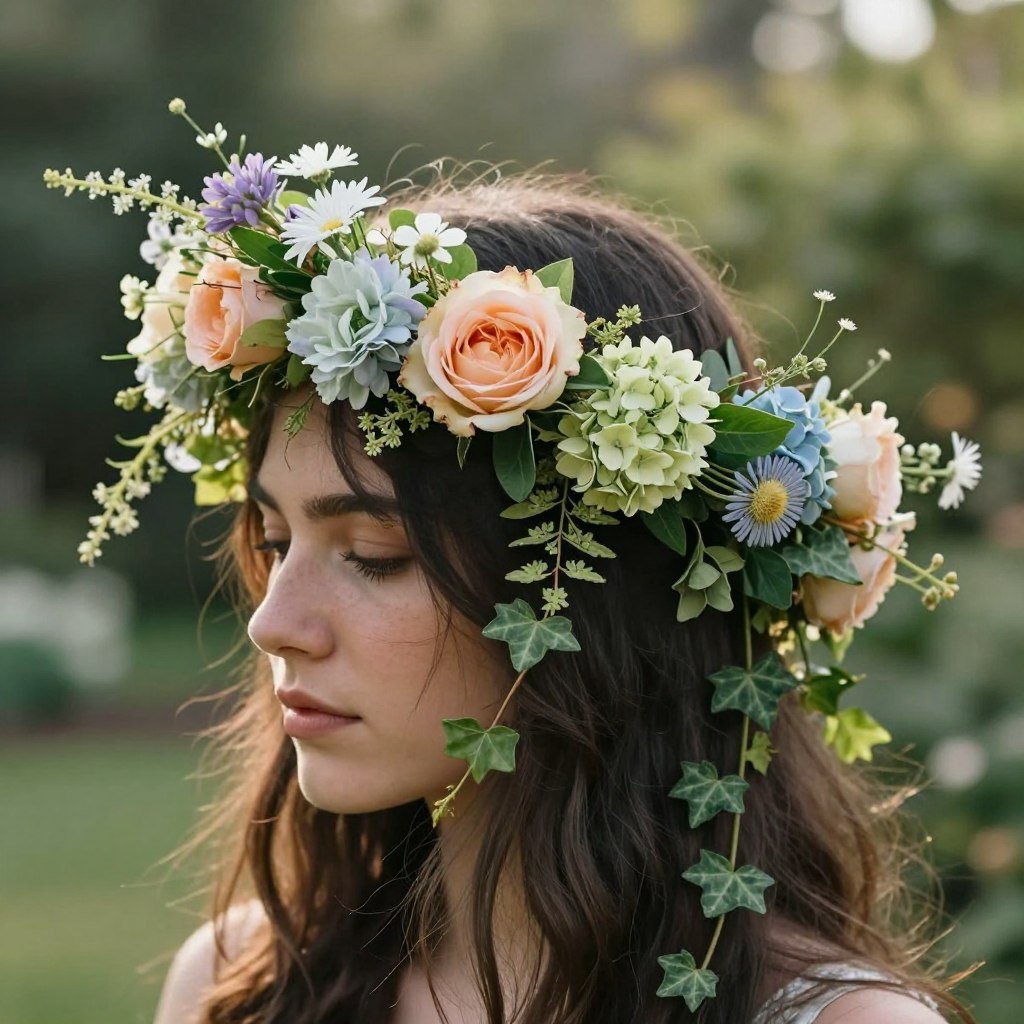
6. Garden Party Fascinator
This lush design combines multiple flower varieties and greenery for a fresh, romantic appearance. The layered approach creates depth and visual interest that photographs beautifully.
Select three to five artificial flowers in varying sizes. Choose a color palette that feels cohesive. Pastels work wonderfully for spring racing events. Include at least one large focal flower, several medium blooms, and a few small accent flowers.
Add greenery elements such as eucalyptus leaves, ferns, or vine tendrils. These natural touches soften the design and provide transitional elements between flowers. Real preserved greenery can be substituted for an authentic touch.
Begin with the largest flower, positioning it as your focal point on the fascinator base. Work outward, adding medium flowers around the perimeter. Fill gaps with small blooms and greenery, creating a natural, garden-gathered appearance.
Layer elements at different heights and angles rather than placing everything flat against the base. This dimensional approach makes the design more dynamic and interesting from multiple viewing angles.
Difficulty Level: Intermediate
Time Required: 1.5 hours
Estimated Cost: $28-40

7. Sculptural Sinamay Swirl
Sinamay fabric offers structure and movement, making it ideal for creating architectural hat designs. This material holds its shape while remaining lightweight on the head.
Purchase pre-made sinamay loops or create your own from flat sinamay fabric. If making your own, cut the fabric into strips three inches wide and 18 inches long. The fabric edges naturally curl when cut, adding to the organic feel.
Shape each strip into loops, swirls, or figure-eight patterns. Use steam from an iron held several inches away to help set the shapes. Pin the shapes temporarily to test different arrangements before gluing.
Build your design by layering loops at various angles. Start with larger loops as a base layer and add smaller swirls on top for dimension. Overlap elements to create visual complexity and interest.
Accent the sinamay with a few strategically placed feathers or a small flower cluster. These additions provide color contrast against the sculptural fabric forms. Keep embellishments minimal to let the sinamay remain the star.
Difficulty Level: Intermediate
Time Required: 2 hours
Estimated Cost: $35-50
8. Ombre Feather Crown
An ombre effect transitions smoothly between colors, creating a sophisticated gradient appearance. This technique works beautifully with feathers arranged in a crown formation around a hat base.
Select feathers in three to four shades of the same color family. For example, transition from pale pink to deep magenta, or from ivory through champagne to chocolate brown. Purchase at least 20 feathers total for full coverage.
Arrange feathers in color order from lightest to darkest. Trim all feathers to approximately the same length using sharp scissors. This uniformity creates a cleaner, more polished look.
Working around the hat base, glue feathers in a radiating pattern. Start with the lightest shade and gradually introduce darker tones as you progress around the circle. Overlap each feather slightly to hide the base completely.
The color transition should appear seamless rather than showing distinct bands. Mix feathers from adjacent shades at transition points to create a natural gradient effect that flows smoothly.
Difficulty Level: Intermediate
Time Required: 2.5 hours
Estimated Cost: $40-55
9. Asymmetrical Statement Piece
Asymmetry creates drama and movement in derby hat design. This bold approach positions all decorative elements on one side, creating an unmistakable focal point.
Choose a larger fascinator base or small hat form that sits securely on one side of the head. The base should attach at an angle rather than sitting flat on top, following the natural line from ear to crown.
Build your design entirely on the front and side section of the base. Leave the back portion clean and undecorated. This approach keeps the hat balanced in weight while maximizing visual impact from the front view.
Combine flowers, feathers, and netting in your chosen color scheme. Arrange elements to create a sweeping line that draws the eye upward and outward. Longer feathers or trailing ribbons emphasize the asymmetrical drama.
Test the angle and placement by trying the hat on before finalizing glue placement. The design should complement your face shape and not obstruct your vision. Adjust positioning as needed for both style and function.
Difficulty Level: Intermediate
Time Required: 2 hours
Estimated Cost: $32-45
10. Layered Petal Fascinator
Individual petals arranged in overlapping layers create a rose-like formation that appears more complex than it actually is. This technique produces stunning results with patience and careful placement.
Disassemble silk flowers to obtain individual petals. You will need approximately 30 to 40 petals depending on their size. Choose flowers with interesting petal shapes such as roses, magnolias, or peonies.
Sort petals by size from largest to smallest. Trim any plastic connecting pieces from the back of each petal so they lay flat when glued.
Begin gluing petals in a circular pattern around the outer edge of your fascinator base. Start with the largest petals, slightly overlapping each one. Work inward in concentric circles, using progressively smaller petals as you approach the center.
Finish the center with a decorative element such as a cluster of beads, a vintage button, or a small feather puff. This focal point disguises the final petal edges and adds polish to the completed design.
Difficulty Level: Intermediate
Time Required: 2.5 hours
Estimated Cost: $25-38
Advanced Derby Hat Creations
Advanced designs require more time, precision, and sometimes specialized materials. These five projects reward skilled crafters with truly unique pieces that rival professional millinery.

11. Hand-Wired Flower Hat
Hand-wiring flowers allows complete control over positioning and creates a more natural, realistic appearance. This traditional millinery technique produces heirloom-quality results.
Purchase silk flowers designed for wedding arrangements. These higher-quality blooms feature more realistic details and better color saturation than standard craft flowers. Select a variety of sizes and shapes.
Remove flowers from their plastic stems. Use floral wire to create new wire stems by wrapping the wire around the flower base multiple times. Wrap the wire stem with floral tape to create a neat, finished appearance.
Position each wired flower individually on the hat, bending the wire stem to achieve the desired angle. Pierce the wire through the hat base and secure on the underside by twisting with another piece of wire or bending flat.
This technique allows you to adjust flower positions even after attachment. The flexibility creates more organic, flowing arrangements that appear to grow naturally from the hat base rather than being simply glued in place.
Difficulty Level: Advanced
Time Required: 4 hours
Estimated Cost: $55-75
12. Structured Sinamay Disc
A large sinamay disc creates maximum visual impact while remaining lightweight. This architectural style requires precise shaping and blocking techniques used in professional millinery.
Purchase a pre-shaped sinamay disc or create your own by blocking flat sinamay over a plate or disc form. To block your own, dampen the sinamay and stretch it over the form, pinning the edges to hold the shape while it dries completely.
The disc should measure between 12 and 18 inches in diameter for authentic derby presence. Larger sizes create more drama but require careful balancing to prevent the hat from tipping.
Attach the disc to a small base that sits securely on the head. The disc should sit at a sharp angle, appearing to float above the head rather than sitting flat. This angle is crucial for the design’s impact and balance.
Decorate the disc minimally with a single statement element such as a large silk flower, feather burst, or fabric rosette positioned where the disc meets the base. Too much decoration overwhelms the structural beauty of the disc itself.
Difficulty Level: Advanced
Time Required: 3.5 hours
Estimated Cost: $60-85
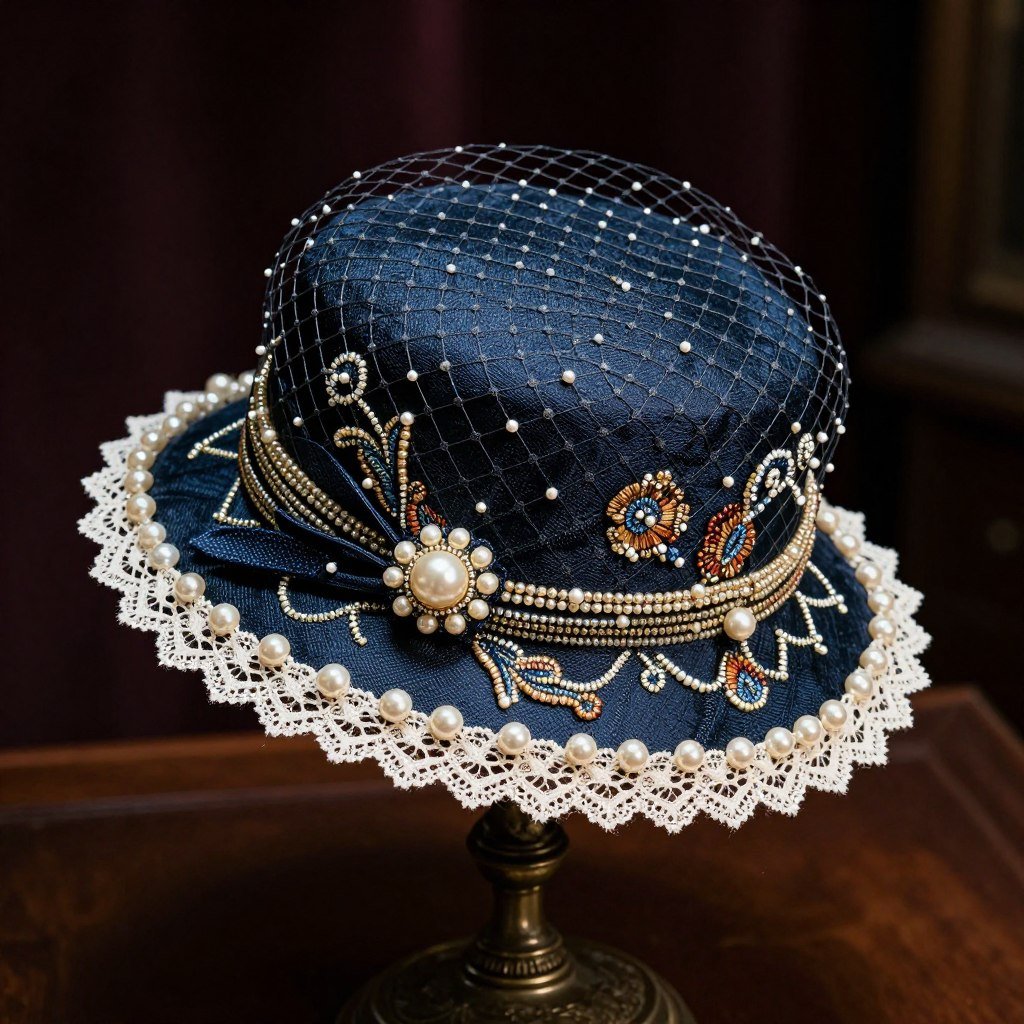
13. Vintage Beaded Veil
Hand-beading elevates a simple veil into an artisan creation. This time-intensive project creates an heirloom piece worthy of special occasions beyond a single derby.
Start with high-quality netting in silk or nylon. Russian veil netting provides the best base for beading due to its regular grid structure. Cut a piece measuring 10 by 12 inches.
Design a beading pattern on paper first. Consider geometric patterns, floral motifs, or scattered pearl placement. Simple patterns often prove most elegant and wearable.
Use a fine beading needle and strong thread to attach individual beads, pearls, or small crystals to the netting. Knot the thread securely after each bead to prevent loss if the thread breaks. This process requires significant time but produces stunning results.
Attach the finished beaded veil to a small fascinator base or comb. The veil can drape forward over part of the face or sweep backward, depending on your style preference. The beading catches light beautifully and adds sophisticated sparkle.
Difficulty Level: Advanced
Time Required: 6+ hours
Estimated Cost: $45-70
14. Sculptural Felt Form
Molding felt into custom shapes creates one-of-a-kind hat silhouettes. This technique requires a hat block or form and basic understanding of felt manipulation through steam and shaping.
Purchase wool felt in your desired color. Wool felt responds better to shaping than synthetic varieties. You will need a piece large enough to cover your hat block with several inches of excess.
Steam the felt thoroughly using a garment steamer or kettle. The felt should feel warm and slightly damp. Working quickly while the felt remains pliable, stretch it over your hat block or form.
Pin the felt edges to hold the shape as it dries. Allow at least 24 hours for complete drying and setting. Once dry, the felt retains the molded shape permanently.
Trim excess felt and finish the edges. Add decorative elements sparingly to highlight the sculptural quality of the shaped felt. A single statement flower, feather arrangement, or ribbon band complements without overwhelming the structural design.
Difficulty Level: Advanced
Time Required: 5 hours (plus drying time)
Estimated Cost: $50-70
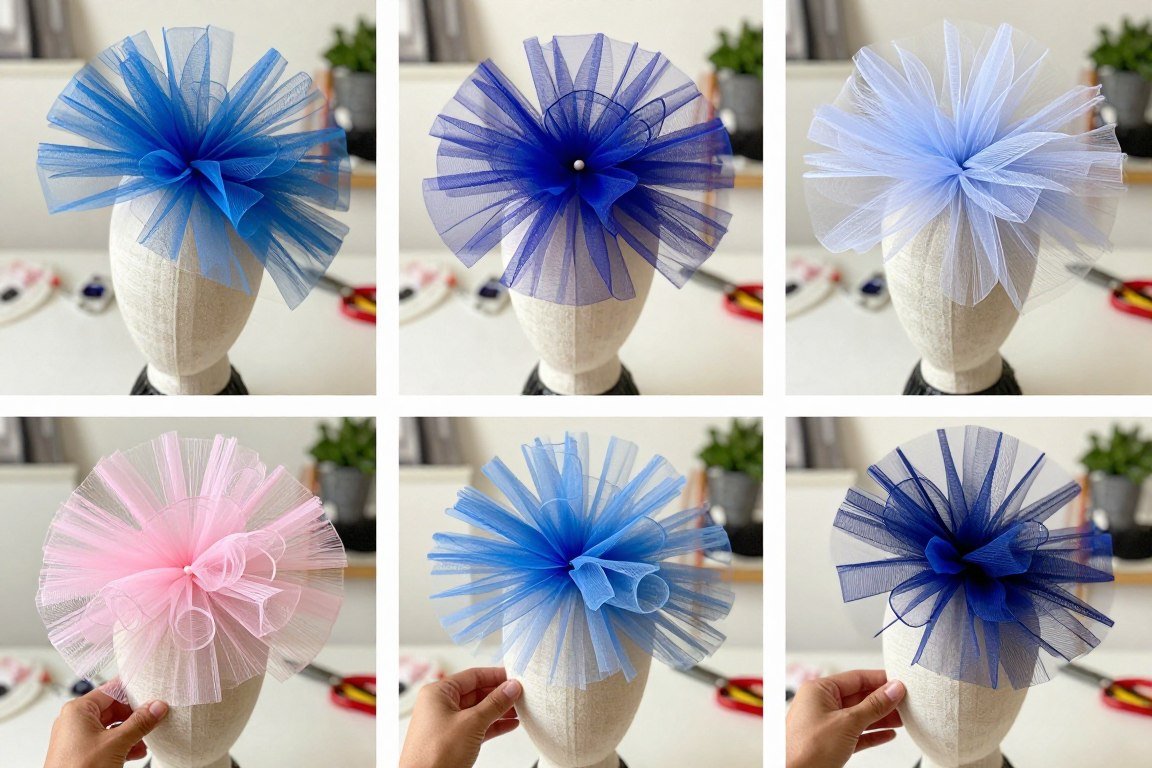
15. Layered Tulle Sculpture
Multiple layers of tulle in varying colors create depth and dimension impossible to achieve with single-layer designs. This technique produces cloud-like formations that appear to float above the head.
Select three to five coordinating tulle colors that create an intentional gradient or complementary palette. Cut each color into strips measuring eight inches wide and four feet long. You will need at least four strips of each color.
Layer all strips of one color together and gather at the center point, creating a puff. Secure with wire. Repeat this process with each color, creating separate puffs.
Stack the puffs on top of each other on your fascinator base, arranging colors to create your desired effect. Secure each layer individually with hot glue before adding the next. Offset the layers slightly so each color remains visible.
Fluff and arrange the tulle to create an even, sculptural form. The different colors should blend naturally while remaining distinct. Add a decorative center element to disguise the gathering points and provide a focal point.
Difficulty Level: Advanced
Time Required: 3 hours
Estimated Cost: $35-50
Statement Derby Hat Designs
These final five designs push creative boundaries and create unforgettable impressions. Perfect for those who embrace bold fashion choices and want to make a lasting impact.

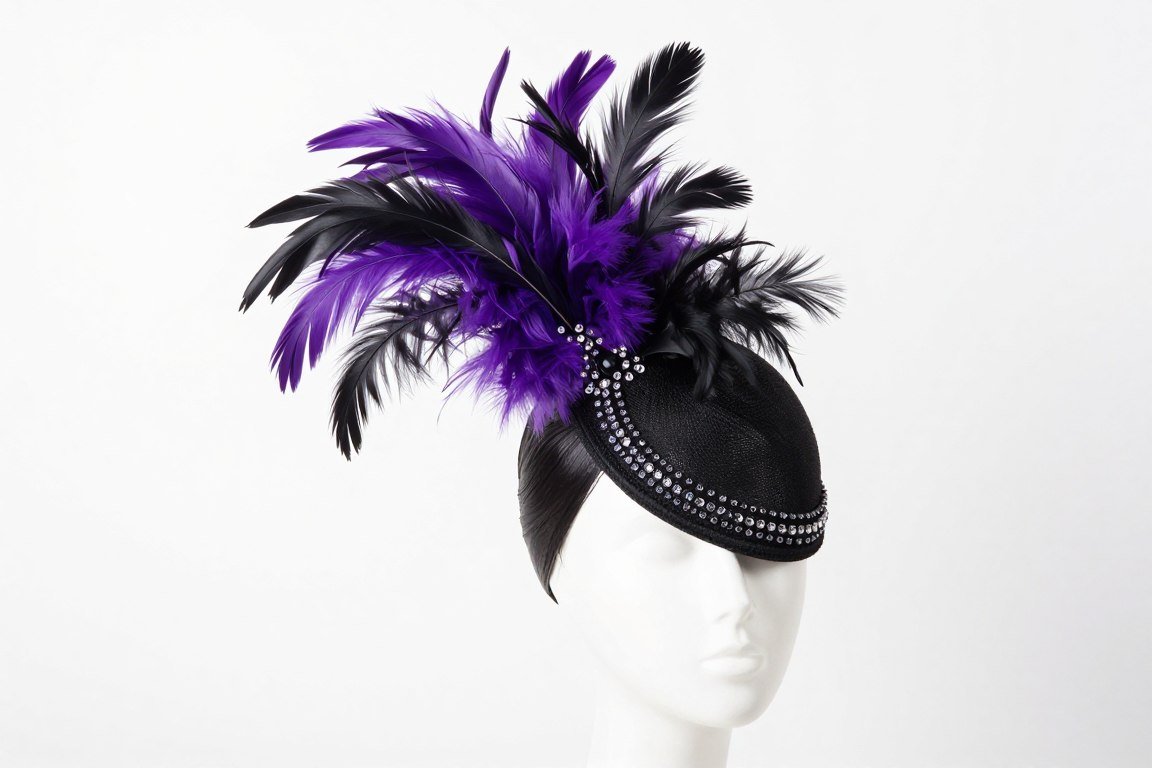
16. Cascading Feather Waterfall
Long feathers arranged to cascade down create movement and drama that captures attention from across the room. This show-stopping design works beautifully in photographs and suits confident personalities.
Select premium feathers that measure at least 12 to 18 inches in length. Ostrich plumes, peacock feathers, and pheasant tail feathers all work excellently for this design. Choose a color palette of two to three complementary shades.
Arrange feathers in a fan shape that sweeps upward and then cascades down, mimicking a waterfall flow. Position the attachment point on one side of the hat, allowing feathers to arc over the top and flow down the opposite side.
Layer different feather types to create texture variation. Place fluffier ostrich plumes as a base layer with sleeker feathers on top for definition. The layering prevents the design from appearing flat.
Secure the feather bundle at its base with wire and hot glue. Consider adding a decorative cuff or jeweled band around the attachment point to enhance the luxurious appearance and disguise mechanics.
Difficulty Level: Advanced
Time Required: 3 hours
Estimated Cost: $65-90
17. Oversized Bow Extravaganza
An enormous bow makes an undeniable statement. This playful yet elegant design suits those who appreciate classic Kentucky Derby style amplified to impressive proportions.
Purchase high-quality ribbon at least six inches wide. Grosgrain ribbon provides the structure needed to support a large bow without drooping. You will need approximately five yards of ribbon.
Create a multi-loop bow with at least six loops on each side. Each loop should measure approximately 10 inches from the center to the tip. The large scale requires more loops to maintain proper proportions.
Wire the bow center securely to maintain shape throughout the day. Create long trailing tails that extend down from the bow, adding additional movement and visual interest.
Mount the bow on a wide-brim hat base rather than a fascinator. The hat brim provides necessary support for the bow’s weight and creates better visual balance. Position the bow at a side angle rather than centered front or back.
Difficulty Level: Intermediate
Time Required: 2 hours
Estimated Cost: $40-60
18. Full Floral Crown
A complete circle of flowers creates a romantic, garden-inspired look. This design works particularly well for outdoor spring racing events and coordinates beautifully with floral dresses.
Select a wide variety of artificial flowers in different sizes, shapes, and colors within your chosen palette. Include at least 15 to 20 flowers to ensure full coverage around the entire hat band area.
Start with a wide-brim hat base. Mark the hat band area where flowers will attach, ensuring even spacing around the entire circumference. This planning prevents gaps or overcrowded sections.
Begin attaching flowers at the front center point. Work outward in both directions around the hat, alternating flower sizes and varieties to create natural variation. Overlap flowers generously to hide any gaps or exposed base.
Fill spaces between flowers with greenery, small accent blooms, or berries. These transitional elements create a cohesive, garden-gathered appearance. The final result should appear lush and abundant without looking cluttered.
Difficulty Level: Intermediate
Time Required: 3.5 hours
Estimated Cost: $50-75
19. Geometric Modern Fascinator
Clean lines and geometric shapes create a contemporary interpretation of traditional derby style. This modern approach suits minimalist aesthetics and architectural fashion sensibilities.
Work with materials that hold crisp edges such as felt, stiffened sinamay, or buckram. Cut shapes such as circles, triangles, or hexagons in varying sizes. Precision cutting ensures professional results.
Arrange geometric shapes in an abstract composition that balances positive and negative space. Overlap some elements while leaving others isolated. This intentional arrangement creates visual interest through shape relationships.
Limit your color palette to two or three shades maximum. Monochromatic schemes work particularly well for geometric designs, allowing the shapes themselves to provide visual impact.
Mount shapes at different angles and heights rather than laying everything flat. This dimensional approach adds depth and allows light to play across the surfaces, creating shadows that enhance the geometric quality.
Difficulty Level: Advanced
Time Required: 2.5 hours
Estimated Cost: $35-55
20. Mixed Media Masterpiece
Combining multiple techniques and materials creates a unique, personalized design that showcases your creative vision. This approach allows complete freedom to express individual style.
Select elements from different design categories: flowers, feathers, ribbons, netting, and embellishments. Choose items that share a common color story even if they represent different styles.
Begin with your largest or most dramatic element as the focal point. Build outward, adding layers and textures that complement without competing. Balance is key to preventing the design from appearing chaotic.
Incorporate unexpected elements such as brooches, vintage jewelry, fabric rosettes, or even small decorative objects that reflect personal interests. These unique touches make your hat truly one-of-a-kind.
Step back frequently during construction to assess the overall composition. Ensure that despite the variety of elements, the design maintains cohesion through color, balance, and intentional placement. The goal is “curated eclectic” rather than “random assortment.”
Difficulty Level: Advanced
Time Required: 4+ hours
Estimated Cost: $60-100+
Styling and Wearing Your DIY Derby Hat
Creating a beautiful hat represents just the first part of derby success. Proper styling and wearing techniques ensure your creation looks intentional and polished.
Positioning and Angle
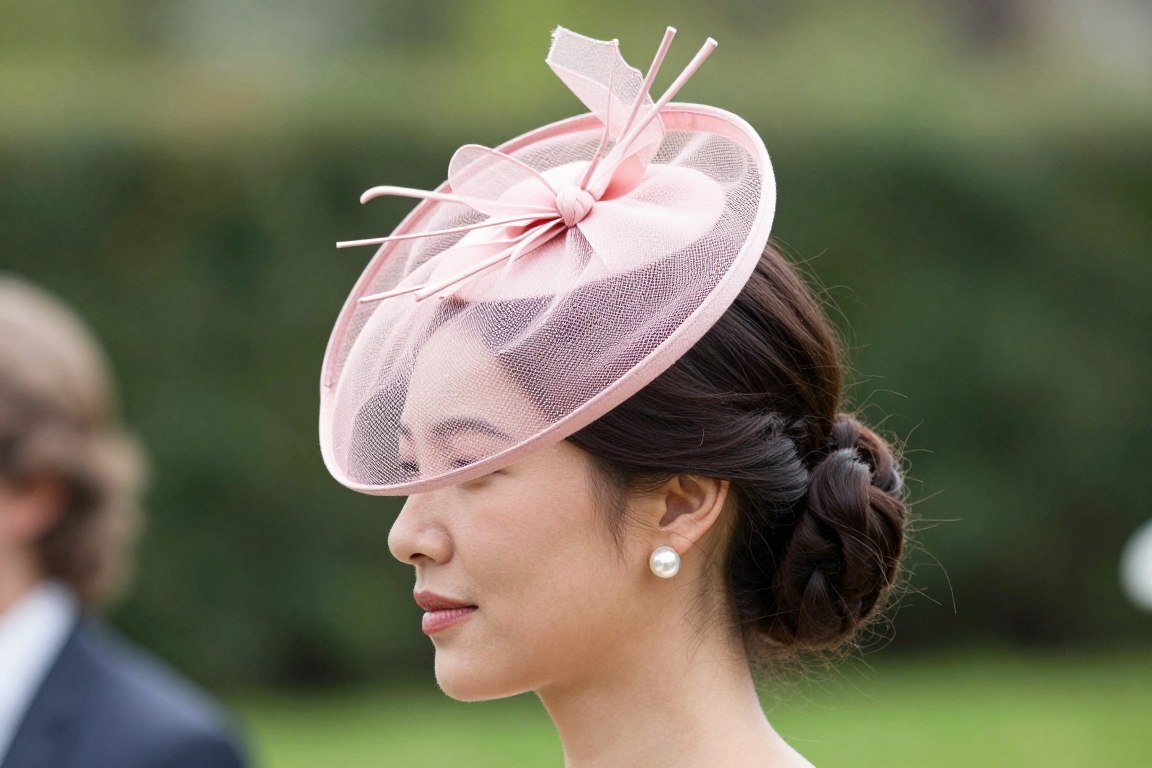
Hat angle significantly impacts the overall look and determines how well your design photographs. Fascinators typically sit at a 45-degree angle from the front of the head toward the side. This placement creates visual interest while maintaining balance.
Wide-brim hats can be worn straight or tilted slightly to one side. Consider your face shape when determining angle. Tilting toward the side with less hair volume creates better balance.
Test different positions before your event. Take photos from multiple angles to see how the hat appears in pictures. Derby photos are a major part of the experience, so photogenic positioning matters.
Securing Your Hat
Proper attachment prevents embarrassing moments and allows you to enjoy your day without constant hat adjustments. Fascinators attach using combs, clips, or headbands built into the base.
For extra security, use bobby pins that match your hair color. Pin through the base into your hair at multiple points around the perimeter. This technique works especially well for heavier hats or windy outdoor venues.
Hairspray on the comb teeth increases grip. This simple trick prevents slipping without leaving residue on the fascinator base. Test the hold by moving your head side to side and bending forward.
Coordinating with Your Derby Outfit
Your hat should complement rather than match your dress exactly. Pulling one accent color from your outfit for the hat creates cohesion without appearing overly coordinated.
Consider the dress neckline when planning hat style. High necklines pair well with dramatic, tall hat designs. Lower necklines balance better with wider, side-swept styles.
Keep other accessories minimal when wearing a statement hat. Simple earrings and a bracelet allow the hat to remain the focal point of your ensemble. Your hat already provides the “wow” factor.
- Pull one color from your dress for hat coordination
- Balance dress detail with hat complexity
- Consider venue lighting when selecting colors
- Match formality level of hat to dress style
- Test complete outfit before event day
Hair Styling Considerations
Your hairstyle provides the foundation for hat placement. Updos work best with fascinators, creating a clean base and preventing hair from competing with the hat design.
If wearing hair down, consider the side where your hat sits. Style hair away from that side or behind your ear to prevent obscuring the hat. Soft waves provide texture without adding bulk.
Create slight height at the crown by teasing or using a volumizing product. This elevation provides a better base for hat placement and prevents the hat from sitting too flat against your head.
Care and Storage of Derby Hats
Proper care extends the life of your handcrafted derby hat, allowing it to be worn for multiple events or even passed down as a treasured keepsake.
Immediate Post-Event Care
Handle your hat gently immediately after wearing. Feathers and fabric elements can become crushed or bent if not addressed promptly. Reshape any compressed areas by gently fluffing or steaming.
Check for any loose glue points or embellishments that may have shifted during wear. Address these issues immediately with additional glue to prevent elements from falling off completely.
Allow the hat to air out if worn for an extended period. This prevents any moisture buildup that could damage materials over time. Place the hat in a well-ventilated area away from direct sunlight.
Long-Term Storage Solutions
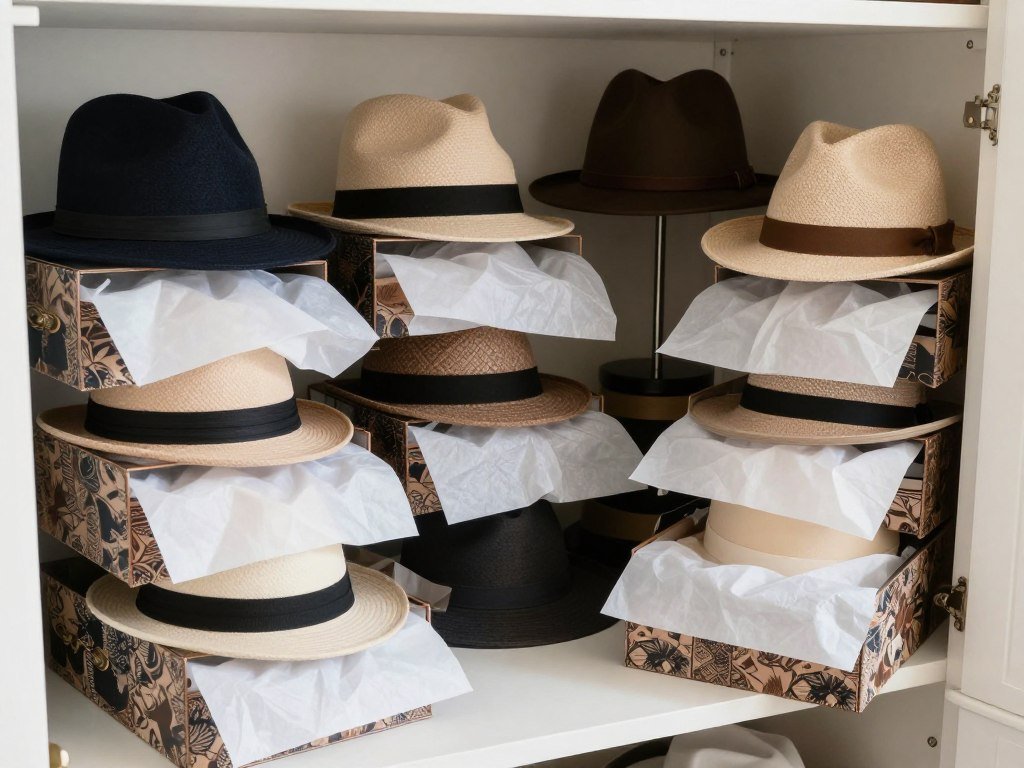
Store hats in hat boxes or containers that provide protection from dust and crushing. Original hat boxes work perfectly, but any sturdy box sized appropriately for your hat serves well.
Stuff the interior of structured hats with acid-free tissue paper to maintain shape during storage. This prevents the hat from collapsing and developing creases that become difficult to remove.
Keep hats in a cool, dry location away from direct sunlight. Heat and UV exposure fade colors and can cause glue to deteriorate. Basements and attics with temperature fluctuations should be avoided.
Storage Tips: Place a small sachet of lavender or cedar in storage boxes to deter moths and add a pleasant scent. Replace these sachets every six months for continued effectiveness.
Cleaning and Maintenance
Dust hats regularly using a soft brush or can of compressed air. This prevents dust from settling into fabric and becoming more difficult to remove later. Hold the hat securely while cleaning to avoid shifting embellishments.
Spot clean stains immediately using a slightly damp cloth. Blot rather than rub to avoid spreading the stain. Different materials require different cleaning approaches, so test any cleaning method on an inconspicuous area first.
Reshape crushed feathers by holding them over steam from a kettle. The heat relaxes the feather barbs, allowing them to return to their original shape. Use your fingers to gently separate and fluff the feathers while steaming.
Conclusion
Creating your own derby hat opens endless possibilities for personal expression while honoring racing event traditions. Each design presented offers a starting point for your creative journey. The beauty of DIY lies in adapting these ideas to reflect your unique style and personality.
Start with simpler designs to build confidence and develop basic skills. As comfort grows with materials and techniques, progress to more complex creations that challenge your abilities. Every hat you make improves your crafting skills and adds to your repertoire of techniques.
Remember that imperfections add character to handmade items. The slight irregularities in your creation make it uniquely yours. Embrace the creative process and enjoy bringing your vision to life one flower, feather, and bow at a time.