
Shoes scattered across your entryway? Closet overflowing with boots and heels? You’re not alone. The average household owns over 20 pairs of shoes per person. Finding affordable storage solutions can feel overwhelming.
This guide shares 20 budget-friendly DIY shoe storage ideas. These projects work in any home space. From small apartments to spacious houses, you’ll find practical solutions. Each idea includes simple instructions and cost estimates.
Whether you’re a beginner or experienced DIYer, these projects are achievable. Most require basic tools and common materials. Let’s transform your shoe chaos into organized bliss.
Table of Contents
1. Over-the-Door Hanging Shoe Organizer
Transform any door into valuable storage space with a hanging shoe organizer. This project takes less than an hour. You’ll maximize vertical space without drilling holes.
Purchase a basic over-door rack with clear pockets. These typically hold 12-24 pairs of shoes. Hang it on your closet door, bedroom door, or even pantry door. The clear pockets let you see every pair at a glance.
Cost estimate: $15-$30 for ready-made organizers. This solution works perfectly for renters. It requires zero installation. You can move it between rooms as needed.
For extra storage, use double-sided organizers. These maximize space on both sides of the door. Store seasonal shoes on the back side. Keep everyday pairs accessible on the front.
2. PVC Pipe Boot Storage Rack
Keep tall boots standing upright with this clever PVC pipe solution. Boots often slouch and crease when stored improperly. This DIY project prevents damage while organizing your closet floor.
Cut PVC pipes to match your boot heights. Insert one pipe into each boot shaft. The pipe keeps the boot standing tall and maintains its shape. Stack the supported boots neatly in your closet.
Materials needed: PVC pipes (2-3 inch diameter), pipe cutter, measuring tape. Total cost runs about $10-$20 for multiple boots. This storage solution also improves air circulation around boots.
You can customize pipe heights for different boot styles. Knee-high boots need longer pipes. Ankle boots require shorter supports. This method works for leather boots, rain boots, and riding boots.
3. Stacked Wooden Crate Shoe Shelf
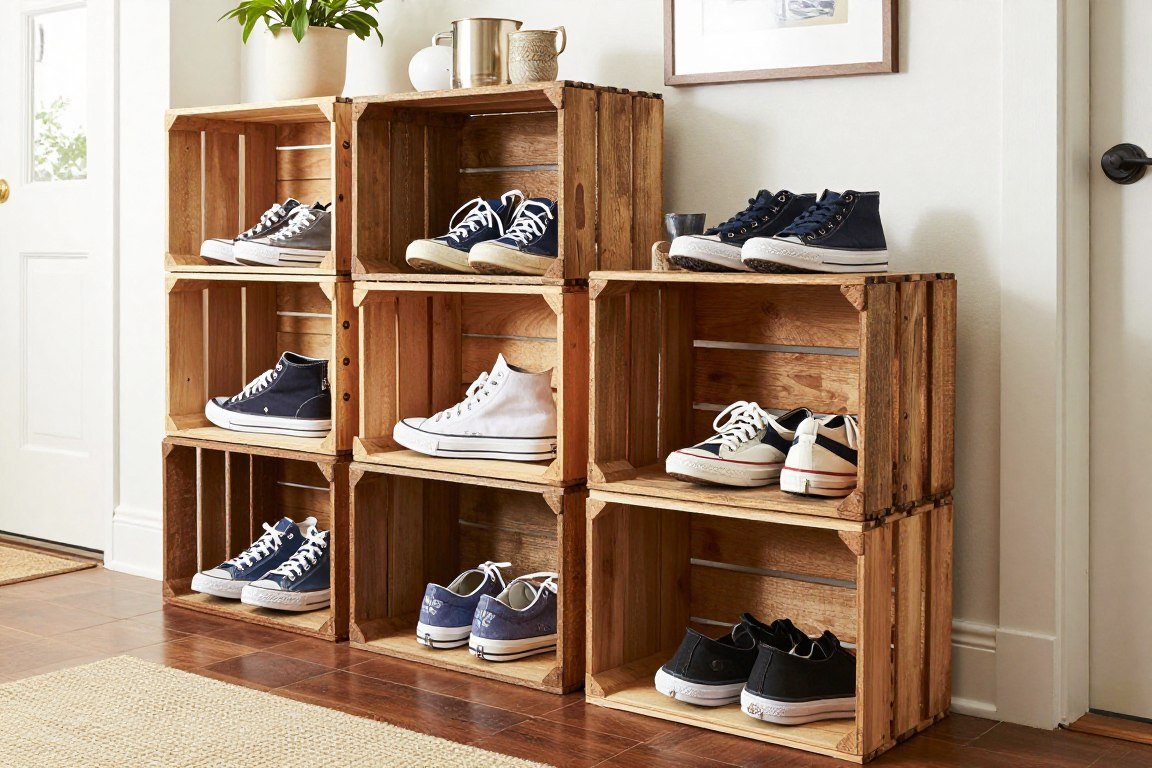
Wooden crates create rustic charm while solving your shoe storage needs. Stack them to build custom shelving units. This project adapts to any space size or layout.
Purchase unfinished wooden crates from craft stores. Sand them smooth to prevent splinters. Stack crates horizontally or vertically based on your space. Secure them with wood screws or brackets for stability.
Each crate holds 2-4 pairs of shoes depending on size. Paint or stain the wood to match your decor. Add wheels to bottom crates for mobile storage. This creates a flexible solution you can rearrange.
Cost breakdown: Crates cost $8-$15 each. Four crates create substantial storage for under $60. This DIY shoe rack works beautifully in entryways, bedrooms, or mudrooms. The open design allows air to circulate around shoes.
4. Tension Rod Closet Shoe Rack
Install tension rods in your closet to create instant shoe storage. This no-drill solution works perfectly for renters. The rods hold heels, wedges, and flats securely.
Measure your closet width and purchase appropriately sized tension rods. Install them at varying heights inside your closet. Hang heeled shoes by their heel on each rod. The shoes dangle neatly without touching the floor.
This method maximizes vertical closet space efficiently. You can install multiple rods at different levels. Lower rods hold everyday heels for easy access. Higher rods store seasonal or special occasion shoes.
Materials cost: $10-$15 per tension rod. Most closets need 2-4 rods. This creates organized shoe storage for under $50. The system keeps pairs visible and prevents scuffing.
5. Repurposed Ladder Shoe Display
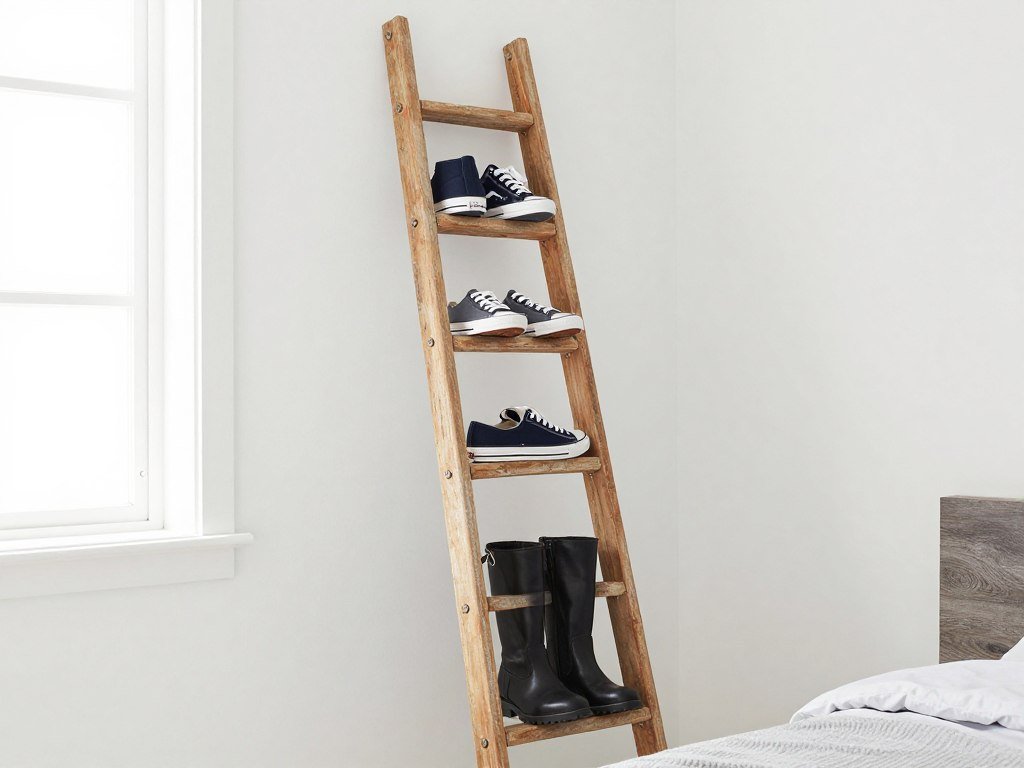
An old wooden ladder becomes functional shoe storage with character. This project adds visual interest to your bedroom or closet. Lean the ladder against any wall for instant storage.
Find a vintage ladder at thrift stores or garage sales. Clean and sand it thoroughly. Apply a fresh coat of paint or wood stain if desired. Lean it securely against your wall at a safe angle.
Place shoes on each rung of the ladder. Sneakers, flats, and low heels work best. This open storage keeps shoes visible and accessible. The ladder creates a focal point while solving storage problems.
Cost: $10-$30 for a secondhand ladder. Add paint for $5-$10 more. This unique DIY shoe storage idea works as functional decor. It fits well in tight spaces and corners.
6. Under-Bed Rolling Shoe Storage
Utilize wasted space under your bed for shoe storage. Rolling bins slide out easily for access. This keeps shoes dust-free and organized out of sight.
Measure the clearance under your bed frame. Purchase or build shallow rolling bins that fit. Attach wheels or casters to wooden boxes or plastic bins. Slide them under the bed when not in use.
Each bin can hold 6-12 pairs depending on dimensions. This storage solution works especially well for seasonal shoes. Store winter boots under the bed during summer months. Switch them out when weather changes.
DIY version costs $20-$40 using basic lumber and wheels. Pre-made options range from $25-$60. This hidden storage keeps your bedroom looking tidy. The wheels make accessing shoes effortless.
7. Crown Molding Shoe Shelf
Transform crown molding into elegant shoe shelving. This unexpected material creates sophisticated storage. The upside-down molding holds heels perfectly in place.
Purchase crown molding from any home improvement store. Mount it upside-down on your closet wall. The curved edge creates a natural shelf for heel backs. Shoes slip onto the molding and stay secure.
Install multiple rows to maximize wall space. Space them about 8-10 inches apart vertically. This allows room for various heel heights. Paint the molding to match your closet interior.
Materials cost approximately $15-$25 for molding and brackets. This elegant DIY solution displays your favorite heels like artwork. It keeps them organized and prevents pile-ups on the closet floor.
8. Pegboard Shoe Organization Wall

A pegboard system offers ultimate flexibility for shoe storage. Rearrange hooks and shelves as your collection changes. This customizable option adapts to your needs.
Mount a large pegboard on your closet wall or entryway. Purchase various pegboard accessories including hooks, small shelves, and baskets. Arrange them to accommodate different shoe types and sizes.
Hang sneakers by their laces on hooks. Place smaller shelves to hold flats and sandals. Use baskets for accessories like shoe care supplies. The configuration possibilities are endless.
Cost breakdown: Pegboard costs $20-$40 depending on size. Accessories add another $15-$30. This versatile system grows with your shoe collection. It works equally well for small and large spaces.
9. Wine Rack Heel Holder
Repurpose a wine rack into creative heel storage. The individual slots perfectly accommodate stilettos and pumps. This unexpected solution adds personality to your closet.
Find a wooden or metal wine rack at thrift stores. Place it horizontally on a closet shelf or wall-mount it. Insert one heel into each wine bottle slot. The shoes stand upright and stay organized.
This method works best for heeled shoes. Each compartment holds one shoe securely. You can see all your heels at once. The vertical storage saves significant closet floor space.
Thrift store wine racks cost $10-$20. New racks range from $25-$50. This clever DIY shoe storage idea turns functional into fashionable. It showcases your favorite pairs as decorative elements.
10. Floating Wooden Shoe Shelves

Build custom floating shelves specifically sized for shoes. These create clean lines in modern spaces. The shelves appear to float on the wall without visible brackets.
Cut boards to your desired shelf length. Install hidden floating shelf brackets into wall studs. Slide the wooden boards onto brackets. Space shelves 10-12 inches apart vertically for most shoe types.
Each shelf accommodates 3-5 pairs depending on width. Stain or paint wood to match your room. This built-in shoe storage looks professional and polished. It keeps shoes off the floor while displaying them attractively.
Materials cost $30-$60 depending on wood quality. You’ll need basic carpentry skills and tools. This permanent solution adds value to your home. The streamlined look suits contemporary and minimalist decor.
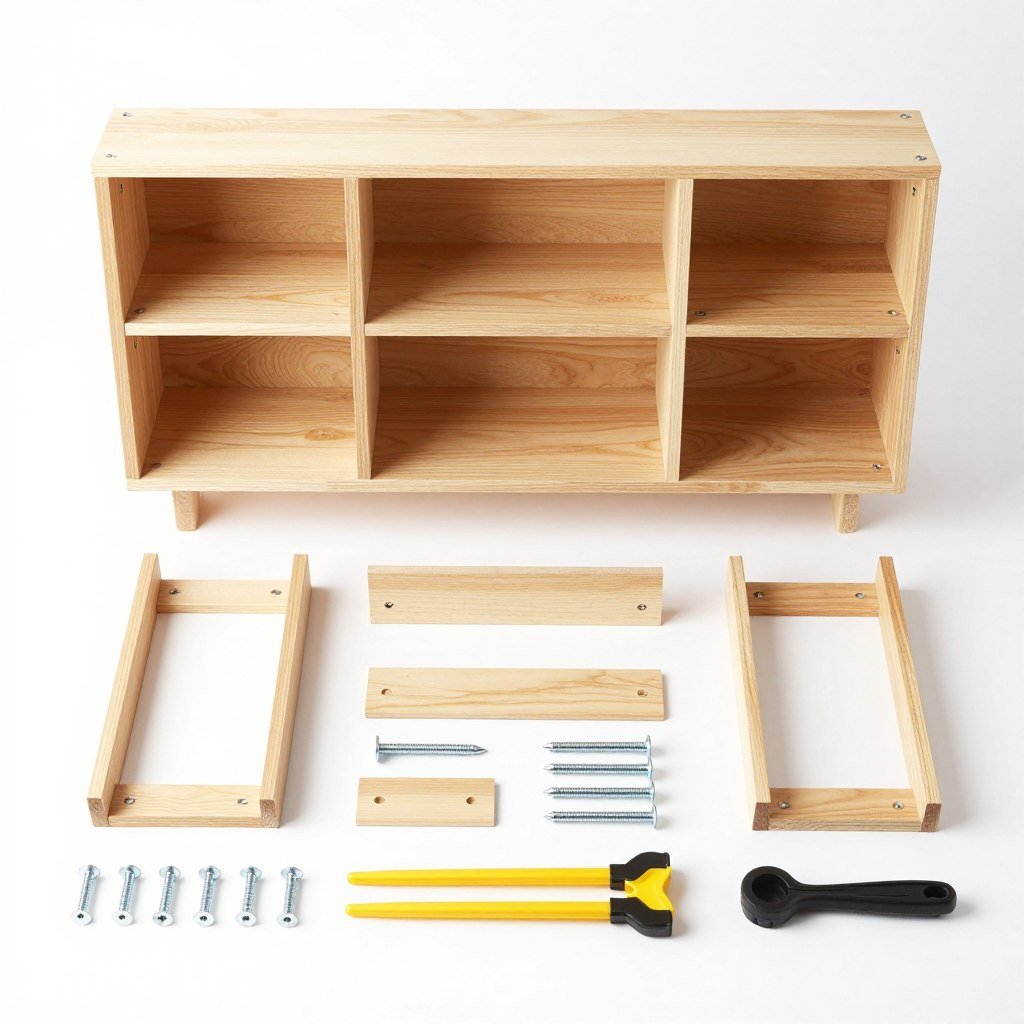
Reader Favorite: Complete Shoe Shelf Kit
This all-in-one kit includes pre-cut boards, hidden brackets, and all hardware needed. Perfect for beginners. No measuring or cutting required. Installs in under 2 hours.
- Holds up to 15 pairs of shoes
- Premium pine wood with smooth finish
- Supports up to 50 lbs per shelf
- Available in 3 sizes and 5 finishes
Price: $79.99 (regularly $99.99)
11. Industrial Copper Pipe Shoe Rack
Create an industrial-chic shoe rack using copper pipes and fittings. This trendy piece doubles as functional furniture. The metallic finish adds modern style to any room.
Purchase copper pipes, elbows, and T-connectors from hardware stores. Assemble them into a freestanding rack structure. No soldering required – friction fit holds pieces together. Add wooden boards across the top for shelving.
The bottom tier holds larger shoes and boots. Upper shelves accommodate smaller footwear. This multi-level design maximizes vertical space efficiently. The open framework allows air circulation to prevent odors.
Total project cost: $40-$70 depending on size. Copper develops a beautiful patina over time. This DIY shoe rack works well in entryways or bedroom corners. The industrial aesthetic complements modern and eclectic decor styles.
12. Entryway Storage Bench with Shoe Cubbies
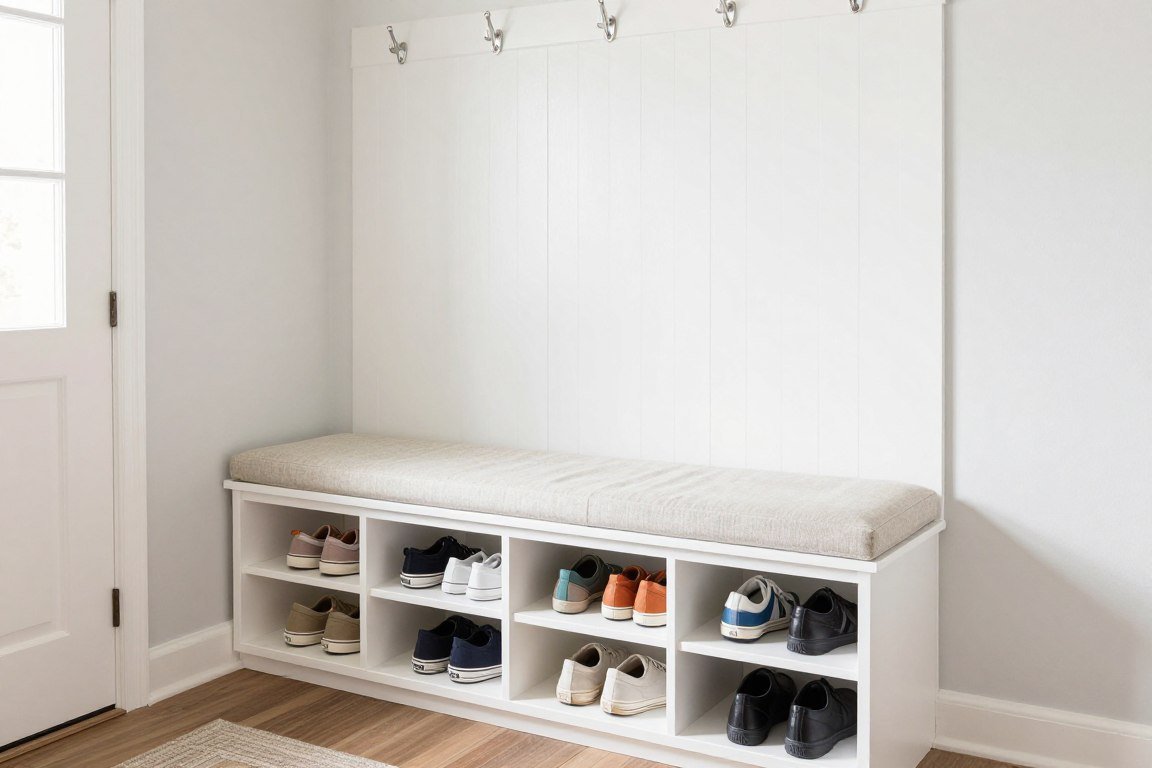
Build a dual-purpose storage bench for your entryway. The top provides seating while cubbies below organize shoes. This piece of furniture solves multiple problems at once.
Construct a simple bench frame from 2×4 lumber. Add dividers to create individual shoe cubbies underneath. Top the bench with a cushioned seat for comfort. Paint or stain to match your home decor.
Each cubby holds 1-2 pairs of shoes. Build 4-6 cubbies for family storage. This keeps the entryway tidy and functional. The bench provides a convenient spot to sit while putting on shoes.
Materials cost approximately $60-$100 depending on wood choice. Add $20-$30 for a seat cushion. This built-in shoe storage bench adds value and organization. It creates a welcoming entryway impression.
13. Rotating Lazy Susan Shoe Carousel
Install a lazy Susan mechanism in your closet floor for rotating shoe storage. Spin to access any pair instantly. This space-saving solution works brilliantly in corner spaces.
Purchase a large lazy Susan turntable from home improvement stores. Build a circular platform with dividers on top. Mount it securely to your closet floor. Arrange shoes in wedge-shaped sections around the circle.
The rotating platform brings back-corner shoes within reach. No more digging through stacked pairs. This system works especially well in walk-in closets. You can customize section sizes for different shoe types.
Project cost ranges from $50-$80 for materials. The lazy Susan mechanism costs about $30. This clever DIY shoe organization system maximizes difficult corner space. It adds a touch of luxury to your closet.
14. Slanted Shelf Shoe Display Rack
Build angled shelves that display shoes like in a store. The slant makes each pair visible from above. This professional-looking storage elevates your closet organization.
Cut wooden boards and attach them to wall-mounted brackets at a 45-degree angle. Space shelves 8-10 inches apart vertically. Shoes sit on the angled surface, facing outward for easy viewing.
This display method works wonderfully for sneaker collections. Each pair gets showcased individually. The slanted design prevents shoes from sliding off. It creates an organized, boutique-style presentation.
Materials cost $35-$60 depending on shelf quantity. You’ll need a saw and drill for installation. This DIY shoe storage idea transforms a plain closet wall. It makes selecting shoes easier and more enjoyable.
15. Fabric Hanging Closet Shoe Organizer
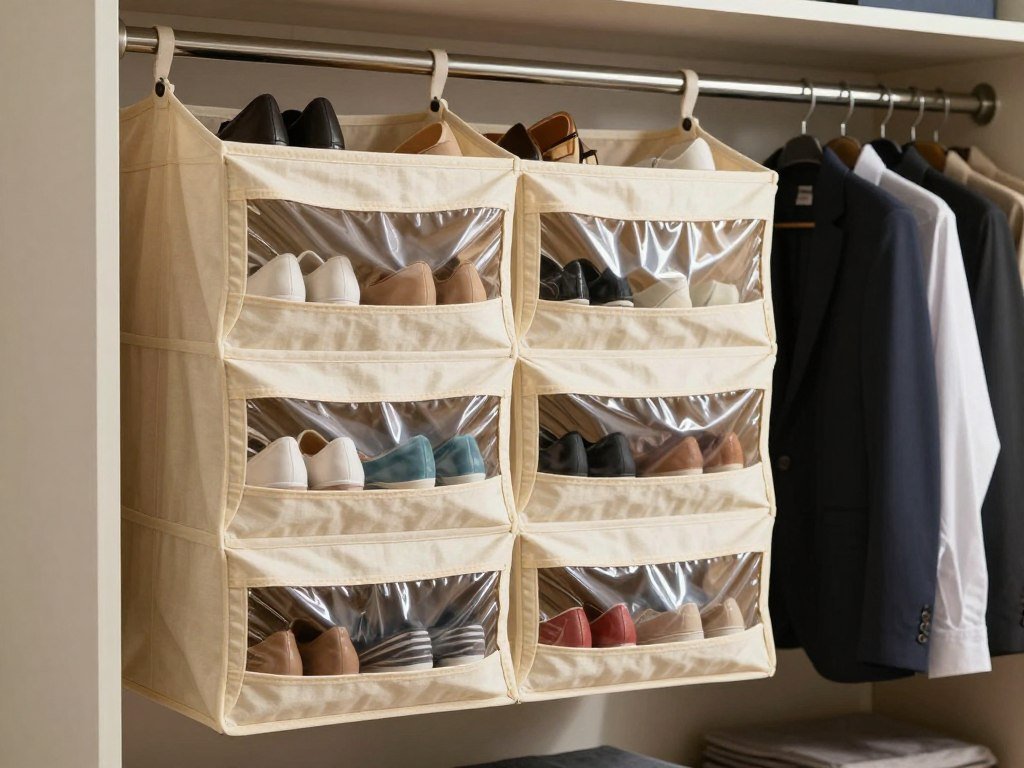
Hang fabric organizers from your closet rod for instant shoe storage. These lightweight solutions require no installation. They’re perfect for renters and temporary spaces.
Choose organizers with reinforced shelves and clear windows. Hook them over your existing closet rod. Fill compartments with shoes, keeping pairs together. The clear windows let you identify contents quickly.
These organizers typically hold 10-16 pairs of shoes. They utilize vertical closet space efficiently. Some models include additional pockets for shoe care accessories. The fabric construction makes them easy to move or relocate.
Cost ranges from $12-$25 for quality organizers. This affordable solution works immediately out of package. No tools or assembly required. It’s one of the easiest DIY shoe storage ideas to implement.
| Storage Solution | Best For | Capacity | Cost Range | Difficulty |
| Hanging Organizer | Renters, Temporary | 10-16 pairs | $12-$25 | Beginner |
| Floating Shelves | Modern Spaces | 15-20 pairs | $30-$60 | Intermediate |
| Storage Bench | Entryways | 8-12 pairs | $60-$100 | Intermediate |
| Wooden Crates | Rustic Style | 8-16 pairs | $32-$60 | Beginner |
| Pegboard System | Customizable | 20-30 pairs | $35-$70 | Beginner |
16. Custom Drawer Dividers for Shoe Storage
Transform dresser drawers into organized shoe storage with custom dividers. This keeps shoes contained and prevents shifting. Each pair gets its own compartment for protection.
Measure your drawer dimensions carefully. Cut thin plywood or foam board to create dividers. Arrange them in a grid pattern inside the drawer. Each section should fit one shoe comfortably.
This method works excellently for flats, sandals, and low-profile shoes. It protects delicate materials from scratching. The closed drawer keeps shoes dust-free. You can label sections for quick identification.
Materials cost about $10-$20 per drawer. Foam board is the most budget-friendly option. Plywood creates sturdier, permanent dividers. This storage solution maximizes existing furniture without adding new pieces.
17. Wall-Mounted Shoe Cubbies
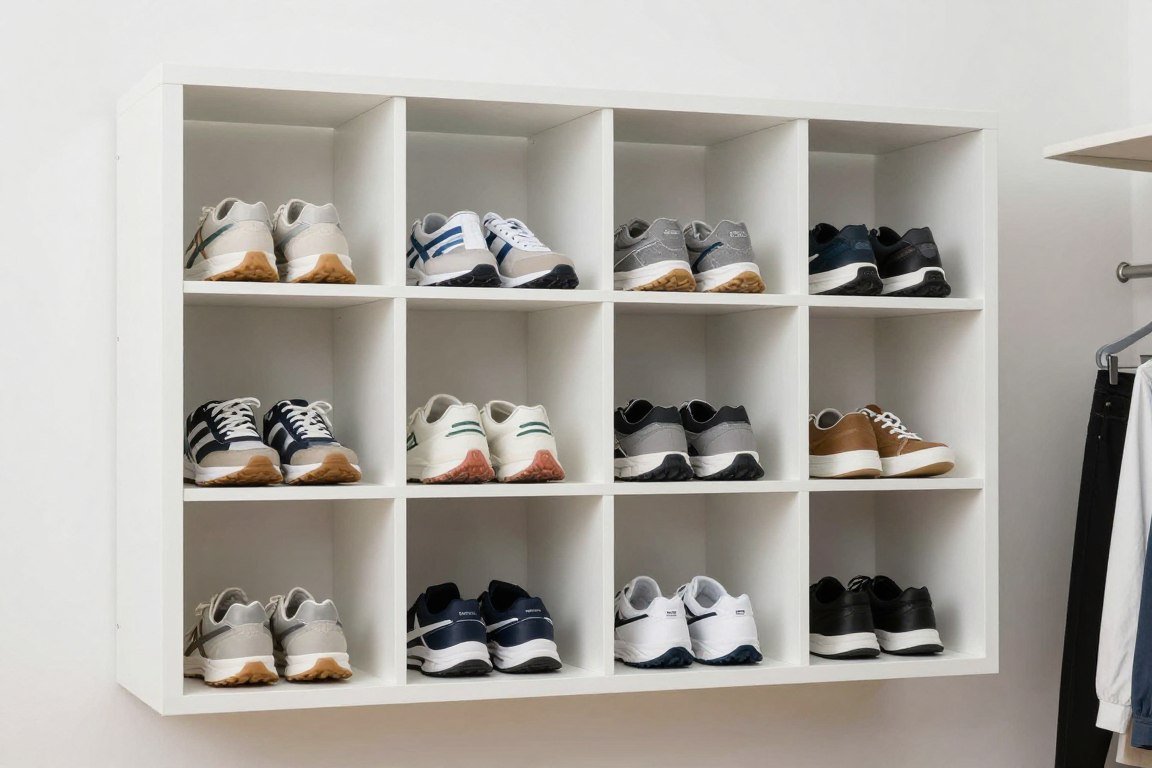
Install individual cubby boxes on your wall for boutique-style shoe storage. Each shoe gets its own display space. This creates visual interest while keeping footwear organized.
Purchase or build small wooden boxes of uniform size. Arrange them in an artistic pattern on your wall. Stagger heights and positions for visual appeal. Secure each box firmly to wall studs.
Paint cubbies in coordinating colors or leave natural wood. Place one pair of shoes in each cubby. This open storage makes selecting shoes effortless. The arrangement becomes wall art in itself.
Cost varies based on quantity: $40-$80 for materials. Pre-made cubby boxes simplify installation. This built-in shoe storage solution works in closets, bedrooms, or entryways. It combines function with decorative appeal.
18. Shower Rod Boot Organizer
Use tension shower rods to organize tall boots efficiently. This prevents boots from creasing and toppling over. The simple solution takes minutes to install.
Install a tension shower rod inside your closet horizontally. Hang boots by their loops or use clips. The rod keeps boots standing upright without consuming floor space. Position the rod at appropriate height for your boot collection.
This method accommodates rain boots, winter boots, and riding boots. It allows air circulation to prevent moisture buildup. Boots remain accessible and visible. The rod removes easily when not needed.
A quality tension rod costs $15-$25. Boot clips add another $10-$15. This quick DIY project solves boot storage challenges immediately. It works particularly well in narrow closets with limited floor space.
19. Repurposed Bookshelf Shoe Rack
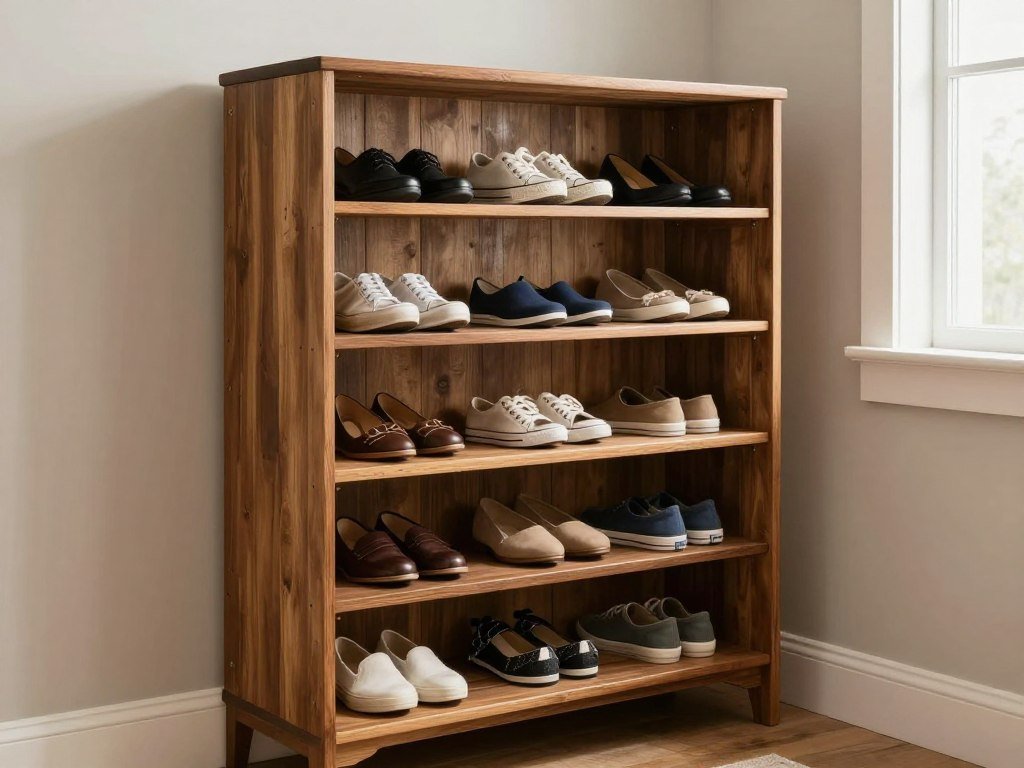
Convert an old bookshelf into dedicated shoe storage. The existing shelves perfectly accommodate most shoe sizes. This gives new life to furniture while solving organization needs.
Find a bookshelf at thrift stores or use one you already own. Clean and refresh it with paint or stain. Adjust shelf heights to fit different shoe types. Place shoes on shelves toe-out for easy viewing.
A standard bookshelf holds 20-40 pairs depending on dimensions. Lower shelves accommodate boots and tall shoes. Upper shelves work well for flats and sandals. This freestanding storage moves easily between rooms.
Thrift store bookshelves cost $20-$50. Paint and supplies add $15-$25. This budget-friendly DIY shoe rack provides substantial storage. It works as a room divider in open floor plans too.
20. Magnetic Strip Shoe Holders
Attach magnetic strips to closet walls for innovative shoe storage. Metal shoe clips hang from the magnets. This creates a customizable, adjustable storage system.
Mount strong magnetic strips horizontally on closet walls. Purchase or make metal shoe clips. Attach shoes to clips and hang them on magnetic strips. Rearrange positions easily as your collection changes.
This system works best for lighter shoes like flats and sandals. The magnetic connection holds securely while allowing flexibility. You can add or remove strips as storage needs evolve.
Magnetic strips cost $12-$20 per foot. Metal clips run about $1-$2 each. This modern storage solution creates a clean, organized appearance. It maximizes wall space while keeping shoes accessible and visible.
Tips for Implementing Your DIY Shoe Storage Project
Planning Your Project
Measure your available space carefully before starting. Count your shoe pairs to determine capacity needs. Consider future growth in your collection. Choose solutions that accommodate expansion.
Assess your skill level honestly. Start with beginner projects if you’re new to DIY. Work up to more complex builds as confidence grows. Watch tutorial videos before beginning construction.
Gather all materials and tools beforehand. Nothing derails a project faster than missing supplies. Create a shopping list and check it twice. Purchase quality materials that will last years.
Maximizing Your Storage
Utilize vertical space whenever possible. Walls and doors offer valuable real estate. Stack solutions upward rather than outward. This preserves floor space for movement and access.
Sort shoes by frequency of use. Keep everyday pairs most accessible. Store seasonal shoes in harder-to-reach spots. Rotate your collection as seasons change throughout the year.
Maintain your system consistently. Return shoes to designated spots after wearing. Clean storage areas regularly to prevent dust buildup. Replace worn organizers promptly to maintain functionality.
💡 Pro Tip: Before starting any DIY shoe storage project, declutter your shoe collection. Donate or discard pairs you haven’t worn in over a year. This reduces the storage space you’ll actually need and makes organizing much easier.
Choosing the Right Storage Solution for Your Space
For Small Apartments
- Over-door organizers maximize unused space
- Under-bed rolling storage hides shoes away
- Vertical wall-mounted solutions save floor area
- Multi-purpose furniture with built-in shoe storage
For Walk-In Closets
- Floating shelves create custom displays
- Rotating carousels utilize corner space
- Built-in cubbies provide permanent storage
- Slanted shelves showcase entire collection
For Entryways
- Storage benches offer seating plus storage
- Wooden crate stacks create rustic charm
- Wall-mounted racks keep floor clear
- Open shelving encourages family organization
Consider your lifestyle and habits when choosing storage. Busy families need quick-access solutions. Shoe collectors benefit from display-style storage. Minimalists prefer hidden, streamlined options. Match the storage solution to how you actually live.
Budget plays an important role in project selection. Many effective solutions cost under $30 to implement. Others require larger investments but add home value. Prioritize projects that deliver the most impact for your specific situation.
Maintaining Your Shoe Organization System
Successful shoe storage requires ongoing maintenance. Set aside 15 minutes monthly to reorganize. Remove shoes that no longer fit or serve your needs. Wipe down shelves and organizers to prevent dust accumulation.
Seasonal rotation keeps your system functional year-round. Store winter boots during summer months. Swap in sandals and lighter shoes for warm weather. This prevents overcrowding and maintains easy access to current footwear.
Involve family members in maintaining the organization. Assign each person their own storage zone. Make returning shoes to designated spots a household rule. Consistent habits prevent chaos from creeping back in.
Benefits of DIY Shoe Storage
- Costs significantly less than pre-made furniture
- Customizes perfectly to your exact space
- Creates unique pieces that match your style
- Provides satisfaction of completed projects
- Allows flexibility to modify as needs change
- Uses sustainable, repurposed materials
Challenges to Consider
- Requires time investment for construction
- May need basic tools and skills
- Results depend on execution quality
- Some projects need permanent installation
- Mistakes can waste materials and money
Create Your Perfect Shoe Storage Solution
These 20 DIY shoe storage ideas offer solutions for every home and budget. From simple over-door organizers to custom-built shelving, you have options. Each project addresses common shoe storage challenges effectively.
Start with one project that excites you most. Master it, then tackle another. Before long, your shoe collection will be completely organized. You’ll enjoy clutter-free entryways, closets, and bedrooms.
Remember that perfect organization is an ongoing process. Adapt these ideas to fit your unique space and needs. Mix and match solutions for comprehensive storage throughout your home. Your organized shoe collection awaits.