
Creating a handmade baby cardigan brings joy to both the maker and the tiny recipient. This button stitch baby cardigan free pattern offers the perfect introduction to garment knitting for beginners.The gentle texture of button stitches creates a lovely decorative edge. Your finished cardigan will become a treasured keepsake.This pattern guides you through every step with clear instructions. You will learn essential techniques while creating something beautiful and practical.
Table of Contents
Why This Baby Cardigan Free Pattern Works for Beginners
This cardigan pattern stands out for its approachable design and clear guidance. The button stitch technique adds visual interest without complicated stitch work.
Many beginners feel intimidated by garment construction. This pattern breaks down each element into manageable steps that build your confidence.
Pattern Advantages
- Simple construction with minimal shaping
- Clear row-by-row instructions
- Beginner-friendly stitch techniques
- Works up quickly in light worsted weight yarn
- Customizable sizing for different age groups
- Professional-looking finished results
Considerations
- Requires basic knitting knowledge
- Seaming needed for final assembly
- Button placement requires careful measurement
- Gauge swatch essential for proper fit
The pattern uses straightforward increases and decreases. You will master these fundamental shaping techniques that apply to many future projects.
Each section builds upon previous skills learned. This progressive approach ensures steady advancement in your knitting abilities.
Complete Materials List for Your Baby Cardigan Pattern

Yarn Requirements
Select a light worsted weight yarn suitable for baby skin. The yarn should be soft, washable, and hypoallergenic for maximum comfort.
You will need approximately 400-500 yards of yarn for the 6-12 month size. Larger sizes require additional yardage accordingly.
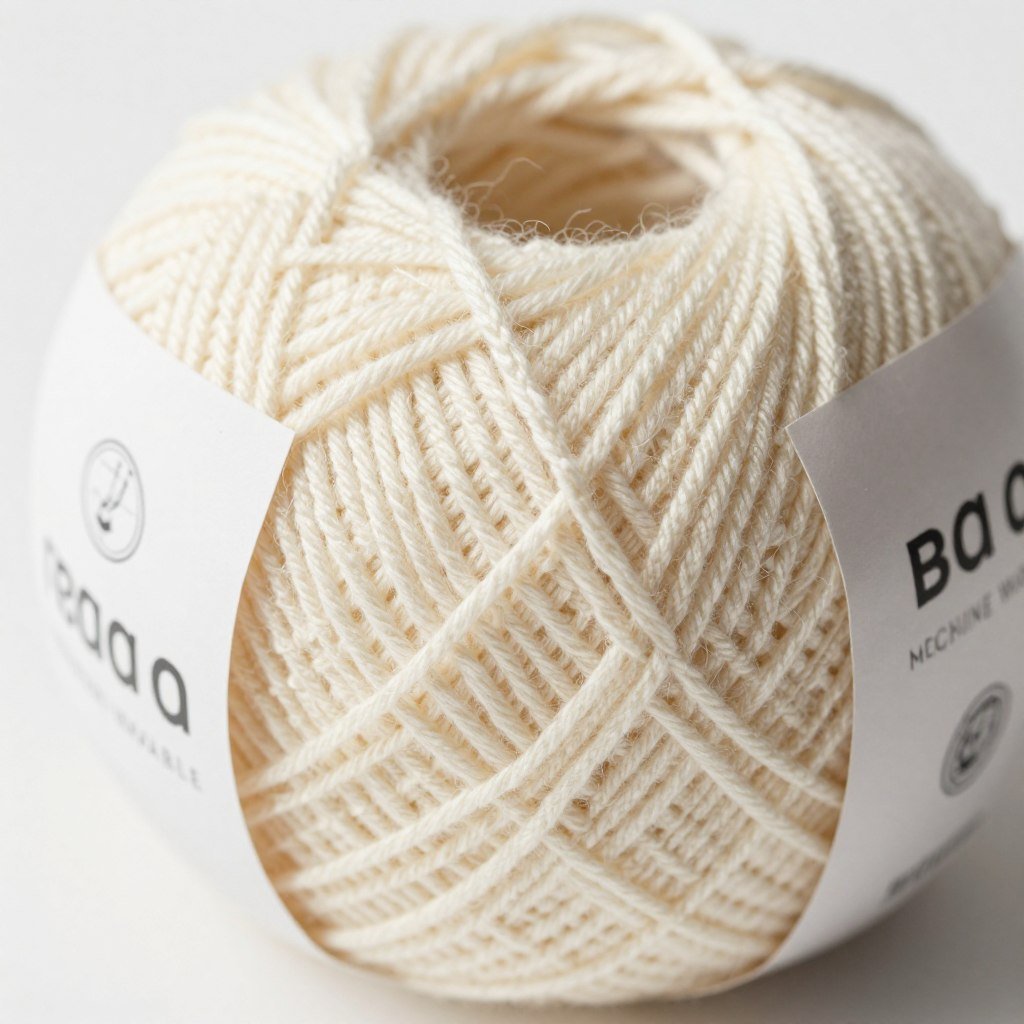
Premium Baby Yarn
This ultra-soft acrylic-cotton blend offers excellent stitch definition. Machine washable and durable for frequent use. Perfect gauge consistency throughout your project.
- 50% cotton, 50% acrylic blend
- 220 yards per 100g ball
- Light worsted weight
- Available in 24 colors
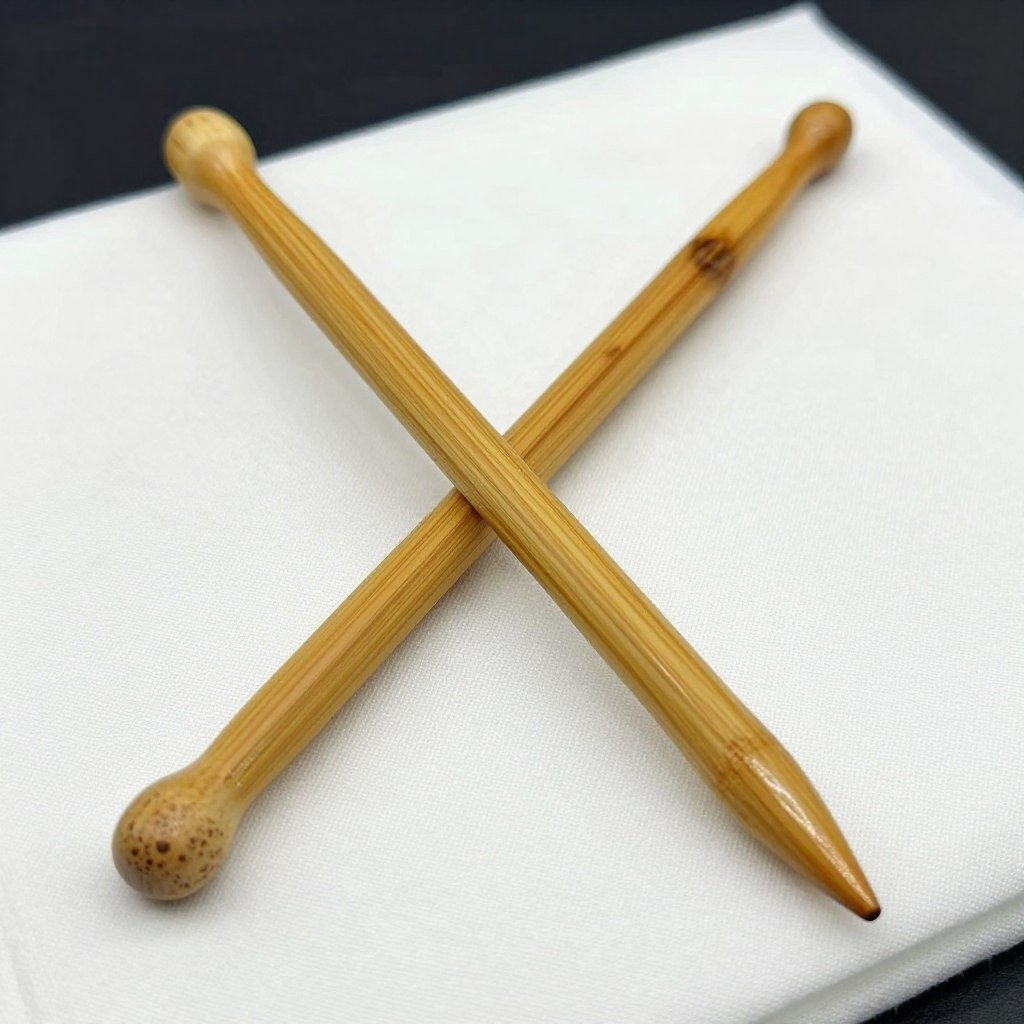
Bamboo Knitting Needles
Size 6 US needles provide the perfect gauge for light worsted yarn. Bamboo offers gentle grip and comfortable knitting for extended sessions.
- Size 6 US (4.0mm) needles
- 14-inch length recommended
- Smooth bamboo finish
- Lightweight and warm to touch
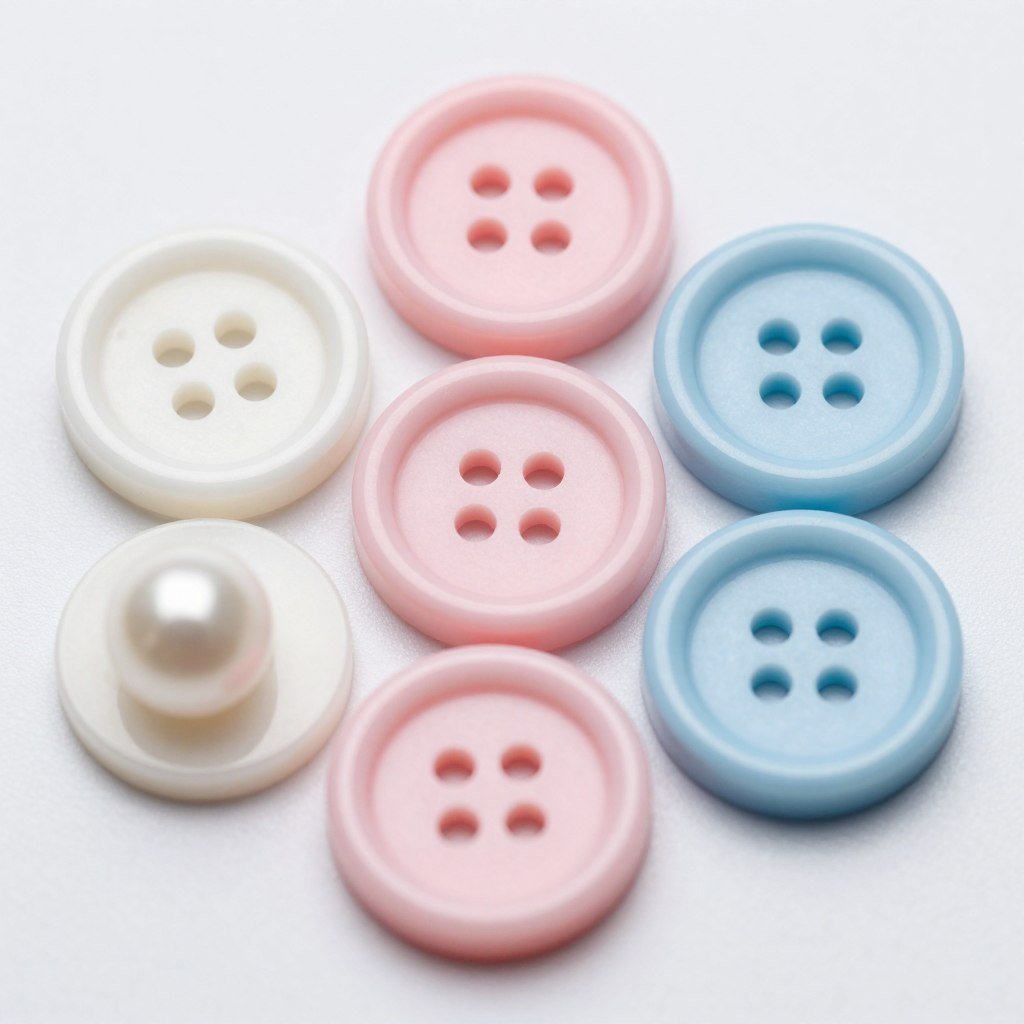
Baby-Safe Buttons
Choose securely attached buttons with smooth edges. Select sizes between 0.5-0.75 inches diameter for best proportion on baby garments.
- 5 buttons required
- Baby-safe materials
- Two-hole or four-hole design
- Coordinating or contrasting colors
Additional Tools and Notions
Gather these essential tools before starting your cardigan project. Having everything ready ensures smooth progress through the pattern.
- Stitch markers to track pattern repeats and mark buttonholes
- Tapestry needle for seaming and weaving in yarn ends
- Measuring tape for checking gauge and cardigan length
- Scissors for cutting yarn between sections
- Stitch holders to hold sleeve stitches while working body
- Row counter to track your progress through rows
- Blocking pins and mat for professional finishing
Quality tools make the knitting process more enjoyable. Invest in good scissors and a reliable measuring tape for accurate work.
Getting the Perfect Gauge for Your Cardigan Pattern
Gauge determines whether your finished cardigan will fit properly. This critical step prevents disappointment after hours of work.
Create a gauge swatch before casting on for the cardigan. Knit a 5-inch square using your chosen yarn and needles.
Required Gauge Specifications
Pattern Gauge: 20 stitches and 28 rows equal 4 inches in stockinette stitch
Measure your swatch after blocking for accurate results. The gauge must match exactly for proper fit.
How to Check Your Gauge
- Cast on 24 stitches using size 6 needles and your chosen yarn
- Work in stockinette stitch (knit right side rows, purl wrong side rows) for 30 rows
- Bind off all stitches loosely to complete your gauge swatch
- Block the swatch using your preferred blocking method
- Let the swatch dry completely before measuring
- Place a ruler across the center and count stitches over 4 inches
- Count rows vertically over 4 inches using the same method
- Adjust needle size if your gauge does not match exactly

Too many stitches per inch means your cardigan will turn out too small. Switch to larger needles to achieve correct gauge.
Too few stitches per inch creates a larger finished garment. Use smaller needles to tighten your gauge accordingly.
Important Note: Never skip the gauge swatch step. Even half a stitch difference per inch significantly affects the final cardigan size. Reworking the entire project wastes more time than creating a proper swatch initially.
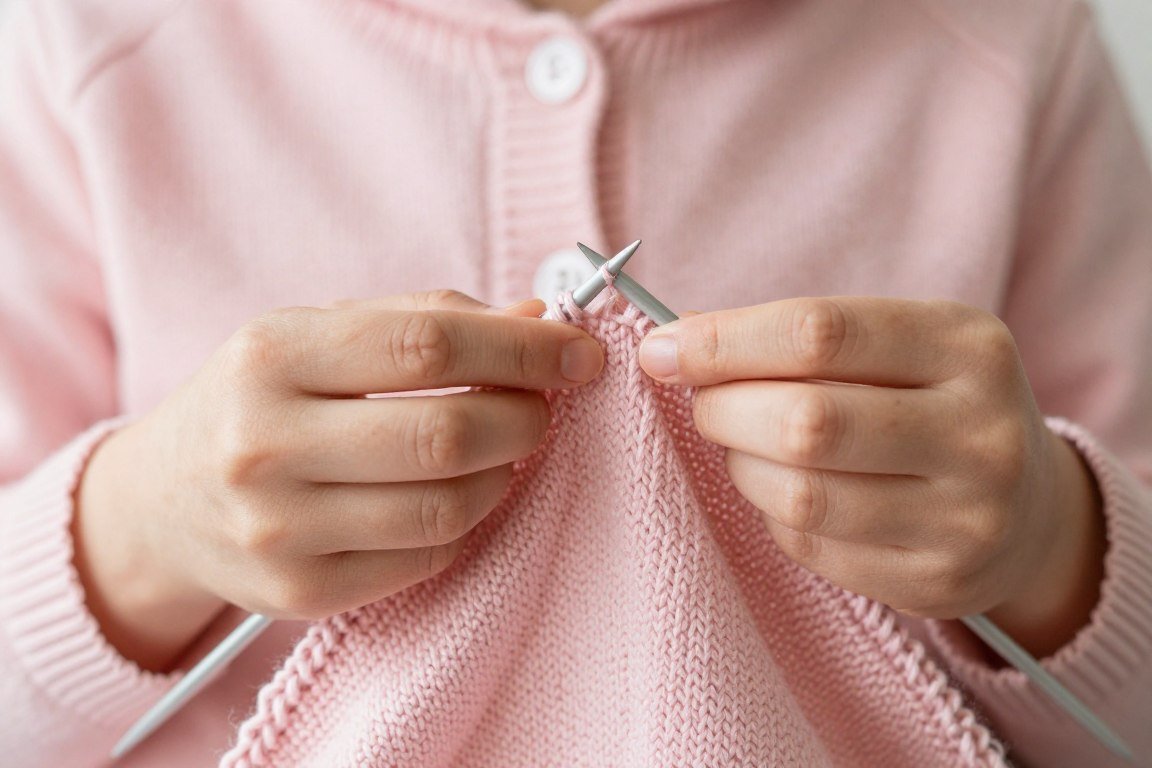
Mastering the Button Stitch Technique
The button stitch creates a textured decorative edge on your cardigan. This simple technique involves strategically placed decreases that form small button-like bumps.
You will work this stitch along the cardigan front edges. The pattern creates visual interest while remaining easy enough for beginners.
Step-by-Step Button Stitch Instructions
- Knit to the position where button stitch should appear
- Insert right needle into next two stitches together as if to knit
- Wrap yarn around needle and pull loop through both stitches
- Slip the new stitch back to left needle without twisting
- Insert right needle into same two stitches again from behind
- Knit these two stitches together through back loop to complete button stitch
- Continue knitting remaining stitches in row as pattern directs
- Work button stitch every 6 rows for consistent spacing along edge
Practice this technique on your gauge swatch first. The motion becomes natural after completing several button stitches.
The button stitch abbreviation appears as “BS” throughout the pattern instructions. This standardized notation keeps directions concise and readable.
Common Button Stitch Mistakes to Avoid
- Pulling stitches too tight creates puckering along the edge
- Forgetting to slip stitch back results in missing the second part
- Working button stitches too close together causes edge distortion
- Inconsistent spacing creates an uneven appearance along front bands
- Twisting stitches when slipping back changes the stitch orientation
Maintain even tension throughout your button stitch work. Consistent tension ensures uniform appearance across all repeats.
Complete Baby Cardigan Pattern Instructions
This cardigan works from the bottom up in separate pieces. You will knit the back, two front panels, and sleeves individually before seaming.
The pattern fits babies aged 6-12 months with a 20-inch chest measurement. Sizing modifications appear at the end of this section.

Knitting the Cardigan Back Panel
The back provides the foundation for your cardigan structure. This rectangular piece requires no complex shaping until the armholes.
Cast on 50 stitches using the long-tail cast-on method for a stretchy edge. This technique provides flexibility while maintaining structure.
Row 1 (Right Side): Knit across all 50 stitches to establish right side of work. Mark this side with a safety pin or removable marker.
Row 2 (Wrong Side): Purl across all stitches. This creates stockinette stitch fabric that forms the cardigan body.
Rows 3-42: Continue in stockinette stitch by repeating Row 1 and Row 2 for a total of 42 rows. Measure your work periodically to track progress.
Your piece should measure approximately 6 inches from cast-on edge to needles. This length provides proper coverage for baby torso.
Shaping the Armholes
Next row (Right Side): Bind off 3 stitches at beginning of row, knit to end. You now have 47 stitches remaining on needle.
Next row (Wrong Side): Bind off 3 stitches at beginning of row, purl to end row. This reduces stitch count to 44 stitches total.
Next row: K1, k2tog, knit to last 3 stitches, k2tog, k1. The k2tog decreases shape armhole curves on both edges.
Next row: Purl all stitches across row without decreasing. This maintains stitch count while continuing stockinette fabric.
Repeat these last 2 rows 3 more times for total of 4 decrease rows. Count your stitches carefully after each decrease row.
You should have 36 stitches remaining after completing armhole shaping. Continue working even in stockinette stitch for 24 more rows.
Creating the Shoulder Slopes
Next row (Right Side): Bind off 4 stitches, knit to end of row. Place remaining stitches on holder.
Next row (Wrong Side): Bind off 4 stitches, purl to end row. These bind-offs create gentle shoulder slope.
Repeat shoulder bind-offs 2 more times on each side. The back neck stitches remain on stitch holder for later finishing.
Cut yarn leaving a 6-inch tail for weaving in later. Set back panel aside while working front pieces.
Knitting the Right Front Panel
The right front features button stitch detail along the front edge. This decorative element adds visual appeal to your finished cardigan.
Cast on 28 stitches for the right front panel. This narrower width creates the cardigan opening down center front.
Row 1 (Right Side): K3 for button band, place marker, knit to end of row. The marker separates button band from body stitches.
Row 2 (Wrong Side): Purl to marker, slip marker, p3 to end row. Maintain garter stitch on button band by purling these stitches.
Row 3: K3, slip marker, knit to end. Keep first 3 stitches in garter stitch throughout front panel.
Rows 4-6: Continue established pattern of garter stitch band with stockinette body. Work 3 more rows maintaining stitch patterns.
Row 7 (Button Stitch Row): K1, work button stitch over next 2 stitches, slip marker, knit to end row. This creates first button stitch.
Repeat button stitch every 6 rows along front edge. Space stitches evenly for consistent decorative detail throughout front length.
Continue working right front for 42 rows total to match back length. End with wrong side row ready to shape armhole.
Right Front Armhole Shaping
Next row (Right Side): Bind off 3 stitches, work in pattern to end. The armhole shaping begins on side edge only.
Next row: Work even in established pattern across all stitches. No shaping occurs on wrong side rows initially.
Next row: K3, slip marker, k1, k2tog, knit to end of row. Decrease 1 stitch at armhole edge while maintaining button band.
Repeat armhole decreases every right side row 3 more times for 4 total decreases. Count stitches after each decrease to verify accuracy.
Work even in pattern until armhole measures same depth as back armhole. Measure carefully to ensure fronts and back align properly.
Right Front Neck and Shoulder Shaping
Next row (Right Side): Work to last 6 stitches, place these 6 stitches on holder for neck edge. The holder keeps neck stitches available for finishing.
Next row: Purl across remaining stitches. Continue in stockinette on shoulder stitches only from this point.
Next row: Knit to last 2 stitches, k2tog to shape neck curve gradually. This decrease rounds the neckline gently.
Repeat neck decrease every right side row 2 more times. Work shoulder bind-offs to match back panel shaping exactly.
Bind off 4 stitches at shoulder edge on next 3 right side rows. Cut yarn and secure final stitch to complete right front.
Knitting the Left Front Panel
The left front mirrors the right front with buttonhole placement. Work button stitches on opposite edge for symmetrical design.
Cast on 28 stitches to begin left front panel construction. Follow same basic structure as right front with reversed shaping.
Row 1 (Right Side): Knit to last 3 stitches, place marker, k3 for button band. The button band now appears on opposite edge.
Continue working left front following right front instructions but reversing all shaping. Work button stitches on left edge instead of right edge.
Create buttonholes on left front to correspond with button stitch spacing. This ensures proper closure when cardigan is complete.
Working Buttonholes
Buttonhole Row (Right Side): Work to button band, k1, yo, k2tog for buttonhole, slip marker, knit to end row.
Space buttonholes every 12 rows along left front band. Mark buttonhole rows on your pattern copy to track placement easily.
Work 5 buttonholes total along left front edge. The top buttonhole should sit 1 inch below neck edge for proper closure.
Knitting the Sleeves
The sleeves add warmth and complete the cardigan silhouette. Work both sleeves identically for matching appearance and fit.
Cast on 30 stitches for sleeve cuff using smaller size 5 needles. The slightly tighter gauge creates gentle gathering at wrist.
Rows 1-8: Work in k1, p1 ribbing for 8 rows to create stretchy cuff. This ribbing helps sleeve stay in place during wear.
Switch to size 6 needles and begin stockinette stitch for sleeve body. The larger needles match gauge of cardigan body sections.
Row 9 (Increase Row): K1, m1, knit to last stitch, m1, k1. The m1 increases shape sleeve gradually toward underarm.
Rows 10-14: Work even in stockinette stitch for 5 rows between increase rows. This spacing creates gentle sleeve taper.
Repeat increase row every 6 rows a total of 8 times. Track increases carefully to maintain symmetrical sleeve shaping.
You now have 46 stitches on needle after all increases complete. Continue working even in stockinette until sleeve measures 6 inches from cast-on edge.
Sleeve Cap Shaping
Next row: Bind off 3 stitches at beginning of next 2 rows for underarm shaping. This matches armhole bind-offs on body pieces.
Next row (Right Side): K1, k2tog, knit to last 3 stitches, k2tog, k1. Decrease on both edges of sleeve cap.
Next row: Purl all stitches without decreasing. The wrong side rows maintain stitch count between decrease rows.
Repeat these 2 rows 8 times total for gradual cap shaping. The decreases curve sleeve cap to fit smoothly into armhole.
Bind off remaining stitches loosely to complete sleeve cap. Cut yarn leaving long tail for seaming sleeve into armhole opening.
Work second sleeve identically to first sleeve for matching pair. Label sleeves to track which is complete during assembly.
Assembling Your Baby Cardigan

Proper assembly creates professional-looking results from your knitted pieces. Take time with seaming for a polished final cardigan.
Blocking the Pieces
Block all cardigan pieces before seaming for easier assembly and better drape. Wet blocking relaxes stitches and evens out any tension irregularities.
- Fill basin with lukewarm water and add gentle wool wash if desired
- Submerge all knitted pieces and let soak for 15 minutes minimum
- Gently squeeze out excess water without wringing or twisting pieces
- Roll pieces in clean towel to remove additional moisture
- Pin pieces to blocking mats according to pattern measurements
- Use rust-proof T-pins to hold edges in desired shape
- Allow pieces to dry completely before removing from blocking surface
- Leave pinned for at least 24 hours in well-ventilated area
Blocked pieces maintain their shape better during seaming. The smooth, even fabric makes matching stitches much easier for clean seams.
Seaming the Shoulder Seams
Begin assembly by joining shoulders using mattress stitch for invisible seams. Thread tapestry needle with matching yarn and work from right side.
Align right front shoulder with corresponding back shoulder edge. Pin pieces together matching row counts exactly before seaming.
Insert needle under bar between first and second stitches on front piece. Pull yarn through gently maintaining even tension throughout.
Move to back piece and insert needle under corresponding bar between stitches. Continue alternating between pieces creating ladder-like stitching.
Pull yarn snug every few stitches to close seam invisibly. The mattress stitch disappears into fabric when worked correctly.
Repeat seaming process for left shoulder joining left front to back. Secure yarn ends by weaving through several stitches on wrong side.
Setting in the Sleeves
Pin sleeve cap into armhole opening matching center top of cap to shoulder seam. Ease any excess fabric evenly around curve.
Use backstitch or mattress stitch to sew sleeve into armhole from wrong side. Work carefully around curves maintaining smooth join without puckers.
Match underarm bind-offs on sleeve to body armhole bind-offs precisely. This alignment ensures sleeves hang properly from shoulder line.
Repeat sleeve insertion process for second sleeve. Check that both sleeves are sewn in identically before continuing to side seams.
Completing Side and Sleeve Seams
Fold cardigan right sides together aligning side edges from hem to underarm. Pin edges together matching row for row accuracy.
Continue pinning from underarm down sleeve seam to cuff. The continuous seam should align perfectly when pieces were knitted to same row count.
Seam from hem up side, around underarm, and down sleeve to cuff in one continuous line. Maintain consistent seam allowance throughout length.
Repeat seaming process on second side of cardigan. Turn cardigan right side out to check seam appearance and alignment.
Adding Buttons and Final Finishing Details
The finishing details transform your knitted pieces into a wearable cardigan. Careful button placement ensures functional and attractive closure.
Picking Up Stitches for Neck Band
The neck band finishes the neckline with ribbed edging that matches cuff ribbing. Pick up stitches evenly around entire neck opening.
Starting at right front neck edge, insert needle into edge stitch and pull loop through. Continue picking up approximately 3 stitches for every 4 rows.
Pick up held stitches from right front neck holder onto needle. Continue around back neck picking up stitches along bound-off edge.
Complete neck band by picking up held stitches from left front neck. You should have approximately 60 stitches total around neckline.
Work in k1, p1 ribbing for 6 rows to create neck band. Bind off loosely in pattern maintaining ribbing elasticity.
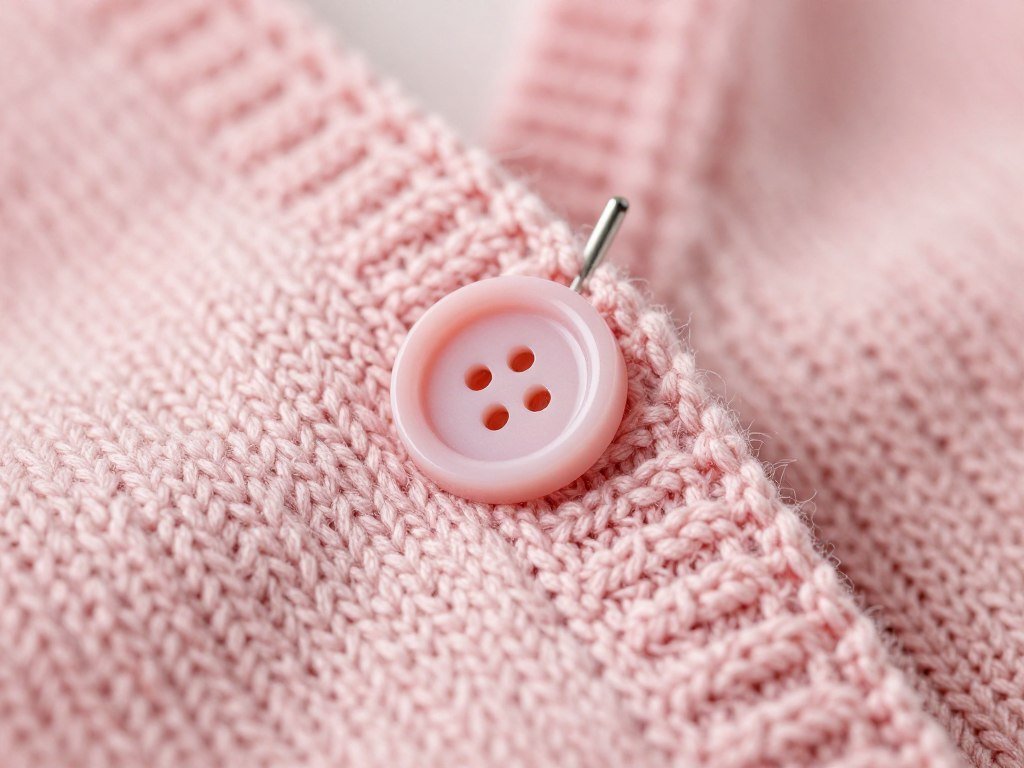
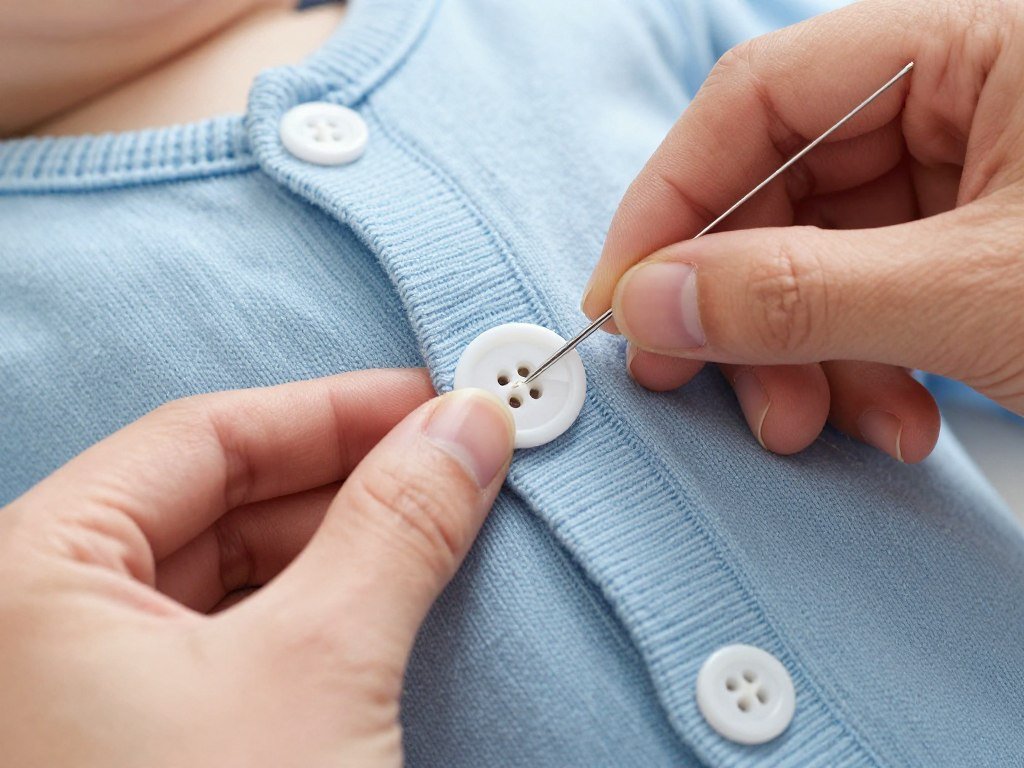
Selecting and Placing Buttons
Choose buttons that complement your yarn color and cardigan style. Buttons between 0.5 and 0.75 inches work best for baby cardigan proportions.
- Select buttons that fit easily through your worked buttonholes
- Test button size before purchasing to ensure proper fit
- Choose baby-safe buttons securely attached without small parts
- Match button color to yarn or select coordinating contrast shade
- Consider button weight to avoid pulling delicate knitted fabric
Mark button placement on right front band to align with buttonholes on left front. Pin cardigan closed and mark through each buttonhole center.
Thread sewing needle with strong thread matching button or yarn color. Sew each button securely with several passes through holes.
Create thread shank under button by wrapping thread several times between button and fabric. This shank accommodates fabric thickness when buttoned.
Weaving in Yarn Ends
Thread each yarn tail onto tapestry needle and weave through several stitches on wrong side. Change direction and weave back through different stitches.
This figure-eight weaving pattern secures ends permanently without knots. Trim tails close to fabric after weaving securely.
Check entire cardigan for any missed ends before final blocking. Loose ends can work out during washing if not properly secured.
Final Blocking and Steaming
Give completed cardigan a final gentle blocking to set seams and even out any remaining irregularities. Pin cardigan flat to measurements.
Steam lightly if yarn content allows or mist with water for gentle blocking. Let dry completely before handling or folding.
The finished cardigan should lay flat with smooth seams and even edges all around. Button bands should remain flat without curling or pulling.
Adjusting Pattern Size for Different Ages

Modify this baby cardigan free pattern to fit newborns through toddlers. Simple adjustments to stitch counts and length create different size options.
Size Adjustment Guidelines
| Size | Age | Chest | Back Stitches | Front Stitches | Sleeve Stitches | Length |
| Newborn | 0-3 months | 16 inches | 40 | 22 | 24 | 8 inches |
| Small | 3-6 months | 18 inches | 45 | 25 | 28 | 9 inches |
| Medium | 6-12 months | 20 inches | 50 | 28 | 30 | 10 inches |
| Large | 12-18 months | 22 inches | 55 | 30 | 34 | 11 inches |
| Extra Large | 18-24 months | 24 inches | 60 | 32 | 36 | 12 inches |
Calculate yarn requirements based on size adjustments. Larger sizes require approximately 100 additional yards per size increase.
Customizing Length and Sleeve Measurements
Measure baby or reference standard sizing charts for custom fit. Add 1-2 inches to measurements for comfortable ease in baby garments.
Work additional rows before armhole shaping to increase body length. Add 4 rows for each additional inch of desired length.
Lengthen sleeves by working more rows between increase rows. Maintain same increase rate but continue pattern for extra length needed.
Short sleeve variations work well for warmer weather baby cardigans. Stop sleeve at 4-5 inches length and work ribbed cuff for finished edge.
Caring for Your Handmade Baby Cardigan
Proper care extends the life of your handknitted cardigan through many wearings. Follow yarn-specific washing instructions for best results.
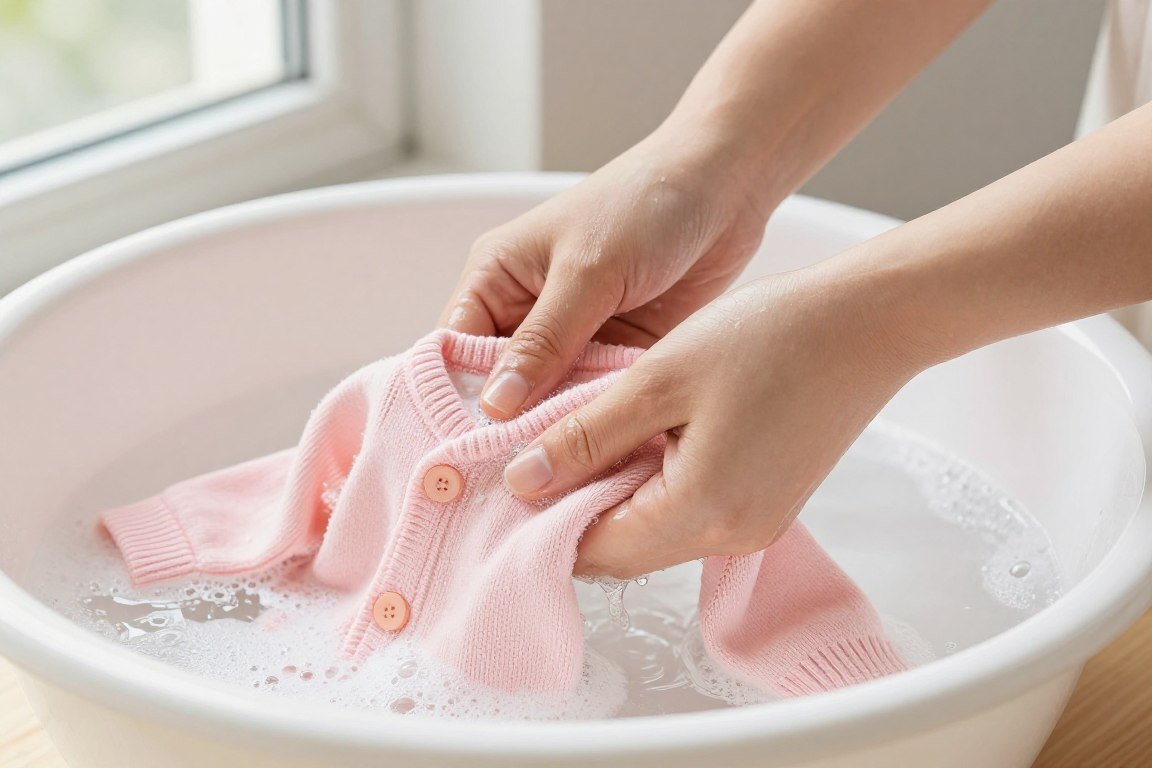
Washing and Drying Guidelines
Hand wash baby cardigans in cool water with gentle detergent formulated for delicates. Avoid hot water that can felt or shrink natural fiber yarns.
- Fill clean basin with cool water and add small amount of wool wash
- Submerge cardigan gently and swish through water without agitating
- Let cardigan soak for 10-15 minutes to release dirt and oils
- Drain basin and refill with clean cool water for rinsing
- Gently press water through cardigan without wringing or twisting
- Repeat rinse if water appears soapy after first rinse cycle
- Press cardigan between clean towels to remove excess moisture
- Lay flat on dry towel in original shape to air dry completely
Never hang wet knitted garments as weight of water stretches fabric out of shape. Always dry flat maintaining original blocked measurements.
Machine washing works for acrylic and superwash wool yarns if care label indicates machine safe. Use gentle cycle and cool water setting only.
Storage Recommendations
Store clean cardigans folded flat in drawer or on shelf. Hanging stretches shoulder area and distorts garment shape over time.
Place cedar blocks or lavender sachets near stored woolens to deter moths naturally. Avoid mothballs that leave strong chemical odor in fibers.
Refold cardigans along different lines periodically to prevent permanent creases forming. This practice maintains fabric flexibility during storage.
Addressing Common Wear Issues
Pills form naturally on knitted fabric from friction during wear. Remove pills gently using fabric shaver or sweater stone without pulling fibers.
Loose stitches sometimes appear after washing or wearing. Use crochet hook to work loose loop back into fabric from wrong side.
Small holes from catching on sharp objects can be darned invisibly using matching yarn. Work duplicate stitch over damaged area to reinforce repair.
Buttons may loosen over time with repeated use. Check button security regularly and resew with additional thread passes as needed.
Common Pattern Questions and Solutions
Even experienced knitters encounter challenges when working garment patterns. These solutions address frequently asked questions about this cardigan pattern.
Why does my gauge not match the pattern specifications?
Gauge varies based on individual knitting tension and yarn characteristics. Change needle size to adjust gauge rather than tension. Use larger needles if gauge is too tight with too many stitches per inch. Switch to smaller needles if gauge is too loose with too few stitches per inch. Work another gauge swatch after changing needles to verify match before starting cardigan.
How do I prevent button band from curling or puckering?
Button bands curl when worked in stockinette stitch due to natural fabric tendency. This pattern uses garter stitch on button bands which lays flat naturally. Maintain consistent tension on band stitches matching body tension. Block button bands carefully pinning edges completely flat. Steam blocking works especially well for setting garter stitch bands in position.
Can I substitute different yarn weight for this pattern?
Substituting yarn weight requires recalculating entire pattern based on new gauge. Different yarn weights produce different stitch counts per inch affecting all measurements. Work gauge swatch in substitute yarn and calculate stitch counts proportionally. Alternatively, search for patterns specifically written for your desired yarn weight for easier execution.
My sleeves appear twisted after seaming into armholes. What happened?
Twisted sleeves result from incorrect sleeve orientation during insertion. The sleeve seam should align with side seam at underarm point. Mark sleeve seam and center top of cap before pinning into armhole. Match these marked points to body seams ensuring sleeve hangs straight from shoulder. Unpick twisted sleeve seam and repin correctly before re-seaming.
How do I fix a dropped stitch several rows below current work?
Use crochet hook to pick up dropped stitches without ripping back rows. Insert hook through dropped loop from front to back. Catch strand from row above and pull through loop on hook. Continue working up rows until stitch reaches current needle level. Place recovered stitch back on needle and continue knitting. Work carefully to maintain correct stitch orientation throughout repair.
The buttonholes seem too large for my chosen buttons. How can I fix this?
Large buttonholes can be tightened by working blanket stitch around opening edge using matching yarn. Thread tapestry needle and work around buttonhole perimeter creating reinforced edge. This technique both strengthens buttonhole and reduces opening size slightly. Alternatively, choose larger buttons to properly fill existing buttonhole size.
Getting Additional Help
Online knitting communities provide excellent support for pattern questions. Post clear photos of your issue along with specific questions for best responses.
Video tutorials demonstrate techniques more clearly than written instructions for visual learners. Search for specific technique names to find helpful demonstrations.
Local yarn shops often offer knitting help and troubleshooting assistance. Bring your work in progress for hands-on guidance from experienced staff.
Creative Variations on the Basic Pattern

Transform this basic button stitch baby cardigan into unique designs through simple modifications. Small changes create dramatically different finished results.
Color and Stripe Variations
Stripes add visual interest without complicated colorwork techniques. Work stripes in any width from single row to wide bands of color.
Change colors at end of wrong side rows for cleanest color transitions. Carry unused color up side edge rather than cutting yarn for narrow stripes.
- Two-color wide stripes create bold graphic look in complementary shades
- Rainbow progression of narrow stripes makes cheerful multicolor cardigan
- Ombre effect fades from light to dark using gradual color changes
- Contrast color sleeves with solid body create sporty baseball-style cardigan
- Colorblock design places different colors on fronts, back, and sleeves
Embellishment Ideas
Add embroidery after completing cardigan for personalized details. Simple embroidered motifs enhance without overwhelming delicate baby scale.
Swiss darning duplicates knit stitches in contrasting color creating embroidered appearance. This technique works beautifully for adding names or small motifs.
Buttons themselves provide decorative opportunity beyond basic closure function. Mix button sizes, colors, and shapes for whimsical effect.
Ribbon trim along edges adds feminine touch to baby girl cardigans. Weave narrow satin ribbon through stitches along front bands and hem.
Texture Variations
Substitute different stitch patterns for stockinette body to create texture interest. Test new stitches on gauge swatch ensuring gauge remains consistent.
Seed stitch creates subtle textured surface throughout cardigan body. This stitch pattern lays flatter than stockinette reducing edge curling.
Cable panels down center back or front bands add traditional Aran styling. Adjust stitch counts to accommodate cable panel width requirements.
Lace pattern inserts create delicate openwork sections perfect for spring and summer cardigans. Place lace panels on sleeves or yoke area.
What You’ll Receive
- New free pattern every week in your inbox
- Exclusive subscriber-only patterns and designs
- Step-by-step technique video tutorials
- Yarn sale alerts and special discount codes
- Tips for fixing common knitting mistakes
- Seasonal project ideas and inspiration
Join 50,000+ Happy Crafters
“The weekly patterns are always beautiful and well-written. I’ve completed dozens of projects from this newsletter and given them as gifts. The instructions are clear enough for my beginner level but still interesting for experienced knitters.”
Your Handmade Baby Cardigan Awaits

You now possess all information needed to create a beautiful button stitch baby cardigan. This free pattern provides complete guidance from first cast-on through final finishing.
The skills learned through this project transfer to countless future knitting endeavors. Button stitches, garment shaping, and seaming techniques apply across many pattern types.
Take your time working through each section at your own pace. Knitting should bring joy and relaxation rather than stress and frustration.
Your finished cardigan will become a cherished item worn with love. Handmade garments carry special meaning that store-bought items cannot replicate.
Share photos of your completed cardigan with the knitting community. Other makers find inspiration seeing finished projects in different yarns and colors.
Consider making multiple cardigans as gifts for baby showers and newborn celebrations. This pattern works up quickly enough to create several in various sizes.
Save this pattern for future reference as babies in your life continue arriving. The timeless design remains popular across changing fashion trends.
Happy knitting, and enjoy every stitch of creating this special baby cardigan. The joy of making something beautiful with your own hands never fades.