
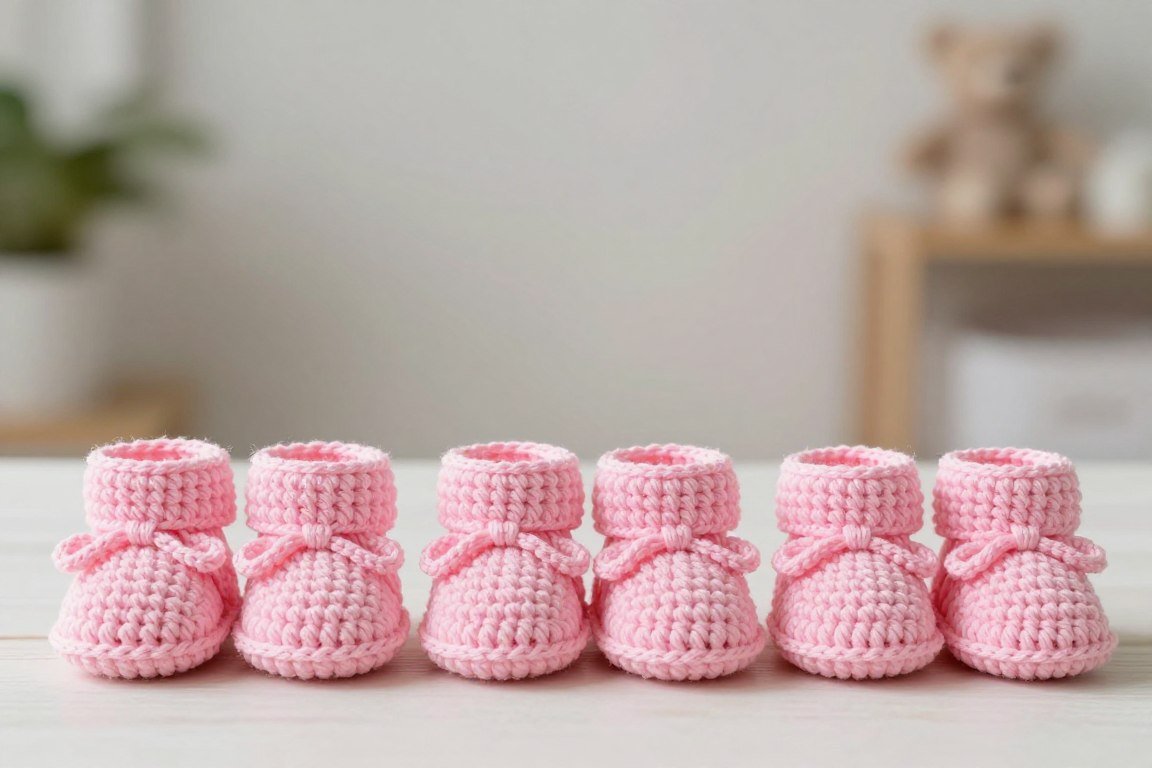
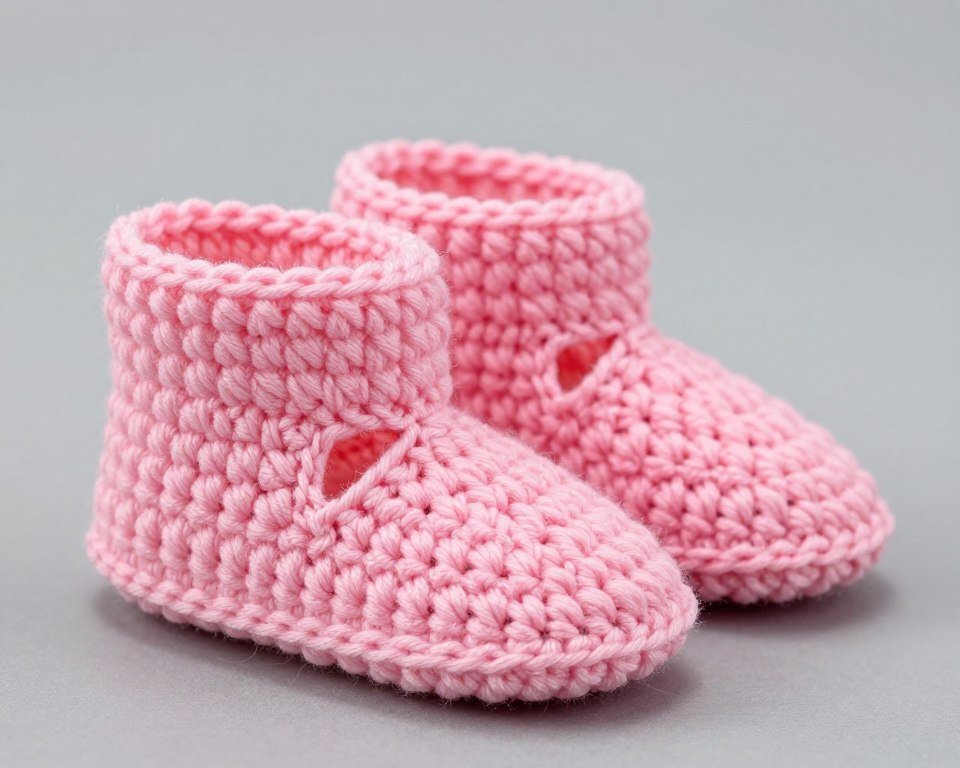
Creating adorable baby booties has never been easier with this comprehensive Pink Lady Baby Booties Free Pattern. These charming little shoes make perfect gifts for baby showers or newborns.
This pattern works beautifully for crafters of all skill levels. The simple stitches and clear instructions help you create professional-looking results.
Table of Contents
Essential Materials for Your Pink Lady Baby Booties
Gathering the right supplies before you start crocheting ensures a smooth crafting experience. Quality materials make a significant difference in the final look of your baby booties.

Yarn Selection
Choose soft, baby-friendly yarn for these crochet baby booties. The Pink Lady pattern works best with lightweight yarns that feel gentle against delicate skin.
- Worsted weight baby yarn in pink (approximately 100 yards)
- Machine washable acrylic or cotton blend recommended
- Hypoallergenic yarns for sensitive baby skin
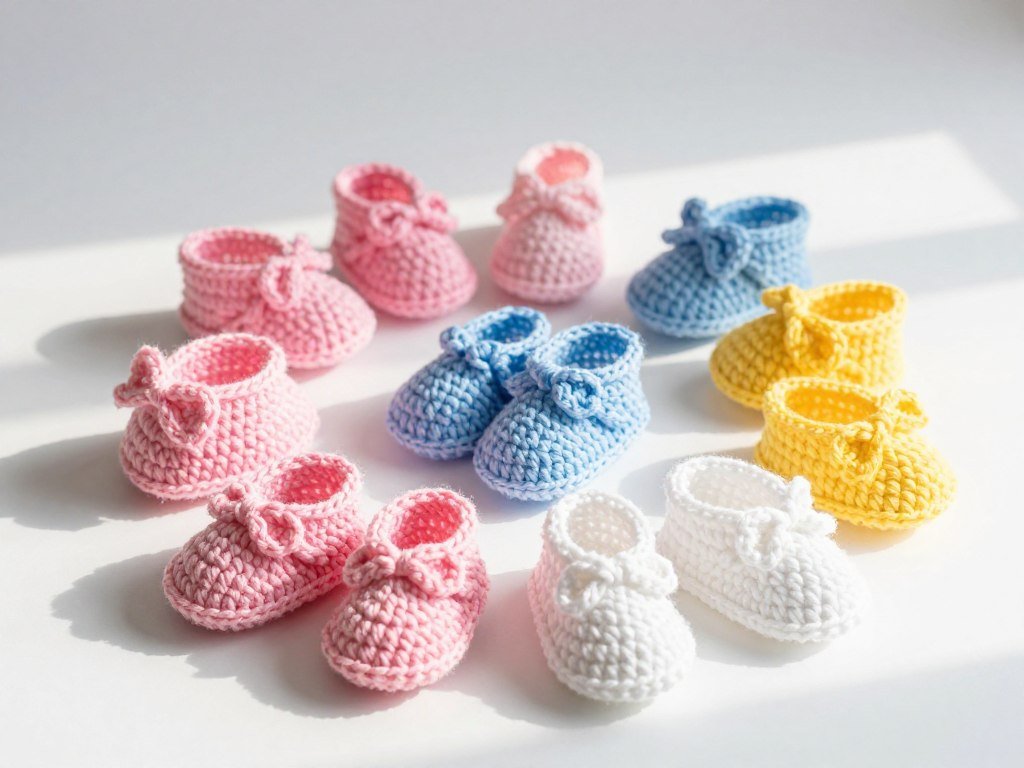
- Color options include light pink, rose, or coral shades
Required Tools and Supplies
Having the proper crochet hook size ensures your bootie maintains the correct shape. Additional tools help with finishing touches and assembly.
- Size G (4.0mm) crochet hook for standard sizing
- Yarn needle for weaving in ends securely
- Stitch markers to track your progress
- Small scissors for trimming yarn tails
- Measuring tape to check sizing accuracy
Recommended Yarn Brands
These trusted brands offer excellent quality for baby projects. They wash well and maintain softness through multiple uses.
- Red Heart Soft Baby yarn
- Bernat Baby Blanket
- Lion Brand Babysoft
Optional Embellishments
Add personal touches to make your baby booties pattern unique. Keep decorations secure and baby-safe.
- Small ribbon bows
- Tiny buttons for decoration
- Contrasting color yarn for details
Understanding Baby Bootie Sizes
Getting the right size ensures comfortable fit for growing feet. This baby booties pattern includes three different sizes to accommodate newborns through six-month-olds.
| Age Range | Foot Length | Sole Length | Chain Start |
| 0-3 months | 3.5 inches | 3 inches | 10 chains |
| 3-6 months | 4 inches | 3.5 inches | 12 chains |
| 6-12 months | 4.5 inches | 4 inches | 14 chains |
Measure baby feet carefully before selecting your size. Allow slight room for growth and comfortable wear throughout the day.
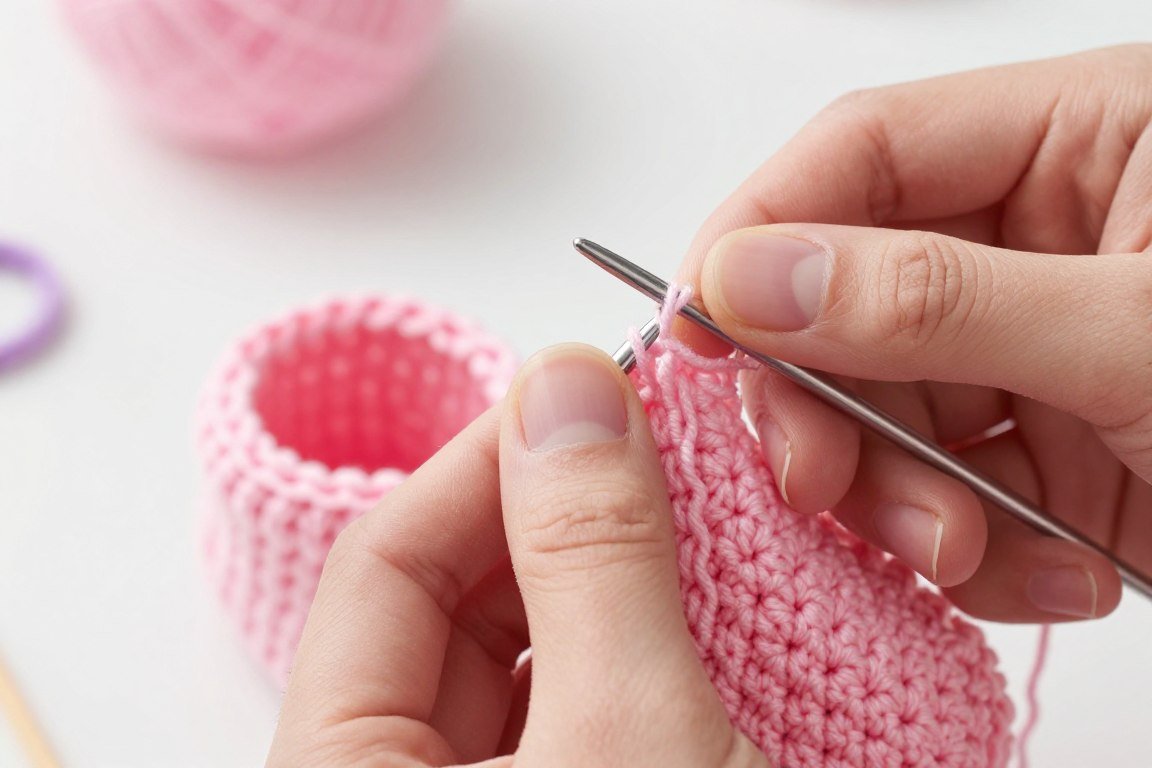
Essential Crochet Stitches You’ll Need
This free pattern uses basic stitches that most crocheters already know. Understanding these fundamental techniques helps you work confidently through each round.

Primary Stitches Used
The Pink Lady pattern relies on simple stitch combinations. These basic techniques create the structure and shape of your crochet baby booties.
- Chain stitch (ch) – foundation for starting each section
- Single crochet (sc) – main body stitch throughout pattern
- Half double crochet (hdc) – used in sole construction
- Double crochet (dc) – creates height in bootie cuff
- Slip stitch (sl st) – joins rounds and creates finished edges
Special Techniques
A few special methods enhance the bootie construction. These techniques aren’t difficult but require attention to detail for best results.
- Working in back loop only (BLO) for textured cuff
- Increasing stitches evenly around sole
- Decreasing to shape the toe area
- Joining rounds invisibly for neat appearance
Beginner Tip: Practice each stitch type on a small swatch before starting your bootie. This builds muscle memory and helps maintain consistent tension throughout your project.
Step-by-Step Pink Lady Baby Booties Pattern Instructions
Follow these detailed instructions to create your adorable baby booties. Work through each section carefully, checking your stitch count at the end of every round.
Creating the Sole
The sole forms the foundation of your baby bootie. Start crocheting with a chain that matches your chosen size from the sizing chart above.
Round 1: Chain 10 (for 0-3 month size). Work 2 hdc in 3rd chain from hook. Hdc in next 7 sts. Work 5 hdc in last chain. Continue working along opposite side of chain. Hdc in next 7 sts. Work 3 hdc in same stitch as beginning. Join with slip stitch to 1st hdc.
Round 2: Chain 2. Work 2 hdc in same stitch. Hdc in next 9 sts. Work 2 hdc in each of next 5 sts. Hdc in next 9 sts. Work 2 hdc in each of next 4 sts. Join with slip stitch.
Stitch Count Check: You should have 38 stitches at the end of Round 2. Count carefully to ensure proper sizing and shape.
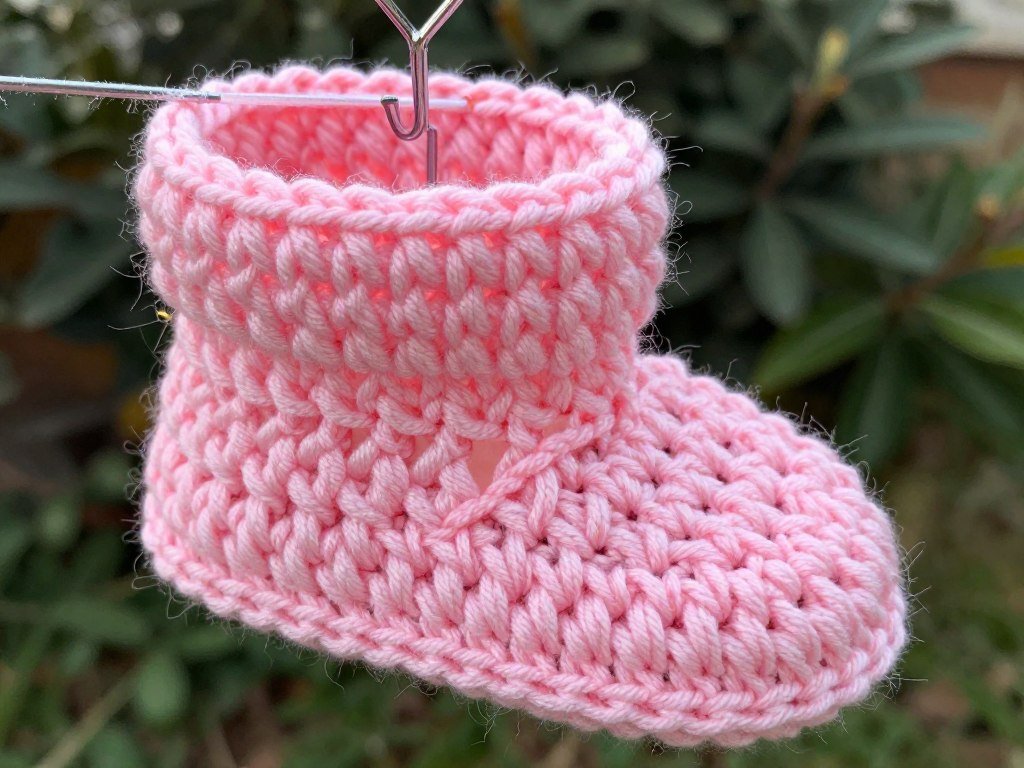
Building the Sides
The side rounds create the shoe shape that wraps around baby feet. Work these rounds in continuous spiral without joining unless specified.
Round 3: Chain 1. Working in back loop only, single crochet in each stitch around. This creates the ridge that defines the sole edge. Continue for 38 sts total.
Rounds 4-6: Single crochet in each stitch around for three rounds. Work evenly without increasing or decreasing. These rounds build height for the bootie sides.
Shaping the Toe
The toe shaping gives your baby booties their characteristic rounded front. Work decreases carefully to maintain even tension.
Round 7: Sc in first 11 sts. Sc2tog (decrease) six times across toe area. Sc in remaining sts to end of round. This round reduces the circumference at the toe.
Round 8: Sc in first 11 sts. Sc2tog three times. Sc in remaining sts. Continue decreasing to shape a comfortable toe box.
Adding the Cuff
The cuff adds a decorative finish and helps booties stay on baby feet. This section uses taller stitches for a different texture.
Round 9: Chain 2. Work half double crochet in each stitch around. Join with slip stitch to top of beginning chain. This starts the cuff section.
Round 10: Chain 2. Working in back loop only, hdc in each stitch around. Join with slip stitch. The back loop technique creates a ribbed appearance.
Round 11: Repeat Round 10 for additional cuff height. You can add more rounds for a taller cuff if desired.
Finishing Your Pink Lady Baby Booties
Proper finishing techniques ensure your crochet baby booties look professional and last through many wearings. Take time with these final steps for best results.
Weaving in Ends
Secure all yarn ends to prevent unraveling. Thread your yarn needle with the tail and weave through several stitches on the wrong side of the work.
- Weave ends through at least five stitches in different directions
- Avoid pulling too tight to prevent puckering
- Trim excess yarn close to the work with sharp scissors
- Check both the sole and cuff for loose ends
Blocking and Shaping
Light blocking helps your baby booties maintain their shape. This optional step improves the overall appearance of your finished pair.
- Gently steam booties with iron on low setting
- Hold iron slightly above the work to avoid flattening stitches
- Shape booties while still warm and slightly damp
- Allow to cool completely before handling
Adding Decorative Elements
Embellishments personalize your baby bootie project. Always secure decorations firmly to prevent choking hazards for baby.
Safe Decoration Options
- Securely sewn ribbon bows on cuff
- Embroidered details using yarn
- Contrasting color edging around sole
- Crocheted flower appliques
Items to Avoid
- Loose buttons or beads
- Long ribbon ties
- Glued-on decorations
- Small removable parts

Caring for Your Crochet Baby Booties
Proper care keeps your handmade baby booties looking fresh through multiple uses. Follow these washing and storage guidelines to maintain quality.
Washing Guidelines
Hand washing extends the life of delicate crochet work. Use gentle methods to preserve the shape and softness of your baby bootie.
- Hand wash in cool water with mild baby detergent
- Gently squeeze excess water without wringing
- Roll in towel to remove additional moisture
- Reshape and lay flat to dry away from direct heat
- Machine wash on delicate cycle only if yarn label permits
Storage Tips
Store booties properly between uses to maintain their structure. Proper storage prevents crushing and keeps yarns fresh.
- Stuff lightly with tissue paper to maintain shape
- Store in breathable fabric bag or box
- Keep away from direct sunlight to prevent fading
- Avoid plastic bags that can trap moisture
Common Issues and Solutions
Even experienced crocheters encounter challenges when working new patterns. These solutions address the most frequent problems with this baby booties pattern.
Why Are My Booties Too Tight?
Tight tension is the most common cause. Try using a larger crochet hook size or consciously relaxing your grip on the yarn. Check that you’re not pulling stitches too snugly after completing them. Some crocheters naturally work tighter and need to go up a hook size from the pattern recommendation.
The Sole Isn’t Lying Flat
Uneven increases often cause curling. Count your stitches carefully at the end of each round to ensure you have the correct number. Work increases more loosely than regular stitches. Light blocking with steam can also help flatten a slightly curved sole.
My Stitch Count Is Off
Use stitch markers to track the beginning of each round. Count stitches at the end of every round rather than waiting until you finish the entire bootie. If you discover an error, it’s easier to unravel a few rows than to redo the entire project later.
The Toe Area Looks Bunched
Decreases should be evenly distributed across the toe section. Work your sc2tog stitches loosely to avoid pulling. If necessary, add an extra round before decreasing to create more gradual shaping. The toe naturally has some gathering, but it shouldn’t create deep pleats.
Important: If booties are intended as a gift, complete at least one test pair first. This allows you to adjust hook size or tension as needed before making the final presentation pair.
Creative Pattern Variations
Once you master the basic Pink Lady baby booties pattern, try these fun variations. Small changes create entirely different looks while using the same foundation pattern.
Color Combinations
Experiment with different color schemes to create unique baby booties. Consider the recipient’s nursery colors or favorite shades.
Classic Pastels
Soft pink, baby blue, mint green, or lavender work beautifully for traditional baby gifts. These gentle colors suit any gender and coordinate with most nursery themes.
Bold Brights
Vibrant red, royal blue, sunny yellow, or emerald green create eye-catching booties. Modern parents often appreciate these stronger color choices for their babies.
Neutral Tones
Cream, beige, gray, or tan offer versatile options that match everything. These sophisticated choices appeal to minimalist aesthetic preferences.
Structural Modifications
Change the pattern structure slightly to create different bootie styles. These modifications maintain the basic construction while adding variety.
- Add extra cuff rounds for high-top bootie style
- Work shorter cuff for ankle-boot look
- Create striped pattern by changing colors every two rounds
- Use variegated yarn for automatic color changes
- Add a contrasting color sole for two-tone effect
Presenting Your Handmade Baby Booties
Thoughtful presentation enhances your handmade gift. These packaging ideas show the care you put into creating your crochet baby booties.
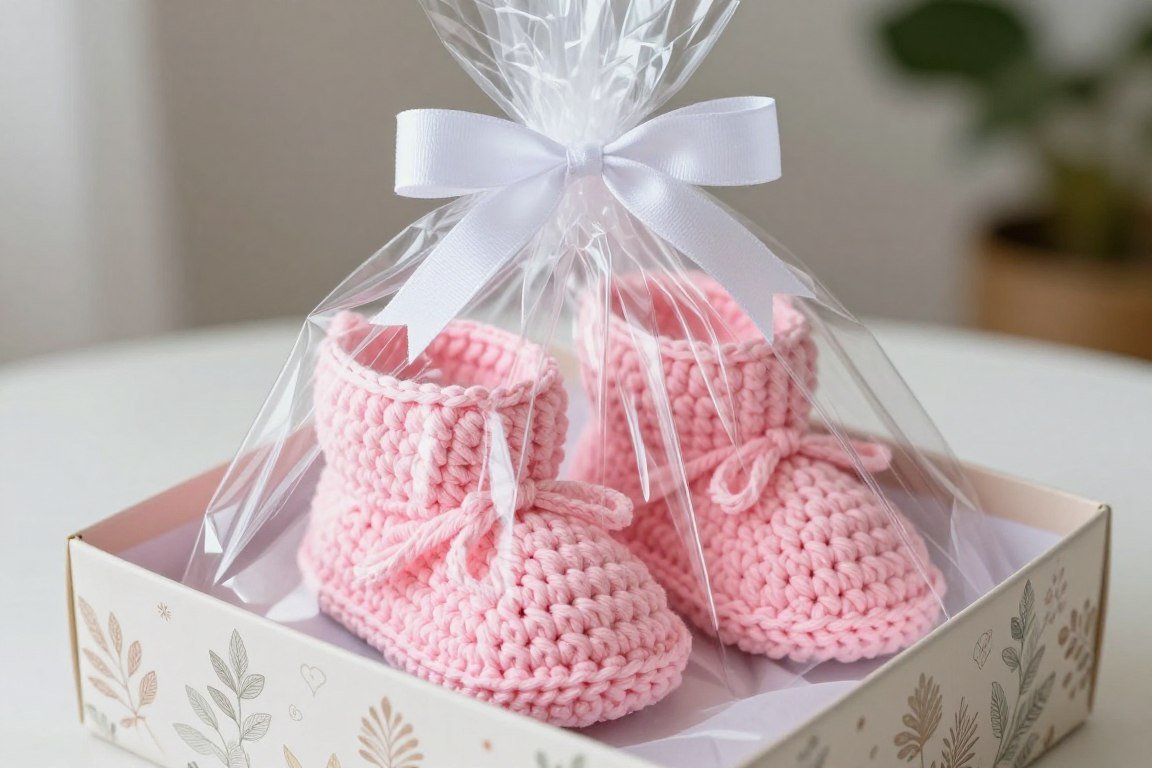
Packaging Ideas
- Place booties in clear cellophane bag tied with coordinating ribbon
- Arrange in small decorative box lined with tissue paper
- Create a basket with other handmade baby items
- Include a handwritten care instruction card
- Add a small tag with the baby’s name or birth date
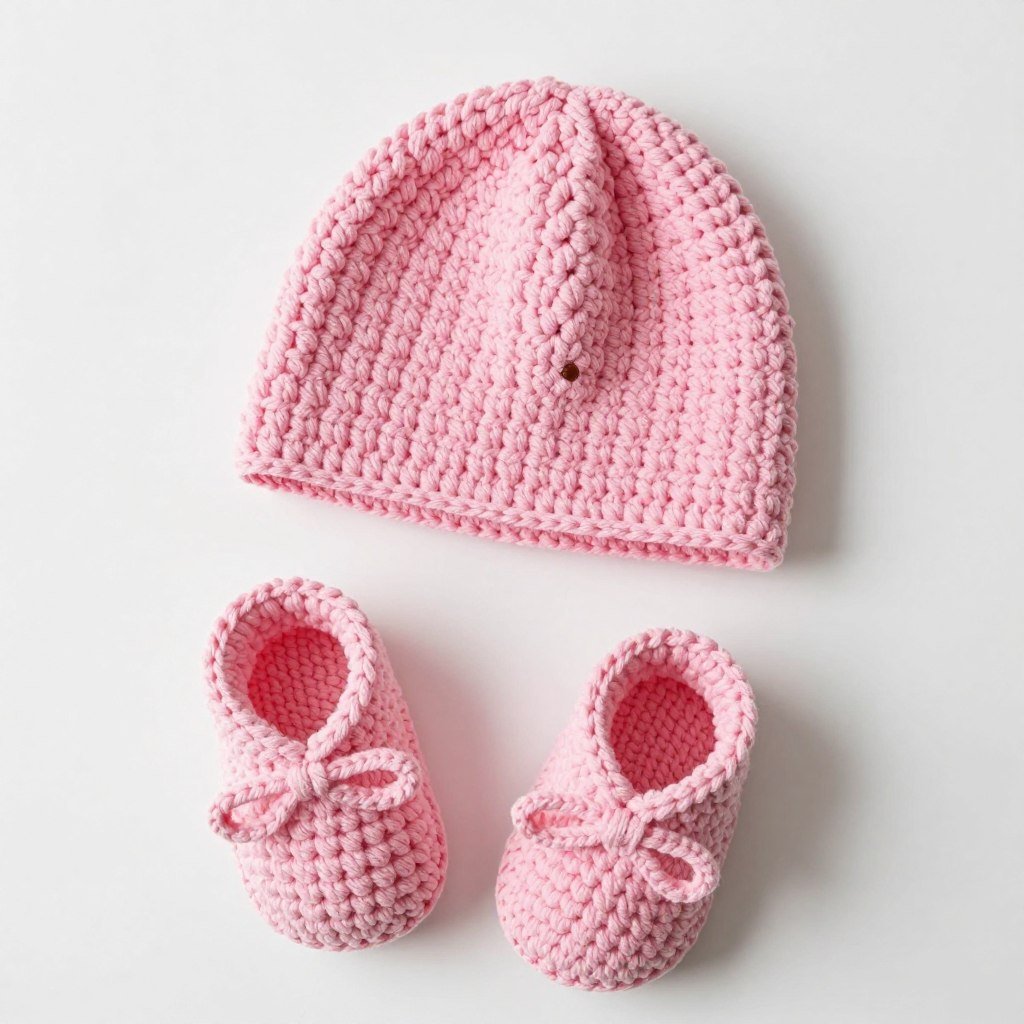
Completing the Gift Set
Pair your baby booties with other matching crochet items for a complete gift. Coordinated sets make impressive baby shower or newborn presents.
- Matching hat in the same pink yarn color
- Small blanket or receiving blanket with similar stitch pattern
- Coordinating mittens to prevent baby scratching
- Stuffed toy in complementary colors
More Free Crochet Baby Patterns
Expand your baby crochet collection with these additional free pattern resources. Each project uses similar skill levels and basic stitches.
Simple Baby Hat Pattern
Create a matching hat using the same yarn and hook. This quick project takes about two hours to complete and perfectly coordinates with your Pink Lady booties.
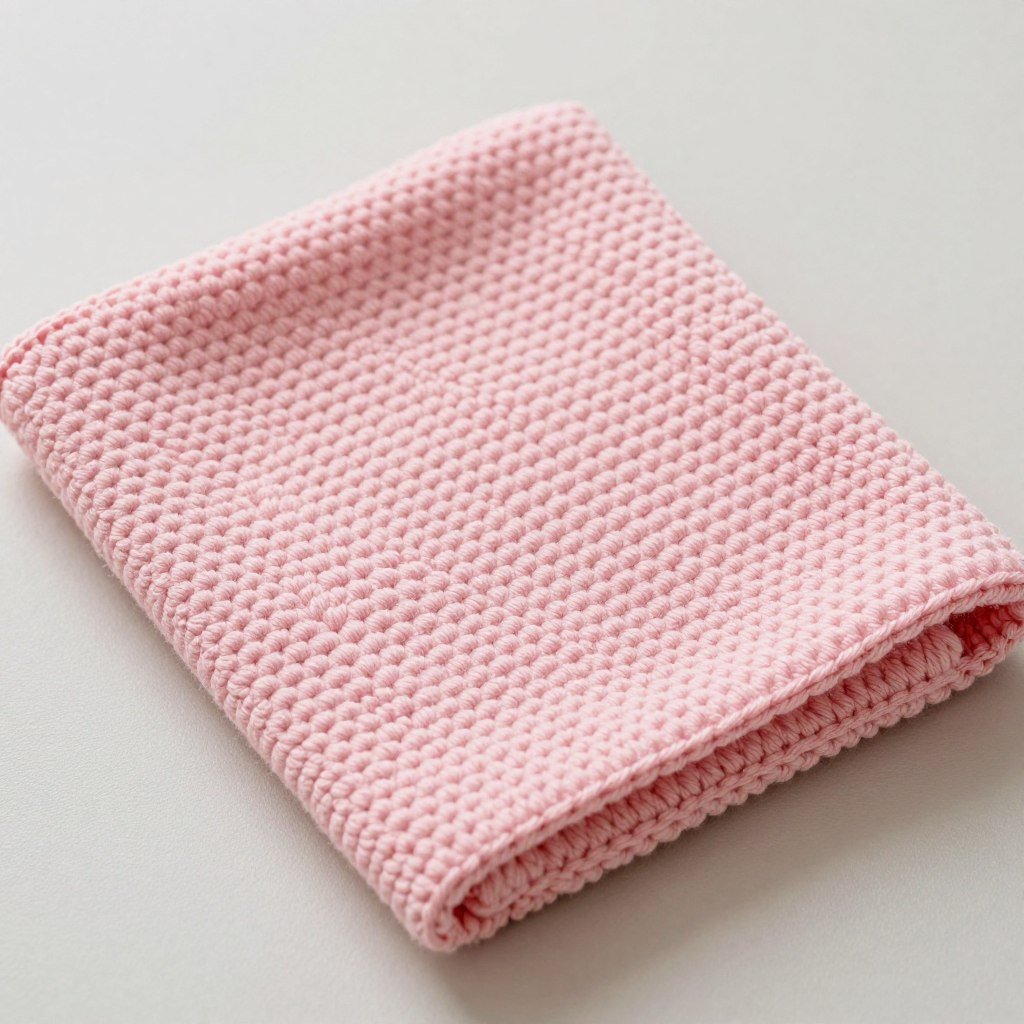
Beginner Baby Blanket
Work up a cozy receiving blanket with basic stitches. This larger project teaches consistent tension and is perfect for practicing your crochet baby skills.
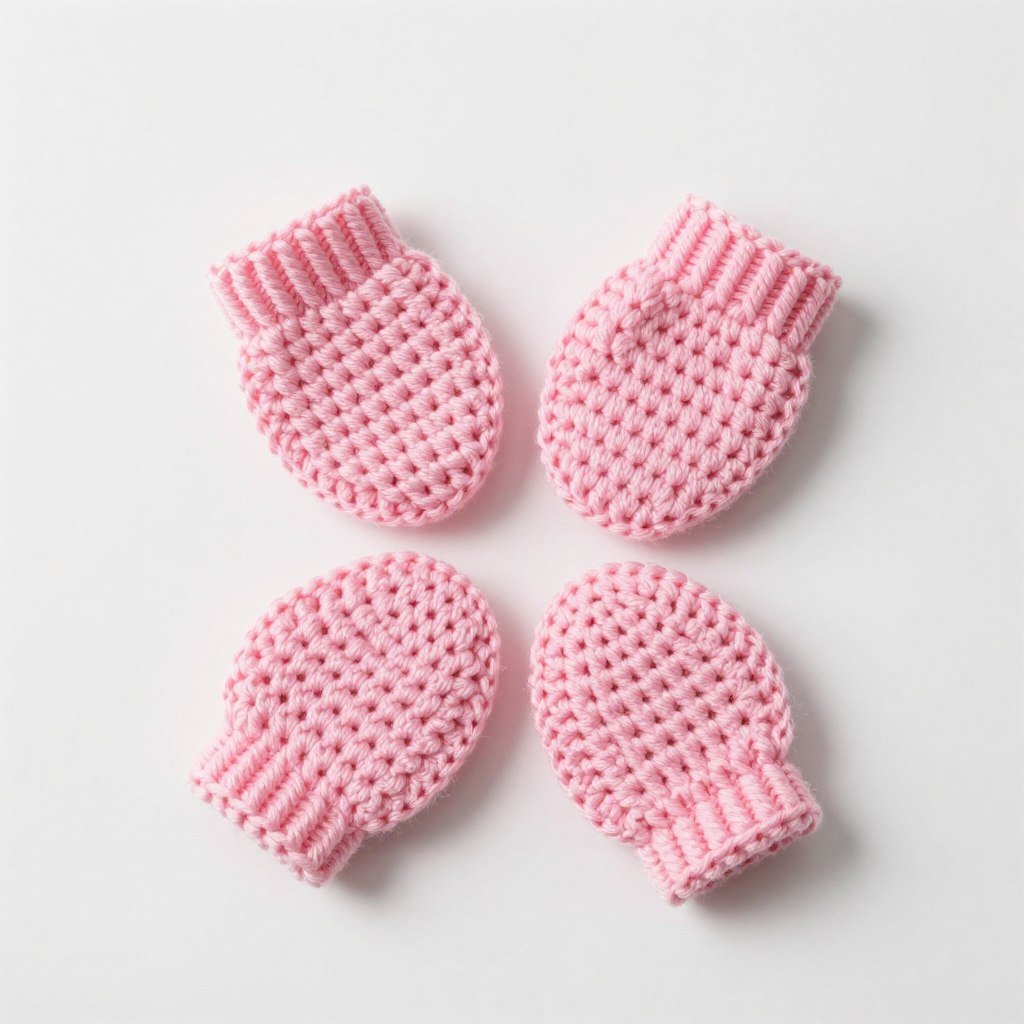
Quick Baby Mittens
These adorable mittens use similar construction to the booties pattern. They work up quickly and make perfect additions to your baby gift sets.
Start Your Pink Lady Baby Booties Project Today
This comprehensive Pink Lady Baby Booties Free Pattern provides everything you need to create adorable handmade shoes for the special baby in your life. The simple stitches and clear instructions make this an ideal project for building your crochet baby skills.
Remember that practice improves your technique with each pair you create. Don’t worry if your first bootie isn’t perfect – the second one will be even better as you develop rhythm and consistency.

These charming baby booties make thoughtful gifts that will be treasured for years. Many parents save their baby’s first shoes as precious keepsakes, and your handmade creation becomes part of their family memories.
Start crocheting your Pink Lady baby booties today and experience the joy of creating something beautiful and functional with your own hands. Share photos of your finished projects with our crafting community and inspire other crocheters to try this delightful free pattern.