
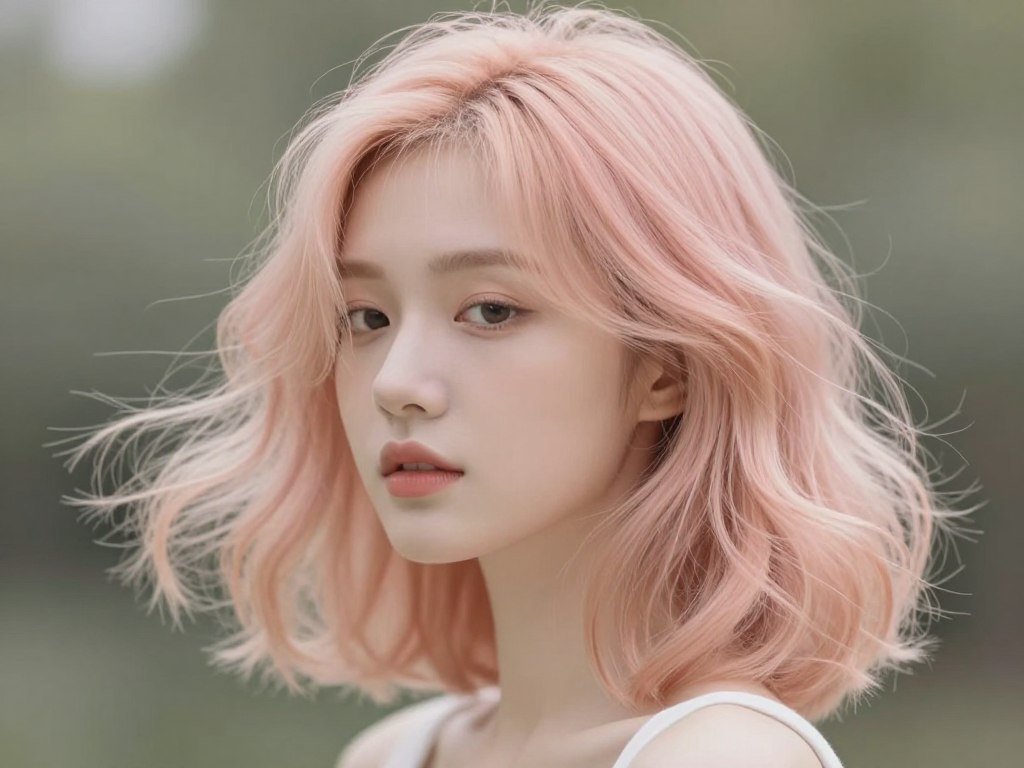
This comprehensive guide explores twenty distinct medium length haircuts designed specifically for thin fine hair. Each style includes detailed descriptions and practical advice. You’ll discover how to select cuts that complement your face shape and lifestyle.
Expert Insight: The right medium length haircut can make thin hair appear twice as thick. Strategic layering and texturizing techniques create dimension that transforms fine strands into voluminous, beautiful styles.
Whether you prefer classic elegance or modern edge, these carefully selected haircuts deliver results. Let’s explore the transformative power of the perfect cut for your thin fine hair.
Table of Contents
1. Textured Layered Bob for Maximum Volume
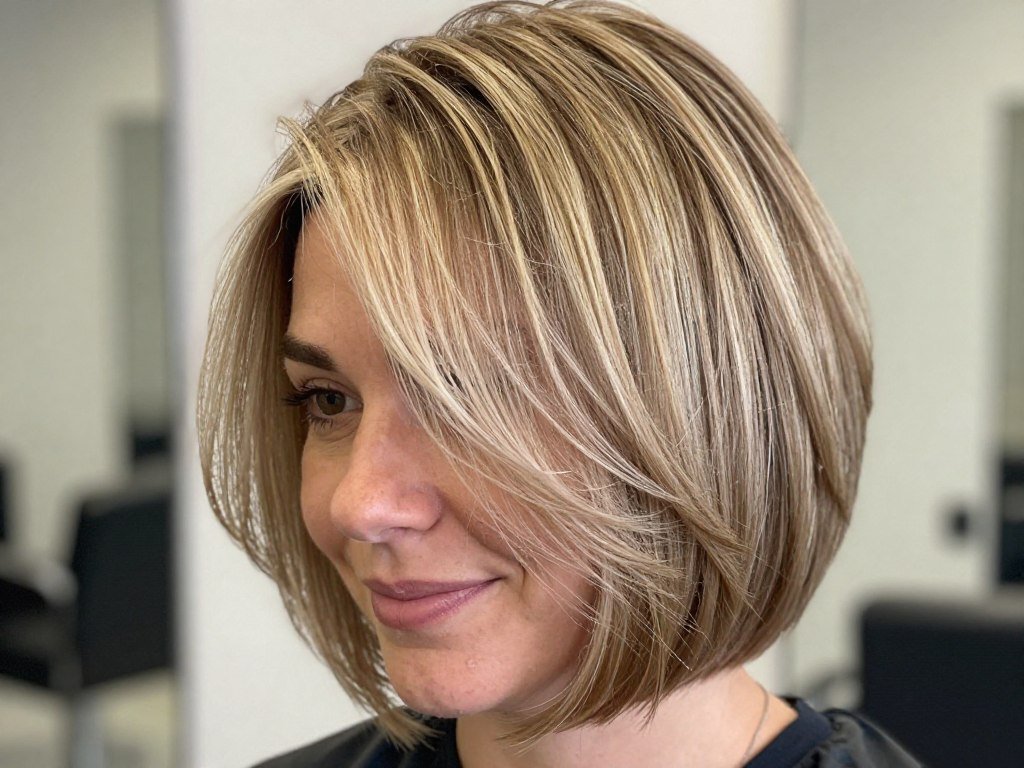
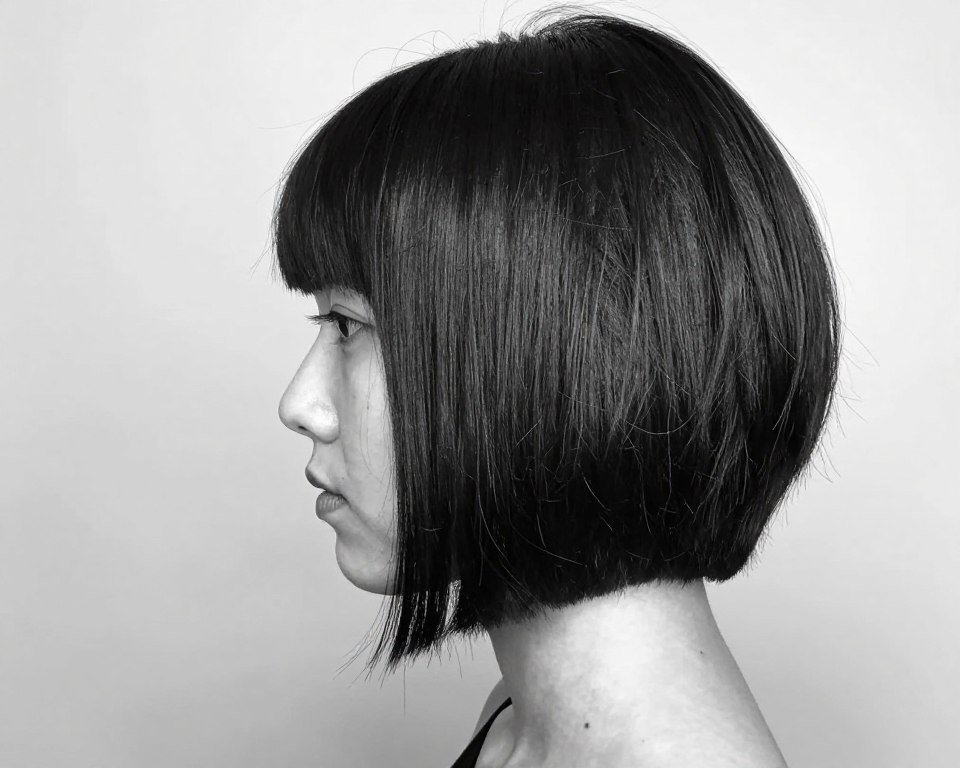
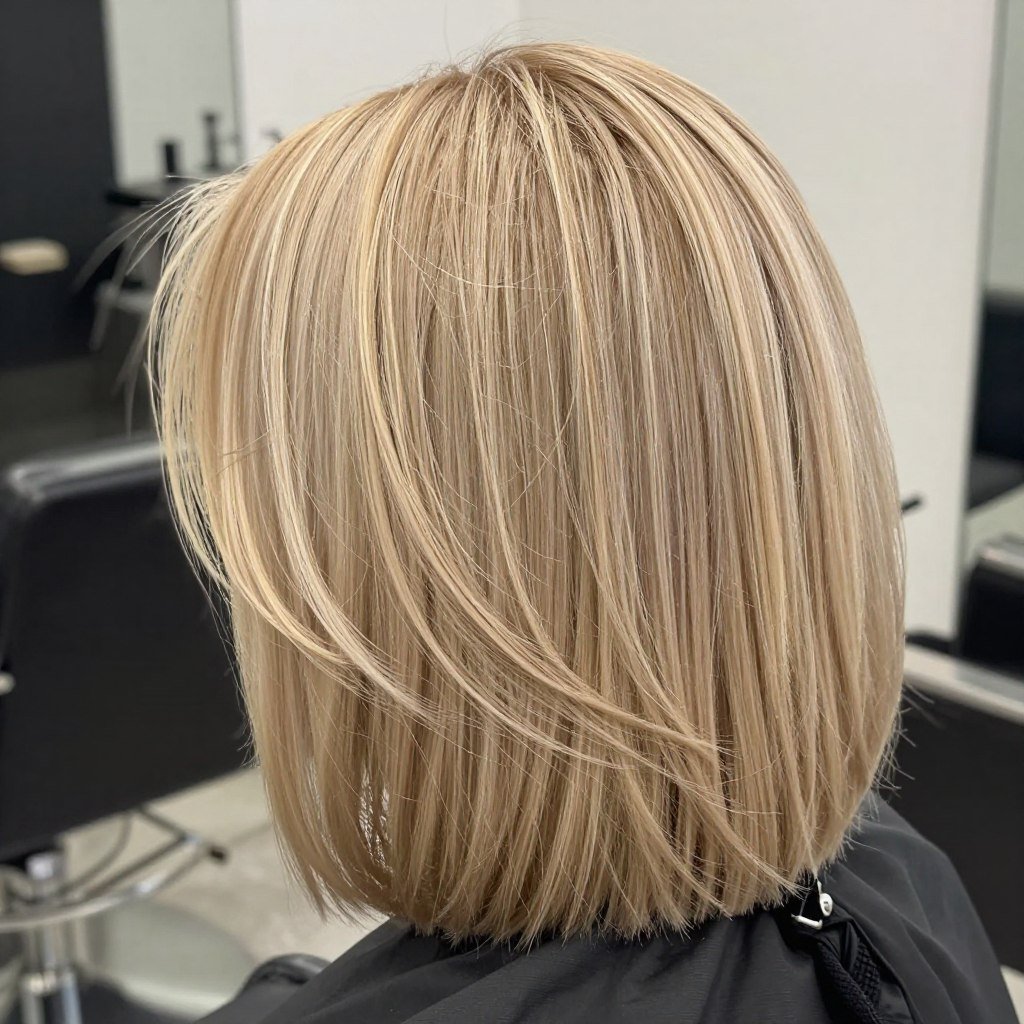
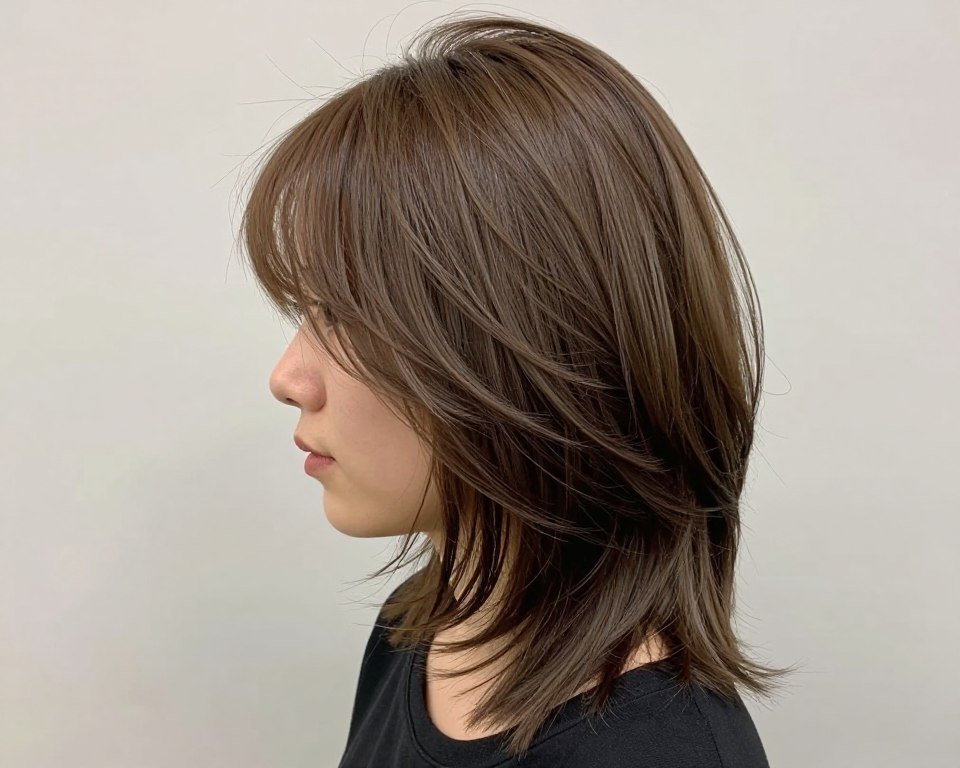
The textured layered bob stands as one of the most effective medium length haircuts for thin fine hair. This style combines strategic layers with texturizing techniques to create impressive volume. The cut typically falls between chin and shoulder length.
Layers throughout this cut prevent hair from laying flat against your head. Each layer adds lift at the roots. The shortest layers near the crown create natural height. Longer layers toward the ends maintain movement and shape.
Why This Cut Works for Thin Hair
The magic lies in how layers remove weight from fine strands. Heavy, blunt cuts pull thin hair down. Layered styles allow each section to move independently. This creates the appearance of fuller, thicker hair.
Texturizing shears add subtle variation to strand thickness. This technique breaks up uniformity that makes thin hair look sparse. The result is a cut with natural-looking body and dimension.
Styling Tips and Maintenance
Styling this cut requires minimal effort for maximum impact. Start with a volumizing mousse on damp hair. Apply product from roots to mid-lengths, focusing on the crown area.
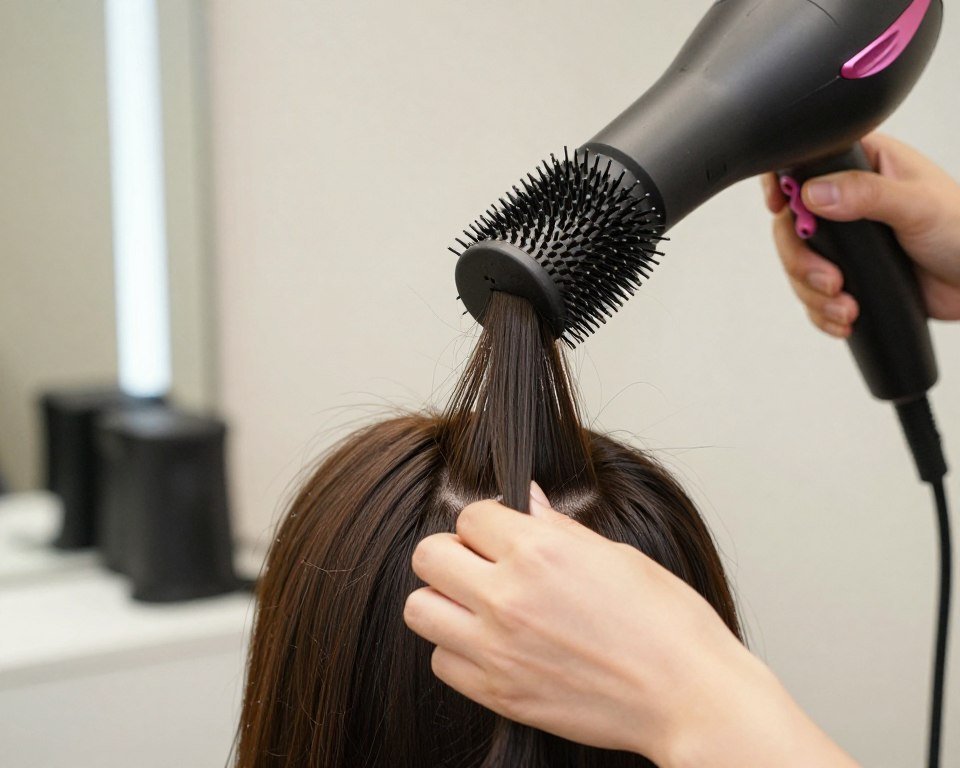
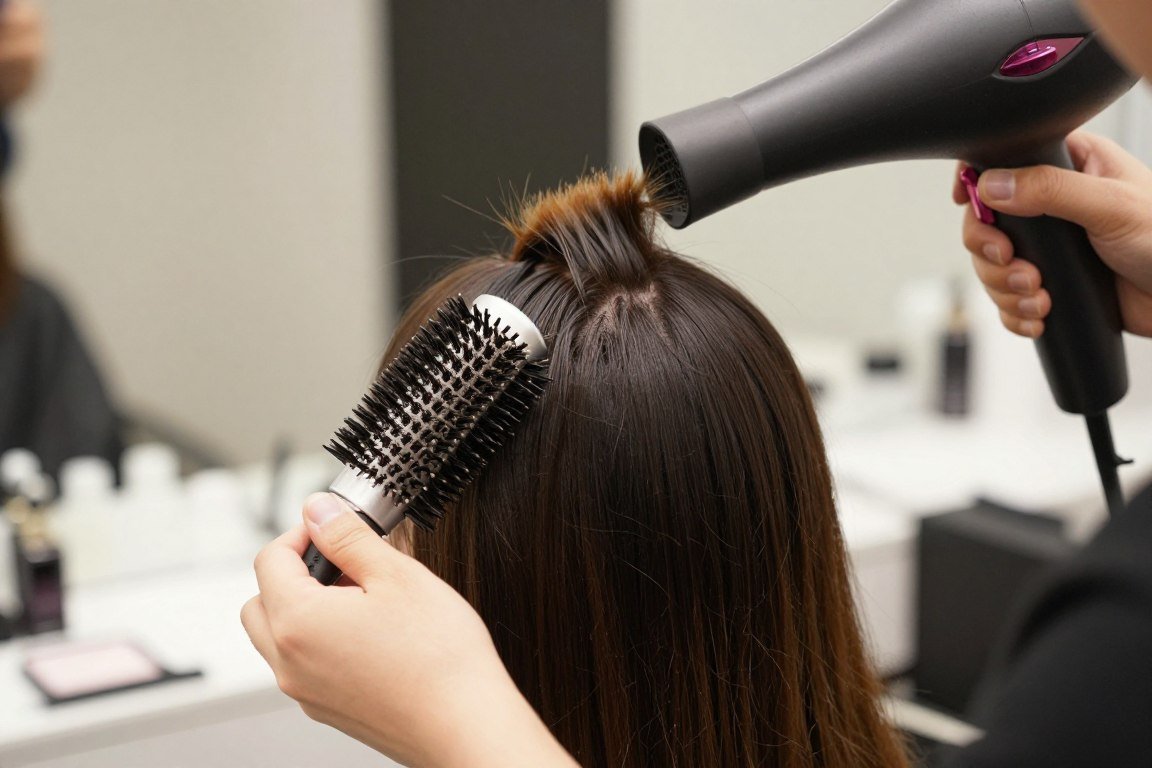
Use a round brush while blow drying to add volume. Lift sections at the roots and direct heat from underneath. This technique creates lasting lift that holds throughout the day.
Finish with a lightweight texturizing spray. Spray at the roots and scrunch gently. This adds grip and separation to fine strands. The hair appears fuller without feeling heavy or sticky.
Maintenance Requirements
Regular trims every six to eight weeks keep this style looking fresh. Ask your stylist to maintain the layer structure. Removing damaged ends prevents thin hair from appearing wispy.
This cut suits most face shapes. Round faces benefit from slightly longer lengths that create vertical lines. Heart-shaped faces look beautiful with this style when layers start at cheekbone level.
2. Long Layers with Face-Framing Pieces

Long layers create beautiful movement in medium length haircuts for thin fine hair. This style features graduated layers that start around the collarbone. Face-framing pieces add dimension around your features.
The longest layers preserve overall length while shorter layers add volume. This creates a cascading effect that makes hair appear thicker. The style works particularly well for those transitioning from longer hair.
Creating the Illusion of Thickness
Strategic layering removes bulk without sacrificing perceived fullness. The key is keeping layers relatively close together. Drastic layer differences can make thin hair look stringy.

Face-framing layers draw attention to your best features. These shorter pieces create movement around the face. They add interest without overwhelming fine strands. The layers catch light beautifully, enhancing dimension.
Styling Techniques for Daily Wear
This versatile cut offers multiple styling options. For a polished look, blow dry with a round brush. Section hair and wrap each section around the brush. Pull the brush downward while directing heat from above.
Create soft waves using a curling iron with a medium barrel. Take small sections and wrap hair around the iron. Alternate the direction of curls for a natural appearance. This technique adds volume and texture to fine strands.
Best Products for This Style
Start with a volumizing shampoo and conditioner system. These products coat each strand to make hair appear thicker. Rinse conditioner thoroughly to prevent weighing down fine hair.
Apply a lightweight styling cream to damp hair. Work product through mid-lengths to ends, avoiding roots. This provides hold without heaviness. The hair maintains natural movement throughout the day.
Finish with a flexible hold hairspray. Mist lightly over completed style. This locks in volume while allowing hair to move naturally. The right products make thin hair look full and healthy.
3. Modern Shag with Choppy Layers
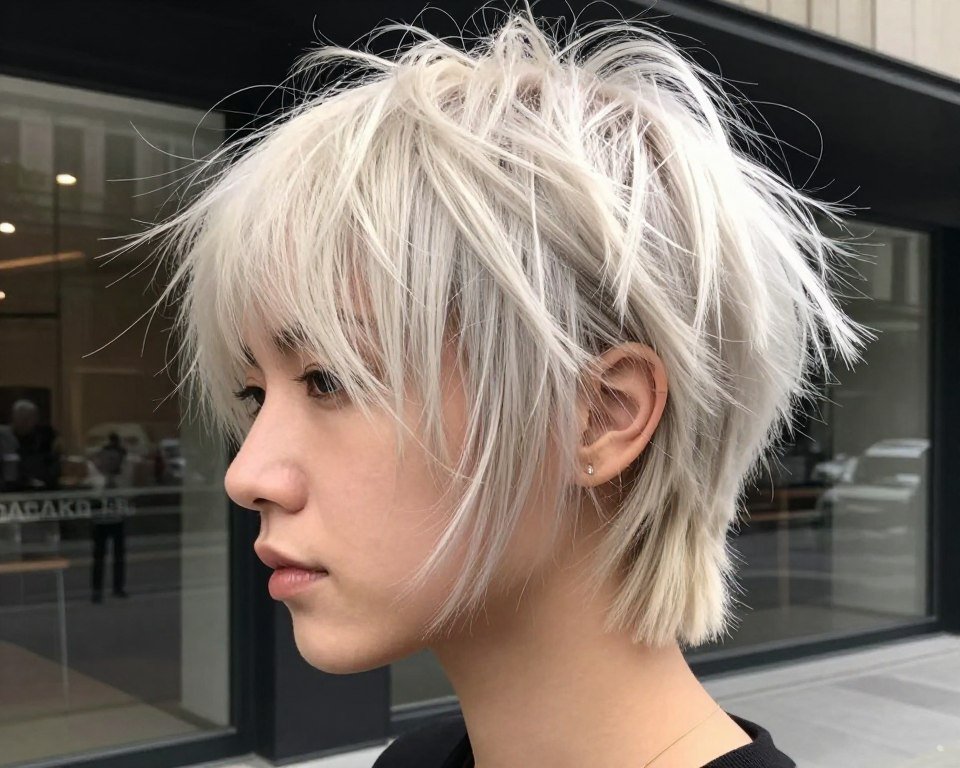
The modern shag brings rock-and-roll edge to medium length haircuts for thin fine hair. This cut features heavily textured, choppy layers throughout. The shag creates incredible volume and movement that thin hair naturally lacks.
Unlike the shags of decades past, modern versions offer refined sophistication. The cut maintains shape while looking effortlessly cool. Layers vary significantly in length, creating dynamic texture and visual interest.
Why Shags Work Wonders for Fine Hair
The shag’s secret lies in its heavy texturizing. Point cutting and razor techniques create separation between strands. This breaks up the uniform appearance that plagues thin hair. Each piece moves independently, creating the illusion of fullness.
Shorter layers at the crown provide natural lift. These layers stand away from the scalp rather than lying flat. The result is built-in volume that requires minimal styling effort.
Achieving the Perfect Shag Look
Styling a shag enhances its natural texture. Apply texturizing spray to damp hair. Scrunch sections while blow drying to encourage natural wave and movement. The goal is controlled chaos, not perfect smoothness.
Use your fingers instead of a brush during styling. This preserves the piece-y texture that makes shags special. Rough-dry hair, lifting sections at the roots. This creates organic volume without looking overly styled.
A flat iron can add finishing touches. Take random sections and bend them in different directions. This creates additional movement. The style should look undone yet intentional.
Face Shape Compatibility
Shags flatter multiple face shapes when customized properly. Oval faces suit most shag variations. Round faces benefit from longer shags that create vertical lines. Square faces look softened with wispy, graduated layers around the face.
The modern shag requires regular maintenance. Schedule trims every six weeks to maintain the textured shape. Ask your stylist to refresh layers and remove bulk. This keeps the cut looking intentionally edgy rather than grown-out.
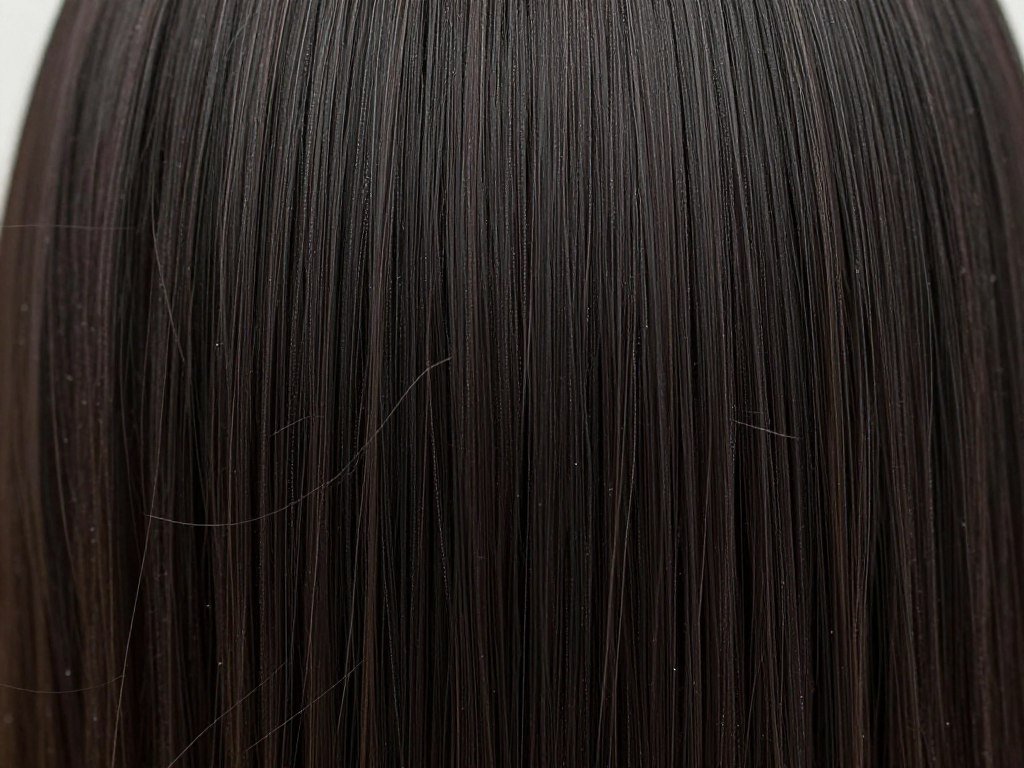
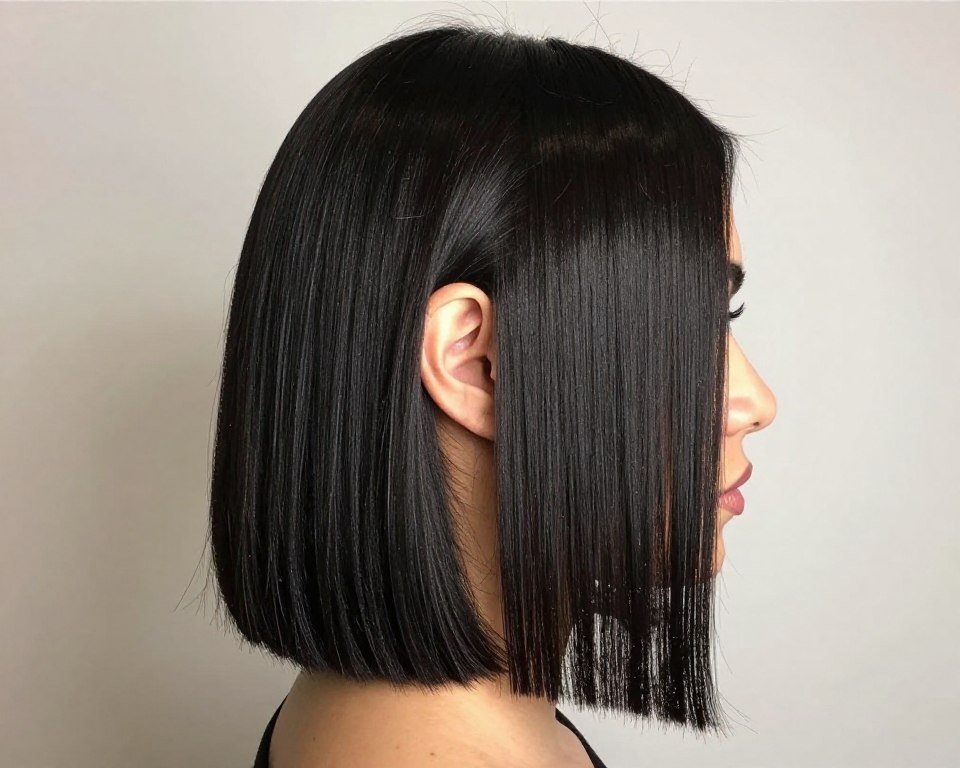
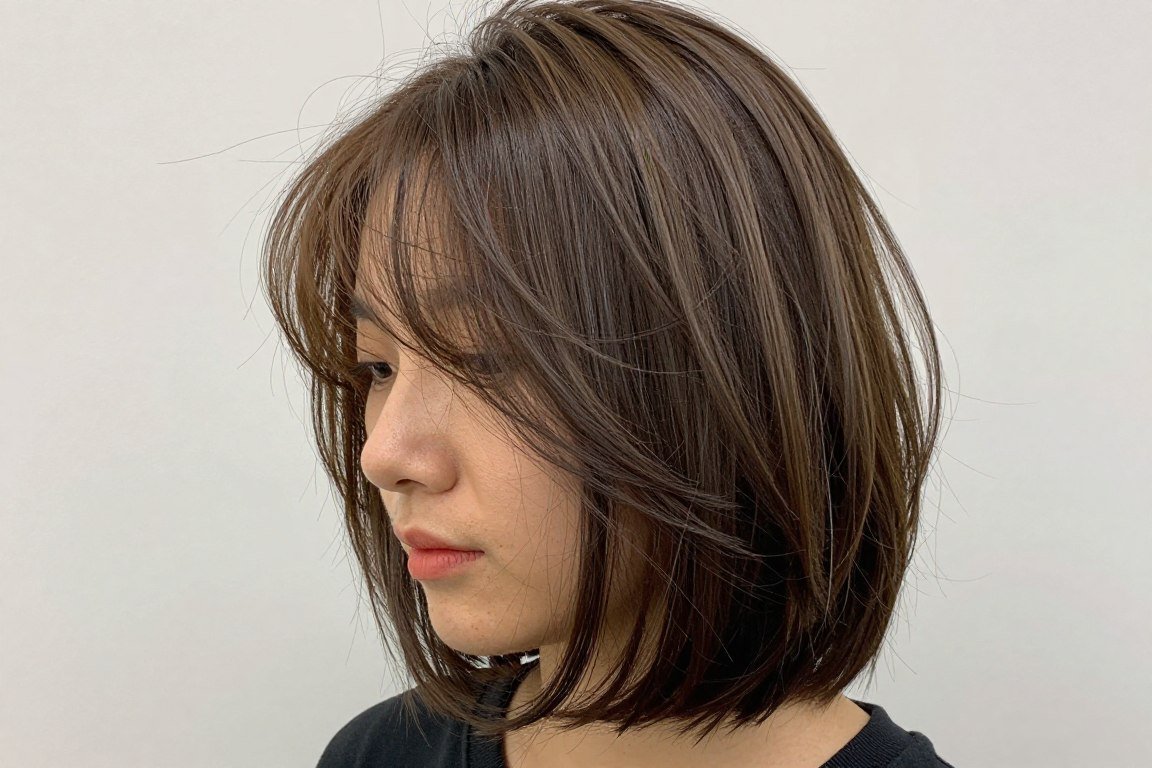
4. Blunt Lob for Clean Lines

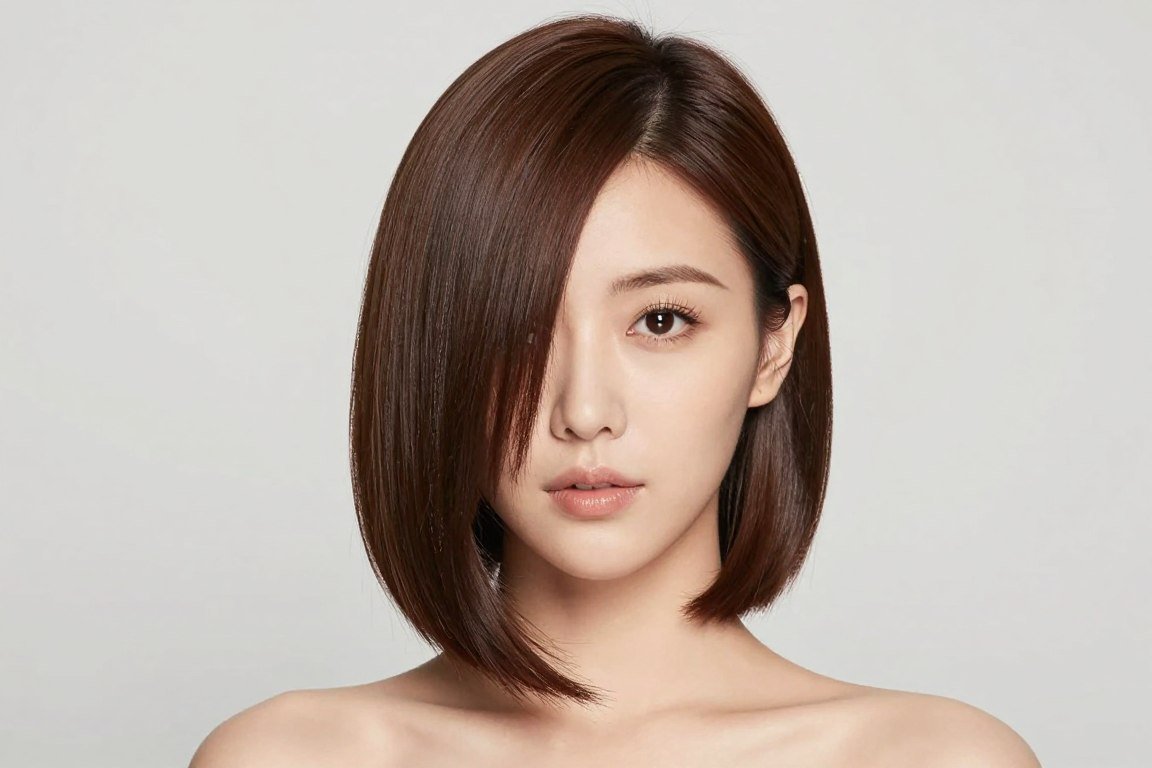
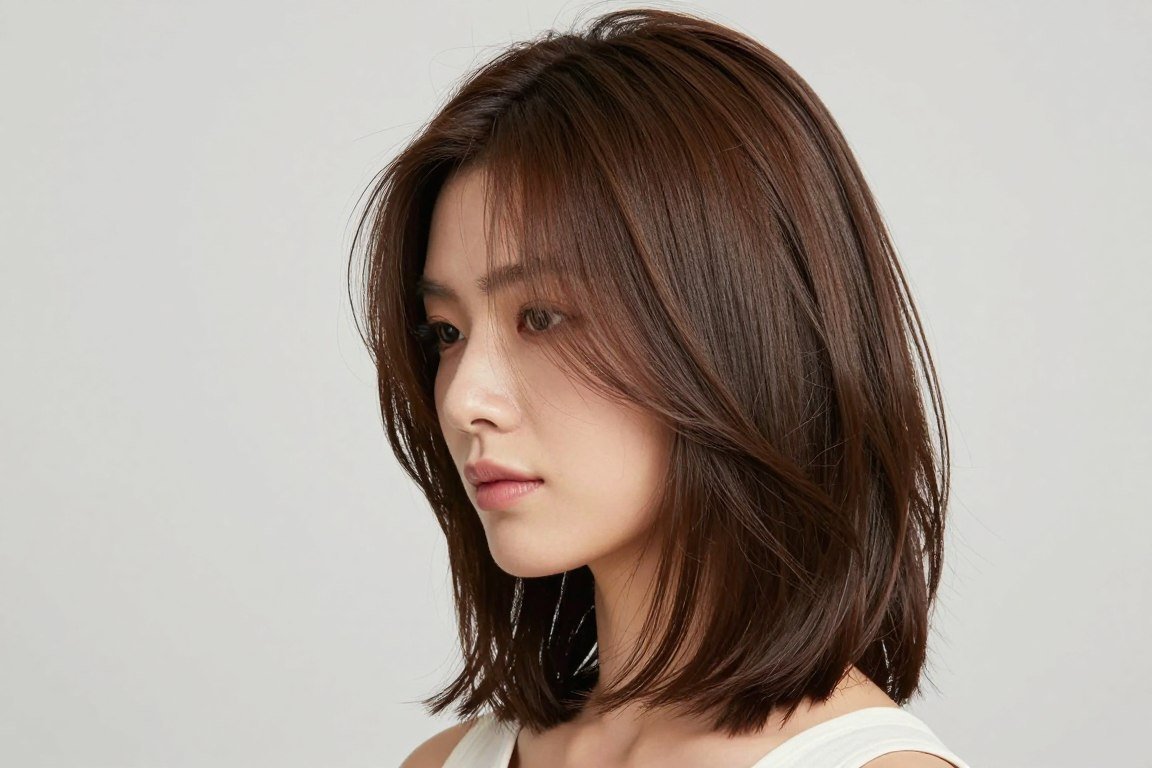
The blunt lob offers a sophisticated approach to medium length haircuts for thin fine hair. This style features a one-length cut typically ending at the collarbone. The lack of layers creates a solid, dense appearance that makes thin hair look fuller.
Blunt cuts work by preserving maximum density at the ends. Every strand reaches the same length. This creates a thicker-looking perimeter. The weight line draws the eye and creates visual impact.
The Science Behind Blunt Cuts
When hair is cut to one length, it naturally appears denser. There are no graduated layers to reveal sparse areas. The solid line creates an optical illusion of thickness. This proves particularly effective for very fine hair with low density.
The blunt lob sits at an ideal length for thin hair. Longer styles can appear stringy. Shorter bobs may lack enough length to create impact. The lob length provides the perfect balance between substance and manageability.
Styling for Sleek Perfection
This cut looks stunning when styled smooth and sleek. Begin with a smoothing serum on damp hair. This controls flyaways and adds shine. Blow dry sections straight using a paddle brush. Keep the dryer moving to prevent heat damage.
A flat iron creates the signature sleek finish. Take small sections and glide the iron from roots to ends. Use moderate heat to protect fine strands. The result is glass-like smoothness that showcases the blunt cut.
Adding Subtle Dimension
While the cut is blunt, color can add depth. Ask your colorist for subtle highlights or balayage. These techniques create dimension without disrupting the solid line. The hair appears to have more depth and richness.
This style requires precise maintenance. Book appointments every eight to ten weeks. Your stylist will trim the perimeter to maintain the blunt edge. Even growth looks intentional with this cut, making it relatively low-maintenance between appointments.
5. Wavy Bob with Natural Texture
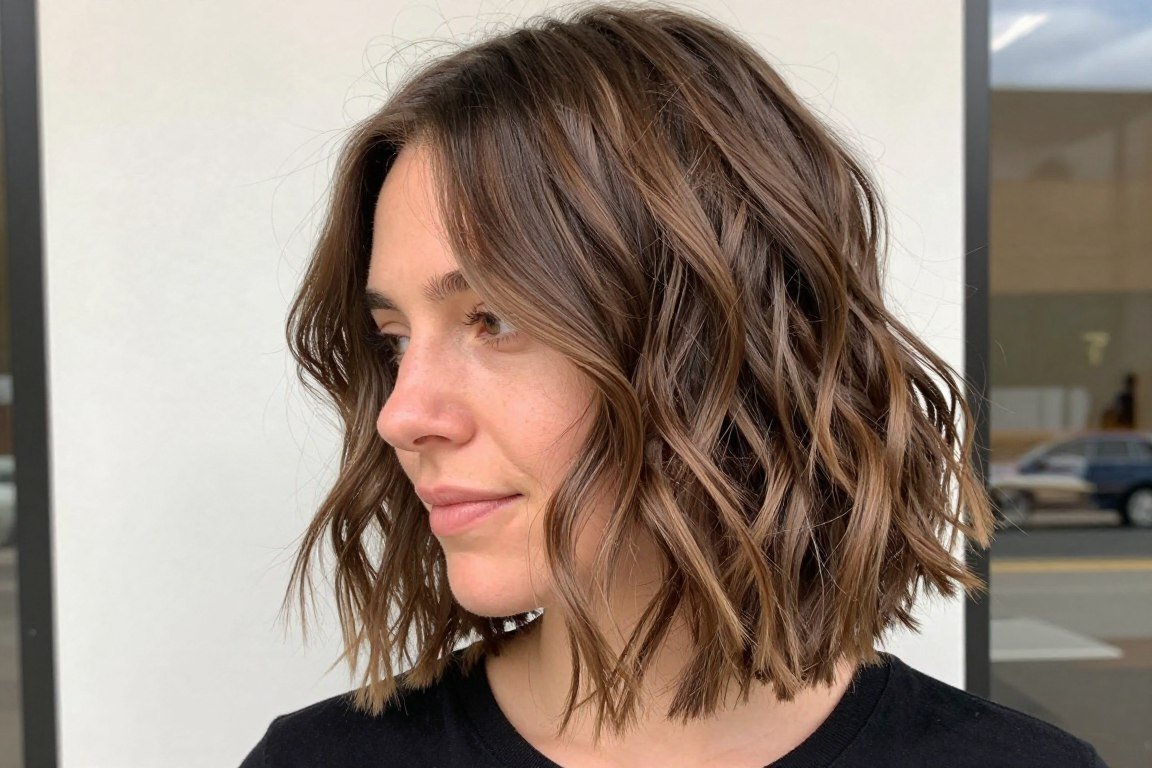
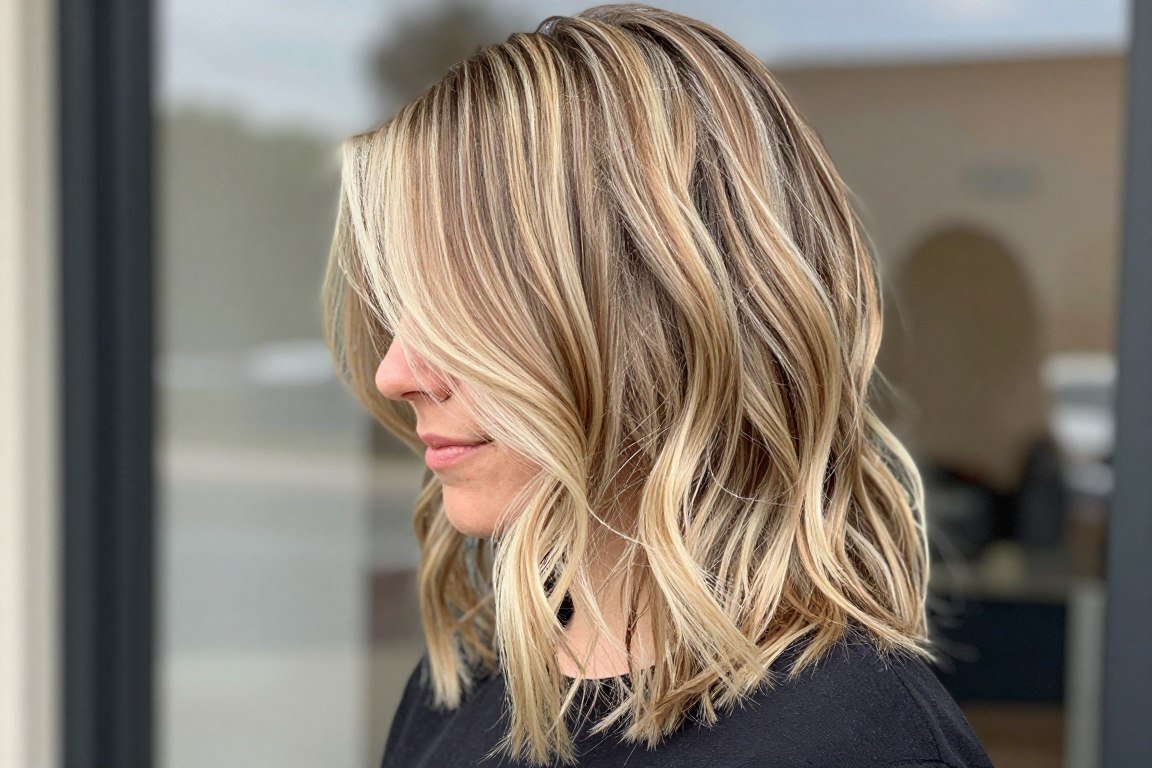
The wavy bob celebrates natural texture while adding volume to thin fine hair. This medium length haircut combines a classic bob shape with enhanced wave patterns. The style creates movement and body that straight hair cannot achieve.
Waves add critical dimension to fine strands. Each wave creates peaks and valleys that catch light differently. This variation makes hair appear fuller and more dynamic. The wavy bob works beautifully for those with naturally wavy hair or those willing to style.
Enhancing Natural Wave Patterns
If your thin hair has natural wave, this cut enhances it. Layers cut to work with your wave pattern create better definition. The stylist analyzes how your hair naturally falls. Cuts are made to encourage waves rather than fight them.
For naturally straight thin hair, creating waves adds transformative volume. The key is using the right techniques and products. Sea salt spray applied to damp hair encourages natural texture. Scrunching while air drying creates organic waves.
Styling Methods for Lasting Waves
The curling iron remains the most reliable tool for creating waves. Use a medium barrel between one and one-and-a-half inches. Take sections and wrap hair around the iron. Leave ends out for a modern, relaxed look.
Alternate curl directions for natural appearance. Curl one section toward your face. Curl the next section away from face. This creates waves that blend together beautifully. The hair appears naturally wavy rather than obviously curled.

Allow curls to cool completely before touching them. This sets the wave pattern. Once cool, run fingers through hair to break up curls. Gently tousle and separate waves. This creates the soft, effortless texture this style requires.
Products That Enhance Waves
Start with a volumizing mousse at the roots. This provides lift and hold. Work a wave-enhancing cream through mid-lengths and ends. These products define waves without weighing down fine strands.
Finish with a flexible hold spray. Mist over completed style from twelve inches away. This locks in waves while maintaining natural movement. The right products make waves last through the day without becoming crunchy or stiff.
6. Asymmetrical Bob for Modern Edge
The asymmetrical bob brings contemporary style to medium length haircuts for thin fine hair. This cut features different lengths on each side. One side typically falls at chin length while the other reaches the shoulder. The dramatic angle creates visual interest.
Asymmetry draws attention and creates the illusion of more hair. The eye focuses on the interesting lines rather than hair density. This clever optical trick makes thin hair appear intentionally styled rather than sparse.
Design Elements of Asymmetrical Cuts
The asymmetrical bob works through strategic angling. The hair is cut on a diagonal from short to long. This creates a strong line that frames the face beautifully. The longer side can be tucked behind the ear or left to fall forward.
Layers within the asymmetrical cut add movement without disrupting the overall shape. Internal layers create lift at the roots. The perimeter maintains its distinctive angled line. This combination delivers both volume and style.
Styling the Asymmetrical Bob
This cut requires precise styling to showcase its shape. Blow dry hair smooth to emphasize the angular lines. Use a round brush on the shorter side to create volume at the roots. The longer side can be styled straight or with a gentle bend towards the face.
A flat iron perfects the asymmetrical line. Straighten sections to create crisp, clean edges. The sharp perimeter defines the style. This cut looks best when styled with intention rather than left to air dry.
Face Shape Considerations
Asymmetrical bobs flatter many face shapes when customized properly. The longer side should fall on the side you prefer to showcase. Part hair on the opposite side to maximize the asymmetrical effect.
Round faces benefit from the vertical lines this cut creates. The angle adds length to the face visually. Square faces are softened by the diagonal lines. Heart-shaped faces look balanced when the longest point hits just past the chin.
Maintenance requires commitment. Book trims every six to eight weeks to maintain the distinctive shape. The asymmetrical line grows out noticeably. Regular maintenance keeps the cut looking intentional and fresh.
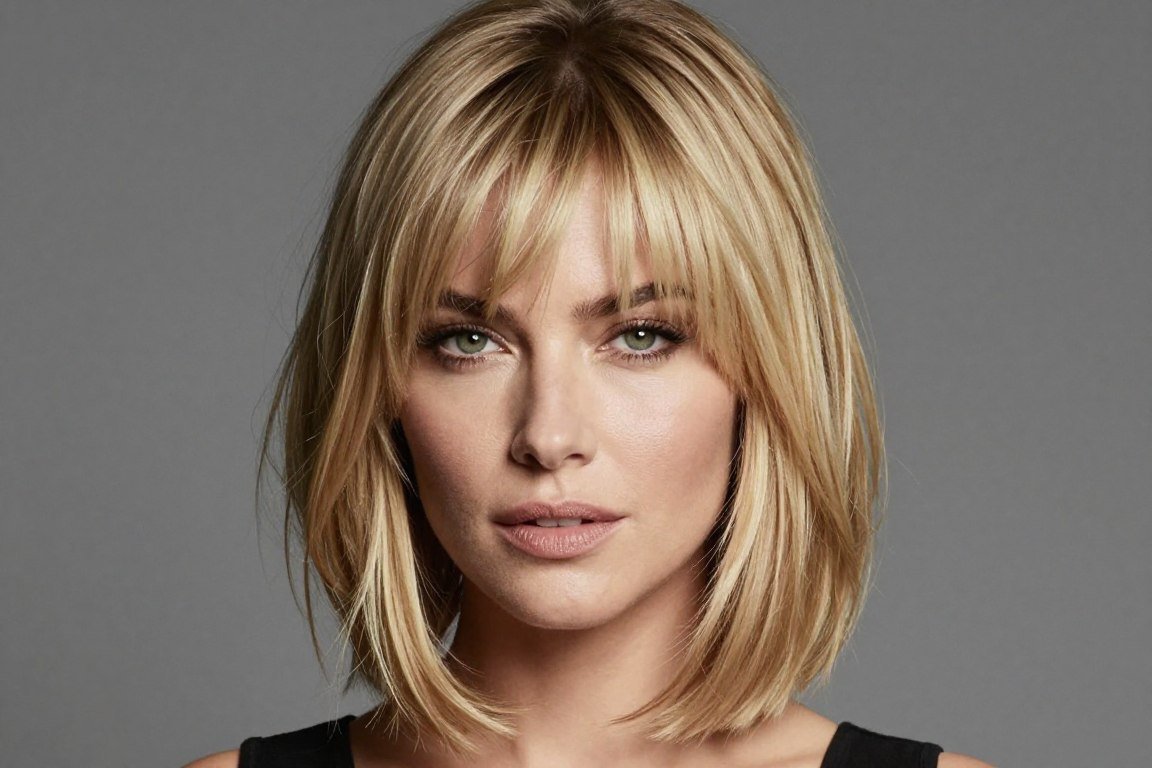
7. Curtain Bangs with Layered Length

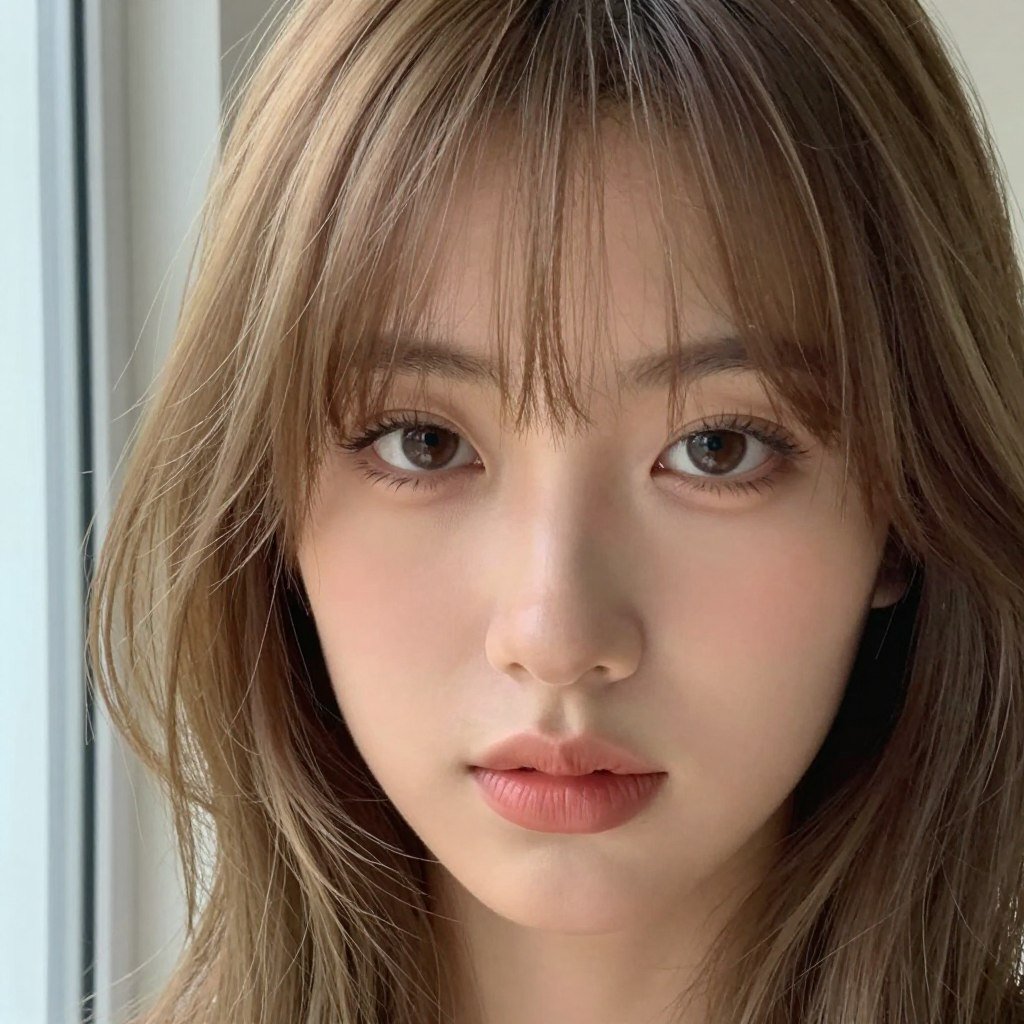
Curtain bangs transform medium length haircuts for thin fine hair by adding face-framing dimension. These bangs part down the middle and sweep to each side. The style creates softness around the face while adding perceived volume.
The combination of curtain bangs and layers works particularly well for thin hair. Bangs add fullness at the front. Layers throughout create movement and body. Together, they create a balanced, voluminous style.
Why Curtain Bangs Suit Thin Hair
Curtain bangs require minimal hair thickness. The feathered, wispy nature works perfectly with fine strands. Unlike heavy blunt bangs, curtain bangs blend seamlessly into the rest of the haircut. They create the illusion of more hair around the face.
These bangs suit various face shapes. They create balanced proportions by drawing attention to the eyes. The center part elongates round faces. The soft framing effect flatters angular features on square or heart-shaped faces.
Styling Curtain Bangs Effectively
Styling curtain bangs requires the right technique. Apply a small amount of volumizing mousse to damp bangs. Use a round brush to blow dry bangs away from the face. Roll the brush under at the ends to create the signature curved shape.
The round brush size matters. Use a medium-sized brush for optimal results. Too small creates tight curls. Too large doesn’t provide enough bend. The right size creates natural-looking curves that frame your face beautifully.
Allow bangs to cool on the round brush before releasing them. This sets the shape. Once cool, gently separate bangs with your fingers. Avoid over-touching, which can make thin hair look greasy.
Maintaining Curtain Bangs
Curtain bangs require regular trims to maintain their shape. Book bang trims every three to four weeks. Many salons offer complimentary bang trims between full haircuts. This keeps bangs at the perfect length.
The ideal length for curtain bangs on thin hair falls between the cheekbone and chin. This length is long enough to style away from the face. It creates beautiful framing without overwhelming fine features. Your stylist can customize the length to your preferences.
Essential Styling Tools for Thin Fine Hair

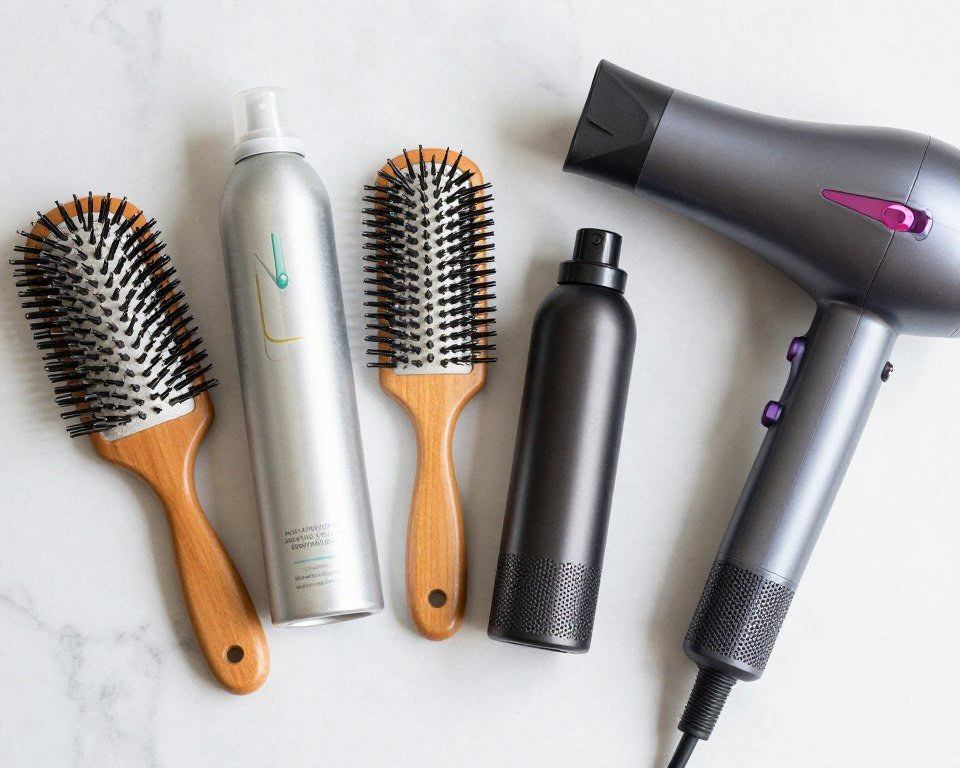
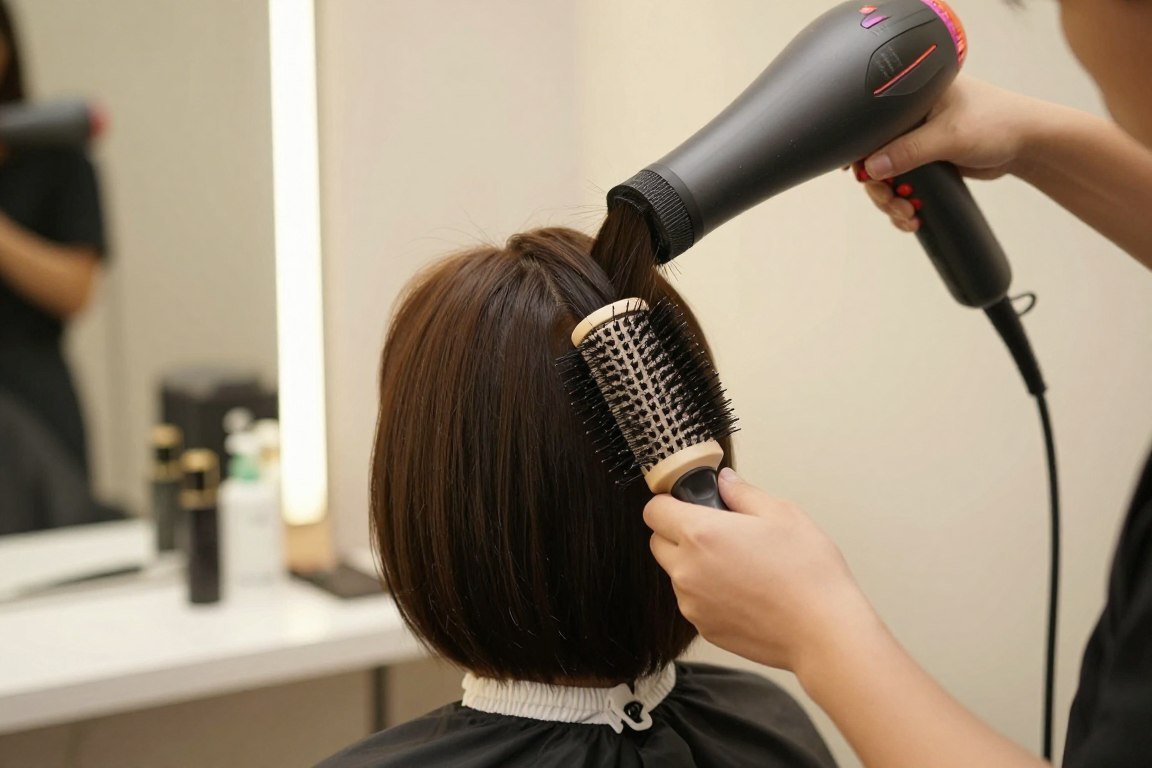
Professional Round Brush
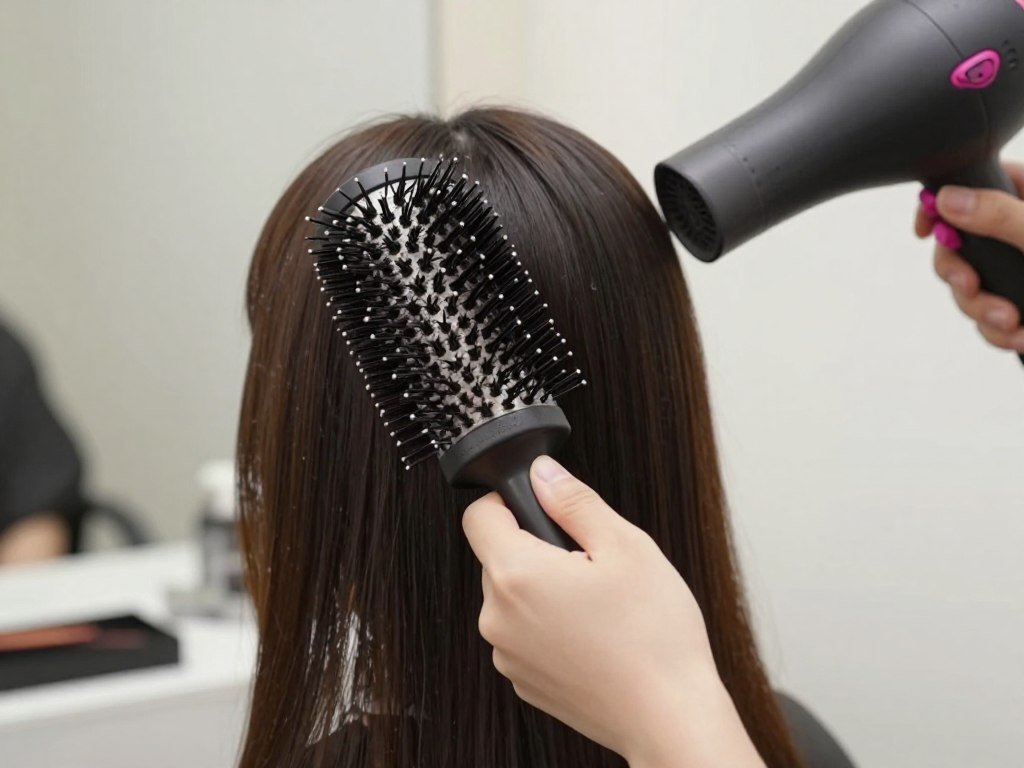
A quality round brush is essential for creating volume in thin hair. Look for brushes with a combination of natural and nylon bristles. The medium barrel size works perfectly for medium length haircuts. This tool lifts roots while smoothing strands.
- Creates lasting volume at roots
- Smooths hair while adding body
- Perfect for curtain bangs styling
- Ceramic barrel distributes heat evenly
Volumizing Mousse
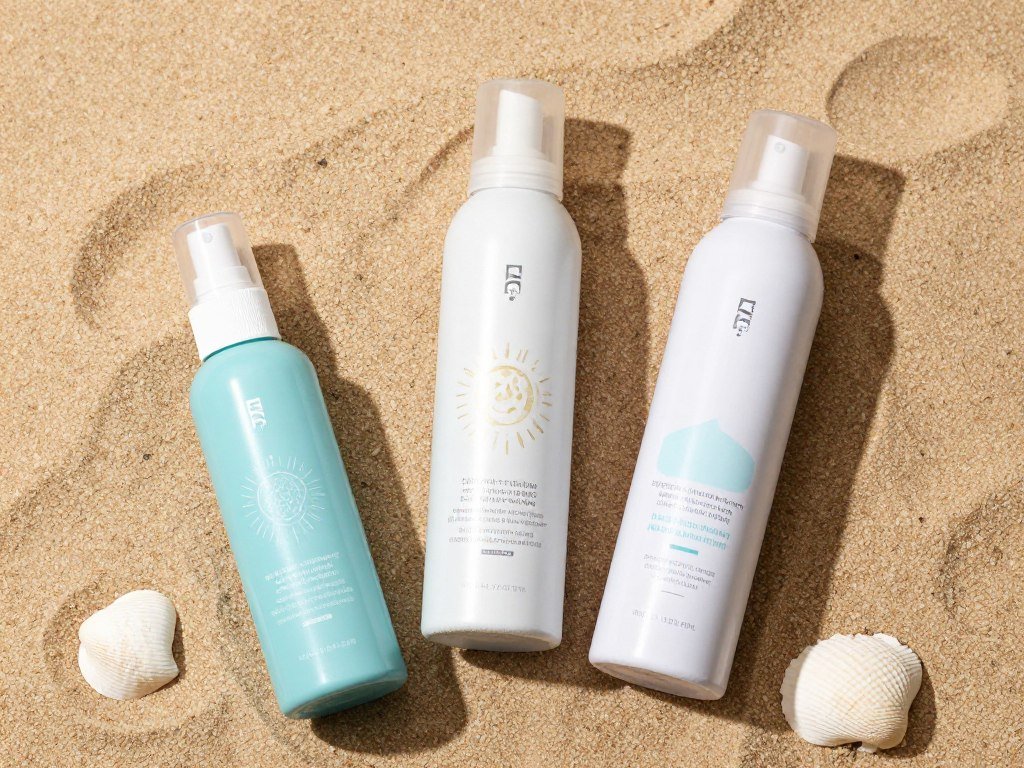
Lightweight volumizing mousse transforms thin hair by coating each strand. Apply to damp hair from roots to mid-lengths. This product provides hold without weighing down fine strands. The right mousse creates the foundation for all-day volume.
- Adds body without stiffness
- Provides heat protection
- Creates lasting lift at roots
- Enhances natural texture
Texturizing Spray
Texturizing spray adds the grip and separation that thin hair lacks naturally. This product creates the appearance of thicker, more abundant hair. Spray at roots for lift or throughout lengths for piece-y texture. The perfect finishing touch for any style.
- Creates natural-looking texture
- Adds grip without stickiness
- Enhances wave definition
- Provides flexible hold
8. Side-Swept Bangs with Soft Layers
Side-swept bangs offer a flattering alternative for medium length haircuts on thin fine hair. These bangs sweep across the forehead at an angle. Combined with soft layers throughout, this style creates feminine elegance and apparent fullness.
The asymmetrical nature of side-swept bangs adds visual interest. They create diagonal lines that draw the eye. This directs attention to your best features while making hair appear more voluminous overall.
Styling Side-Swept Bangs
Creating the perfect side sweep requires proper technique. Apply volumizing mousse to damp bangs. Part hair deeply on one side. The deeper the part, the more dramatic the sweep.
Blow dry bangs in the direction you want them to fall. Use a round brush to add volume at the roots. Direct heat from above while pulling bangs across the forehead. This creates smooth, swooping bangs that stay in place.
A flat iron can refine the look. Take the bang section and glide the iron from roots to ends. Curve the iron slightly as you reach the ends. This creates a soft bend that enhances the swept effect.
Face Shape Compatibility
Side-swept bangs flatter nearly every face shape. They create asymmetry that adds interest to round faces. The diagonal line across the forehead elongates the face visually. Square faces appear softer when bangs sweep gently across angular features.

Heart-shaped faces benefit from the width that side-swept bangs create at the forehead. This balances a wider forehead with a narrower chin. Oval faces suit this style universally. The bangs add character without disrupting natural facial balance.
Layering Throughout the Cut
Soft layers complement side-swept bangs perfectly. The layers should be subtle rather than dramatic. This creates gentle movement without removing too much density. Each layer adds dimension while maintaining overall fullness.
The layers begin around cheekbone level and continue throughout the length. This creates a cohesive flow from bangs through the rest of the style. The hair moves as one unified shape rather than separate sections.
9. Angled Bob with Volume at Crown

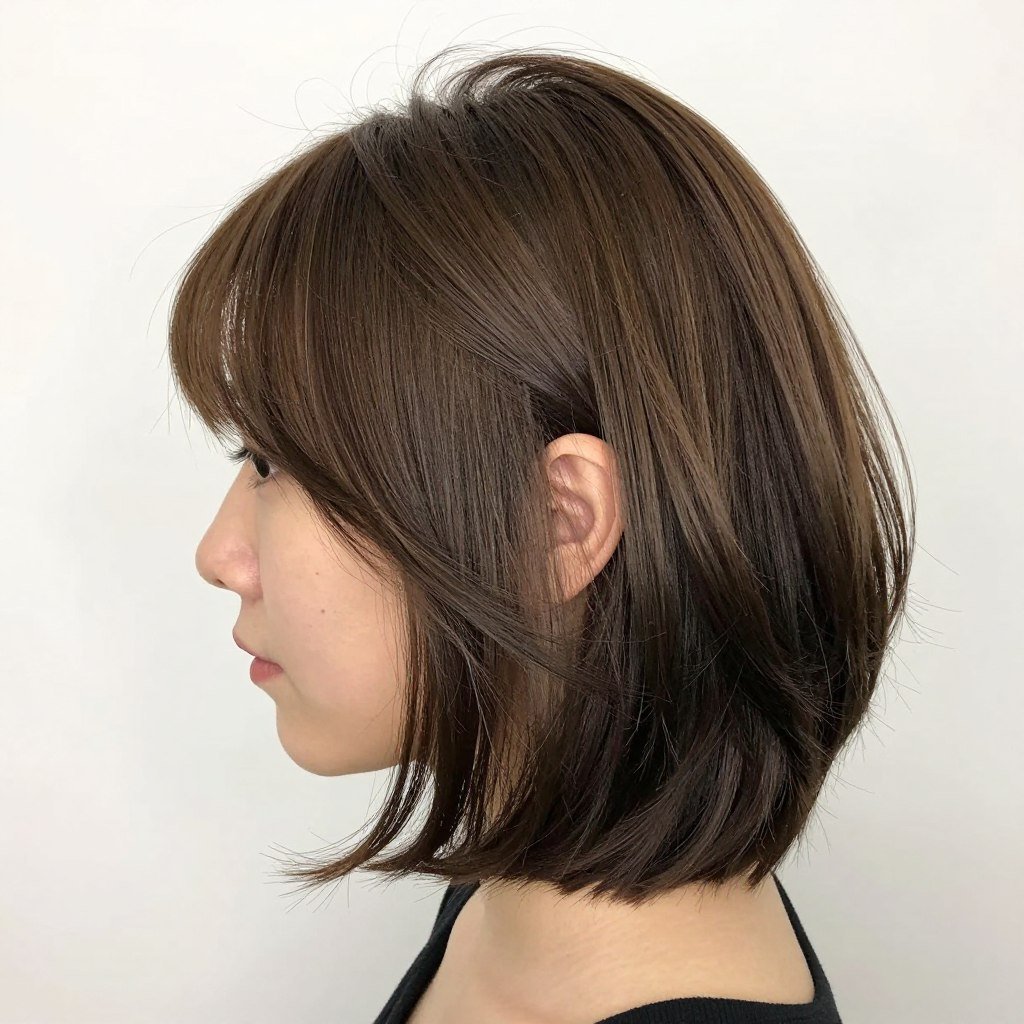
The angled bob provides sophisticated structure for medium length haircuts on thin fine hair. This cut features shorter length at the back that gradually angles to longer pieces in front. The graduation creates natural lift at the crown.
Volume at the crown proves critical for thin hair. This area often appears flat and lifeless. The angled bob’s stacked back creates built-in height. The style requires minimal effort to achieve maximum impact.
Understanding the Angled Cut
Angled bobs are cut using graduation techniques. The back is cut shorter, often around nape length. Each subsequent section is cut slightly longer as you move toward the front. The longest pieces frame the face at chin or jaw length.
The back sections are often stacked, meaning they’re cut at an upward angle. This stacking removes weight and creates volume. The hair naturally wants to lift away from the head. This gives thin hair the body it typically lacks.
Achieving Crown Volume
The angled bob’s structure creates automatic volume, but styling enhances it. Apply volumizing mousse to damp hair, concentrating on the crown area. Blow dry hair in sections, lifting at the roots.
Use a round brush at the crown to add extra lift. Roll the brush under while directing heat from underneath. Hold each section until cool before releasing. This sets the volume for lasting results.
The front pieces should curve slightly under or can be styled straight. This depends on personal preference. The key is maintaining the volume at the crown while creating polished front sections.
Maintenance and Upkeep
Angled bobs require regular maintenance to preserve their shape. The back grows faster than the front, which can disrupt the angle. Schedule trims every five to six weeks. Your stylist will re-establish the graduation and stacking.
This cut suits active lifestyles. The short back stays off the neck, providing comfort. The longer front offers styling versatility. You can tuck it behind ears, add waves, or wear it sleek. The angled bob adapts to various looks while maintaining its volume-boosting properties.
10. Choppy Ends for Added Texture

Choppy ends revolutionize medium length haircuts for thin fine hair by adding critical texture. This cutting technique creates irregular, piece-y ends rather than a blunt line. The variation in length makes hair appear fuller and more dynamic.
Stylists achieve choppy ends through point cutting or slide cutting techniques. These methods create texture by cutting into the hair at angles. The result is ends that appear naturally textured rather than uniformly cut.
The Benefits of Textured Ends
Choppy ends solve a common problem with thin hair. Blunt cuts can emphasize lack of density at the ends. Textured ends break up solid lines. The varied lengths create visual interest that distracts from thinness.
Light reflects differently off choppy ends compared to blunt cuts. Each piece catches light at its own angle. This creates dimension and the appearance of more hair. The texture adds movement that makes styles look lived-in and effortless.
Styling Choppy Layers
Choppy ends look best when styled to emphasize their texture. Apply texturizing spray to damp hair. This product enhances the piece-y separation. Scrunch sections while air drying to encourage natural movement.
For polished texture, use a flat iron strategically. Take random sections and bend them in different directions. Some pieces curve inward, others curve outward. This creates organic-looking texture that appears natural rather than overly styled.

A curling iron adds another dimension to choppy ends. Curl random sections, leaving ends out of the iron. This creates waves with textured tips. The combination of waves and choppy ends delivers maximum volume and interest.
Product Recommendations
Dry shampoo works wonders on choppy ends. Spray at the roots for volume. Spray on ends and scrunch to enhance texture. The product adds grip that makes thin hair appear thicker and more textured.
Finish with a light pomade or styling cream. Take a small amount and work it through the ends only. This defines the choppy pieces without weighing down roots. The hair maintains volume while showcasing textured ends beautifully.
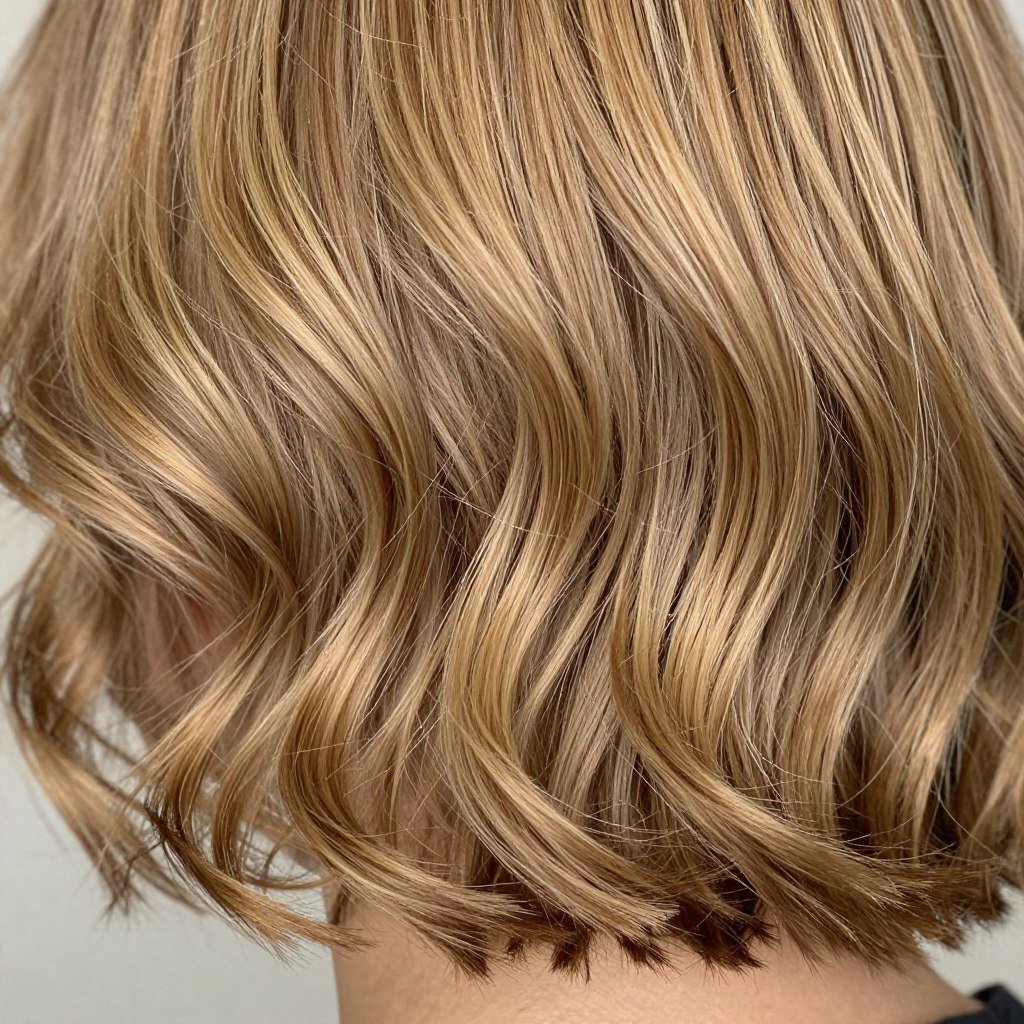
11. Dimensional Color with Strategic Highlights
While not a cut itself, dimensional color dramatically enhances medium length haircuts for thin fine hair. Strategic highlights and lowlights create depth that makes hair appear fuller. The interplay of light and dark tones adds visual volume.
Color dimension works through optical illusion. Multiple tones create shadows and highlights throughout the hair. This variation makes each strand more visible. The eye perceives more hair than actually exists.
Color Placement Techniques
Balayage creates natural-looking dimension ideal for thin hair. The hand-painted technique places lighter pieces throughout the cut. Highlights are concentrated around the face and on surface layers. This draws light to areas where you want to create the illusion of volume.

Face-framing highlights brighten your complexion while adding dimension around the face. These lighter pieces catch light beautifully. They create movement and draw attention to your features. The contrast with base color makes hair appear fuller.
Lowlights add equally important depth. Darker tones placed strategically create shadows. These shadows make highlights appear brighter by contrast. The combination of both creates realistic, multi-dimensional color.
Best Color Combinations for Thin Hair
Choose colors within two to three shades of your natural base. Dramatic contrasts can make scalp more visible through thin hair. Subtle variations create dimension without exposing sparse areas.
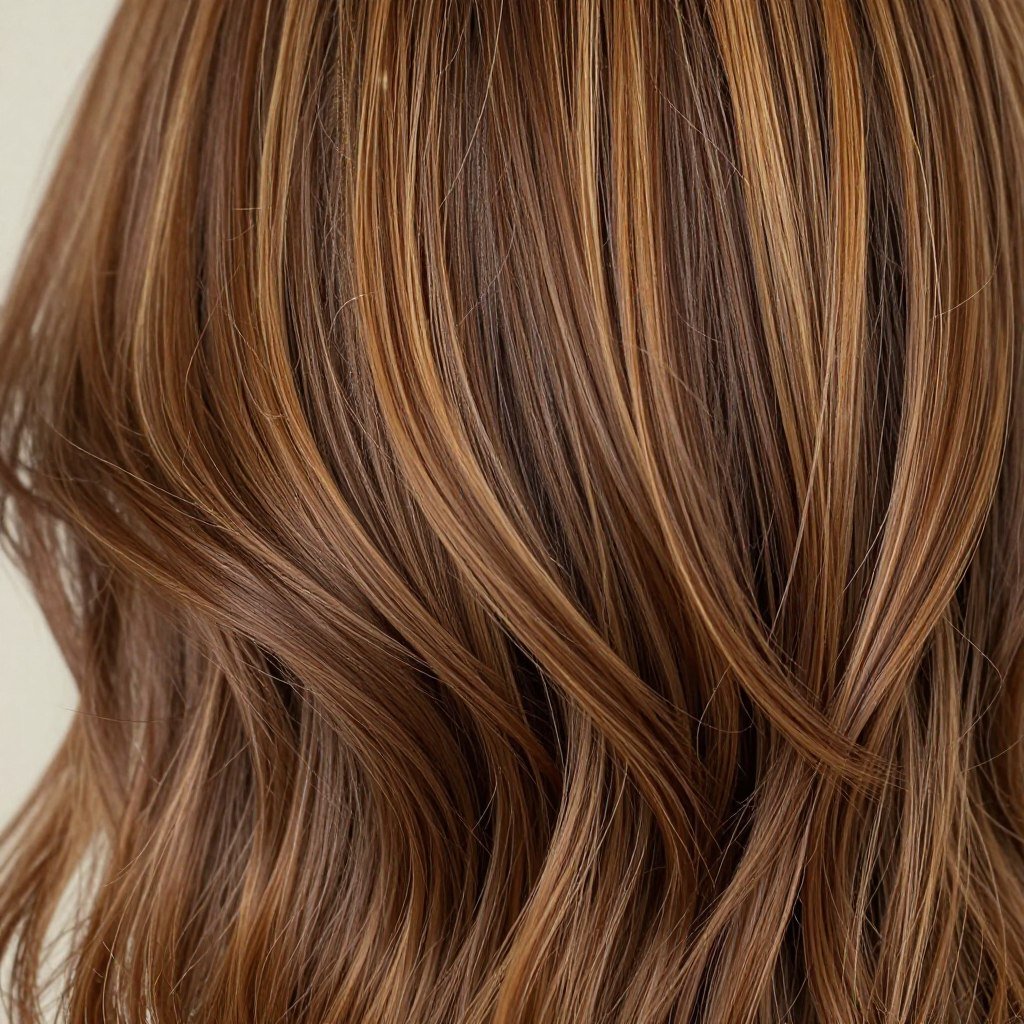
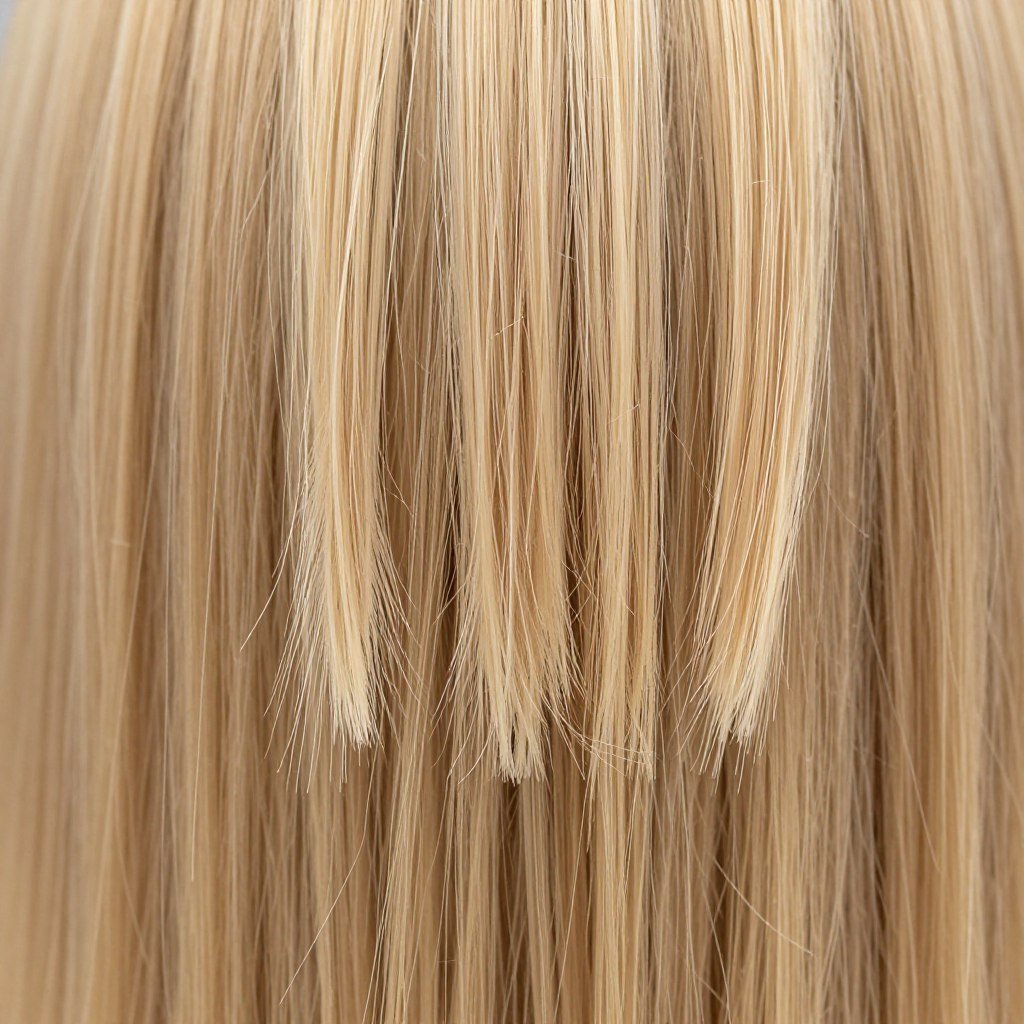
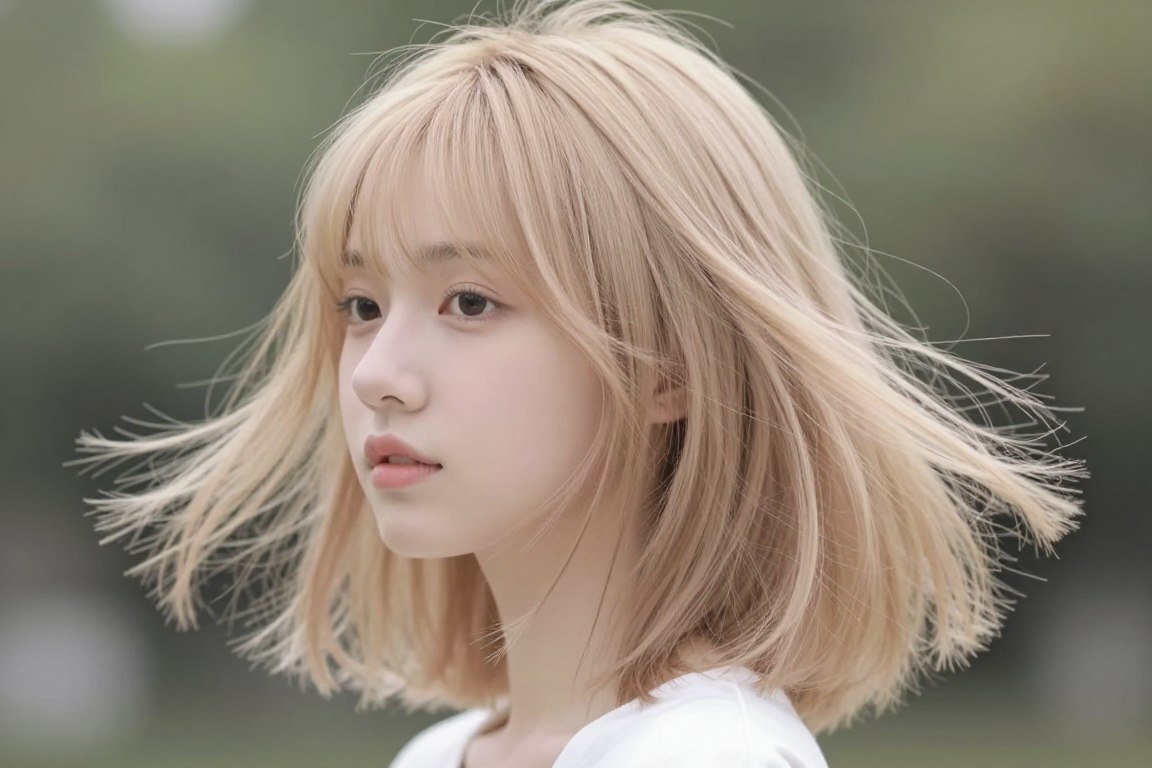
Warm tones like caramel, honey, and golden blonde work beautifully on thin hair. These colors reflect light, making hair appear more abundant. Cool tones like ash and platinum can also work but require careful placement to avoid appearing washed out.
Maintaining Dimensional Color
Color-treated hair requires special care to maintain vibrancy. Use sulfate-free shampoo designed for color-treated hair. These formulas preserve color while gently cleansing. Wash hair less frequently to prevent color fading.
Deep conditioning treatments restore moisture lost during coloring. Apply treatment weekly to keep hair healthy and shiny. Healthy hair reflects light better, enhancing the dimensional effect of your color.
Schedule color refresh appointments every eight to twelve weeks. Your colorist will add new highlights and tone existing color. This maintains the dimensional effect that makes thin hair appear fuller and more vibrant.
12. Piece-y Layers for Maximum Separation
Piece-y layers create ultimate separation in medium length haircuts for thin fine hair. This cutting approach focuses on creating distinct, separated pieces throughout the hair. Each layer moves independently, creating the illusion of abundant, thick hair.
The technique involves cutting with texturizing shears and razors. These tools create varying strand thickness. Some pieces are thinner, others slightly thicker. This variation prevents the uniform appearance that makes thin hair obvious.
Cutting Techniques for Separation
Stylists achieve piece-y texture through several methods. Point cutting creates texture by cutting into ends at an angle. This removes weight while creating separation. The ends appear feathered and piece-y rather than solid.

Slide cutting involves closing scissors while sliding down the hair shaft. This removes bulk throughout the strand rather than just at ends. The result is lighter, more separated pieces that move freely. The technique works particularly well on fine hair that needs to maintain length while losing weight.
Styling for Enhanced Separation
Piece-y layers require specific styling to maximize their effect. Start with texturizing spray on damp hair. This product creates the grip necessary for separation. Work it through from roots to ends.
Blow dry hair using your fingers instead of a brush. Scrunch sections to encourage piece-y texture. The goal is controlled messiness. Each section should dry in a slightly different direction, creating natural-looking separation.
A curling iron adds dimension to piece-y layers. Take small, random sections. Curl some pieces toward the face, others away. Leave some sections straight. This variation creates interest and emphasizes the separated layer structure.
Products That Define Pieces
Styling paste or clay works beautifully on piece-y layers. Warm a small amount between your palms. Run fingers through hair, twisting random pieces. This defines separation and creates the textured, piece-y look this cut delivers best.
Sea salt spray enhances natural texture in piece-y layers. Spray throughout damp hair before styling. The salt creates grip and texture. As hair dries, the separated pieces become more defined. The result is effortless-looking texture that makes thin hair appear substantially fuller.
13. Razored Ends for Soft Movement

Razored ends bring soft, romantic movement to medium length haircuts for thin fine hair. The razor cutting technique creates feathered, ultra-light ends. This approach removes weight while adding graceful movement that flatters fine strands.
Unlike scissors, which create blunt lines, razors shave into the hair at angles. This creates tapered ends that move beautifully. The technique is particularly effective on thin hair because it doesn’t remove density unnecessarily.
The Razor Cutting Advantage
Razor cuts excel at creating soft texture. The tool naturally produces feathered ends that blend seamlessly. There are no harsh lines or obvious layers. Instead, the hair graduates naturally from one length to another.
This softness particularly benefits thin hair. Sharp, blunt cuts can emphasize sparseness at the ends. Razored ends create a softer perimeter. The feathered effect makes the ends appear fuller even though the hair is actually quite fine.
Styling Razored Haircuts
Razored cuts look stunning when air dried naturally. The technique creates hair that wants to move. Apply a lightweight styling cream to damp hair. Scrunch gently and allow hair to dry naturally. The razored ends will create soft, natural-looking waves.
For more polished looks, use a round brush while blow drying. The razored ends bend easily around the brush. Create soft curves at the ends by rolling the brush under. The feathered tips create a polished yet soft appearance.
Curling wands work beautifully on razored hair. The feathered ends wrap easily around the barrel. Create loose, soft curls throughout. The razored ends prevent curls from looking too tight or structured. The result is effortless, romantic waves.
Maintenance Considerations
Razored cuts require careful maintenance. The technique can cause split ends if performed incorrectly or on damaged hair. Ensure your stylist is experienced with razor cutting. Quality razors make clean cuts that don’t damage the hair shaft.
Regular trims every eight weeks keep razored ends looking fresh. The stylist will remove any damaged ends while maintaining the soft, feathered texture. Deep conditioning treatments help keep ends healthy. Moisturized hair responds better to razor cutting and maintains its soft appearance longer.
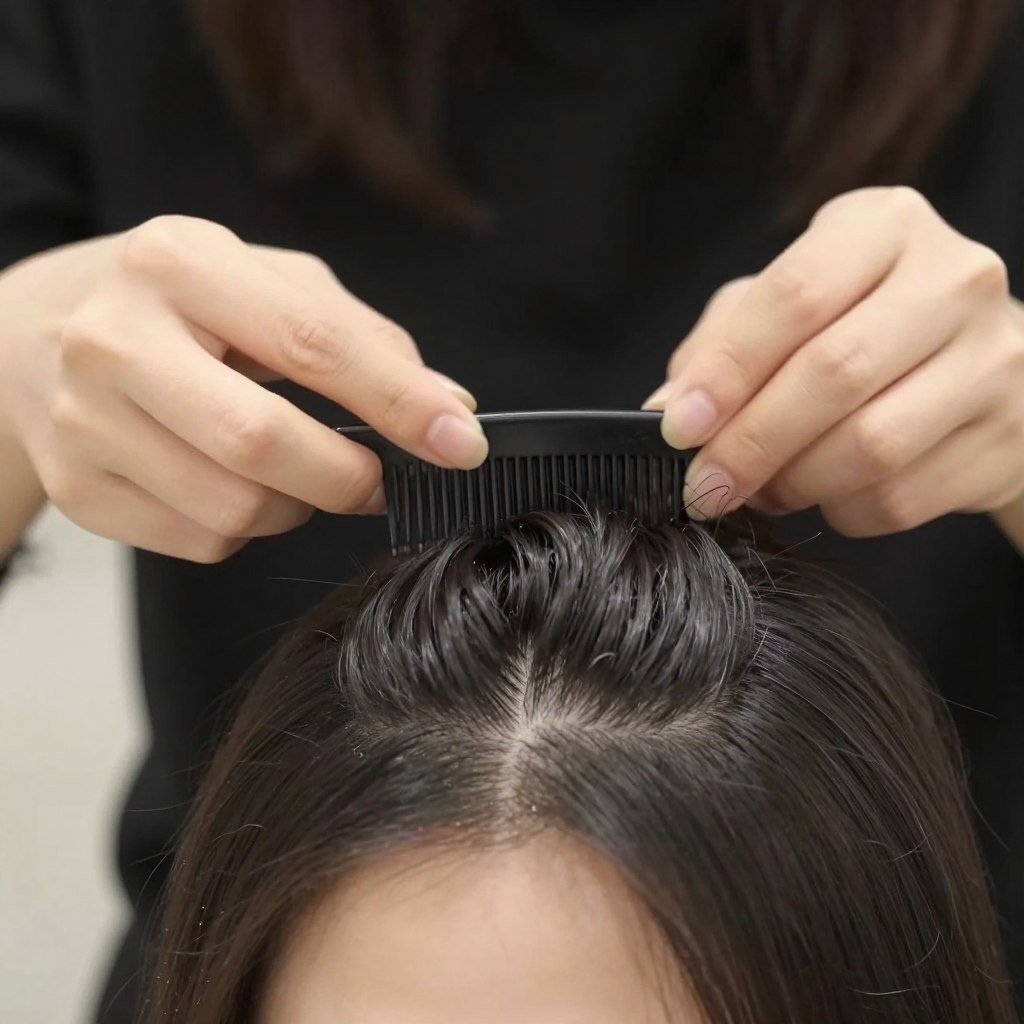
14. Root Lift Styling for Instant Volume
Root lift techniques transform any medium length haircut on thin fine hair into a voluminous style. These styling methods focus on creating height at the roots where thin hair typically falls flat. The right approach delivers lasting volume that survives the entire day.
Volume at the roots makes the biggest visual impact. When roots have lift, the entire hairstyle appears fuller. The hair cascades from a higher starting point, creating the illusion of density and thickness throughout.
Blow Drying for Maximum Lift
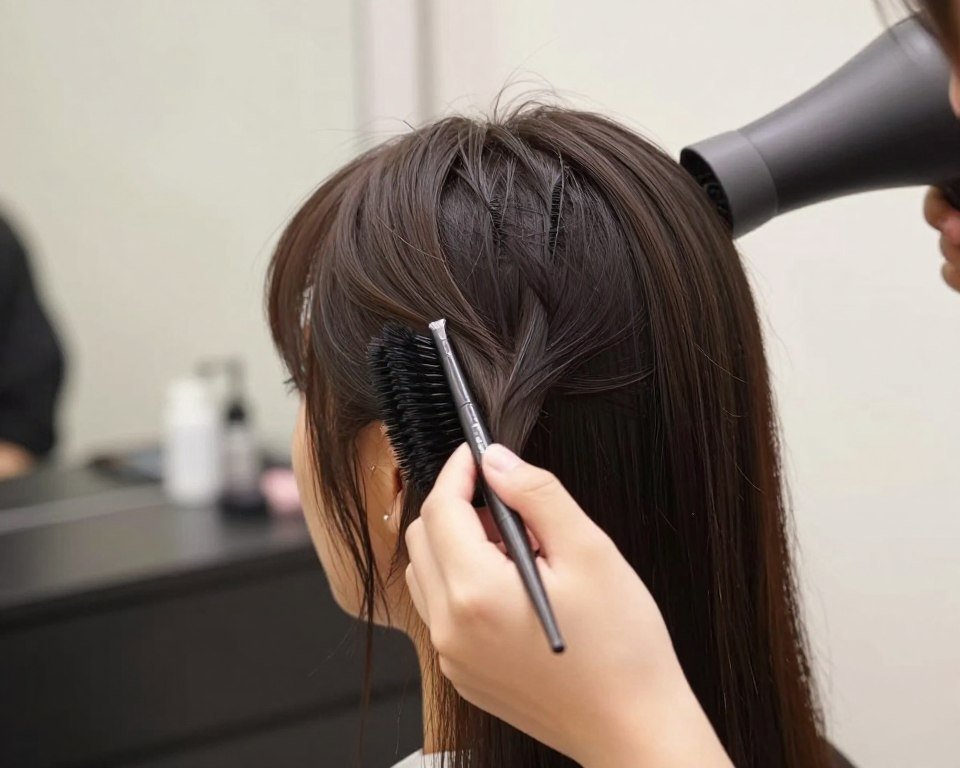
The foundation of root lift begins during blow drying. Section hair into manageable pieces. Start at the crown, where volume matters most. Apply volumizing mousse directly to roots in this section.
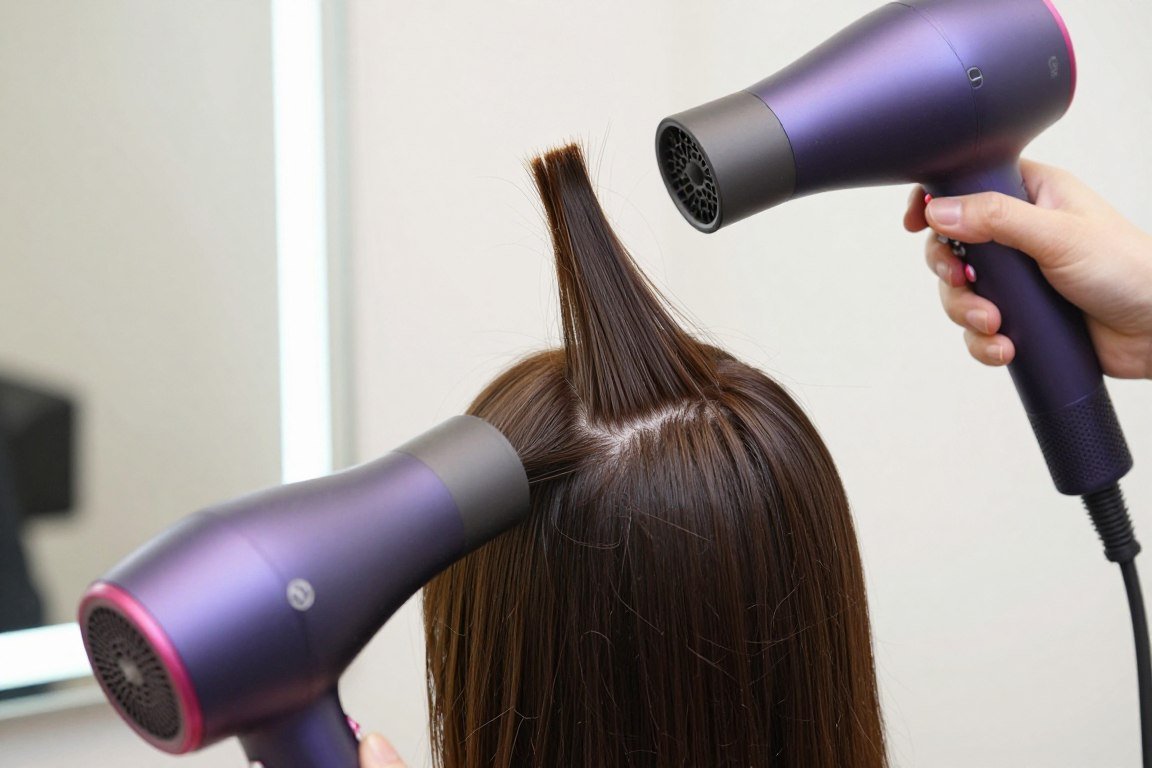
Lift each section perpendicular to the head. Place a round brush at the roots. Direct the blow dryer from underneath the brush. This lifts hair away from the scalp. Hold the section taut while applying heat. Allow it to cool completely before releasing.
Work systematically through all sections. The sides require attention too, not just the crown. Lift sections at the roots all around the head. This creates uniform volume rather than concentrated lift in one area.
Products That Boost Root Volume
Root-lifting sprays work specifically at the base of the hair. Spray directly onto roots of damp hair. These products contain polymers that coat the hair shaft. As they dry, they create lift and hold that lasts.

Dry shampoo serves double duty for thin hair. It absorbs oil that weighs down roots. The powder also creates texture and grip at the scalp. This allows roots to maintain lift longer. Apply dry shampoo to roots, focusing on the crown area.
Velcro Rollers for Set Volume
Velcro rollers create dramatic root lift. After blow drying, roll the crown section onto large velcro rollers. The rollers should sit directly at the roots. Spray with hairspray and allow to cool completely.
Leave rollers in for at least fifteen minutes. The longer they stay, the better the set. When removed, the roots have significant lift. Gently tease the crown if additional height is desired. This technique delivers volume that lasts all day.
For overnight volume, sleep in velcro rollers. Place rollers strategically at the crown and sides. Secure with clips if needed. Wake up to incredible root lift that requires minimal styling. This method works perfectly for thin hair that struggles to hold volume.
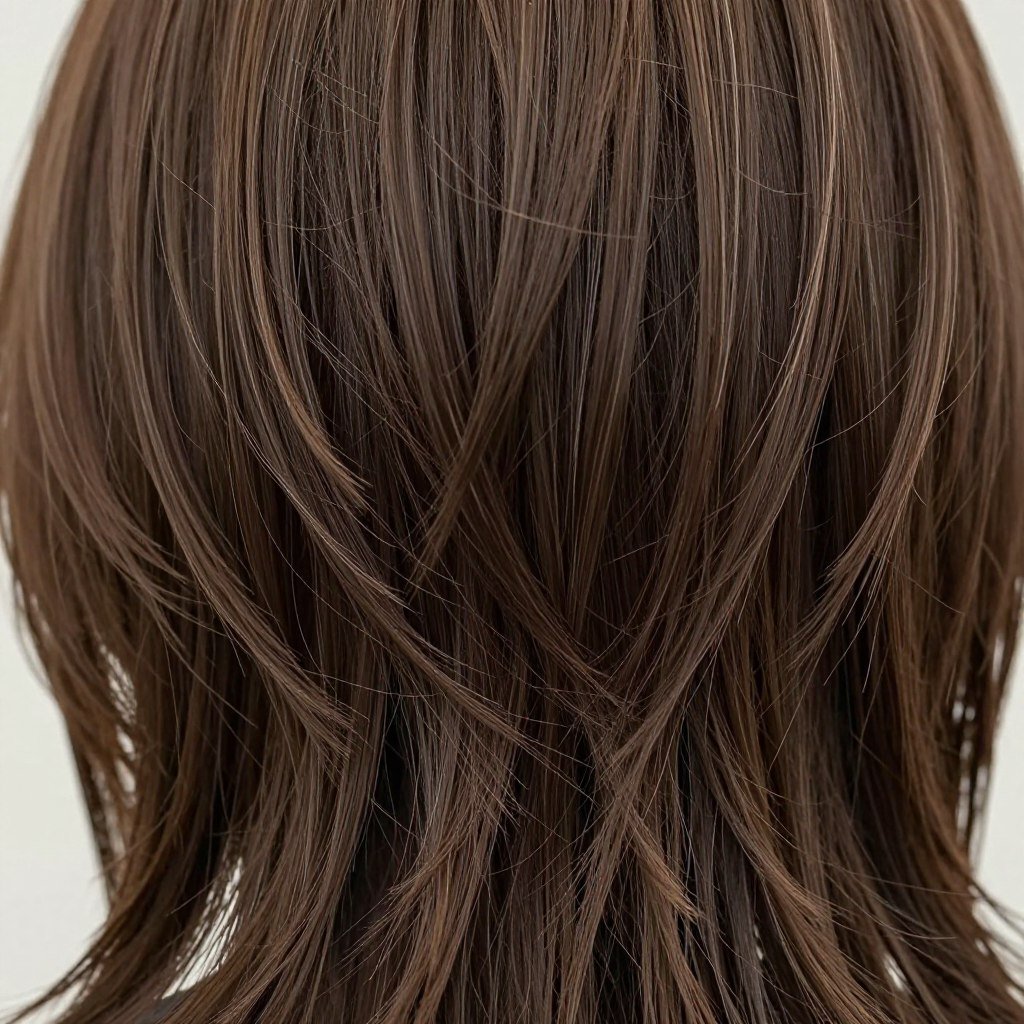
15. Graduated Layers for Fullness
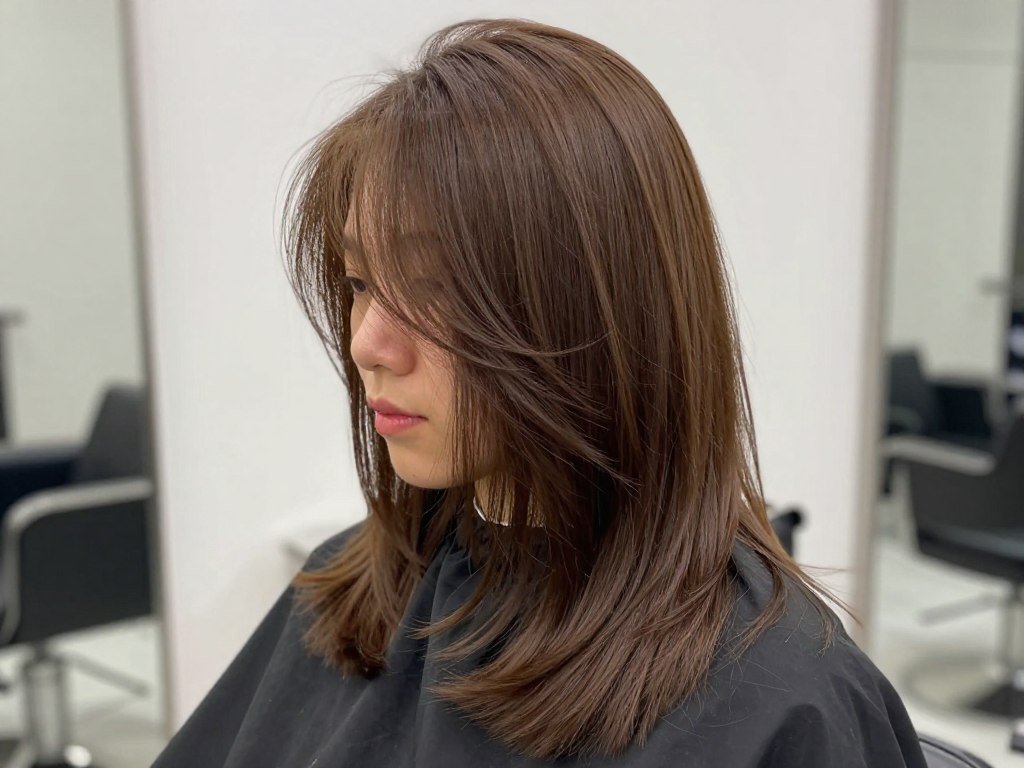
Graduated layers strategically build fullness into medium length haircuts for thin fine hair. This layering technique features shorter layers at the crown that gradually increase in length toward the ends. The graduation creates natural volume and beautiful shape.
The key to graduated layers lies in their carefully calculated angles. Each layer is cut at a specific degree to create lift. The shortest layers at the crown stand away from the head. Subsequent layers fall at progressively longer lengths, creating a cascading effect.
How Graduation Creates Volume
Graduation works by removing weight in strategic areas. The shorter top layers have less weight pulling them down. They naturally lift away from the scalp. This creates the volume foundation for the entire style.
Longer layers underneath provide support and shape. They create the overall silhouette while allowing shorter layers to add fullness on top. The combination delivers both volume and length, perfect for those who want to maintain a medium length style.
Styling Graduated Layers
Graduated layers style easily with proper technique. Apply volumizing mousse throughout damp hair. Focus extra product at the crown where the shortest layers sit. These layers need the most support to maintain their lift.
Blow dry using a round brush, starting with the crown sections. Lift each short layer and dry it away from the head. This sets the volume into the cut’s natural graduation. Work toward longer sections, maintaining smooth styling.
The beauty of this cut is its versatility. Graduated layers look stunning straight, creating a polished, professional appearance. They also accept waves and curls beautifully. The layering adds movement to any styling choice.
Face Shape Recommendations
Graduated layers flatter multiple face shapes when customized appropriately. Round faces benefit from keeping the graduation higher at the crown. This creates vertical height that elongates the face shape.
Square faces look softened when graduation begins around cheekbone level. The layers create curved lines that contrast with angular jaw lines. Heart-shaped faces suit graduation that adds width at the jawline, balancing a wider forehead.
Oval faces can wear any variation of graduated layers. This versatile face shape suits both dramatic and subtle graduation. Discuss your preferences with your stylist to achieve the most flattering version of this volume-building cut.
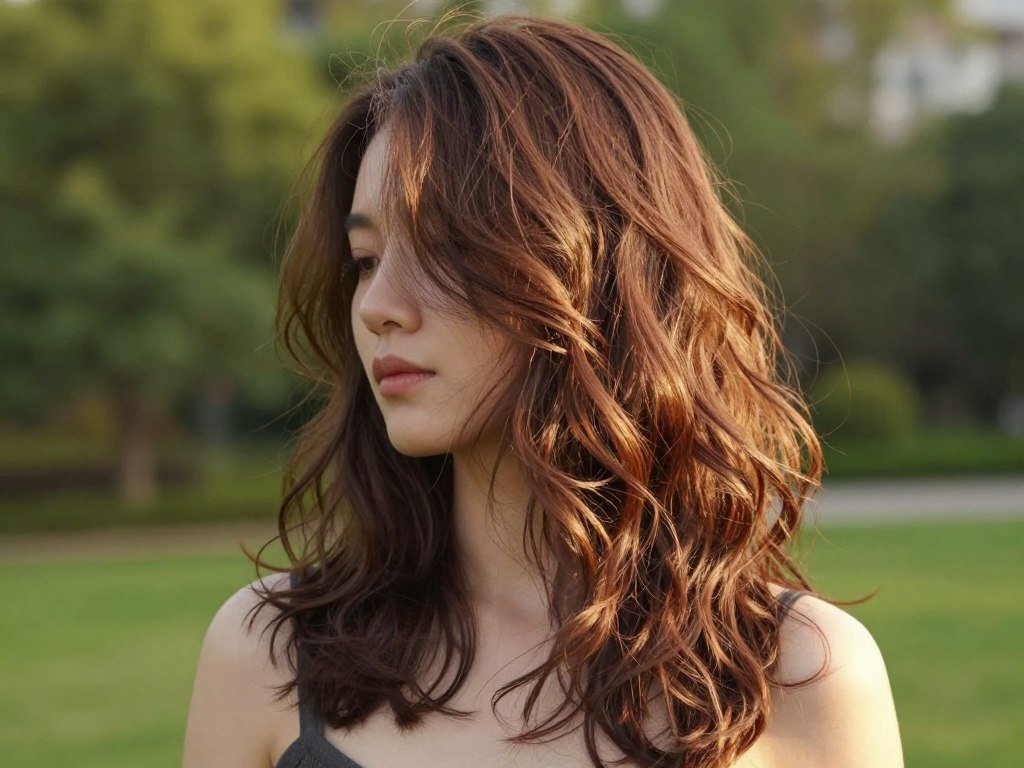
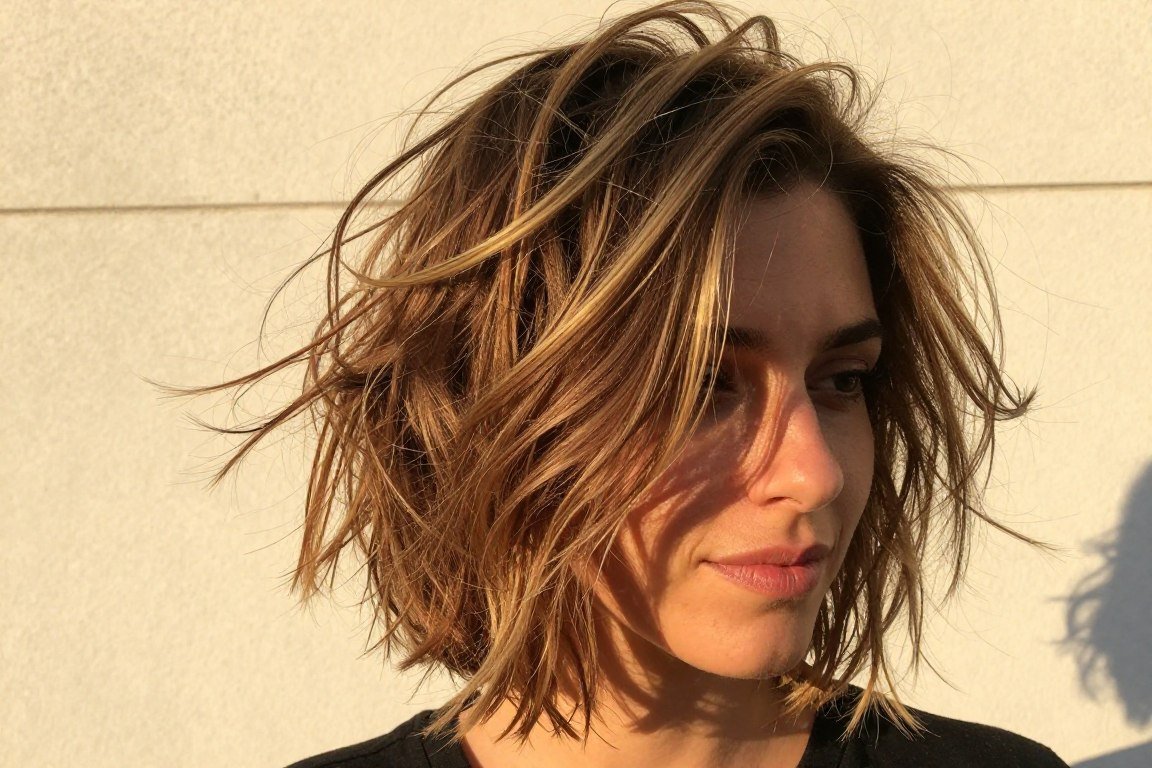
16. Beach Waves for Effortless Texture

Beach waves bring effortless texture to medium length haircuts for thin fine hair. This styling approach creates loose, natural-looking waves that add significant volume. The undone, casual appearance suits modern lifestyles while making thin hair appear substantially fuller.
The beauty of beach waves lies in their imperfection. Unlike structured curls, beach waves embrace natural variation. Some waves are tighter, others looser. This organic appearance works perfectly with thin hair, disguising any sparse areas with textured movement.
Creating Beach Waves at Home
Several methods create beautiful beach waves. The simplest uses a curling wand with a medium barrel. Take sections of hair and wrap them around the wand. Leave the ends out for that signature beach wave look. Alternate the direction of curls for natural appearance.

Sea salt spray provides another avenue to beach waves. Spray generously on damp hair. Scrunch sections with your hands while hair dries. The salt creates texture and encourages natural wave patterns. This method works especially well for hair with even slight natural wave.
Braiding delivers overnight beach waves without heat. Braid damp hair into two or three sections before bed. Sleep with braids intact. In the morning, release braids and gently separate waves with fingers. This creates beautiful, heat-free texture.
Products for Perfect Beach Texture
Texturizing sprays form the foundation of great beach waves. These products contain sea salt or similar ingredients that create grip. Apply to damp hair before styling or spritz on dry hair to enhance existing waves.
Wave-enhancing mousses work beautifully on thin hair. These formulas define waves without weighing down fine strands. Apply to damp hair from roots to ends. Scrunch while drying to encourage wave formation. The product provides hold that keeps waves intact.
Maintaining Beach Waves
Beach waves last longer with proper care. Sleep with hair in a loose bun to preserve wave pattern overnight. In the morning, spray with dry texture spray and scrunch to refresh. This revives waves without complete restyling.
Avoid touching hair excessively throughout the day. Each touch can separate waves and reduce volume. The natural oils from your hands can also weigh down fine strands. Allow beach waves to exist in their effortless state for best results.
17. Wispy Ends for Airy Lightness
Wispy ends create an airy, ethereal quality in medium length haircuts for thin fine hair. This cutting technique produces ultra-light, feathered tips that appear to float. The delicate ends add femininity while making thin hair look intentionally styled rather than sparse.
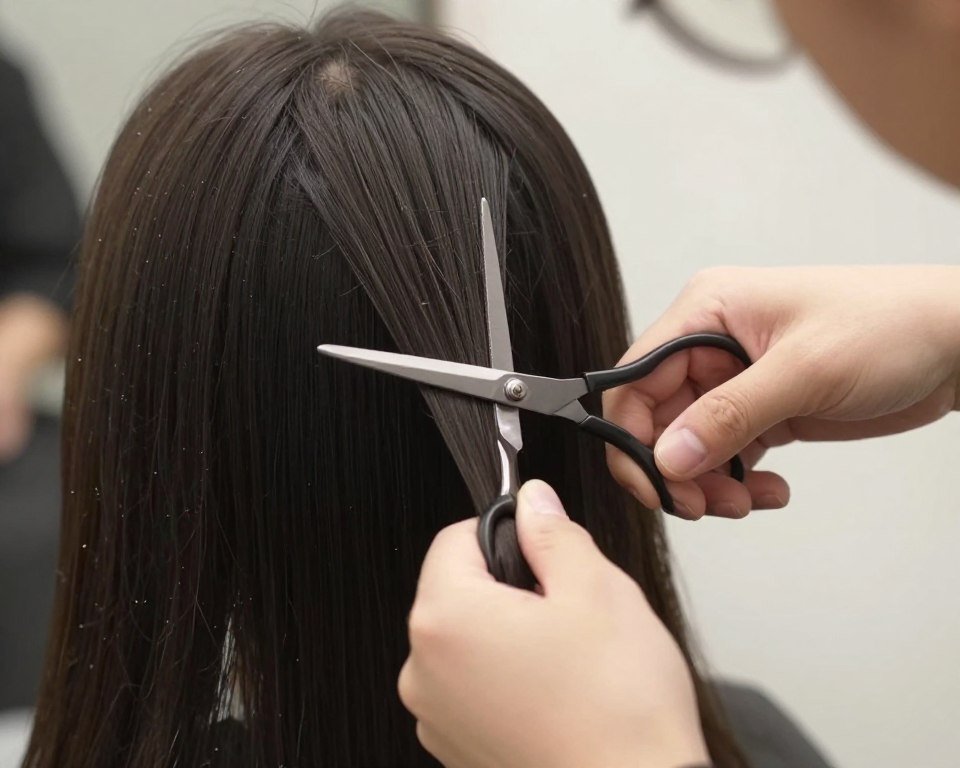
Creating wispy ends requires skilled cutting. Stylists use point-cutting techniques to create feathered tips. The scissors cut into the hair at angles, removing weight while creating delicate, tapered ends. Each strand finishes with a soft point rather than a blunt edge.
Benefits of Wispy Ends
Wispy ends solve the common problem of blunt cuts looking too heavy on thin hair. The light, feathered texture prevents the harsh line that can emphasize lack of density. Instead, the ends appear soft and intentionally textured.
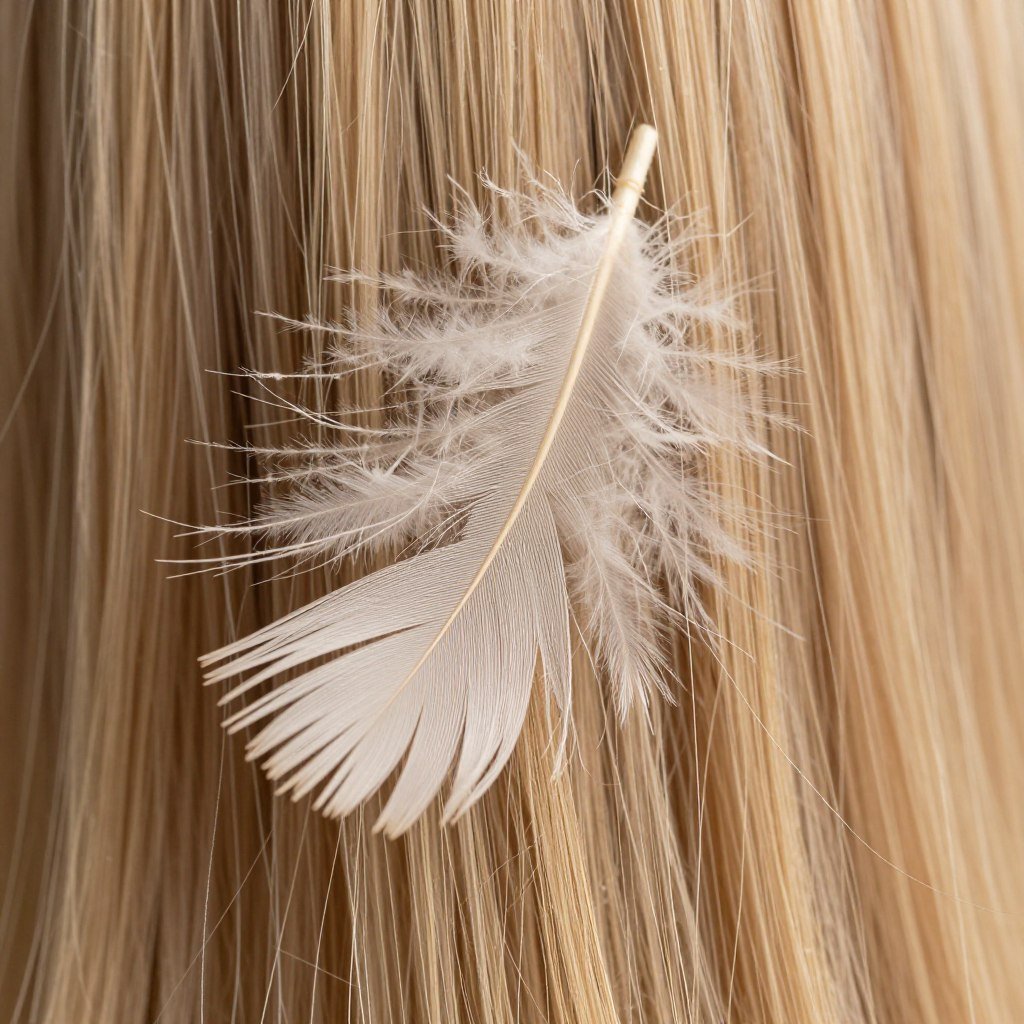
Light moves beautifully through wispy ends. The varied lengths catch light differently, creating dimension. This play of light and shadow makes hair appear fuller. The eye perceives more hair due to the visual interest created by the texture.
Styling Wispy Cuts
Wispy ends require gentle styling to maintain their delicate nature. Avoid heavy products that can clump fine ends together. Instead, use lightweight serums or oils. Apply a tiny amount to ends only, preserving the airy texture.
Air drying works beautifully with wispy ends. Apply a small amount of styling cream to damp hair. Scrunch gently and allow to dry naturally. The ends will maintain their feathered, piece-y appearance without heat styling damage.

When using heat tools, keep temperatures moderate. High heat can damage the delicate wispy ends. Use a heat protectant spray before styling. Create soft bends or waves that work with the feathered texture rather than fighting against it.
Maintenance and Care
Wispy ends require regular trimming to prevent damage. The delicate tips can develop split ends if neglected. Schedule trims every six to eight weeks. Your stylist will refresh the wispy texture while removing any damaged portions.
Deep conditioning treatments help maintain healthy wispy ends. Apply treatment from mid-length to tips weekly. Healthy hair maintains its feathered texture better. Dry, damaged ends clump together, losing the airy quality that makes this cut special for thin hair.
18. Internal Layers for Invisible Body
Internal layers provide a secret weapon for medium length haircuts on thin fine hair. These layers exist within the haircut, invisible on the surface. They remove weight and create volume without disrupting the overall shape. The technique delivers body while maintaining a polished exterior.
Unlike visible surface layers, internal layers are cut underneath top sections. The outer layer remains relatively solid. This creates the appearance of thickness while the hidden layers provide movement and lift. The result is a cut that looks fuller than its actual density.
The Internal Layering Technique
Stylists create internal layers by lifting sections and cutting underneath. The top layers remain longer, creating a protective canopy. Beneath this surface, shorter layers remove bulk and add movement. The hair gains volume without looking obviously layered.
This technique works exceptionally well for thin hair that needs volume but looks stringy when traditionally layered. The solid surface layer provides the appearance of density. The internal structure creates the actual volume and movement.
Styling Internal Layers
Internal layers make styling easier. The hair naturally wants to lift and move. Apply volumizing mousse to damp hair as usual. The internal structure responds beautifully to basic blow drying techniques.
Use a round brush to enhance the natural volume internal layers create. Lift sections at the roots and dry. The internal layers support this lift, making it last longer than it would with a one-length cut. The volume appears to come from natural thickness rather than styling.
The beauty of this cut is its versatility. The smooth surface can be worn sleek for professional settings. Add waves or curls, and the internal layers provide incredible movement. The cut adapts to various styling needs while always maintaining volume.
Who Benefits Most from Internal Layers
Internal layers suit those who want volume without obvious layering. Professional environments that require polished appearance benefit from this technique. The cut looks sophisticated and intentional while delivering the body thin hair needs.
This approach also works for those growing out previous cuts. Internal layers add volume during the growing process without creating awkward lengths. The smooth exterior maintains shape while hair transitions to longer lengths.
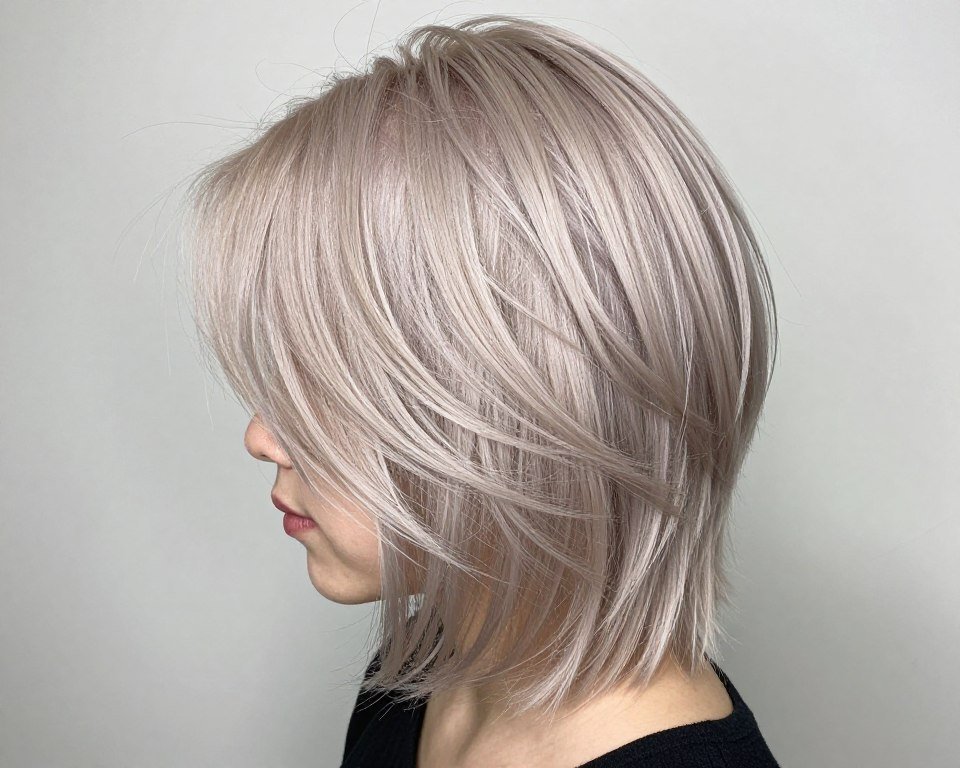
19. Voluminous Crown with Sleek Ends

The combination of voluminous crown with sleek ends creates striking contrast in medium length haircuts for thin fine hair. This styling approach concentrates volume where it matters most while maintaining polished ends. The result is a sophisticated style that makes thin hair appear abundant.
Maximum volume at the crown draws the eye upward. This creates the illusion of more hair overall. The sleek ends provide balance, preventing the style from appearing top-heavy. The contrast between full crown and smooth lengths creates modern elegance.
Achieving Crown Volume
Building crown volume starts with proper product application. Apply root-lifting spray directly to the crown area of damp hair. This product provides the foundation for lasting lift. Work it thoroughly into roots using fingertips.
Blow dry the crown section first. Use a large round brush and lift hair straight up from the head. Direct heat from underneath the brush. This creates maximum lift. Hold each section until completely cool before releasing. The cooling sets the volume.
Gentle teasing adds extra height if desired. Take small sections at the crown and backcomb lightly. Use a fine-tooth comb and work gently to avoid damage. Smooth the surface layer over the teased sections. This creates hidden volume that looks natural.
Creating Sleek Ends
While the crown boasts volume, the ends should be smooth and polished. After creating crown height, focus on the lengths. Apply a small amount of smoothing serum to mid-lengths and ends. This provides slip for sleek styling.

Use a flat iron to smooth sections from mid-length to ends. Take your time with each piece, gliding the iron slowly for maximum smoothness. The contrast between voluminous crown and sleek ends creates the sophisticated aesthetic this style delivers.
Maintaining the Look Throughout the Day
Set the entire style with hairspray. Spray the crown area from underneath to lock in volume. Mist lightly over the sleek sections. This prevents humidity from disrupting your polished ends while keeping crown volume intact.
Carry a small amount of dry shampoo for touch-ups. If crown volume falls throughout the day, spray dry shampoo at the roots. Gently lift sections to refresh volume. The powder reinvigorates lift, extending your style’s lifespan.
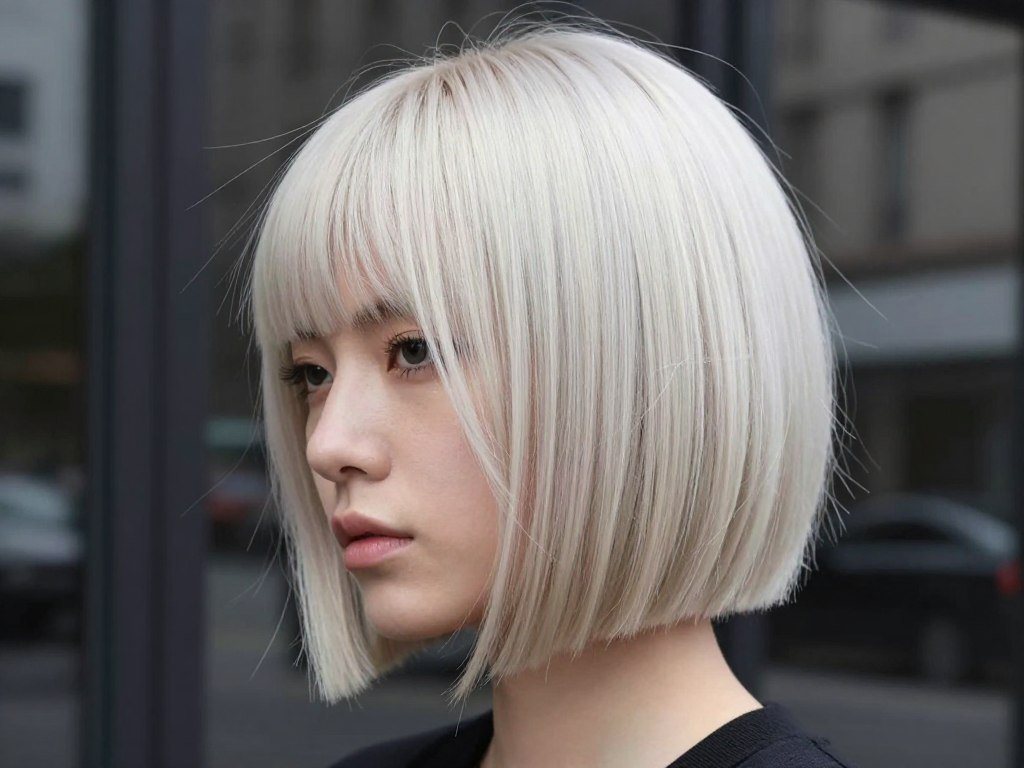
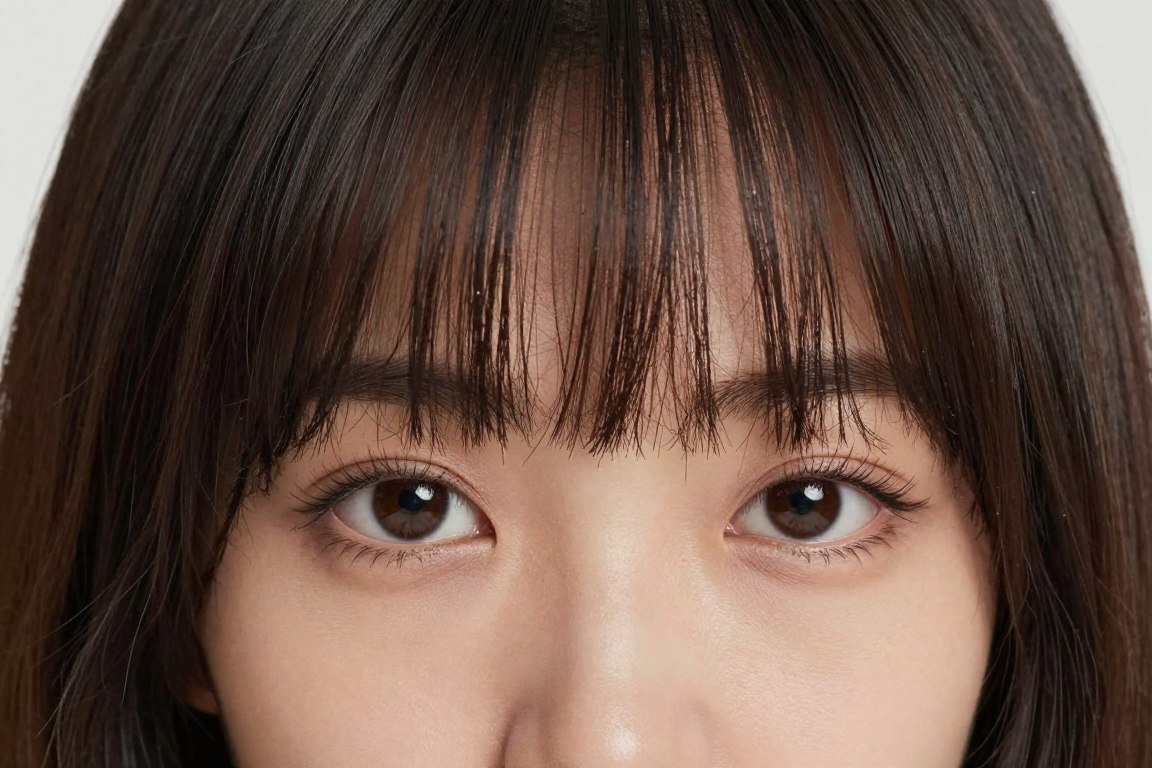
20. Textured Fringe with Dimensional Layers

Textured fringe combined with dimensional layers completes our collection of medium length haircuts for thin fine hair. This modern style features piece-y, textured bangs that blend into beautifully layered length. The combination creates movement, personality, and the appearance of fuller hair.
Textured fringe differs from traditional bangs. Instead of a solid line across the forehead, this approach creates separated, piece-y bangs. Each piece moves independently. This separation adds dimension and makes thin hair appear more abundant.
Creating the Perfect Textured Fringe
Stylists create textured fringe using point-cutting techniques. The scissors cut into the bangs at various angles. This creates pieces of different lengths. Some sections fall shorter, others longer. The variation creates natural-looking texture.
The fringe blends seamlessly into face-framing layers. There’s no harsh line where bangs end. Instead, longer pieces around the face create a cohesive flow. This integration makes the entire haircut work as one unified style.
Dimensional Layers Throughout
Layers throughout the cut complement the textured fringe. These layers follow the same piece-y, textured approach. Each layer adds movement without removing necessary density. The cut maintains fullness while gaining dynamic texture.
Color dimension enhances this cut beautifully. Highlights around the face and through the fringe catch light. This draws attention to the textured elements. The interplay of color and texture creates maximum visual interest.

Styling Your Textured Fringe
Styling textured fringe requires minimal effort. Apply a small amount of lightweight styling cream to damp fringe. Use fingers to separate pieces while blow drying. Direct the dryer downward to smooth fringe while maintaining separation.
A flat iron can define individual fringe pieces. Take small sections and gently clamp the iron. Pull downward while applying light pressure. This creates smooth, separated pieces that maintain the textured appearance.
Complete Style Maintenance
Textured fringe grows out gracefully. As it lengthens, it blends naturally into face-framing layers. This makes maintenance flexible. You can trim fringe every four to six weeks or allow it to grow into longer layers.
The dimensional layers require regular shaping. Schedule full haircuts every eight weeks. Your stylist will refresh the layering structure and maintain the piece-y texture. This keeps the cut looking intentionally textured rather than simply grown out.
This versatile cut suits various face shapes and personal styles. The textured fringe adds character while the dimensional layers create fullness. Together, they deliver a contemporary look that makes thin fine hair appear thick, healthy, and beautifully styled.
Finding Your Perfect Medium Length Haircut for Thin Fine Hair

You have explored twenty stunning medium length haircuts specifically designed for thin fine hair. Each style offers unique benefits and approaches to creating volume, dimension, and the appearance of fuller hair. The right cut transforms how your hair looks and how you feel.
Remember that the best haircut for you depends on multiple factors. Your face shape plays a significant role in which styles flatter most. Consider your lifestyle and how much time you can dedicate to styling. Some cuts require more maintenance than others.
Key Takeaways for Thin Hair Success
Layers remain your best friend when working with thin fine hair. Strategic layering removes weight that pulls hair flat. Layers create movement and the illusion of thickness. Whether you choose subtle internal layers or dramatic piece-y texture, layering delivers volume.
Texture techniques enhance any cut for thin hair. Choppy ends, razored pieces, and wispy tips all add visual interest. These elements break up the uniform appearance that makes thin hair obvious. Embrace texture for fuller-looking styles.
Color dimension works alongside your cut to maximize fullness. Highlights and lowlights create depth that makes hair appear more abundant. Discuss color options with your stylist to enhance your chosen haircut.
Taking the Next Step
Armed with this comprehensive knowledge, you are ready to make an informed decision. Consider which styles resonate most with your personal aesthetic. Think about the styling commitment each requires. Choose a cut that fits your life while delivering the volume you desire.
Consultation with a skilled stylist remains crucial. Bring photos of styles you love from this guide. Discuss your hair’s unique characteristics and your styling abilities. A professional can customize any of these cuts to your specific needs.
Your perfect medium length haircut awaits. These twenty styles prove that thin fine hair can look absolutely stunning with the right cut and styling approach. Volume, movement, and beauty are absolutely achievable.
Embrace the transformative power of the right haircut. Your thin fine hair has incredible potential. The styles in this guide unlock that potential, creating looks you will love. Beautiful, voluminous hair is within your reach.