
Welcome to wonderland! If you’re planning an Alice wonderland themed party or simply want to add a touch of whimsy to your space, you’ve found the perfect page. Creating your own decorations brings that special magic that store-bought items simply can’t match.
This post shares 30 enchanting decoration ideas that transform any room into a curious wonderland. Each project includes clear instructions and a list of items you’ll need. Plus, we’ve created free printable templates to make your wonderland come to life even faster!
Whether you’re hosting a birthday celebration or a tea party table gathering, these fun DIY projects work for any occasion. Let’s tumble down the rabbit hole and explore these delightful decoration ideas together!
Table of Contents
1. Oversized Playing Card Garland
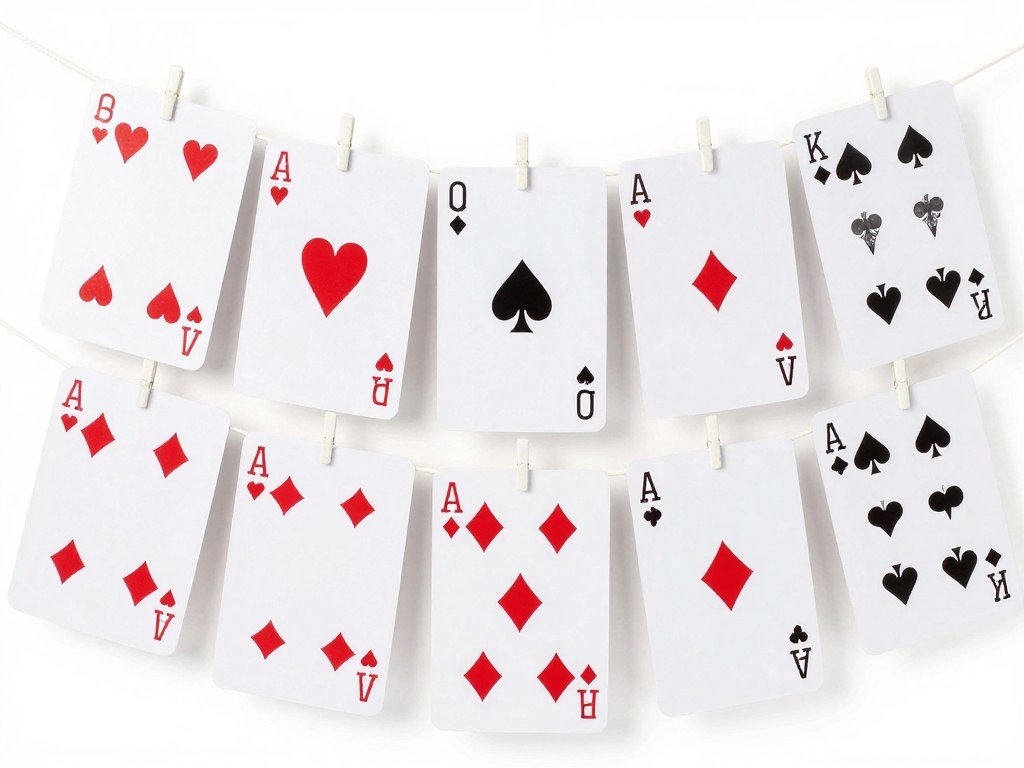
Create a statement garland using giant playing cards inspired by the queen hearts. This classic wonderland decoration adds instant drama to any party table or wall.
Cut rectangles from white cardstock measuring 8×12 inches. Print or hand-draw the suit symbols in red and black. Arrange the cards in alternating patterns for visual interest.
String them together with ribbon or twine, leaving small gaps between each card. Hang across doorways, windows, or above your tea party table for maximum impact.
Materials Needed
- White cardstock or poster board
- Red and black markers or paint
- Hole punch
- Ribbon or decorative twine
- Scissors and ruler
2. Vintage Teacup Flower Centerpieces
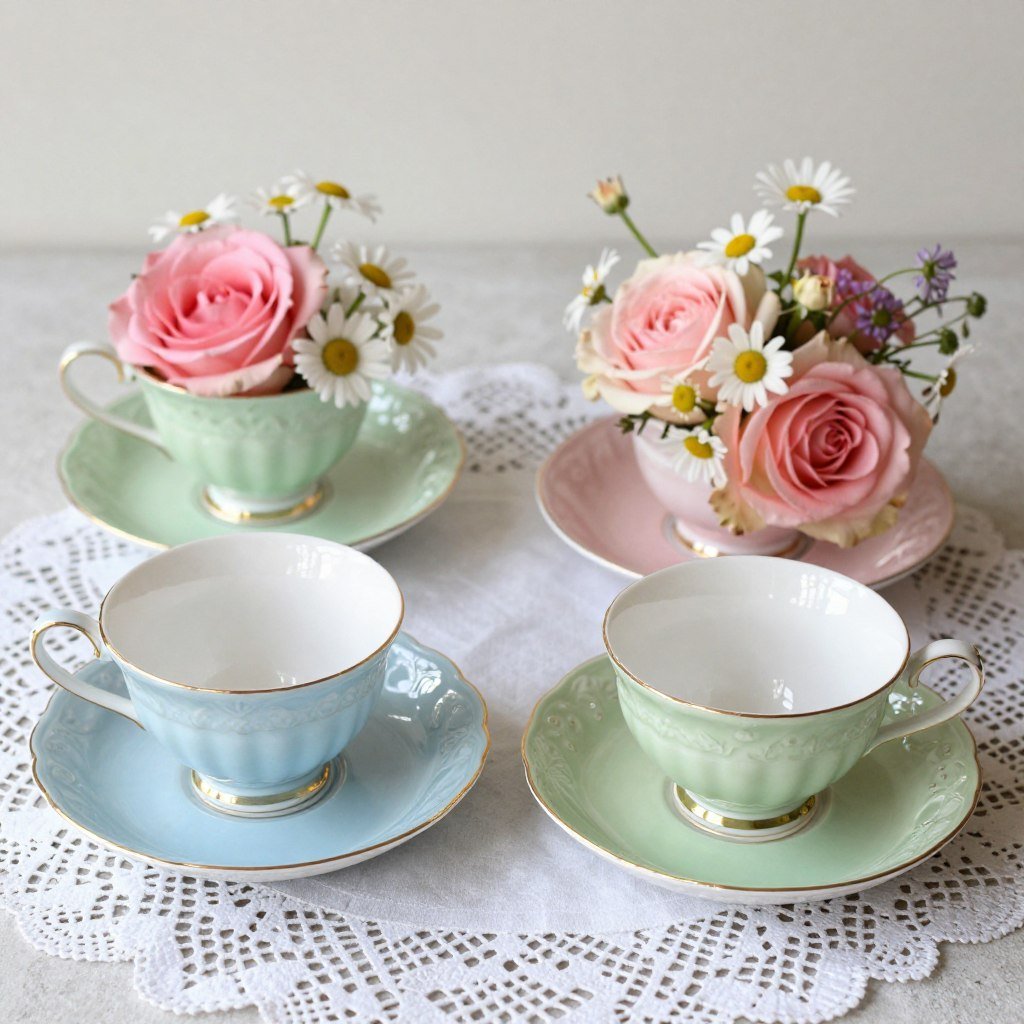
Transform mismatched vintage teacups into charming centerpieces perfect for your alice wonderland celebration. This idea captures the essence of a mad hatter tea party table with minimal time investment.
Visit thrift stores or dollar tree to find affordable teacups in various patterns. Fill each cup with fresh or silk flower arrangements in coordinating colors.
Place them on saucers and arrange in clusters across your party table. Add small cards with “Drink Me” tags for an authentic wonderland touch.
Materials Needed
- Vintage teacups and saucers (4-6 pieces)
- Fresh or silk flowers
- Floral foam or water tubes
- Small decorative tags
- Lace doilies (optional)
3. Whimsical Paper Mushrooms

These adorable mushroom decorations bring the wonderland forest indoors. They make great additions to your party scene and can be sized to fit any space.
Create mushroom caps using red cardstock formed into cone shapes. Add white circles for the classic toadstool look. Fashion stems from rolled paper tubes painted cream or tan.
Attach caps to stems with glue. Display them in groups on tables, shelves, or create a mushroom garden backdrop for photos.
Materials Needed
- Red and white cardstock
- Paper towel tubes or rolled paper
- White paint or paper circles
- Hot glue gun
- Green tissue paper for grass base
4. “I’m Late!” Clock Face Decorations
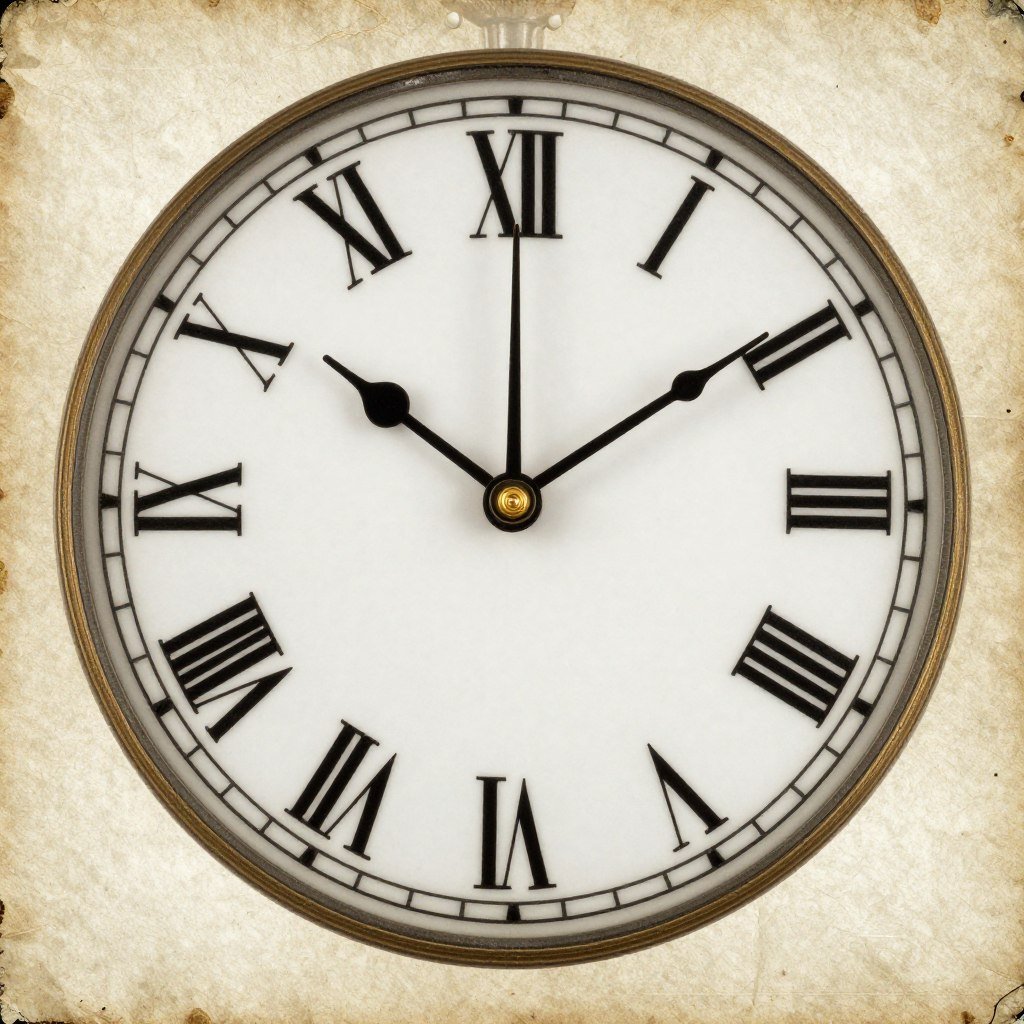
Reference the white rabbit’s famous worry about being late with clock decorations showing different times. This detail adds storytelling depth to your wonderland party decorations.
Print clock face templates in various sizes or draw them on cardstock. Use different times on each clock for visual variety and authenticity.
Age the paper with tea staining for a vintage look. Hang them at different heights on walls or attach to sticks as table decorations.
Materials Needed
- Cardstock in cream or white
- Printed clock templates
- Tea bags for aging effect
- Markers or pens for details
- String or wooden dowels
5. Rabbit Hole Door Decoration
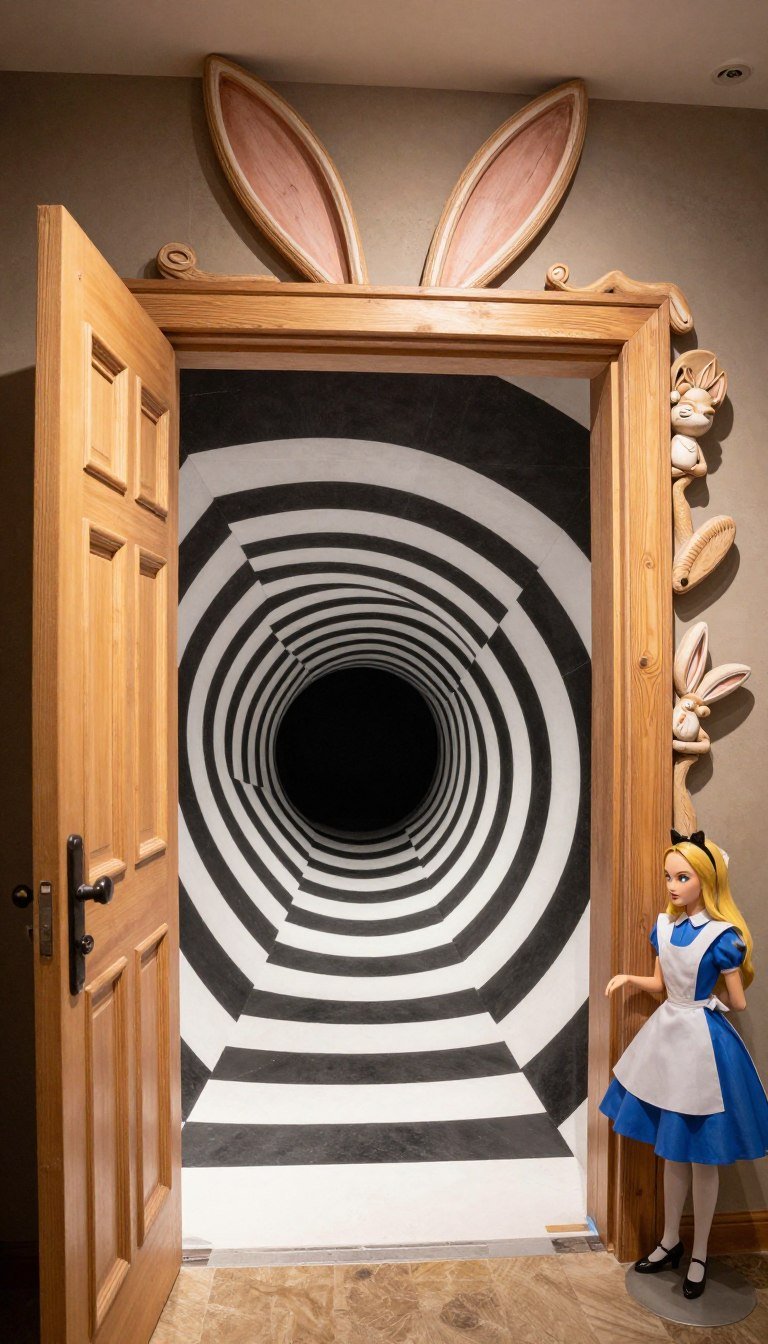
Welcome guests to your wonderland party through a magical rabbit hole entrance. This impressive decoration sets the tone before anyone enters your party space.
Cover your doorway with black paper or fabric. Create a spiral pattern using white strips to suggest the tumbling effect of falling down the rabbit hole.
Add dimensional elements like dangling clocks, playing cards, or keys around the entrance. This immersive experience makes guests feel like they’re truly entering wonderland!
Materials Needed
- Black poster board or fabric
- White streamers or paper strips
- Double-sided tape
- Hanging decorations (clocks, keys, cards)
- String or fishing line
6. “Painting the Roses Red” Display
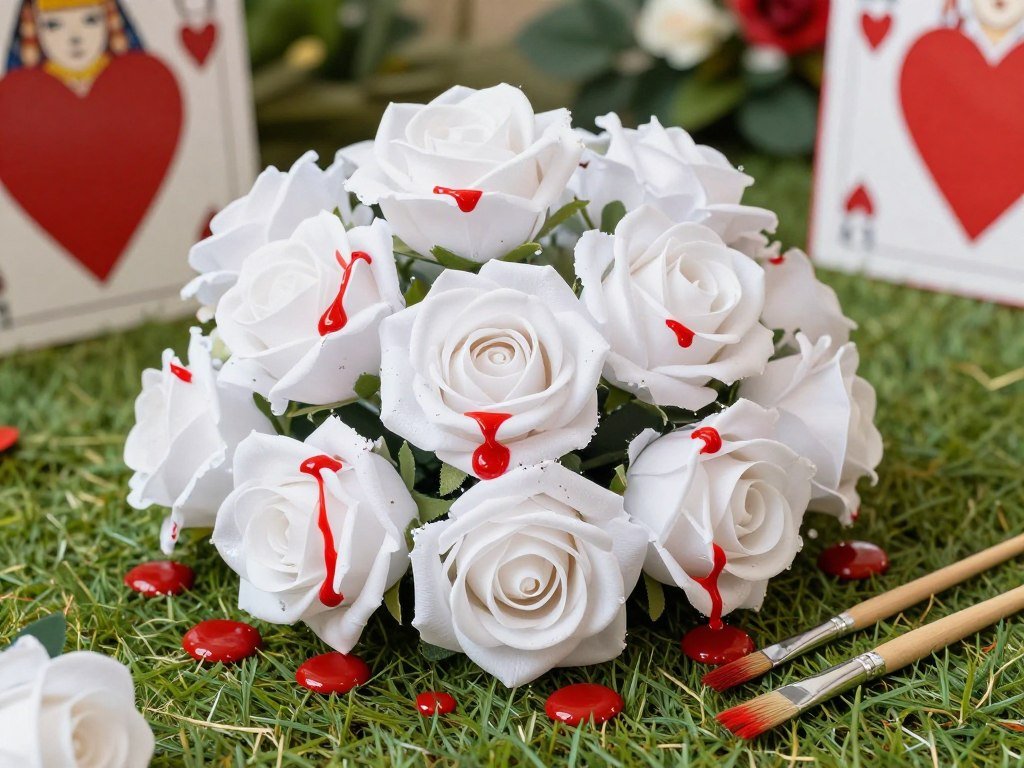
Recreate the iconic scene where cards paint white roses red. This wonderland decoration serves as both decor and a fun party activity for guests.
Arrange white artificial roses in vases or attach to poster board. Provide red paint and brushes so guests can participate in “painting” them during the party.
Alternatively, pre-paint roses with deliberate drips and splatters for a finished display. Add small card soldier cutouts with paintbrushes for authenticity.
Materials Needed
- White artificial roses or flowers
- Red acrylic paint
- Small paintbrushes
- Vases or display boards
- Drop cloths or protective covering
7. Hanging Teapot Lanterns
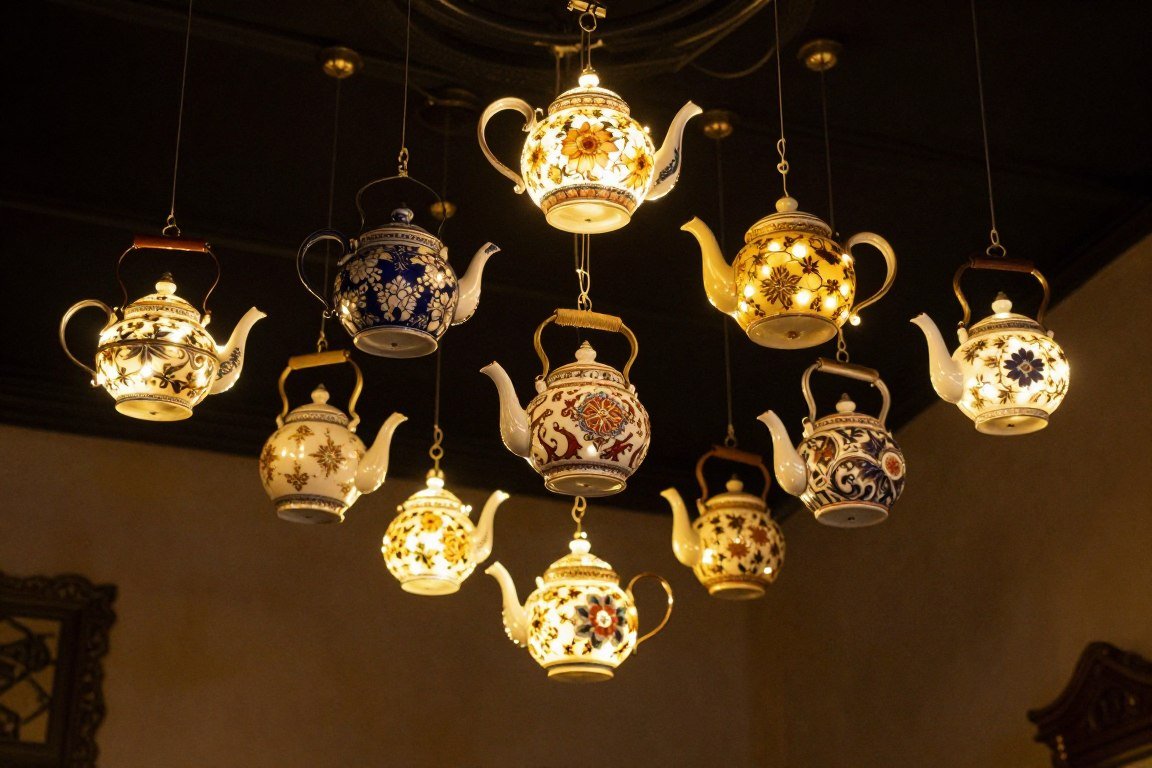
Transform old teapots into enchanting light fixtures that cast a warm glow over your tea party table. This creative reuse brings vintage charm to your wonderland party.
Find teapots at thrift stores or dollar tree. Place battery-operated LED lights or fairy lights inside each pot. Remove lids or leave slightly ajar to allow light to escape.
Hang teapots at varying heights using strong wire or chain. The soft glow creates magical ambiance perfect for evening celebrations.
Materials Needed
- Vintage teapots (3-5 pieces)
- Battery-operated LED lights
- Strong wire or decorative chain
- Ceiling hooks
- Wire cutters and pliers
8. Vintage Key and Bottle Garland

Create mystery and intrigue with a garland featuring old-fashioned keys and tiny bottles labeled “Drink Me.” This decoration references wonderland’s size-changing potions and locked doors.
Collect vintage-style keys from craft stores or online. Add small bottles or vials with handmade labels. String them alternately on jute twine or ribbon.
Drape across mantels, tables, or doorways. The metallic glint of keys catches light beautifully and adds dimension to your party decorations.
Materials Needed
- Vintage-style keys (metal or plastic)
- Small glass bottles or vials
- Printed “Drink Me” labels
- Jute twine or ribbon
- Wire for attaching items
9. Cheshire Cat Direction Signs
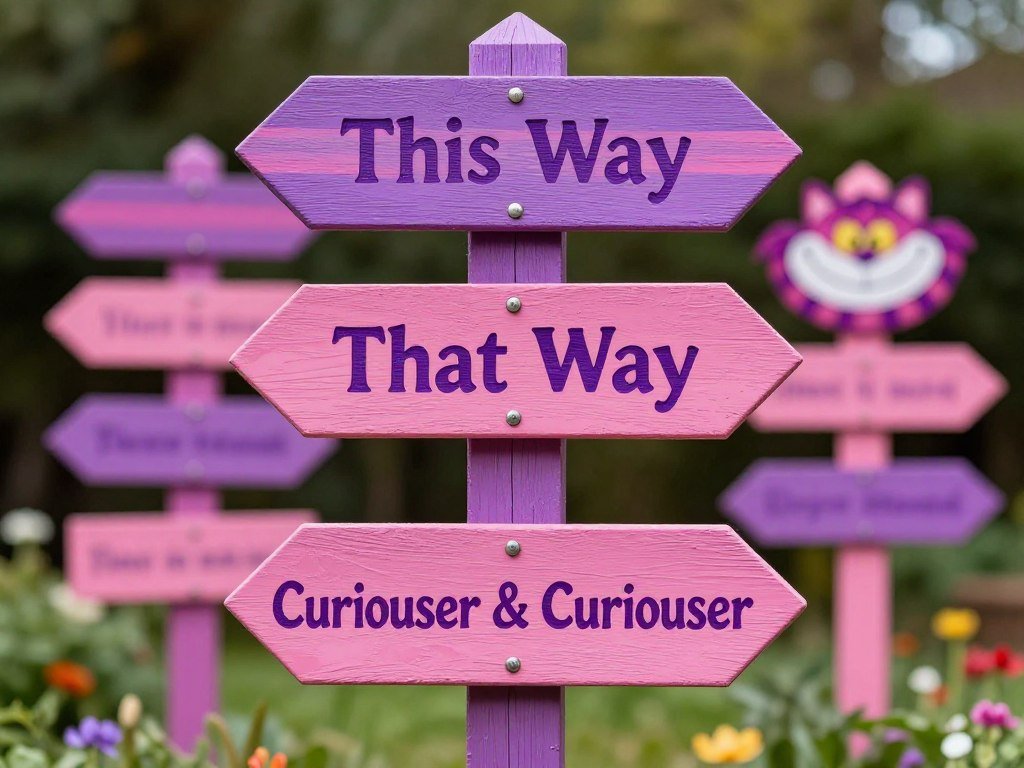
Guide guests through your wonderland with directional signs inspired by the Cheshire Cat’s cryptic guidance. These fun decorations add interactive elements to your party space.
Cut arrow shapes from wood or sturdy cardboard. Paint them in pink and purple stripes or solid colors. Add the Cheshire Cat’s iconic grin to each sign.
Write phrases like “This Way,” “That Way,” or “We’re All Mad Here” on the arrows. Mount on stakes and place throughout your party area pointing in various directions.
Materials Needed
- Wood planks or thick cardboard
- Purple and pink acrylic paint
- Black paint for Cheshire grin
- Wooden stakes or dowels
- Paintbrushes and stencils
10. Paper Flamingo Croquet Set
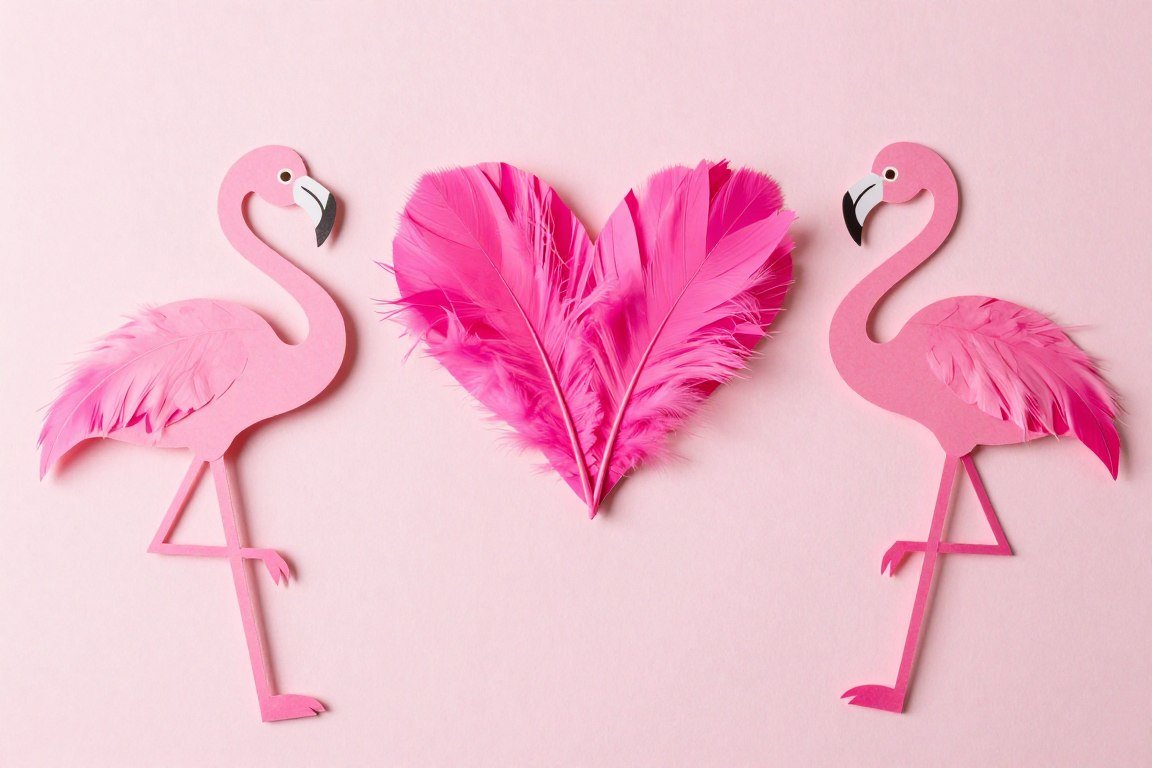
Bring the queen hearts’ favorite game to life with decorative flamingo props. These make excellent photo opportunities and party activities for guests of all ages.
Create flamingo shapes from pink cardstock or foam board. Add dimensional details with tissue paper feathers and pipe cleaner legs. Make them life-sized or scaled down as table decorations.
Pair with painted wickets made from wire or pool noodles. Set up a croquet area where guests can pose for photos or play a modified game.
Materials Needed
- Pink cardstock or foam board
- Pink tissue paper for feathers
- Pink pipe cleaners
- Wire or pool noodles for wickets
- Hot glue and scissors
11. Storybook Page Bunting

Celebrate the literary origins of alice wonderland with bunting made from book pages. This elegant decoration appeals to book lovers and adds sophisticated charm to your party.
Use photocopies of book pages or print excerpts from online sources. Cut into triangle or pennant shapes. Fold the top edge over string or ribbon and secure with glue.
Mix illustrated pages with text-only pages for visual variety. The black white contrast creates classic elegance that complements any color scheme.
Materials Needed
- Printed book pages or photocopies
- Scissors and ruler
- Twine or ribbon
- Glue stick or double-sided tape
- Optional: tea for aging effect
12. Topsy-Turvy Teacup Tower
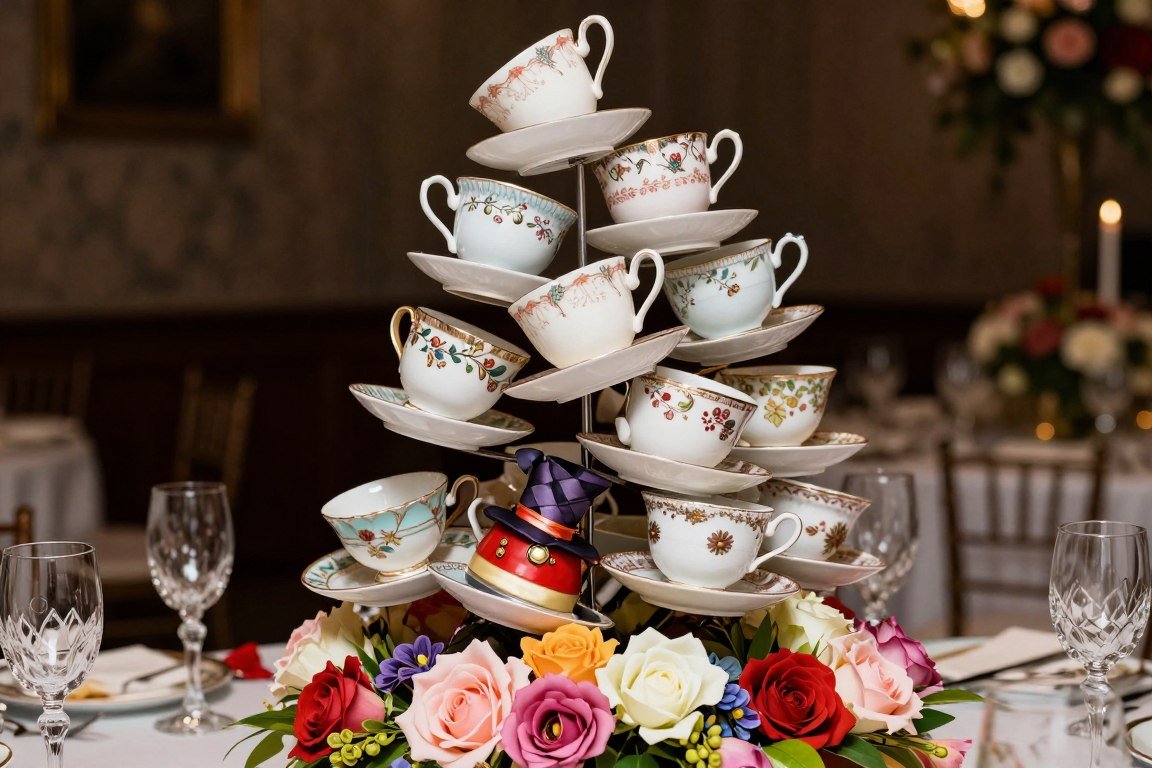
Stack teacups and saucers in impossible angles to create a mad hatter-worthy centerpiece. This eye-catching decoration becomes an instant conversation starter at any wonderland party table.
Secure cups and saucers with a threaded rod or strong adhesive in off-kilter angles. Alternate sizes and patterns for maximum whimsy. Add silk flowers, ribbons, or small decorative items between layers.
Place on a sturdy base like a cake stand or wooden platform. This centerpiece works beautifully for a tea party table or as a focal point on a buffet.
Materials Needed
- Mismatched teacups and saucers (5-7 sets)
- Threaded rod or strong adhesive
- Decorative base or cake stand
- Silk flowers and ribbons
- Drill (if using threaded rod method)
13. Queen of Hearts Crown Props
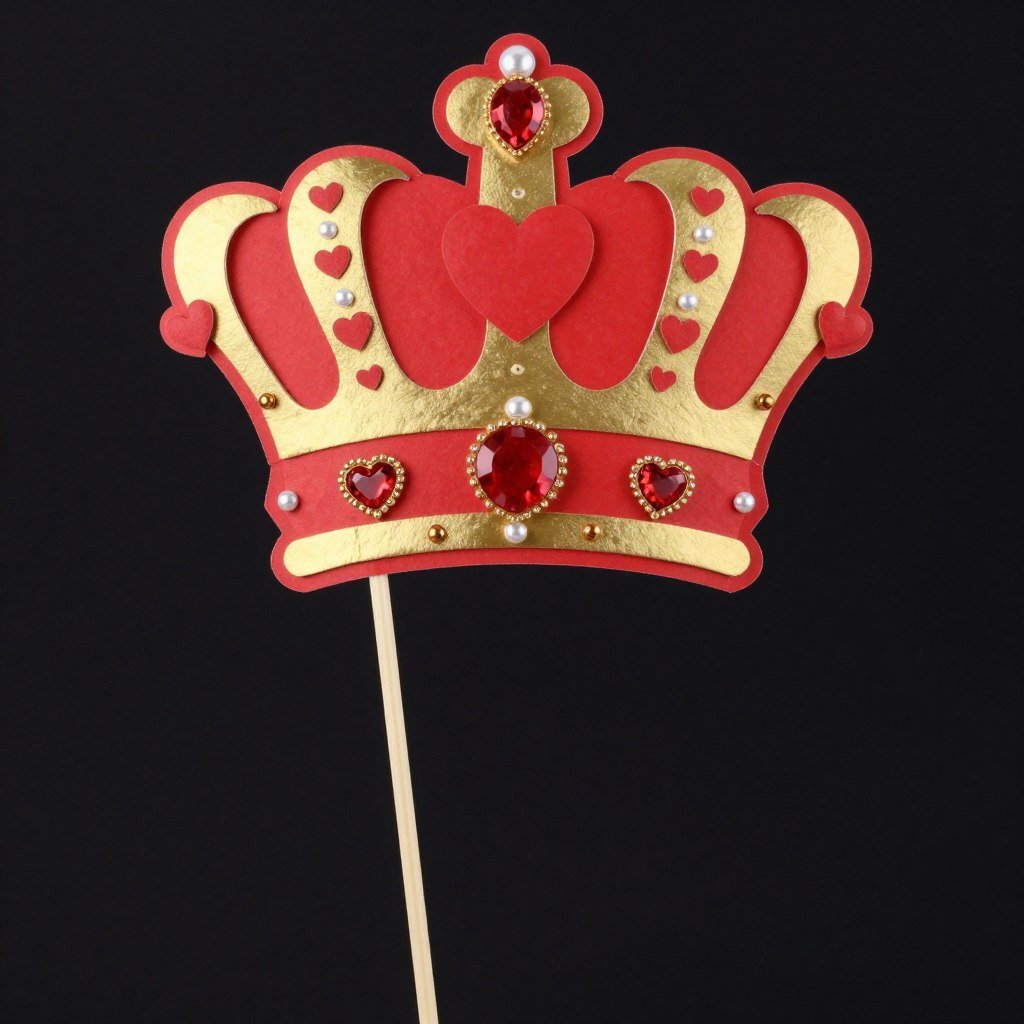
Create regal photo props that let guests channel their inner queen hearts. These crowns add fun to photo sessions and make wonderful party favor keepsakes.
Cut crown shapes from red and gold cardstock. Decorate with heart cutouts, glitter, and adhesive jewels. Make adjustable headbands or attach to sticks for handheld props.
Provide a variety of sizes for both children and adults. Set up a photo area with multiple props for guests to mix and match.
Materials Needed
- Red and gold cardstock
- Heart-shaped punches or templates
- Glitter and adhesive jewels
- Elastic headbands or wooden sticks
- Hot glue gun
14. “Floating” Teacup Installation
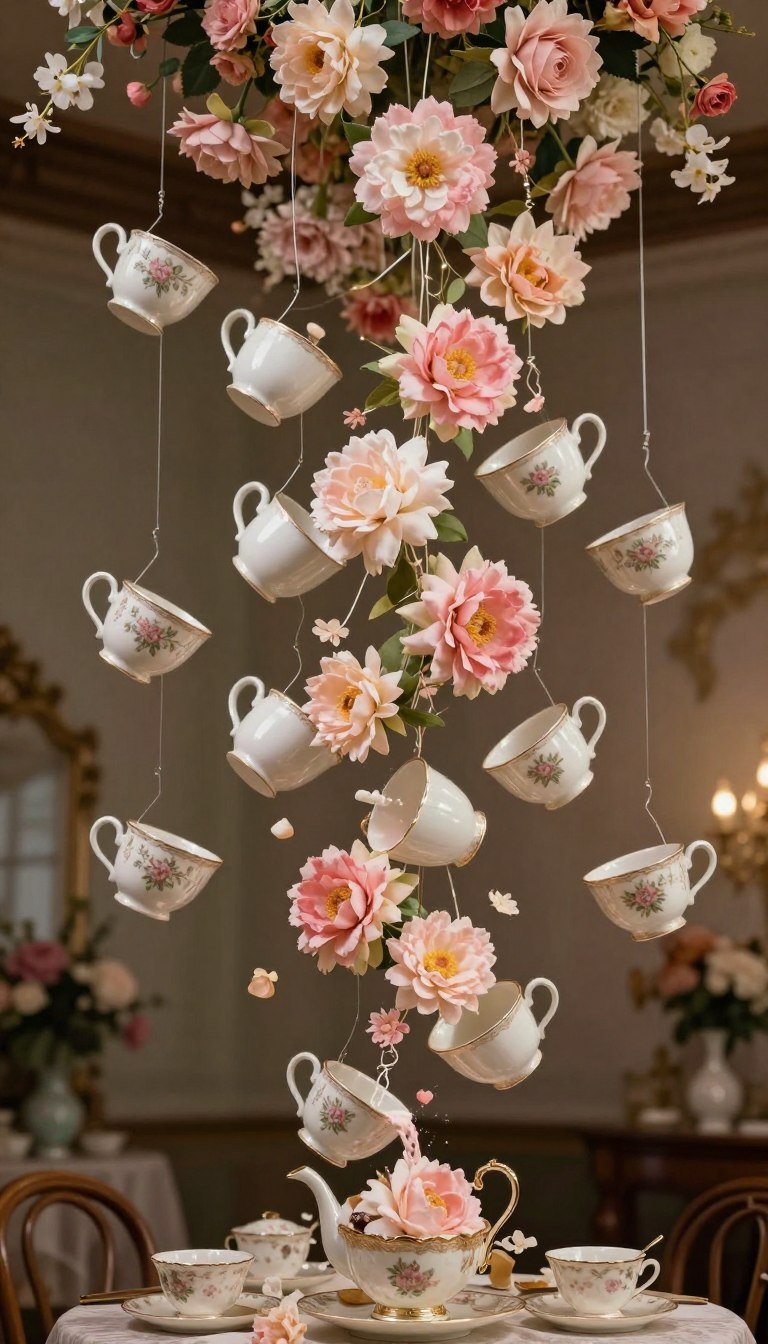
Design a gravity-defying display where teacups appear to float in mid-air, pouring an endless stream of flowers. This stunning installation captivates guests and creates memorable photo opportunities.
Bend heavy wire into support structures hidden inside teacups and flower cascades. Attach silk flowers to create the illusion of pouring. Suspend from ceiling at various heights.
Use monofilament line for invisible hanging. Position over the tea party table or in an entrance area for maximum impact. This decoration requires more time but delivers spectacular results.
Materials Needed
- Vintage teacups and saucers (3-5 sets)
- Heavy gauge wire
- Silk flowers in coordinating colors
- Monofilament fishing line
- Ceiling hooks and wire cutters
15. “Eat Me” Tiered Dessert Stand
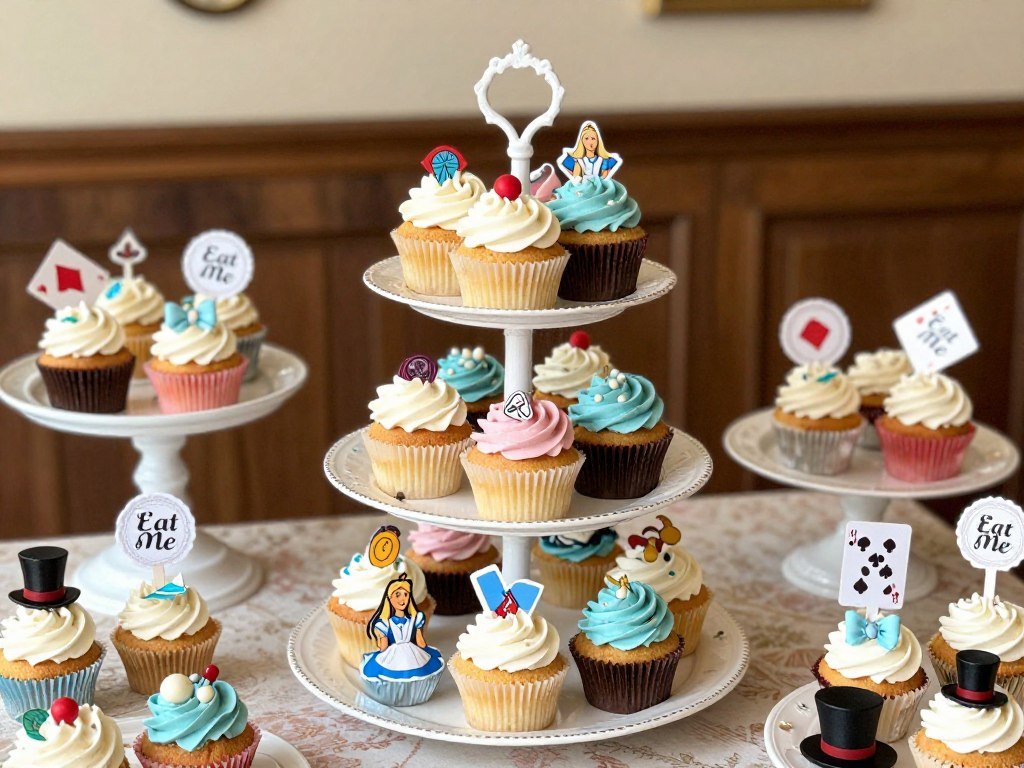
Transform a simple tiered stand into wonderland magic with themed decorations and “Eat Me” tags. This functional piece displays treats while reinforcing your alice wonderland theme.
Decorate a plain cake stand with painted designs, ribbon, or adhesive cutouts. Create small tags reading “Eat Me” to attach to treats. Add miniature decorative elements like tiny top hats or playing cards.
Fill with themed cookies, cupcakes, or other small desserts. The vertical display saves table space while creating visual interest at your party table.
Materials Needed
- Tiered cake stand or plates with supports
- Decorative ribbon or paint
- Cardstock for “Eat Me” tags
- Miniature decorative elements
- Hot glue and scissors
16. Blue Caterpillar Balloon Arch

Welcome guests under a balloon arch inspired by the wise caterpillar. This colorful decoration frames doorways, dessert tables, or photo areas with wonderland charm.
Inflate balloons in various shades of blue and purple. Create an arch frame using PVC pipe, wire, or a balloon arch kit. Attach balloons in a curved pattern, clustering colors for the caterpillar’s segmented body.
Add details like paper eyes or a pipe cleaner hookah pipe. Position over entryways or use as a photo backdrop. This decoration makes a bold statement with relatively simple supplies.
Materials Needed
- Blue and purple balloons (50-75 count)
- Balloon arch frame or PVC pipe
- Balloon pump
- Fishing line or balloon tape
- Black cardstock for face details
17. Pocket Watch Table Numbers
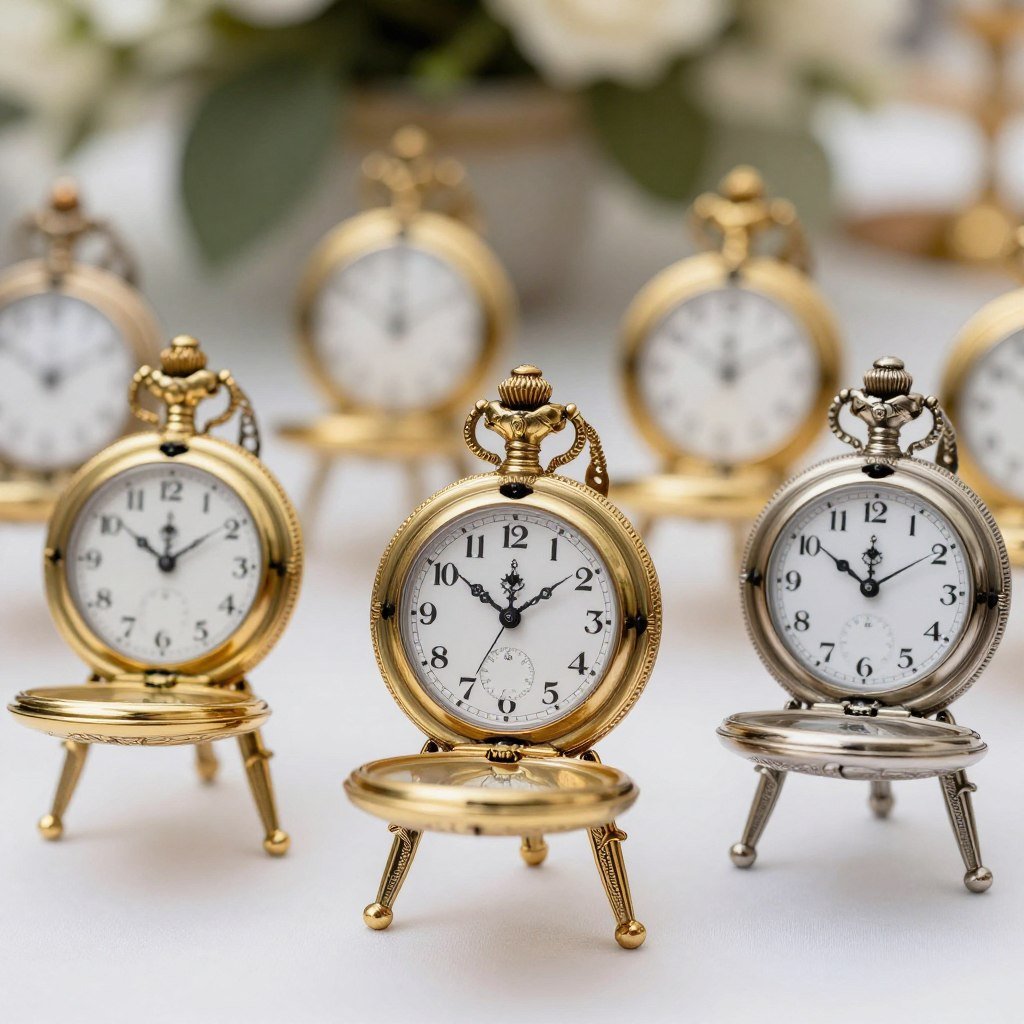
Guide guests to their seats with pocket watch table numbers that reference the white rabbit’s time obsession. These elegant details add sophistication to your wonderland party decorations.
Print or draw pocket watch faces in various sizes. Mount on cardstock backing and attach small easels or stands. Incorporate table numbers into the clock face design or attach separately.
Each watch can display a different time for authenticity. Add chains made from beads or metallic ribbon for dimensional details that catch light beautifully.
Materials Needed
- Printed pocket watch templates
- Cardstock backing
- Small easels or display stands
- Metallic ribbon or bead chains
- Number stickers or markers
18. Miniature “Drink Me” Bottle Favors
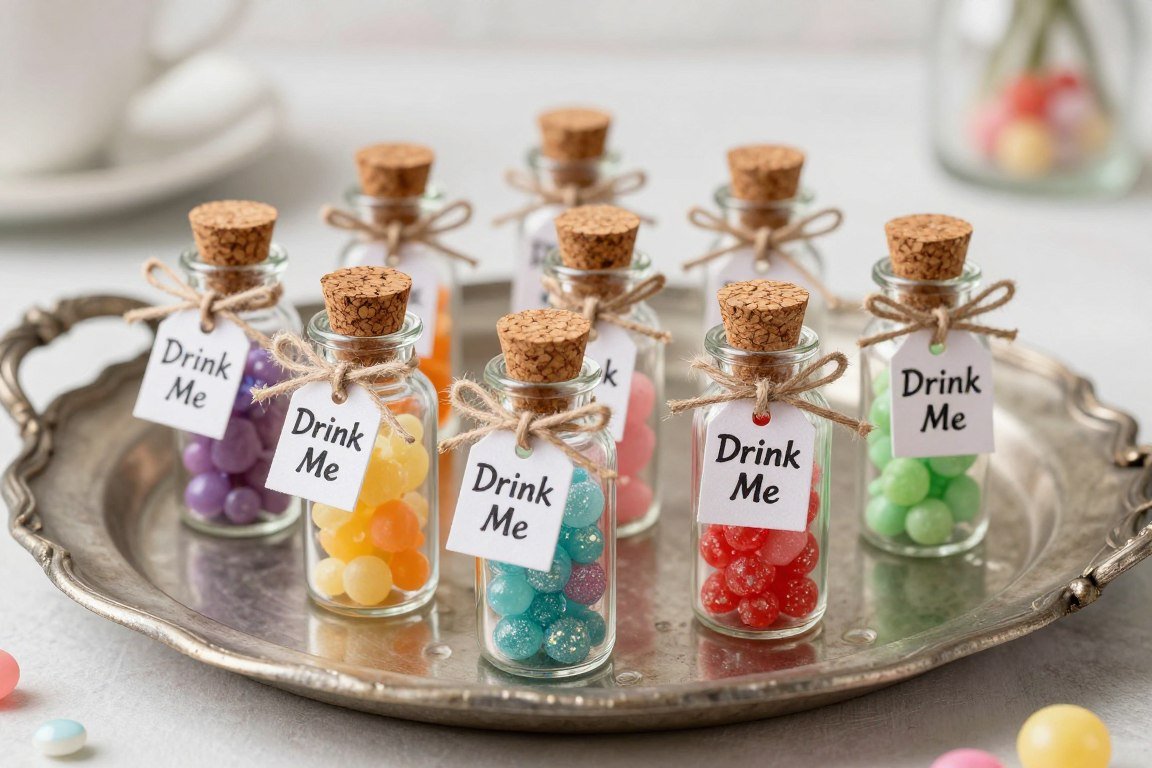
Send guests home with their own size-changing potions packaged in adorable miniature bottles. These party favor items double as table decorations during the celebration.
Fill small glass bottles or vials with colorful candy, glitter, or bath salts. Create vintage-style “Drink Me” labels on aged paper. Tie with twine or ribbon around bottle necks.
Display in clusters on tables or arrange near place settings. Guests appreciate these thoughtful details that extend the wonderland magic beyond the party time itself.
Materials Needed
- Small glass bottles with corks (1 per guest)
- Printed “Drink Me” labels
- Twine or narrow ribbon
- Fillers (candy, glitter, bath salts)
- Scissors and glue
19. Looking Glass Mirror Frame
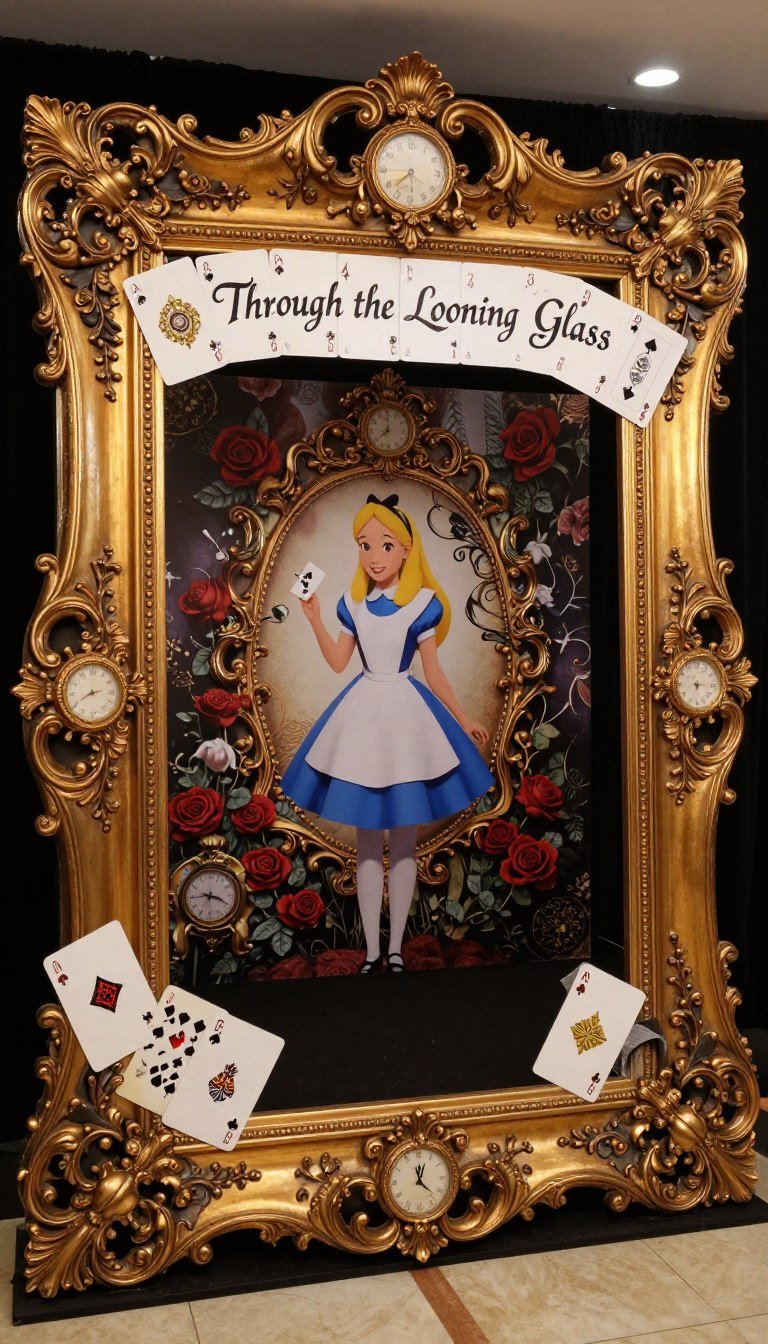
Create a “through the looking glass” experience with a decorated mirror frame that serves as both decoration and photo opportunity. This versatile piece anchors any wonderland party space.
Find a large mirror or empty frame at thrift stores. Embellish the frame with painted details, attached playing cards, artificial flowers, clock parts, and keys. Paint “Through the Looking Glass” across the top.
Position at guest height for selfies and group photos. The reflection adds depth to your party space while providing entertainment and memories for all guests.
Materials Needed
- Large mirror or empty picture frame
- Acrylic paints
- Playing cards and decorative elements
- Hot glue gun
- Optional: mirror backing if using empty frame
20. Stacked Mad Hatter Top Hat Display
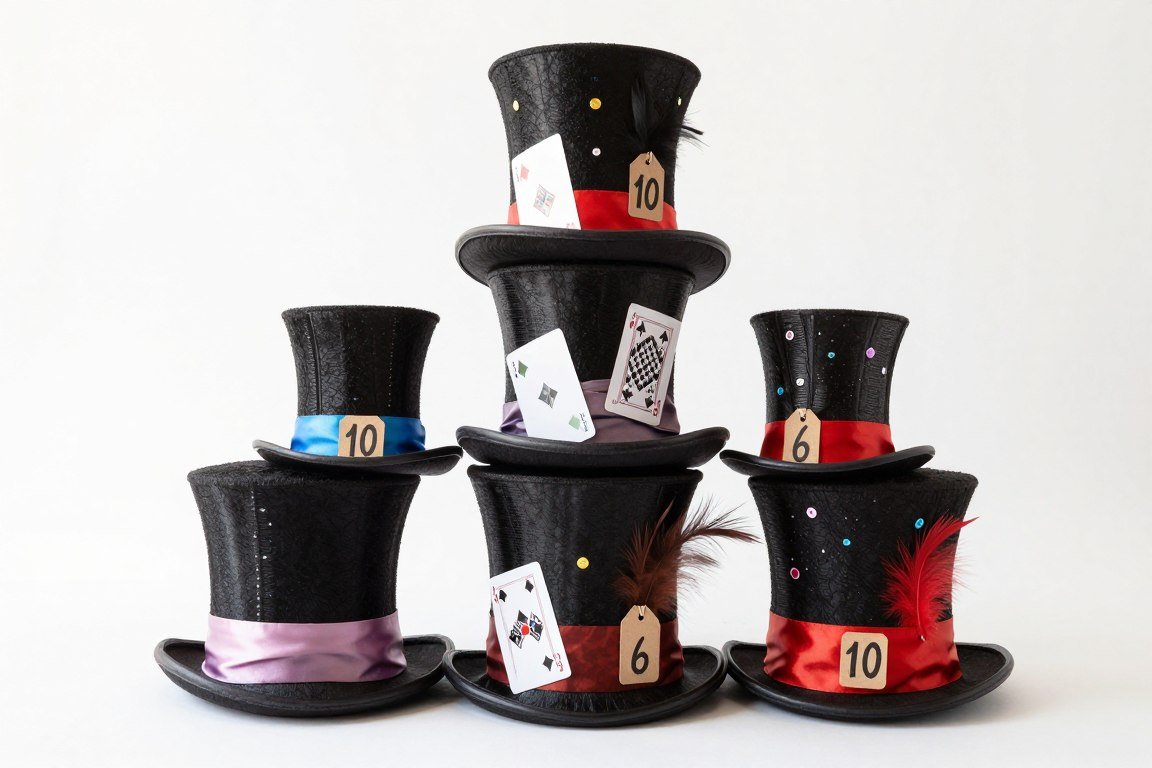
Honor the mad hatter with a towering stack of decorated top hats. This striking centerpiece brings immediate wonderland recognition and works beautifully as a focal point.
Create hats from black cardstock formed into cylinders with circular brims. Stack hats in graduating sizes using hidden supports. Decorate each hat differently with ribbons, cards, feathers, and the iconic 10/6 price tag.
Tilt hats at playful angles as you stack them. This dimensional decoration adds height and drama to your tea party table or buffet area.
Materials Needed
- Black cardstock or poster board
- Decorative ribbons in various colors
- Playing cards and feathers
- Wooden dowel for support
- Hot glue and scissors
21. Queen’s Heart Garland

Craft a bold garland featuring cascading red hearts to celebrate the queen hearts’ domain. This simple yet effective decoration adds color and theme reinforcement throughout your party space.
Cut hearts from red cardstock in multiple sizes. Add details like crown symbols, playing card suits, or glitter edges. String hearts on ribbon or thread with even spacing.
Drape across walls, windows, or tables. Layer multiple garlands at different heights for dimensional interest. The repetition of heart shapes creates cohesive visual flow across your wonderland party.
Materials Needed
- Red cardstock in various shades
- Heart templates or punches
- Black ribbon or thread
- Glitter and embellishments
- Hole punch and scissors
22. “Drink Me” Bottle Wraps
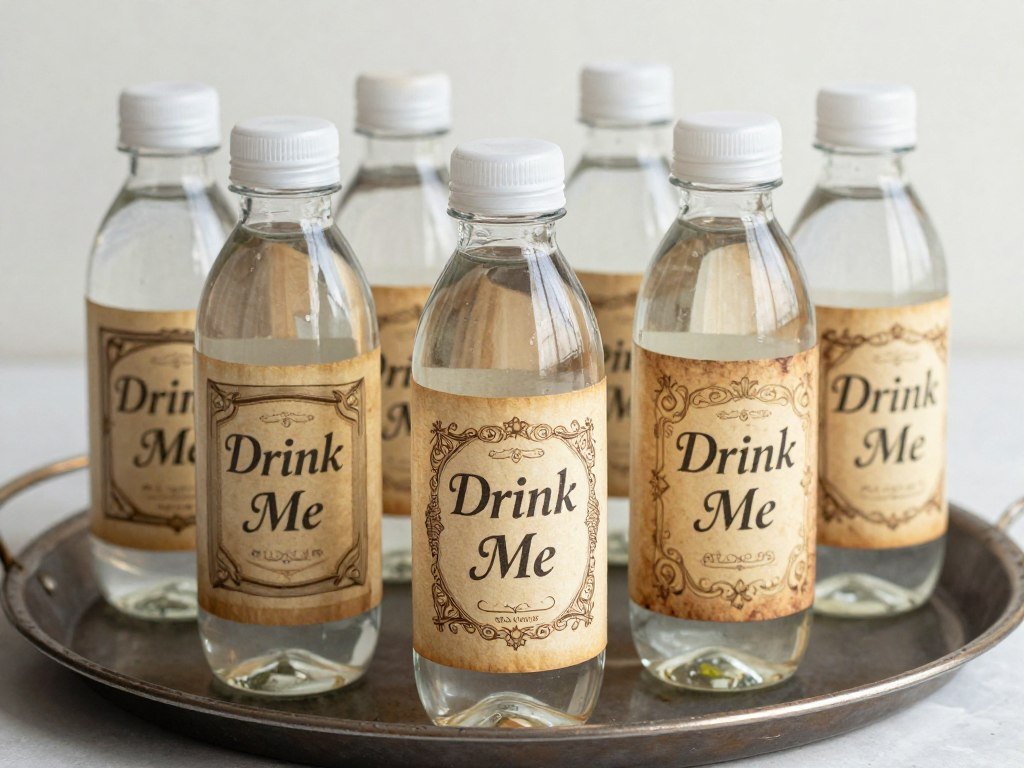
Transform ordinary water bottles into themed decorations with custom “Drink Me” wraps. This practical decoration keeps guests hydrated while maintaining your wonderland aesthetic throughout the party.
Design label wraps that fit standard water bottles. Print on aged-looking paper or regular paper treated with tea staining. Include phrases like “Drink Me,” “Refreshment,” or quotes from the book.
Secure labels with double-sided tape or glue. Display bottles in vintage crates, buckets, or on the tea party table. This simple touch elevates ordinary items into theme-appropriate details.
Materials Needed
- Printed label templates
- Regular or aged paper
- Double-sided tape or glue stick
- Water bottles
- Optional: tea bags for aging
23. White Rabbit Silhouette Decorations

Feature the story’s catalyst with white rabbit silhouettes positioned throughout your party space. These recognizable shapes instantly communicate your wonderland theme to arriving guests.
Cut rabbit silhouettes from white cardstock or foam board. Include details like the pocket watch, waistcoat, or worried expression. Create various sizes from table-top to life-sized versions.
Stand rabbits using folded cardstock feet or mount on stakes. Place near the entrance, scattered among other decorations, or create a “rabbit run” path leading to your party area.
Materials Needed
- White cardstock or foam board
- Rabbit templates
- Black marker for details
- Scissors or craft knife
- Wooden stakes or cardstock stands
24. Teacup-Shaped Favor Boxes

Create adorable favor boxes shaped like teacups that guests will love taking home. These containers hold treats while serving as decorative items during your wonderland celebration.
Use teacup box templates to cut and fold decorative paper into cup shapes. Add paper handles and decorate with patterns, glitter, or stickers. Fill with candies, small toys, or themed trinkets.
Place one at each guest’s seat or create a favor table where guests choose their own. These party favor boxes extend your tea party table theme while providing functional takeaway items.
Materials Needed
- Printed teacup box templates
- Decorative cardstock or scrapbook paper
- Glue or double-sided tape
- Ribbon for handles
- Small treats or party favors
25. Garden Rose Archway
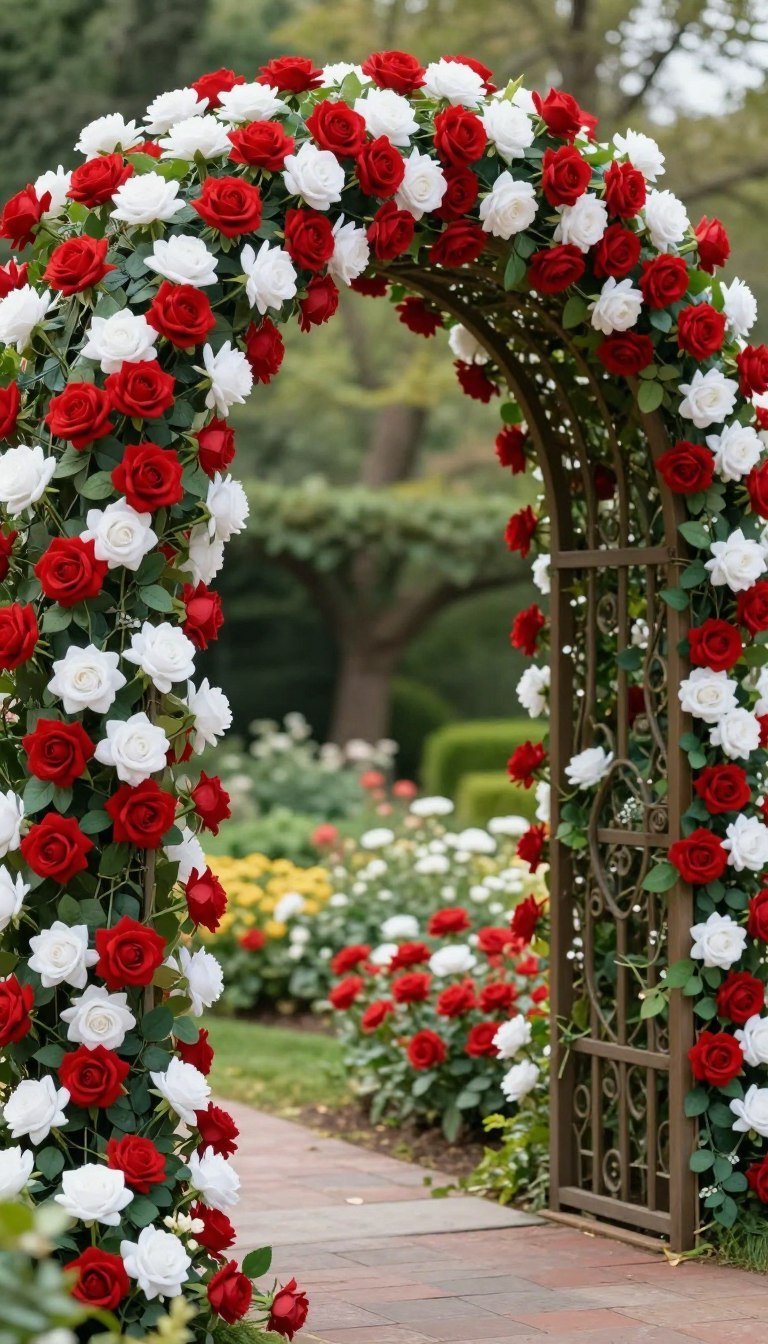
Welcome guests through a blooming archway inspired by the queen’s garden. This impressive decoration transforms your entrance into a wonderland portal that delights every arrival.
Build an arch frame from PVC pipe, wire, or purchase a pre-made arbor. Cover with artificial roses in red and white, plus greenery for fullness. Concentrate flower clusters at the top and sides.
Add playing card decorations tucked among the flower arrangements. Position at your entrance or use as a photo backdrop. This statement piece requires more time and materials but creates unforgettable impact.
Materials Needed
- Arch frame (PVC, wire, or purchased arbor)
- Red and white artificial roses (50-75 stems)
- Artificial greenery
- Floral wire and zip ties
- Playing cards for accents
26. “Painting the Roses” Splatter Tablecloth

Design a unique tablecloth that references the card soldiers painting white roses red. This creative backdrop for your tea party table becomes functional art that protects surfaces while enhancing theme.
Start with a plain white tablecloth or large sheet. Use red fabric paint or acrylic paint to create deliberate splatters and drips. Allow paint to dry completely before use.
Add painted rose shapes, playing card symbols, or leave it abstract. This washable decoration can be reused for future wonderland party celebrations or other themed events.
Materials Needed
- White tablecloth or large white sheet
- Red fabric or acrylic paint
- Paintbrushes and sponges
- Protective drop cloth
- Cardboard insert to prevent bleed-through
27. Oversized Talking Doorknob Prop

Recreate the sleepy talking doorknob that guards wonderland’s entrance. This charming decoration adds character recognition and serves as an excellent photo prop throughout your alice wonderland party.
Form a large doorknob shape from cardboard or papier-mâché. Paint with metallic gold or brass paint. Add facial features using paint or attached paper elements showing the doorknob’s sleepy expression.
Mount on a door or create a freestanding version. Add details like a keyhole below the knob. This recognizable character piece delights fans familiar with every part of the story.
Materials Needed
- Cardboard or papier-mâché base
- Gold or brass metallic paint
- Black paint for facial features
- Mounting hardware or stand
- Paintbrushes and sealant
28. Black and White Striped Columns
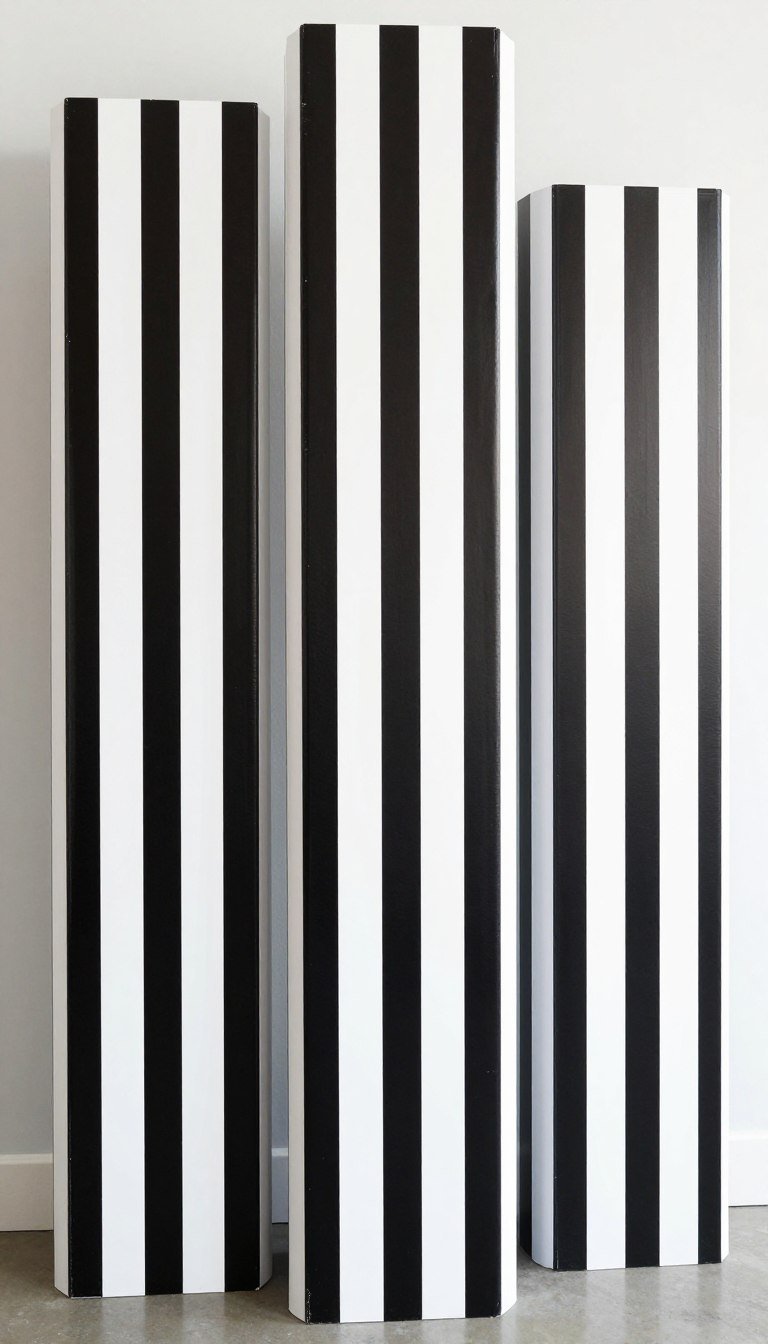
Add dramatic height and visual interest with black white striped columns. These bold graphic elements define party spaces and create stunning photo backgrounds without complex construction.
Wrap cardboard tubes, foam pillars, or PVC pipes with alternating black and white paper strips. Vary the stripe widths for visual interest. Create multiple columns in different heights.
Position columns to frame doorways, define party areas, or create a photo backdrop. Top with playing cards, clocks, or other wonderland elements. The stark contrast makes powerful impact with simple materials.
Materials Needed
- Cardboard tubes or foam pillars (3-5 pieces)
- Black and white paper or fabric
- Double-sided tape or glue
- Decorative toppers (cards, clocks, etc.)
- Stands or weighted bases
29. Giant Paper Garden Flowers
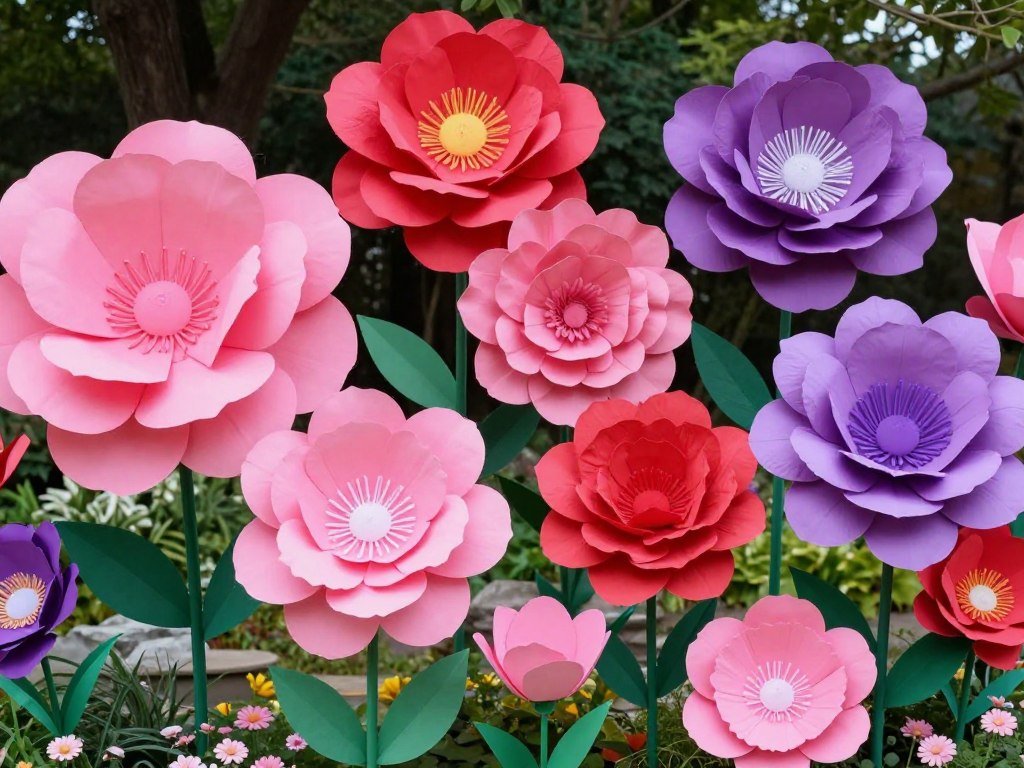
Create an enchanted garden with oversized paper flower that tower over guests. These dramatic decorations establish the queen’s garden atmosphere and provide incredible photo opportunities for everyone.
Cut large petal shapes from crepe paper or tissue paper in vibrant colors. Layer petals around a center, securing with wire or glue. Attach to stakes or poles for height.
Cluster flowers in groups of varying heights. Mix colors for a wild wonderland garden feel. These statement pieces transform any space into a fantastical flower garden that amazes guests.
Materials Needed
- Crepe or tissue paper in multiple colors
- Floral wire or dowel rods
- Green paper or fabric for stems
- Wooden stakes or PVC poles
- Hot glue and scissors
30. Mismatched “Mad Tea Party” Chair Arrangement

Embrace the mad hatter’s chaotic tea party with intentionally mismatched seating. This fun approach creates authentic wonderland atmosphere while solving seating challenges creatively.
Gather chairs in different styles, sizes, and colors. Enhance mismatched appeal by adding decorative elements like ribbon ties, painted details, or attached playing cards. Some chairs can be decorated more heavily than others.
Arrange around your tea party table in a deliberately disorganized fashion. This unexpected detail surprises guests and encourages the playful, anything-goes spirit of wonderland. It transforms a necessity into a themed decoration.
Materials Needed
- Collection of mismatched chairs (borrow from friends)
- Decorative ribbons in various colors
- Acrylic paint (optional)
- Playing cards and small decorations
- Hot glue or ties for attaching elements
Bring Your Wonderland to Life
You now have 30 enchanting decoration ideas to transform any space into alice wonderland magic. From simple projects like bottle labels to elaborate installations like floating teacups, these ideas accommodate every skill level and time commitment.
The beauty of DIY alice in wonderland decorations lies in personal creativity. Mix and match ideas that speak to you. Add your own twists to make each decoration uniquely yours.
Remember that wonderland celebrates whimsy and imagination. Don’t stress about perfection. The slightly imperfect, handmade quality adds authentic charm that guests appreciate far more than store-bought alternatives.
Start with a few key pieces that establish your theme. Add layers as time allows. Even implementing just five or six of these ideas creates impressive impact that transports guests into a magical wonderland experience they’ll remember long after the party ends.
