
Independence Day calls for festive nails that capture the spirit of summer and patriotism. Short nails offer the perfect canvas for simple yet striking designs. You don’t need a salon visit to rock amazing nail art this holiday.
This collection brings you 30 achievable looks. Each design works beautifully on shorter nail lengths. From classic stars and stripes to modern takes on the American flag theme, these ideas suit every style and skill level.
Get ready to celebrate with nails that pop. Whether you’re attending a backyard barbecue or watching fireworks, these patriotic manicures complete your 4th of July look with minimal effort and maximum impact.
Table of Contents
Classic Red White and Blue Designs
The traditional color palette never goes out of style. These timeless combinations bring instant recognition to your patriotic theme. Red white and blue designs form the foundation of perfect 4th of July nails.
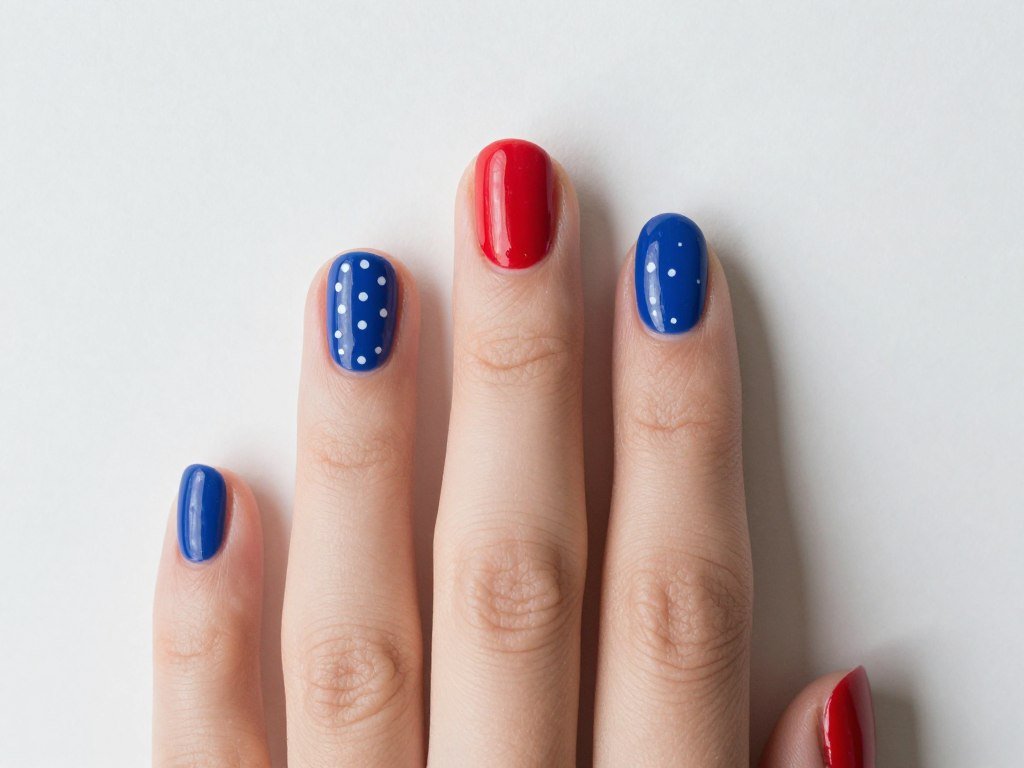
Solid Color Rotation
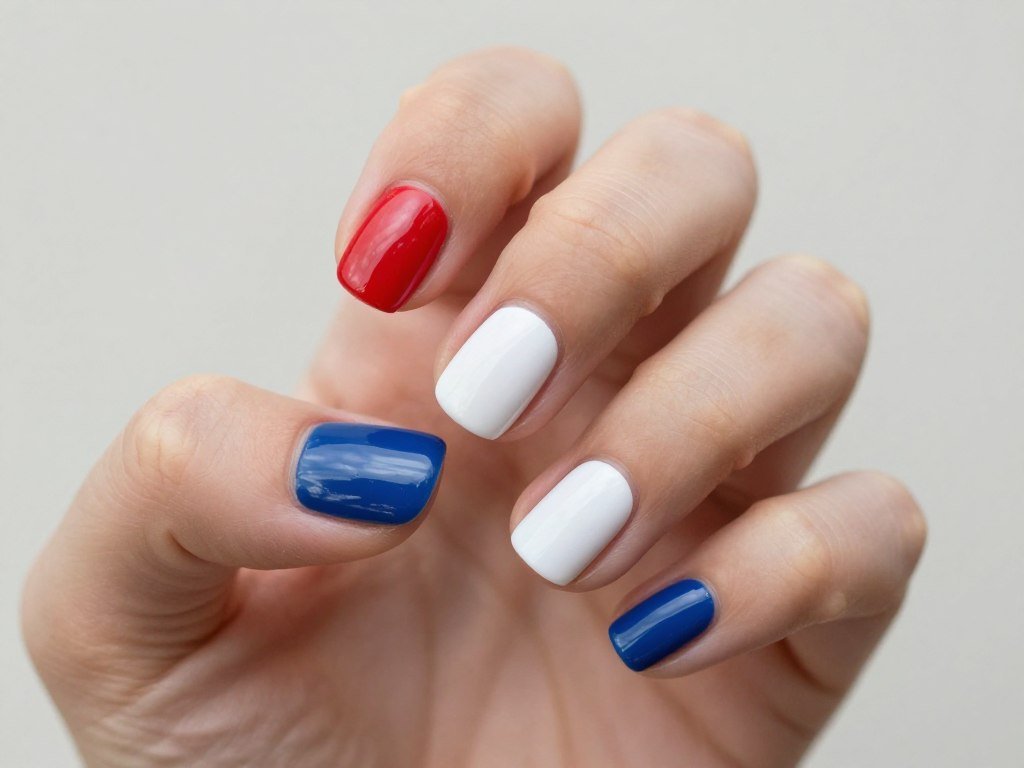
This simple approach alternates solid colors across each nail. Paint your thumb and ring finger red. Use white for your index finger. Choose blue for your middle and pinky fingers.
The rotation creates visual interest without complexity. A quality base coat protects your nails. Two thin layers of polish provide even coverage. Finish with a glossy top coat for lasting shine.
This design takes less than 20 minutes. You only need three bottles of polish. The clean look suits both casual and dressy occasions throughout the holiday.
Half Moon Patriotic Style
Half moon designs add sophistication to basic colors. Start with a white base across all nails. Let it dry completely before the next step.
Use nail guides or tape to create the half moon shape at your cuticle. Alternate red and blue colors for the main nail area. Remove the guides while polish is still slightly wet.
This technique creates a retro vibe. The color blocking effect works perfectly on short nails. You achieve a salon quality look with patience and steady hands.
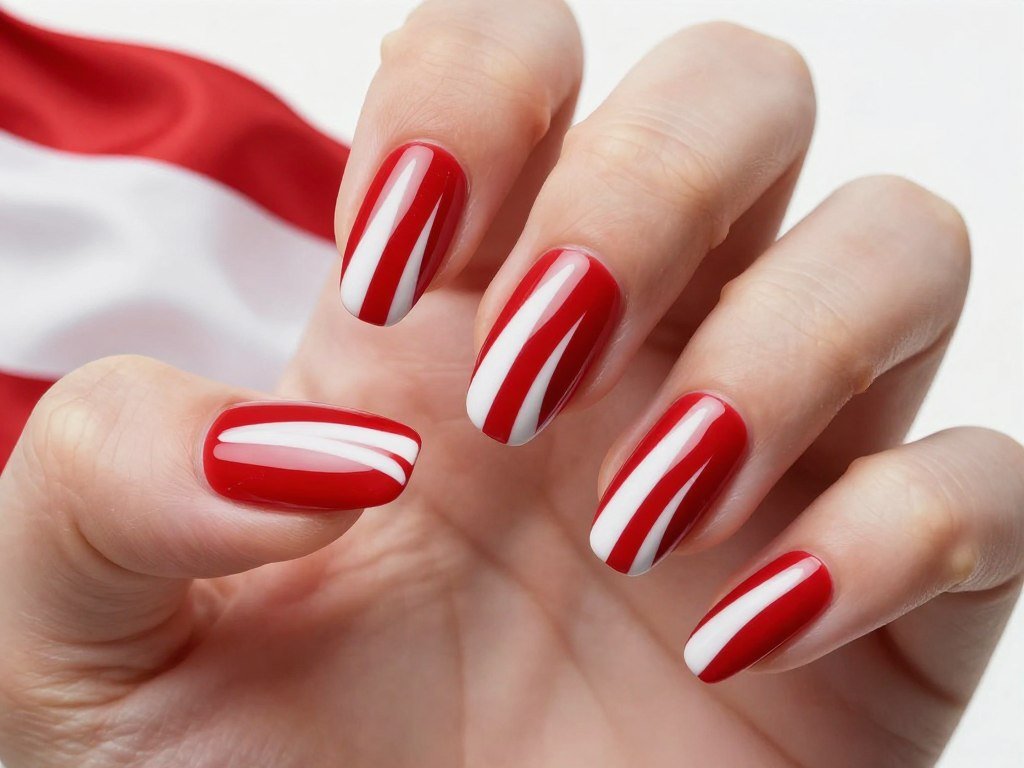
Ombre Red to Blue
Gradient effects bring modern flair to patriotic colors. This design transitions smoothly from red at the base to blue at the tip. White fills the middle section for a true flag inspired look.
Use a makeup sponge to blend colors together. Apply each shade to the sponge first. Dab it onto your nail with a bouncing motion. Multiple light layers work better than one heavy application.
Clean up edges with a small brush dipped in nail polish remover. The ombre technique takes practice but creates stunning results on short nails.
Color Block Minimalism
Geometric shapes make a bold statement. Divide each nail into two or three sections. Use tape to create clean lines between colors.
Try vertical stripes on some nails and horizontal on others. Mix diagonal lines for added interest. The key is keeping shapes simple and colors bold.
This style celebrates modern nail art trends. Short nails benefit from these clean designs. The look appears complex but the execution remains straightforward.
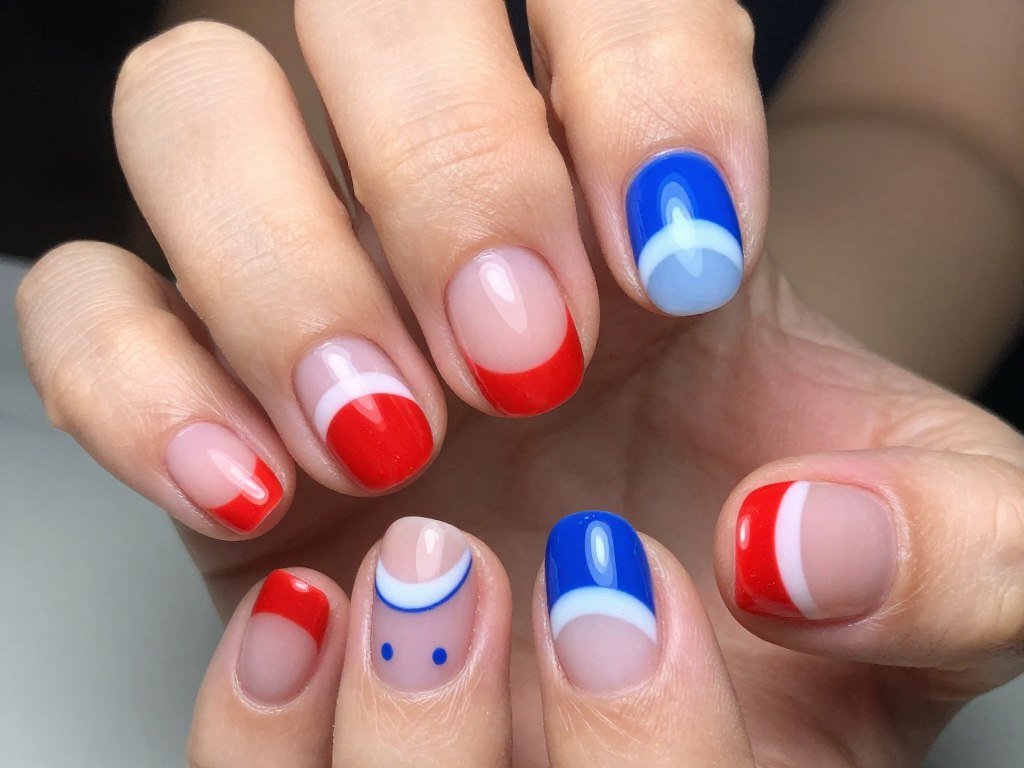
French Tips with a Twist
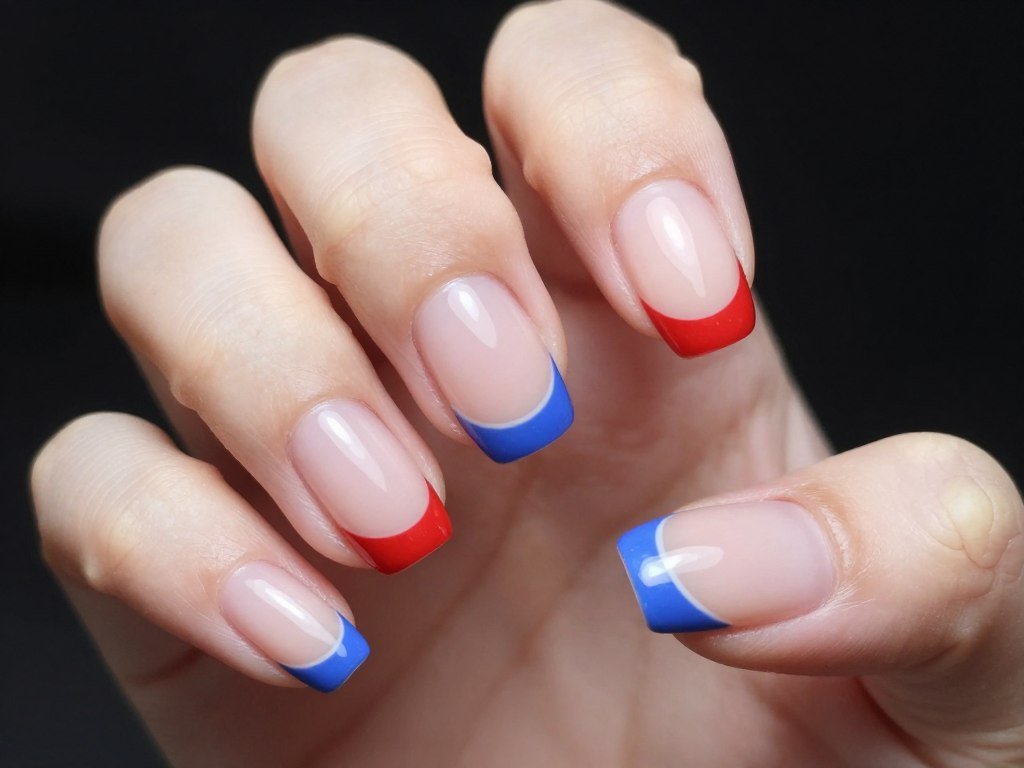
French manicures get a patriotic update with colored tips. Keep your base nude or soft pink. Paint tips in alternating red and blue instead of classic white.
The subtle approach works for those who prefer understated holiday style. Tip width should stay thin on short nails. This maintains the elegant proportion of traditional French tips.
Add a single white stripe between the base and colored tip for extra flag inspiration. The design suits professional settings while showing your festive spirit.
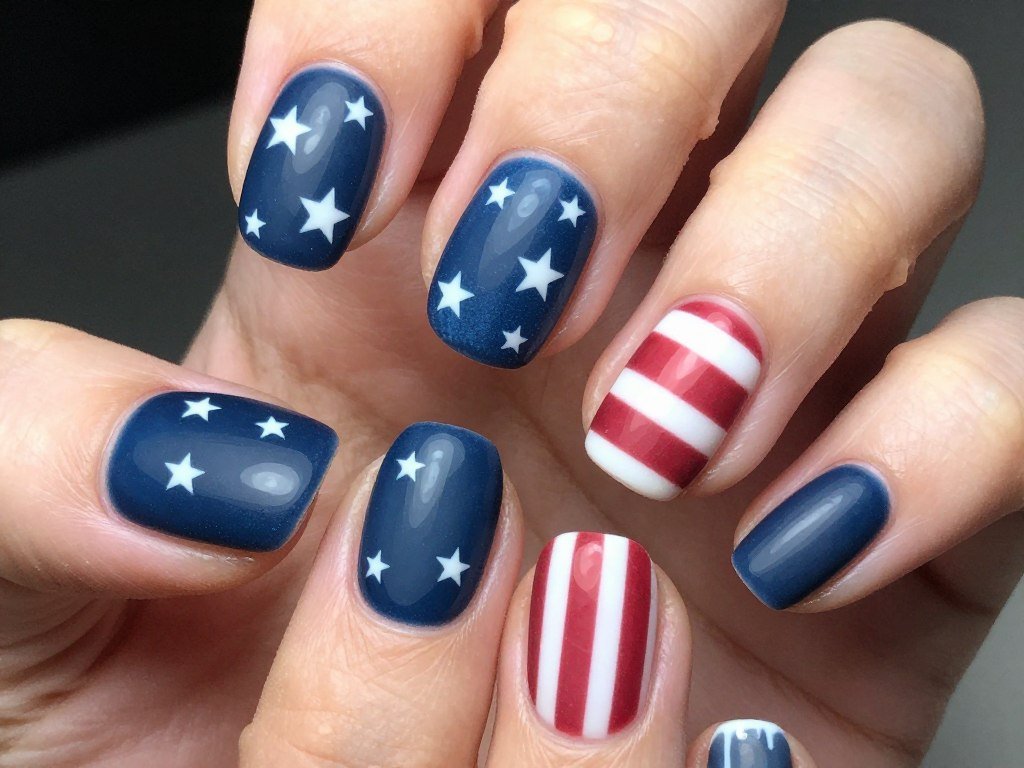
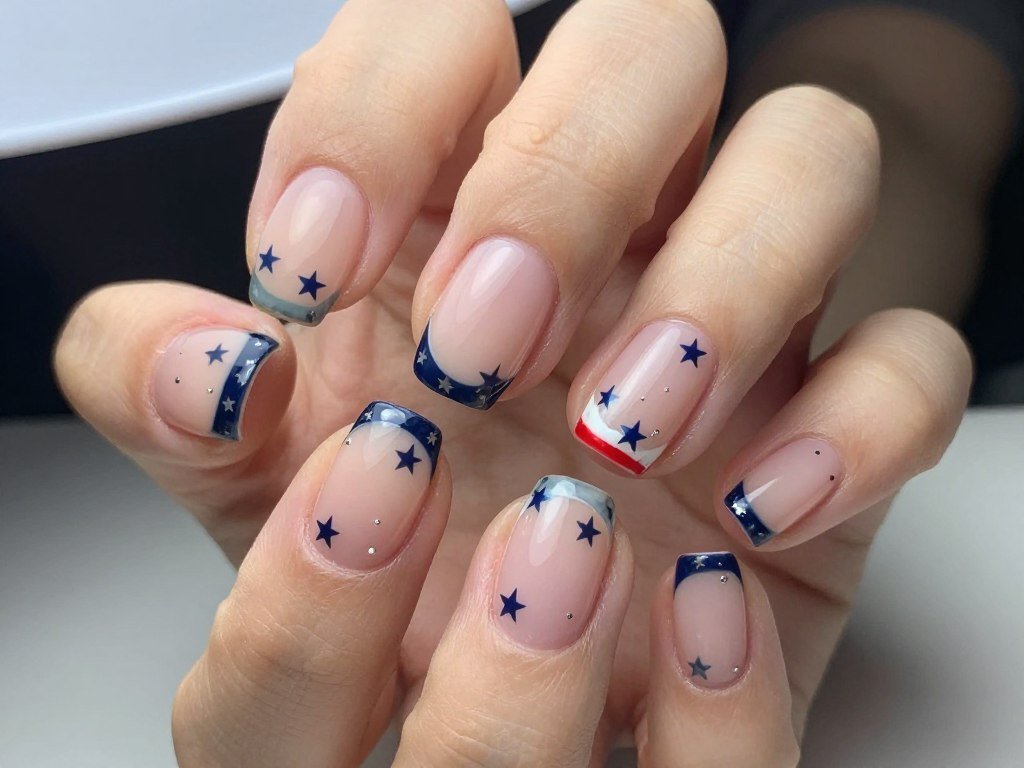
Stars and Celestial Patterns
Stars represent the most iconic symbol on the American flag. These designs bring celestial magic to your fingertips. Star patterns work exceptionally well on shorter nail lengths.
Tiny Star Scatter
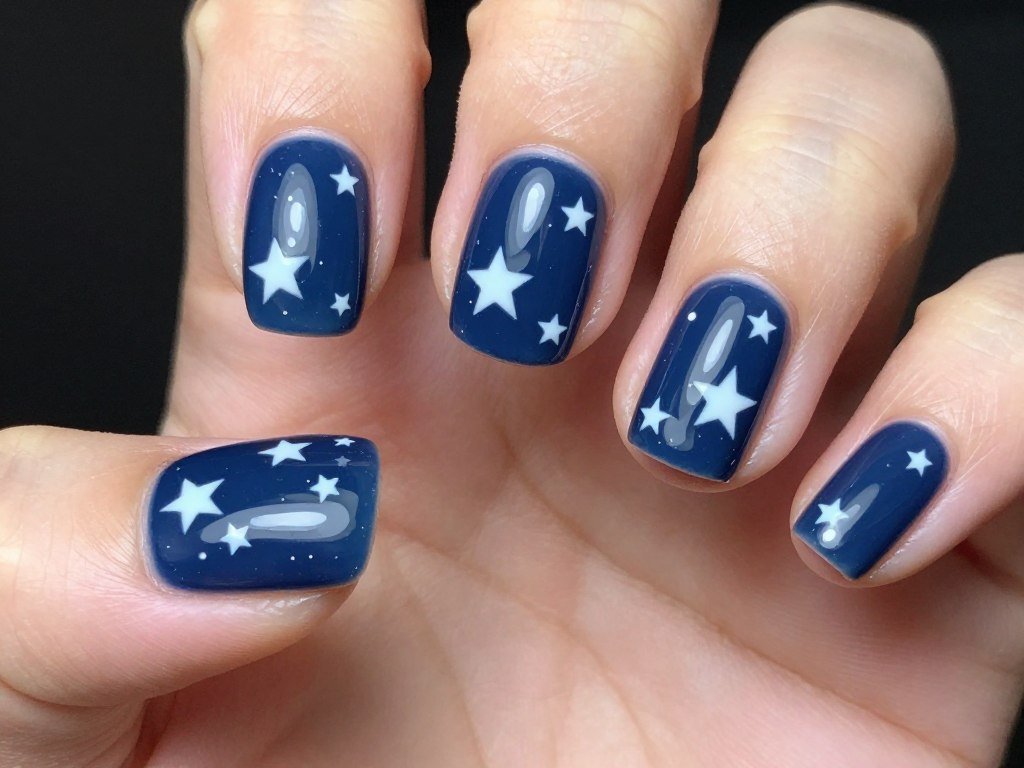
Random star placement creates a night sky effect. Paint nails in deep blue as your base. Once dry, add small white stars in various sizes across the surface.
Use a dotting tool or toothpick to create five pointed stars. Dots of different sizes add to the celestial feel. Some nails can have many stars while others show just a few.
This design hides small imperfections well. The random nature means perfect symmetry isn’t required. White star stickers offer an easier alternative to hand painting.
Single Statement Star
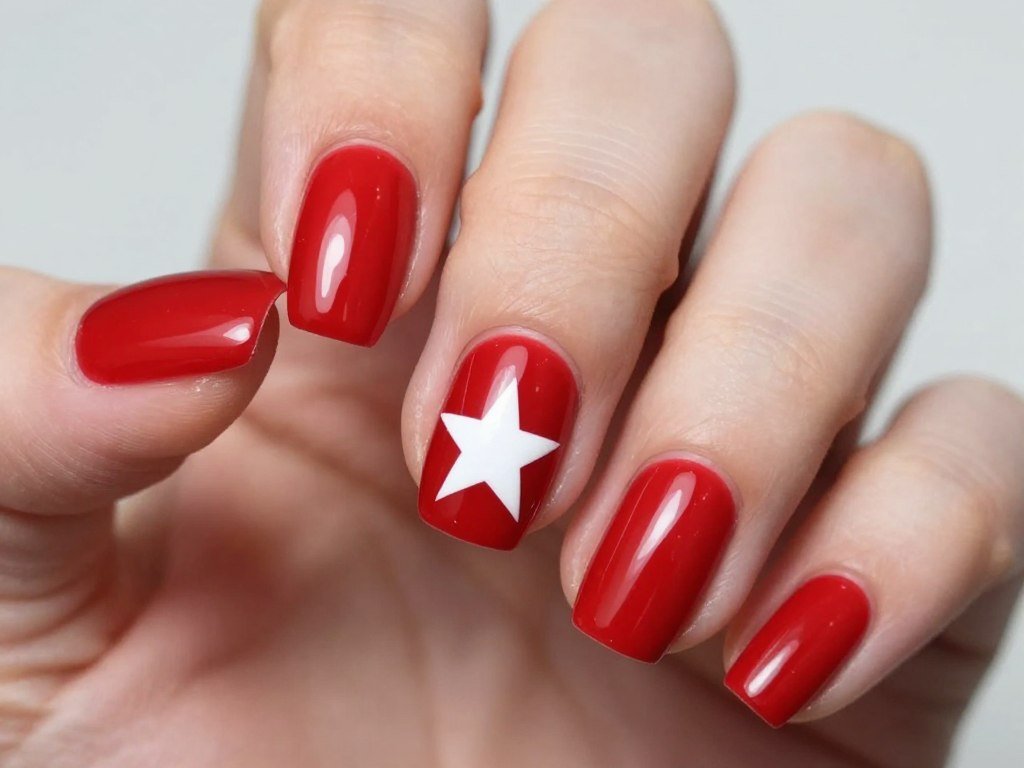
One bold star on an accent nail creates focus. Paint all nails in solid red. Choose your ring finger for the star accent.
Apply white polish as the base on your accent nail. Once dry, use red polish to create a negative space star. Alternatively, use a large star sticker for precision.
The single star approach keeps the look clean. It works perfectly for those new to nail art. The design takes minimal time while delivering maximum impact.
Starry Gradient
Stars that grow in size create visual movement. Start with a blue base across all nails. Begin placing small stars near the cuticle.
Gradually increase star size as you move toward the nail tip. The largest star sits at the free edge. This technique draws the eye upward and makes nails appear longer.
Space stars evenly for the best effect. The gradient concept applies to both size and density. Fewer stars at the base and more at the tip enhance the design.
Constellation Map
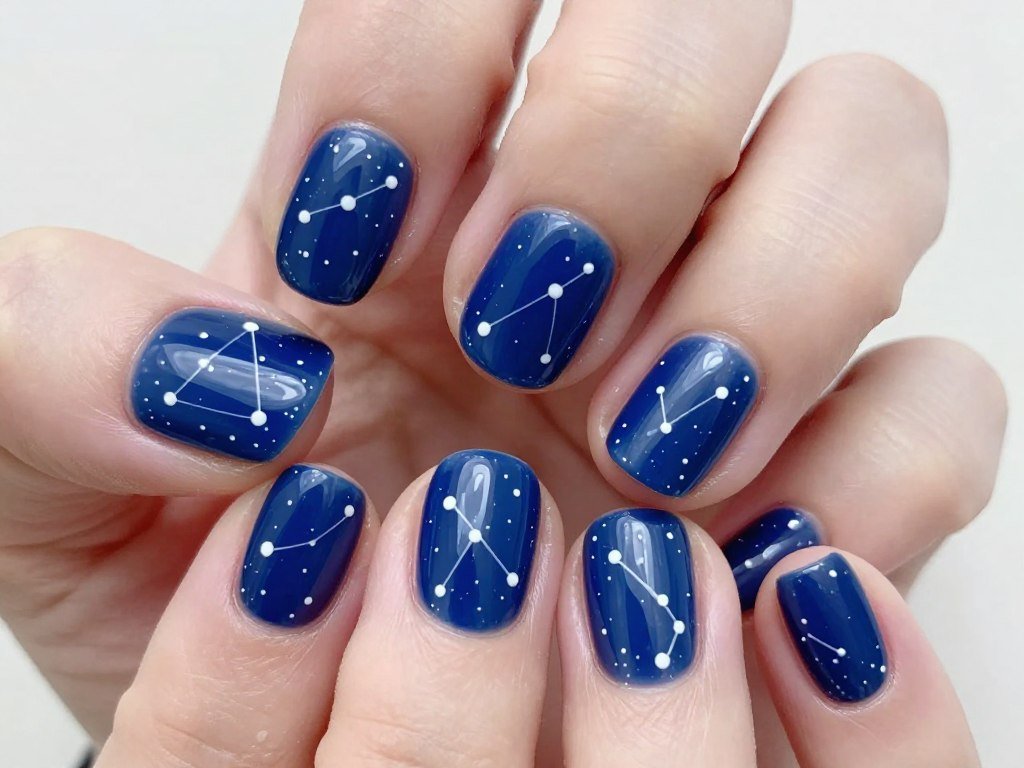
Connect stars with thin lines to form constellations. This artistic approach adds sophistication to star designs. Use a dark blue or black base for maximum contrast.
Place small white dots in a random but balanced pattern. Connect some dots with ultra thin white lines using a striping brush or nail art pen.
The constellation theme sparks conversation at summer gatherings. It demonstrates creativity beyond typical holiday designs. Short nails provide the perfect small canvas for this intricate pattern.
Glitter Star Explosion
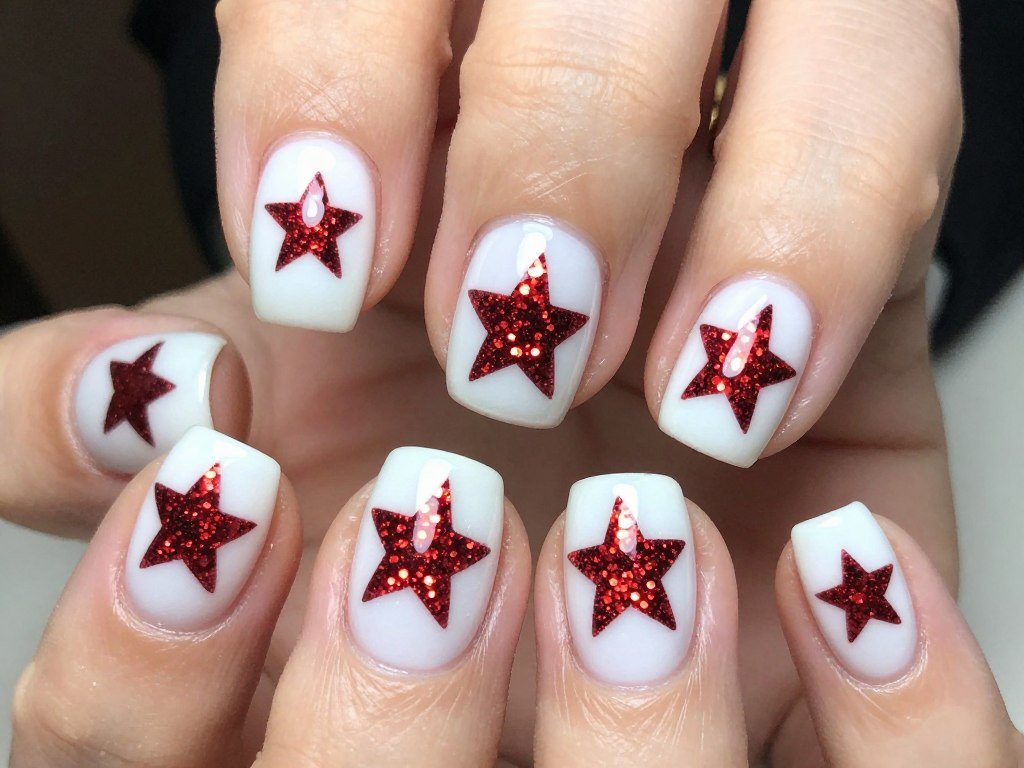
Glitter brings extra sparkle to star motifs. Apply a white base to all nails. Use red glitter polish to create star shapes of varying sizes.
Layer glitter stars for dimension. Some can overlap while others stand alone. The glitter catches light beautifully during outdoor celebrations.
This playful design suits the festive mood of Independence Day. Glitter polish makes application easier than loose glitter. Clean up edges before the glitter dries for the neatest results.
Stripes and Linear Designs
Stripes capture the essence of the American flag. Linear patterns create clean graphic appeal. These designs prove that simple lines deliver powerful visual impact on short nails.
Vertical Stripe Pattern
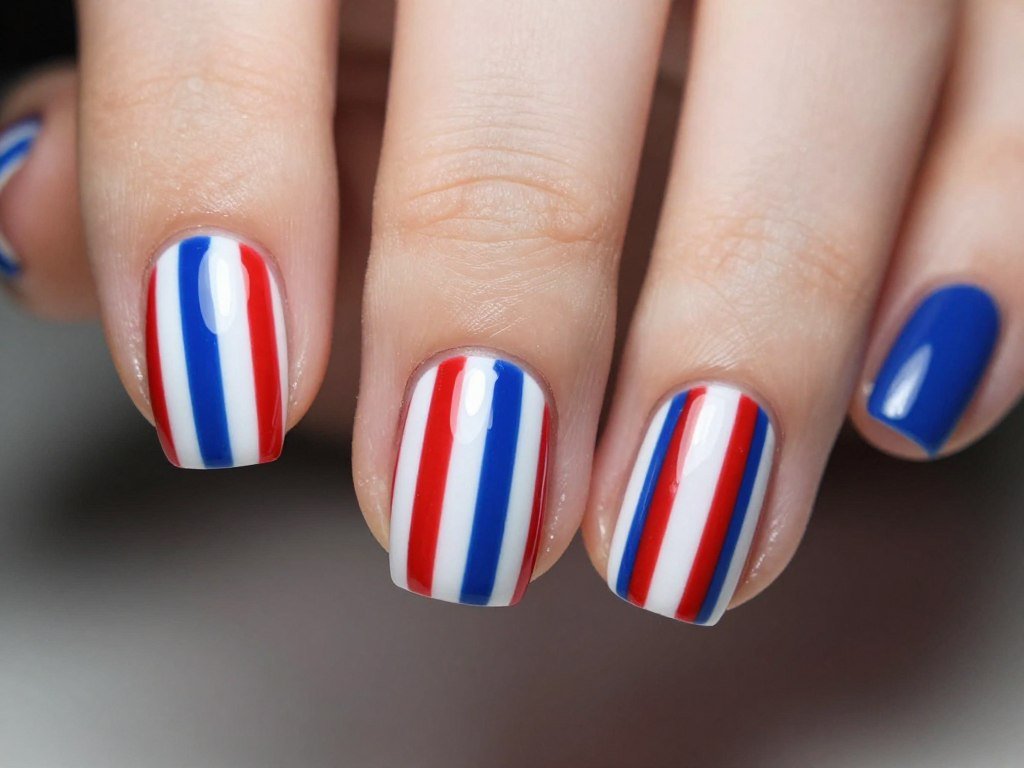
Vertical stripes elongate the appearance of short nails. Use striping tape to create perfectly straight lines. Apply a white base first for the brightest color payoff.
Alternate red and blue stripes with white between them. Keep stripe width consistent across all nails. Remove tape while the polish is slightly wet to prevent peeling.
This design channels classic Americana style. The vertical orientation suits the natural shape of nails. Three to five stripes per nail provides the best balance.
Horizontal Nautical Stripes
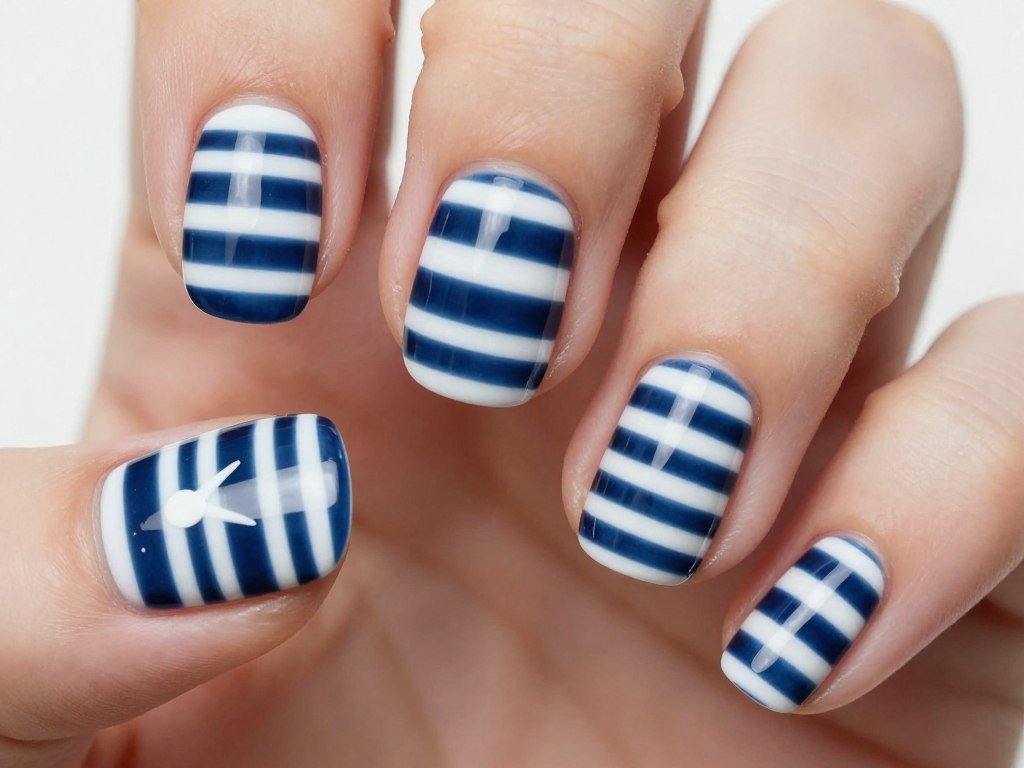
Horizontal lines bring a nautical summer vibe. This pattern works especially well with navy and white. The stripes evoke classic sailor style that fits the holiday theme.
Paint two or three horizontal stripes across each nail. Thin stripes work better on short nails than thick bands. A striping brush gives you the most control.
Pair this look with red accents on one or two nails. The navy and white combination offers a sophisticated take on patriotic colors. This design suits both beach days and evening events.
Diagonal Stripe Accent
Diagonal lines add dynamic energy to your mani. Keep most nails solid in red or blue. Add diagonal white stripes to your accent nails.
The angled lines create movement and interest. They break up the symmetry of solid colors. This technique works perfectly when you want subtle complexity.
Apply tape at a 45 degree angle for consistency. The diagonal stripe makes short nails appear longer. This optical trick enhances your natural nail shape.
Thin Line Details
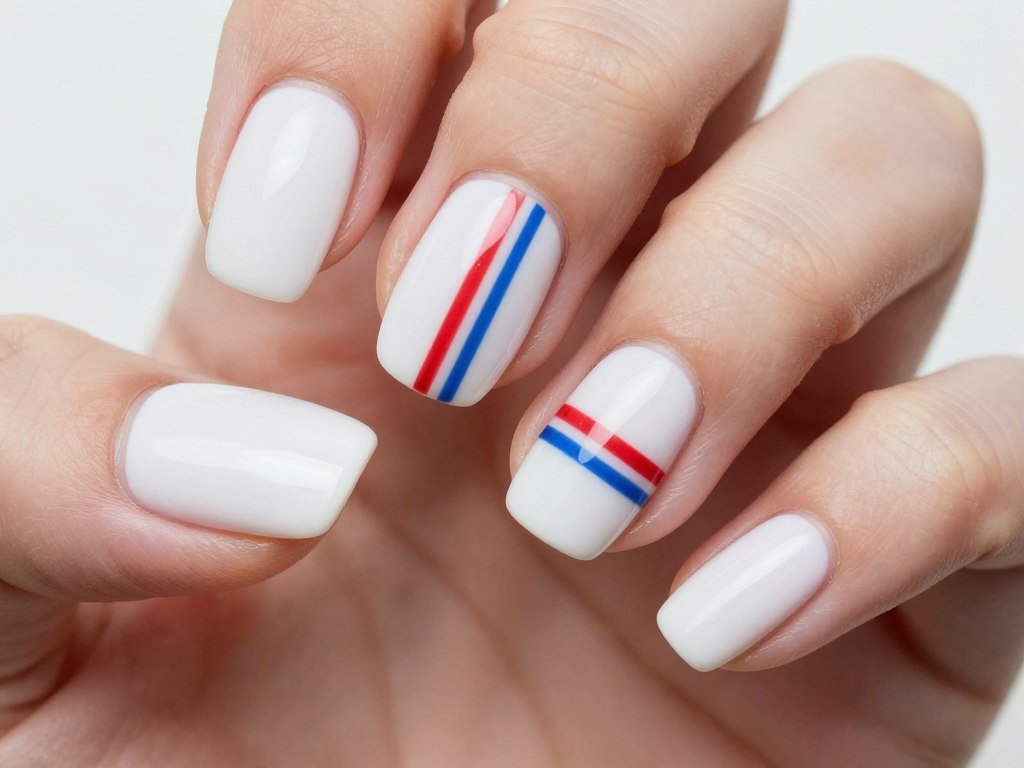
Ultra thin lines create minimalist elegance. Paint nails white as your base. Add one or two very thin red and blue lines parallel to each other.
Use a nail art pen or the finest striping brush available. The delicate lines look sophisticated and modern. This design suits those who prefer understated holiday style.
Place lines horizontally across the middle of the nail. Alternatively, run them vertically near one edge. The minimal approach lets your nail shape shine while nodding to the theme.
Chevron Pattern
Chevron stripes form eye catching zigzag patterns. This geometric design brings contemporary style to traditional colors. Each nail features multiple V shaped stripes pointing toward the tip.
Use vinyl nail guides to create sharp angles. Apply colors one at a time, allowing each to dry. The repetition of the pattern creates rhythm across your nails.
Chevron suits those who love bold geometric nail art. The pattern makes a strong statement. Short nails carry this design without overwhelming your fingers.
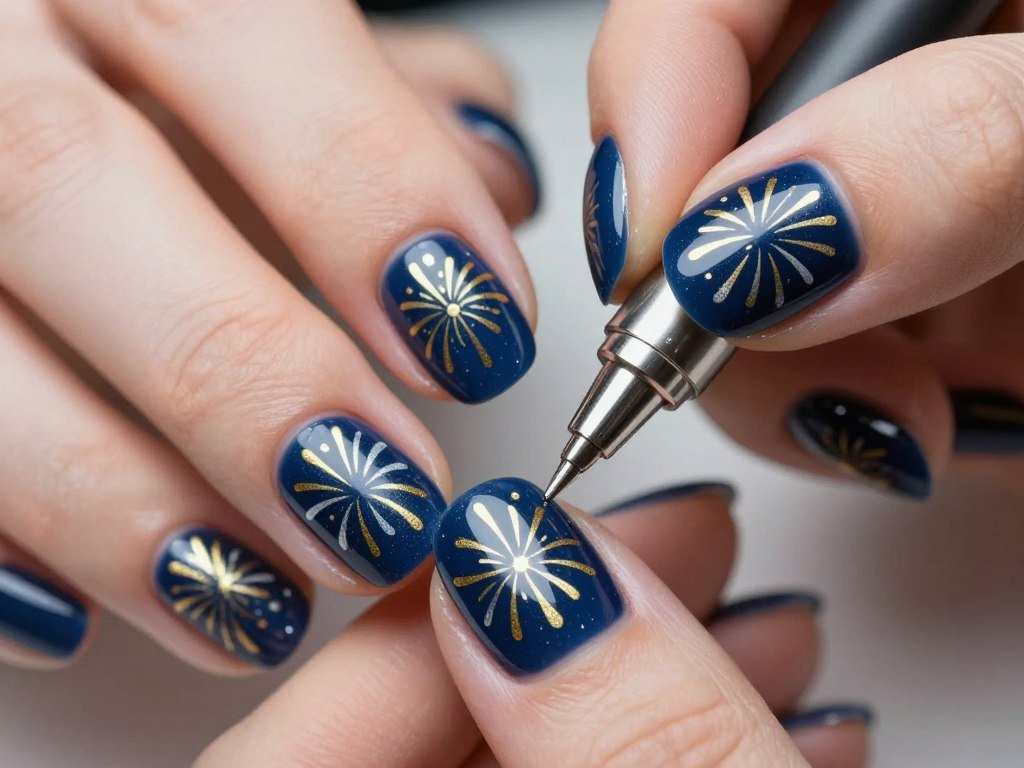
Fireworks and Sparkle
Fireworks symbolize celebration and joy. These explosive designs capture the magic of Independence Day displays. Sparkle and shimmer bring the excitement of summer nights to your fingertips.
Glitter Burst

Create firework effects with strategic glitter placement. Apply a dark blue or black base. Use a fan brush to sweep silver glitter from the cuticle outward.
The glitter should be densest at the base and fade toward the tip. This mimics the burst pattern of fireworks. Red and gold glitter can substitute for different firework colors.
Layer different glitter sizes for dimension. The mixed textures catch light from multiple angles. This design shines brilliantly during evening celebrations and night time firework displays.
Starburst Pattern
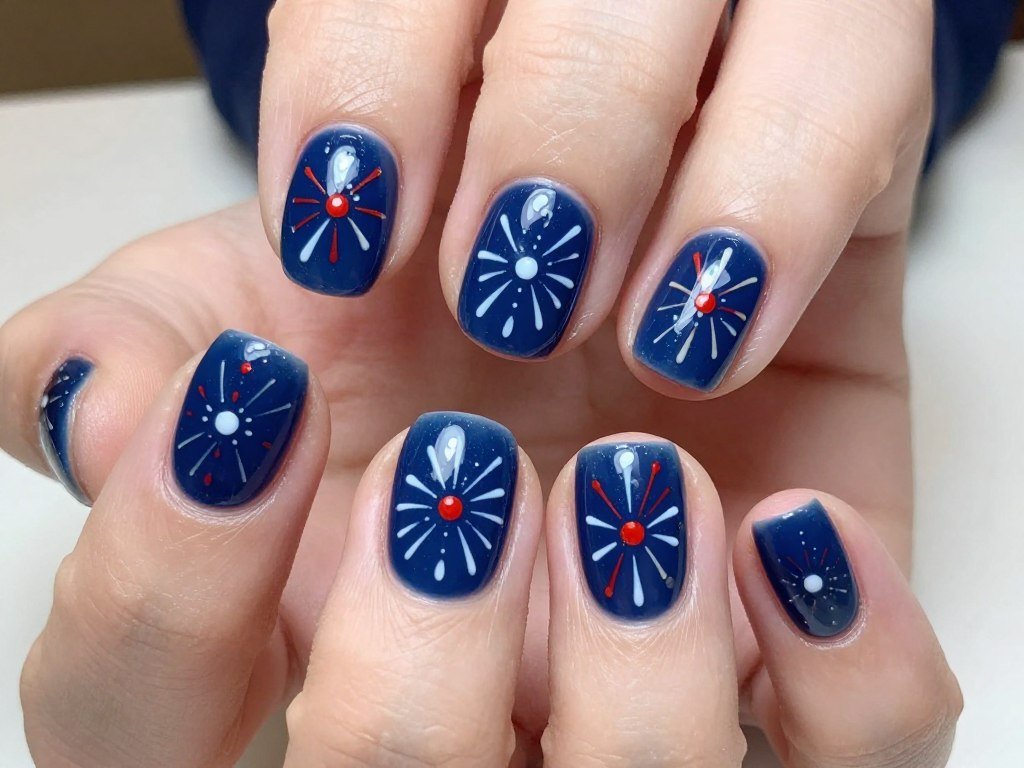
Hand painted starbursts bring artistry to your nails. Use a dark base to make colors pop. Paint small dots as the center of each starburst.
Draw thin lines radiating outward from each dot. Vary the line lengths for a natural explosion effect. Use red, white, and blue for a patriotic color scheme.
This technique requires a steady hand but the results impress. Place two to three starbursts per nail. The hand painted quality adds a personal artistic touch to your holiday look.
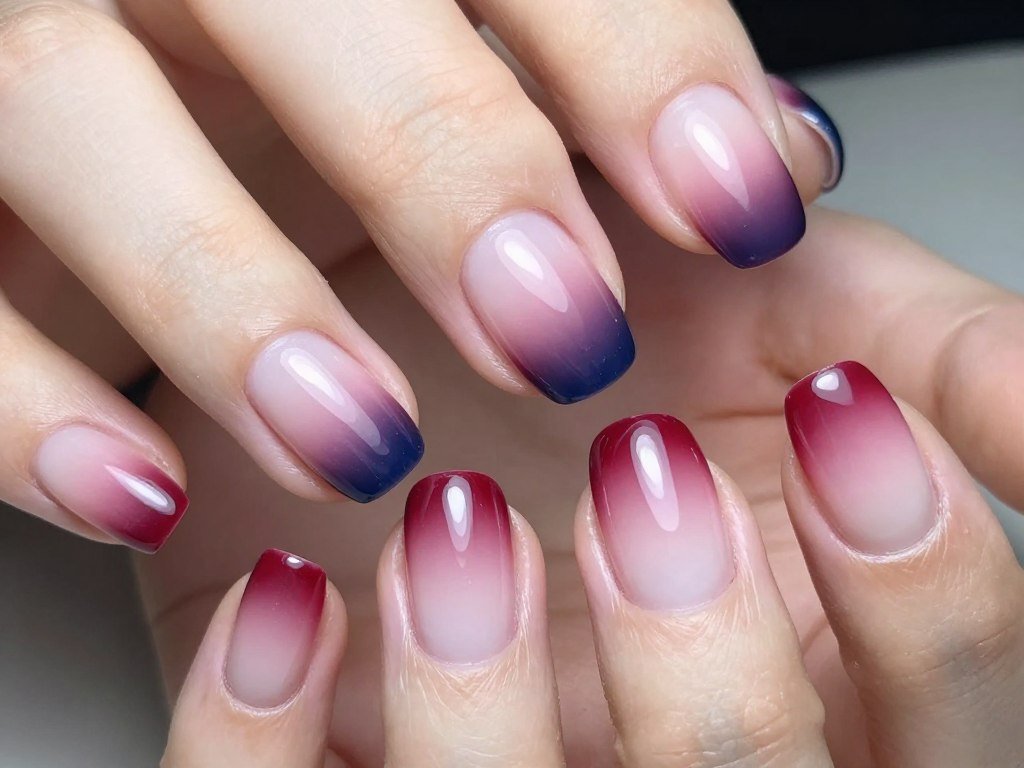
Glitter Gradient Tips
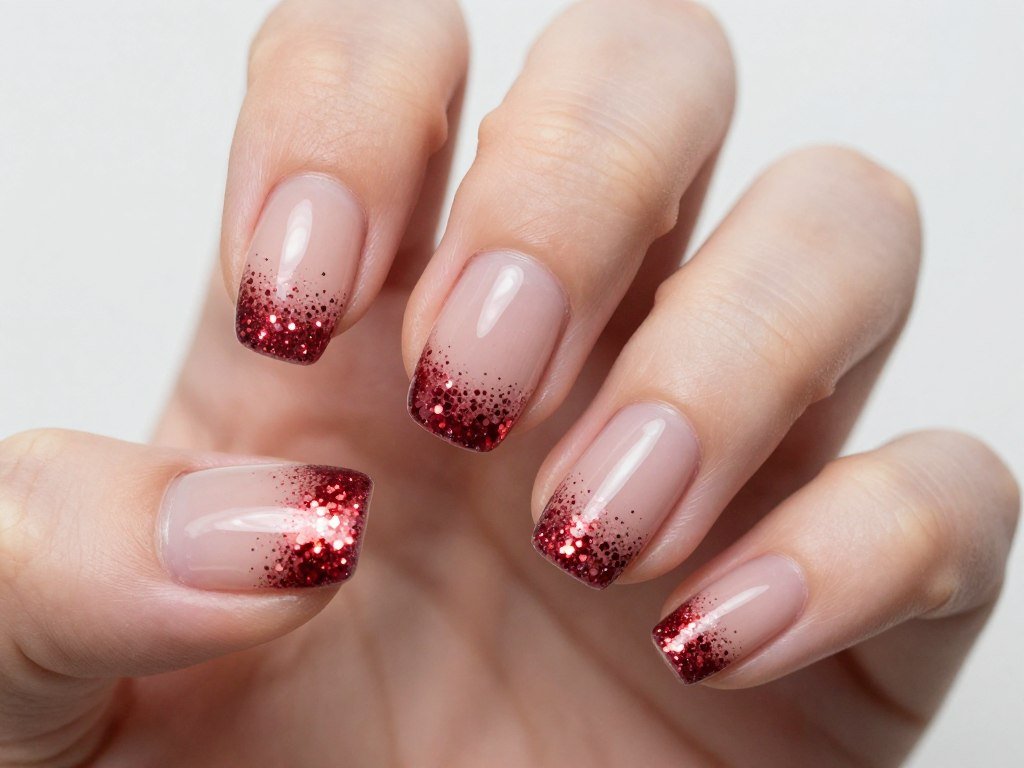
Concentrate glitter at your nail tips for a subtle sparkle effect. Start with a nude or light pink base. Apply red or blue glitter polish heavily at the tip.
Use a sponge to dab and blend the glitter toward the middle of the nail. The gradient should fade naturally. This creates a sophisticated take on glitter nails.
The design elongates short nails visually. The sparkle draws attention to the tips. This approach works for those who want festive nails that aren’t too bold.
Scattered Sparkle
Random glitter placement creates a confetti effect. Apply a white or light blue base. While the polish is still tacky, sprinkle red, white, and blue glitter across the nail.
Use a toothpick to push glitter pieces into position. The random nature makes this design forgiving. Each nail will be unique, adding to the celebratory feel.
Seal everything with a thick top coat to smooth the surface. The scattered glitter catches light beautifully. This playful design captures the carefree spirit of summer celebrations.
Firework Stamping
Nail stamping creates precise firework images quickly. Choose a stamping plate with firework or starburst designs. Apply special stamping polish to the design.
Scrape away excess polish and transfer the image to your stamper. Roll the stamper onto your nail to apply the design. The technique produces detailed images impossible to paint by hand.
Stamping works perfectly for repeating patterns across multiple nails. The professional looking results take only minutes. This method suits those who want complex designs without freehand painting skills.
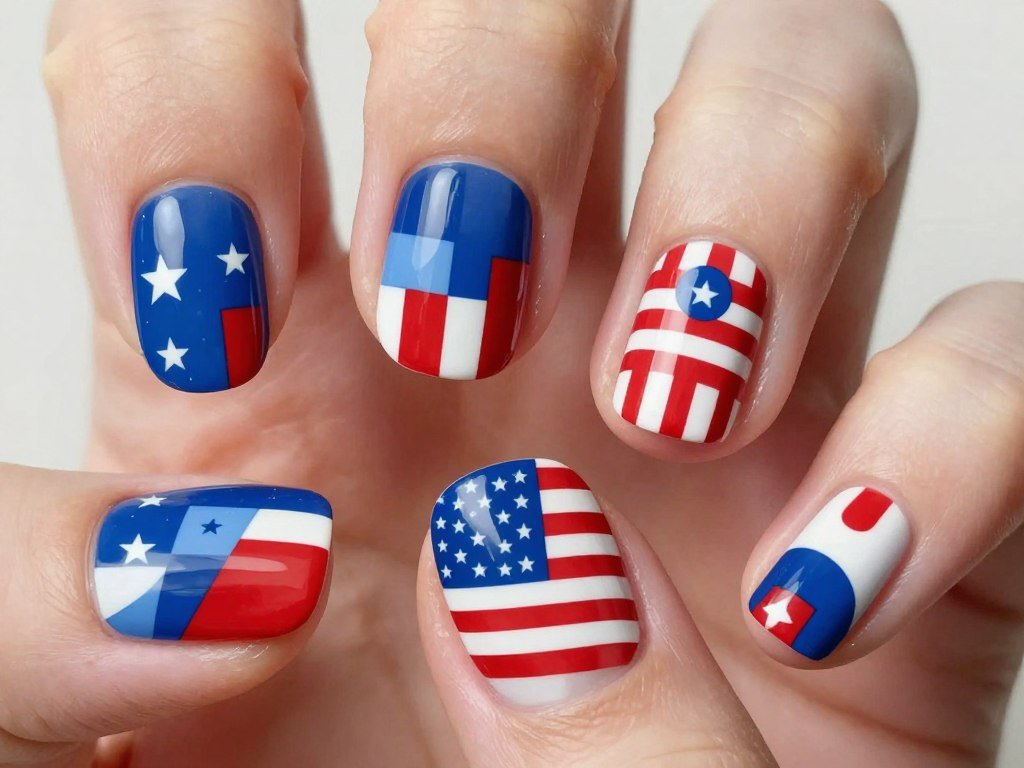
Flag Inspired Looks
The American flag offers endless design inspiration. These interpretations range from literal recreations to abstract flag themes. Each look celebrates the iconic stars and stripes in creative ways on short nails.
Mini Flag Recreation

Transform each nail into a tiny flag. Paint your thumb with a blue field and white stars. Use red and white stripes on your other fingers.
This literal interpretation requires precision. Use a thin brush for the stars and stripes. Striping tape helps create clean straight lines between colors.
The design works best when you dedicate each nail to one flag element. Short nails actually suit this design well. The small canvas prevents the flag from looking too busy or overwhelming.
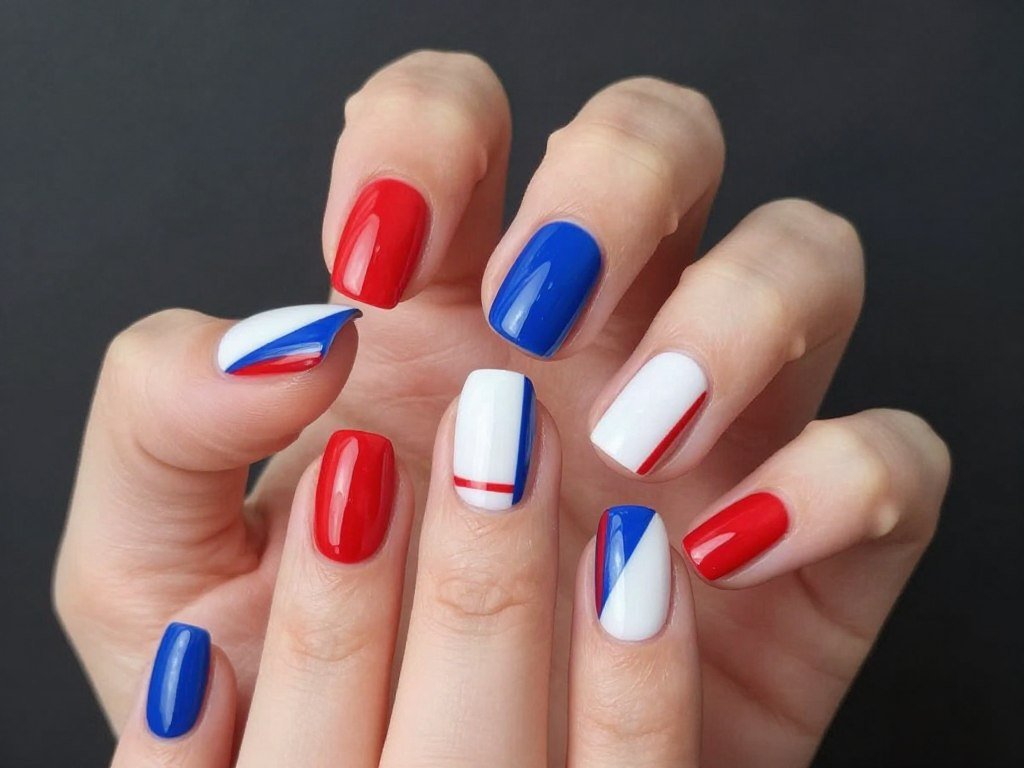
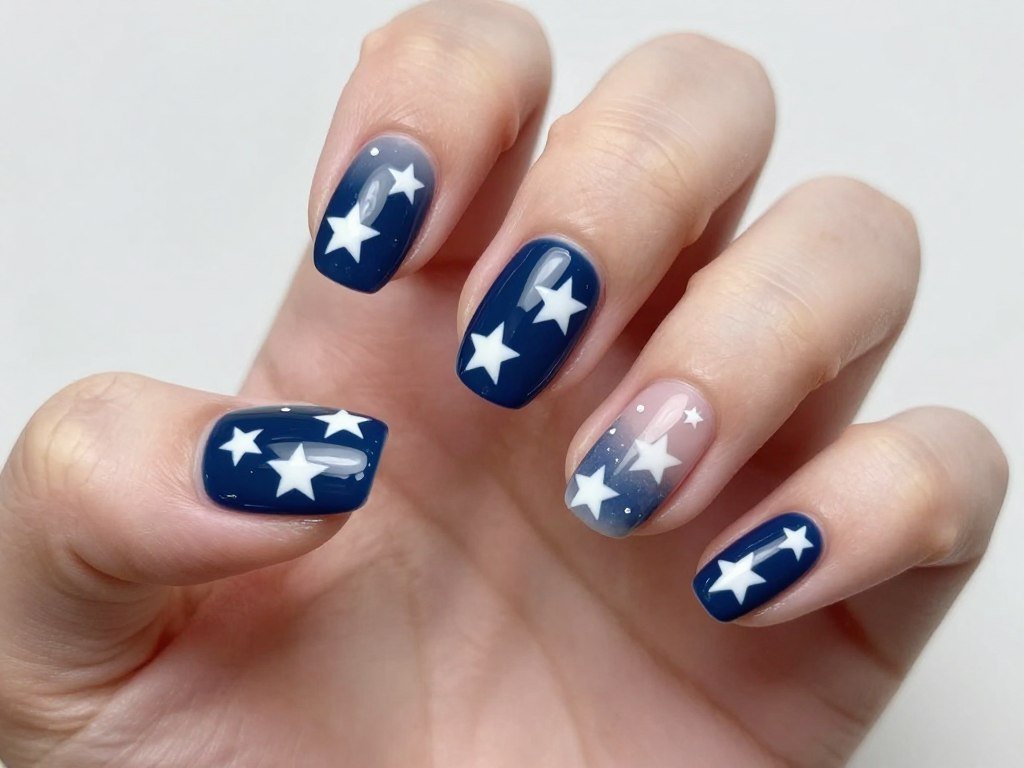
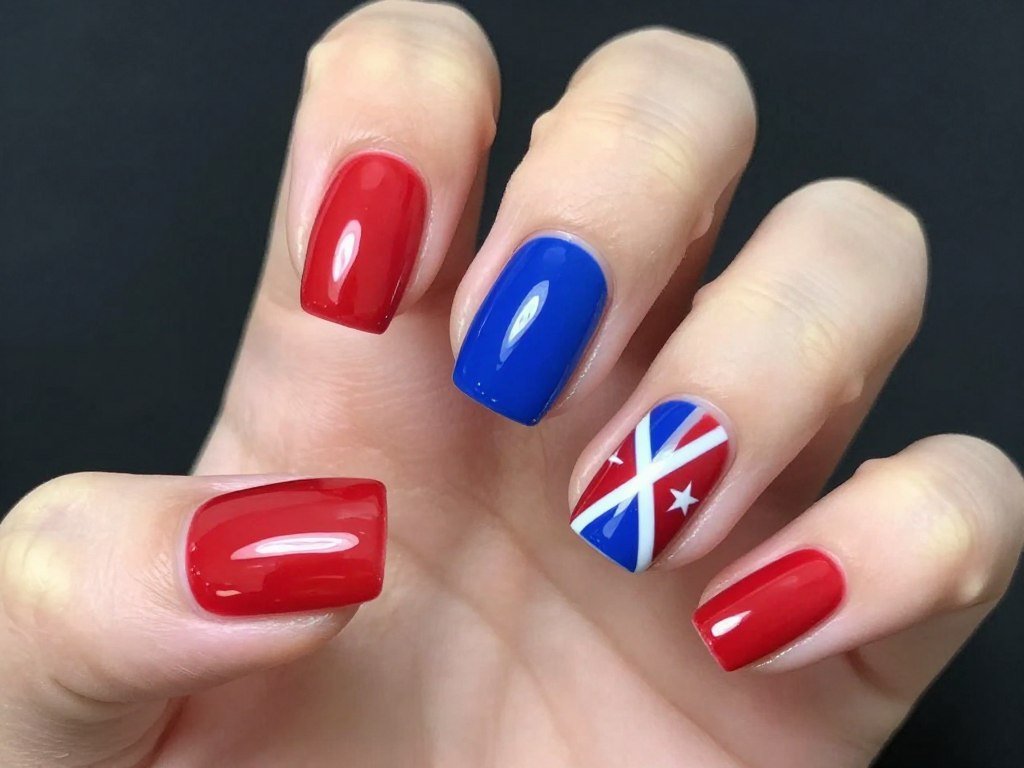
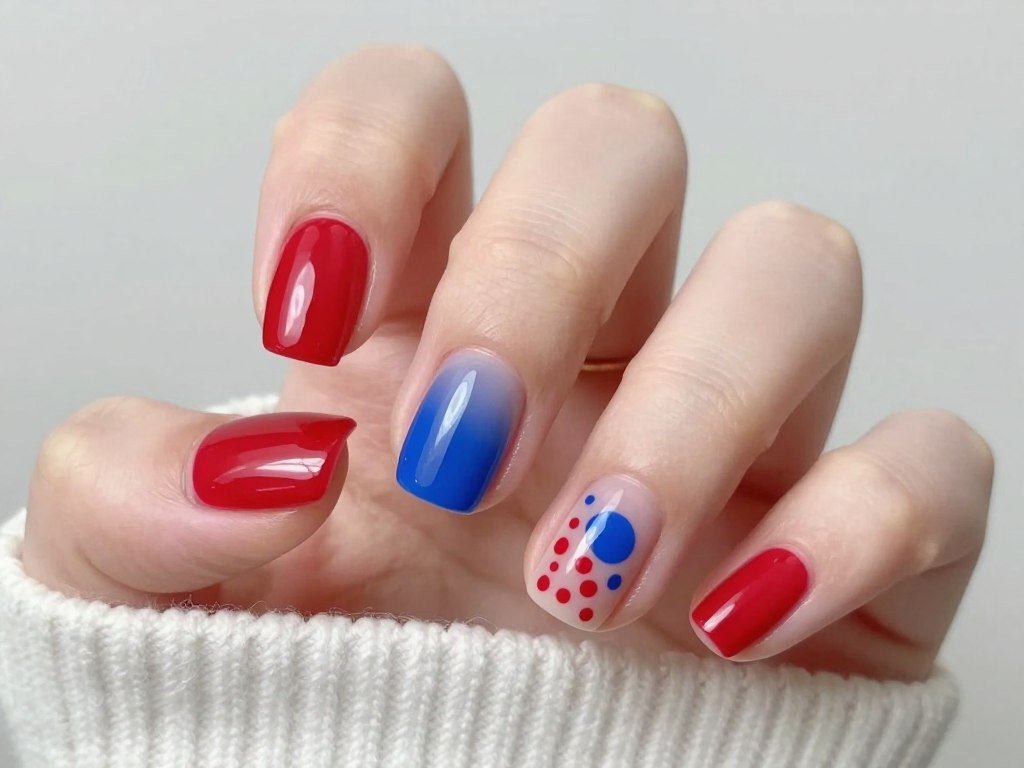
Abstract Flag Elements
Deconstruct the flag into modern abstract art. Use flag colors and elements but arrange them in unexpected ways. Mix stars, stripes, and solid blocks across different nails.
One nail might feature only the blue star field. Another shows just red and white stripes. The third displays a white base with a single blue star.
This artistic approach creates visual interest through variety. Each nail relates to the theme without identical repetition. The abstract nature allows for creative freedom while maintaining patriotic spirit.
Reverse Flag Design
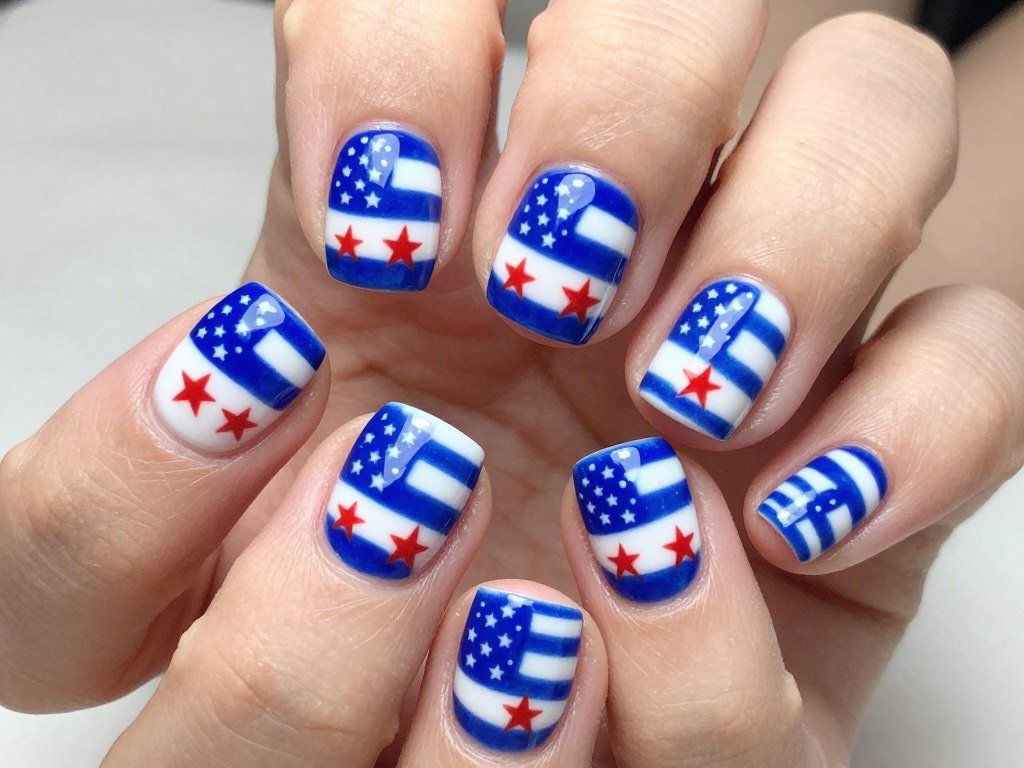
Flip the traditional flag colors for a fresh take. Use white as your dominant background. Apply blue stripes instead of red. Add red stars on a white field.
This reverse color scheme stands out from typical flag designs. The unexpected arrangement catches attention. It shows creativity while clearly maintaining the patriotic theme.
The lighter overall palette suits summer aesthetics. The design feels fresh and modern. This approach works for those who want to honor the holiday theme without conventional execution.
Waving Flag Effect
Create the illusion of movement with curved lines. Instead of straight stripes, paint gentle curves. The waves suggest a flag blowing in the summer breeze.
This technique requires a steady hand and patience. Start with horizontal guidelines. Add curves that flow in the same direction across all nails.
The flowing design brings life to static colors. It adds sophistication to the flag theme. Short nails benefit from the curved lines which create interesting visual flow.
Flag Corner Accent
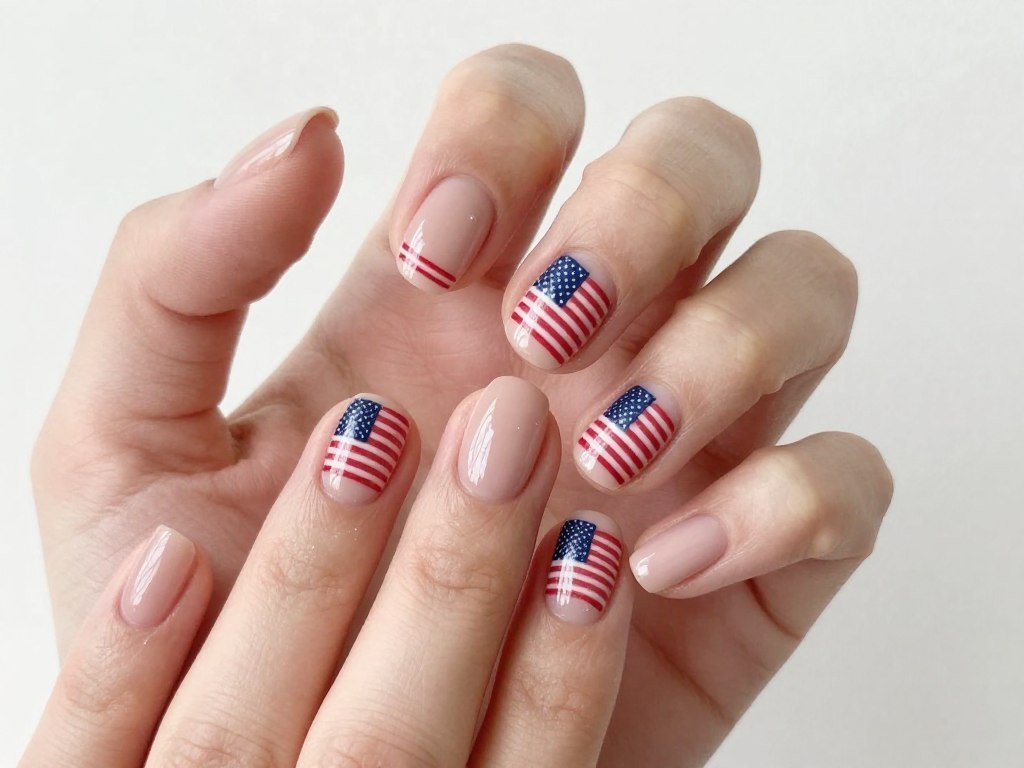
Place a miniature flag in one corner of each nail. Keep the rest of the nail nude or soft pink. The small flag acts as a delicate accent rather than the main focus.
This subtle approach suits professional environments. The design nods to the holiday without dominating your look. Use a fine detail brush or nail art pen for precision.
The corner placement leaves most of the nail clean. This creates an elegant, understated patriotic statement. The design works beautifully for those who prefer minimal nail art.
Best Patriotic Polish Colors
Quality polish makes all the difference in your finished look. The right shades of red, white, and blue ensure your patriotic nail art pops. These top choices deliver vibrant color and lasting wear.
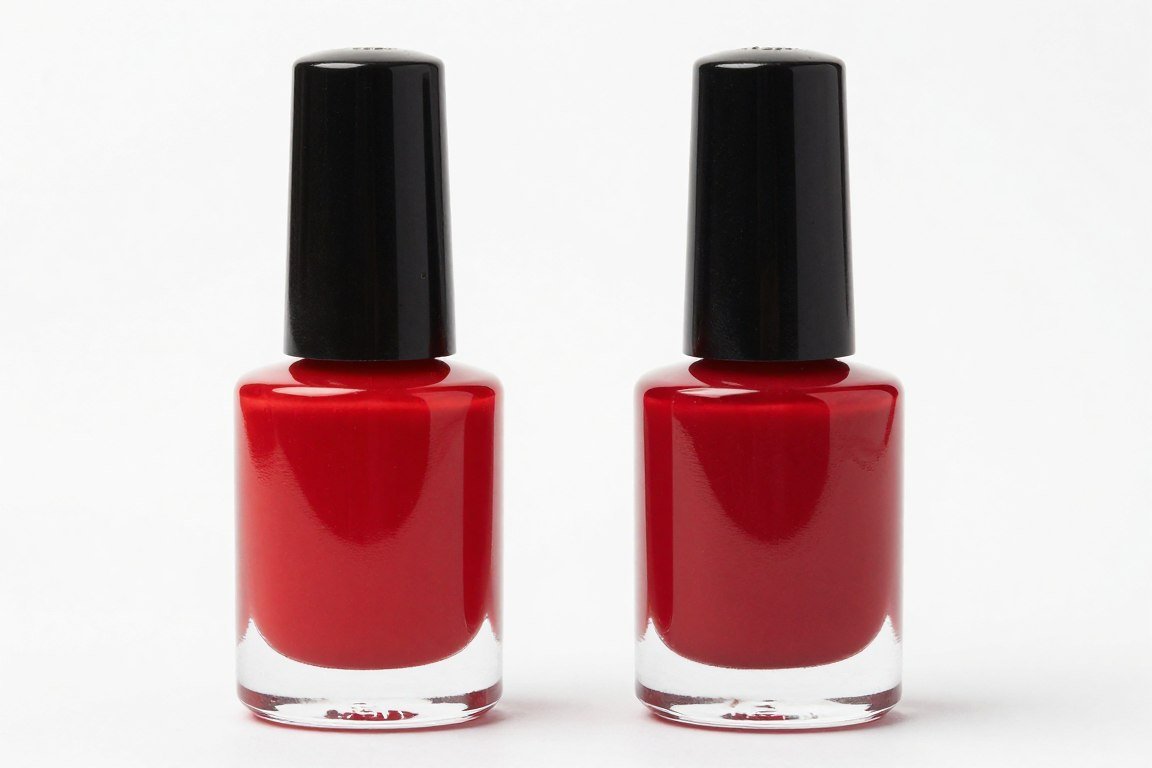
Classic Red Polish
A true red shade forms the foundation of patriotic designs. Look for highly pigmented formulas that provide full coverage in two coats. The perfect red leans neither orange nor burgundy but captures pure vibrant red.
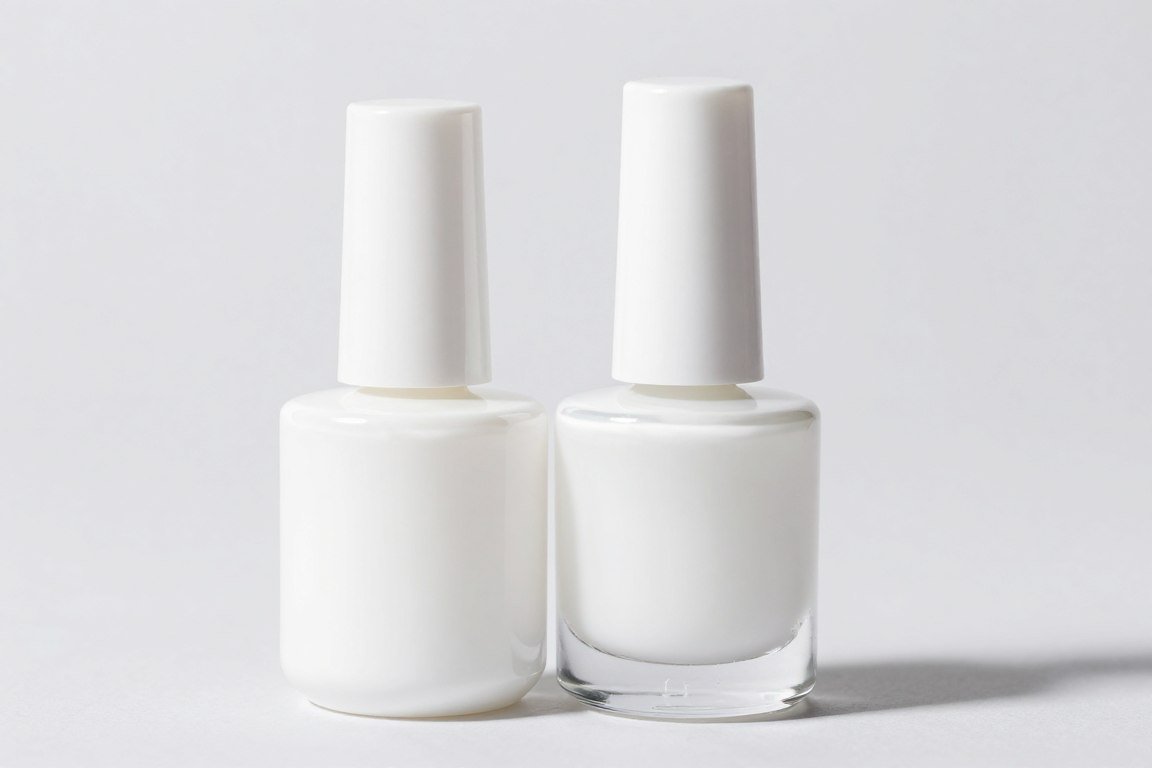
Bright White Polish
White polish challenges even experienced painters. Choose an opaque formula that doesn’t streak. Three thin coats work better than two thick ones. A quality white polish makes the difference between amateur and professional looking results.
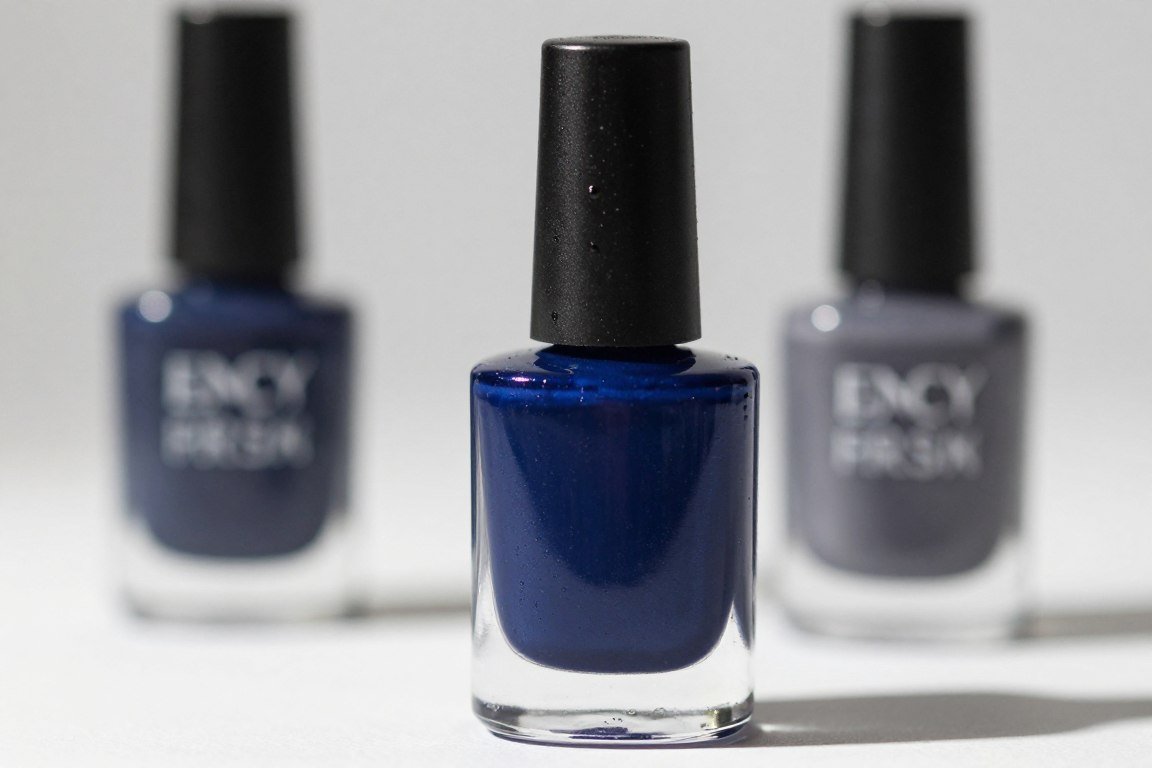
Navy Blue Base
Navy provides sophisticated depth to patriotic designs. This shade works as either a base color or accent. Darker blues make white and red details pop beautifully. Choose a navy that leans slightly toward true blue rather than black.
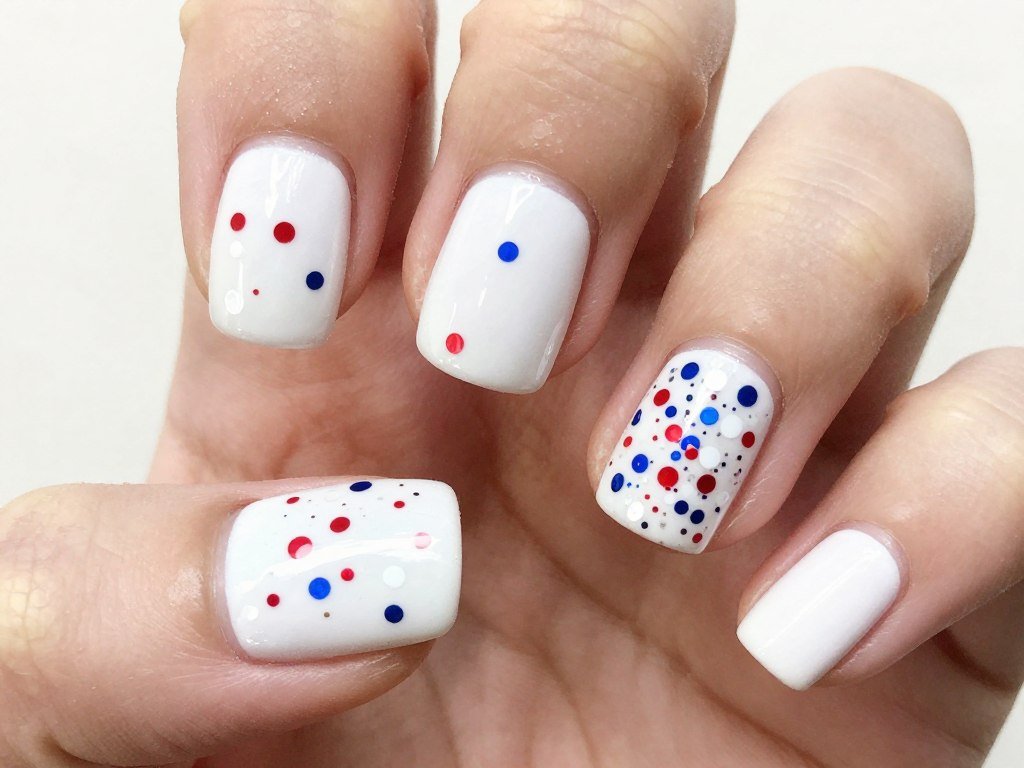
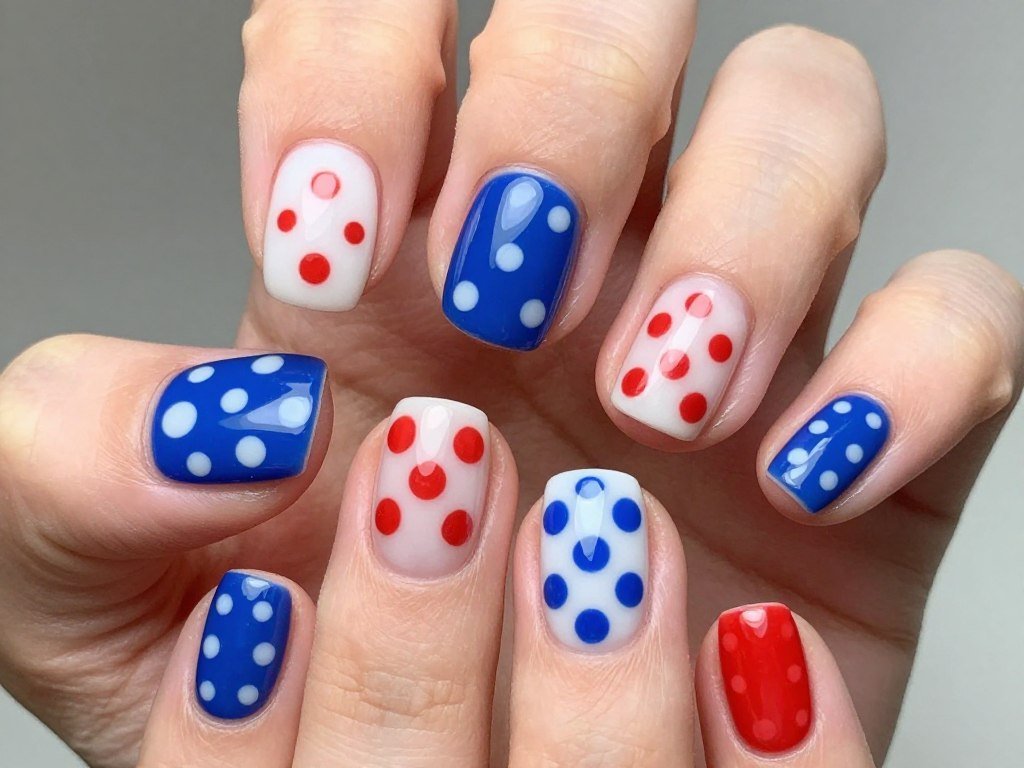
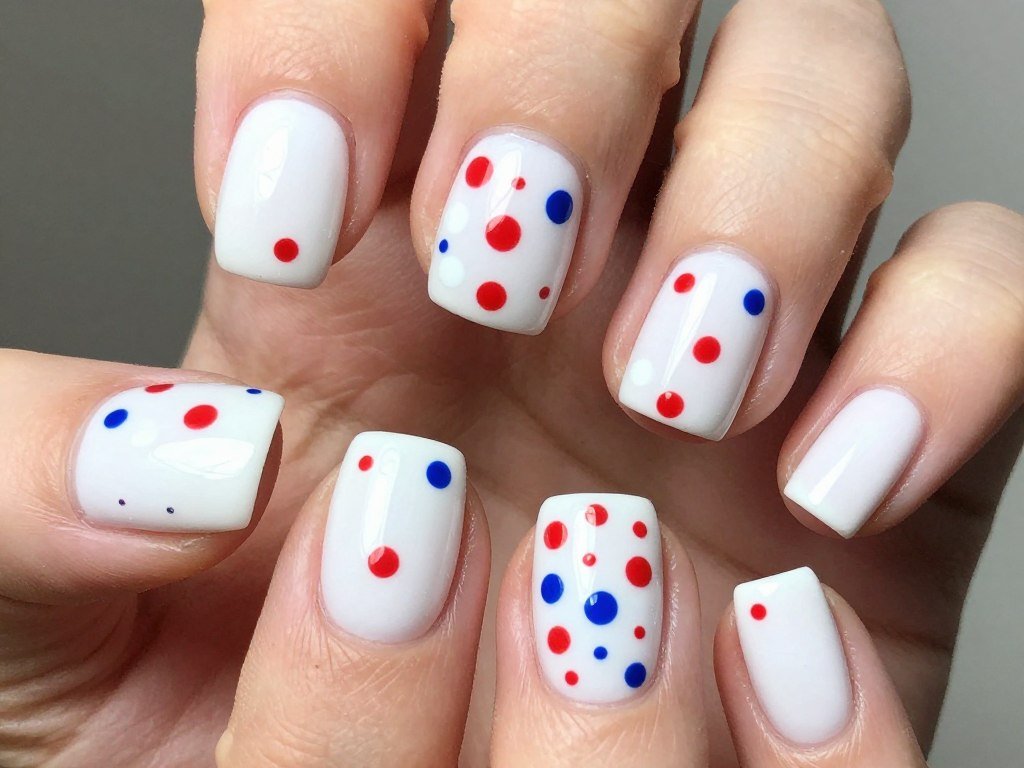
Polka Dots and Playful Patterns
Polka dots bring retro charm to patriotic nails. These circular patterns create playful energy perfect for summer celebrations. Dots work exceptionally well on short nails, offering maximum impact with minimal complexity.
Classic Polka Dot Pattern

Traditional polka dots never go out of style. Paint your base color first, usually white for maximum contrast. Once dry, add dots in red and blue using a dotting tool.
Keep dots uniform in size and spacing. A dotting tool creates perfect circles every time. Dip the tool in polish and press it straight down onto your nail.
This timeless pattern suits all ages and occasions. The playful dots capture summer fun. The design requires minimal skill but delivers impressive visual results on short nails.
Multi Sized Dots
Vary dot sizes for contemporary flair. Use multiple dotting tools or the opposite end of different brushes. Large dots act as focal points while small dots fill gaps.
Create visual interest through size variation. Place larger dots first, then fill in with smaller ones. The mixed sizes add depth and movement to the design.
This approach breaks the rigidity of traditional polka dots. The random sizing feels more organic. Short nails carry this pattern beautifully without appearing cluttered.
Dots as Accent
Use dots sparingly for subtle decoration. Paint nails in solid patriotic colors. Add just three to five dots per nail in a contrasting shade.
This minimal approach suits those who want a hint of pattern. The few dots add interest without overwhelming. Place them randomly or in a deliberate line.
The restrained use of dots maintains elegance. The design works for conservative settings. You acknowledge the holiday theme without bold graphics.
Negative Space Dots
Create reverse polka dots by leaving circles unpainted. Apply red or blue polish to your whole nail. Before it dries, use a dotting tool to remove circles of polish.
Your natural nail shows through the circles. This negative space technique creates unique visual interest. The exposed nail acts as another color in your palette.
Work quickly before polish dries. The removal technique requires practice but produces distinctive results. This modern take on dots stands out from traditional applications.
Confetti Dots
Scatter dots randomly across your nails like thrown confetti. This carefree approach captures celebration energy. Use multiple colors and sizes without worrying about perfect placement.
The random nature makes this design forgiving. Each nail becomes unique. The scattered pattern suits the joyful spirit of Independence Day festivities.
Apply dots with abandon rather than precision. The imperfect spacing adds to the party atmosphere. This design takes minimal time while creating maximum fun.
Theme Variations and Twists
Creative variations on the patriotic theme keep your nail art fresh. These unique twists honor Independence Day while showcasing personal style. Each design offers something different from typical red, white, and blue approaches.
Matte Finish Patriotic
Swap glossy top coat for matte finish. The flat texture creates sophisticated appeal. Patriotic colors look completely different without shine.
Apply your design as usual. Finish with matte top coat instead of glossy. The velvety surface catches light differently than traditional polish.
Matte nails feel modern and editorial. The finish elevates simple designs. Short nails wear matte polish beautifully without looking dated.
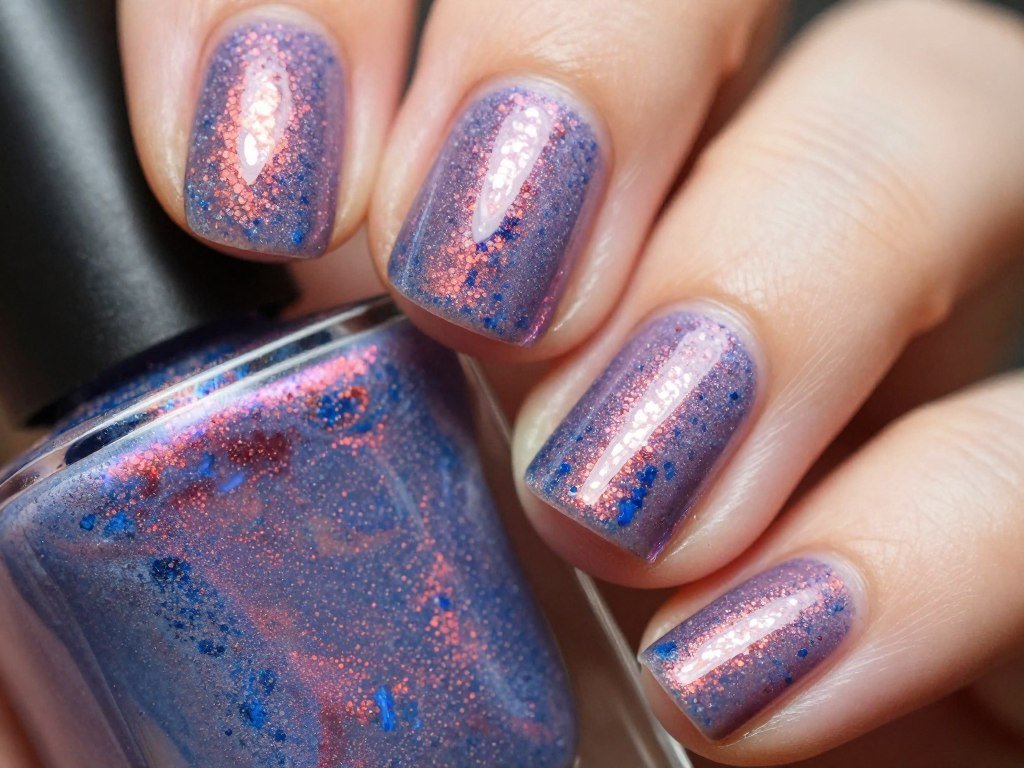
Metallic Accents
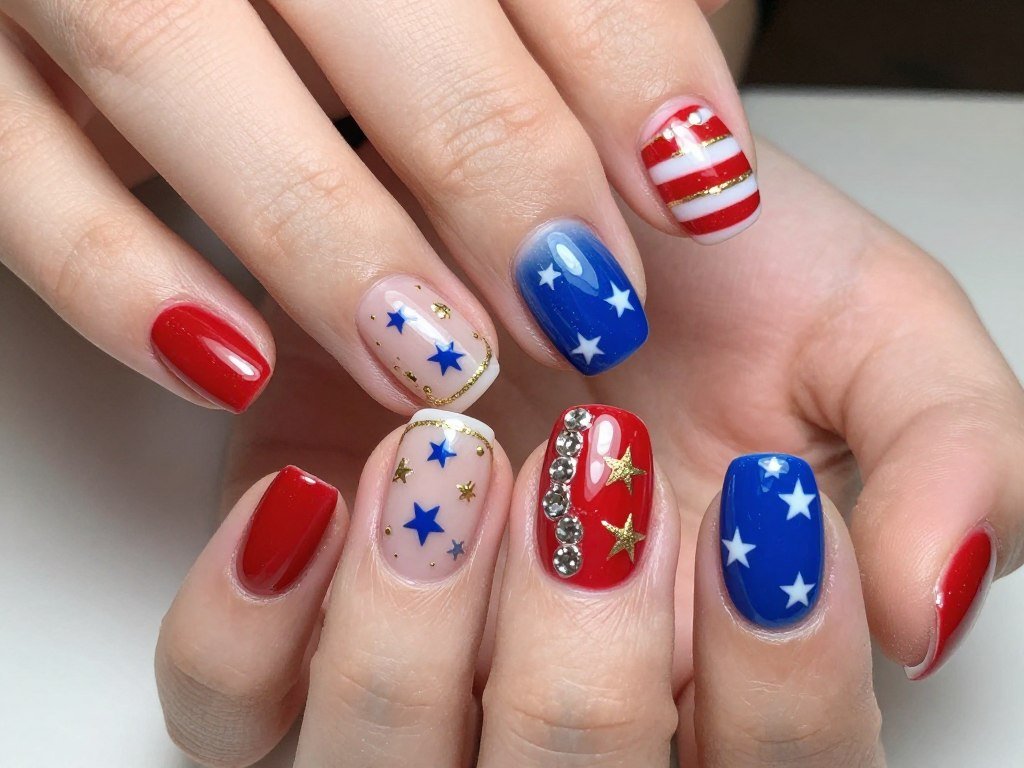
Add metallic polish for luxe appeal. Gold or silver details elevate basic patriotic designs. Metallic stripes, stars, or borders catch light beautifully.
Use metallic as an accent rather than the main color. Thin gold lines between red and blue create richness. Silver stars on blue backgrounds shimmer elegantly.
The metallic touch brings sophistication to holiday nails. The reflective quality adds dimension. Short nails benefit from these light catching details.
Watercolor Effect
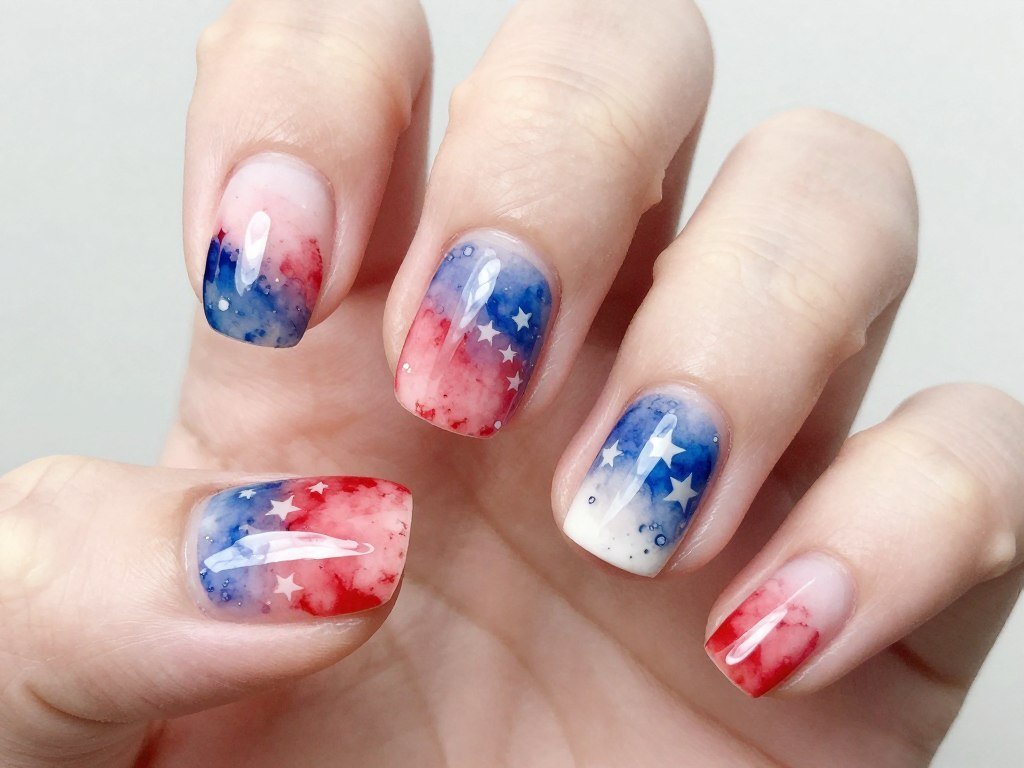
Create soft blended edges for artistic flair. Dilute regular polish with clear coat to achieve translucent colors. Apply in light layers, allowing colors to blend where they meet.
The watercolor technique produces dreamy results. Colors appear to float into each other. This artistic approach suits creative personalities.
Use a fan brush or sponge for the softest blends. The technique requires patience but creates unique nail art. Each nail becomes a tiny painted canvas.
French with Stars
Combine French manicure with patriotic stars. Apply a traditional French tip in white. Add small blue or red stars near the tip line.
This hybrid design suits professional settings. The French base keeps the look clean. Stars provide just enough holiday reference without overwhelming.
Place two to three small stars per nail. The minimal accent maintains elegance. This approach works year round with color modifications for different holidays.
Textured Polish
Textured polish adds tactile dimension. Sand or sugar effect polishes create rough surfaces. The unusual texture makes simple colors more interesting.
Apply textured polish as your base or accent color. The finish doesn’t require top coat. The rough surface catches light differently than smooth polish.
This trend brings novelty to your patriotic mani. The texture feels summery and beachy. Short nails showcase textured polish without snagging issues longer nails might encounter.
Tips for Perfect Application
Proper technique transforms good nail art into great nail art. These professional tips ensure your designs look salon quality. Mastering application basics makes every patriotic design more successful.
Base Coat Importance
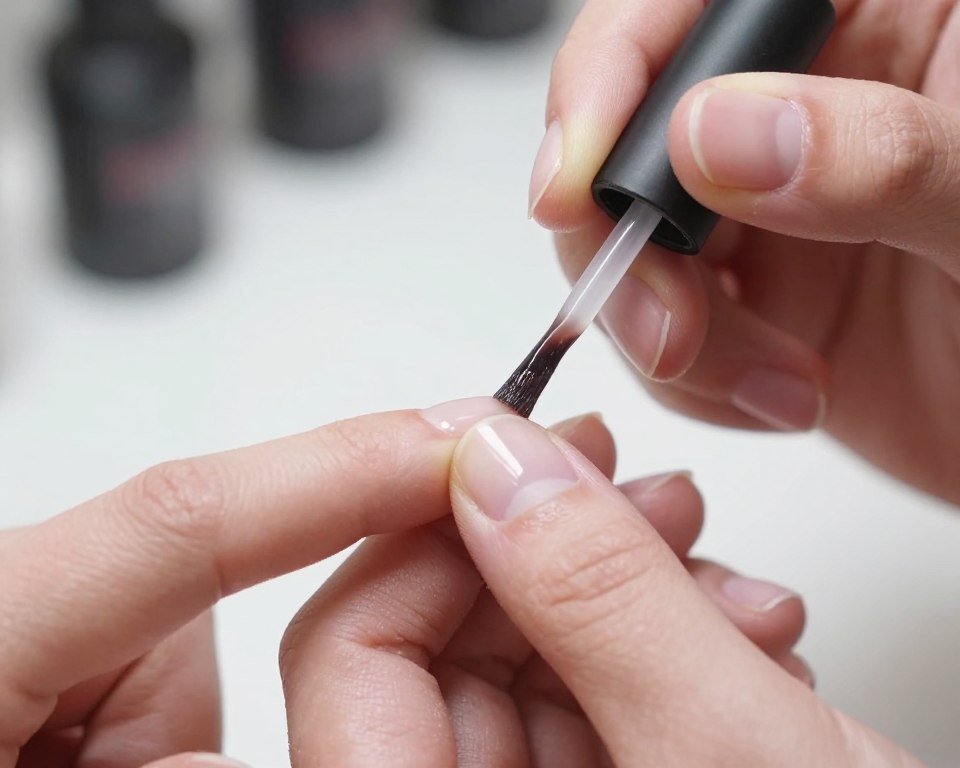
Never skip base coat. This clear layer protects your natural nail from staining. It creates a smooth surface for color application.
Base coat helps polish adhere better and last longer. Apply one thin layer and let it dry completely. Quality base coat prevents yellowing and extends wear time.
This foundational step takes one minute but makes a significant difference. Your manicure will chip less and look better longer. The investment in good base coat pays off in every design you create.
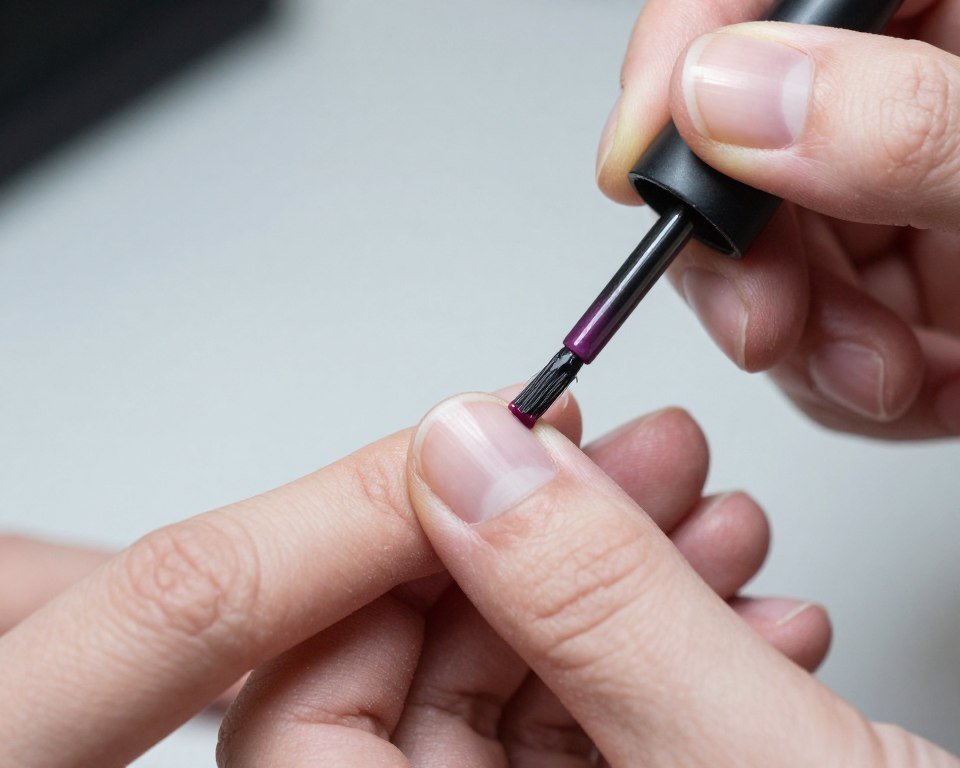
Thin Layer Strategy
Multiple thin coats beat one thick layer every time. Thin applications dry faster and more evenly. They prevent bubbling and dragging.
Wait between coats for proper drying. Rushing leads to smudges and dents. Two to three thin layers provide better coverage than one gloopy coat.
This technique requires patience but delivers professional results. The thin layer method works especially well with white and light colors that tend to streak.
Clean Up Techniques
Keep a small angled brush and acetone nearby. Dip the brush in remover to clean mistakes. Work around each nail to perfect the edges.
Clean up after each coat dries. This prevents remover from affecting your design. Precision edges make the difference between amateur and professional looking nails.
A cotton swab wrapped around an orange stick reaches tight spaces. The cleanup step elevates your finished look. Short nails benefit from these crisp, clean lines around the cuticle.
Top Coat Protection
Seal your design with quality top coat. This clear layer adds shine and protection. It prevents chips and extends the life of your manicure.
Apply top coat to the entire nail including the free edge. Cap the tip to seal the polish. Reapply top coat every two days to maintain shine and protection.
Top coat makes colors appear more vibrant. It smooths any texture from layered designs. This final step ensures your patriotic nails last through all your holiday celebrations.
Drying Time Matters
Patience during drying prevents disasters. Allow each layer to dry before applying the next. Touch test with a clean finger to check for dryness.
Quick dry drops speed the process without compromising results. Cold water dips help set polish faster. Avoid using your hands for at least 30 minutes after finishing.
Proper drying time prevents smudges and sheet marks. The wait ensures your hard work doesn’t get ruined. Plan your manicure when you have time to let nails dry completely.
Complete Your Patriotic Mani
Transform your nail art from good to gorgeous with the right finishing products. Quality tools and accessories ensure your 4th of July nails look professional and last through every celebration. Stock up on these essentials for flawless results.
- Fast-drying top coat for quick finish and lasting shine
- Nail art brushes in multiple sizes for precise details
- Striping tape for perfectly straight lines
- Dotting tools for uniform circles and stars
- Cleanup brush for crisp edges
- Star and flag nail stickers for easy application
Maintenance and Care
Keeping your patriotic nails looking fresh requires proper care. These maintenance tips extend the life of your manicure. A little daily attention keeps your holiday nail art perfect through all your Independence Day activities.
Daily Protection
Wear gloves for household chores and cleaning. Water and chemicals break down nail polish quickly. Protection during daily tasks prevents premature chipping.
Apply cuticle oil daily to keep the nail area moisturized. This prevents polish from lifting at the edges. Healthy cuticles frame your design beautifully.
Avoid using your nails as tools. Short nails are durable but still need gentle treatment. Opening cans or scraping labels can cause chips and breaks.
Touch Up Strategy
Keep your polish colors handy for quick touch ups. Small chips are easy to fix before they spread. Dab a tiny amount of matching color over the chip.
Add a fresh layer of top coat every other day. This refreshes shine and seals any minor wear. The extra protection extends your manicure’s life significantly.
Address problems immediately rather than waiting. Quick fixes prevent complete manicure failure. Five minutes of touch up work saves redoing entire nails.
Removal Done Right
Use acetone based remover for quickest results. Soak cotton pads and press them onto each nail. Wait 30 seconds before wiping away polish.
Never peel or pick at polish. This damages your natural nail surface. Patient removal preserves nail health for your next design.
Moisturize nails and cuticles after polish removal. Acetone dries out the nail area. Restoring moisture prepares your nails for the next patriotic look.
Choosing Your Perfect Design
With 30 options, selecting the right design depends on several factors. Consider your skill level, time available, and personal style. The perfect choice balances what you love with what you can achieve.
Skill Level Assessment
Beginners should start with solid colors or simple dots. These designs build confidence and teach basic techniques. Success with easier patterns encourages trying more complex art.
Intermediate painters can tackle stripes and basic stars. These designs require steadier hands but remain achievable. Practice makes each attempt better than the last.
Advanced artists enjoy hand painted fireworks and intricate patterns. Complex designs showcase your skills. Short nails provide the perfect canvas for detailed work.
Time Considerations
Quick designs include solid color rotation and simple dots. These take 20 minutes or less. Perfect for last minute plans or busy schedules.
Medium time designs like stripes and stamps need 30 to 45 minutes. Plan for drying time between steps. These suit when you have an evening to dedicate to nail art.
Detailed designs require an hour or more. Hand painted elements and intricate patterns demand patience. Schedule these when you can focus without rushing.
Occasion Matching
Backyard barbecues call for playful dots and glitter. Casual celebrations suit fun, carefree designs. Choose patterns that capture summer joy.
Evening events pair well with sophisticated stripes or matte finishes. Elegant interpretations of patriotic themes suit dressier occasions. Metallic accents add refinement.
Family gatherings work with any design that makes you happy. Choose what reflects your personality. The best design is one that makes you smile every time you see your nails.
Personal Style Integration
Bold personalities suit graphic stripes and bright glitter. Statement designs match your confident energy. Go big with colors and patterns.
Minimalist styles prefer subtle accents and negative space. Understated patriotic nods suit refined tastes. Single stars or thin lines maintain your aesthetic.
Romantic styles love soft watercolors and delicate details. Dreamy interpretations of flag colors match your gentle approach. Blended edges and small stars create feminine appeal.
Celebrate in Style with Perfect Patriotic Nails

Short nails prove perfect for festive Independence Day designs. These 30 ideas offer something for every skill level and style preference. From simple solid colors to intricate hand painted art, your options span the full creative spectrum.
The key to successful nail art lies in choosing designs that match your abilities and available time. Start with easier patterns to build confidence. As your skills grow, tackle more complex looks that showcase your developing technique.
Remember that proper preparation and quality products make the biggest difference in your results. Base coat protects, thin layers ensure smoothness, and top coat seals your work. These fundamental steps transform any design from good to gorgeous.
Your patriotic manicure celebrates American spirit while expressing personal style. Whether you choose bold graphics or subtle accents, your nails add the perfect finishing touch to Independence Day celebrations. Rock your festive look with pride this 4th of July.