
Creating a beautiful garden path doesn’t require a massive budget or professional help. Whether you’re looking to add charm to your outdoor space or create functional pathways through your yard, these cheap walkway DIY ideas will help you achieve stunning results without breaking the bank.
From simple stepping stones to creative gravel designs, you’ll discover thirty budget-friendly projects that transform ordinary yards into extraordinary outdoor spaces. Each idea includes practical guidance that makes the project achievable for homeowners at any skill level.
Ready to get started? We’ve compiled a free Garden Walkway Planning Checklist to help you organize your project from start to finish.
Table of Contents
Budget-Friendly Gravel Path Solutions
Gravel paths represent one of the most affordable and versatile options for creating walkways in your garden. These simple garden path ideas work well in various yard styles and require minimal materials and tools to complete.
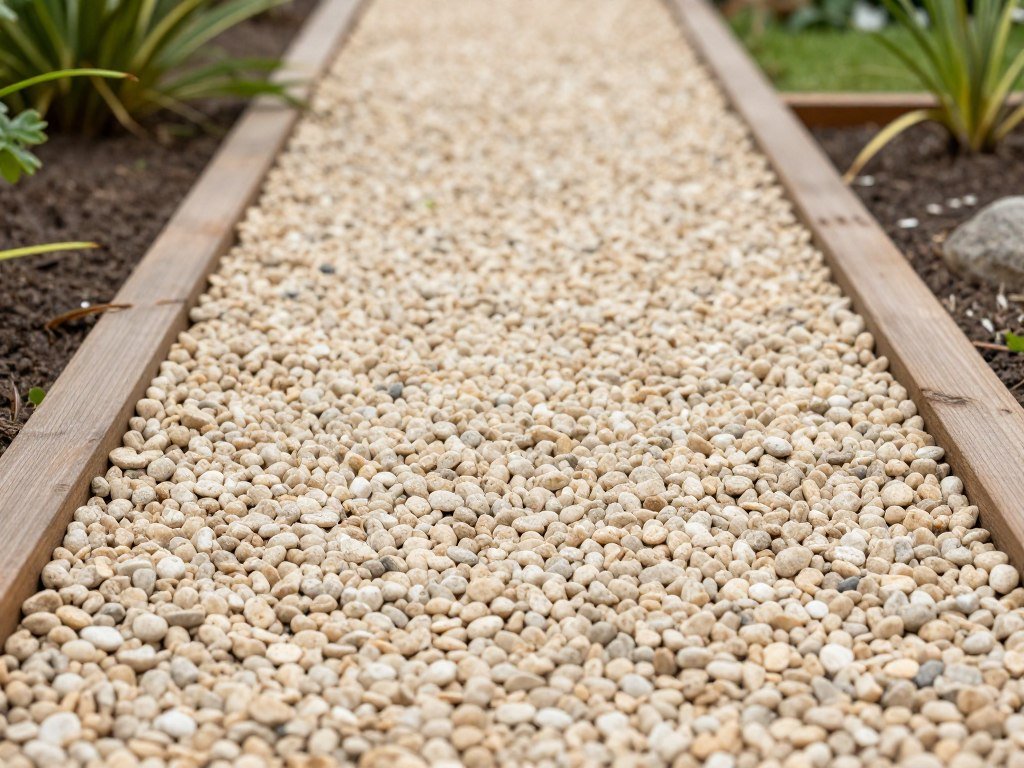
Classic Pea Gravel Walkway
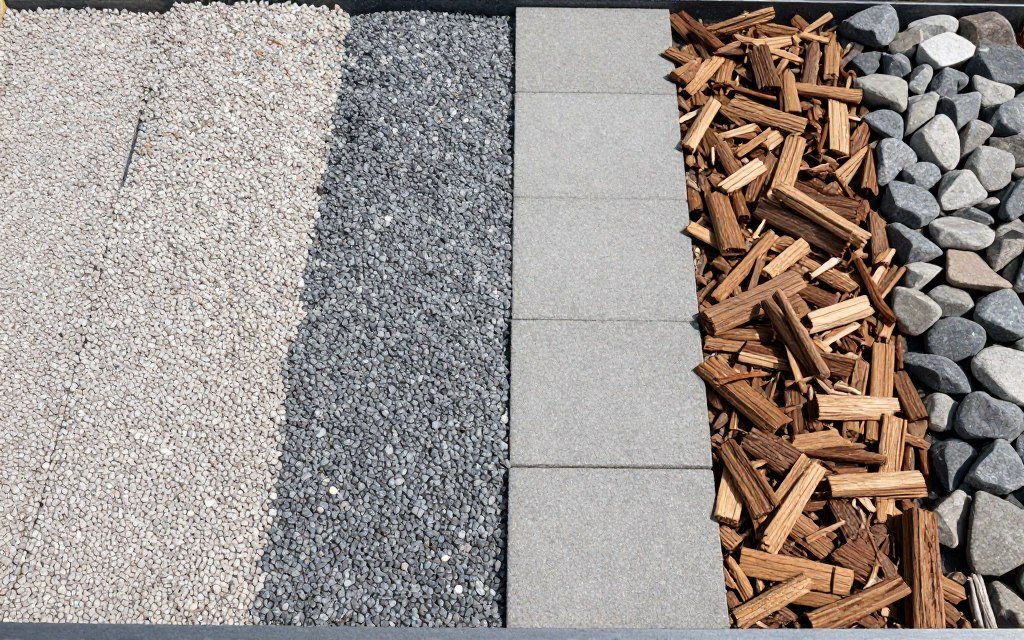
Pea gravel creates a timeless look that complements any garden style. This small, rounded stone option costs less than many other materials and provides excellent drainage.
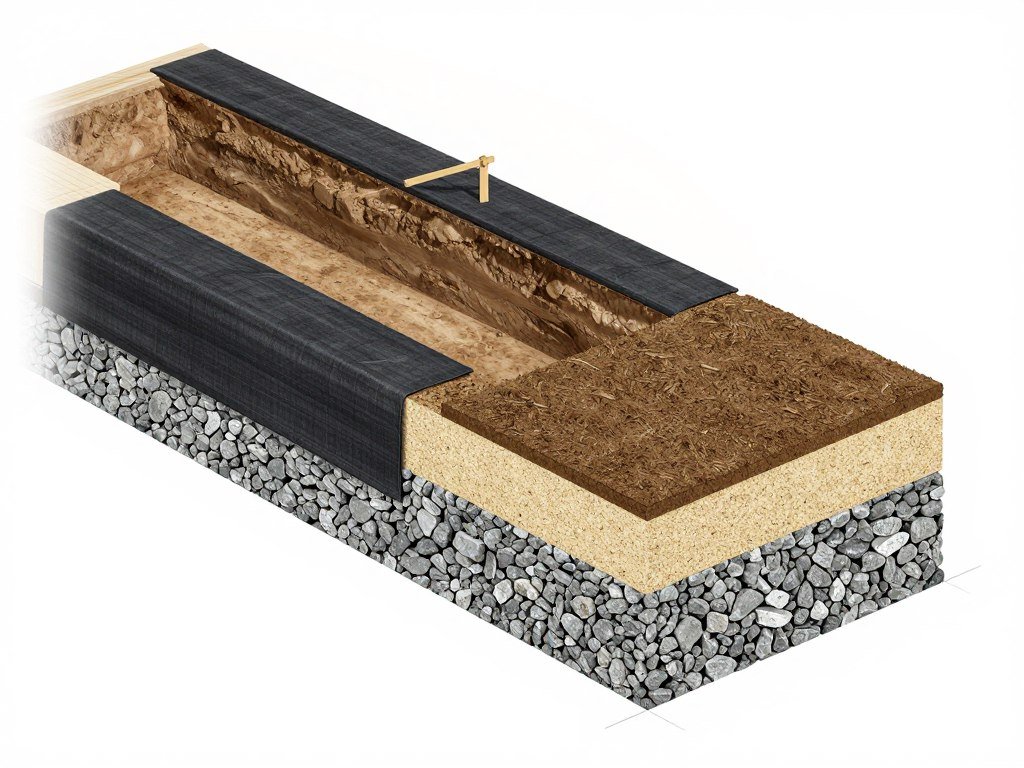
Start by marking your desired path width using stakes and string. Remove grass and soil to a depth of about three inches. Line the base with landscape fabric to prevent weed growth.
Add a two-inch layer of crushed stone as your base material. This creates stability and improves drainage. Top with two inches of pea gravel for a finished look.
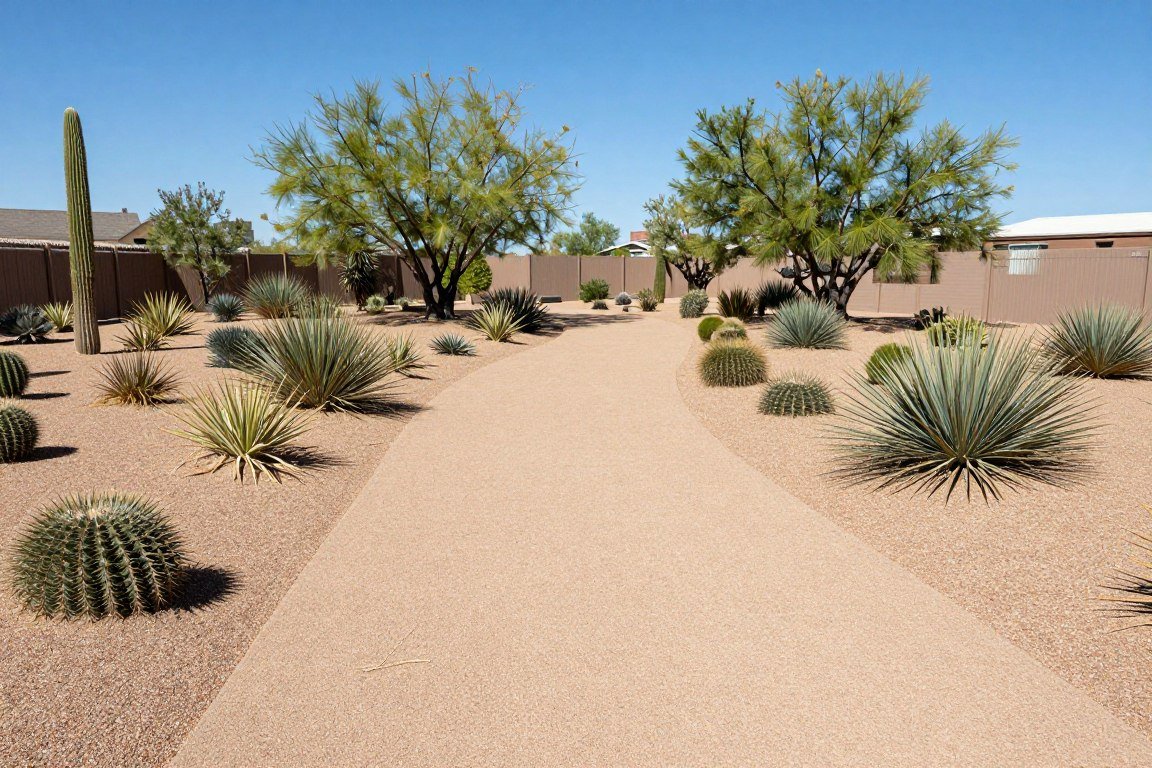
Decomposed Granite Path
Decomposed granite offers a firm walking surface that compacts naturally over time. This material works particularly well in dry climates and creates a rustic aesthetic.
The installation process mirrors that of pea gravel. Excavate your path area and install landscape fabric. Add your base layer of larger crushed rock.
Spread decomposed granite in thin layers, wetting and compacting each layer as you go. This technique ensures a solid, stable path that holds up to foot traffic for years.
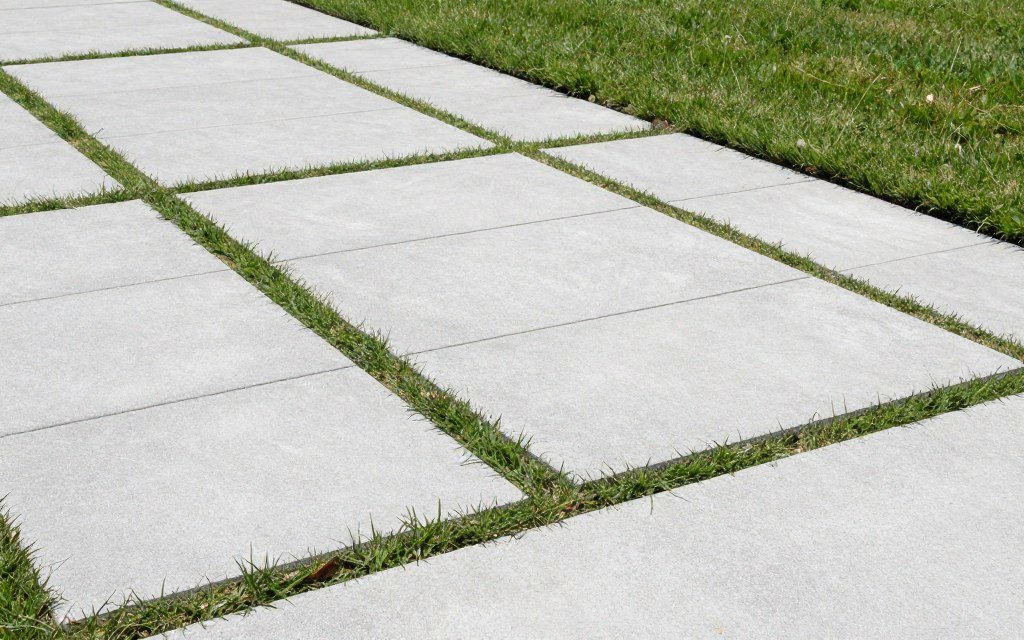
Crushed Stone with Brick Borders
Combining crushed stone with recycled brick edging creates an elegant DIY garden path on a budget. The brick borders contain the gravel and add visual interest to your outdoor space.
Lay bricks along both edges of your path, setting them in a shallow trench. Make sure they’re level and stable. Fill the center section with your chosen crushed stone material.
This design works especially well for curved paths. The bricks bend easily around corners while maintaining a clean, finished appearance throughout your garden.

Creative Stepping Stone Path Ideas
Stepping stones offer endless possibilities for cheap DIY garden projects. These versatile elements create charming paths while allowing grass to grow between stones, reducing material costs significantly.
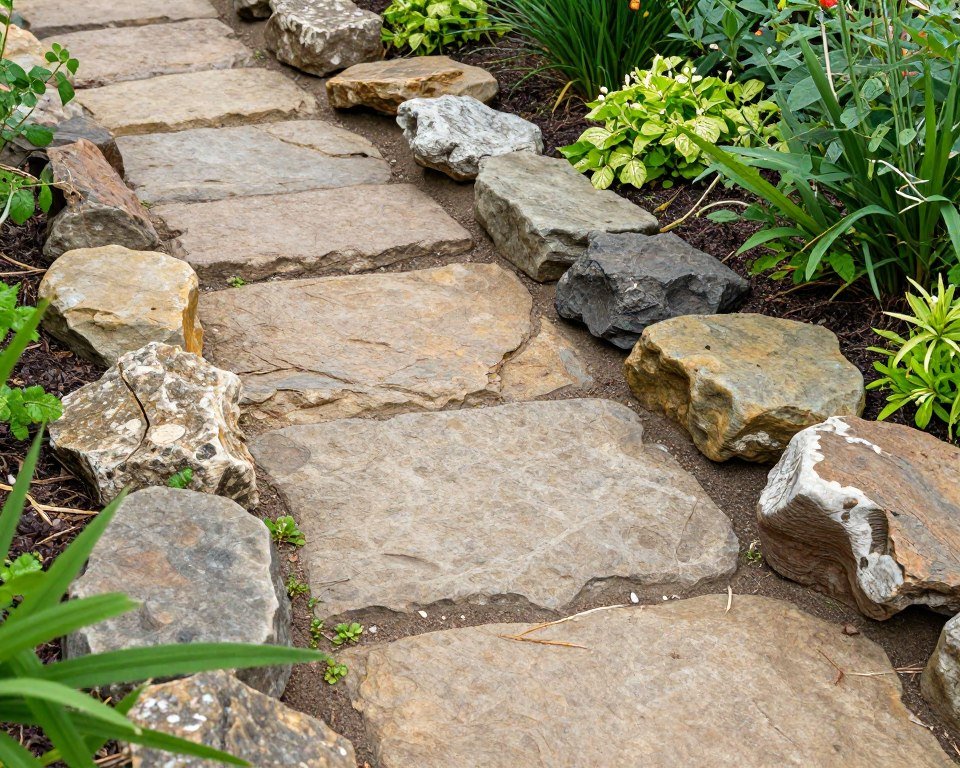
Natural Flagstone Path
Flagstone stepping stones create an organic, natural look that blends beautifully with any landscape design. Look for local stone suppliers who offer irregular pieces at discounted prices.
Arrange your stones on the ground before digging to find the most attractive layout. Space them according to your natural stride for comfortable walking.
Excavate beneath each stone to create a level base. Add sand to help with leveling and stability. This simple approach creates a professional-looking path without complex construction steps.

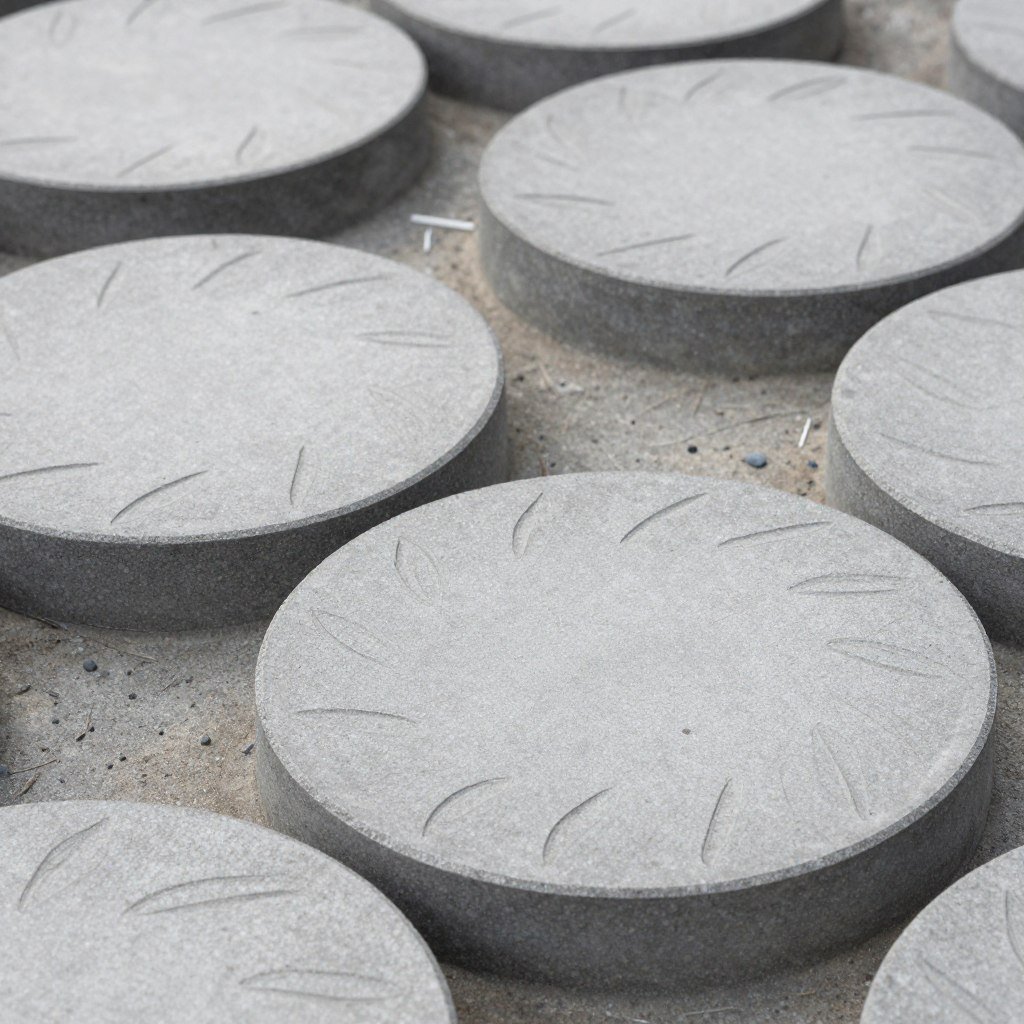
Concrete Stepping Stone Path
Concrete stepping stones represent one of the most affordable options for creating garden paths. You can purchase pre-made stones or create custom designs using simple molds.
For a DIY project, use purchased molds or create your own from wood frames. Mix concrete according to package directions and pour into molds.
Add decorative elements like glass pieces, shells, or leaf impressions before the concrete sets. These personal touches make your path unique without adding significant cost to the project.
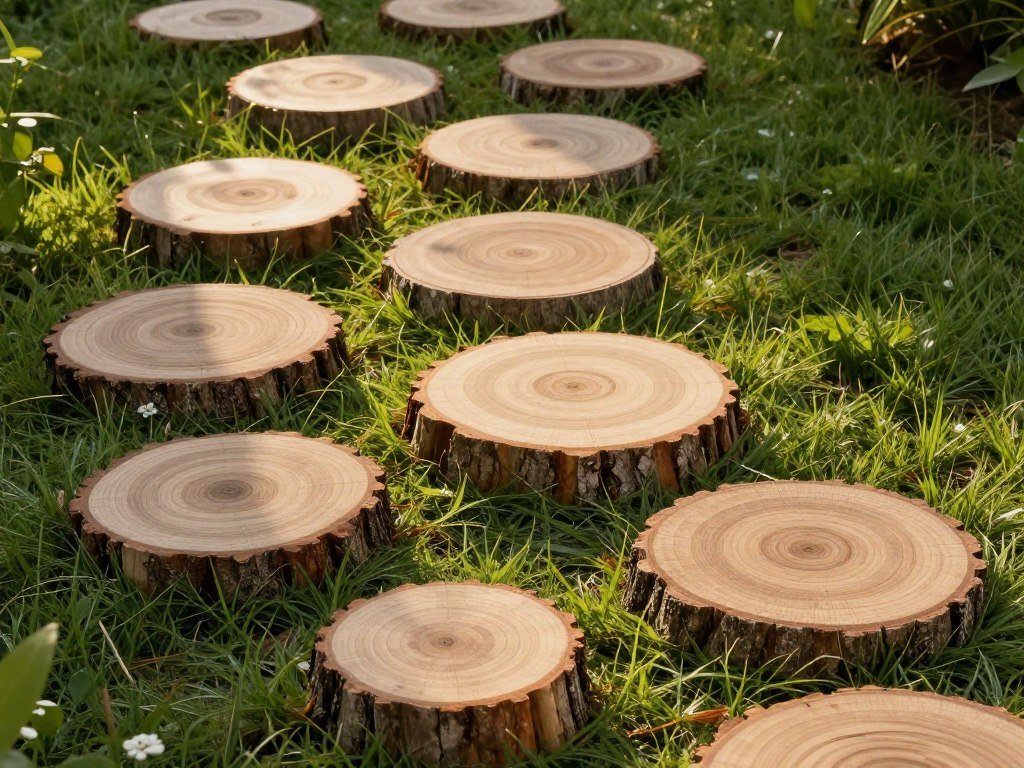
Reclaimed Wood Rounds
Wood rounds from tree trunks create rustic stepping stones that add warmth to your garden. Many tree removal services offer these materials for free or at minimal cost.
Select pieces that are at least four inches thick for durability. Treat the wood with a sealant to extend its lifespan and prevent rapid deterioration.
Dig shallow depressions for each round and add a gravel base for drainage. This prevents water from pooling beneath the wood and causing premature rot.
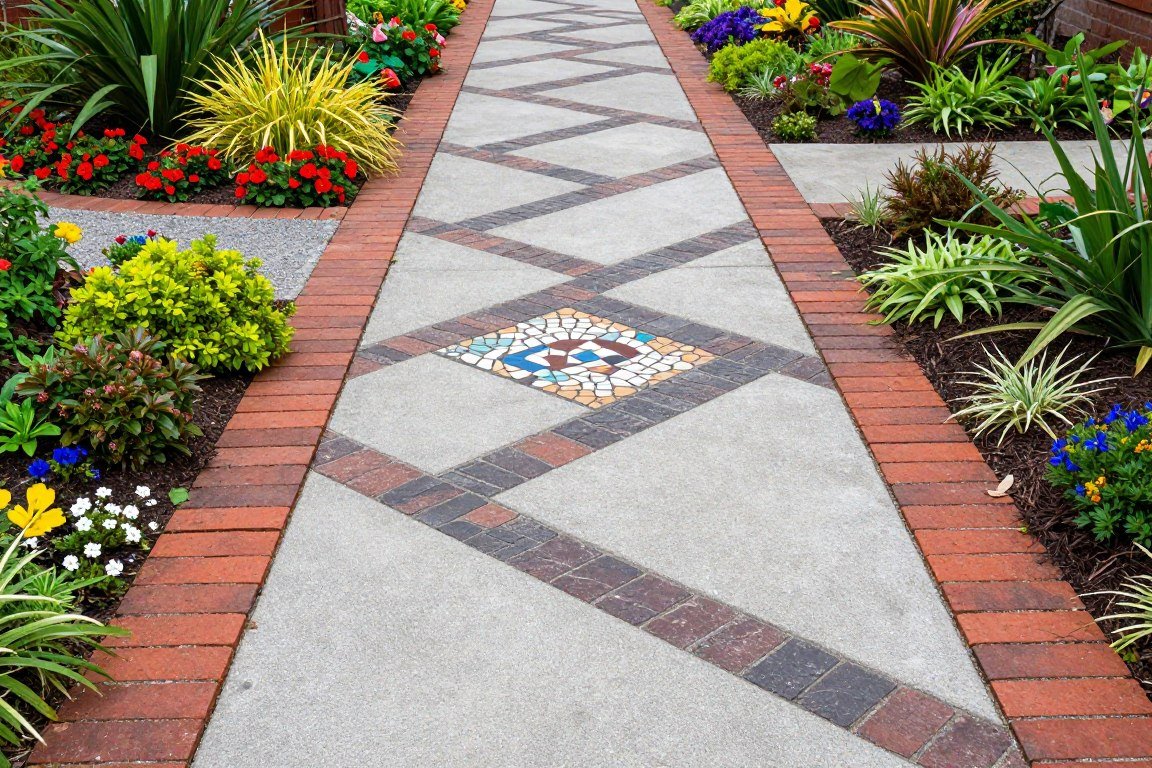
Affordable Brick and Paver Walkway Projects
Bricks and pavers create classic garden paths that stand the test of time. Finding reclaimed or salvaged materials makes these projects fit into tight budgets while adding character to your outdoor space.
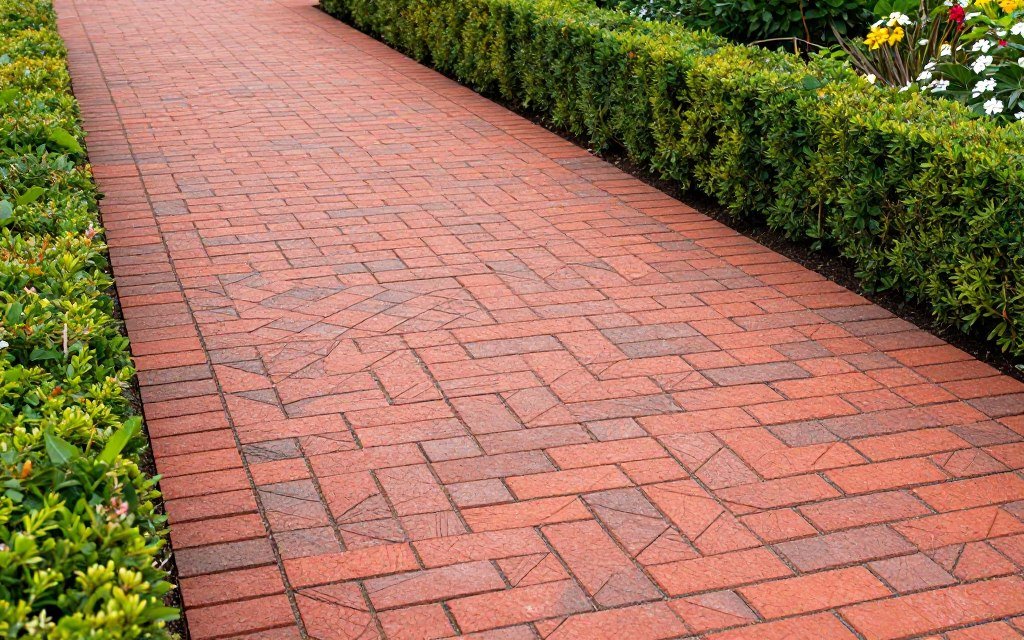
Reclaimed Brick Herringbone Pattern
A herringbone pattern using reclaimed bricks creates visual interest and exceptional stability. This timeless design works well for both straight paths and gently curving walkways.
Source reclaimed bricks from demolition sites, salvage yards, or online marketplaces. The weathered appearance adds instant charm and character to your garden.
Prepare your base by excavating to a depth of six inches. Add four inches of gravel base and two inches of sand. Lay bricks in the herringbone pattern, cutting edge pieces as needed with a brick saw or chisel.

Installation Steps for Brick Paths
- Mark your path boundaries with stakes and string to maintain straight edges throughout the project
- Excavate the soil to proper depth, ensuring the path base sits level with surrounding ground
- Install landscape edging along both sides to keep bricks from shifting over time
- Compact your gravel base layer thoroughly using a hand tamper or plate compactor
- Spread sand evenly and screed it level before laying any bricks on the surface
- Lay bricks in your chosen pattern, maintaining consistent spacing between each piece
- Fill joints with polymeric sand and mist with water to lock everything in place
Concrete Paver Pathway
Concrete pavers offer uniform sizing that simplifies installation while keeping costs reasonable. These manufactured units come in various colors and textures to match your design vision.
Shop for pavers during end-of-season sales or check for discontinued colors at home improvement stores. These options often cost fifty percent less than current inventory items.
The installation process follows the same base preparation as brick paths. The uniform size of pavers makes them easier to lay in straight lines and geometric patterns.
Mixed Material Paver Design
Combining different paver types and sizes creates visual interest without increasing your budget. Mix concrete pavers with bricks or natural stone for a custom look at DIY prices.
Create patterns by alternating materials in geometric designs. This approach uses leftover materials efficiently and reduces waste throughout your project.
The varied texture and color create focal points along your path. This design technique draws the eye and makes simple materials look more expensive and intentional.
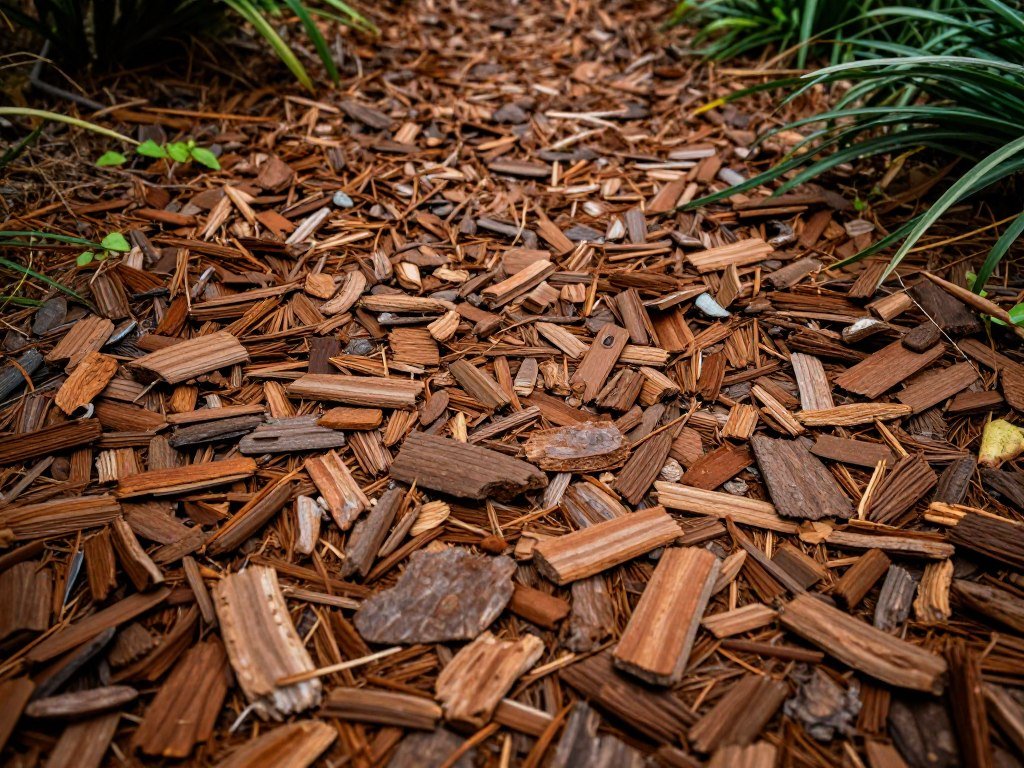
Natural Mulch and Wood Chip Walkways
Mulch and wood chip paths provide the most economical option for creating garden walkways. These organic materials offer soft walking surfaces and improve soil quality as they decompose over time.
Hardwood Mulch Path
Hardwood mulch creates attractive, budget-friendly paths that complement natural garden settings. This material costs less than gravel or pavers and installs quickly without specialized tools.
Define your path edges using natural materials like logs, rocks, or metal edging. This containment keeps mulch in place and creates clean, professional-looking borders.
Spread mulch to a depth of three to four inches for adequate coverage. Replenish the material annually to maintain path depth and appearance as natural decomposition occurs.

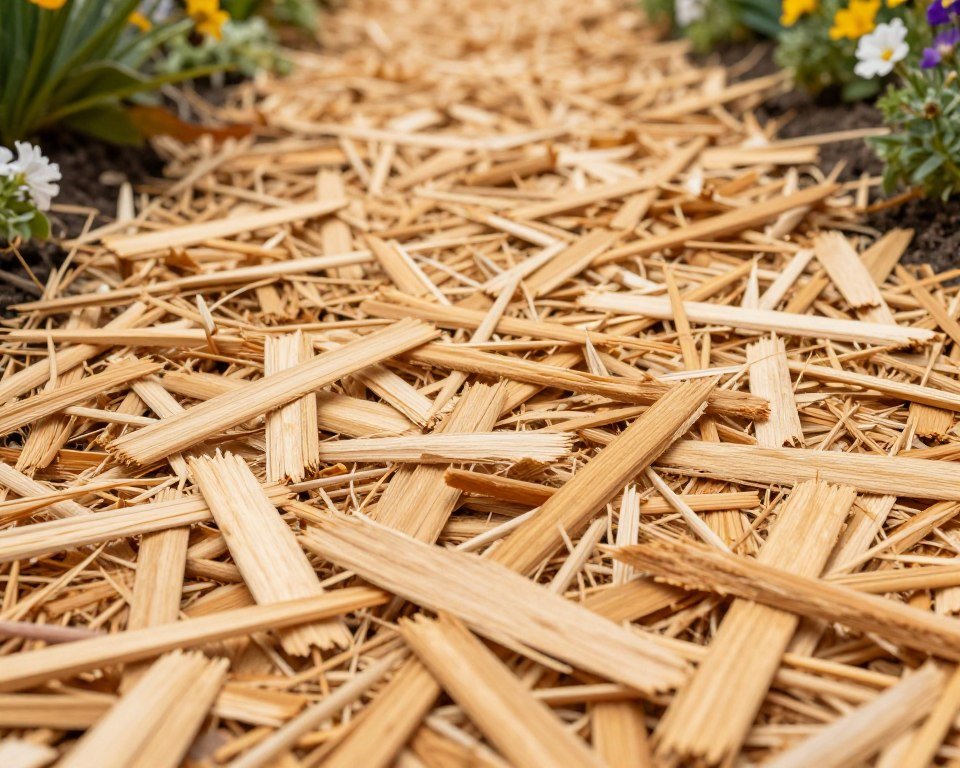
Pine Bark Nugget Walkway
Pine bark nuggets offer larger pieces that decompose more slowly than shredded mulch. This characteristic means less frequent replacement and lower long-term maintenance costs for your garden path.
The natural reddish-brown color creates warm visual appeal that works well in woodland gardens. The chunks provide good drainage and create a soft walking surface.
Install landscape fabric beneath bark nuggets to suppress weeds effectively. This simple step reduces maintenance time and keeps your path looking tidy between seasonal refreshing applications.
Cedar Chip Garden Path
Cedar chips naturally repel insects while creating attractive, aromatic pathways. This material lasts longer than many other wood options due to cedar’s natural rot resistance.
The pleasant scent enhances your outdoor experience during walks through the garden. This sensory element adds value beyond the visual appeal of your DIY project.
Source cedar chips from local tree services who often provide them free or at minimal cost. This sustainable approach recycles local materials while saving money on your project.
Stone and Rock Garden Path Ideas
Natural stone and rock create permanent pathways that require minimal maintenance once installed. Strategic sourcing makes these materials accessible for budget-conscious DIY garden projects throughout your outdoor space.
River Rock Pathway
Smooth river rocks create beautiful, natural-looking paths with excellent drainage properties. These rounded stones work well for curved paths and informal garden designs throughout your yard.
Mix different sizes of river rocks for visual texture and improved stability. Larger stones provide stepping surfaces while smaller pebbles fill gaps between them effectively.
Edge your river rock path with larger boulders or concrete pavers. This creates definition and prevents smaller rocks from migrating into surrounding garden beds or grass areas.

Crushed Limestone Path
Crushed limestone compacts firmly to create stable walking surfaces while remaining permeable to water. This material costs less than decorative gravel yet provides professional-looking results for your garden.
The light color of limestone brightens shaded areas and creates striking contrast against dark mulch or green grass. This visual pop enhances your overall landscape design without expensive materials.
Limestone naturally raises soil pH over time. Consider this factor when planning paths near acid-loving plants like azaleas or blueberries in your garden beds.
Stone Path Installation Tips
- Calculate material quantities by measuring path length, width, and desired depth in inches
- Excavate your path area to accommodate base material plus your chosen stone layer
- Compact the soil base thoroughly to prevent settling and surface irregularities later
- Install quality landscape fabric to block weeds while allowing water drainage through
- Add crushed stone base layer and compact it before adding decorative top layer
- Spread your chosen stone material evenly across the entire path surface area
- Compact the final layer gently to settle stones without crushing them completely
- Add edging material to contain stones and create clean, finished path borders
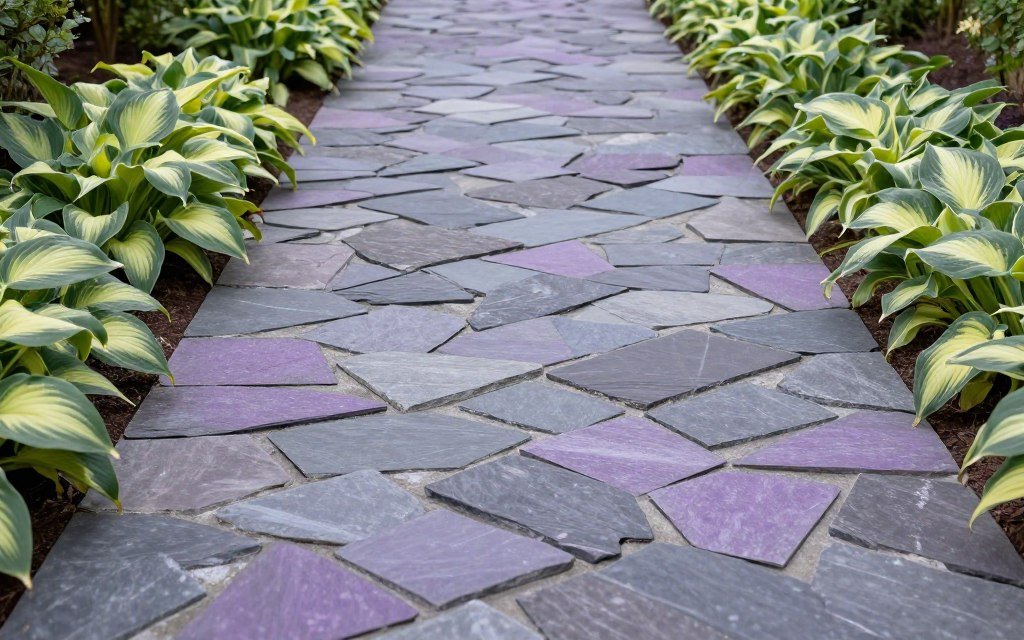
Slate Chip Walkway
Slate chips offer rich colors ranging from deep purple to charcoal gray, creating sophisticated paths on modest budgets. These angular pieces interlock naturally for stable walking surfaces.
The varied colors within slate create natural visual interest without requiring pattern planning. This characteristic simplifies installation while delivering high-end aesthetic results throughout your garden.
Slate’s durability ensures your path maintains its appearance for many years. Unlike organic materials, stone won’t decompose or require frequent replacement in your outdoor space.
Eco-Friendly Recycled Material Walkways
Recycled materials offer the cheapest DIY garden path options while supporting sustainable practices. These creative solutions transform discarded items into functional, attractive walkways for your outdoor space.
Broken Concrete Mosaic Path
Broken concrete pieces, often called urbanite, create unique mosaic-style paths at virtually no cost. Demolition sites and concrete removal projects provide free material for this creative DIY project.
Arrange concrete chunks like puzzle pieces, leaving small gaps between them. This irregular pattern creates visual interest and allows for drainage between pieces throughout your path.
Fill gaps with soil and plant low-growing ground covers like creeping thyme. This softens the look and adds living elements to your recycled concrete path design.

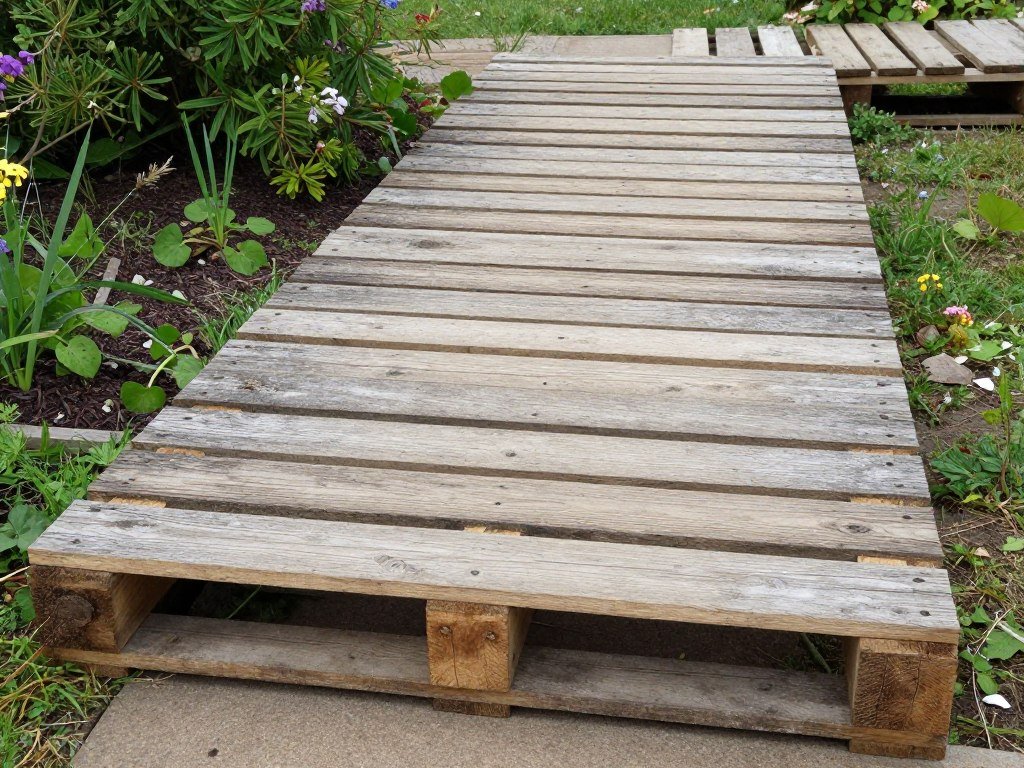
Reclaimed Pallet Wood Path
Wooden pallets disassembled into planks create rustic boardwalk-style paths. Many businesses offer free pallets, making this one of the most economical walkway options available today.
Treat pallet wood with exterior sealant to extend its lifespan in outdoor conditions. This preparation step adds minimal cost while significantly improving durability over time.
Install planks over a gravel base for drainage and air circulation. Space them slightly apart to allow water to drain through and prevent wood rot issues.
Glass Bottle Border Path
Recycled glass bottles create colorful, artistic borders for gravel or mulch paths. This creative approach transforms waste materials into eye-catching garden features throughout your yard.
Bury bottles upside down along path edges, leaving bottoms exposed above ground level. The glass catches sunlight and creates sparkle effects throughout the day.
Mix different colored bottles for rainbow effects or use single colors for cohesive design. This flexibility allows creative expression without purchasing expensive decorative materials.

Living Walkway Solutions with Grass and Ground Covers
Living paths made from grass or ground cover plants create soft, natural walkways that blend seamlessly with your landscape. These growing paths cost little to establish and provide environmental benefits beyond simple transportation routes.
Mown Grass Pathway
Simply mowing a defined path through your lawn creates instant walkways without any material costs. This approach works beautifully in large yards where you want to create multiple route options.
Keep the path grass shorter than surrounding areas to define the route clearly. This height difference guides foot traffic naturally and creates visual interest in your outdoor space.
Edge your grass path with natural stones or leave it informal for a cottage garden aesthetic. Both approaches work well depending on your overall landscape design goals.

Creeping Thyme Walkway
Creeping thyme creates fragrant, flowering paths that tolerate moderate foot traffic. This ground cover option costs less than traditional paving while providing visual beauty and pleasant scent.
Plant thyme plugs in prepared soil, spacing them according to package directions. The plants spread naturally to fill in gaps within one growing season.
This living path requires minimal maintenance once established. Simply trim back edges occasionally to maintain desired path width and remove any encroaching weeds.

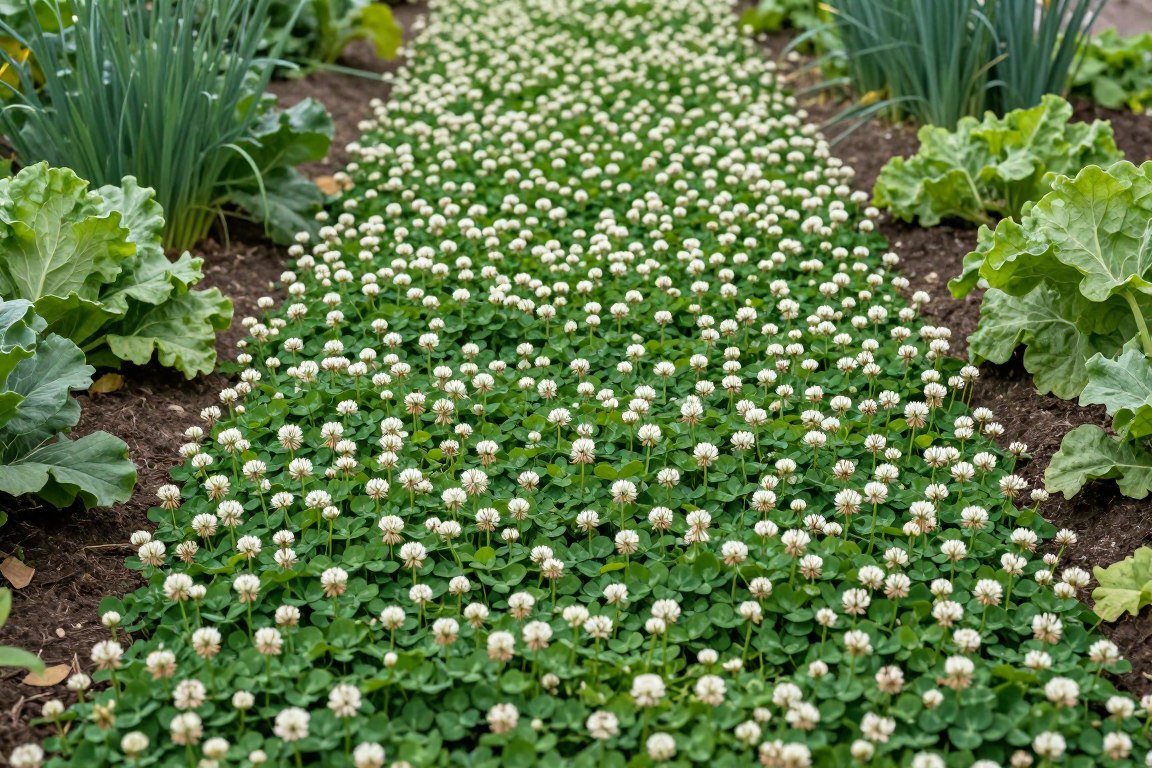
Clover Path Through Garden
Clover creates dense, soft walkways that fix nitrogen in soil and stay green with minimal watering. This eco-friendly option costs pennies per square foot to establish.
Sow clover seed in prepared soil during spring or fall for best germination. Keep the area moist until plants establish, then reduce watering to occasional deep soaking.
The white flowers attract beneficial pollinators to your garden while providing nectar sources throughout the growing season. This dual purpose adds value beyond the simple path function.
Modern Grid and Geometric Path Designs
Geometric patterns create contemporary garden paths that make bold design statements. These structured layouts work particularly well in modern landscapes and formal garden settings throughout your property.
Concrete Grid with Gravel Fill
Concrete pavers arranged in grid patterns with gravel filling create striking modern paths. This design balances hard surfaces with permeable areas for improved drainage throughout your walkway.
Space concrete squares evenly, leaving four to six inches between each piece. This gap accommodates gravel fill while maintaining structural stability for comfortable walking.
The geometric precision creates visual rhythm that leads the eye along the path. This design principle makes spaces feel larger and more intentional despite simple materials.

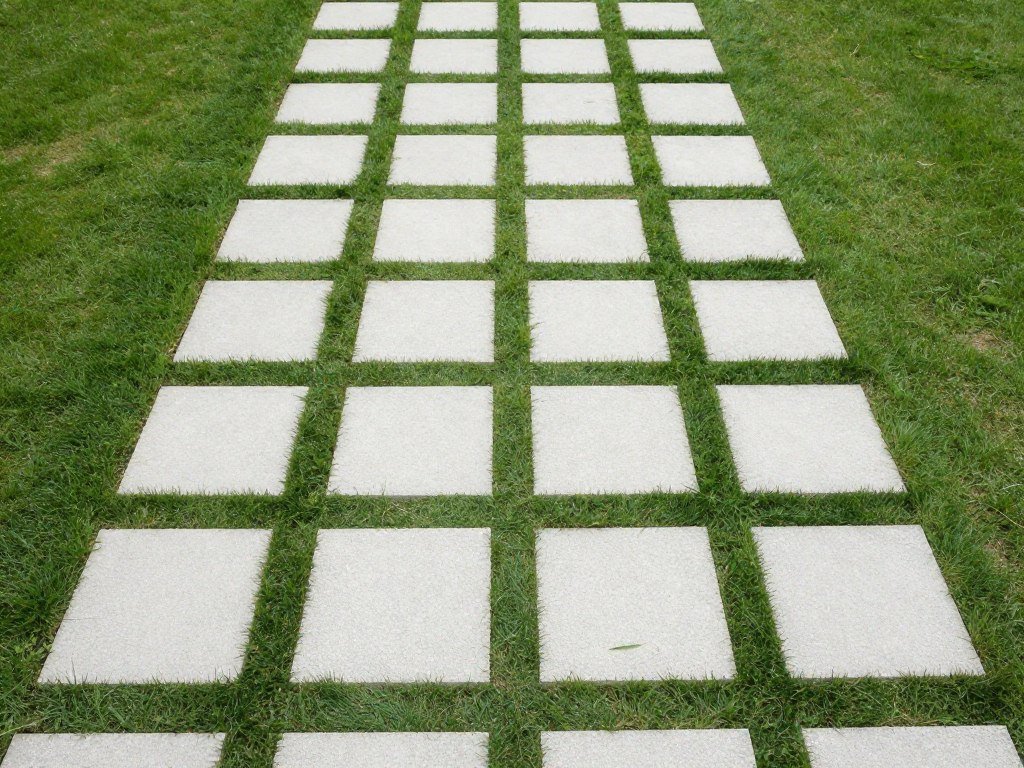
Stepping Stone Grid Pattern
Square stepping stones arranged in precise grid formations create orderly paths with grass growing between stones. This pattern works well for contemporary and traditional garden styles alike.
Maintain consistent spacing between all stones for visual harmony throughout the path. Use a measuring tape and stakes to ensure accuracy during the layout phase.
The grass between stones reduces material costs significantly while creating attractive green space. Regular mowing keeps the grass tidy and maintains the clean geometric appearance.
Diagonal Brick Pattern Path
Bricks laid diagonally create dynamic visual movement along your walkway. This classic pattern technique makes narrow paths appear wider and adds energy to your outdoor space design.
Cut bricks at path edges to maintain the diagonal pattern consistently. This attention to detail creates professional results that elevate your entire landscape appearance.
The diagonal orientation creates natural direction flow that guides visitors along the intended route. This subtle psychological effect enhances the functional aspects of your garden path.
Walkway Ideas for Sloped Garden Areas
Sloped terrain presents unique challenges for DIY garden path projects. These budget-friendly solutions create safe, attractive walkways on hillsides and uneven ground throughout your property.
Terraced Stone Steps
Natural stone steps terraced into slopes create functional paths while controlling erosion. Source flat stones locally to minimize costs while achieving professional-looking results on your project.
Excavate level platforms into the slope for each step placement. This creates stable foundations that prevent shifting over time despite hillside drainage and weather.
Backfill behind each stone step with crushed gravel for drainage and stability. This simple technique prevents water buildup that could undermine your carefully constructed pathway over years.

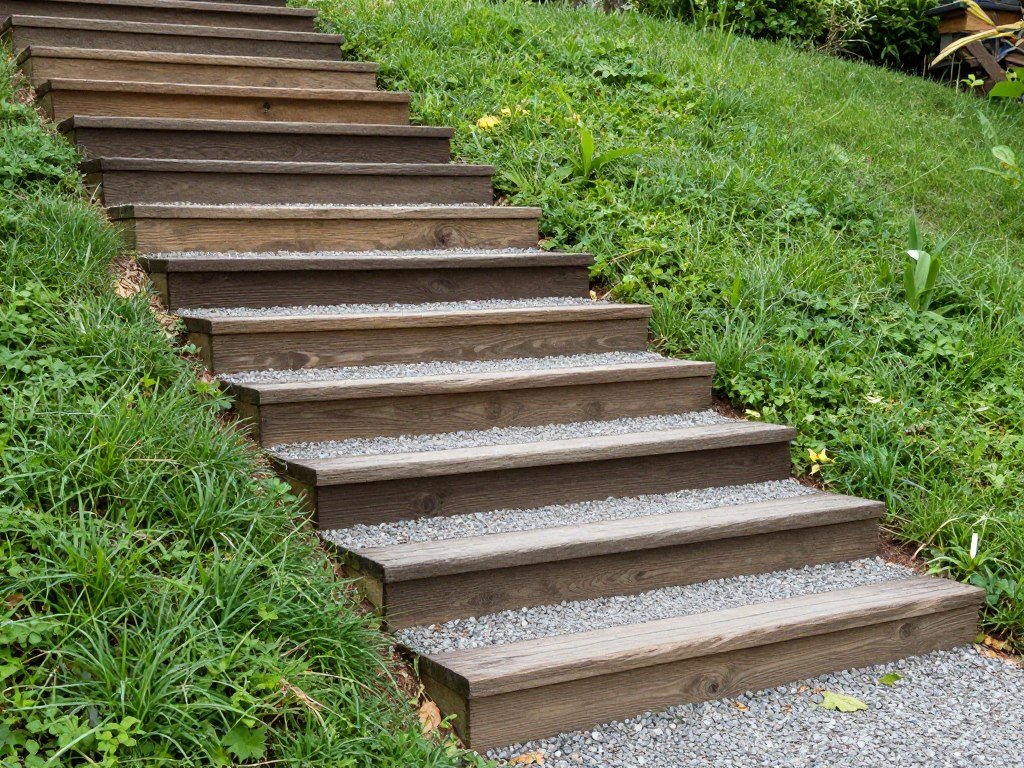
Timber Step Path
Landscape timbers create affordable steps for sloped paths when properly installed. These pressure-treated wood pieces resist rot and provide years of service in outdoor conditions.
Anchor each timber securely with rebar driven through pre-drilled holes. This prevents shifting and creates safe, stable steps that handle regular foot traffic effectively.
Fill behind timbers with gravel or crushed stone to create level tread surfaces. Plant ground covers alongside steps to soften the look and control erosion naturally.
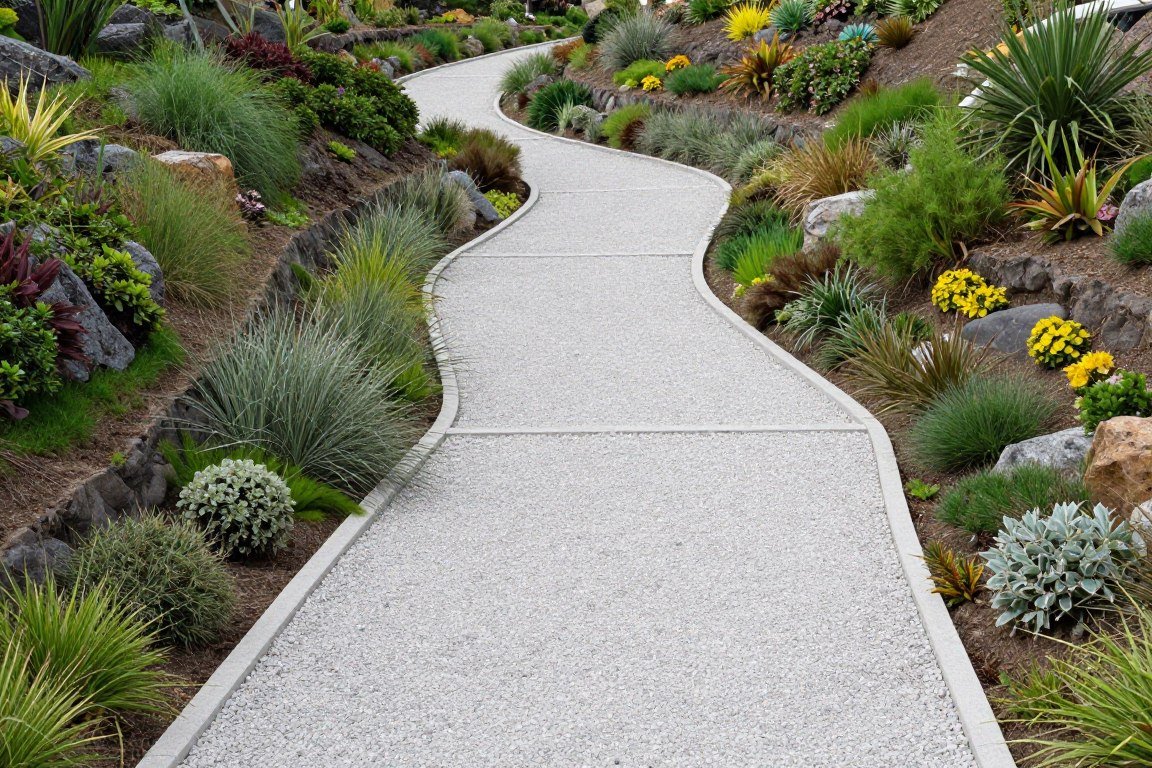
Switchback Gravel Path
Switchback paths zigzag up slopes to reduce grade and create manageable walking surfaces. This design approach makes steep terrain accessible without expensive retaining walls or extensive excavation work.
Plan gentle turns rather than sharp angles for comfortable navigation and natural appearance. Mark your route before beginning excavation to ensure proper grade throughout the path.
Install erosion control fabric beneath gravel to prevent washout during heavy rains. This protective layer extends path life and reduces maintenance needs significantly over time.
Creative Edging and Border Ideas for Garden Paths
Attractive borders define path edges and prevent material migration into surrounding areas. These cheap DIY solutions create professional-looking finished edges without expensive manufactured edging products.
Natural Rock Border
Rocks collected from your property or sourced locally create free borders that look natural in any landscape. Varying sizes add visual interest and organic charm to your path edges.
Bury rocks partially to create stability and prevent shifting over time. This technique also makes borders look established rather than simply placed on the surface.
Arrange larger rocks at path entrances and corners to create focal points. This design strategy adds structure while using materials that might otherwise go unused.
Repurposed Brick Edging
Salvaged bricks installed vertically or at angles create classic borders that complement any garden style. This traditional technique costs little when using reclaimed materials from demolition projects.
Set bricks in shallow trenches to maintain proper height and alignment along your path. Compact soil firmly around each brick to prevent tilting or movement.
The vertical orientation creates clean lines that contain path materials effectively. This simple installation method requires no mortar or specialized tools for completion.

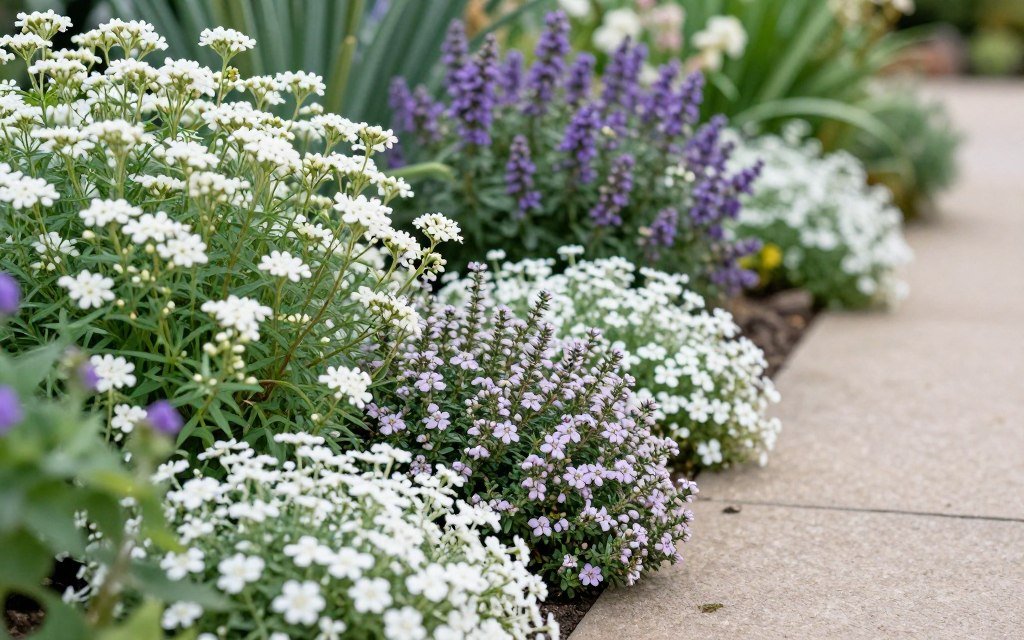
Living Plant Borders
Low-growing plants create soft, living edges that blend paths naturally into surrounding gardens. This approach costs only the price of starter plants or divisions from existing garden specimens.
Choose plants that tolerate being occasionally stepped on for best results. Good options include creeping thyme, sweet alyssum, or low-growing sedums throughout your path edges.
Plant in rows along path sides, spacing according to mature spread. The plants fill in naturally within one season to create lush, living borders that require minimal maintenance.
Budget-Friendly Path Lighting Solutions
Pathway lighting extends usability into evening hours while adding ambiance and safety. These inexpensive solutions illuminate walkways without complicated electrical work or high energy costs.
Solar Stake Light Path
Solar-powered stake lights provide illumination without electrical wiring or operating costs. Modern LED versions produce substantial light while maintaining affordability for budget-conscious projects.
Space lights every four to six feet along path edges for consistent illumination. This interval provides adequate visibility without creating harsh over-lighting effects.
Choose lights with dusk-to-dawn sensors for automatic operation that requires no manual intervention. This convenience feature makes your path safely lit every evening without ongoing effort.

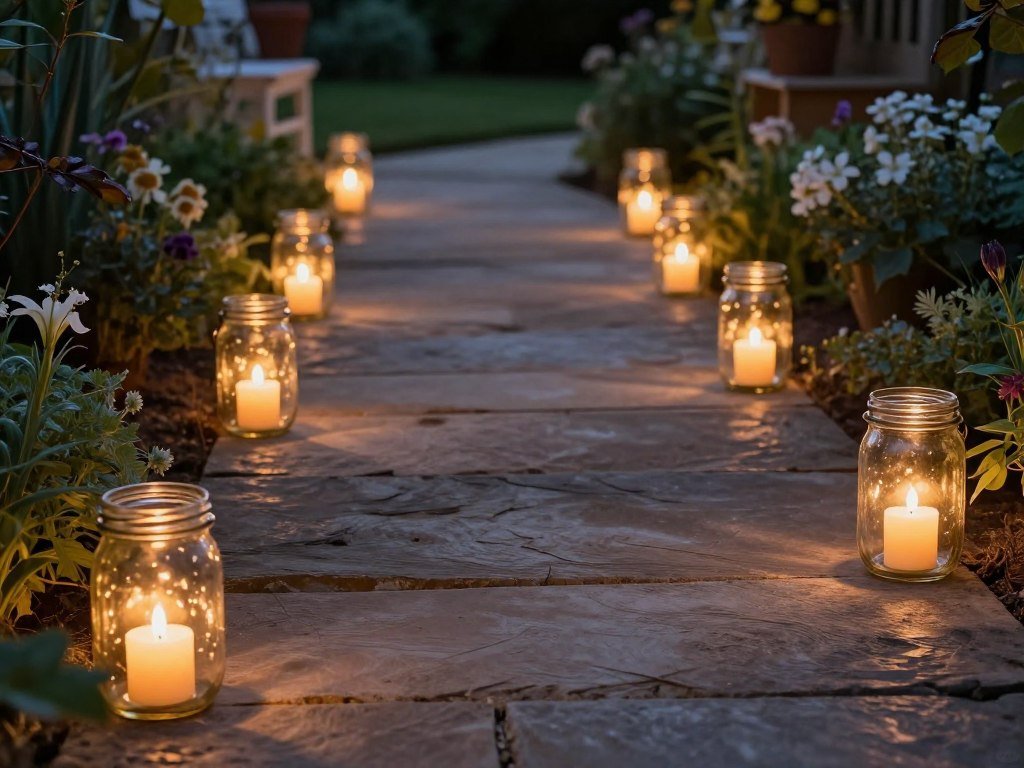
Mason Jar Lantern Path
Mason jars transformed into lanterns create charming DIY path lighting using battery-operated LED candles. This project costs just a few dollars and adds rustic appeal to your outdoor space.
Fill jar bottoms with sand or pebbles for stability and decorative effect. Place battery-operated tea lights inside each jar for safe, weather-resistant illumination.
Line jars along path edges or hang them from shepherd’s hooks for varied lighting effects. This flexibility allows creative arrangements that suit your specific design preferences.
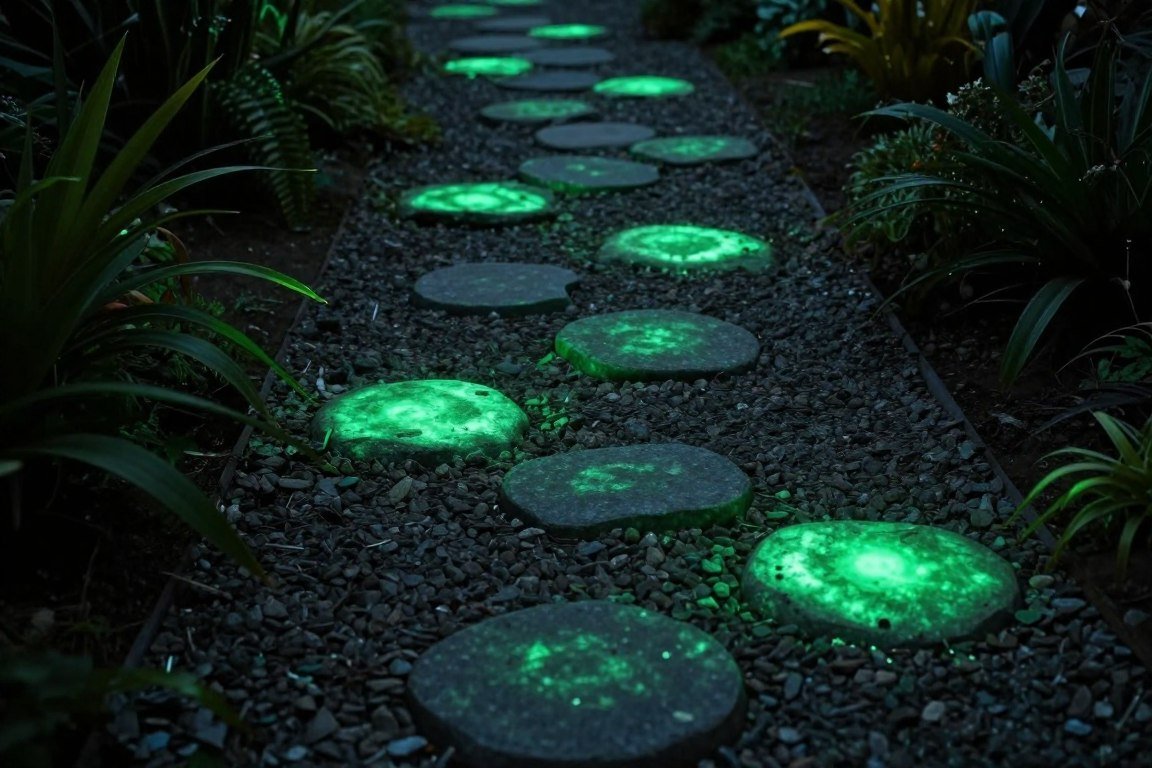
Glow Stone Accent Lighting
Glow-in-the-dark stones mixed into path materials create subtle illumination that guides nighttime navigation. These phosphorescent stones charge in sunlight and emit soft light after dark.
Scatter glow stones throughout gravel paths or place them strategically along stepping stone routes. The subtle effect provides just enough light for safe walking without overwhelming brightness.
This passive lighting solution requires no electricity, batteries, or maintenance once installed. The stones continue glowing for years with no ongoing costs or effort.
Essential Maintenance Tips for Long-Lasting Paths
Proper maintenance keeps DIY garden paths looking beautiful and functioning well for years. These simple care practices protect your investment and minimize repair needs over time.
Weed Control Strategies
Regular weed removal prevents plants from disrupting path surfaces and appearance. Address weeds when small to make removal easier and prevent seed spread throughout your garden.
Apply landscape fabric beneath path materials during initial installation to suppress weed growth. This preventive measure reduces ongoing maintenance requirements significantly over the path’s lifetime.
Use organic mulch or gravel between stepping stones to discourage weed establishment. These materials block sunlight while allowing water drainage, creating inhospitable conditions for most weeds.
Seasonal Path Care Checklist
- Spring – Replenish mulch or gravel paths that settled over winter and check for frost heave damage
- Summer – Monitor drainage during rainy periods and address pooling water issues promptly to prevent erosion
- Fall – Remove fallen leaves regularly to prevent staining and slippery surfaces on stone paths
- Winter – Clear ice and snow promptly and use sand instead of salt to protect materials
Surface Leveling and Repair
Check path surfaces regularly for settling or unevenness that creates tripping hazards. Address problems early before they worsen and require extensive repairs.
Add base material beneath settled areas to restore proper level and stability. This simple fix prevents further settling and extends path life significantly.
Replace damaged stepping stones or pavers promptly to maintain safety and appearance. Keep spare materials from original installation for seamless repairs when needed.
Edge Maintenance
Trim grass and plants along path edges to maintain clean lines and prevent encroachment. This regular grooming keeps paths looking intentional and well-maintained throughout the growing season.
Reset loose edging materials annually to maintain proper containment of path surfaces. This prevents material migration and reduces replacement needs over years.
Refresh decorative borders as needed to keep them looking attractive and functional. Small touchups maintain the overall appearance without requiring complete path reconstruction projects.

Comparing Costs of Different Walkway Materials
Understanding material costs helps you choose the best option for your budget and needs. These estimates reflect typical prices for DIY projects where you provide the labor.
| Material Type | Cost per Square Foot | Lifespan | Maintenance Level |
| Pea Gravel | $0.50 – $2.00 | 10+ years | Low |
| Wood Chips | $0.25 – $1.00 | 3-5 years | Medium |
| Concrete Pavers | $3.00 – $6.00 | 20+ years | Low |
| Reclaimed Brick | $2.00 – $5.00 | 25+ years | Low |
| Natural Stone | $4.00 – $10.00 | 30+ years | Very Low |
| Decomposed Granite | $1.00 – $3.00 | 15+ years | Low |
| Mulch (Hardwood) | $0.30 – $1.50 | 2-4 years | High |
| Grass Seed | $0.10 – $0.50 | Indefinite | Medium |
Remember that these costs represent materials only. DIY installation eliminates labor costs that typically double or triple total project expenses when hiring professionals.
Consider long-term value when comparing options. Materials with higher initial costs often prove more economical over time due to extended lifespan and reduced maintenance requirements.
Design Principles for Attractive Garden Paths
Understanding basic design principles helps create paths that enhance rather than detract from your overall landscape. These guidelines ensure your DIY project complements your outdoor space beautifully.
Path Width Guidelines
Main garden paths should measure at least three feet wide for comfortable two-way traffic. This width accommodates wheelbarrows and garden equipment while allowing easy passage.
Secondary paths can narrow to eighteen to twenty-four inches for single-file walking. These narrower routes work well for access paths through garden beds where space is limited.
Stepping stone paths allow even narrower routes since users step from stone to stone. This flexibility makes them perfect for informal garden areas where full paths aren’t necessary.
Curve and Line Considerations
Gentle curves create natural flow and visual interest throughout your garden. Avoid sharp angles that feel awkward and look forced in residential landscapes.
Straight paths work best in formal gardens or when connecting specific points directly. This geometric approach creates intentional, structured appearances that suit traditional design styles.
Mix curves and straight sections to create dynamic routes that maintain interest along their entire length. This variation prevents monotony while serving functional transportation needs.

Material Compatibility
Choose path materials that complement your home’s architectural style and existing landscape elements. This coordination creates cohesive designs that feel intentional rather than haphazard.
Rustic materials like wood chips and natural stone suit cottage gardens and informal landscapes. Modern materials like concrete and geometric pavers work better in contemporary settings.
Consider maintenance compatibility with your lifestyle and available time. Low-maintenance materials make sense for busy homeowners while labor-intensive options suit dedicated gardeners who enjoy upkeep.
Installation Fundamentals for All Path Types
Certain installation principles apply regardless of which specific materials you choose. Following these fundamentals ensures successful projects that perform well and last for years.
Proper Base Preparation
All permanent paths require proper base preparation for stability and longevity. Skipping this step leads to settling, shifting, and premature failure regardless of surface materials.
Excavate to appropriate depth based on your chosen materials and local climate conditions. Frost-prone areas require deeper excavation to prevent heaving during freeze-thaw cycles.
Install base layers in proper sequence – landscape fabric, crushed stone base, leveling sand, then surface material. Each layer serves specific functions that contribute to overall path performance.
Drainage Considerations
Proper drainage prevents water accumulation that damages paths and creates muddy conditions. Plan for water movement during the initial design phase rather than addressing problems later.
Slope paths slightly away from buildings and toward drainage areas. This subtle grade prevents water from flowing toward foundations while remaining comfortable for walking.
Install permeable surfaces where possible to allow water infiltration rather than runoff. This environmentally responsible approach reduces erosion and supports groundwater recharge.
Essential Installation Tools
- Measuring tape and stakes for accurate layout marking before beginning any excavation work
- Flat shovel for excavation and moving soil and base materials efficiently during preparation
- Garden rake for spreading and leveling materials to create smooth, even surfaces
- Hand tamper or plate compactor for compacting base layers to prevent future settling
- Wheelbarrow for transporting materials from delivery location to work area efficiently
- Level for checking grade and ensuring proper drainage slope throughout the project
- Safety equipment including gloves and safety glasses for protection during all phases
Edging Installation
Proper edging contains path materials and creates clean, finished appearances. Install edging during base preparation rather than adding it as an afterthought.
Set edging at appropriate heights relative to surrounding ground level. This prevents trip hazards while effectively containing loose materials like gravel or mulch.
Secure edging firmly using stakes or by burying portions below ground. This prevents shifting that compromises the entire path system over time.
Best Seasons for Different Path Projects
Timing your project appropriately improves results and makes installation easier. Different materials and techniques work better during specific seasons throughout the year.
Spring Installation Projects
Spring offers ideal conditions for most path installation projects when soil is workable and temperatures moderate. The growing season ahead allows newly planted borders to establish quickly.
Avoid working during extremely wet periods when soil compaction becomes difficult. Wait for ground to dry somewhat while remaining soft enough for easy excavation work.
Spring timing allows paths to settle and stabilize before heavy summer use. This maturation period improves long-term performance and reduces maintenance needs later.
Fall Project Advantages
Fall provides excellent conditions for path building with comfortable temperatures and typically drier soil. Completed projects have winter to settle before spring growing season begins.
Install living paths like grass or ground cover in early fall for establishment before winter. This timing takes advantage of warm soil and cooler air temperatures perfect for root development.
Fall sales at garden centers make materials more affordable as retailers clear inventory. This seasonal pricing can reduce project costs by twenty to thirty percent.
Year-Round Considerations
Some simple projects like mulch paths or stepping stones can proceed in any season. These flexible options work well when you need immediate improvements regardless of calendar timing.
Avoid frozen ground conditions that make excavation impossible or extremely difficult. Wait for spring thaw rather than fighting frozen soil with inadequate results.
Summer heat makes physical labor more challenging but doesn’t prevent path installation. Work during cooler morning hours and stay well hydrated throughout the construction process.

Transform Your Yard with Budget-Friendly Walkways
Creating beautiful garden paths doesn’t require professional help or expensive materials. These thirty cheap walkway DIY ideas demonstrate how creativity and effort produce stunning results that transform ordinary yards into extraordinary outdoor spaces.
Start with a simple project that matches your skill level and available time. Success builds confidence for tackling more ambitious path designs in future seasons throughout your property.
Remember that the best walkway for your garden balances aesthetic appeal with practical function and budget constraints. Consider how you’ll actually use the path rather than just how it looks in photos.
Your outdoor space deserves pathways that invite exploration and make every corner of your garden accessible. These DIY projects put professional-quality results within reach of any motivated homeowner willing to invest some weekend time.