
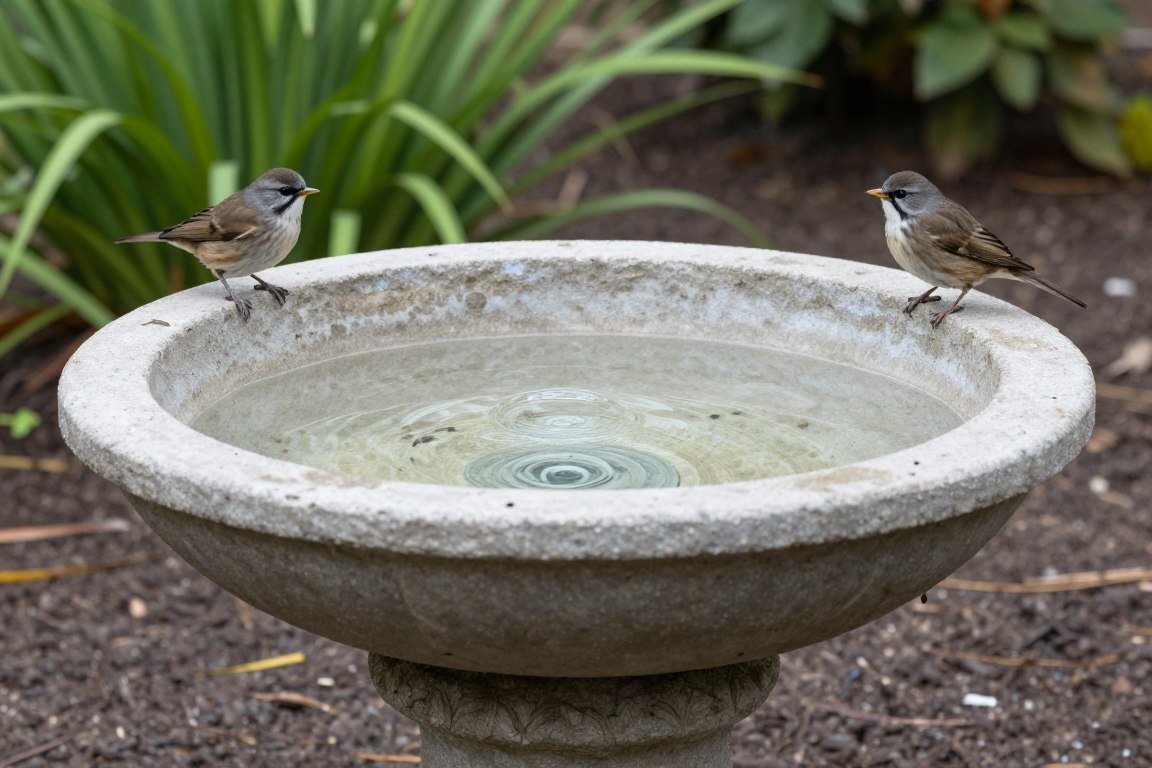
Creating a DIY concrete bird bath transforms your garden into a wildlife haven. Birds need fresh water for drinking and bathing throughout the year. A well-made concrete birdbath withstands weather conditions better than plastic alternatives.
Concrete offers exceptional durability when properly mixed and sealed. These ten projects range from simple bowl designs to elaborate pedestal structures. Each idea includes specific techniques to prevent cracking and extend the life of your bird bath.
Whether you have basic DIY skills or advanced concrete experience, you’ll find a project that matches your ability level. Let’s explore these creative and practical concrete bird bath ideas that will serve your feathered friends for years to come.
Table of Contents
Classic Rhubarb Leaf Birdbath
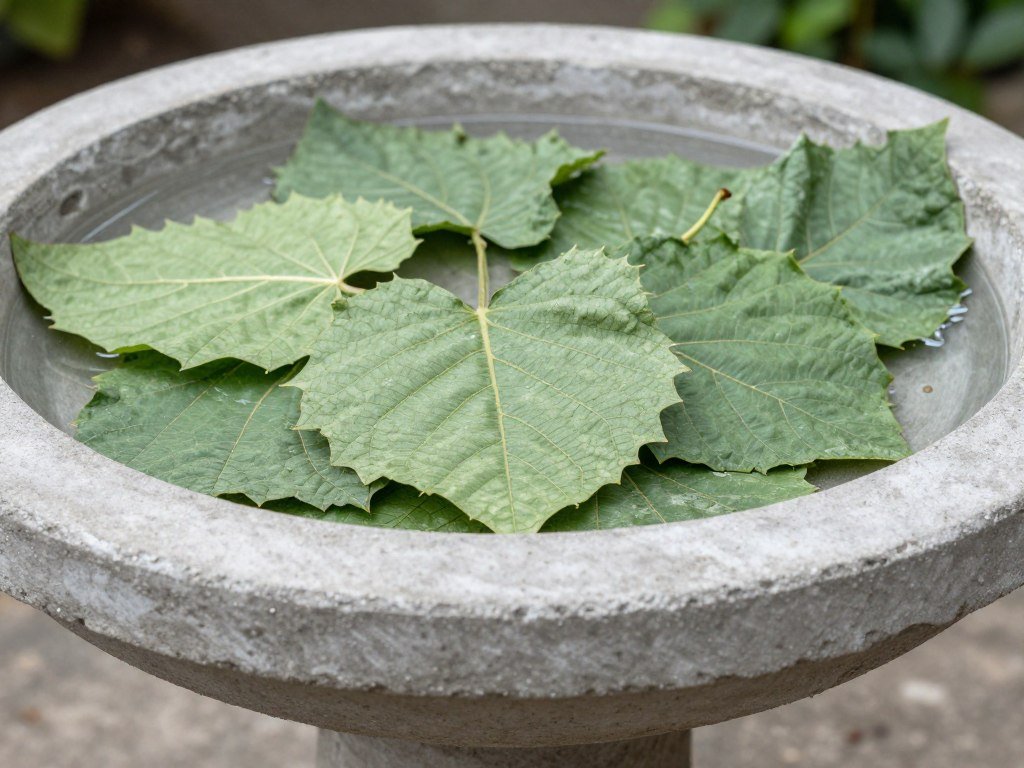
The rhubarb leaf concrete birdbath remains one of the most popular DIY projects. Large leaves create natural molds with beautiful texture. This design requires minimal materials and produces stunning results.
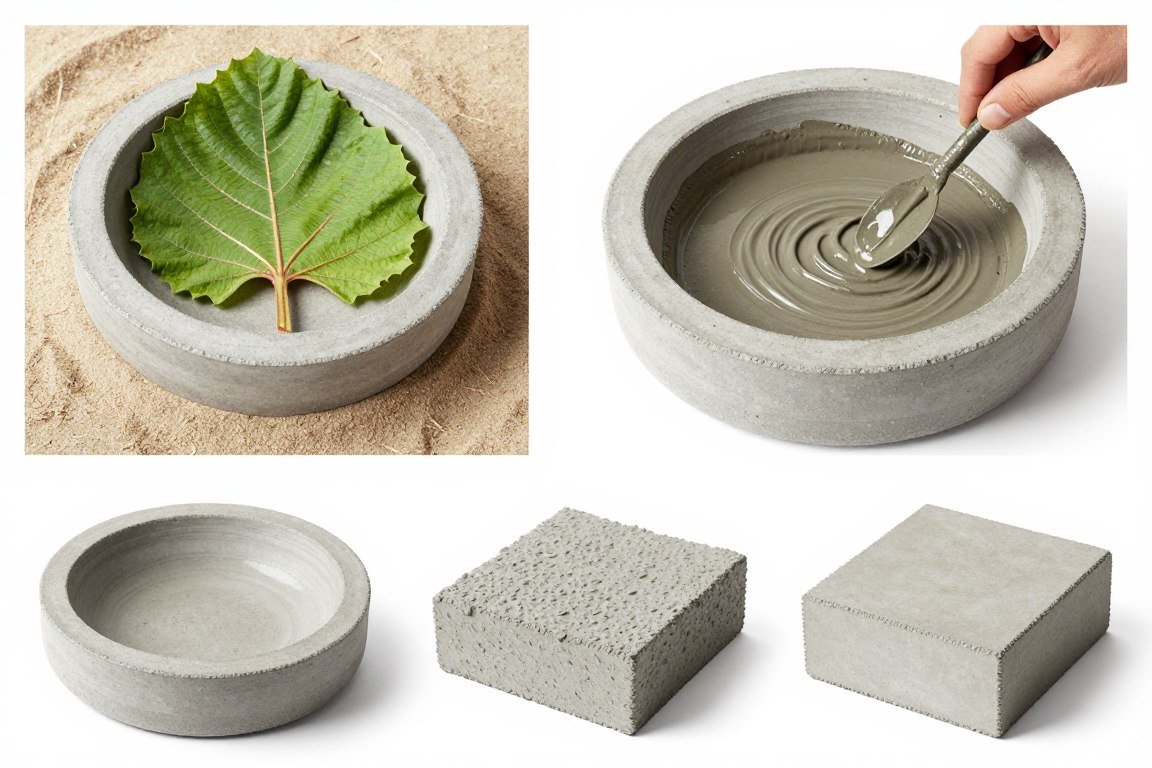
Start by selecting a large rhubarb or hosta leaf from your garden. Build a sand pile to support the leaf during concrete curing. Mix your concrete to a thick, workable consistency for best results.
Materials for Leaf Birdbath
- Portland cement or concrete mix (10-15 pounds)
- Large rhubarb or hosta leaf
- Sandbox sand for mold support
- Concrete sealer for weather protection
- Plastic sheeting to cover during curing
- Rubber gloves and safety glasses
Construction Steps
Create a sand mound slightly larger than your leaf. Place the leaf face-down on the sand pile. This positioning captures the natural vein texture on the finished surface.
Mix concrete according to package directions, aiming for peanut butter consistency. Spread concrete evenly over the leaf, working from center to edges. Build up thickness to about one inch at the center and three-quarters inch at edges.
Cover the project with plastic and let it cure for 48 hours. Concrete gains strength during this time. Remove the leaf carefully after curing completes. The natural texture remains beautifully preserved in the concrete.
Durability Enhancement
Add fiber reinforcement to your concrete mix for crack resistance. These tiny fibers distribute throughout the mixture and prevent stress fractures. Apply two coats of concrete sealer after the bath fully cures.
Place your leaf birdbath on a stable base to prevent tipping. A flat rock or concrete pedestal works perfectly. Make sure the bottom surface stays level to keep water from pooling unevenly.
Stacked Stone Pedestal Design
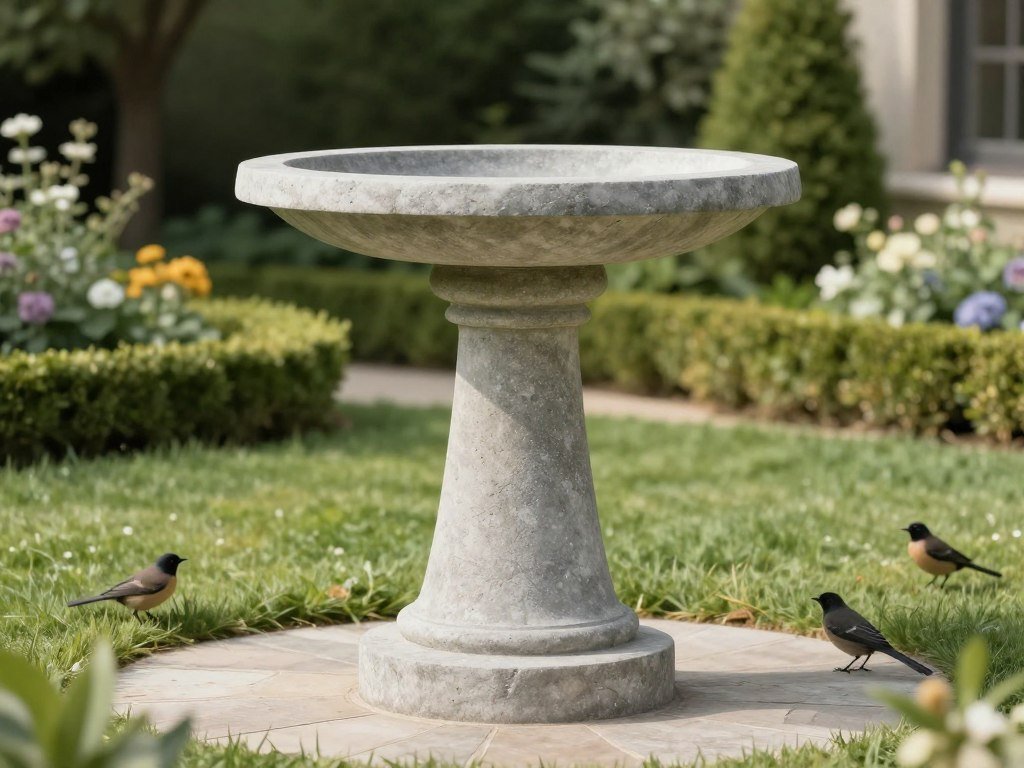
A pedestal birdbath adds vertical interest to any garden space. This design combines a concrete bowl with a sturdy base column. The elevated position gives birds better visibility of potential predators.
This project requires more time than simpler designs but delivers professional results. The pedestal stands between two and three feet tall. Birds prefer this height for both safety and accessibility.
Creating the Bowl Component
Use two nested plastic bowls as your mold. The outer bowl should measure 16-18 inches in diameter. Choose an inner bowl about two inches smaller to create proper wall thickness.
Coat both bowls with cooking spray for easy removal. Pour concrete between the bowls, filling to your desired depth. Tap the sides gently to release air bubbles trapped in the mix.
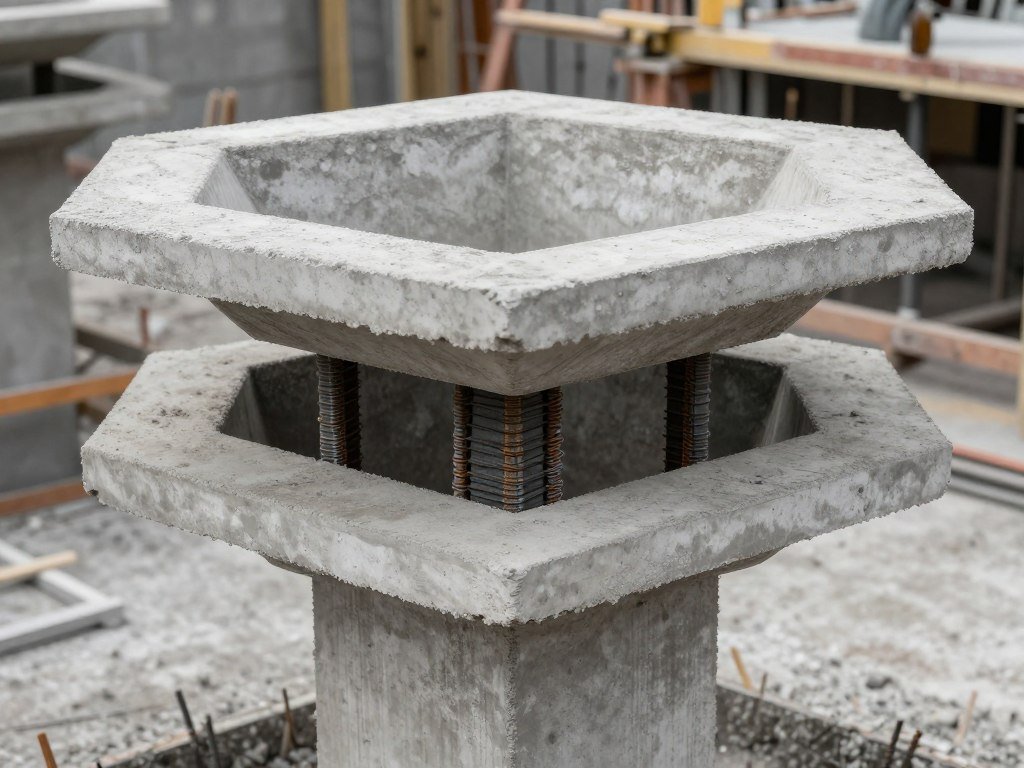
Insert three pieces of rebar or thick wire into the wet concrete at the bowl center. These will anchor into the pedestal top. Let the bowl cure for three days before removing the molds.

Building the Pedestal Base
Form the pedestal using a concrete tube form or PVC pipe. An eight-inch diameter works well for stability. Cut the tube to your desired height, typically 24-30 inches.
Create a footer by pouring concrete into a larger base mold first. Insert the tube form into the wet footer concrete. This provides a stable foundation that won’t tip over.
Fill the tube with concrete, using rebar for internal reinforcement. The wire or rebar from the bowl will insert into the wet pedestal top. This creates a strong mechanical bond between components.
Mosaic-Decorated Concrete Bath

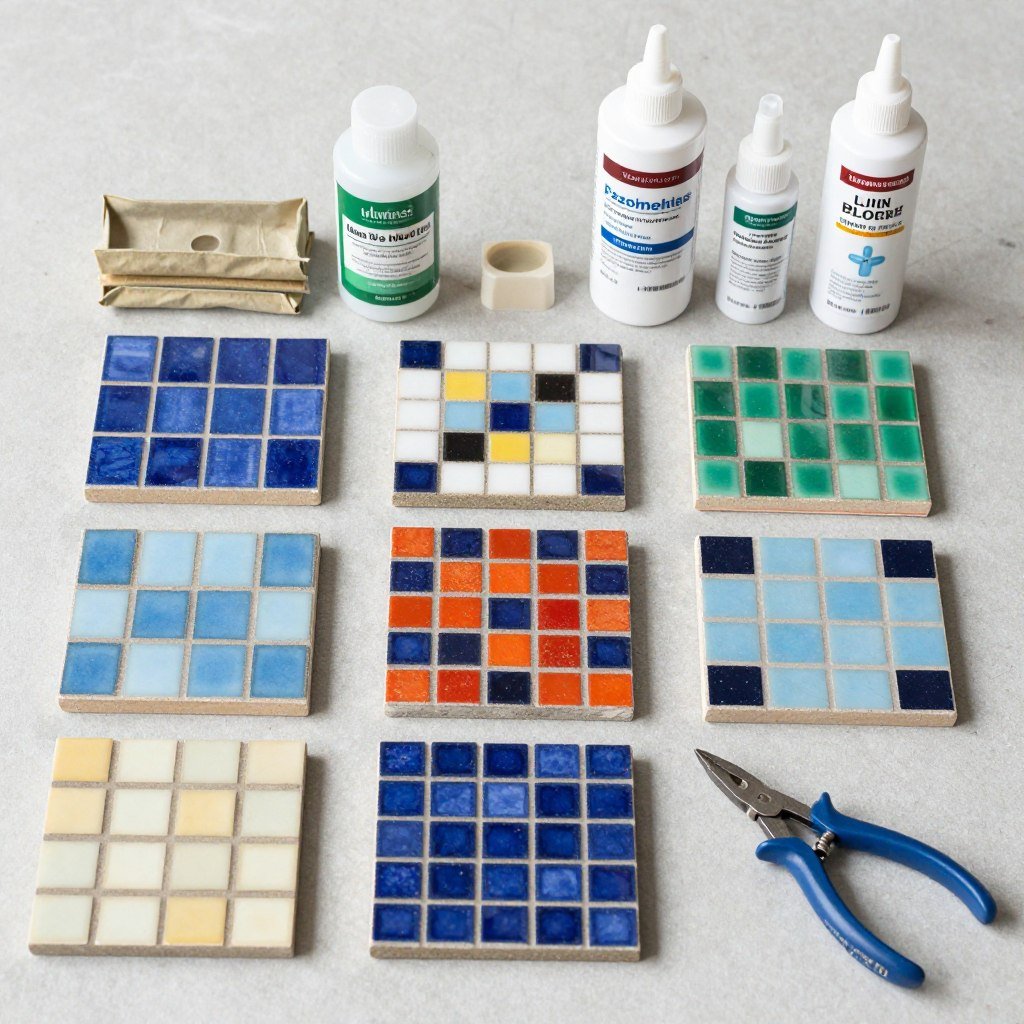
Mosaic tiles transform a basic concrete birdbath into garden art. This technique allows unlimited creative expression through color and pattern. The tile surface also provides texture that birds find easier to grip.
Start with a plain concrete bowl made using the nested-bowl method. Let it cure completely before beginning tile work. This typically takes seven days for full strength development.
Tile Selection and Preparation
Choose frost-proof tiles rated for outdoor use. Glass mosaic tiles work beautifully and resist weather damage. Broken ceramic pieces also create interesting patterns at lower cost.
Plan your design on paper before starting. Simple geometric patterns work best for beginners. Arrange tiles in a test layout to visualize the final appearance.
Materials Needed
- Cured concrete bowl
- Outdoor-rated mosaic tiles
- Thin-set mortar
- Tile grout (sanded or unsanded)
- Grout sealer
- Tile nippers for cutting
Application Process
Apply thin-set mortar to small sections at a time. Press tiles firmly into the mortar bed. Use consistent spacing between pieces for professional results.
Work from the center bottom outward and upward. This prevents accidentally disturbing completed sections. Allow the mortar to cure for 24 hours before grouting.
Mix grout to toothpaste consistency and spread over the entire surface. Push grout into all gaps between tiles. Wipe away excess with a damp sponge after 15 minutes.
Let grout cure for three days, then apply grout sealer. This prevents water penetration and staining. Your mosaic bird bath will resist freeze-thaw damage much better with proper sealing.
Premium Concrete Sealer
Protect your bird bath from weather damage with a penetrating concrete sealer. This product prevents water absorption, reduces cracking, and extends the life of your project by years. Apply after full curing for maximum durability.
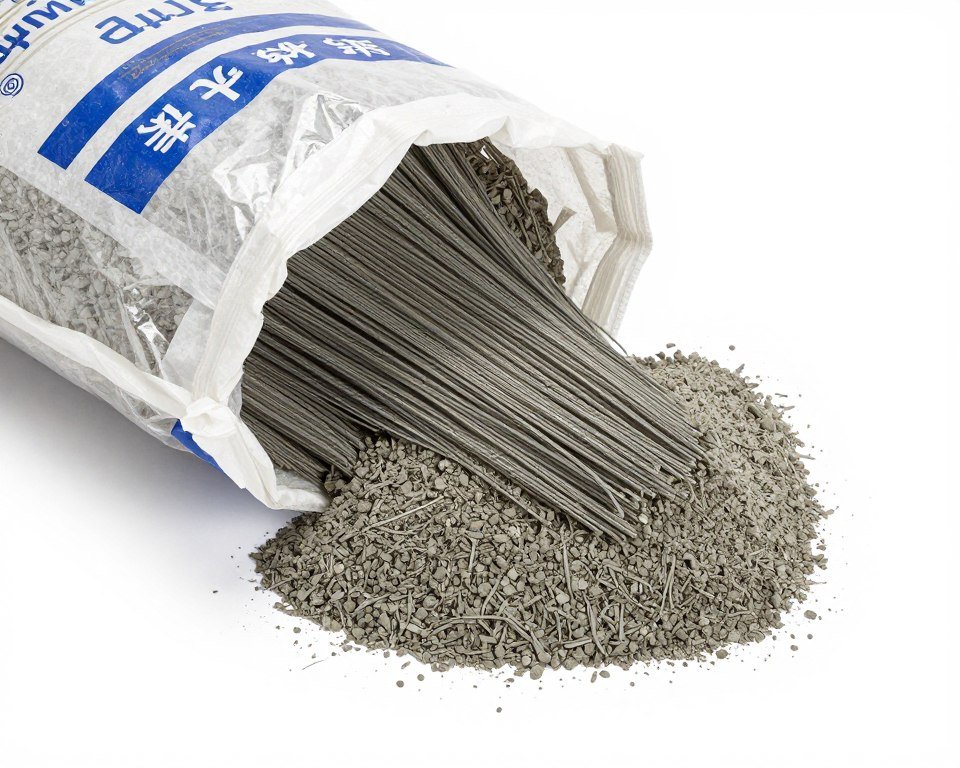
Fiber Reinforcement
Add fiber reinforcement to your concrete mix to prevent hairline cracks and increase impact resistance. These synthetic fibers distribute throughout the mix and provide internal structure. Essential for bird baths exposed to freeze-thaw cycles.
Quality Concrete Mix
Start with a quality concrete mix designed for outdoor use. Look for formulas with built-in plasticizers that improve workability and reduce cracking. A good mix makes the difference between a project that lasts years versus one that fails quickly.
Hypertufa Lightweight Birdbath
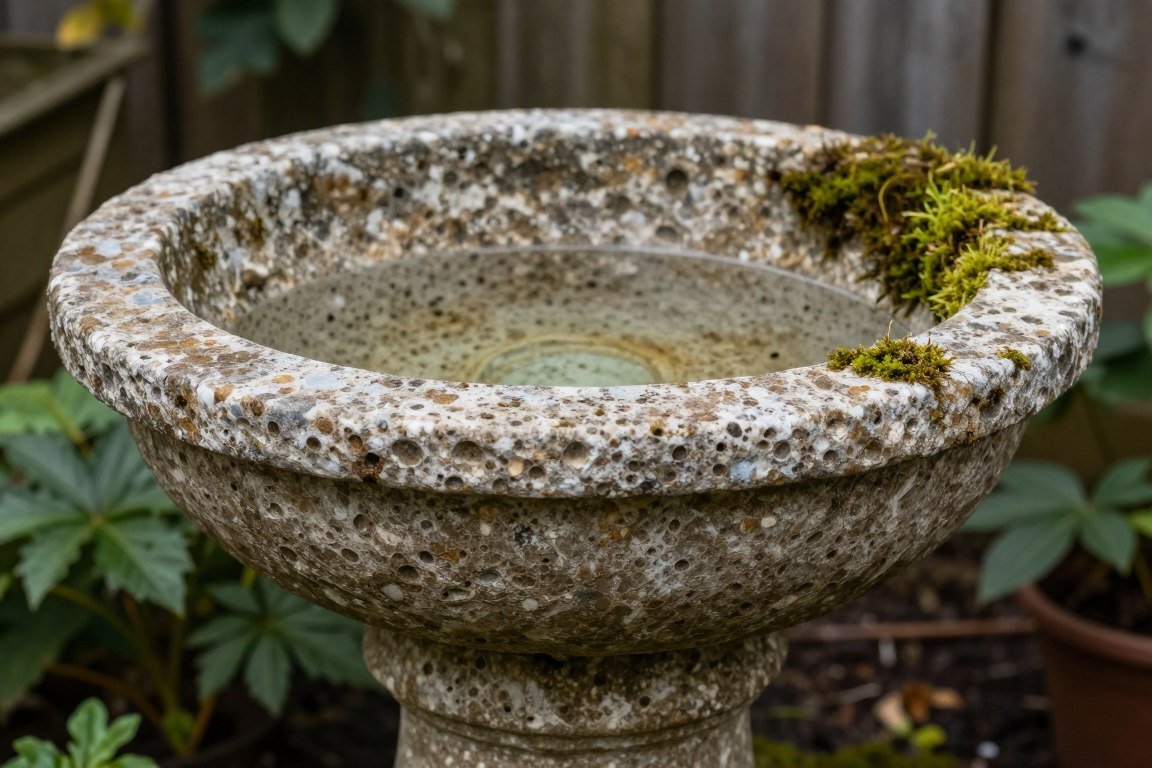
Hypertufa creates lightweight concrete alternatives using peat moss and perlite. This mixture weighs considerably less than standard concrete. The porous texture also develops a natural patina over time.
Traditional hypertufa recipes combine Portland cement, peat moss, and perlite in equal parts. Some makers add sand for additional strength. The resulting material looks like natural tufa stone.
Mixing Hypertufa Recipe
Combine three parts peat moss, three parts perlite, and three parts Portland cement. Mix dry ingredients thoroughly before adding water. The peat moss must be finely ground for best results.
Add water gradually while mixing until the consistency resembles cottage cheese. Too much water weakens the final product. The mixture should hold together when squeezed but not be dripping wet.
Forming Techniques
Use cardboard boxes, plastic containers, or foam as molds. Line molds with plastic bags for easy removal. Press hypertufa firmly into all corners to eliminate air pockets.
Build wall thickness between one and two inches for adequate strength. Thinner sections may crack under stress. Thicker walls add unnecessary weight without improving durability.

Cover the mold with plastic and let cure for at least five days. Hypertufa cures more slowly than regular concrete. Remove from molds carefully and allow another week of curing before use.
Aging and Finishing
Brush the surface with a wire brush to expose aggregate. This creates an aged, weathered appearance immediately. The porous nature encourages moss and lichen growth over time.
Hypertufa bird baths benefit from multiple water rinses before use. This removes excess alkalinity that can harm birds. Fill and dump the bath several times over a few days.
Stamped Texture Basin

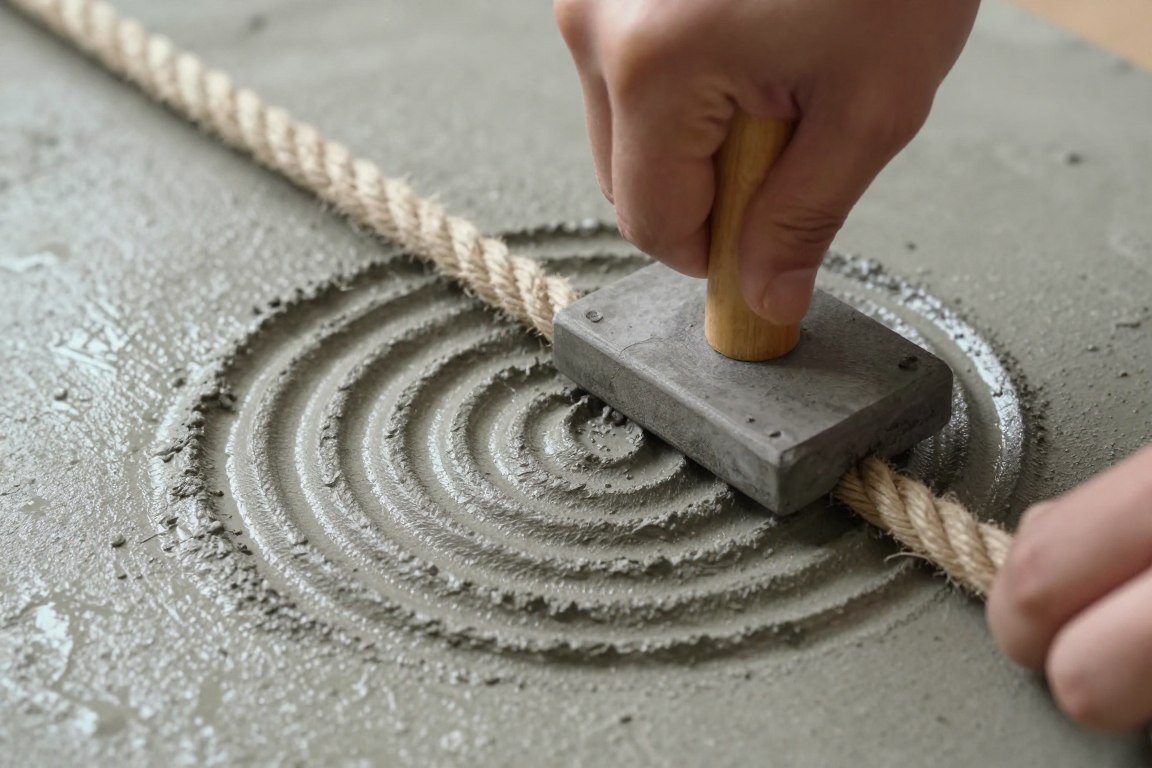
Stamped textures add visual interest without complex tile work. Press objects into wet concrete to create permanent impressions. This technique works with leaves, rope, fabric, or commercial stamps.
The stamping process requires quick work before concrete sets. Prepare all materials before mixing your concrete. Have your stamps or texture items ready within easy reach.
Texture Options
Natural items like rope create organic patterns. Coil rope in spiral patterns for nautical themes. Press thick rope into concrete edges for dimensional borders.
Lace fabric produces delicate, intricate patterns. Stretch fabric tight over the surface and press firmly. The concrete captures even fine thread details when properly applied.
Commercial concrete stamps offer consistent, repeatable patterns. Stone and brick textures work particularly well. These stamps cost more but provide professional results every time.
Stamping Method
Pour and smooth concrete in your mold first. Let it set for 30-60 minutes until surface water disappears. The concrete should be firm enough to hold an impression but not fully hardened.
Press your texture items firmly into the surface. Apply even pressure across the entire area. Rock stamps gently to ensure complete contact with the concrete.
Leave stamps in place for several hours as concrete continues curing. Remove carefully to avoid damaging edges. Any minor imperfections add to the handmade character.
Multi-Level Cascading Design

Cascading bird baths create moving water that attracts more birds. Multiple levels provide bathing options for different bird sizes. The gentle water movement prevents mosquito breeding naturally.
This advanced project requires three bowls of graduated sizes. Each level needs proper support and drainage. Plan your structure carefully before beginning concrete work.
Bowl Sizing and Layout
Create three bowls measuring 18 inches, 14 inches, and 10 inches in diameter. Each tier should be three to four inches smaller than the one below. This creates visual balance and stability.
Form each bowl separately using the nested-container method. Add drainage holes in the upper two bowls for water flow. Position holes slightly off-center for better circulation.
Support Structure
Build a central pedestal to support all three tiers. Use concrete tube forms or stack circular molds. Each tier needs a platform at the correct height.
Reinforce the pedestal with rebar or metal pipe. The weight of water and birds creates significant stress. Internal reinforcement prevents tipping and structural failure over time.
Space tiers six to eight inches apart vertically. This allows adequate water fall without excessive splashing. Birds can easily move between levels at this spacing.
Water Circulation System
Install a small submersible pump in the bottom bowl. The pump lifts water to the top tier. Choose a pump rated for outdoor use and continuous operation.
Run tubing up through the center pedestal to the top bowl. Hide tubing inside the concrete structure during construction. Seal all penetrations to prevent leaks.
Add a layer of river rocks to the bottom bowl to hide the pump. This also creates a more natural appearance. Clean the pump filter monthly to maintain proper water flow.
Modern Geometric Bowl
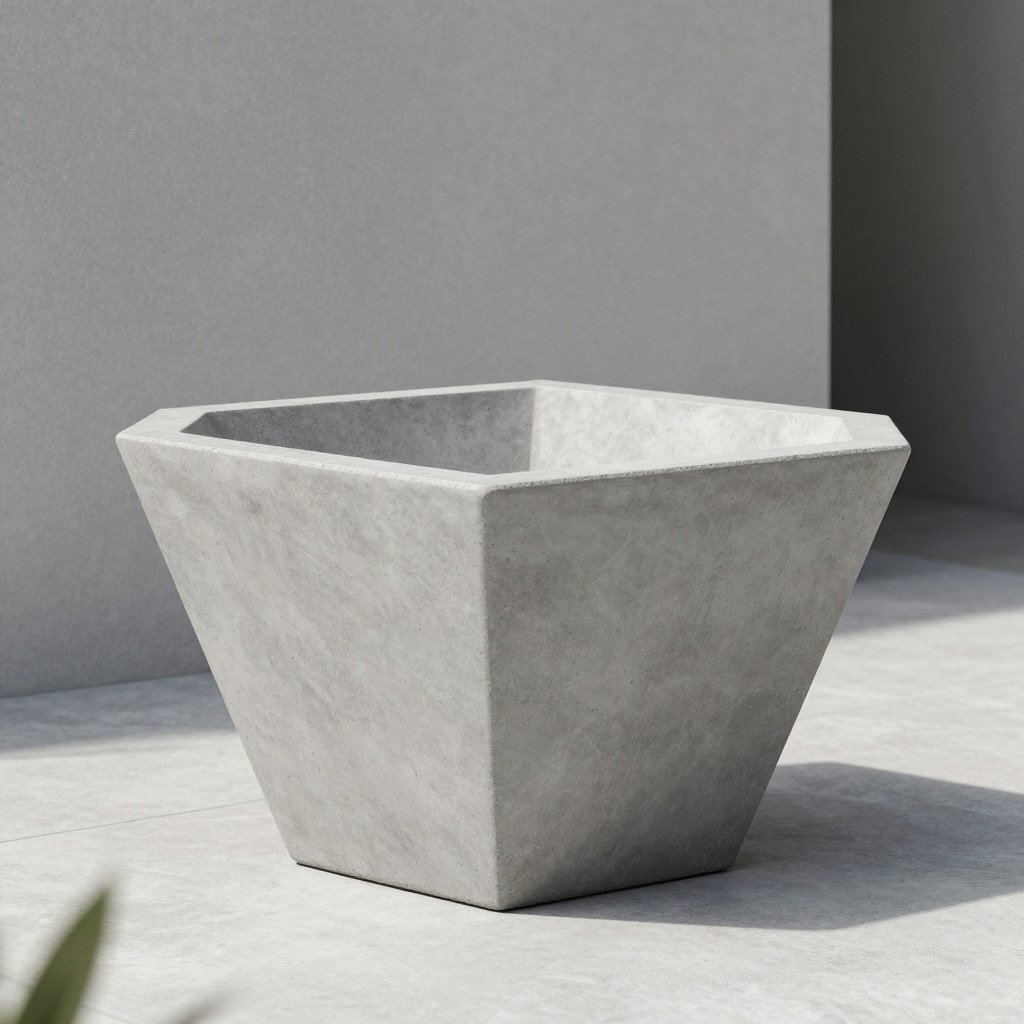
Geometric designs bring contemporary style to traditional bird baths. Angular molds create clean, modern lines. This approach appeals to minimalist garden aesthetics.
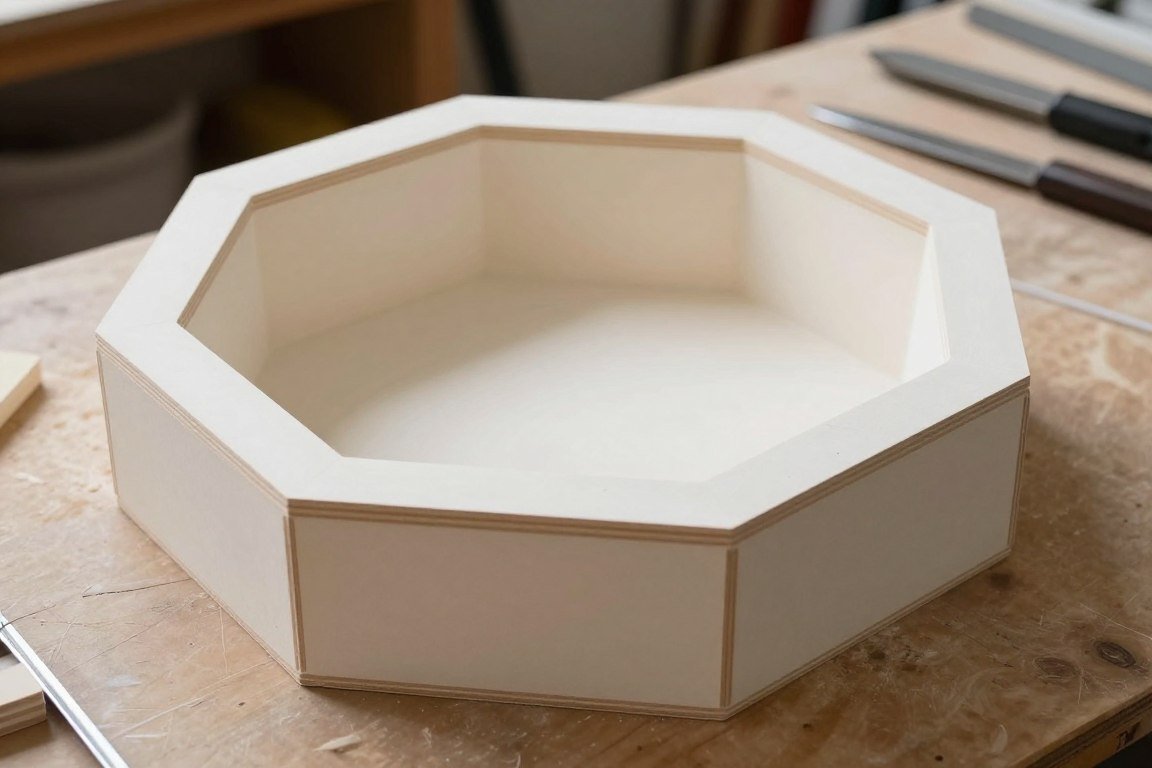
Build custom molds from wood or foam board for geometric shapes. Hexagonal and octagonal forms work particularly well. Square bases provide stable platforms for unusual bowl shapes.
Creating Angular Molds
Cut foam insulation board into geometric patterns. Hot glue or tape pieces together to form your mold. Foam board costs less than wood and is easier to cut.
Line foam molds with plastic sheeting for smooth surfaces. Secure plastic with tape, eliminating wrinkles that transfer to concrete. Smooth surfaces give the most professional appearance.
Wood molds offer reusability for multiple projects. Use melamine-coated boards that release concrete easily. Seal joints with caulk to prevent leakage.
Concrete Finishing
Smooth geometric surfaces benefit from trowel finishing. Work the surface until it becomes glass-smooth. This takes practice but creates striking results.
Consider adding concrete dye for bold color statements. Mix dye into wet concrete according to package directions. Black, charcoal, and terra cotta create sophisticated modern looks.
Expose aggregate by washing away surface cement before full cure. Spray water and brush lightly after several hours. This reveals sand and small stones for textured interest.
Embedded Stone Design
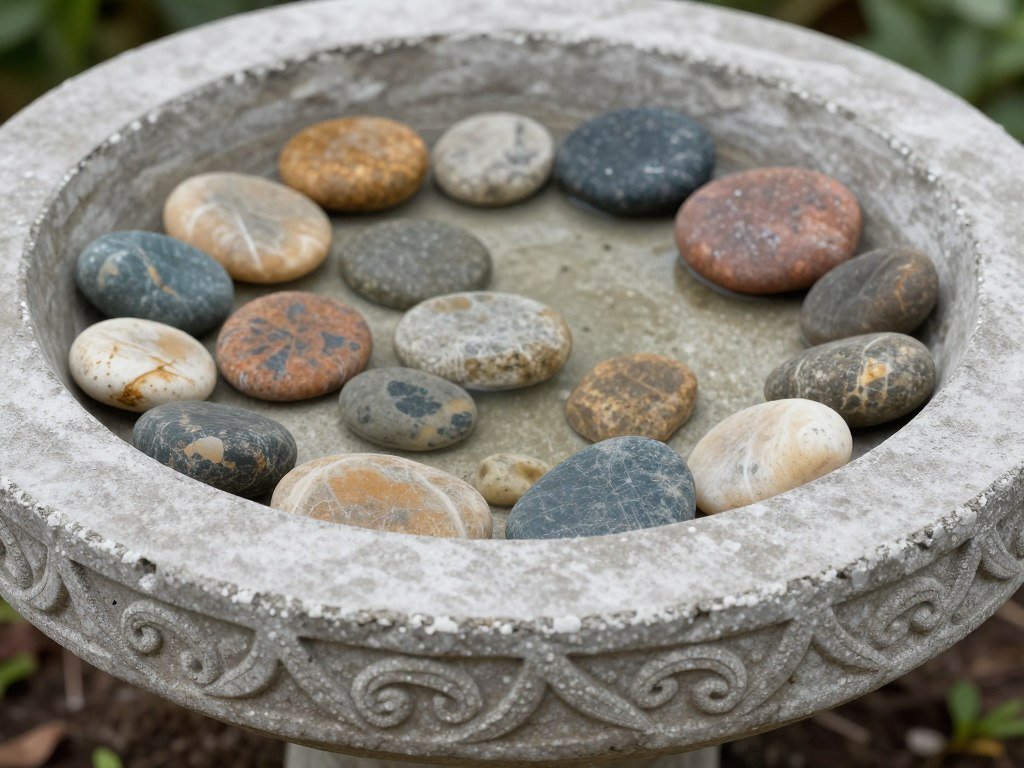
Embedding stones into concrete creates beautiful, durable surfaces. River rocks, colored glass, or semi-precious stones work well. This technique combines artistry with function.
Collect stones before starting your project. Choose flat-backed stones that sit securely in concrete. Round stones may not anchor properly and can fall out over time.
Stone Selection and Placement
Select stones that complement your garden colors. Blues and greens evoke water and nature. Earth tones blend with most landscape designs.
Sort stones by size and color before beginning. Plan your pattern or design on paper first. Random placement can look busy rather than artistic.
Larger stones work best for visible impact. Pieces smaller than a half-inch may disappear into concrete texture. Mix sizes for visual interest while maintaining clear patterns.
Embedding Technique
Pour concrete into your mold and smooth the surface. Let it set for one to two hours until slightly firm. The concrete should support stone weight without stones sinking completely.
Press stones into the surface firmly but not too deep. Leave at least half the stone height exposed. Stones set too deep may be obscured by concrete laitance.
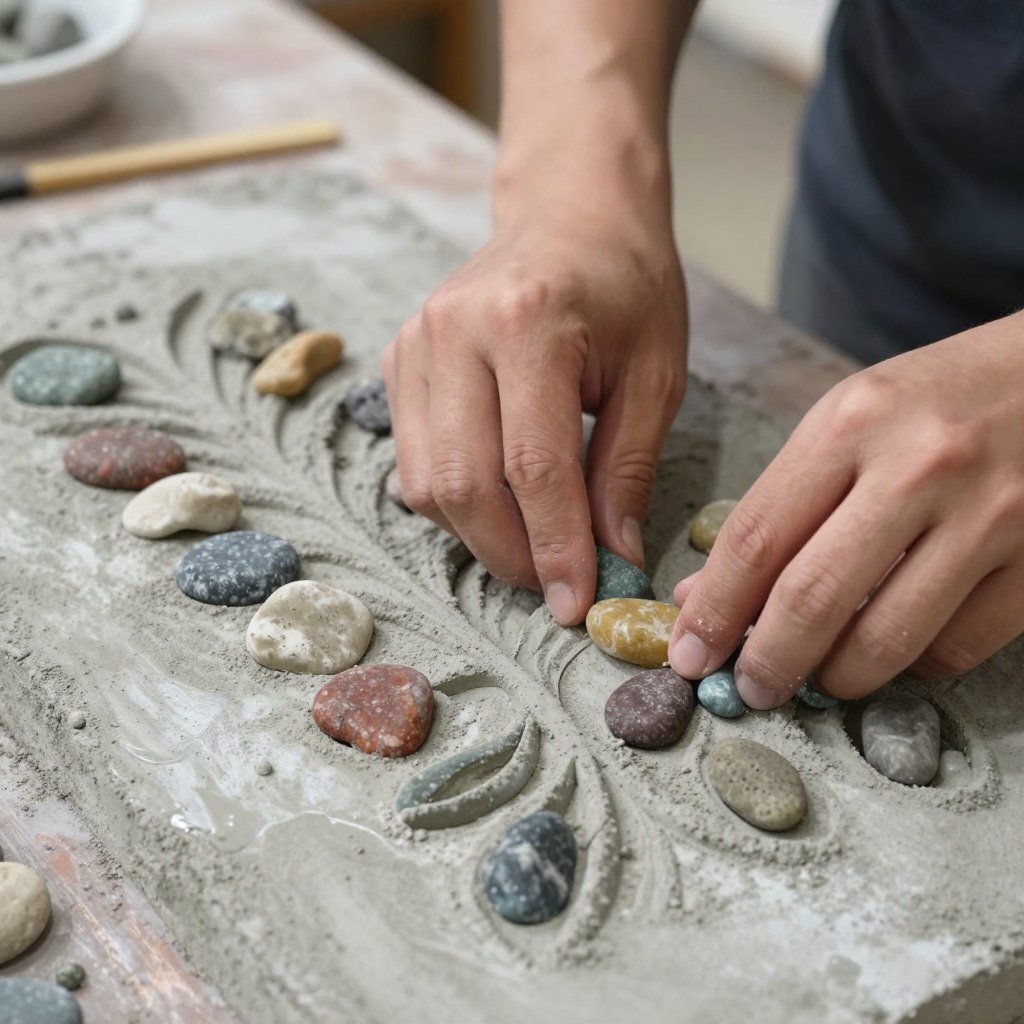
As concrete cures, brush the surface gently to expose more stone. Use a soft brush and light water spray. This removes cement film while stones remain secure.
Seal the entire surface after full curing completes. Sealer enhances stone colors and protects the concrete. Reapply sealer annually for continued protection and vibrant colors.
Recycled Container Conversion

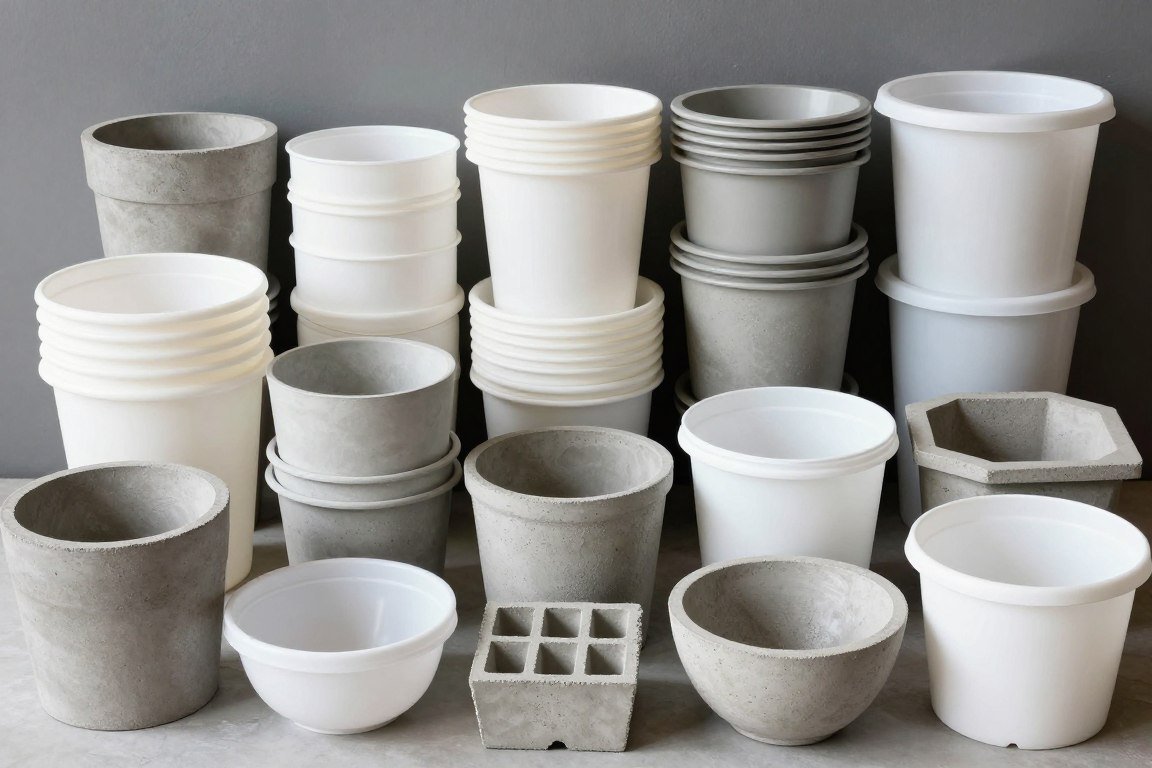
Repurpose household containers as molds for unique bird baths. Mixing bowls, plastic planters, and storage containers work perfectly. This eco-friendly approach costs almost nothing.
Search your recycling bin for interesting shapes and sizes. Square storage containers create modern geometric baths. Round mixing bowls produce classic shapes.
Container Preparation
Clean containers thoroughly before use. Remove all labels and sticky residue. Rough surfaces inside containers transfer texture to your concrete.
Coat containers with cooking spray or petroleum jelly. This acts as a release agent. Concrete releases much easier from coated surfaces.
For containers you want to keep, use plastic bag liners. Press bags smooth against container walls. Remove concrete and bag together, preserving your container for future use.
Creative Combinations
Combine different container sizes for stepped designs. Stack smaller containers on larger bases. This creates visual interest without complex construction.
Use textured containers for instant surface patterns. Woven baskets lined with plastic create beautiful imprints. The weave pattern appears raised on finished concrete.
Add decorative elements before concrete sets completely. Press shells, coins, or ceramic pieces into surface. These personal touches make each bath truly unique.
Reinforced Winter-Hardy Bath

Winter conditions challenge concrete durability through freeze-thaw cycles. Proper reinforcement and materials create bird baths that survive harsh winters. This design prioritizes longevity over quick construction.
Use air-entrained concrete mix specifically formulated for freeze resistance. Tiny air bubbles provide expansion space when water freezes. This prevents cracking from ice formation inside the concrete.
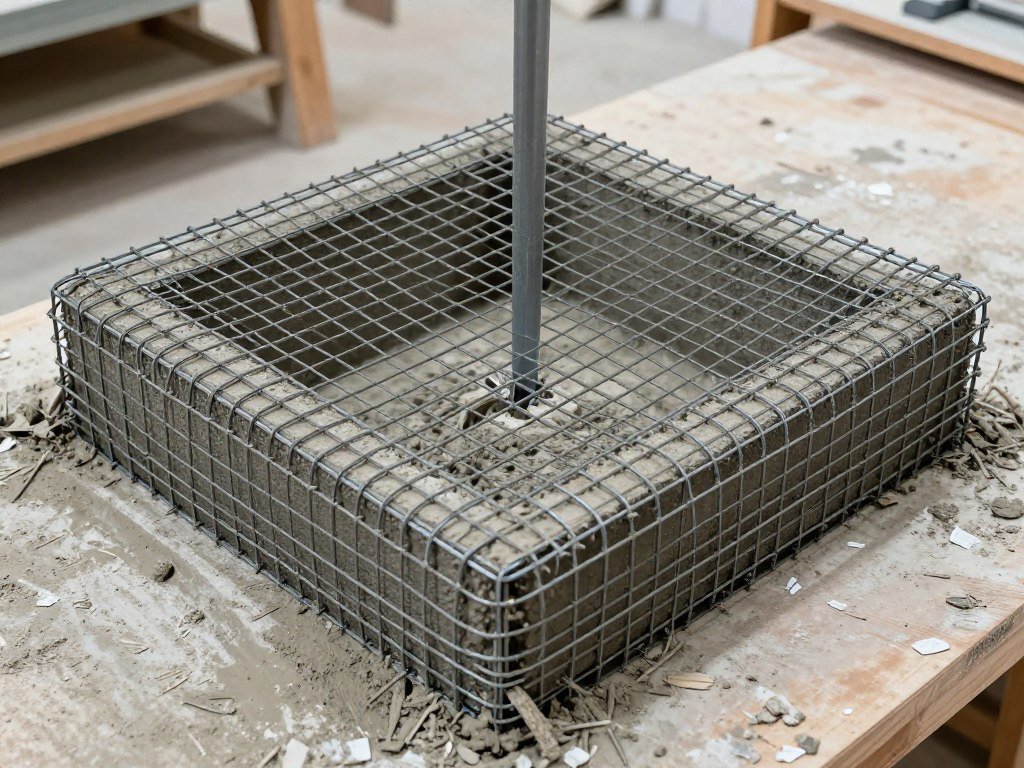
Internal Reinforcement
Add wire mesh to the center of concrete thickness. Cut hardware cloth or chicken wire to fit your mold shape. Position mesh so concrete surrounds it completely on all sides.
Fiber reinforcement supplements wire mesh for crack resistance. Mix fibers into concrete according to package directions. The combination of wire and fiber provides maximum strength.
Increase wall thickness to at least one and a half inches. Thicker walls better withstand freeze-thaw stress. The extra concrete also improves overall weight and stability.
Mix Enhancements
Add concrete plasticizer to improve workability without extra water. Less water means stronger concrete with better freeze resistance. Follow manufacturer’s recommended dosage carefully.
Consider using polymer-modified concrete mix for extreme durability. These specialty mixes cost more but offer superior weather resistance. They’re worth the investment in harsh climate zones.
Curing and Sealing
Allow extended curing time for winter-hardy baths. Keep concrete moist for seven full days. This ensures complete hydration for maximum strength development.
Apply penetrating silane/siloxane sealer after curing completes. This type penetrates deeply rather than coating the surface. It provides superior freeze-thaw protection compared to surface sealers.
Reapply sealer every two years in cold climates. Check for any hairline cracks before winter. Fill small cracks with concrete repair caulk to prevent water penetration.
Shallow Ground-Level Basin
Ground-level bird baths accommodate birds uncomfortable with elevated baths. Many ground-feeding species prefer this design. The shallow, wide basin serves the largest variety of bird sizes.
Create this bath using a large, shallow form. Pizza pans, plant saucers, and shallow storage lids work well. The basin should be wide but only two to three inches deep.
Proper Depth Considerations
Birds need varying water depths for safe bathing. Create a graduated basin with shallow edges. The center can reach two inches deep while edges stay under one inch.
Form the gradient by tilting your mold slightly during pouring. Alternatively, build up concrete on one side before it sets. A gentle slope feels natural to bathing birds.
Add texture to the bottom surface for secure footing. Press coarse sand into wet concrete. Birds grip textured surfaces better than smooth finishes.
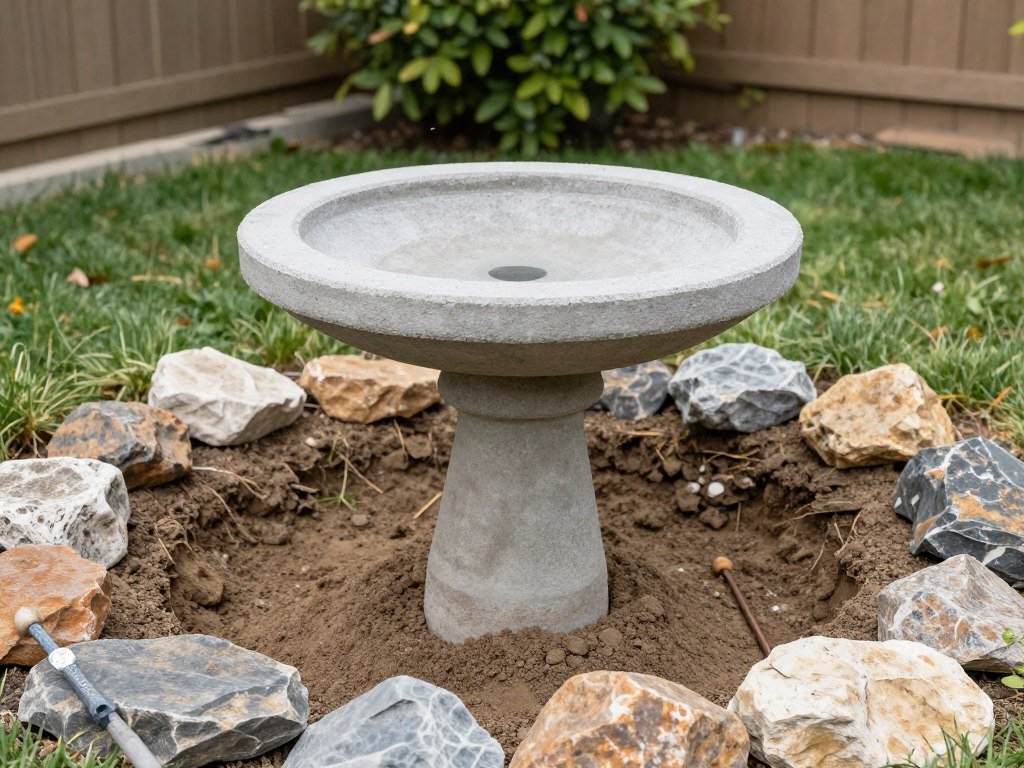
Installation Tips
Set ground-level baths in a slight depression for stability. Dig out an area matching your basin size. Add a sand base to create a level foundation.
Surround the bath with flat rocks or gravel for drainage. Water splashed during bathing needs somewhere to go. Good drainage prevents muddy areas around the bath.
Place the bath away from dense shrubs where predators hide. Birds need clear sightlines while bathing. Position near trees or bushes for quick escape routes, but not directly underneath.
Consider making multiple shallow basins for different garden areas. Ground-level baths work particularly well in shaded spots. They provide cool bathing options during hot summer months.
Essential Durability and Maintenance Tips

Proper maintenance extends bird bath life by many years. Regular care prevents damage and keeps water fresh for birds. Follow these essential practices for long-lasting results.
Seasonal Care Requirements
Clean your concrete birdbath weekly during active seasons. Scrub with a stiff brush and fresh water. Avoid harsh chemicals that leave residues harmful to birds.
Change water every two to three days in summer. Stagnant water breeds mosquitoes and harmful bacteria. Fresh water attracts more birds and stays cleaner longer.
Remove the bird bath before first frost in cold climates. Store indoors if possible. If you must leave it outside, empty completely and flip upside down.
Crack Prevention and Repair
Inspect for hairline cracks each spring and fall. Small cracks expand through freeze-thaw cycles if ignored. Early repair prevents major damage later.
Clean cracks thoroughly before filling. Use a wire brush to remove loose material. Rinse well and let dry completely before applying concrete repair compound.
Apply repair compound according to manufacturer directions. Overfill slightly and smooth level after curing. Seal repaired areas with concrete sealer for protection.
Regular Maintenance Checklist
- Weekly cleaning during active seasons
- Water changes every 2-3 days
- Monthly sealer inspection
- Seasonal crack checks
- Annual resealing in harsh climates
- Winter storage or protection
Signs of Needed Repairs
- Visible cracks or chips
- Water draining faster than normal
- Surface scaling or flaking
- Wobbling or instability
- Staining that won’t clean
- Moss or algae buildup
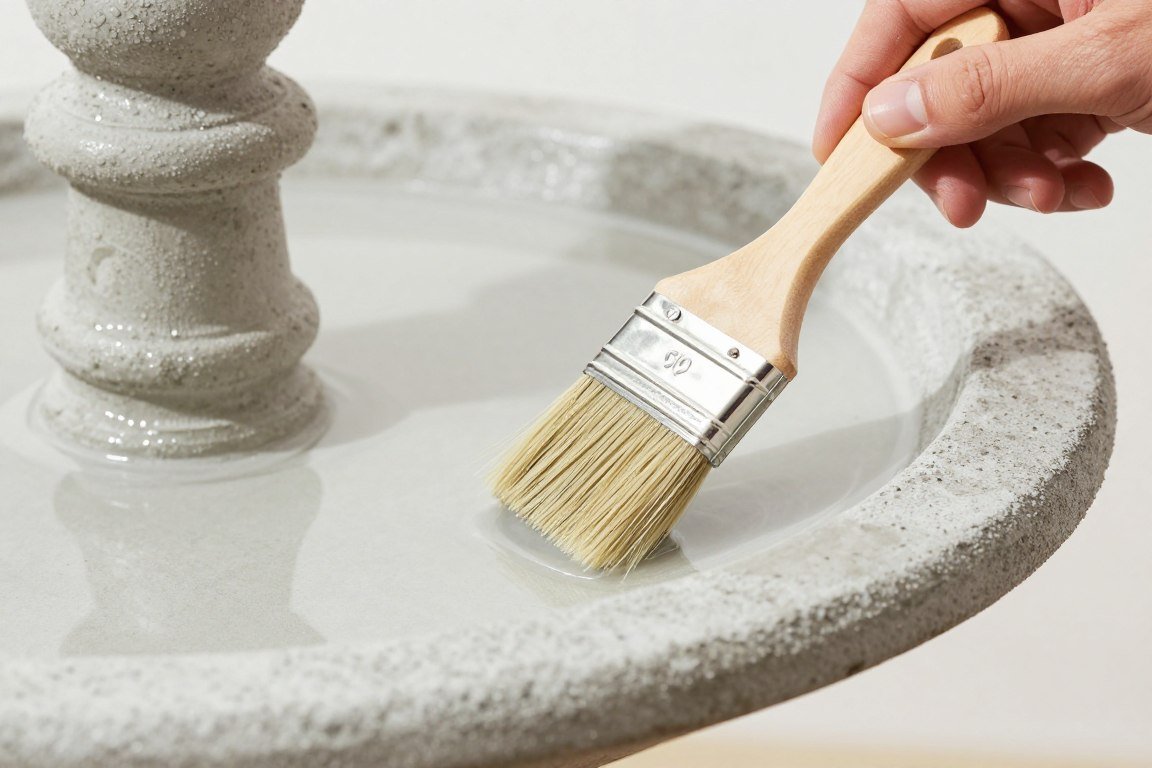
Sealer Reapplication
Reapply concrete sealer every one to two years. Climate and exposure determine frequency. Harsh winters or intense sun require more frequent sealing.
Clean the bath thoroughly before sealing. Remove all algae, mineral deposits, and dirt. The surface must be completely dry before sealer application.
Apply sealer in thin, even coats with a brush or sprayer. Multiple thin coats work better than one thick application. Allow proper drying time between coats.
Algae and Mineral Control
Scrub away green algae growth promptly. Algae indicates water staying too long. Increase water change frequency during warm weather.
Remove white mineral deposits with vinegar solution. Mix equal parts white vinegar and water. Scrub deposits gently and rinse thoroughly afterward.
Add a small water fountain or bubbler to prevent stagnation. Moving water resists algae growth naturally. Battery-operated options require no electrical installation.