
Your outdoor space deserves to be just as inviting as your indoor living areas. Many homeowners delay patio projects because they assume quality flooring requires a significant investment. The truth is you can create a stunning patio floor without emptying your wallet.
Budget-friendly patio flooring options have improved dramatically in recent years. Modern materials offer durability and style at accessible price points. Whether you’re starting from scratch or updating an existing surface, affordable solutions exist for every skill level and aesthetic preference.
This comprehensive guide explores twenty inexpensive patio floor ideas that deliver impressive results. You’ll discover options ranging from simple DIY projects to professional installations that won’t break your budget. Each idea includes practical information about costs, installation difficulty, and maintenance requirements to help you make an informed decision.
Table of Contents
1. Painted Concrete: The Budget Champion
Painted concrete offers the most affordable way to refresh an existing patio surface. This simple solution transforms dull gray concrete into a vibrant outdoor feature. The material cost remains minimal, making it perfect for tight budgets.
Cost and Installation Details
Expect to spend between $50 and $200 for a standard patio. This includes concrete cleaner, primer, paint, and sealer. The installation difficulty rates as beginner-friendly for anyone comfortable with basic painting tasks.
Surface preparation takes the most time. You’ll need to clean thoroughly, repair cracks, and apply primer. The actual painting process moves quickly with proper tools. Most homeowners complete the project in a weekend.
Design Possibilities
Concrete paint opens up creative opportunities. You can create patterns using stencils or painter’s tape. Popular designs include faux tile patterns, geometric shapes, or simple color blocking. Multiple colors add visual interest without increasing costs significantly.
Advantages
- Extremely low material cost
- Quick weekend project
- Endless color options
- Works on existing concrete
- Easy to change later
Disadvantages
- Requires repainting every few years
- Can chip in high-traffic areas
- Surface must be in good condition
- Not suitable for severely damaged concrete
Maintenance Tip: Apply a fresh coat of sealer annually to protect your painted concrete from weather damage and extend the life of your finish. Clean the surface with a mild detergent and soft brush to avoid removing paint.
2. Pea Gravel: Natural and Versatile
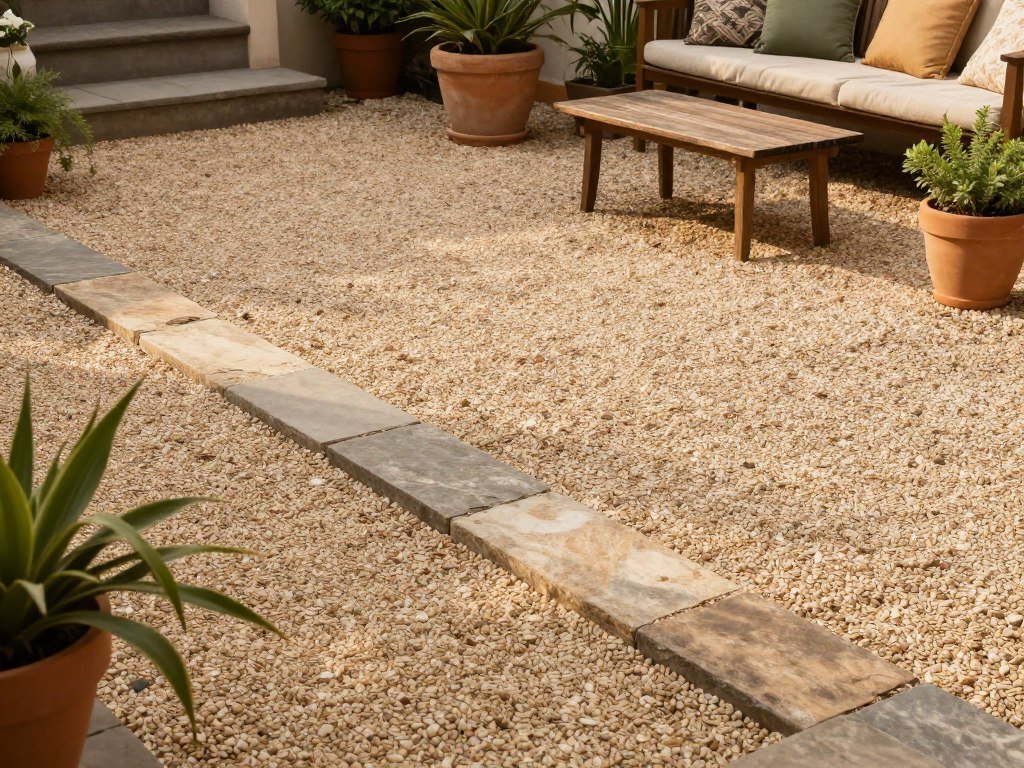
Pea gravel creates a casual, cottage-style atmosphere in your outdoor space. These small, rounded stones provide excellent drainage and a pleasant texture underfoot. The natural material complements various landscaping styles while keeping costs low.
Budget Breakdown
A pea gravel patio typically costs between $2 and $5 per square foot. This includes the gravel, landscape fabric, and edging materials. For a 10×10 foot patio, expect to spend $200 to $500 total.
Installation requires moderate skill but no special tools. You’ll need to excavate the area, install edging, lay landscape fabric, and spread the gravel. Most DIY enthusiasts complete this in a weekend with basic equipment.
Installation Steps
- Mark your patio area and remove grass or existing surface
- Excavate 4-6 inches deep for proper drainage base
- Install sturdy edging to contain the gravel
- Add landscape fabric to prevent weed growth
- Spread base layer of crushed stone for stability
- Pour and rake pea gravel to desired depth
- Compact the surface for better stability
Long-Term Considerations
Pea gravel requires occasional maintenance to stay attractive. Stones gradually spread beyond borders and need raking back into place. Weeds sometimes grow through despite fabric barriers. Plan to add fresh gravel every few years as some stones sink into the soil.
The loose surface makes furniture placement challenging. Consider adding stepping stones or pavers where you’ll place tables and chairs. This creates stable areas for outdoor living while maintaining the gravel aesthetic.
Climate Consideration: Pea gravel works exceptionally well in areas with heavy rainfall. The excellent drainage prevents puddles and keeps your outdoor area usable even after storms. In snowy climates, avoid this option as snow removal becomes difficult.
3. Concrete Pavers: Classic and Durable
Concrete pavers deliver a professional appearance at a fraction of natural stone costs. These manufactured units come in numerous shapes, sizes, and colors. The uniform dimensions make installation straightforward for DIY projects.
Standard concrete pavers cost between $3 and $6 per square foot installed. This price point makes them accessible for most budgets while providing decades of service. The installation difficulty falls in the moderate range, requiring patience and attention to detail rather than specialized skills.
Design Flexibility
Running Bond Pattern
The simplest layout mimics brick walls. Pavers offset by half create a classic look. This pattern works well for rectangular spaces and requires minimal cutting.
Herringbone Pattern
Angled pavers create visual interest and maximum stability. This traditional design suits high-traffic areas. The pattern requires more cutting but delivers stunning results.
Basket Weave Pattern
Pairs of pavers alternate direction for a woven appearance. This design adds texture without complexity. The pattern hides minor installation imperfections well.
Base Preparation Critical
Proper base construction determines long-term success with concrete pavers. Skip this step and expect shifting, settling, and uneven surfaces within months. The foundation matters more than the pavers themselves.
A standard base includes compacted gravel, leveling sand, and edge restraints. This three-layer system provides stability and drainage. Budget an additional $2 per square foot for base materials when calculating total project cost.

4. Deck Tiles: Instant Transformation
Deck tiles snap together over existing surfaces for the fastest patio upgrade available. These interlocking squares install without tools or adhesives. The modular design allows for easy removal and reconfiguration.
Quality deck tiles range from $4 to $12 per square foot depending on material. Composite options cost more but last longer than basic plastic versions. This flooring option works perfectly for renters since installation causes no permanent changes to the underlying surface.
Material Options
Wood composite deck tiles offer natural appearance with minimal maintenance. The material resists rot, insects, and weather damage. Most products include UV protection to prevent fading over time.
Plastic deck tiles provide the most affordable option. Modern designs mimic wood, stone, or tile convincingly. These lightweight squares work well for temporary installations or seasonal use.
Stone-look porcelain tiles deliver premium aesthetics at mid-range prices. The ceramic material handles freeze-thaw cycles better than natural stone. Installation remains simple despite the upscale appearance.
Installation Requirements
- Clean, level base surface required
- Concrete, wood, or compacted gravel acceptable
- No special tools needed for assembly
- Tiles snap or click together quickly
- Cuts possible with standard saw for edges
- Drainage gaps built into tile design
Surface Note: Deck tiles require a relatively smooth, level base. Uneven concrete or damaged surfaces may prevent proper interlocking. Consider leveling severely uneven areas before installation to ensure stability and prevent rocking tiles.
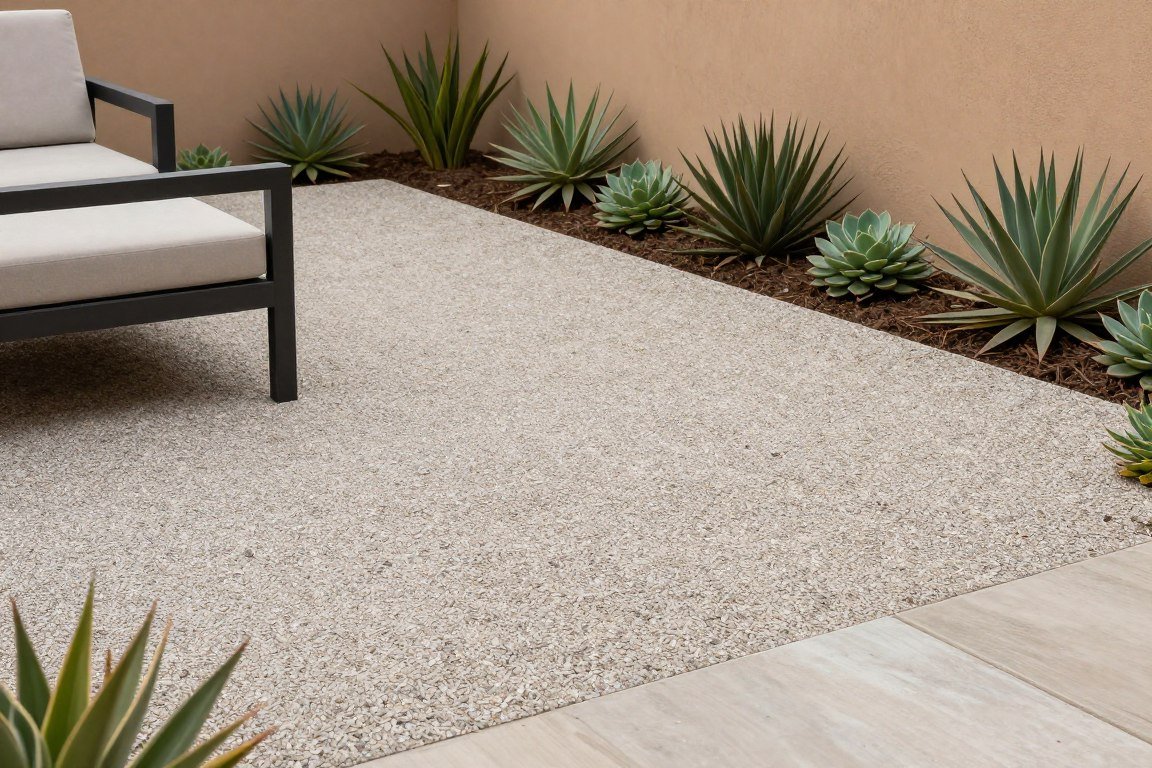
5. Crushed Stone: Industrial Charm
Crushed stone creates a stable, permeable patio surface with modern appeal. The angular stones compact tighter than rounded gravel, providing better stability for furniture and foot traffic. This material suits contemporary outdoor design aesthetics.
Expect to pay $1.50 to $4 per square foot for crushed stone installations. The cost varies based on stone type and delivery distance. Decomposed granite, crushed limestone, and bluestone screenings all work well for patio applications.
Compaction Is Key
Unlike pea gravel, crushed stone requires proper compaction to perform well. The angular edges lock together when compressed, creating a firm surface. Rent a plate compactor for best results, or plan to compact in layers by hand.
The compacted surface supports outdoor furniture without excessive sinking. Chairs and tables remain stable for comfortable outdoor living. This advantage makes crushed stone more functional than loose gravel options.
6. Stained Concrete: Sophisticated Finish
Concrete stain penetrates the surface to create permanent, fade-resistant color. This technique transforms plain concrete into elegant flooring with depth and variation. The chemical reaction produces unique patterns that resemble natural stone or aged materials.
Acid-based stains create earthy tones with variegated coloring. Water-based stains offer a broader color palette with more uniform results. Both options cost between $2 and $4 per square foot for materials, making this an economical upgrade for existing concrete patios.
Application Process
Surface preparation determines staining success. The concrete must be completely clean, with all sealers or coatings removed. Any residue prevents proper stain penetration and creates blotchy results.
Apply acid stains carefully with protective gear and proper ventilation. The chemical reaction takes several hours to develop full color. Neutralize the surface afterward and rinse thoroughly before sealing.
Water-based stains apply more like paint but still penetrate the concrete. These products work well for DIY projects since they’re safer to handle. The color develops immediately, allowing you to see results during application.
Design Techniques
Layer multiple stain colors for depth and complexity. Apply lighter shades first, then add darker accents. The translucent nature of stains allows colors to blend organically.
Create patterns using tape or stencils before staining. Geometric designs add visual interest to large concrete areas. Remove masking materials before the stain dries for clean lines.
Seal stained concrete to protect the finish and enhance color depth. Use a penetrating sealer for natural appearance or a topical sealer for added sheen. Reapply sealer every few years to maintain protection and appearance.
7. Brick Pavers: Timeless Appeal
Clay brick pavers bring warmth and traditional character to outdoor spaces. These classic materials age beautifully, developing richer color over time. Reclaimed or salvaged bricks offer budget-friendly options with instant vintage charm.
New brick pavers cost $5 to $10 per square foot installed. Reclaimed bricks from demolition sites or architectural salvage yards often sell for $0.50 to $2 per brick. The installation process mirrors concrete paver techniques, requiring a proper base and edge restraints.

Sourcing Affordable Bricks
Check local demolition sites for reclaimed brick opportunities. Many contractors dispose of perfectly usable bricks from renovation projects. You’ll need to clean these bricks, but the labor saves significant money compared to new materials.
Architectural salvage yards stock reclaimed building materials including bricks. Prices vary based on brick age, condition, and local demand. Visit regularly to find the best deals as inventory changes frequently.
Some brick manufacturers sell “seconds” at reduced prices. These bricks have minor cosmetic flaws but function perfectly for patio applications. The imperfections actually enhance the casual, informal appearance many homeowners prefer.
8. Outdoor Carpet: Soft Comfort
Outdoor carpet tiles provide comfortable, soft flooring for covered patios and screened porches. Modern materials resist mold, mildew, and fading from sunlight exposure. The cushioned surface feels pleasant underfoot compared to hard flooring options.
Quality outdoor carpet tiles cost $2 to $6 per square foot. Installation requires no special skills or tools. Most products feature peel-and-stick backing or interlocking edges for simple DIY installation over concrete or wood surfaces.
Benefits of Outdoor Carpet
- Soft, comfortable surface for bare feet
- Available in numerous colors and patterns
- Quick and easy installation process
- Provides sound absorption
- Individual tiles replaceable if damaged
- Works well in covered outdoor areas
Limitations
- Not suitable for fully exposed areas
- Requires covered or partially covered space
- Can trap moisture if not properly ventilated
- Shorter lifespan than hard surface options
- Regular cleaning needed to prevent staining
Choose carpet tiles designed specifically for outdoor use. Indoor carpet deteriorates quickly when exposed to moisture and temperature fluctuations. Outdoor-rated products include drainage backing and UV-resistant fibers for extended durability.
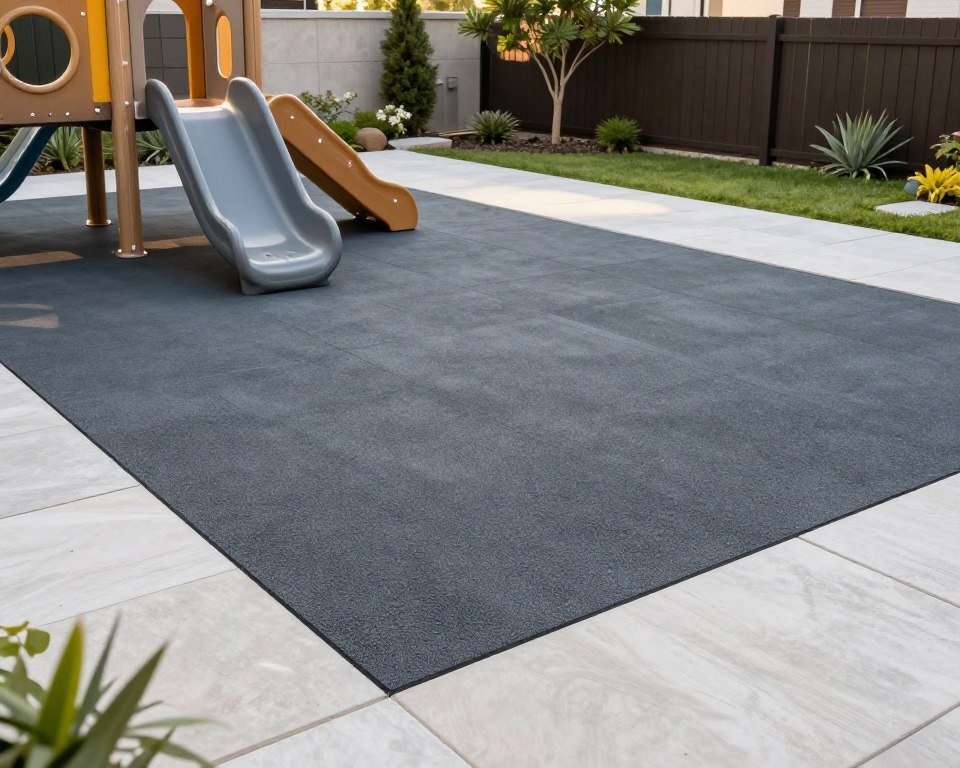
9. Rubber Pavers: Safe and Sustainable
Recycled rubber pavers offer eco-friendly flooring with excellent safety characteristics. The cushioned surface reduces impact from falls, making this option ideal for families with children. The material never needs sealing and resists cracking in freeze-thaw cycles.
Rubber paver costs range from $4 to $8 per square foot. These tiles install easily over concrete, compacted gravel, or even grass. The interlocking design requires no adhesives or special tools for installation.
Performance Advantages
Rubber pavers drain quickly after rain due to built-in drainage channels. The permeable design prevents puddles and slippery surfaces. This feature makes rubber an excellent choice for areas around pools or water features.
The material stays cooler than concrete or stone in direct sunlight. Dark-colored hard surfaces can become uncomfortably hot during summer months. Rubber remains walkable even in intense heat.
Rubber pavers resist mold and mildew growth naturally. The non-porous surface doesn’t absorb moisture where organisms thrive. Simple sweeping and occasional hosing maintain the attractive appearance without special cleaning products.
10. Flagstone: Natural Elegance
Flagstone creates organic, flowing patio designs with natural beauty. These irregular stone pieces fit together like puzzles, creating unique patterns impossible to replicate. The natural material suits both formal and casual outdoor living spaces.
Budget-friendly flagstone options include sandstone and limestone varieties. Expect to pay $8 to $15 per square foot for materials. Avoid expensive slate or bluestone if budget constraints matter. The installation difficulty rates as intermediate to advanced depending on your layout approach.
Installation Methods
Dry-Laid Flagstone
Place stones directly on a sand or gravel base without mortar. This approach costs less and allows for easier adjustments. The gaps between stones can be filled with sand, gravel, or ground cover plants for different aesthetic effects.
Dry-laid installation works well for DIY projects. You can work at your own pace and make changes easily. The method also allows for better drainage compared to mortared applications.
Mortared Flagstone
Set stones in mortar over a concrete base for maximum stability. This permanent installation costs more but prevents shifting over time. The mortared joints keep weeds from growing between stones.
Professional installation recommended for mortared flagstone. The technique requires experience to achieve proper adhesion and drainage. Mistakes in mortar application lead to cracking and stone movement.
Budget Tip: Purchase flagstone directly from quarries when possible to bypass retail markups. Many quarries sell “select” and “regular” grades. The regular grade costs significantly less but works perfectly for patio applications where minor imperfections don’t matter.
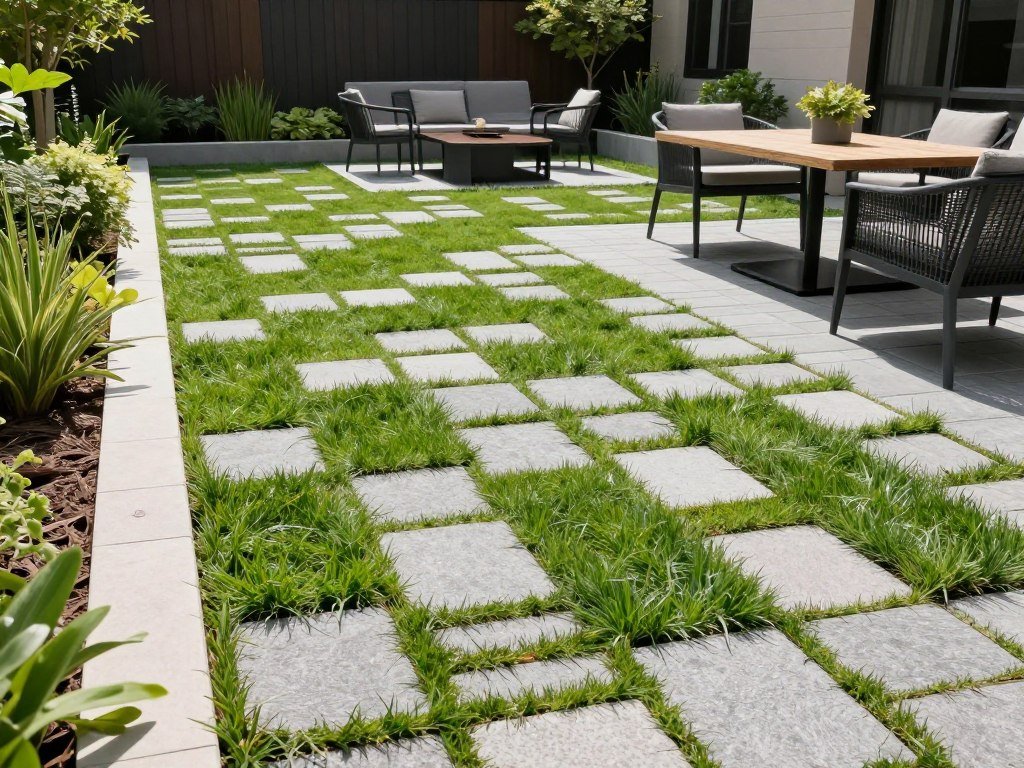
11. Permeable Pavers: Eco-Friendly Drainage
Permeable pavers allow water to flow through the surface into the ground below. This environmentally responsible option reduces runoff and helps prevent flooding. Many municipalities offer rebates for installing permeable surfaces, potentially offsetting material costs.
These specialized pavers cost $5 to $10 per square foot installed. The grid-like design creates spaces for grass or gravel to grow through. The combination of hard surface and vegetation provides both functionality and visual interest.
Environmental Benefits
Permeable surfaces reduce the urban heat island effect by allowing moisture to evaporate naturally. Traditional impermeable patios trap heat and increase ambient temperatures. The planted areas in permeable pavers help cool the surrounding space.
Water infiltration recharges groundwater supplies instead of running into storm sewers. This natural process filters water through soil layers, removing pollutants. Your patio becomes part of the solution to water management challenges.
Some areas require permeable surfaces to comply with stormwater regulations. Check local building codes before starting any patio project. Permeable options may be mandatory rather than optional in some jurisdictions.
12. Stamped Concrete: Affordable Luxury Look
Stamped concrete mimics expensive materials like stone, slate, or brick at a fraction of the cost. Contractors press texture mats into wet concrete to create realistic patterns. Color additives complete the illusion of premium materials.
Professional stamped concrete installation costs $8 to $15 per square foot. This price includes excavation, base preparation, concrete, stamping, and sealing. The finished surface requires less maintenance than many natural materials while delivering upscale appearance.
Design Options
Popular stamp patterns include ashlar slate, random stone, and cobblestone. Modern techniques create remarkably realistic textures that fool most observers. Multiple color layers add depth and authenticity to the stamped design.
Borders and accent areas incorporate contrasting patterns or colors. A stamped border around smooth concrete creates visual interest without stamping the entire surface. This technique reduces costs while maintaining aesthetic impact.
| Pattern Style | Best For | Complexity | Cost Impact |
| Ashlar Slate | Modern, contemporary spaces | Moderate | Standard pricing |
| Random Stone | Natural, organic designs | High | Premium pricing |
| Cobblestone | Traditional, classic areas | Moderate | Standard pricing |
| Wood Plank | Deck-look without wood maintenance | Low to Moderate | Standard pricing |
| Seamless Texture | Subtle enhancement, budget projects | Low | Economy pricing |
Professional installation essential for quality stamped concrete results. The timing of stamping, color application, and sealing requires expertise. Poor execution creates obvious artificial appearance and premature deterioration.
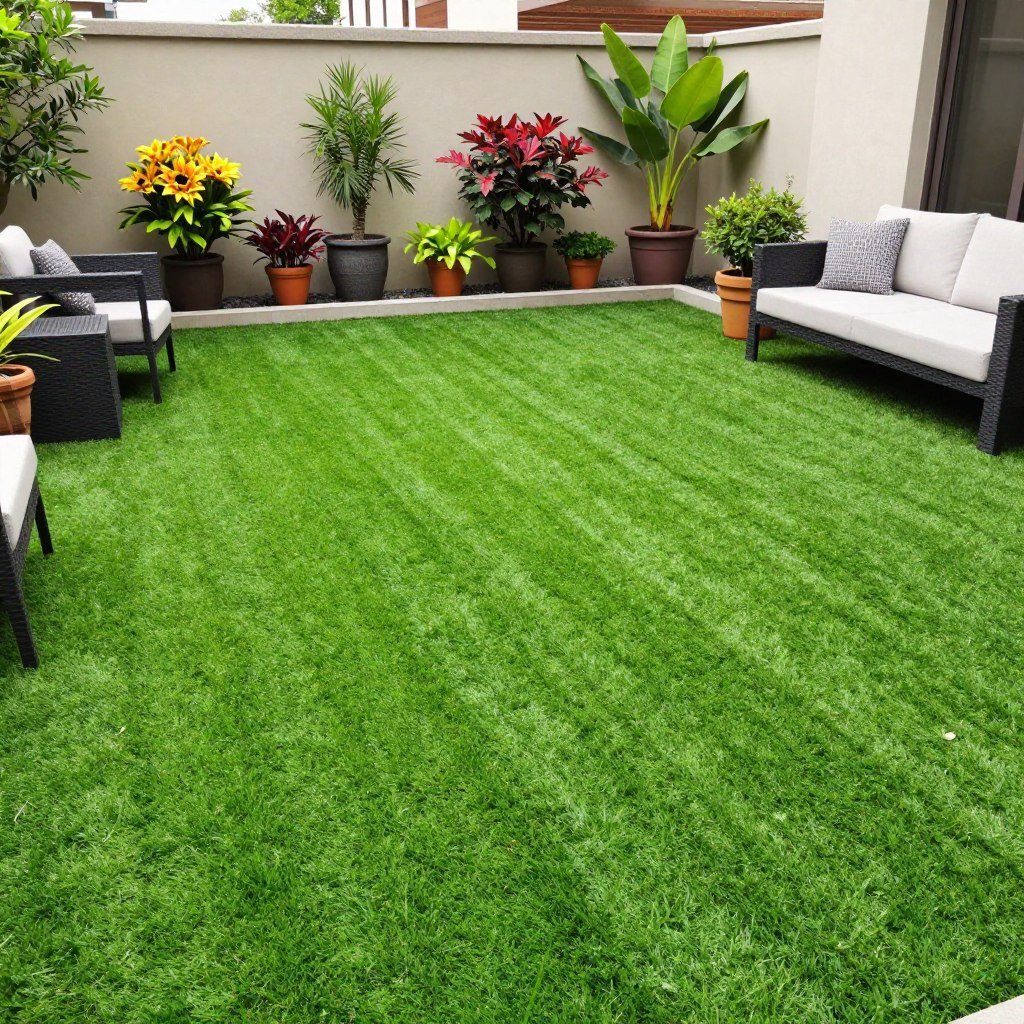
13. Artificial Grass: Low-Maintenance Green
Artificial grass transforms patios into green oases without watering, mowing, or fertilizing. Modern synthetic turf looks remarkably realistic with varied blade heights and colors. The soft surface provides comfortable flooring for outdoor living spaces.
Quality artificial grass costs $5 to $12 per square foot installed. This includes the turf, base preparation, and installation materials. The investment eliminates ongoing lawn maintenance costs while providing year-round green appearance.
Installation Process
- Remove existing surface and grade the area
- Install compacted base material for drainage
- Add thin layer of decomposed granite or sand
- Roll out turf and allow to relax in sun
- Cut and fit turf to patio dimensions
- Secure edges with nails or adhesive
- Add infill material between blades
- Brush turf to achieve natural appearance
The proper base prevents drainage problems and surface irregularities. Skimp on base preparation and expect premature wrinkles and uneven surfaces. This foundation work represents half the total installation effort.
Maintenance Requirements
Artificial grass needs occasional rinsing to remove dust and debris. Use a leaf blower or stiff broom to restore blade position after heavy use. The low-maintenance surface never requires watering or chemical treatments.
Pet owners appreciate artificial grass for easy cleanup and odor control. Regular hosing removes pet waste without damaging the turf. Some products include antimicrobial treatments that prevent odor development.
14. Mulch: Natural and Organic
Wood mulch creates rustic patio flooring with natural appeal. This organic material costs very little and installs easily. The soft surface works well for casual outdoor spaces and woodland garden settings.
Bulk mulch costs $25 to $50 per cubic yard delivered. A cubic yard covers approximately 100 square feet at three inches deep. This makes mulch one of the most economical patio floor options available.
Types of Mulch for Patios
Hardwood mulch breaks down slowly and resists compacting. Cedar and cypress varieties offer natural insect-repelling properties. These premium mulches cost more but last longer than standard hardwood options.
Rubber mulch made from recycled tires never decomposes. This permanent option eliminates the need for annual replacement. The material stays in place better than wood mulch during heavy rain or wind.
Pine bark nuggets provide attractive texture with larger particle size. These chunks don’t blow away easily and create interesting visual patterns. The nuggets cost slightly more than shredded mulch but require less frequent replacement.
Important Note: Mulch works best for low-traffic patio areas and pathways. Heavy furniture use creates bare spots as mulch compresses and moves. Consider combining mulch with stepping stones for a practical solution in seating areas.
15. Reclaimed Wood: Character-Rich Flooring
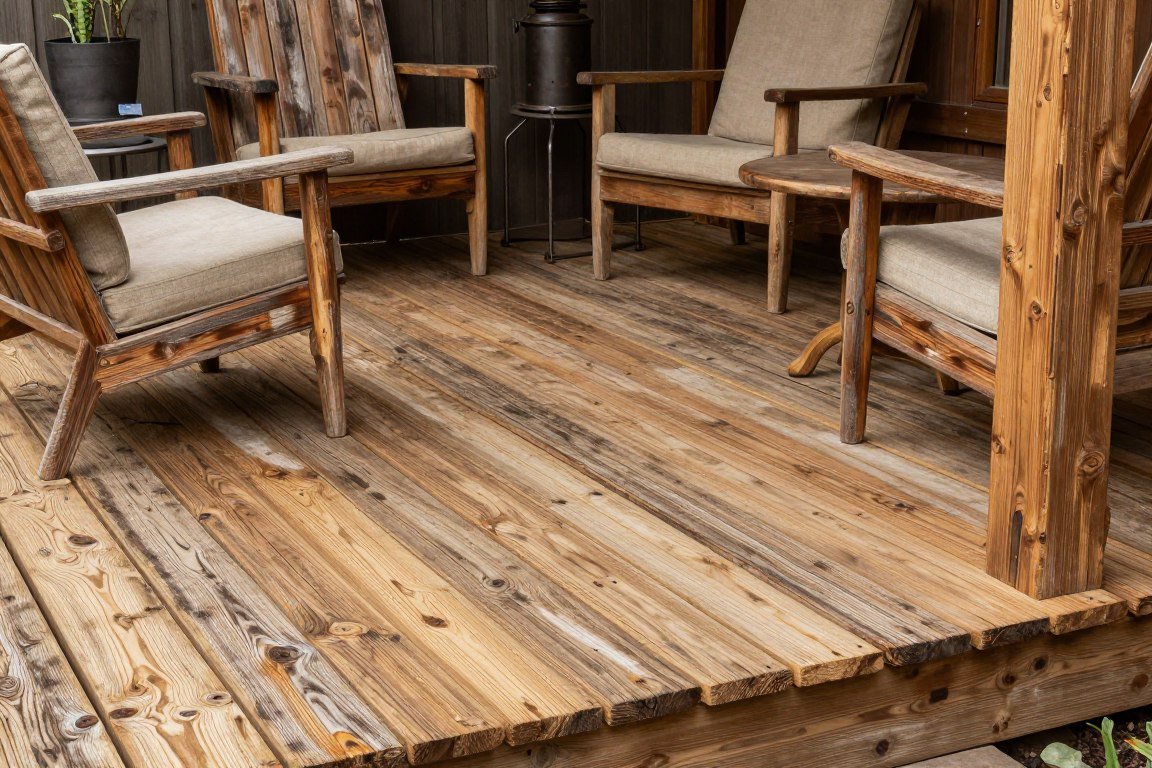
Reclaimed wood brings instant character and history to outdoor spaces. Salvaged barn wood, old fence boards, and deconstructed pallets provide free or low-cost flooring materials. Each board tells a story through unique weathering and patina.
Free reclaimed wood requires time investment for sourcing, cleaning, and processing. Budget $100 to $300 for fasteners, supports, and sealers. The installation difficulty varies from moderate to challenging depending on wood condition and your carpentry skills.
Sourcing Reclaimed Materials
Free pallets from businesses provide abundant wood for creative projects. Industrial shipping pallets break down into usable boards. Disassembly takes time but yields significant quantities of material at no cost.
Demolition sites and renovation projects generate salvaged lumber. Ask contractors if you can haul away old decking or fencing. Many appreciate free disposal of materials they would otherwise pay to remove.
Online marketplaces frequently list free building materials. People renovating homes often give away old wood just to clear their property. Check listings regularly and respond quickly to secure the best materials.
Preparation and Treatment
Remove old nails, screws, and hardware from reclaimed wood. Inspect carefully for hidden metal that could damage tools during cutting. A metal detector helps locate embedded fasteners in weathered boards.
Clean boards thoroughly to remove dirt, mold, and loose material. Pressure washing works well for heavily soiled wood. Allow boards to dry completely before installation.
Seal reclaimed wood to protect against moisture and insect damage. Choose environmentally friendly sealers that won’t harm plants or pets. Reapply protective coating every few years to maintain durability.
16. Porcelain Pavers: Premium Look, Manageable Cost
Porcelain pavers deliver high-end aesthetics with durability that surpasses natural stone. These manufactured tiles resist staining, fading, and moisture absorption. The dense material handles freeze-thaw cycles without cracking or spalling.
Budget porcelain pavers start around $6 to $10 per square foot. Higher-end designs mimicking marble or exotic stone cost more but remain cheaper than actual stone. The installation process resembles ceramic tile work, requiring mortar and grout over a concrete base.
Wood-Look Porcelain
Realistic wood-grain porcelain eliminates maintenance concerns of real wood. The tiles capture natural wood texture perfectly. Enjoy the warmth of wood appearance without rot, splinters, or termite worries.
Stone-Look Porcelain
Marble, travertine, and slate replicas look authentic at lower cost. The consistent sizing simplifies installation compared to natural stone. Each tile maintains uniform thickness for easier leveling.
Modern Concrete-Look
Industrial-style porcelain mimics polished concrete perfectly. The smooth, contemporary finish suits modern architecture. Zero maintenance required beyond occasional sweeping.
Installation Considerations
Porcelain pavers require stable concrete base for proper support. The rigid tiles crack if installed over unstable surfaces. Proper substrate preparation prevents costly failures.
Professional installation recommended unless you have tile-setting experience. Proper spacing, leveling, and grouting techniques ensure long-term performance. Mistakes create trip hazards and water infiltration problems.
17. Adobe Pavers: Southwestern Style
Adobe pavers bring warm, earthy tones and southwestern character to outdoor spaces. These compressed soil and clay blocks work beautifully in hot, dry climates. The material stays relatively cool underfoot despite direct sun exposure.
Traditional adobe costs $4 to $8 per square foot depending on your location. Regions with adobe manufacturing traditions offer better prices. The installation difficulty rates as moderate, similar to concrete paver projects.

Climate Suitability
Adobe performs best in arid climates with minimal rainfall. The material absorbs moisture and can deteriorate in wet conditions. Seal adobe pavers in areas with occasional rain to improve water resistance.
Avoid adobe in freeze-thaw climates where moisture cycles cause cracking. The porous material traps water that expands when frozen. This expansion destroys the structural integrity of the blocks.
Hot desert environments showcase adobe’s best qualities. The thermal mass moderates temperature swings throughout the day. The material releases accumulated heat slowly during cool evenings.
18. Gravel with Grid System: Stable Loose Stone
Plastic or metal grid systems contain gravel while providing firm surface stability. The honeycomb structure prevents stone migration and creates a solid base for furniture. This hybrid approach combines gravel aesthetics with improved functionality.
Grid systems cost $3 to $6 per square foot plus gravel. The investment creates a usable surface far superior to loose gravel alone. Installation requires moderate skills but no specialized tools.
Grid Installation Steps
Excavate the patio area to proper depth for base and gravel. Install compacted gravel base for drainage and stability. Level the base carefully since the grid follows the existing contours.
Lay grid sections and connect according to manufacturer instructions. Most systems snap or interlock without fasteners. Cut edge pieces to fit irregular spaces using basic hand tools.
Fill grid cells with gravel slightly above the cell tops. Compact the filled gravel to settle stones into cells. Add more gravel as needed to achieve a level surface.
Advantages
- Prevents gravel migration and spreading
- Creates stable surface for furniture placement
- Maintains excellent drainage characteristics
- Easier to shovel snow compared to loose gravel
- Environmentally permeable surface
- Can be installed over existing gravel
Disadvantages
- Higher cost than simple gravel installation
- Grid visible if gravel level drops
- Requires periodic gravel replenishment
- Heavier initial installation effort
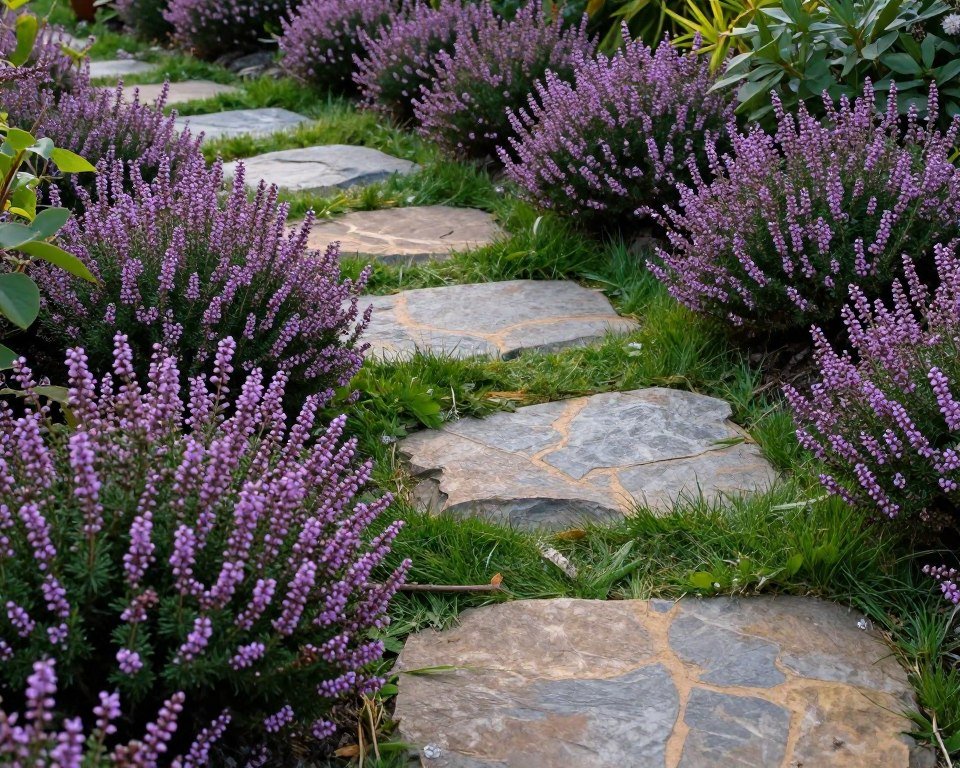
19. Stepping Stones with Ground Cover: Garden Integration
Individual stepping stones surrounded by low-growing ground cover create living patio floors. This approach blends hardscape with landscape for organic outdoor spaces. The combination provides both function and visual beauty.
Budget stepping stones cost $2 to $5 each for concrete pavers. Natural stone rounds cost more but offer unique character. Space stones 18 to 24 inches apart for comfortable walking. Calculate five to eight stones per ten feet of pathway.
Ground Cover Plant Options
Creeping thyme releases pleasant fragrance when stepped on. The low-growing herb tolerates foot traffic well. Purple or white flowers add color during blooming season.
Moss creates lush green carpets in shady patio areas. The soft texture feels pleasant underfoot. Moss requires consistent moisture and shade to thrive.
Sedum varieties handle sun and drought exceptionally well. The succulent plants require almost no maintenance. Different sedums offer varied colors and textures for visual interest.
Installation Tips
Set stones level with surrounding ground to prevent tripping. Excavate beneath each stone and add sand for leveling. The top surface should sit flush with the soil after settling.
Plant ground covers between stones after installation. Space plants according to their spreading characteristics. Most ground covers fill in gaps within one growing season.
Water new plantings regularly until established. Once ground covers spread, they require minimal care. Occasional trimming keeps growth from covering stone surfaces.
20. Composite Decking on Ground Level: Deck Alternative
Composite decking boards installed at ground level create maintenance-free patio surfaces. Modern composites resist rot, insects, and weathering without staining or sealing. The material mimics wood appearance while eliminating traditional deck maintenance.
Composite decking costs $6 to $12 per square foot for materials. Budget options exist alongside premium brands with enhanced grain patterns. Installation difficulty rates as moderate for those comfortable with basic carpentry.
Ground-Level Installation Method
Build a frame using pressure-treated lumber or composite joists. Set the frame on concrete blocks or deck piers for support. Space supports according to decking manufacturer specifications to prevent sagging.
Level the frame carefully in all directions. Use shims under supports to achieve perfect leveling. The composite boards will telegraph any irregularities in the frame.
Install composite boards perpendicular to joists using hidden fasteners or face screws. Follow spacing recommendations for thermal expansion. Composite materials expand more than wood in heat.
Money-Saving Tip: Purchase composite decking during fall clearance sales when building season ends. Many retailers discount inventory significantly. Store materials properly over winter for spring installation.
Long-Term Value
Composite decking never needs staining, painting, or sealing. Annual cleaning with soap and water maintains appearance. The elimination of maintenance costs offsets higher initial investment.
Quality composites last 25 to 30 years with minimal degradation. The material won’t rot, splinter, or crack like wood. Most manufacturers offer warranties of 20 years or more.
Composite decking maintains consistent appearance over time. Wood decks gray and weather unless maintained regularly. The stable color of composites provides lasting aesthetic appeal.
Choosing the Right Floor for Your Patio
Selecting appropriate patio flooring depends on multiple factors beyond simple cost considerations. Your climate, intended use, aesthetic preferences, and maintenance tolerance all influence the best choice. Evaluate your specific situation before committing to materials.
Climate Considerations
Hot, Dry Climates
Materials that stay cool and resist heat damage work best in desert environments.
- Adobe pavers for traditional southwestern style
- Light-colored concrete to reflect heat
- Crushed stone for temperature moderation
- Permeable pavers with planted areas
Cold, Wet Climates
Freeze-thaw resistant materials prevent cracking and deterioration in harsh winters.
- Concrete pavers rated for freeze-thaw cycles
- Rubber pavers that flex with temperature changes
- Composite decking unaffected by moisture
- Properly sealed stamped concrete
Humid, Rainy Areas
Drainage and mold resistance become critical in consistently wet conditions.
- Permeable pavers for water management
- Gravel systems with excellent drainage
- Porcelain pavers that don’t absorb moisture
- Composite materials resistant to mold
Moderate Climates
Most flooring options work well in areas without extreme weather conditions.
- Natural stone for timeless appeal
- Brick pavers for traditional look
- Stained concrete for versatility
- Wide range of budget options available
Usage Patterns
Heavy furniture placement requires stable, firm surfaces. Loose materials like gravel shift under concentrated weight. Choose pavers, concrete, or composite decking for dining areas and seating groups.
High foot traffic areas need durable materials that resist wear. Painted surfaces chip in heavily used zones. Opt for inherently colored materials like stained concrete or through-body pavers.
Bare-foot areas benefit from comfortable surfaces that stay cool. Artificial grass, outdoor carpet, or rubber pavers feel pleasant underfoot. Avoid dark stone or concrete that absorbs heat.

Installation Tips for Budget Success
Proper installation techniques determine the longevity and appearance of your patio floor. Many budget projects fail prematurely due to shortcuts in base preparation or installation methods. Following fundamental principles ensures your investment delivers lasting value.
Base Preparation Fundamentals
Every patio floor needs proper base preparation regardless of surface material. The foundation prevents settling, shifting, and drainage problems. Invest time in this invisible work for visible long-term results.
Essential Base Components
- Compacted subgrade free of organic material
- Landscape fabric to prevent weed growth
- Crushed stone base layer for drainage
- Leveling sand or stone dust for final grading
- Proper slope away from structures
- Edge restraints to contain materials
Drainage Best Practices
- Minimum 2% slope for water runoff
- Direct water away from building foundations
- Install drainage system for low spots
- Use permeable base materials
- Consider French drains in problem areas
- Test drainage before final surface installation
Common Base Mistakes
- Insufficient excavation depth
- Poor compaction of base layers
- Installing over tree roots or debris
- Skipping landscape fabric
- Inadequate edge restraints
- Ignoring drainage requirements
Tool and Equipment Considerations
Renting specialized equipment often makes sense for one-time projects. A plate compactor costs $50 to $75 per day to rent. This investment produces far better results than manual tamping methods.
Wet saws for cutting pavers or tile rent for $40 to $60 daily. The clean cuts justify rental cost for professional-looking results. Attempting to cut masonry with inadequate tools creates frustration and waste.
Level and straight edge tools prove essential for proper installation. A four-foot level helps establish correct slopes and flat surfaces. String lines guide edge alignment and maintain straight rows.
Safety First: Always wear appropriate safety equipment including eye protection, gloves, and dust masks when working with masonry materials. Hearing protection becomes necessary when operating power tools or compactors for extended periods.
Maintaining Your Inexpensive Patio Floor
Regular maintenance extends the life of budget flooring installations. Simple care routines prevent minor issues from becoming expensive problems. Different materials require specific maintenance approaches for optimal longevity.
Cleaning and Sealing Schedule
| Material Type | Cleaning Frequency | Sealing Schedule | Special Care |
| Painted Concrete | Monthly sweeping, quarterly washing | Annual sealer application | Touch up paint chips promptly |
| Stained Concrete | Weekly sweeping, monthly washing | Every 2-3 years | Avoid harsh chemical cleaners |
| Pavers (all types) | Bi-weekly sweeping, seasonal washing | Every 3-5 years | Re-sand joints as needed |
| Natural Stone | Weekly sweeping, gentle cleaning as needed | Annually for soft stone | Use pH-neutral cleaners only |
| Gravel/Crushed Stone | Weekly raking, seasonal leveling | Not applicable | Add material every 2-3 years |
| Composite Decking | Monthly sweeping, bi-annual washing | Never needs sealing | Remove stains promptly |
| Artificial Grass | Weekly brushing, monthly rinsing | Not applicable | Infill replenishment as needed |
Seasonal Maintenance Tasks
Spring inspections identify winter damage requiring repair. Look for cracks, shifted pavers, or drainage issues. Address problems early before they worsen through additional freeze-thaw cycles or storm water erosion.
Summer maintenance focuses on cleaning and weed control. Power wash surfaces to remove accumulated dirt and organic growth. Apply fresh sealer to concrete and stone surfaces during warm, dry weather for best results.
Fall preparation includes clearing leaves and debris that trap moisture. Clean drainage channels to handle winter precipitation. Apply polymeric sand to paver joints before cold weather arrives.
Winter care minimizes the use of harsh de-icing chemicals. These products damage many patio floor materials over time. Use sand for traction instead of salt when possible to preserve surface integrity.
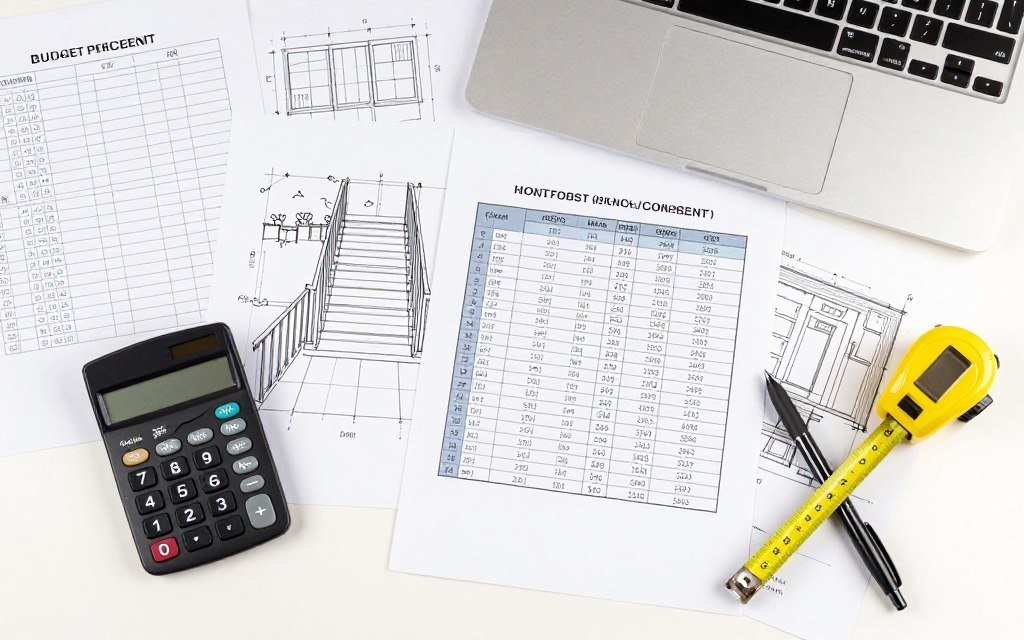
Budget Planning and Cost Comparison
Understanding total project costs helps you make informed decisions about patio flooring. Material prices represent only part of the investment. Factor in tools, base materials, and potential professional help for accurate budgeting.
Complete Cost Breakdown
Materials Category
- Surface flooring materials
- Base layer materials (gravel, sand)
- Edge restraints or borders
- Landscape fabric
- Adhesives, mortars, or fasteners
- Sealers or protective coatings
Typical Range: 60-70% of total budget
Tools and Equipment
- Rental equipment (compactor, saw)
- Hand tools (shovels, rakes, levels)
- Safety equipment
- Wheelbarrow or cart
- Mixing containers
- Application tools (trowels, brushes)
Typical Range: 10-15% of total budget
Additional Expenses
- Delivery fees for bulk materials
- Waste disposal costs
- Permits if required
- Professional consultation
- Unexpected material needs
- Finishing touches (lighting, planters)
Typical Range: 15-20% of total budget
Money-Saving Strategies
Purchase materials during off-season sales for significant discounts. Spring and fall typically offer the best prices as retailers clear inventory. Buy in bulk when possible to qualify for contractor pricing even as a homeowner.
Borrow or rent specialized tools rather than purchasing. One-time use rarely justifies buying expensive equipment. Join tool-sharing programs or rent from home improvement stores for economical access.
Tackle demolition and excavation yourself to reduce labor costs. These tasks require more sweat than skill. Save professional help budget for technical aspects like final grading and specialized installations.
Common Mistakes to Avoid
Learning from others’ mistakes saves money and frustration. Budget patio projects often fail due to predictable errors. Awareness of common pitfalls helps you avoid expensive corrections later.
Skipping Base Preparation
The most expensive mistake involves inadequate base work. A proper foundation costs money and takes time, tempting shortcuts. Poor bases cause settling, shifting, and premature failure requiring complete reinstallation. Spend the time and money on invisible foundation work. Your patio will last decades instead of seasons. The base represents the most important investment in any patio project.
Ignoring Drainage Requirements
Water damage destroys patio floors faster than any other factor. Pooling water accelerates deterioration and creates safety hazards. Always slope surfaces away from buildings at minimum two percent grade. Install drainage systems in low areas where water naturally collects. Test drainage before installing final surface materials. Fixing drainage problems after installation costs significantly more than planning properly from the start.
Choosing Inappropriate Materials
Beautiful materials fail quickly in wrong applications. Adobe dissolves in wet climates. Wood rots in humid environments. Painted surfaces chip under heavy traffic. Research material suitability for your specific climate and usage patterns. The cheapest option becomes expensive when replacement becomes necessary within a few years. Match materials to conditions for lasting value.
Underestimating Material Quantities
Running short on materials mid-project creates expensive delays. Different production lots may not match perfectly in color. Purchase at least ten percent extra material beyond calculated needs. Account for cutting waste, broken pieces, and future repairs. Extra materials cost far less than emergency purchases or mismatched repairs later. Store unused materials properly for future maintenance needs.
Attempting Complex Projects Without Experience
Some projects require professional expertise for quality results. Stamped concrete, mortared stone, and complex tile work challenge even experienced DIYers. Hiring professionals for technical work prevents expensive do-overs. Save DIY efforts for appropriate skill-level projects. The money saved on labor disappears quickly when poor execution requires professional correction.
Transform Your Outdoor Space Today
Creating an attractive patio floor on a budget is entirely achievable with proper planning and realistic expectations. The twenty ideas presented here offer solutions for every skill level, climate, and aesthetic preference. Your perfect outdoor floor exists within your budget constraints.
Start by honestly assessing your DIY capabilities, available time, and budget limitations. Choose materials appropriate for your climate and intended use. Invest in proper base preparation regardless of surface material selection. These fundamental principles ensure success with any flooring option.
Remember that patio projects can be completed in phases if budget constraints require. Install a basic functional surface now and add enhancements later. The most important step involves starting your project rather than waiting for perfect conditions or unlimited budgets.

Your outdoor space deserves attention and investment. Even modest improvements dramatically enhance your outdoor living experience. Take action on these inexpensive patio floor ideas to create the outdoor area you’ve been dreaming about.