Creating a classic crochet bunny brings joy to crafters and gift recipients alike. This adorable free crochet bunny pattern offers beginner-friendly instructions that guide you through every stitch. Whether you’re crafting for Easter, a baby shower, or simply adding to your stuffed animals collection, this timeless design delivers satisfying results.
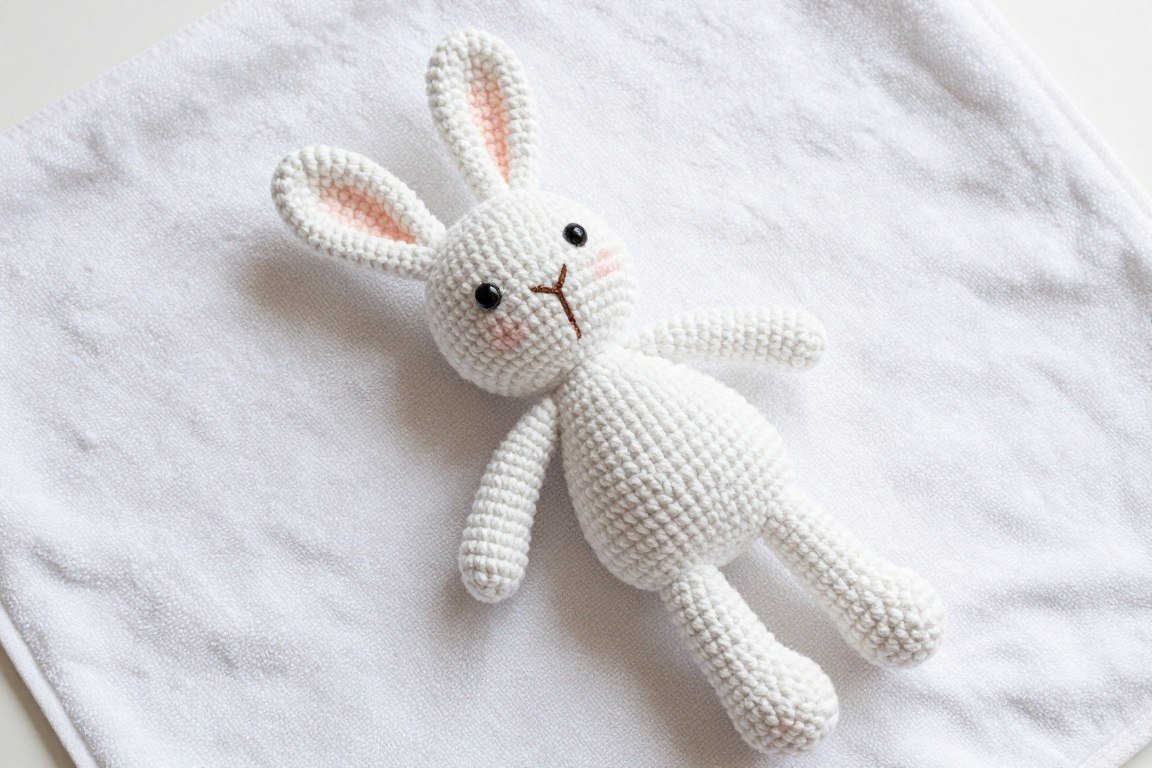
The pattern uses basic techniques like the magic circle and single crochet stitches. Even newcomers to amigurumi will find success with clear round-by-round guidance. Your finished bunny will measure approximately eight inches tall, making it perfect for little hands to cuddle.
Worsted weight yarn in your chosen color creates the body, head, ears, arms, legs, and tail. Simple embroidery adds personality through the nose and facial features. Safety eyes give your bunny a sweet, lifelike expression that children and adults adore.
Table of Contents
Materials and Supplies You’ll Need
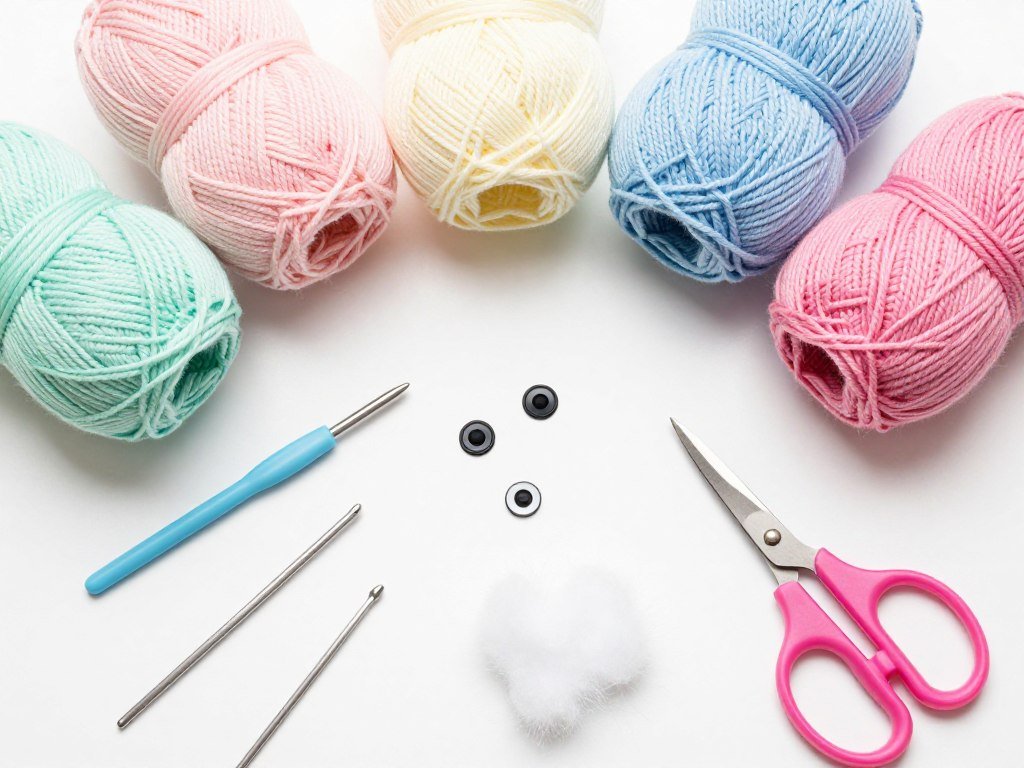
Gathering the right materials ensures your crochet bunny pattern turns out beautifully. Quality supplies make the stitching process smoother and create a professional-looking finished piece. Here’s everything you need to start this project.
Yarn Selection
Choose worsted weight yarn for the best results with this pattern. Medium weight yarn creates a bunny with good stitch definition and pleasant texture. Cotton blends work wonderfully for washable toys, while acrylic yarn offers durability and affordability.
You’ll need approximately 200 yards of your main color. Popular choices include soft pastels like cream, pink, light blue, or classic white. Consider adding a contrasting color for inner ears or clothing details if desired.
Hook and Notions
A size G (4.0mm) crochet hook works perfectly with worsted weight yarn. This hook size creates tight stitches that prevent stuffing from showing through. You’ll also need a yarn needle for sewing pieces together and weaving in ends.
Stitch markers help track your rounds and maintain accuracy. A good pair of scissors completes your basic toolkit for this crochet bunny project.
Stuffing and Eyes
Polyester fiberfill creates a soft, huggable bunny body. Purchase high-quality stuffing that maintains its shape and doesn’t clump. You’ll need enough to stuff the head, body, arms, legs, and tail pieces firmly but not overly tight.
Safety eyes (9mm or 12mm) give your bunny an expressive face. These plastic eyes lock securely into the fabric, making them child-safe for toys intended for kids over three years old.
Embroidery Thread
Black or brown embroidery floss lets you embroider the nose and mouth details. This simple finishing touch brings personality to your bunny’s face. A small amount goes a long way for these delicate features.
Some crafters prefer using yarn for embroidery instead of floss. Either option works well depending on your preference and the look you want to achieve.
Pattern Difficulty and Required Skills
This crochet bunny pattern suits beginners who know fundamental crochet techniques. The design uses basic stitches worked in continuous rounds. Understanding these core skills ensures smooth progress through the pattern.

Essential Techniques
The magic circle starts each piece with a tight, adjustable center. This technique eliminates the hole typically found when beginning rounds. If you haven’t mastered the magic circle yet, several excellent video tutorials demonstrate this foundational skill.
Single crochet forms the primary stitch throughout this pattern. Working in continuous rounds rather than joined rounds creates seamless pieces. A stitch marker tracks the beginning of each round, preventing confusion about where rounds start and end.
Increase and Decrease Skills
Increasing stitches shapes the bunny’s body parts by adding width where needed. The pattern indicates when to work two single crochet stitches into the same stitch. This simple technique expands rounds gradually.
The sc2tog decrease (single crochet two together) reduces stitch counts to shape pieces. Insert your hook into the next stitch, yarn over and pull through. Insert hook into the following stitch, yarn over and pull through. Yarn over and pull through all three loops on your hook.
Assembly and Finishing
Sewing pieces together requires basic whipstitching skills. Leave long yarn tails when finishing each piece for easier assembly. The pattern guides you through attaching the head, ears, arms, legs, and tail to create your complete bunny.
Embroidering the nose adds character to your bunny’s face. Simple straight stitches form a triangular nose shape. Practice on scrap fabric if you’re new to embroidery on crochet pieces.
Time Commitment
Expect to spend 4-6 hours completing this bunny pattern from start to finish. Breaking the project into sessions works well. Complete the body and head in one sitting, then tackle the smaller pieces like ears, arms, and legs in another session.
Understanding Pattern Abbreviations
Crochet patterns use standardized abbreviations to communicate instructions efficiently. Learning these shorthand terms helps you read any crochet bunny pattern with confidence. Here are the key abbreviations used throughout this design.
| Abbreviation | Full Term | Meaning |
| sc | single crochet | Basic stitch worked in continuous rounds |
| inc | increase | Work 2 sc in the same stitch |
| dec / sc2tog | decrease | Single crochet two stitches together |
| st(s) | stitch(es) | Individual loop or completed stitch |
| ch | chain | Foundation chain stitch |
| sl st | slip stitch | Joining or finishing stitch |
| rnd | round | Circular row of stitches |
| rep | repeat | Work instructions again |
Reading Pattern Instructions
Patterns present instructions in a specific format. Round numbers appear first, followed by the stitch instructions. Parentheses and asterisks indicate repeated sequences. Brackets show the total stitch count for that round.
For example, “Rnd 5: (sc in next 3 sts, inc) x 6 [30]” means work single crochet in three stitches, then increase. Repeat this sequence six times for a total of 30 stitches in round five.
The “x 6” tells you how many times to repeat the bracketed sequence. The final number in brackets confirms your stitch count after completing that round. Count your stitches regularly to catch any mistakes early.
Starting with the Magic Circle
The magic circle creates a tight, adjustable beginning for your crochet bunny’s body parts. This technique starts each piece without leaving a visible hole in the center. Mastering this foundation ensures professional-looking results.
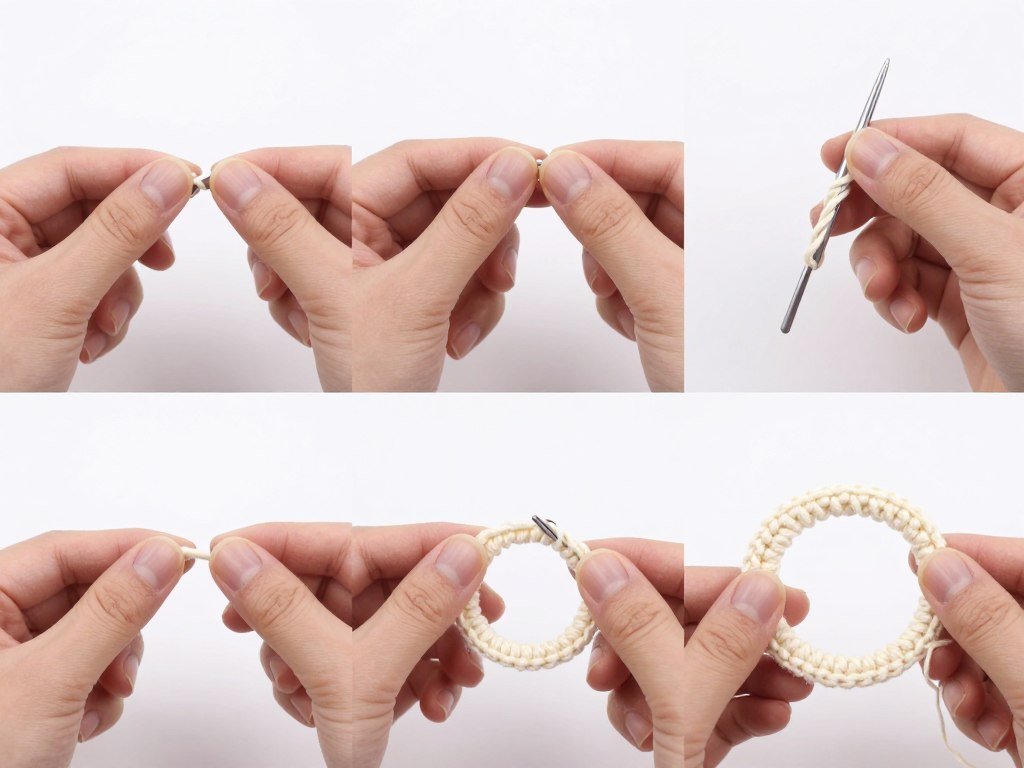
Creating Your First Magic Circle
Wrap the yarn around your fingers to form a ring. Leave a tail about six inches long. Insert your crochet hook under the ring, yarn over, and pull through to create a loop on your hook. Chain one to secure the circle.
Work your first round of single crochet stitches into the ring, not into the chain. For most bunny pieces, you’ll start with six single crochet stitches in the magic circle. Insert your hook into the center of the ring for each stitch.
After completing your stitches, gently pull the yarn tail to close the center hole. The ring tightens around your stitches, creating a seamless start. Place a stitch marker in your first stitch to track the beginning of each round.
Magic Circle Alternative
If the magic circle feels challenging, try this alternative: Chain 2, then work 6 sc in the second chain from your hook. This method leaves a small hole but works perfectly fine for learning. Many experienced crocheters started this way before mastering the magic circle.
Common Magic Circle Mistakes
Working stitches too loosely prevents the circle from tightening properly. Keep consistent tension as you work those first few stitches. The ring should feel snug but not impossibly tight.
Some beginners forget to work into the ring itself and accidentally work into the chain stitch instead. Remember that your single crochet stitches go through the center ring, creating a foundation for subsequent rounds.
Crocheting the Bunny Head
The head forms the focal point of your adorable crochet bunny. This sphere-shaped piece uses increases and decreases to create the rounded form. Work carefully through each round to maintain even shaping.
Head Pattern Rounds
Begin with a magic circle and six single crochet stitches. Round two increases to twelve stitches by working two single crochet in each stitch around. Round three alternates between regular single crochet and increases, creating eighteen stitches total.
Continue this increase pattern through round six, expanding the sphere’s diameter. The head grows gradually, maintaining a circular shape. Count your stitches at the end of each round to ensure accuracy.
- Round 1: 6 sc in magic circle [6 sts]
- Round 2: inc in each st around [12 sts]
- Round 3: (sc, inc) around [18 sts]
- Round 4: (sc in next 2 sts, inc) around [24 sts]
- Round 5: (sc in next 3 sts, inc) around [30 sts]
- Round 6: (sc in next 4 sts, inc) around [36 sts]
- Rounds 7-12: sc in each st around [36 sts]
Rounds seven through twelve maintain the same stitch count. Work single crochet in each stitch without increasing. These straight rounds create the middle section of the head, establishing its full size.
Shaping and Decreasing
Round thirteen begins the decreasing sequence. Work sc2tog decreases to gradually reduce the sphere’s opening. Mirror the increase pattern in reverse to maintain symmetrical shaping.
Insert safety eyes between rounds 9 and 10, spacing them about six stitches apart. Position them before you stuff the head. Once the eyes lock in place, they cannot be repositioned.
- Round 13: (sc in next 4 sts, sc2tog) around [30 sts]
- Round 14: (sc in next 3 sts, sc2tog) around [24 sts]
- Round 15: (sc in next 2 sts, sc2tog) around [18 sts]
- Round 16: (sc, sc2tog) around [12 sts]
Stuff the head firmly after round fifteen. Add more stuffing through the opening as you decrease. The head should feel plump and hold its shape without being overly hard.
Round seventeen decreases to six stitches. Cut the yarn, leaving a long tail for sewing. Thread your yarn needle and weave through the remaining stitches. Pull tight to close the opening, then secure with a knot.

Constructing the Bunny Body
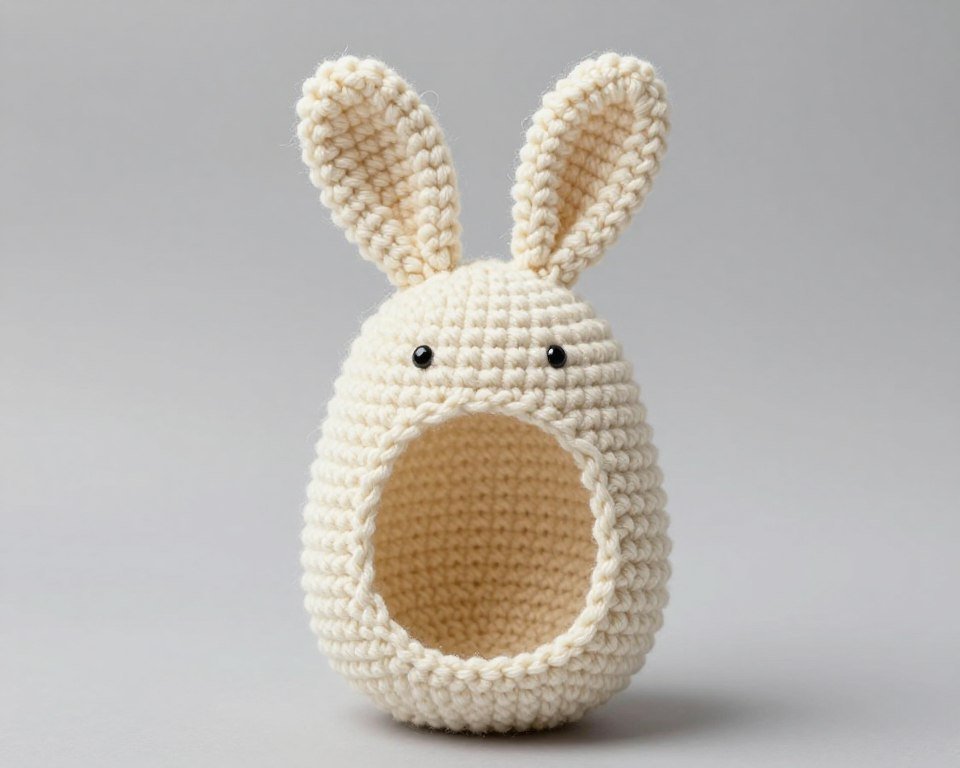
The body provides the foundation for your crochet bunny pattern. This egg-shaped piece connects to the head and supports the arms, legs, and tail. Follow the same techniques used for the head with slight variations in shaping.
Body Pattern Instructions
Start with a magic circle and six single crochet stitches, just like the head. Increase through the first six rounds following the same expansion pattern. The body begins with the same diameter as the head.
After reaching 36 stitches in round six, work straight rounds without increases or decreases. The body needs more length than the head, so continue working even rounds through round fifteen.
- Create magic circle and work 6 sc into ring
- Increase following the standard sphere pattern through round 6
- Work straight rounds (no increases) from round 7 through round 15
- Begin decreasing in round 16 using sc2tog
- Continue decreasing through round 20
- Stuff body firmly before final closure
- Close opening and secure with long yarn tail
Creating the Egg Shape
Round sixteen starts the decrease sequence. The body tapers more gradually than the head, creating an elongated egg shape. This design gives your bunny a classic, balanced proportion.
Work decreases every other round rather than in consecutive rounds. This slower reduction creates the gentle curve characteristic of a bunny’s body. The wider top section sits perfectly beneath the head.
Stuff the body generously before completing the final rounds. The body should feel substantial and support the bunny’s structure. Add stuffing gradually to avoid lumps and achieve smooth, even filling throughout the piece.

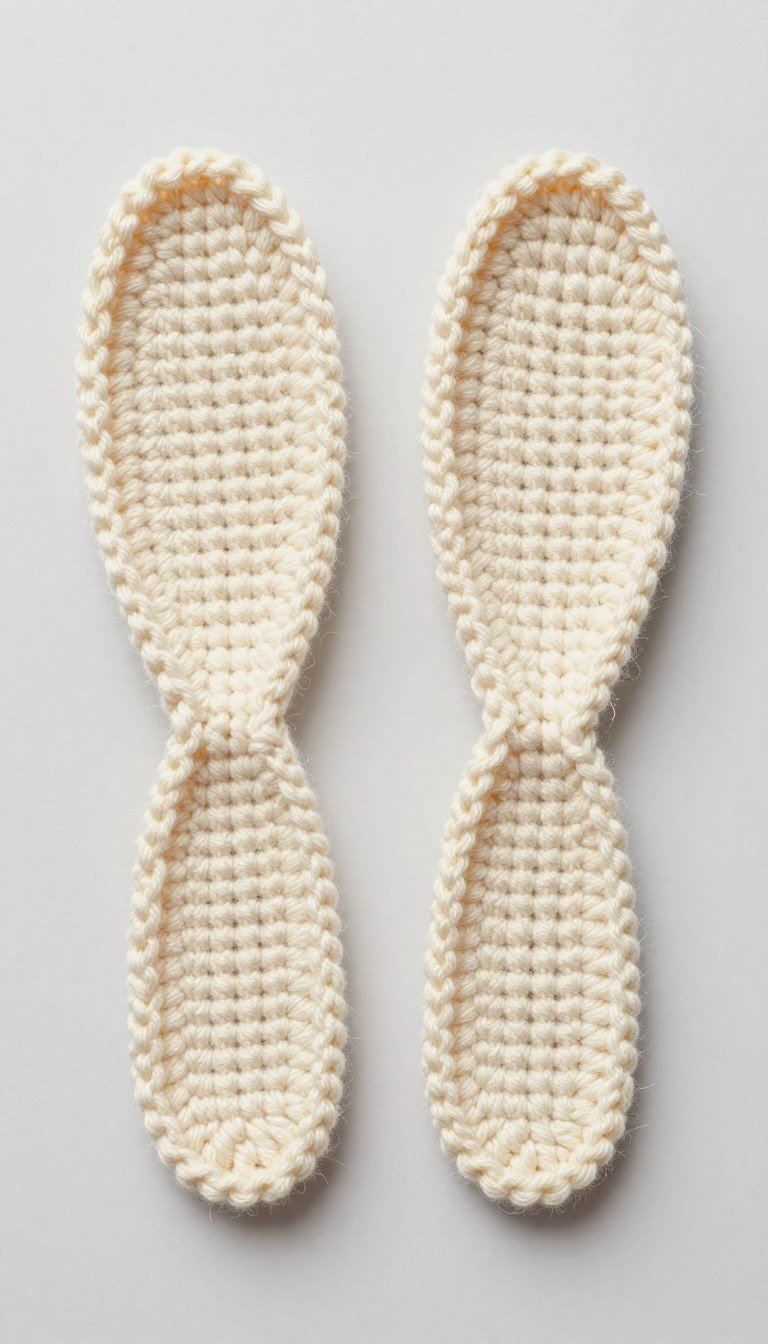
Making the Floppy Bunny Ears
Adorable floppy ears give your bunny its signature charm. These elongated pieces attach to the top of the head, framing your bunny’s face. The pattern creates ears that stand upright slightly while maintaining a soft, natural drape.
Ear Pattern Details
Each ear begins with a magic circle and six stitches. Unlike the head and body, ears remain relatively flat with minimal increasing. Work through rounds that gradually widen the base before maintaining consistent width along the length.
The pattern creates two identical ears. Make one ear completely before starting the second to ensure consistency. Keep your tension even throughout both pieces for symmetrical results.
- Round 1: 6 sc in magic circle [6 sts]
- Round 2: inc in each st around [12 sts]
- Round 3: (sc, inc) around [18 sts]
- Rounds 4-14: sc in each st around [18 sts]
- Round 15: (sc in next 4 sts, sc2tog) around [15 sts]
- Round 16: (sc in next 3 sts, sc2tog) around [12 sts]
Rounds four through fourteen create the ear’s length without changes in width. These straight rounds form the characteristic long, floppy appearance. Work each round carefully to maintain even edges.
Finishing the Ears
The final rounds taper slightly at the tip. Decreases at the top create a gentle rounded point. This shaping prevents the ears from looking too rectangular while maintaining their floppy nature.
Don’t stuff the ears. Leave them flat and flexible. Lightly stuffed ears stand too rigidly and lose the adorable droopy quality. Flatten each ear gently before sewing to the head.
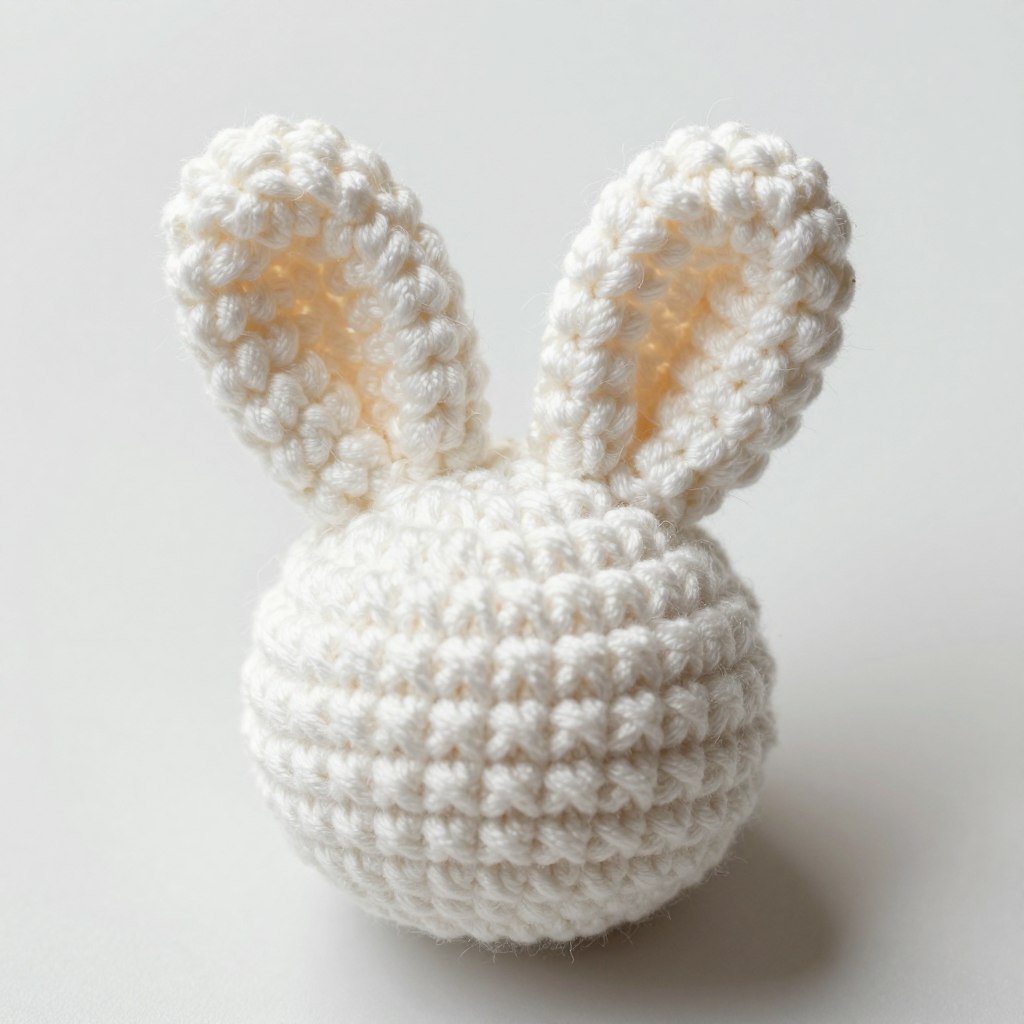
Cut the yarn leaving a long tail for sewing. Position the ears on top of the head, slightly angled outward. Sew around the base of each ear several times for security, ensuring they stay firmly attached even with handling.
Creating Arms and Legs
The bunny’s arms and legs add dimension and huggable appeal. These small tubular pieces attach to the body sides and bottom. Simple construction makes them quick to complete.

Arm Pattern
Arms start with a magic circle and six stitches. Increase minimally to create narrow tubes. The arms remain slender compared to the body, giving your bunny delicate proportions.
- Round 1: 6 sc in magic circle [6 sts]
- Round 2: inc in each st around [12 sts]
- Rounds 3-10: sc in each st around [12 sts]
- Flatten and close opening, leaving long tail
Work straight rounds after the initial increase. Eight rounds of even single crochet create arms about two inches long. Stuff lightly, keeping the arms soft and posable.
Flatten the opening and single crochet across to close. This creates a flat edge perfect for sewing to the body. The flattened end provides more surface area for secure attachment.
Leg Pattern
Legs use the same basic construction as arms with slightly more increases for wider proportions. The legs support the bunny when positioned sitting, so they need adequate width and stability.
- Round 1: 6 sc in magic circle [6 sts]
- Round 2: inc in each st around [12 sts]
- Round 3: (sc, inc) around [18 sts]
- Rounds 4-12: sc in each st around [18 sts]
- Flatten and close opening, leaving long tail
Stuff the legs more firmly than the arms. Well-stuffed legs help the bunny maintain a sitting position. The additional rounds create legs slightly longer than the arms for proper proportion.
Make two arms and two legs total. Consistency matters, so try to work all limbs with similar tension. Place the pieces together periodically to check that they match in size.
Crafting the Fluffy Tail
The bunny’s tail adds an essential finishing touch. This small pompom-like piece attaches to the back of the body. Its fluffy appearance creates an authentic bunny silhouette.
Tail Pattern Instructions
The tail follows a simple sphere pattern in miniature. Start with a magic circle and work through quick increase and decrease rounds. The finished tail measures about one and a half inches in diameter.
- Round 1: 6 sc in magic circle [6 sts]
- Round 2: inc in each st around [12 sts]
- Round 3: (sc, inc) around [18 sts]
- Rounds 4-5: sc in each st around [18 sts]
- Round 6: (sc, sc2tog) around [12 sts]
- Round 7: sc2tog around [6 sts]
Stuff the tail densely before closing. A firmly packed tail maintains its round shape and creates the characteristic fluffy appearance. Don’t skimp on stuffing for this small piece.
Close the opening tightly and secure well. Leave a long yarn tail for sewing the pompom to the bunny’s back. Position the tail centered on the back of the body, slightly above where the legs attach.
Assembly and Putting It Together
Assembling your crochet bunny brings all the individual pieces together into an adorable finished toy. Proper attachment ensures your bunny withstands hugging and play. Take your time with this important stage.

Attaching the Head
Position the head on top of the body, aligning them so the bunny faces forward. Use the long yarn tail from the head or a fresh strand of yarn. Whipstitch around the connection point several times.
Work your stitches through both the head and body fabric. Pull gently but firmly to create a secure join. The head should not wobble or feel loose when tugged. Add extra stitches around the circumference if needed for stability.
Weave your yarn tail through the stitches to hide it. Trim excess yarn close to the fabric, being careful not to cut working stitches. A properly attached head feels like one continuous piece with the body.
Positioning Arms and Legs
Pin or temporarily position all four limbs before sewing. This preview helps you achieve symmetrical placement. The arms attach to the upper sides of the body, positioned where shoulders would naturally fall.
Legs attach to the bottom front of the body. Angle them slightly outward so the bunny can sit. The flat edges created when closing the limbs make sewing easier and create stronger attachments.
Sewing Technique
Thread your yarn needle with the long tail from each limb. Stitch through the limb’s edge and into the body fabric. Work back and forth several times, creating multiple anchor points.
Check that each limb sits securely before moving to the next. Tug gently on each arm and leg to test the connection. Re-stitch any pieces that feel loose or wobbly.
Adding Ears and Tail
Sew ears to the top of the head, spacing them evenly. Position them slightly angled outward for a natural look. The ears’ flat construction makes attachment straightforward.
Attach the tail to the center back of the body. Stitch around the entire base of the pompom for maximum security. The tail should protrude noticeably from the bunny’s back.

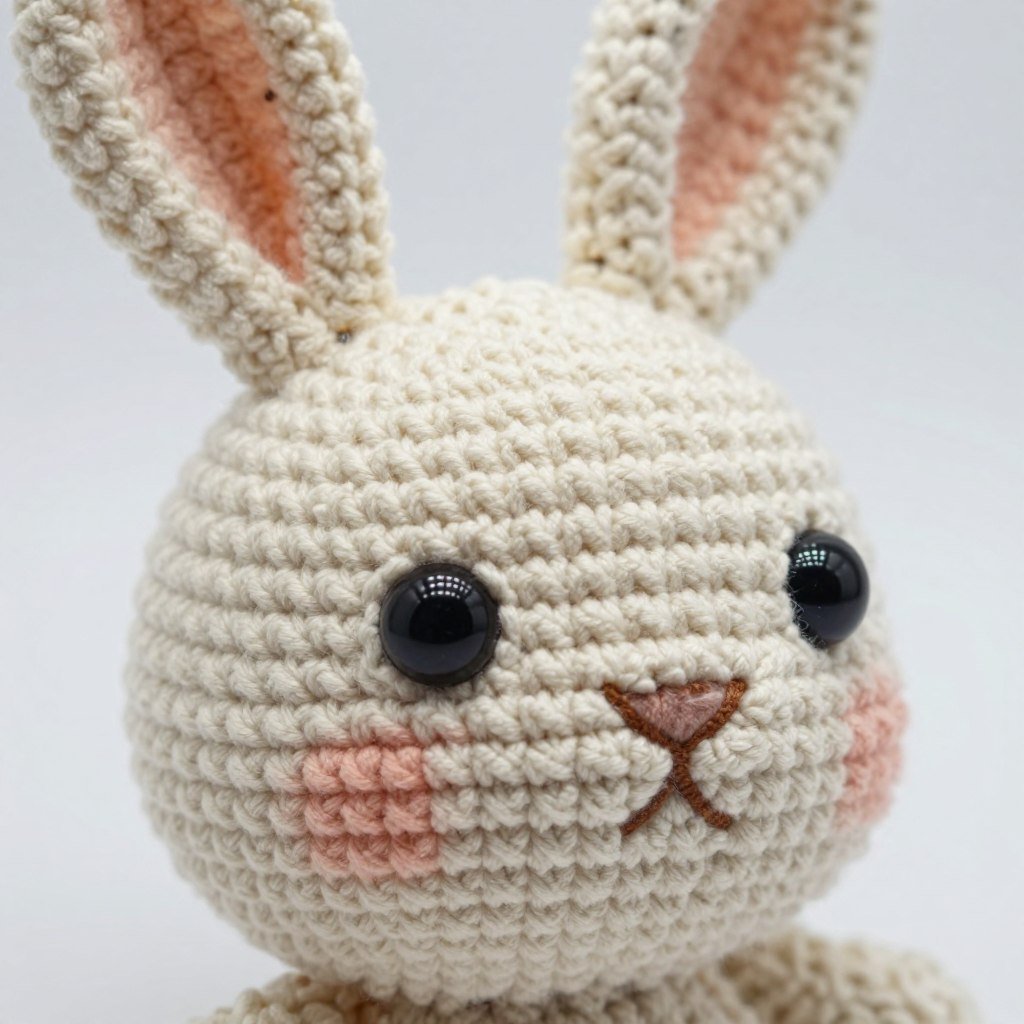
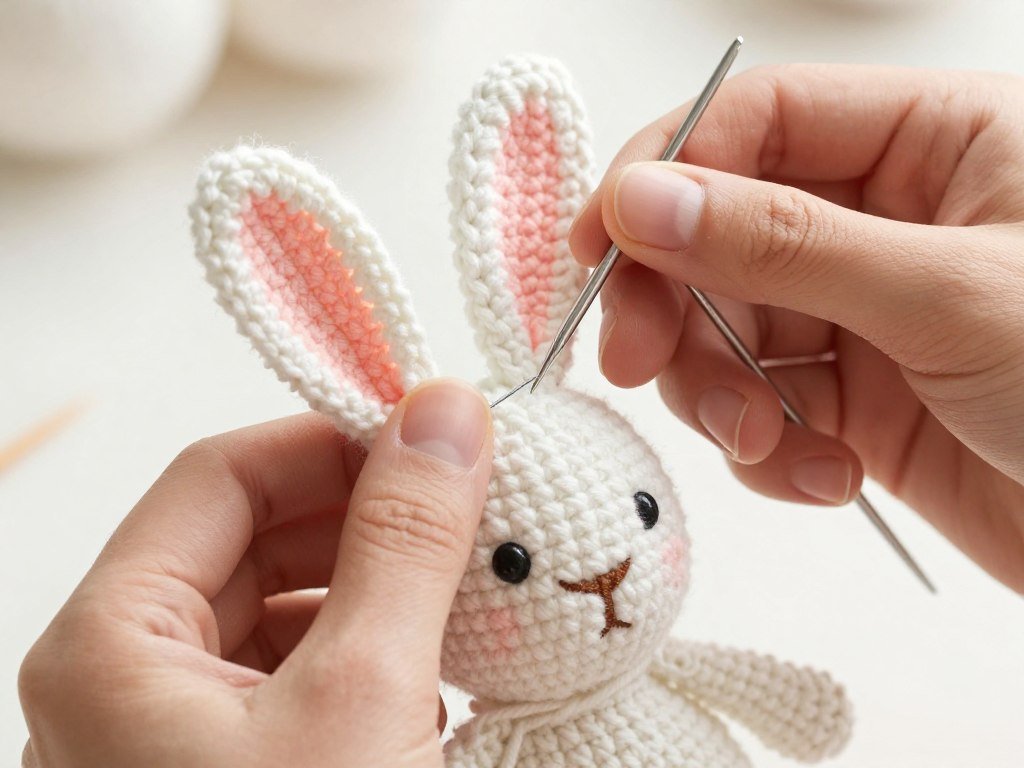
Embroidering Facial Features
Adding facial features brings personality to your crochet bunny. Simple embroidery creates the nose and mouth. These final touches transform your bunny from basic pieces into an expressive character.
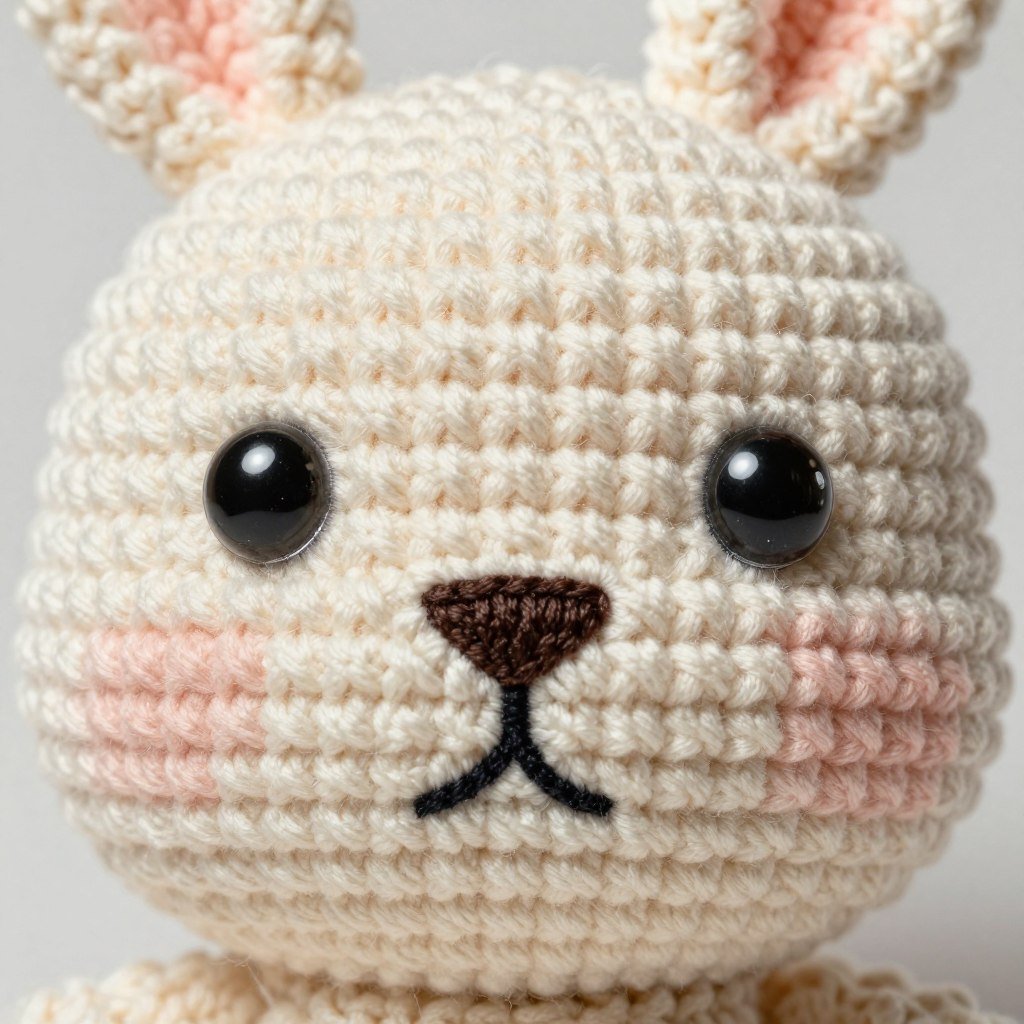
Creating the Nose
Thread your yarn needle with black or brown embroidery floss. Locate the center point between the safety eyes, slightly below them. This position creates proper facial proportions.
Embroider a small inverted triangle for the nose. Work satin stitches to fill the triangular shape. Keep your stitches close together for solid color coverage. The nose typically measures about half an inch wide at its base.
Secure your thread on the back of the head fabric. Weave through several stitches before trimming to prevent the embroidery from loosening. A well-secured nose withstands gentle handling and play.
Adding the Mouth
Create a simple Y-shaped mouth beneath the nose. Bring your needle up through the fabric at the bottom point of the nose. Work a straight stitch downward about a quarter inch.
From that center point, create two angled lines extending outward and upward slightly. These lines form the classic bunny smile. Keep the stitches subtle rather than exaggerated for a sweet, gentle expression.
Some crafters prefer working the mouth with yarn instead of embroidery floss. Yarn creates a bolder look, while floss offers delicate detail. Choose based on your preferred aesthetic and the bunny’s intended recipient.
Eye Safety for Children
Safety eyes include small parts unsuitable for children under three years. For baby gifts, embroider eyes instead using black yarn or thread. Create simple circles with satin stitches, or work French knots for dimensional eyes.
Finishing Touches and Personalization
Your basic bunny is complete, but personalization options abound. Simple additions create unique variations that showcase your creativity. Consider these finishing touches to make your bunny special.

Adding Accessories
A small ribbon bow around the neck adds instant charm. Choose coordinating colors or seasonal patterns. Tie the bow loosely and tack it in place with a few stitches to prevent shifting.
Crochet a tiny vest or dress for your bunny using lightweight yarn. Simple garments require minimal additional time but create completely different looks. Seasonal clothing transforms one pattern into year-round gift options.
Consider adding inner ear details in a contrasting color. Work a smaller oval shape in pink or white and sew it to the front of each ear. This classic detail adds visual interest and refinement.
Size Variations
Create a family of bunnies by varying your yarn weight and hook size. Use sport weight yarn with a smaller hook for miniature bunnies perfect for ornaments. Bulky yarn and a larger hook produce oversized huggable versions.
The pattern scales proportionally with different yarn weights. Just maintain the same hook size appropriate for your chosen yarn. All pieces adjust together, keeping the design balanced regardless of final size.
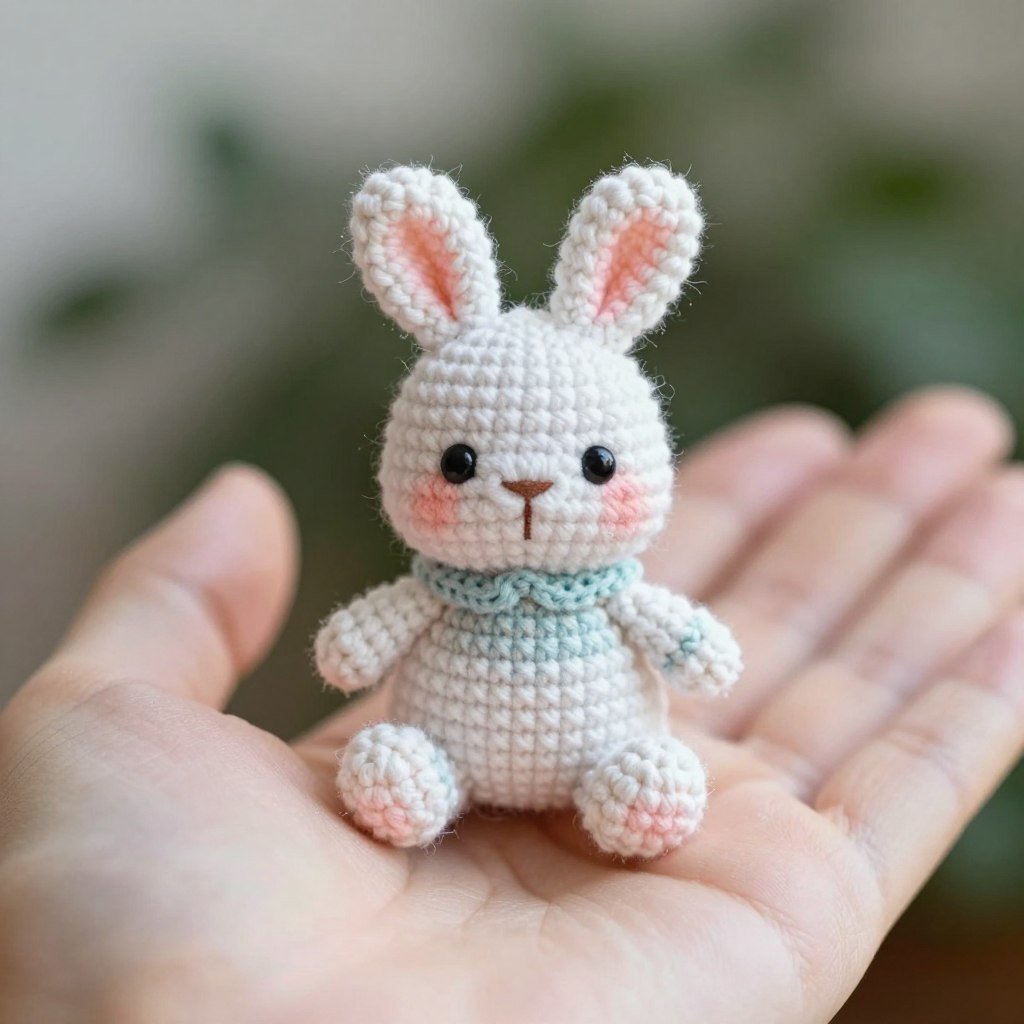
Mini Bunny Version
Sport weight yarn with a 3.5mm hook creates bunnies about four inches tall. These petite versions work wonderfully as gift toppers, Easter basket additions, or ornamental decorations.
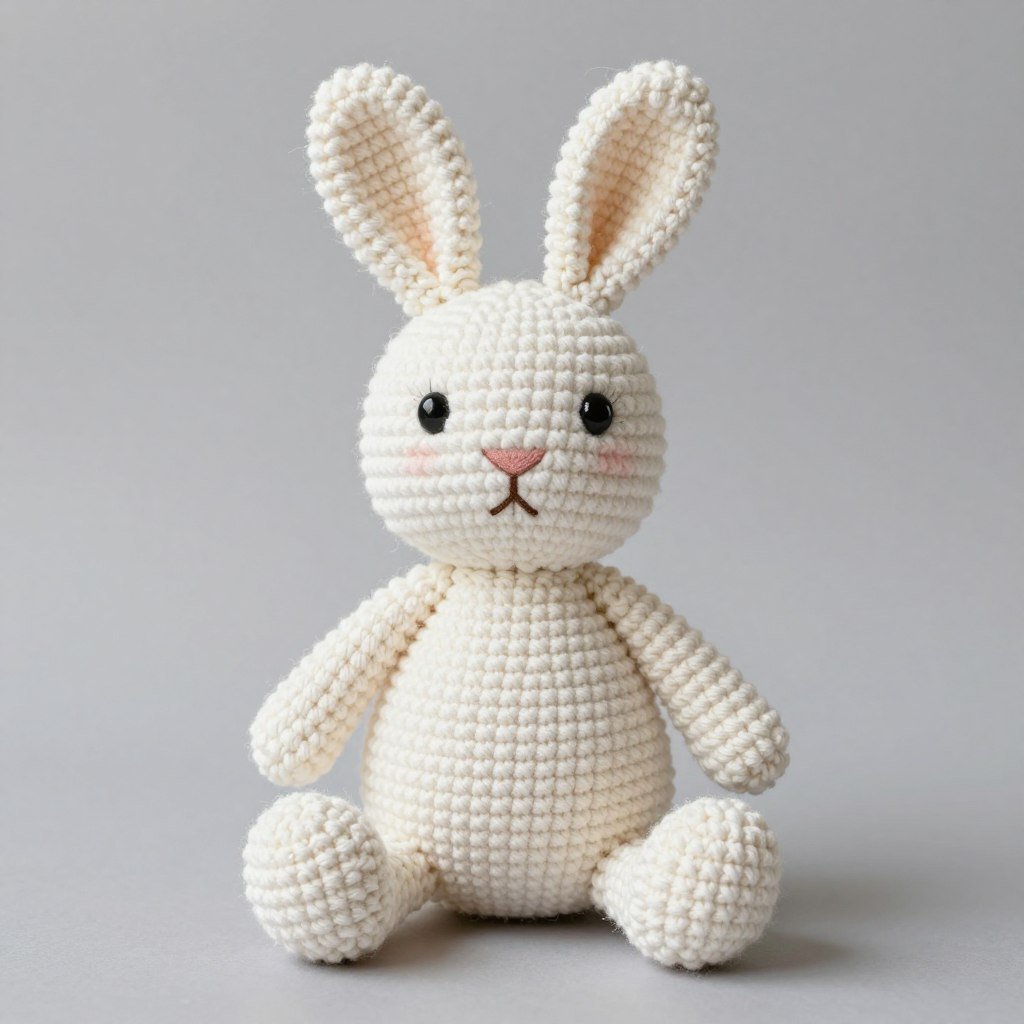
Standard Classic Bunny
Worsted weight yarn produces the classic eight-inch bunny. This size offers the perfect balance for gifting and cuddling. The detailed features show clearly at this scale.
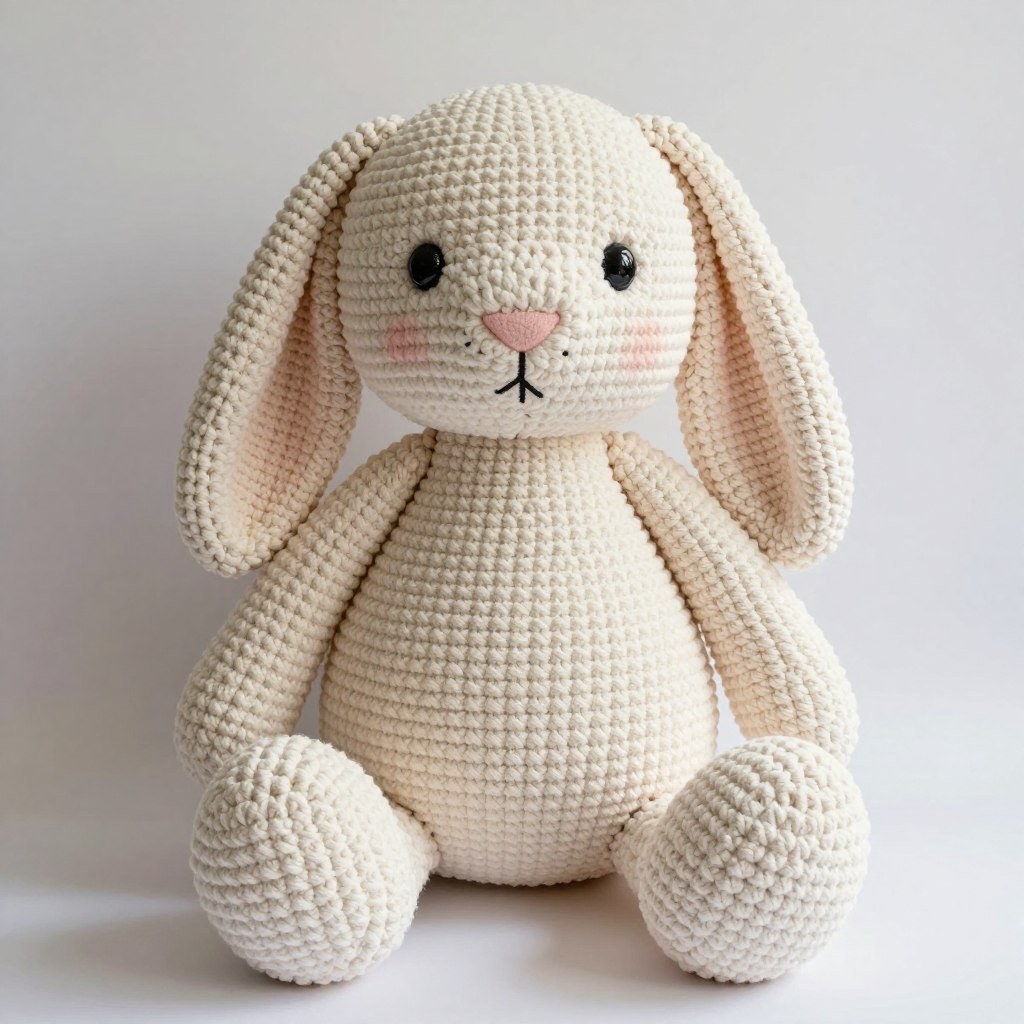
Jumbo Huggable Bunny
Bulky yarn with a 6mm hook creates impressively large bunnies measuring twelve to fourteen inches. These substantial toys become beloved companions for children and impressive handmade gifts.
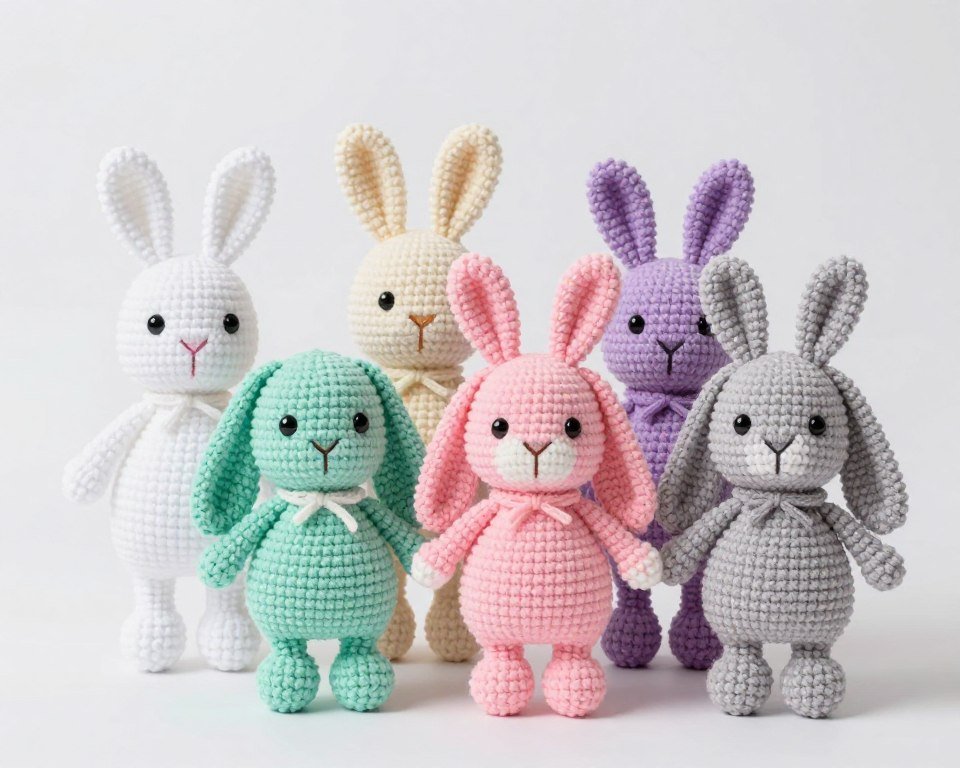
Color Combinations
Traditional white or cream creates timeless appeal. Pastel shades suit spring and Easter themes perfectly. Consider soft pink, baby blue, lavender, or mint green for seasonal variations.
Natural browns and grays produce realistic bunny colors. These earthy tones appeal to those preferring nature-inspired aesthetics. Mix colors within one bunny for added interest, like a white body with gray ears.
Bold, bright colors create modern, playful versions. Rainbow bunnies, color-blocked designs, or striped patterns offer contemporary twists on this classic pattern. Let your creativity and yarn stash guide your color choices.
Troubleshooting Common Issues
Even experienced crocheters encounter challenges when working amigurumi patterns. Understanding common problems and their solutions prevents frustration. Here are frequent issues and how to fix them.
Tension and Stitch Consistency
Loose tension creates gaps where stuffing shows through. This common beginner issue affects the finished appearance significantly. Practice maintaining consistent tension throughout your work.
Try going down a hook size if your fabric feels too open. Amigurumi requires tighter stitches than typical crochet projects. The fabric should feel firm and dense, with minimal space between stitches.
Inconsistent stitch sizing creates lumpy, uneven surfaces. Work deliberately rather than rushing. Each single crochet should look similar to the previous one. Regular practice improves muscle memory and tension consistency.
Counting and Tracking Rounds
Losing count leads to incorrect shaping and sizing. Always use a stitch marker in the first stitch of each round. Move it up as you complete rounds to maintain accurate tracking.
Count stitches at the end of every round, especially when increasing or decreasing. Catching mistakes immediately beats reworking multiple rounds later. The numbers in brackets provide essential checkpoints.
If your count seems off, don’t assume you miscounted. Recount carefully, and if still incorrect, check for missed increases or accidental decreases. Fix errors promptly before continuing.
Why does my bunny lean to one side?
Uneven stuffing causes tilting. Distribute fiberfill evenly throughout the body and head. Add more stuffing to the side that leans back until the bunny sits upright balanced.
How do I prevent the head from wobbling?
Sew the head to the body with multiple passes around the entire join. Use strong whipstitches that go deep into both pieces. Add extra stitches if the connection feels loose after initial attachment.
What if my pieces don’t match the size in the pattern?
Yarn weight and personal tension affect finished sizes. As long as all your pieces proportion correctly to each other, size variations don’t matter. Consistency within one project matters more than matching exact measurements.
Fixing Assembly Mistakes
Crooked limbs or ears result from hasty attachment. Take time to position each piece before sewing. Use pins or temporary stitches to hold pieces in place while checking overall appearance.
If a piece looks wrong after attachment, don’t hesitate to remove it and reattach correctly. Carefully cut the joining stitches and resew. Proper positioning significantly impacts the final appearance.
Care and Maintenance Instructions
Proper care extends your crochet bunny’s lifespan and keeps it looking fresh. Different yarn types require specific washing methods. Follow these guidelines to maintain your handmade creation.
Washing Guidelines
Acrylic yarn bunnies tolerate machine washing on gentle cycles. Place the bunny inside a mesh laundry bag for protection. Use cool water and mild detergent to prevent color fading or yarn damage.
Cotton bunnies wash similarly but may shrink slightly. Preshrink your yarn before crocheting if you plan to machine wash the finished toy. This prevents size changes after the first wash.
Hand washing offers the safest cleaning method for all yarn types. Fill a basin with cool water and gentle soap. Submerge the bunny and gently squeeze soapy water through the fabric. Rinse thoroughly until water runs clear.
Drying and Storage
Never put crochet toys in the dryer. High heat damages yarn fibers and can melt safety eyes. Instead, gently squeeze excess water from the bunny without wringing or twisting.
Reshape the bunny while damp, ensuring proper proportions. Lay flat on a clean towel to air dry completely. Flip occasionally for even drying. Full drying may take 24 to 48 hours depending on humidity.
Store clean, completely dry bunnies in breathable containers. Avoid plastic bags that trap moisture and encourage mildew. A fabric storage bag or cardboard box works perfectly for long-term storage.
Safety Eye Warning
Excessive heat can loosen safety eye backings. Always air dry toys with safety eyes. Check that eyes remain secure after washing. Re-tighten or replace any eyes that feel loose to maintain toy safety.
Pattern Variations and Creative Ideas
This basic crochet bunny pattern serves as a foundation for countless variations. Small modifications create entirely different looks. Explore these creative adaptations to expand your amigurumi repertoire.

Seasonal Adaptations
Spring bunnies wear tiny crocheted flowers behind one ear. Create simple five-petal flowers in contrasting colors and tack them in place. This delicate detail transforms ordinary bunnies into spring decorations.
Easter variations include pastel color schemes and egg-themed accessories. Crochet a miniature basket and fill it with tiny yarn eggs. Position the basket in your bunny’s arms for an adorable seasonal display.
Winter holiday bunnies can wear Santa hats or carry miniature presents. Red and green color schemes create festive appeal. Add these seasonal touches while maintaining the classic bunny silhouette.
Character Variations
Create character bunnies by adjusting proportions. Larger heads with smaller bodies produce cute, cartoonish versions. Elongated bodies create elegant, sophisticated rabbits. Experiment with ratios while maintaining the basic construction method.
Long, thin ears versus short, rounded ears completely change the bunny’s appearance. Modify the ear pattern length for different effects. Upright ears versus floppy ears offer additional variety from one base pattern.
Pattern Strengths
- Beginner-friendly with clear instructions
- Uses basic stitches and techniques
- Minimal materials required
- Quick to complete in 4-6 hours
- Highly customizable design
- Creates gift-worthy results
- Scales easily with different yarn weights
Potential Challenges
- Magic circle may frustrate beginners
- Requires consistent tension throughout
- Assembly needs patience and precision
- Safety eyes not suitable for babies
- Embroidery skills helpful for best results
Advanced Modifications
Add bendable wire armature inside the arms and legs for posable limbs. Insert wire before stuffing, ensuring no sharp ends poke through. This modification creates display pieces that hold various poses.
Create jointed limbs using button joints between body and arms or legs. This technique requires additional skills but produces movable, articulated bunnies. Search for amigurumi joint tutorials to learn this advanced method.
Experiment with textured yarns for different effects. Fuzzy yarn creates ultra-soft bunnies with plush appeal. Variegated yarn produces multicolored effects without changing colors manually. Each yarn type offers unique visual results.
Creating Memories with Your Handmade Bunny
This adorable free classic crochet bunny pattern provides endless creative possibilities. The straightforward instructions guide beginners through each step while offering experienced crocheters a reliable foundation for variations.

Your finished bunny represents hours of careful work and creative expression. Each stitch contributes to a unique handmade treasure. The recipient will appreciate the thought and effort invested in this personal gift.
Handmade stuffed animals carry special meaning that store-bought toys cannot match. Your crochet bunny becomes a cherished companion, carrying memories of the maker’s love and skill. These timeless toys often become family heirlooms passed to future generations.
Continue developing your crochet skills through practice and experimentation. Each bunny you create improves your technique and builds confidence. The fundamental skills learned here apply to countless other amigurumi patterns and crochet projects.
Share your finished bunnies with the crafting community. Post photos online, gift them to loved ones, or donate them to charitable causes. Spreading handmade joy multiplies the satisfaction of creating.
“The beauty of handmade gifts lies not in perfection, but in the love and time invested in creating something unique.”
Remember that every expert crocheter started as a beginner. Mistakes teach valuable lessons and improve future projects. Embrace the learning process and enjoy the meditative rhythm of working with yarn and hook.
This free crochet bunny pattern opens doors to the wonderful world of amigurumi. Use it as a springboard for exploring more complex patterns, trying new techniques, and developing your signature style. Happy crocheting!