
Creating handmade gifts brings joy to both the maker and receiver. This fleece teddy bunny free pattern opens the door to crafting adorable stuffed animals that become treasured keepsakes. Whether you are making your first stuffed animal or you have experience with yarn and crochet, this pattern guides you through each stitch.
Fleece fabric offers softness and durability that makes these projects perfect for children and adults alike. The pattern works equally well for teddy bears and bunnies. You can customize each piece to match the personality of your gift recipient.
These cuddly companions require minimal materials and basic skills. The magic circle technique starts the head, while simple stitches build the body and ears. Safety eyes add character without complicated steps.
Table of Contents
Why Choose Fleece for Stuffed Animals

Fleece stands out as the ideal material for creating stuffed animals. This fabric combines practical benefits with aesthetic appeal. The synthetic fibers resist wear while maintaining their soft texture through countless hugs.
Unlike cotton or wool yarn, fleece does not pill easily. The tight weave keeps stuffing securely inside. Children can play with these toys without worry about shedding or deterioration.
Advantages of Fleece
- Machine washable for easy cleaning
- Hypoallergenic properties safe for sensitive skin
- No fraying edges during cutting and sewing
- Stretches slightly for easier stuffing
- Available in countless colors and patterns
- Affordable compared to specialty fabrics
- Dries quickly after washing
Considerations
- Can attract pet hair and lint
- Not suitable for very small pieces
- Heat-sensitive, requires low iron settings
- May stretch out of shape if overstuffed
The material works beautifully for both crochet and sewing projects. When you work with fleece, your stitches glide smoothly. The fabric forgives minor mistakes that might show on thinner materials.
Baby soft fleece varieties feel gentle against infant skin. Parents appreciate gifts made from materials they can toss in the washing machine. The durability means these stuffed animals become longtime companions rather than short-lived toys.
Essential Materials and Tools

Gathering the right supplies before starting ensures smooth progress through your project. Most materials are available at local craft stores or online retailers. Quality supplies make a noticeable difference in your finished stuffed animal.
Fabric and Yarn Requirements
The pattern works with fleece fabric or worsted weight yarn. For fabric versions, you need half a yard of fleece for one medium-sized animal. Lion Brand Baby Soft yarn works exceptionally well for crocheted versions.
Choose colors that match your vision. Classic teddy bears look charming in brown or cream tones. Bunnies shine in white, gray, or pastel shades. You can mix colors for the body and ears to create unique combinations.
- Main color fleece or yarn for body and head
- Contrasting color for inner ears and accents
- Worsted weight yarn if choosing crochet method
- Thread matching your fabric color
Stuffing and Safety Components
Polyester fiberfill provides the best stuffing for these projects. This material stays fluffy and distributes evenly. You need approximately eight ounces for a standard-sized bunny or teddy.
Safety eyes come in various sizes. Choose twelve-millimeter eyes for medium animals. These attach securely and meet safety standards for children. Insert hook front loops carefully when adding eyes to crocheted pieces.
Safety Tip: For babies under three years old, embroider eyes instead of using plastic safety eyes. This eliminates choking hazards while maintaining the adorable expression.
Tools for Success
Basic tools make construction easier and results more professional. A five-millimeter crochet hook suits most worsted weight yarn projects. Stitch markers guide your work through continuous rounds.
- Size H (5mm) crochet hook for yarn projects
- Sharp fabric scissors for clean cuts
- Tapestry needle for weaving ends
- Stitch marker or safety pin
- Straight pins for holding fabric pieces
- Sewing machine or hand sewing needle
- Ruler or measuring tape
Quality scissors make precise cuts through fleece. Dull blades create ragged edges that affect the final appearance. A tapestry needle weaves in yarn ends invisibly.
Sizing Options for Every Need
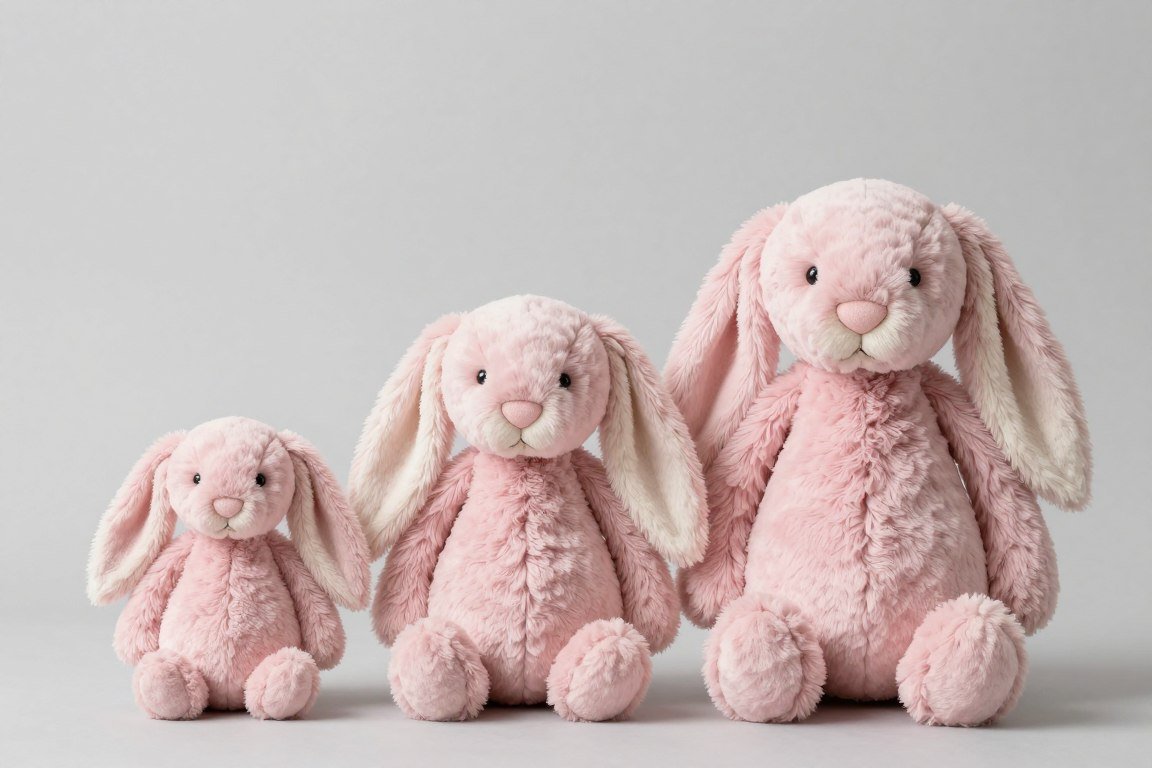
This versatile pattern adapts to create stuffed animals in multiple sizes. The basic technique remains consistent while you adjust measurements. Each size serves different purposes and appeals to various age groups.
Small Size Perfect for Little Hands
Small versions measure approximately six inches tall. These compact animals fit perfectly in tiny hands. They work wonderfully as basket stuffers or stocking additions.
For small animals, reduce your initial magic circle to four single crochet stitches. Work fewer rounds to build the head. Use less stuffing to maintain the proper proportions.
- Finished height: 6 inches
- Yarn needed: 50 grams worsted weight
- Stuffing required: 2 ounces
- Time to complete: 2-3 hours
- Best for: Toddlers, ornaments, party favors
Medium Size for Classic Appeal
Medium stuffed animals stand about ten inches tall. This traditional size feels substantial without being unwieldy. Most crafters find medium projects offer the best balance of detail and time investment.
The standard pattern instructions create medium-sized animals. You begin with six stitches in your magic circle. The head requires approximately twenty rounds before you stuff and close it.
Medium animals showcase details beautifully. You have enough space to add embroidered features or decorative elements. The bunny ears stand out prominently at this scale.
Large Size for Statement Pieces
Large versions reach fourteen to sixteen inches in height. These impressive stuffed animals become room decorations and beloved bedtime companions. They require more materials but create stunning results.
Start large projects with eight stitches in your magic circle. Work additional rounds on each body section. The increased stitch count creates fuller, rounder shapes.
| Size | Height | Yarn Amount | Stuffing | Completion Time |
| Small | 6 inches | 50 grams | 2 ounces | 2-3 hours |
| Medium | 10 inches | 100 grams | 5 ounces | 4-5 hours |
| Large | 14-16 inches | 200 grams | 10 ounces | 7-9 hours |
Large stuffed animals make impressive baby shower gifts. The substantial size conveys thoughtfulness and effort. Recipients often display these pieces prominently in nurseries or bedrooms.
Crafting the Perfect Bunny Head

The bunny head forms the foundation of your stuffed animal personality. This section requires attention to detail but follows straightforward steps. Your magic circle skills come into play immediately.
Starting with the Magic Circle
Begin by creating a magic circle. This adjustable loop starts rounds without leaving a hole in the center. Wrap your yarn around two fingers twice, then insert hook through both loops.
Pull working yarn through to create your first loop. Chain one to secure, then work six single crochet stitches into the ring. Pull the tail to tighten the circle. Place your stitch marker in the first stitch.
The magic circle technique creates a seamless beginning. Unlike chain circles, this method closes completely. Your bunny head starts with a smooth, rounded top.
Building Rounds for Shape
Work in continuous rounds without joining. Move your stitch marker up after completing each round. This technique eliminates the spiral effect that joining creates.
Round two doubles your stitch count. Work two single crochet stitches in each stitch around. You now have twelve stitches total. Continue increasing rounds to build the head size.
- Round 1: 6 single crochet in magic circle
- Round 2: Increase in each stitch (12 stitches)
- Round 3: Single crochet, increase, repeat around (18 stitches)
- Round 4: Two single crochet, increase, repeat around (24 stitches)
- Round 5: Three single crochet, increase, repeat around (30 stitches)
- Round 6-10: Work even with no increases (30 stitches)
After reaching your target width, work several rounds without increases. These straight rounds create the middle section of the head. The piece begins to cup in your hand.
Decreasing for the Bottom
Decreasing rounds mirror your increases in reverse. Instead of adding stitches, you combine two stitches into one. This shapes the bottom of the bunny head.
Work next round with decreases evenly spaced. Insert hook front loop and back loop of first stitch, then through both loops of next stitch. Yarn over and pull through all loops. This creates an invisible decrease.
Continue decreasing rounds until you have twelve stitches remaining. Before closing completely, stuff the head firmly. The stuffing should feel solid but not rock-hard.
Pro Tip: Stuff head as you decrease the bottom rounds. This makes it easier to shape and ensures even filling. Add small amounts of stuffing at a time, pushing it into the top of the head first.
Adding Facial Features
Position safety eyes between rounds nine and ten. Space them approximately six stitches apart. Push the post through the fabric from the front side. Secure the backing washer from inside before adding stuffing.
Make sure the eyes sit level. Hold the head at eye level to check alignment. Adjust if needed before clicking the washers into place. Once secured, safety eyes cannot be removed.
Embroider the nose and mouth after stuffing. Use black yarn or embroidery floss. Create a small triangle for the nose, then stitch a Y-shape below for the mouth. Keep stitches tight for definition.
Shaping Distinctive Bunny Ears

Bunny ears define the character of your stuffed animal. Long, floppy ears create an endearing appearance. The construction method determines whether ears stand upright or droop adorably.
Floppy Ear Method
Floppy ears begin with a simple oval shape. Chain fifteen stitches for the foundation. Work single crochet in the second chain from hook. Continue down the chain to the end.
At the bottom, work three single crochet stitches in the last chain. This turns your work back up the other side. Continue working single crochet up the opposite side of the foundation chain.
Work around the entire ear shape for several rounds. Increase slightly at the rounded bottom to maintain the oval. After completing five or six rounds, fasten off. Leave a long tail for sewing.
Standing Ear Technique
Standing ears require internal support. Begin the same way as floppy ears but add wire after stuffing. Flexible craft wire holds shape without feeling stiff.
Work ears in two pieces for added stability. Create an outer ear and inner ear in contrasting colors. Sew them together with wrong sides facing. Leave bottom open for wire insertion.
Bend wire into ear shape slightly smaller than the finished piece. Insert wire between layers. Sew bottom closed around the wire. The ears now hold any position you bend them into.
Materials for Ears
- Same yarn as head or contrasting color
- Optional: Lighter shade for inner ear
- Craft wire for standing ears
- Wire cutters if using wire
- Small amount of stuffing (optional)
Ear Attachment Tips
- Position ears on top of head at rounds 3-4
- Space ears approximately eight stitches apart
- Sew through all layers multiple times
- Use matching yarn for invisible seams
- Secure with knots inside the head
Adding Inner Ear Details
Inner ear contrast adds dimension and realism. Use pink, white, or cream yarn for the inner portion. Work a smaller oval following the same technique as the outer ear.
Make inner ears approximately two-thirds the size of outer ears. Attach them to the front of each ear before sewing ears to the head. Center the inner ear piece and sew around the edges.
The contrast creates visual interest. Light inner ears on dark outer ears pop beautifully. This detail elevates your bunny from simple to sophisticated.
Building the Stuffed Bunny Body
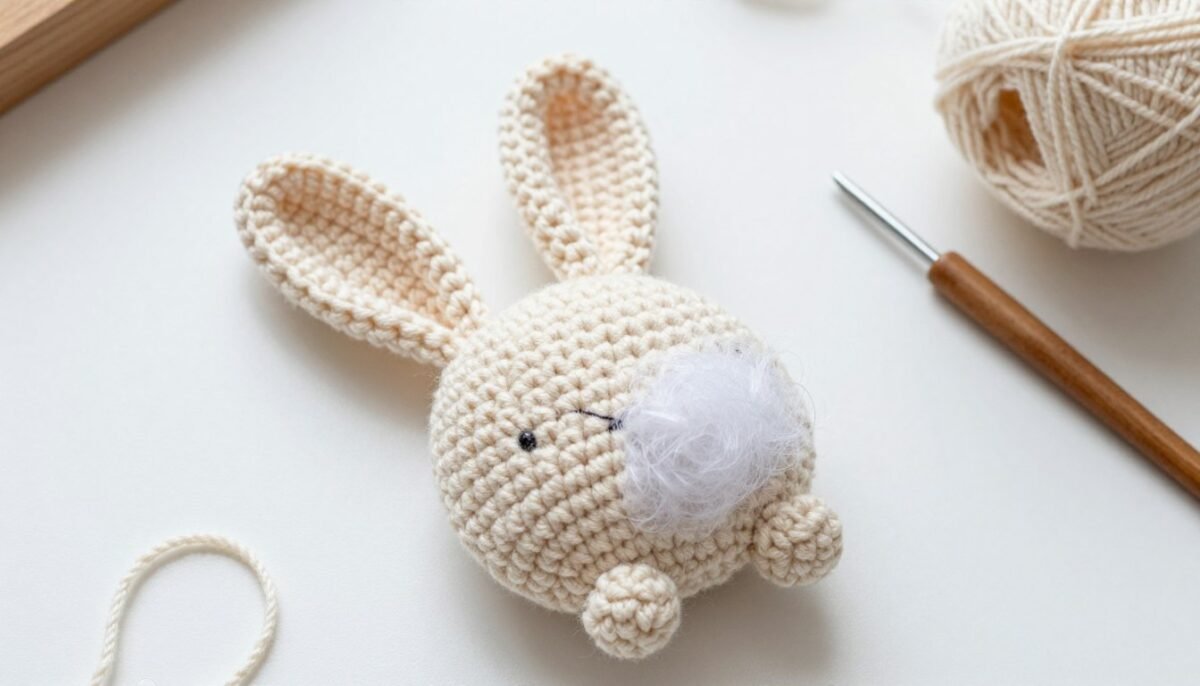
The body provides the huggable bulk of your stuffed animal. This component works up quickly using the same basic techniques. Proper shaping creates a cuddly, balanced form.
Creating the Body Base
Start the body with a magic circle just like the head. Begin with six stitches and increase following the same pattern. Work until you reach your desired body width.
For medium-sized animals, work to forty-two stitches around. This creates a pleasantly plump body. The bottom body rounds out more than the head for a pear shape.
Work straight rounds for the middle section. Continue for approximately twelve to fifteen rounds without increases or decreases. This elongates the body to proper proportions.
Shaping Bottom and Sides
The bottom of the body requires strategic decreasing. Begin decrease rounds when the piece measures about two-thirds of your target height. Work decreases evenly spaced around.
Stuff the body firmly as you work the final rounds. Push stuffing down into the bottom first. Add more as you decrease, maintaining even distribution throughout.
- Begin stuffing when piece is two-thirds complete
- Add stuffing in small handfuls
- Push stuffing to corners and bottom
- Work next decrease round
- Add more stuffing
- Continue until opening is small
- Stuff firmly one final time
- Close opening with slip stitch
The right side of the body should face outward. Check your stitches regularly to ensure you are working correctly. See stitches clearly by using good lighting as you work.
Attaching Head to Body
Proper attachment creates a sturdy connection between head and body. Position the head centered on top of the body. Pin in place temporarily to check alignment.
Thread a tapestry needle with matching yarn. Sew around the connection point twice. Go through both pieces with each stitch. Pull tight to create a secure bond.
Weave ends through stitches inside the body. This hides yarn tails and reinforces the connection. Your bunny can now withstand enthusiastic hugging.
Stability Secret: For extra durability, run a thread through the head and body vertically before sewing the outer seam. This internal anchor prevents wobbling even with rough play.
Adding Arms, Legs, and Tail Details
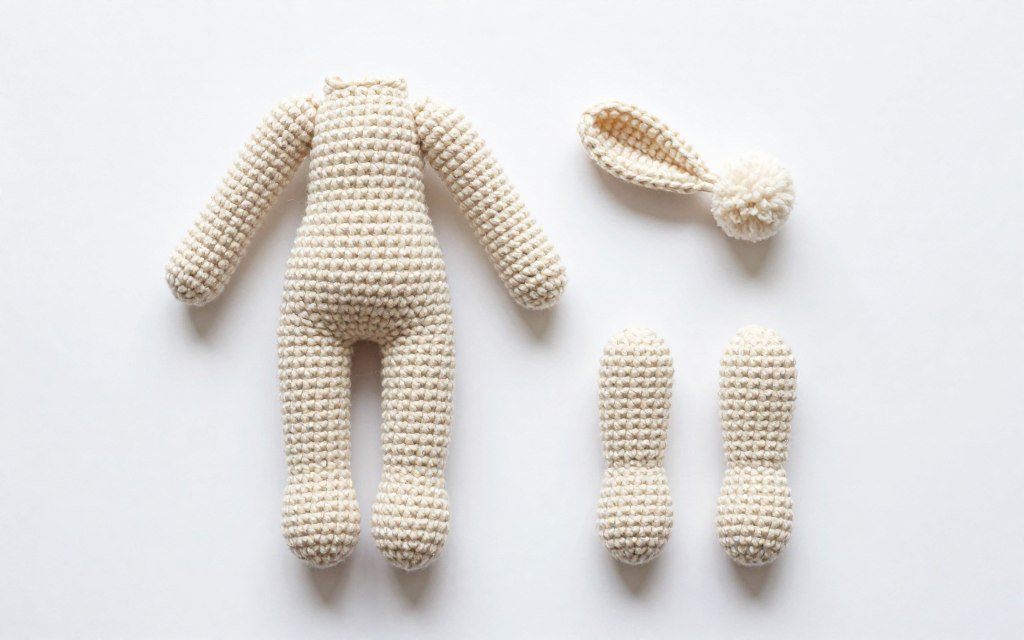
Limbs and tails bring your stuffed animal to life. These smaller pieces work up quickly. Attention to symmetry ensures your bunny looks balanced and professional.
Simple Arm Construction
Arms begin with a magic circle of five stitches. Work increases for three rounds to reach fifteen stitches. Continue straight for eight to ten rounds depending on desired arm length.
Stuff arms lightly. Too much stuffing makes them stiff and stick straight out. Light filling allows arms to drape naturally at the sides. Leave the top two inches unstuffed for easier attachment.
Flatten the opening of each arm. Sew across the top to close. This creates a flat edge that attaches flush against the body. Position arms on either side at the neck line.
Creating Sturdy Legs
Legs require more structure than arms. Start with six stitches in a magic circle. Increase to twenty-four stitches for the foot area. Work several rounds at full width.
Decrease back to twelve stitches above the foot. This creates a distinct foot shape. Work straight rounds for the leg length. Stuff feet firmly for stability.
Attach legs to bottom body at a slight angle. Position them toward the front so the bunny sits properly. Sew securely through all layers multiple times.
Arm Specifications
- Starting stitches: 5 in magic circle
- Maximum width: 15 stitches
- Length: 10-12 rounds straight
- Stuffing: Light, leave top empty
- Placement: Sides at neck line
Leg Specifications
- Starting stitches: 6 in magic circle
- Foot width: 24 stitches
- Leg width: 12 stitches
- Stuffing: Firm in foot, medium in leg
- Placement: Bottom front of body
Crafting an Adorable Tail
Bunny tails add charm and whimsy. Create a fluffy pompom using Lion Brand or similar yarn. Wrap yarn around three fingers fifty times for a medium-sized tail.
Tie the center tightly with a separate piece of yarn. Cut the loops on both sides. Trim the pompom into a round ball shape. Fluff the fibers to create maximum volume.
Attach the tail to the bottom back of the body. Sew through the center tie multiple times. The tail should sit slightly upward for the classic bunny appearance.
Alternatively, crochet a small round ball for the tail. Work in continuous rounds starting with a magic circle. Increase to fifteen stitches, work three rounds straight, then decrease back to six stitches. Stuff lightly before closing.
Complete Step-by-Step Assembly Guide
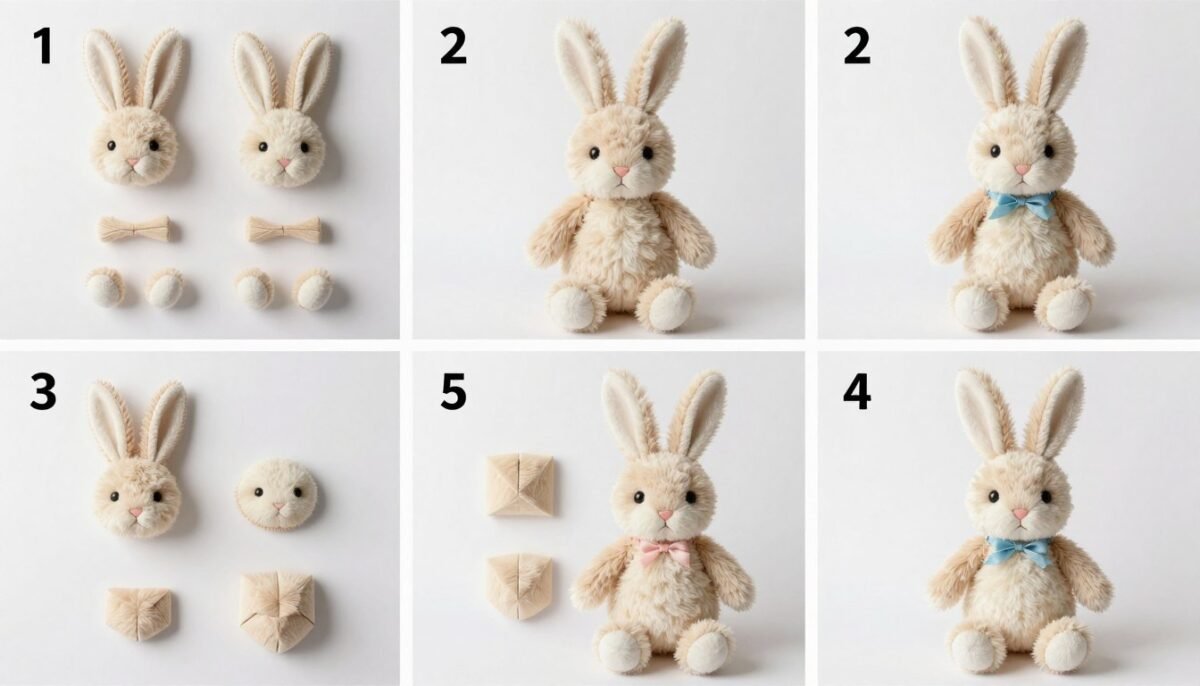
Following assembly in the correct order prevents mistakes and ensures professional results. This systematic approach works for both crochet and sewn versions. Take your time with each step.
Preparation Phase
Gather all completed pieces before beginning assembly. Lay them out to check that you have everything needed. Block pieces if desired by gently steaming with an iron on low heat.
Cut yarn lengths for sewing approximately thirty inches long. Thread tapestry needles with matching colors. Keep scissors and extra stuffing nearby.
- One completed head with facial features
- One body piece fully stuffed
- Two ears with inner ear details
- Two arms lightly stuffed
- Two legs firmly stuffed
- One tail pompom or crocheted ball
Assembly Order
Begin by attaching ears to the head. Position them symmetrically using the stitch marker guide. Sew each ear with matching yarn. Go through the head multiple times at each attachment point.
Next, join the head to the body. Center the head on top. Pin if needed to maintain position while sewing. Work around the entire circumference twice for security.
- Attach both ears to head top
- Sew head securely to body
- Add arms at shoulder position
- Attach legs to body bottom
- Sew tail to back bottom
- Weave in all remaining ends
- Give final shape adjustment
- Trim any stray fibers
Arms attach at the shoulder line where head meets body. Angle them slightly forward. Sew through the flattened arm tops into the body sides. Reinforce with multiple passes of the needle.
Legs position toward the front of the bottom body. Space them evenly apart. The bunny should sit upright when placed on a flat surface. Adjust positioning if needed before final securing.
Final Details and Finishing
After all pieces attach, check for any loose ends. Weave ends through stitches on the inside of pieces. Trim close to the work so tails do not show through.
Shape your bunny by gently manipulating the stuffing. Press and adjust until the form looks balanced. The head should sit level, not tilting to either side.
Give your creation a final inspection. Look for any gaps in seams that need reinforcement. Add extra stitches where pieces join if you see any openings. Your stuffed bunny is now complete.
Creative Customization and Personalization
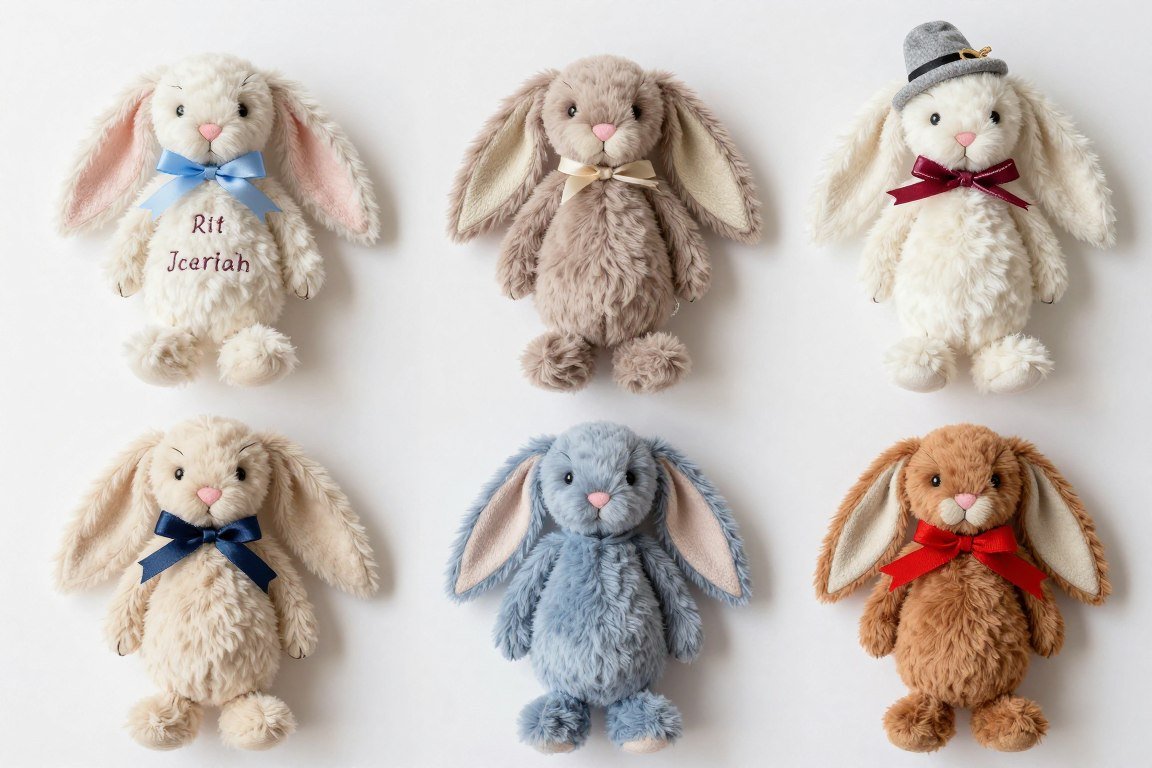
Personalizing your stuffed animals makes them extra special. Simple modifications transform the basic pattern into unique creations. Recipients treasure customized gifts that reflect their personalities.
Color Combinations and Patterns
Experiment with unexpected color pairings. Traditional pastels work beautifully, but bold colors create modern appeal. Mix bright yarn with neutral tones for contemporary style.
Create ombre effects by gradually changing yarn colors. Start with dark yarn at the bottom and transition to lighter shades toward the head. This technique requires planning your color changes at specific rounds.
Use variegated or self-striping worsted weight yarn for automatic patterns. These specialty yarns create stripes or color pools without changing yarn. The effect looks complex while remaining beginner-friendly.
- Rainbow gradient from feet to head
- Two-tone body with contrasting limbs
- Seasonal colors for holiday gifts
- School or team colors for sports fans
- Pastel combinations for nursery decor
- Metallic yarn accents for special occasions
Adding Clothing and Accessories
Dress your bunny in miniature clothing for added charm. Simple pieces like scarves and bows require minimal extra time. More elaborate outfits showcase advanced skills.
Create a simple scarf by chaining thirty stitches. Work three rows of single crochet. Fringe the ends by cutting yarn into three-inch pieces and knotting them through the edge stitches.
Bow ties add formal flair. Cut ribbon approximately six inches long. Wrap the center with thread to create the bow shape. Sew directly to the bunny at neck level.
Easy Accessories
- Ribbon bows
- Simple scarves
- Felt hearts
- Button embellishments
Intermediate Options
- Crocheted hats
- Fabric dresses
- Knit sweaters
- Booties or shoes
Advanced Details
- Complete outfits
- Seasonal costumes
- Themed accessories
- Matching sets
Embroidered Names and Messages
Personalize gifts with embroidered names on the bottom of feet or body. Use backstitch for clean lettering. Practice on scrap fabric first to perfect your technique.
Add birth dates, special messages, or meaningful symbols. Keep text simple and legible. Choose embroidery floss colors that contrast with your base fabric for visibility.
Transfer patterns using water-soluble markers. Draw directly on the fleece or yarn surface. The marks disappear when you wash the finished piece. This method ensures accurate placement.
Seasonal and Holiday Variations
Adapt the basic pattern for holidays throughout the year. Small changes create themed versions perfect for seasonal decorating or gift-giving.
Easter bunnies wear pastel colors with floral accessories. Add felt flowers to ears or create tiny baskets for arms to hold. Include small plastic eggs as props.
Christmas teddy bears look festive in red and green combinations. Add white trim to ears and feet to simulate Santa outfit details. A tiny felt hat completes the transformation.
Valentine versions use pink and red yarn with heart embellishments. Embroider small hearts on the feet or body. Add lace trim around ears for romantic detail.
Proper Care and Maintenance Guidelines

Proper care extends the life of handmade stuffed animals. These toys withstand regular play when maintained correctly. Simple cleaning routines keep them fresh and safe.
Washing Instructions
Machine washing works for most fleece and yarn stuffed animals. Place the toy inside a mesh laundry bag for protection. Use cold water on gentle cycle to prevent damage.
Choose mild, dye-free detergent. Harsh chemicals can fade colors or damage fibers. Skip fabric softener as it may affect the fleece texture.
Spot clean small stains rather than washing the entire piece. Dab with a damp cloth and gentle soap. Blot dry immediately. This method works well for minor spills.
Safety Note: Remove any non-washable accessories before machine washing. Ribbons, felt pieces, and buttons may not survive the washing machine. Reattach them after the toy dries completely.
Drying Methods
Air drying preserves shape and texture better than machine drying. Squeeze excess water gently without wringing. Lay flat on a clean towel in a well-ventilated area.
Reshape the toy while damp. Adjust limbs, ears, and body to proper positions. Fluff stuffing by pressing gently from the outside. Allow twenty-four to forty-eight hours for complete drying.
Low-heat tumble drying works in a pinch. Add several clean tennis balls to help maintain shape. Check every fifteen minutes. Remove while slightly damp and finish air drying.
- Never use high heat on fleece or yarn
- Avoid direct sunlight while drying to prevent fading
- Ensure complete drying before storage
- Fluff and reshape during drying process
- Check for loose seams after washing
Storage Recommendations
Store stuffed animals in clean, dry locations. Avoid damp basements or hot attics. These environments encourage mold growth or attract pests.
Keep toys in breathable containers if storing long-term. Plastic bins can trap moisture. Cotton bags or open shelves work better for preservation.
Protect from direct sunlight during storage. UV rays fade colors over time. Choose dark closets or covered storage areas for best color retention.
Repair and Maintenance
Inspect seams regularly for wear. Reinforce loose areas before they become holes. A few quick stitches prevent major repairs later.
Replace safety eyes immediately if they loosen. This prevents choking hazards for young children. Keep spare eyes and backings in your craft supplies.
Refresh flattened stuffing by opening a small seam and adding fresh fiberfill. Distribute evenly throughout the piece. Sew the opening closed with matching thread.
Trim pilling from fleece surfaces using fabric shavers. These devices remove fuzzy balls without damaging the underlying fabric. Work gently to avoid thinning the material.
Perfect Presentation for Gift Giving

Thoughtful presentation elevates handmade gifts. The packaging shows recipients how much you care. Simple wrapping techniques create professional-looking results.
Packaging Ideas
Clear cellophane bags showcase your handiwork while protecting it. Choose bags slightly larger than the stuffed animal. Tie with coordinating ribbon at the top.
Decorative boxes work well for formal occasions. Line boxes with tissue paper in complementary colors. Nestle the stuffed animal in the center. Add a handmade tag for personal touch.
Reusable fabric gift bags offer eco-friendly options. The recipient can use the bag for storage afterward. Choose patterns that match the occasion or recipient preferences.
Budget-Friendly Options
- Clear cellophane with ribbon
- Brown kraft paper with twine
- Recycled boxes with tissue
- Fabric scraps as wrapping
- Newspaper comic section for fun look
Premium Presentation
- Custom wooden gift boxes
- Monogrammed fabric bags
- Shadow box display frames
- Personalized gift baskets
- Professional gift wrapping service
Adding Personal Touches
Include care instruction cards with each gift. Type or handwrite washing guidelines. Recipients appreciate knowing how to maintain their special toy.
Attach small tags with the stuffed animal name and creation date. This adds sentimental value. Years later, recipients remember exactly when they received their special gift.
Create matching sets for siblings or twins. Coordinate colors while maintaining individual characteristics. Package together or separately depending on the occasion.
Occasion-Specific Suggestions
Baby shower gifts look darling in pastel wrapping. Include practical items like burp cloths or bibs alongside the stuffed animal. Create a themed basket around the toy.
Birthday presentations benefit from age-appropriate wrapping. Bright colors and fun patterns suit children. Elegant wrapping in favorite colors works for adults who collect handmade items.
Holiday gifts coordinate with seasonal themes. Use traditional colors and add small ornaments or seasonal decorations. The packaging becomes part of the gift experience.
Seller Tip: If you plan to sell your creations, invest in professional tags and packaging. Consistent branding helps customers remember your work. Include business cards or care instructions with each sale.
Troubleshooting Common Crafting Challenges
Even experienced crafters encounter challenges. Recognizing common issues helps you solve them quickly. Most problems have simple fixes that do not require starting over.
Tension and Gauge Problems
Inconsistent tension creates uneven stitches. Your work may appear wavy or puckered. Practice maintaining steady yarn tension as you work.
Too-tight stitches make stuffing difficult and create stiff fabric. Relax your grip slightly. The hook should slide through stitches easily. See stitches clearly without straining the yarn.
Loose stitches create gaps that expose stuffing. Tighten your tension or switch to a smaller crochet hook. The fabric should feel firm without being rigid.
- Practice consistent hand position
- Maintain even yarn tension throughout
- Switch hook sizes if needed
- Take breaks to prevent hand fatigue
- Check gauge against pattern specifications
Shaping and Symmetry Issues
Lopsided pieces result from uneven increases or decreases. Count stitches at the end of each round. Mark round beginnings with your stitch marker to guide accurate counting.
Flat spots indicate insufficient stuffing. Add more fiberfill to problem areas. Use a chopstick or crochet hook to push stuffing into tight corners.
Overstuffed pieces look distorted and strain seams. Remove excess stuffing before closing pieces. The fabric should feel full but not stretched tight.
Assembly Difficulties
Wobbly head attachment needs reinforcement. Add more sewing passes around the neck connection. Consider adding internal support with pipe cleaners or wire.
Limbs that stick out awkwardly require repositioning. Remove and reattach at different angles. Pin placement before sewing to preview the final look.
Visible seams detract from finished appearance. Use matching yarn for sewing. Work stitches under the surface layer rather than over the top. Pull stitches snug to hide them.
Fixing Mistakes Without Starting Over
Small mistakes rarely require complete do-overs. Strategic fixes save time while maintaining quality. Assess whether the error affects structure or just appearance.
Dropped stitches can be picked up and reworked. Insert your hook into the dropped loop. Pull working yarn through to recreate the stitch. Continue working from that point.
Wrong stitch counts require adjustment in subsequent rounds. Add or skip increases as needed to reach the correct count. Distribute changes evenly around the piece.
Color mistakes in small areas can be covered with embellishments. Add decorative stitching or felt shapes over errors. Transform mistakes into intentional design elements.
Creating Teddy Bear Variations
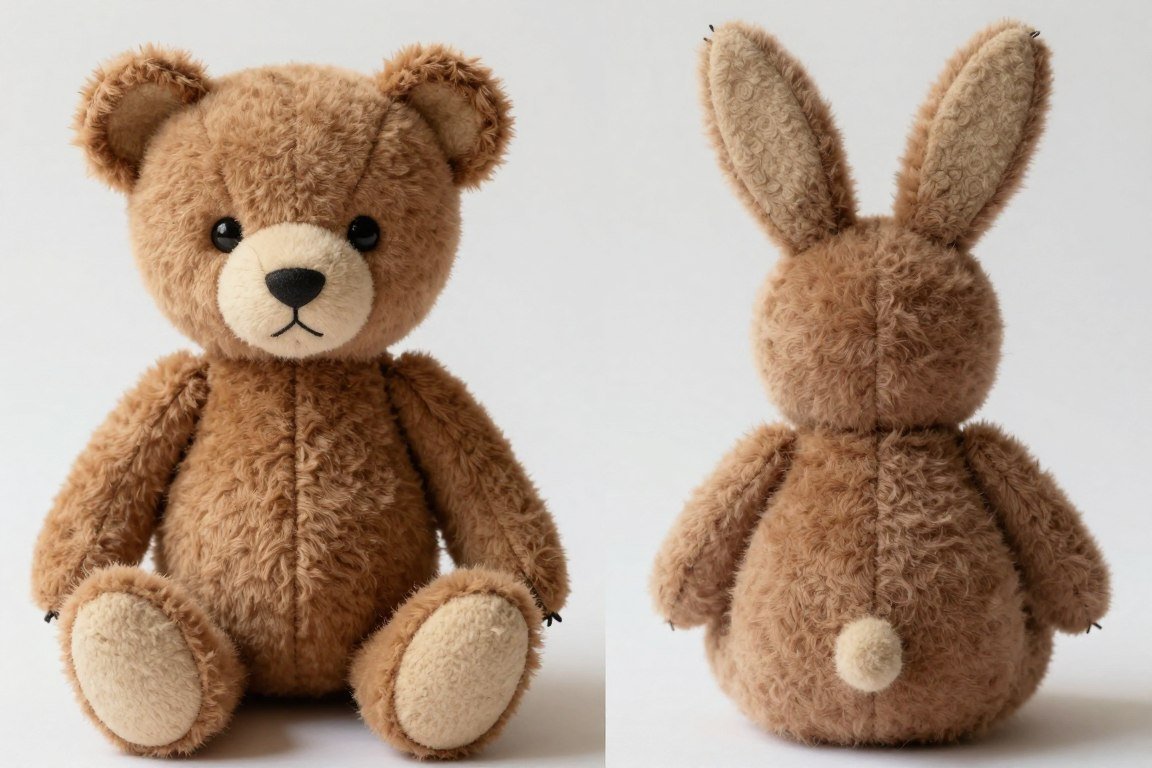
The same basic pattern creates adorable teddy bears with minor modifications. Understanding the changes helps you offer variety. Both animals follow identical body construction.
Modifying Ears for Teddy Style
Teddy bear ears are round rather than long and oval. Create them by working in continuous rounds rather than oval shapes. Start with a magic circle of six stitches.
Increase to eighteen stitches over three rounds. Work two rounds straight at eighteen stitches. Flatten the ear and sew the opening closed. Leave a long tail for attachment.
Position ears on the sides of the head rather than on top. Place them at rounds eight through twelve. Angle them slightly upward for alert appearance.
Adjusting Facial Features
Bears have rounder faces than bunnies. Work one or two additional increase rounds when making the head. This creates a fuller, less elongated shape.
Position safety eyes slightly higher and closer together. This gives the teddy bear an endearing expression. Space eyes approximately four to five stitches apart instead of six.
Embroider a triangular nose slightly larger than bunny noses. Create an inverted Y-shape below for the mouth. Use dark brown or black yarn for definition.
Bunny Characteristics
- Long oval ears on top of head
- Slightly elongated face
- Eyes wider apart
- Small triangular nose
- Round tail pompom
Teddy Bear Features
- Round ears on sides of head
- Fuller, rounder face
- Eyes closer together
- Larger triangular nose
- Optional small round tail
Paw Pad Details
Add paw pads to teddy bear feet for authentic detail. Cut small ovals from contrasting felt. Sew them to the bottom of feet before attaching legs to body.
Create toe definitions by stitching three or four lines across the top of each paw pad. Use matching embroidery floss. Keep stitches even for professional appearance.
Embroider paw pads directly onto crocheted feet as an alternative. Use contrasting yarn to fill a kidney-bean shape on each foot bottom. Satin stitch creates smooth coverage.
Building Your Crafting Skills

This pattern offers opportunities to develop multiple crafting techniques. Each project builds confidence and skill. Regular practice produces noticeable improvement.
Mastering Fundamental Stitches
Single crochet forms the foundation of this entire pattern. Perfect this stitch through repetition. Focus on maintaining consistent height and tension.
Insert hook front and back loops unless directed otherwise. This creates the standard stitch appearance. Some patterns specify front loop only or back loop only for texture variation.
Practice invisible decreases until they become automatic. This technique keeps your work neat. The decreases blend seamlessly into surrounding stitches when worked correctly.
- Start with simple practice swatches
- Work on maintaining even tension
- Master the magic circle technique
- Perfect invisible decreases
- Learn to read your stitches
- Practice counting accurately
- Develop efficient hand position
- Build speed gradually
Understanding Construction Methods
Working in continuous rounds differs from joined rounds. This pattern uses continuous rounds for seamless appearance. Understanding when to use each method expands your pattern options.
Top-down construction begins at the head and works toward the bottom. This approach allows you to try on or check fit as you work. Bottom-up construction reverses this order.
Flat pieces sewn together create different effects than worked-in-the-round pieces. Both methods have advantages. Experimenting helps you discover personal preferences.
Advancing to Complex Projects
After mastering basic bunnies and bears, try adding complexity. Create clothing, accessories, or additional features. Each addition teaches new techniques.
Join pieces as you work rather than sewing later. This advanced technique requires planning but eliminates finishing work. Research join-as-you-go methods for future projects.
Experiment with different yarn weights. The same pattern creates varied results with thin or thick yarn. Adjust hook sizes accordingly and note how finished sizes change.
Take Your Skills to the Next Level
Join our exclusive online crafting community for advanced tutorials, pattern variations, and personalized help. Access our library of specialized techniques, connect with fellow makers, and showcase your creations.
Creating Treasured Handmade Memories

This fleece teddy bunny free pattern opens doors to endless creative possibilities. You now possess the knowledge to craft adorable stuffed animals perfect for any occasion. Each piece you create carries the warmth of handmade love.
The skills developed through these projects extend beyond simple crafting. You have learned patience, attention to detail, and problem-solving. These abilities serve you well in all future creative endeavors.
Remember that perfection comes with practice. Your first bunny may not match your vision exactly. Each subsequent project shows improvement. Embrace the learning process and celebrate small victories.
Share your creations with loved ones or keep them as cherished decorations. Handmade stuffed animals become family heirlooms passed through generations. The time invested creates lasting memories and meaningful connections.
Continue exploring variations and developing your unique style. Try new color combinations, add creative embellishments, or design original accessories. Your personal touch transforms basic patterns into distinctive works of art.
The crafting community welcomes makers of all skill levels. Share your progress, ask questions, and inspire others. Together we celebrate the joy of creating beautiful, functional art with our own hands.
Final Encouragement: Every expert crafter started as a beginner. Do not let fear of imperfection stop you from starting. Pick up your hook or needle and create something wonderful today. Your first stitch begins an amazing journey.