
Standing water in your yard after every rain creates more than just muddy inconvenience. It damages your landscape, attracts mosquitoes, and threatens your home’s foundation.
A dry creek bed offers a beautiful solution. This natural drainage feature channels water away from problem areas while adding visual interest to your landscape.
These 20 ideas provide practical approaches for every yard size and budget. Each method addresses specific drainage challenges homeowners face today.
Table of Contents
Understanding Dry Creek Beds for Effective Drainage
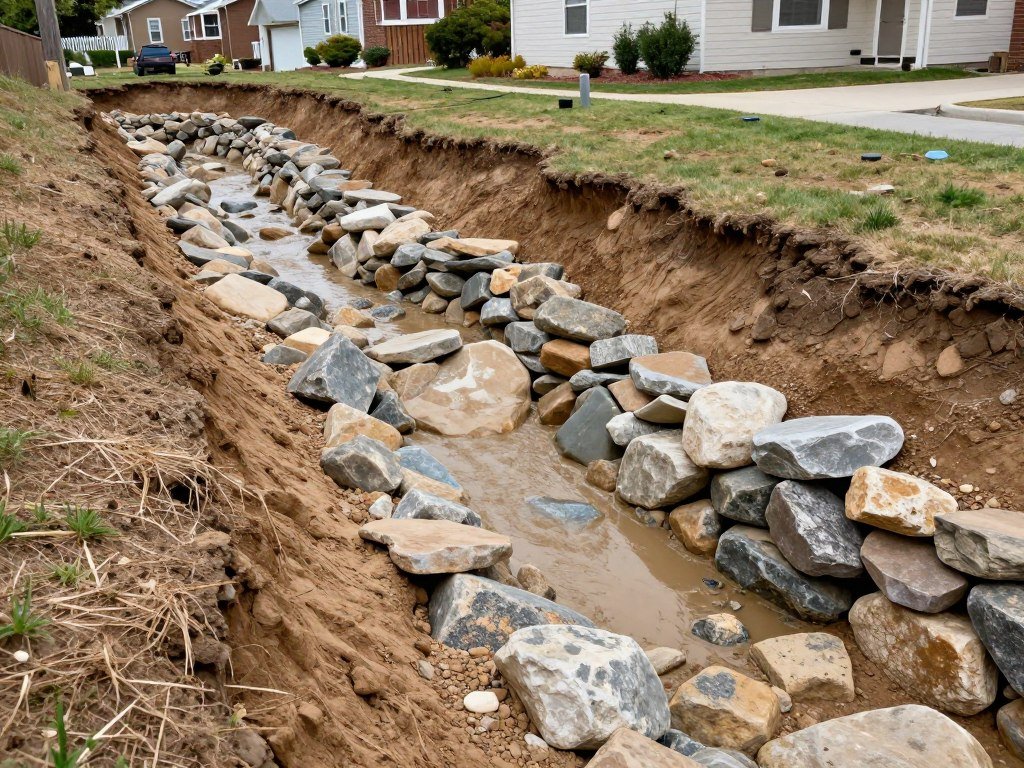
A dry creek bed mimics nature’s drainage systems. Water flows through a carefully designed channel filled with rocks and gravel during rain events.
The structure remains attractive even when dry. Rocks of varying sizes create texture and visual appeal in your landscape throughout the year.
The system works through careful grading and material selection. Heavy-duty landscape fabric prevents weeds while allowing water to pass through efficiently.
Key Components of Successful Drainage
Every effective dry creek bed includes several essential elements working together. Understanding these components helps you build a system that lasts years.
- Proper slope directing water away from structures
- Heavy-duty landscape fabric preventing soil erosion
- Varied rock sizes creating natural appearance and function
- Strategic placement capturing water at high points
- Native plants stabilizing edges and filtering runoff
Planning Your Drainage Path
Water follows the path of least resistance. Observe your yard during heavy rain to identify natural flow patterns.
Mark where water pools and where it currently drains. This information guides your dry creek bed placement for maximum effectiveness.
The ideal path intercepts water before it causes problems. Route the creek bed to carry water to appropriate drainage points away from your home.
1. Basic Straight Channel Design
The straight channel works perfectly for simple drainage needs. This design moves water efficiently across flat or gently sloping yards.
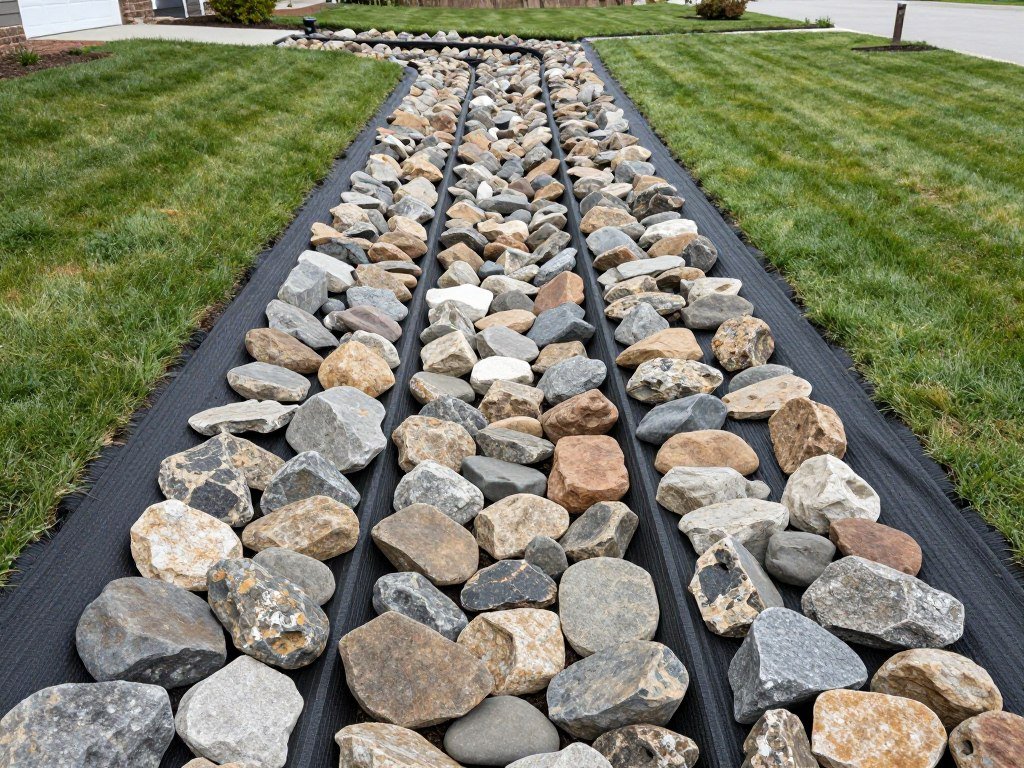
Start by digging a trench six to eight inches deep. The width depends on the amount of water your yard receives during storms.
Line the excavated area with heavy-duty landscape fabric. This barrier prevents weeds from growing through rocks while allowing water to drain into soil below.
Material Requirements
- Heavy-duty landscape fabric to cover entire channel
- Larger river rock for channel bottom and stability
- Smaller river rock for top layer and visual appeal
- Edge restraint to keep rocks contained
Fill the bottom third with larger rocks. These create space for water flow and provide structural foundation.
Top with smaller river rock for a finished appearance. The varied rock sizes prevent settling and maintain drainage capacity over time.
2. Meandering Natural Creek Style
Curved paths look more natural than straight lines. A meandering dry creek bed blends seamlessly into landscape design while handling drainage effectively.
Create gentle curves using a garden hose to mark the desired path. Avoid sharp turns that might restrict water flow during heavy rain events.

The shape should follow natural landscape contours. This approach requires less excavation and works with existing yard topography.
Creating Natural Curves
Vary the creek bed width along its length. Wider sections occur naturally at curves where water might spread out.
Narrow sections between curves create visual interest. This variation mimics how real streams form in nature over time.
Place larger boulders on the outside of curves. These anchor the design and prevent erosion where water naturally pushes against edges.
3. Multi-Level Cascade System
Sloped yards benefit from stepped drainage. This design creates small drops that slow water velocity and prevent erosion.
Each level acts as a temporary holding area during rain. Water pools briefly before flowing to the next section, reducing downstream impact.

Build small rock dams at intervals down the slope. These barriers create the cascade effect while maintaining structural integrity.
Construction Technique
Start at the highest point in your yard. Dig the first section and set large rocks to create the initial pool area.
Each subsequent level sits slightly lower. The drops between levels should be six to twelve inches for best results.
Secure larger rocks with packed soil beneath. This prevents shifting during heavy water flow events that test the system.
4. Bordered Edge Design
Defined edges give dry creek beds a polished look. This approach uses uniform stones or pavers to create clean boundaries.
The border contains smaller rocks within the channel. It also provides a clear transition between the creek bed and surrounding landscape.

Select border materials that complement your home’s exterior. Matching colors create visual cohesion across your entire landscape design.
Install borders before filling with rock. Set them firmly to prevent movement when rocks settle over time.
5. Heavy-Duty Fabric Foundation System
Quality landscape fabric makes the difference between temporary and permanent solutions. This foundation prevents weeds while maintaining excellent drainage capacity.
Commercial-grade fabric withstands rocks settling into soil over years. Cheaper alternatives break down quickly, allowing weeds to penetrate and ruin your creek bed.
Proper Fabric Installation
Overlap fabric sections by at least six inches. This prevents gaps where weeds might emerge between pieces.
Secure fabric edges with landscape staples every two feet. Stakes prevent fabric from shifting during rock placement or heavy rain.
Extend fabric beyond your planned rock area. Tuck edges under surrounding soil or mulch for a seamless appearance.
Premium Fabric Benefits
- Blocks 98% of weed growth long-term
- Water drainage rate exceeds 50 gallons per minute
- UV-resistant materials prevent breakdown in sunlight
- Professional-grade warranty up to 25 years
Quality fabric investment pays off over time. You avoid the frustration of pulling weeds from between rocks year after year.
6. Decorative Bridge Crossing Feature
A small bridge transforms a functional drainage feature into a landscape focal point. This addition works especially well where the creek bed crosses a garden path.

The bridge serves both practical and aesthetic purposes. It provides easy passage over the drainage channel while adding architectural interest to your yard.
Select bridge materials that match your home’s style. Wood, stone, or composite materials each create different visual effects.
Installation Considerations
Position the bridge at the narrowest creek bed point. This minimizes bridge length while maintaining stable banks on both sides.
Ensure adequate clearance beneath for water flow. Even decorative bridges need six inches minimum space for drainage during storms.
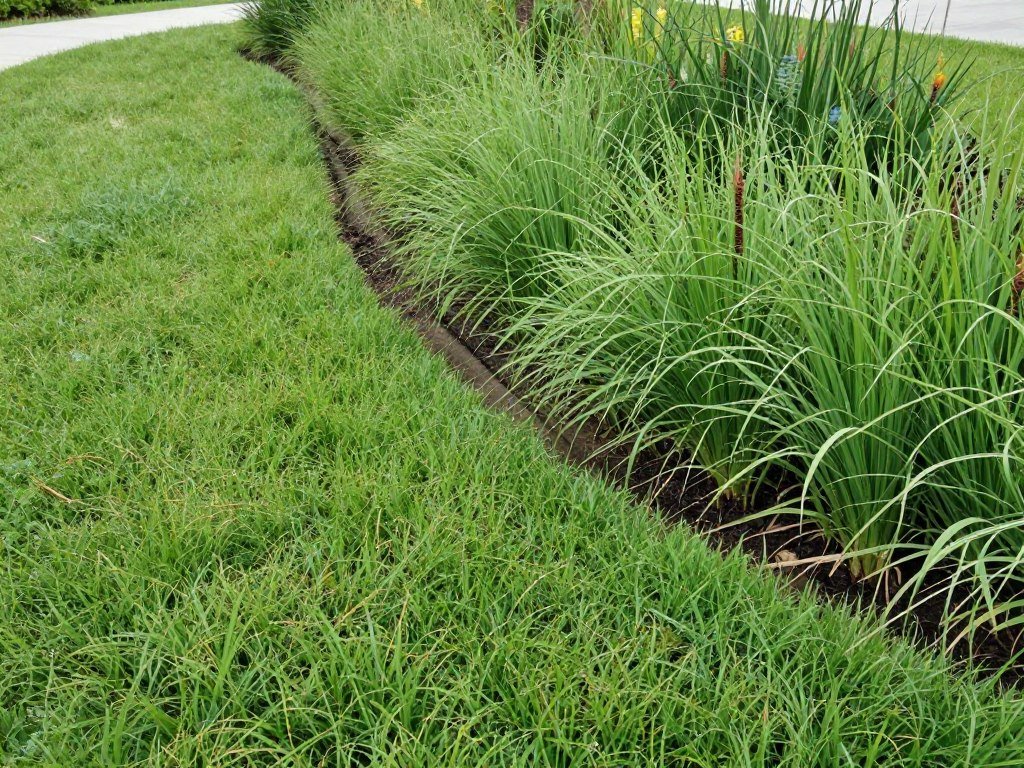
7. Planted Edge Integration
Native plants soften dry creek bed edges naturally. They also provide additional erosion control and wildlife habitat throughout the year.
Select species that tolerate both wet and dry conditions. Creek bed edges experience moisture during rain but may dry completely between storms.
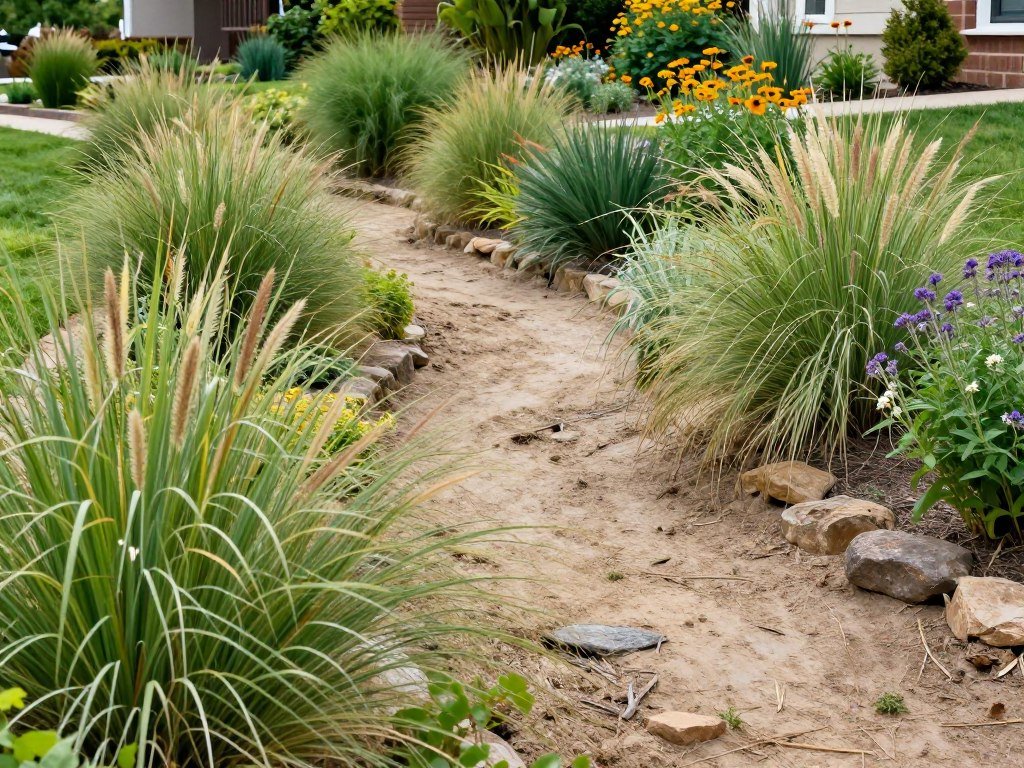
Plant in irregular groupings for natural appearance. Avoid straight lines or evenly spaced plants that look artificial.
Plant Selection Guide
Ground Covers
Low-growing plants fill space between rocks and prevent soil erosion.
- Creeping thyme for fragrance
- Blue star creeper for color
- Creeping Jenny for texture
- Sedum varieties for drought tolerance
Ornamental Grasses
Grasses add movement and height while requiring minimal maintenance.
- Blue fescue for compact growth
- Fountain grass for dramatic effect
- Mexican feather grass for texture
- Switch grass for height
Flowering Perennials
Blooming plants attract pollinators and provide seasonal color.
- Black-eyed Susans for summer blooms
- Purple coneflowers for butterflies
- Daylilies for various colors
- Salvia for continuous flowering
Native Shrubs
Larger plants create structure and year-round visual interest.
- Buttonbush for wetland areas
- Winterberry for fall color
- Native azaleas for spring blooms
- Spicebush for wildlife value
8. Boulder Accent Placement
Large boulders add drama and anchor your design visually. Strategic placement creates focal points while serving functional drainage purposes.
Position boulders to redirect water flow naturally. They guide drainage while creating the appearance of a natural stream bed.
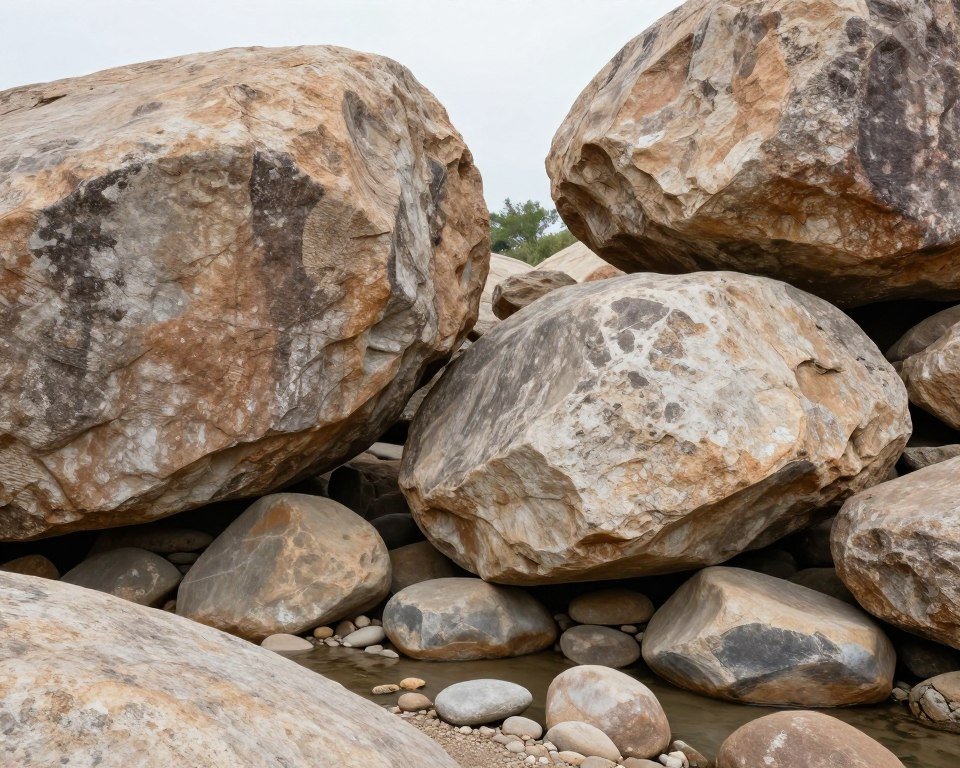
Bury boulders partially for authentic appearance. One-third of each boulder should sit below ground level for stability and natural look.
Placement Strategy
Use odd numbers of boulders in groupings. Three or five rocks create more visual interest than even numbers.
Vary boulder sizes within each grouping. This mimics how rocks naturally occur in stream beds over time.
Place the largest boulders first. Build the remaining design around these anchor points for cohesive flow.
9. Gravel Gradient Technique
Varying rock sizes from large to small creates natural-looking transitions. This gradient approach improves both function and aesthetics.
Larger rocks sit at the creek bed bottom. Medium rocks fill the middle layer, while smaller gravel tops the surface.

This layering prevents smaller rocks from washing away. The varied sizes also improve water percolation through the system.
Material Proportions
- Bottom layer: 4-8 inch rocks covering one-third depth
- Middle layer: 2-4 inch rocks filling next third
- Top layer: 1-2 inch gravel for final third
- Accent boulders: 12+ inches placed strategically
10. Underground Pipe Integration
Combine dry creek beds with buried drainage pipes for maximum capacity. This hybrid system handles extreme rainfall while maintaining attractive surface features.
The pipe carries heavy water flow underground. The visible creek bed manages moderate rain and provides aesthetic value between storms.
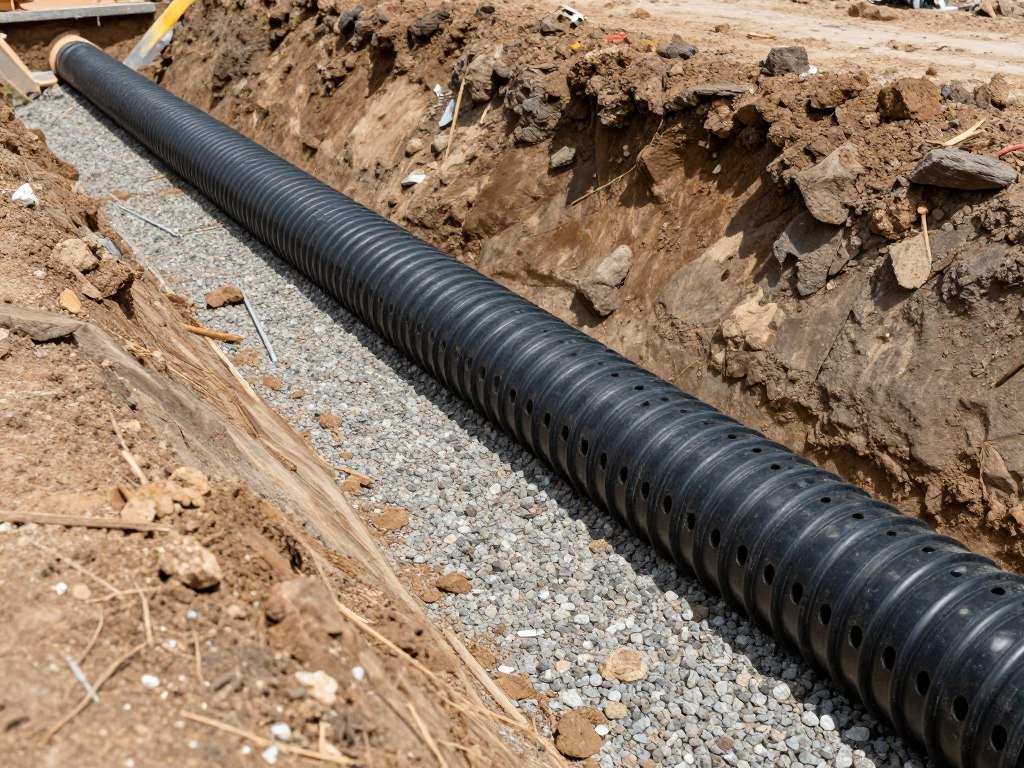
Install perforated pipe at the bottom of your trench. Surround it with gravel before adding landscape fabric and decorative rocks above.
System Benefits
The dual approach prevents overflow during extreme weather. Buried pipes handle volume that exceeds surface capacity.
This design works well near foundations. It ensures water moves away from your home even during the heaviest storms.
11. Rain Garden Combination
A rain garden at your creek bed’s end creates a beautiful water management system. This planted depression captures and filters runoff before it enters storm drains.
The dry creek bed channels water into the rain garden during storms. Native plants absorb moisture and filter pollutants naturally.

Size the rain garden to handle your creek bed’s water volume. Calculate based on your roof area and average rainfall amounts.
Rain Garden Essentials
Dig the garden four to eight inches deep. This shallow depression holds water temporarily without creating a permanent pond.
Select native plants adapted to wet-dry cycles. These species thrive in periodically saturated soil and drought conditions.
Position the garden at least ten feet from foundations. This distance protects your home while maximizing landscape benefits.
12. Dry Stream Terracing
Multiple small terraces work better than one steep channel on significant slopes. Each level slows water velocity and prevents erosion damage.
Create rock walls between terrace levels. These barriers contain soil while allowing water to cascade naturally downward.
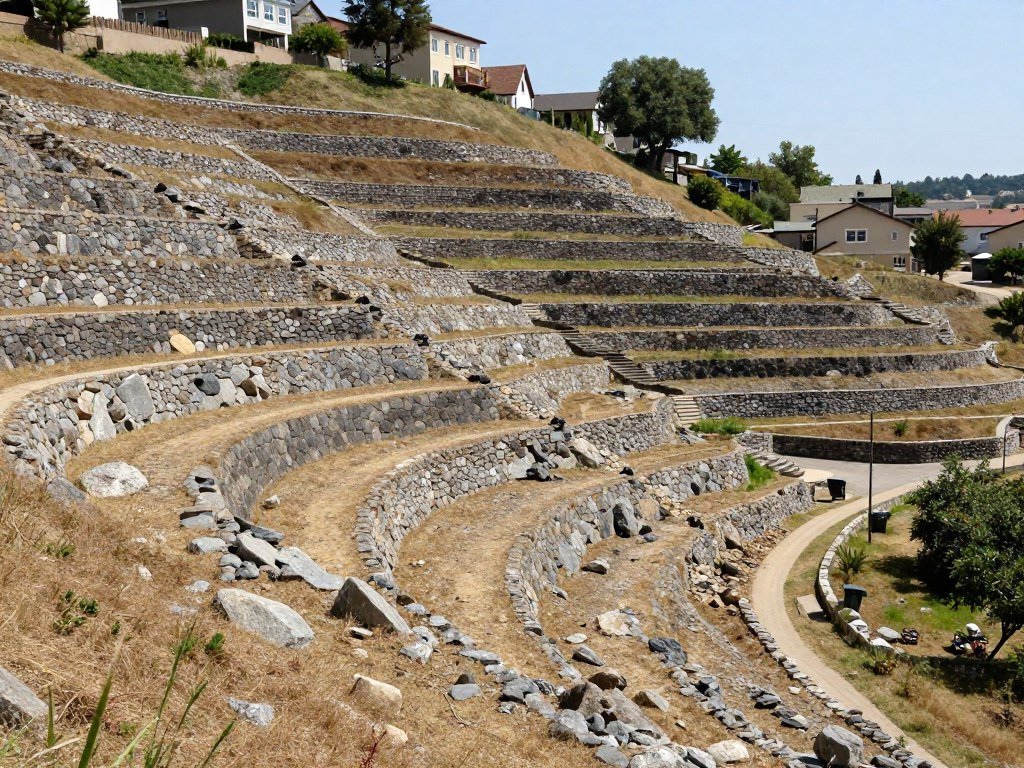
Each terrace should span the slope’s width. This maximizes water capture and distribution across the drainage area.
Building Stable Terraces
Excavate each level platform before building walls. Compact soil thoroughly to prevent settling over time.
Use the largest rocks for terrace walls. Smaller rocks shift during heavy rain, compromising structural integrity.
13. Permeable Paver Base
Pavers provide a walkable dry creek bed surface. This design works well where foot traffic crosses drainage areas regularly.
Choose pavers specifically designed for water permeability. Standard pavers block drainage and defeat the system’s purpose.
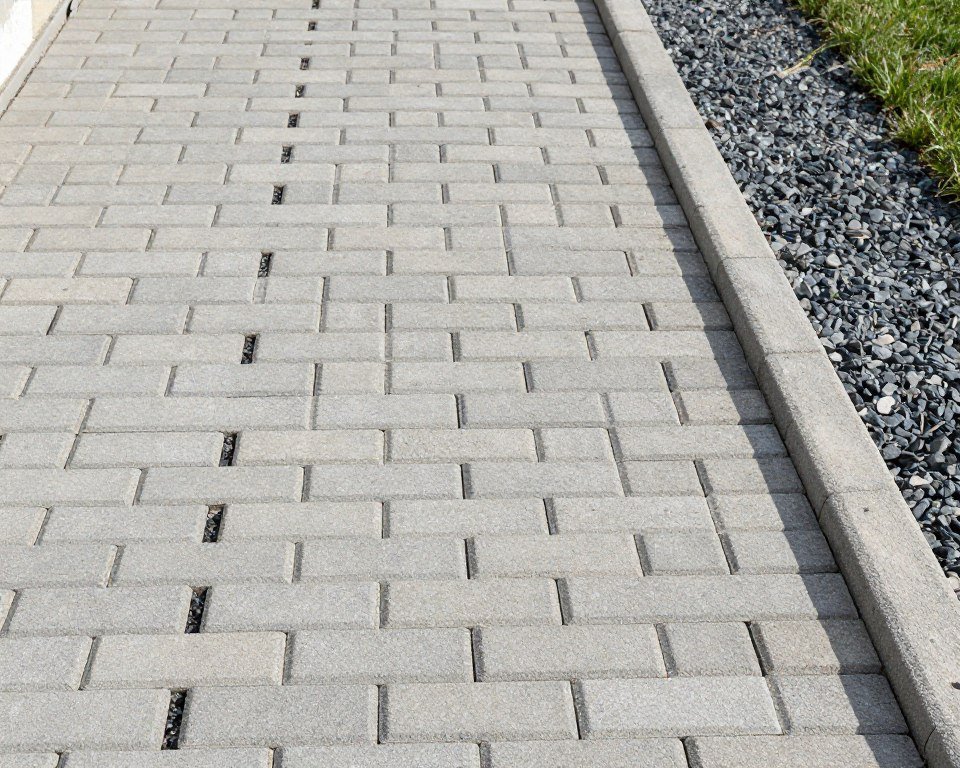
Install pavers over a gravel base for support. The combination creates a stable walking surface that drains effectively.
Installation Steps
Prepare the base with four inches of compacted gravel. This foundation prevents paver settling and maintains drainage capacity.
Add two inches of coarse sand above gravel. Level carefully to ensure even paver placement and proper water flow.
Set pavers with small gaps between units. Fill gaps with additional sand or fine gravel for permeability.
14. Seasonal Color Beds
Annual flowers along creek bed edges provide changing color throughout growing seasons. This approach combines drainage function with ornamental gardening.
Select plants that tolerate moisture fluctuations. Creek bed edges remain damp after rain but dry between storm events.

Replace plantings each spring for continuous color. Annual flowers offer more color variety than perennials alone.
Planting Recommendations
Create planting pockets between rocks. Fill with quality soil amended for improved drainage and plant health.
Group plants in masses of single colors. This creates stronger visual impact than mixing colors randomly.
15. Native Ecosystem Approach
Using exclusively native plants creates a self-sustaining landscape. These species evolved with local rainfall patterns and soil conditions.
Native plants require less maintenance once established. They resist local pests and diseases naturally without chemical interventions.
Ecosystem Benefits
Native plantings support local wildlife populations. Birds, butterflies, and beneficial insects depend on indigenous plant species.
Deep root systems improve soil structure naturally. This enhances water infiltration and reduces erosion over time.
Native plants survive drought periods without irrigation. Their adaptation to local climate saves water and maintenance costs.
- Zero fertilizer requirements after establishment
- Natural pest resistance without chemicals
- Year-round wildlife habitat and food sources
- Authentic regional landscape character
16. Landscape Lighting Integration
Low-voltage lighting extends dry creek bed enjoyment into evening hours. Strategic placement creates dramatic nighttime effects while improving yard safety.
Light fixtures tucked between rocks create subtle illumination. This approach highlights creek bed features without harsh glare.

LED fixtures consume minimal electricity while lasting years. Solar options eliminate wiring for easier installation.
Lighting Placement
Position lights to highlight key features. Illuminate larger boulders, plant groupings, and curves for maximum visual impact.
Avoid over-lighting the entire creek bed. Shadows and contrast create more interesting nighttime appearance than uniform brightness.
Use warm white bulbs for natural appearance. Cool white lighting looks artificial in landscape settings.
17. Bioswale Conversion Design
Transform your dry creek bed into a functional bioswale with specific plant selections. This engineered system filters pollutants while managing water drainage.
Bioswales use dense plantings to slow and clean runoff. Water percolates through root zones that remove contaminants naturally.
This approach particularly benefits properties near water bodies. It prevents lawn chemicals and road runoff from entering storm systems.
Bioswale Plant Requirements
Select species with fibrous root systems. These roots create natural filtration while stabilizing soil against erosion.
Include plants of varying heights for complete coverage. Multiple layers intercept and filter water more effectively.
18. Seasonal Dry Stream
Design creek beds specifically for seasonal water flow. This approach works where drainage occurs primarily during spring snowmelt or rainy seasons.
The creek bed remains completely dry most of the year. Design focuses on year-round visual appeal with functional capacity during wet periods.

Use decorative rock colors and textures for interest. The creek bed serves as landscape art when not managing drainage.
Seasonal Considerations
Ensure adequate depth for peak flow events. Calculate based on worst-case seasonal runoff amounts.
Select drought-tolerant edge plantings. These survive long dry periods between seasonal water events successfully.
19. Courtyard Water Feature Style
Formal dry creek beds suit contemporary landscape designs. Geometric patterns and uniform materials create architectural drainage solutions.
Straight lines and right angles replace natural curves. This style complements modern homes with clean architectural lines.
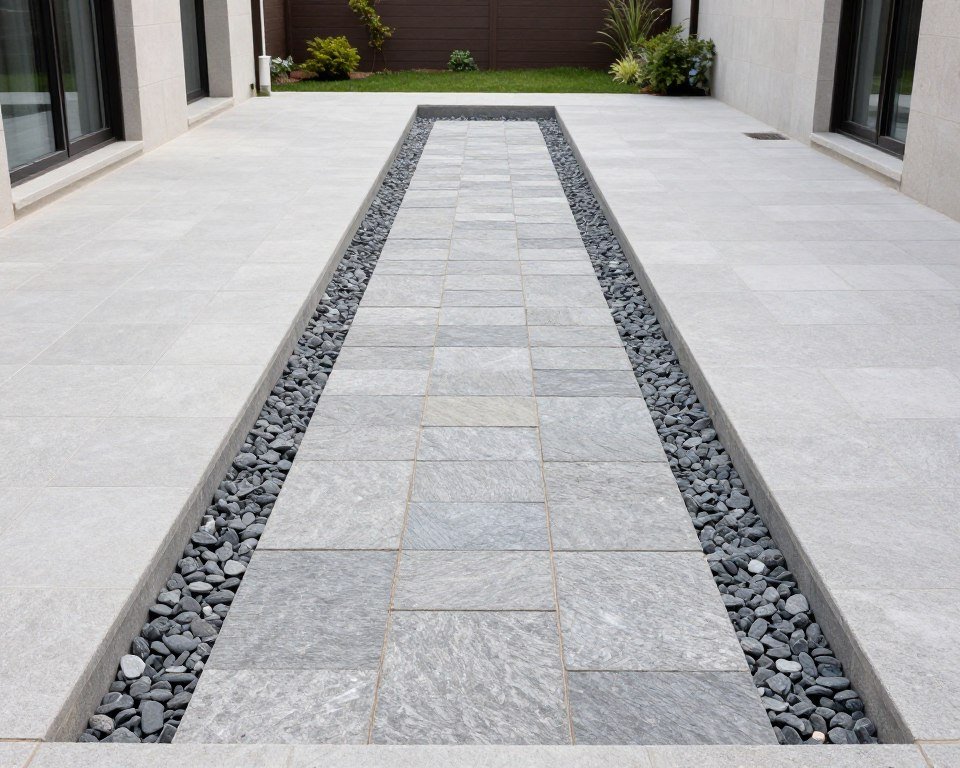
Use single rock colors for sophisticated appearance. Uniformity emphasizes geometric design rather than natural variety.
Contemporary Materials
Consider smooth river rocks in consistent sizes. This creates modern texture while maintaining drainage function.
Metal edging provides crisp boundaries. Stainless steel or aluminum complements contemporary architecture perfectly.
20. Erosion Control Priority Design
Some yards face severe erosion requiring aggressive solutions. This design emphasizes soil retention above aesthetic considerations.
Multiple rock check dams slow water velocity dramatically. These barriers trap sediment while allowing water to continue downslope.
Dense plantings between rock barriers hold soil. Roots create natural reinforcement that prevents washout during heavy rain.
Maximum Protection Strategy
Space check dams every six to eight feet on steep slopes. Closer spacing provides better erosion control on challenging terrain.
Build each dam higher than typical designs. Six to ten inch walls create effective sediment traps.
Plant immediately after construction. Quick establishment prevents erosion before vegetation matures.
Material Selection and Sourcing
Choosing appropriate materials determines your dry creek bed’s longevity and effectiveness. Quality components prevent future problems and reduce maintenance requirements.
Rock Selection Criteria
River rocks work best for most applications. Their smooth surfaces and varied colors create natural-looking creek beds.
| Rock Type | Size Range | Best Use | Coverage Rate |
| Large River Rock | 4-8 inches | Bottom layer, structure | 50-60 sq ft per ton |
| Medium River Rock | 2-4 inches | Middle layer, fill | 70-80 sq ft per ton |
| Small River Rock | 1-2 inches | Top layer, appearance | 90-100 sq ft per ton |
| Pea Gravel | 1/4-1/2 inch | Base, fine detail | 120-130 sq ft per ton |
| Boulders | 12+ inches | Accents, focal points | Decorative only |
Fabric Quality Standards
Landscape fabric quality varies dramatically between products. Commercial-grade materials last decades while cheap alternatives fail within years.
Look for fabric rated at least five ounces per square yard. Heavier weight prevents tearing during installation and resists degradation from rocks settling into soil.
Woven fabrics outperform non-woven varieties for creek beds. The tight weave blocks weeds effectively while maintaining water permeability.
Calculating Material Quantities
Measure your planned creek bed length and average width. Multiply these dimensions to determine total square footage.
Account for depth when calculating rock quantities. A six-inch deep bed requires approximately twice the material of a three-inch depth.
Order ten percent extra material for settling and gaps. Rocks nestle together over time, reducing visible coverage slightly.
Installation Best Practices
Proper installation techniques ensure your dry creek bed functions effectively for years. Following proven methods prevents common problems that compromise drainage systems.
Site Preparation
Clear vegetation completely from the planned area. Remove grass, weeds, and roots that might grow through landscape fabric.

Grade the bottom of your trench for consistent slope. Water must flow continuously toward the intended drainage point without pooling.
A minimum slope of two percent prevents standing water. This equals two inches of drop per ten feet of creek bed length.
Layer Installation Sequence
- Excavate to planned depth plus two inches for settling
- Install landscape fabric with proper overlap
- Add bottom layer of largest rocks first
- Fill middle layer with medium-sized rocks
- Complete top layer with smaller rocks or gravel
- Position accent boulders and edge treatments
- Plant vegetation and add mulch as needed
Common Installation Mistakes
Avoid These Errors:
- Insufficient slope causing water pooling
- Overlapping fabric in wrong direction
- Using inadequate fabric weight or quality
- Placing small rocks before large ones
- Inadequate depth for expected water volume
- Failing to compact excavation bottom
- Neglecting to test water flow before completing
Testing Your System
Run water through the creek bed before final planting. This reveals drainage problems when fixes remain simple.
Observe where water flows and pools. Make adjustments to slope or rock placement as needed for proper drainage.
Test during a real rain event if possible. Natural rainfall reveals issues that garden hose testing might miss.
Long-Term Maintenance Requirements
Dry creek beds require minimal maintenance compared to other landscape features. Regular attention keeps the system functioning properly and looking attractive.
Seasonal Tasks
Spring Maintenance
- Remove accumulated debris and leaves
- Check for rocks displaced by winter weather
- Inspect fabric for any exposed areas
- Trim back overgrown edge plants
- Test drainage before rainy season
Summer Care
- Pull any weeds emerging between rocks
- Water new plantings during drought
- Monitor for erosion after heavy storms
- Refresh mulch around planted edges
- Add rocks where settling occurs
Fall Preparation
- Clear fallen leaves regularly
- Cut back perennial plants as needed
- Secure any loose rocks before winter
- Inspect drainage flow before freeze
- Plan spring improvements or additions
Addressing Settling
Rocks naturally settle into soil over the first year. This normal process reduces surface coverage slightly.
Add supplemental rocks to maintain desired depth. Keep extra materials on hand for easy touch-ups as needed.
Major settling indicates inadequate base preparation. Extensive settling requires excavation and proper base reconstruction.
Weed Management
Quality landscape fabric prevents most weed growth. Occasional weeds appear from airborne seeds landing on rock surfaces.
Pull weeds immediately before roots establish. Early removal prevents damage to fabric beneath rocks.
Never use chemical weed killers near creek beds. Herbicides wash into storm drains and harm downstream environments.
Troubleshooting Common Issues
Even properly installed dry creek beds occasionally develop problems. Understanding solutions helps maintain effective drainage long-term.
Standing Water Problems
Water pooling indicates insufficient slope or outlet blockage. Check the entire drainage path for obstructions first.
If slope proves inadequate, excavate deeper at problem areas. Increase the gradient to ensure continuous water flow.
Sometimes poor soil drainage beneath fabric causes pooling. Installing perforated pipe under rocks solves this issue effectively.
Erosion Along Edges
Edge erosion occurs when water overtops creek bed banks. This typically happens when the channel lacks adequate capacity.
Widen the creek bed in affected areas. Additional width accommodates higher water volumes during extreme storms.
Plant ground covers along vulnerable edges. Dense vegetation holds soil and absorbs excess water naturally.
Rock Displacement
Heavy water flow sometimes moves rocks downstream. This indicates either inadequate rock size or excessive water velocity.
Replace displaced rocks with larger sizes. Heavier rocks resist movement during high-flow events.
Add check dams to slow water velocity. These barriers protect downstream sections from erosion damage.
How deep should I dig my dry creek bed?
Most dry creek beds require six to eight inches depth for adequate drainage. Properties with heavy runoff may need ten to twelve inches. The depth depends on the amount of water your system must handle during peak rain events.
Can I build a dry creek bed on flat ground?
Yes, but you must create artificial slope during excavation. Flat yards need at least two percent grade (two inches per ten feet) for effective water movement. Consider adding underground drainage pipes if natural slope proves impossible.
How do I calculate rock quantities needed?
Multiply your creek bed length times width times depth in feet, then divide by 27 for cubic yards. One cubic yard of rock typically covers 100 square feet at three inches deep. Always order ten percent extra for settling and gaps.
Will landscape fabric prevent all weeds?
Heavy-duty landscape fabric blocks 95-98% of weeds when properly installed. Occasional weeds may sprout from seeds landing on rock surfaces, but they pull easily before establishing roots. Quality fabric makes enormous difference in long-term weed control.
How long does installation typically take?
A simple 20-foot creek bed takes one weekend for most homeowners. Complex projects with terracing, underground pipes, or extensive plantings may require several weekends. Professional installation typically completes in one to three days depending on project scope.
Creating Your Drainage Solution
These 20 dry creek bed ideas provide solutions for virtually any drainage challenge. Each approach addresses specific yard conditions while adding landscape beauty.
Start with careful planning and site assessment. Understanding your water flow patterns ensures the chosen design functions effectively year-round.
Quality materials and proper installation techniques create lasting results. Investing time in correct methods prevents future problems and expensive repairs.
Your completed dry creek bed transforms problematic drainage into attractive landscape features. The functional art enhances property value while protecting your home from water damage.