
Your wardrobe deserves a fresh look without draining your wallet. DIY clothes ideas offer the perfect solution for anyone wanting to transform old pieces into completely new outfits. Whether you’re looking to upcycle old jeans or breathe new life into forgotten shirts, these projects will show you how.
This comprehensive guide presents 25 beginner-friendly projects that anyone can tackle. You’ll discover techniques that range from simple no-sew options to more detailed sewing patterns. Each project comes with clear instructions and materials lists to get you started right away.
The best part about these DIY clothes transformations is their versatility. You can create gifts for loved ones, refresh your entire wardrobe, or simply enjoy a creative weekend project. Let’s dive into these exciting ideas that will change how you look at old clothes forever.
Table of Contents
Getting Started with DIY Clothes Essentials
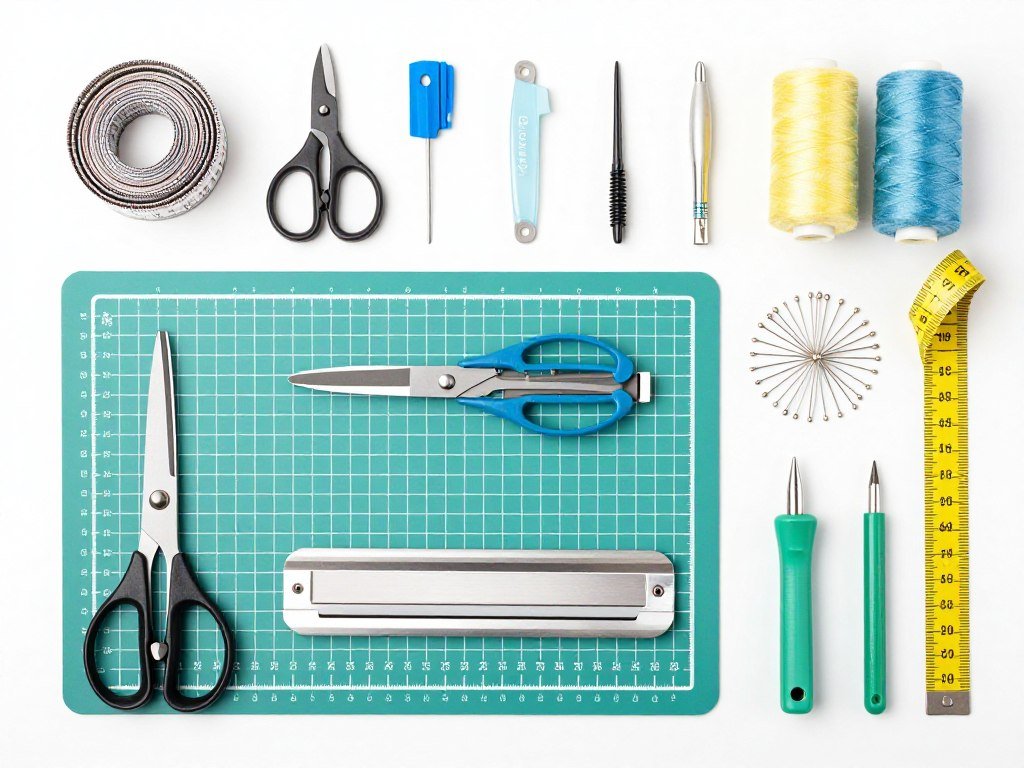
Before jumping into specific projects, you’ll need some basic supplies. Most DIY clothes ideas require tools you might already have at home. A good pair of fabric scissors, measuring tape, and pins form the foundation of any crafting toolkit.
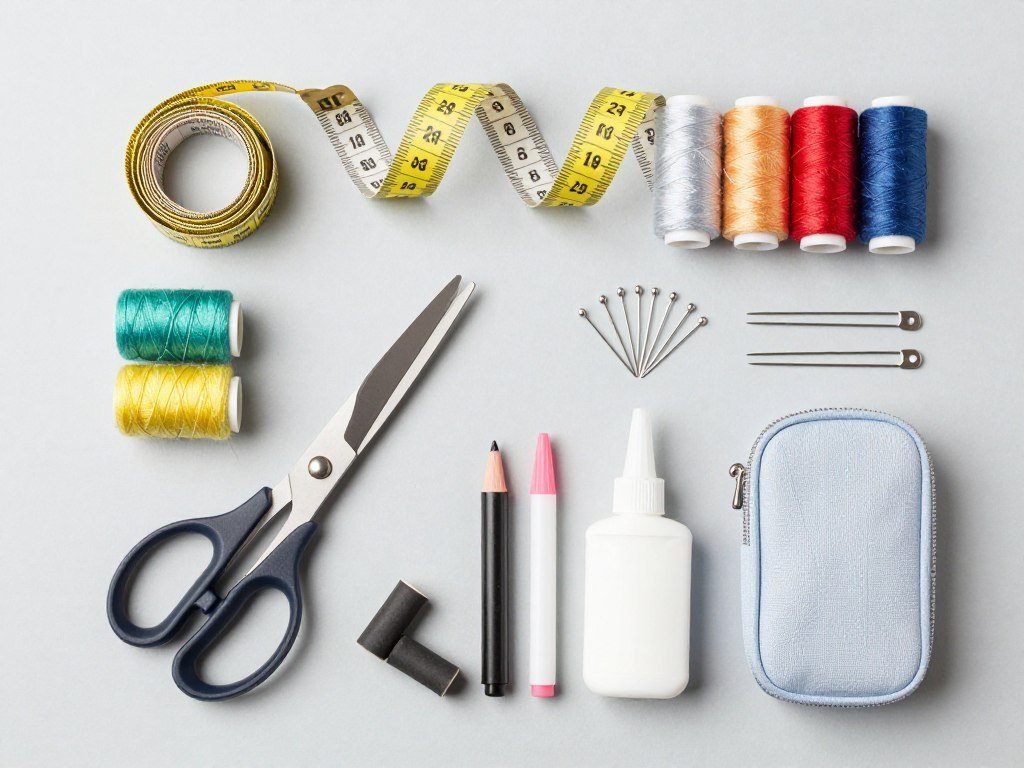
Fabric glue becomes your best friend for quick projects that don’t require sewing. You’ll also want to gather some basic sewing supplies like needles and thread in various colors. These simple tools open up countless possibilities for clothing transformation.
Consider investing in a basic sewing machine if you plan to tackle multiple projects. However, many of these DIY ideas work perfectly well with hand-sewing techniques. Start with what you have and expand your toolkit as you discover which projects you love most.
Basic Techniques Every Beginner Should Know
Understanding a few fundamental techniques will make your DIY journey much smoother. These methods form the building blocks for most clothing transformation projects. Master these basics, and you’ll feel confident tackling any tutorial you find.
Measuring and Cutting Fabric
Accurate measurements make the difference between a professional-looking project and a disappointing result. Always measure twice before cutting any fabric. Use a clear ruler and fabric chalk to mark your cutting lines precisely.
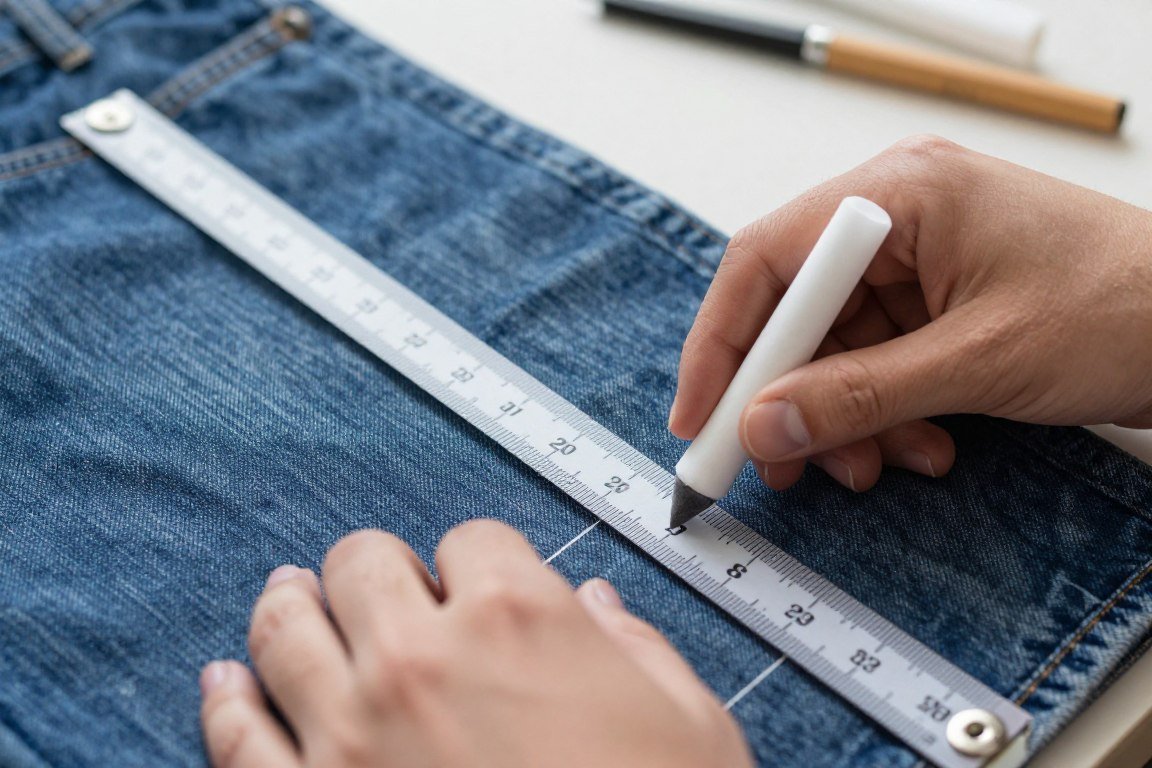
When working with old clothes for upcycling projects, examine the fabric carefully first. Check for worn areas or stains that you’ll need to work around. This planning step saves time and prevents frustration later in your project.
Hand-Sewing Fundamentals
You don’t need a sewing machine to create beautiful DIY clothes. Hand-sewing offers complete control and works perfectly for smaller projects. The basic running stitch, backstitch, and whipstitch will cover most of your needs.
Running Stitch
The simplest stitch for joining fabric pieces together. Perfect for temporary seams and gathering fabric.
- Easy to learn and quick to execute
- Great for beginners starting out
- Works well on most fabric types
- Can be removed easily if needed
Backstitch
Creates stronger seams that won’t come apart easily. Use this for permanent clothing alterations.
- Provides excellent seam strength
- Looks more professional than running stitch
- Takes slightly longer to complete
- Essential for stress points in garments
Whipstitch
Perfect for finishing edges and joining two finished edges together with visible stitches.
- Prevents fabric edges from fraying
- Creates decorative visible stitching
- Works beautifully on felt projects
- Quick method for edge finishing
Hem Stitch
Creates invisible hems that look professionally done. Essential for finishing garment bottoms.
- Nearly invisible from the right side
- Perfect for dress and pant hems
- Requires practice to master
- Gives polished, professional results
Working with Different Fabrics
Each fabric type behaves differently under your scissors and needle. Denim requires sharp scissors and a sturdy needle. Cotton fabrics work well for beginners because they’re forgiving and easy to handle.
Stretchy fabrics like jersey need special attention to prevent distortion. Pin these materials carefully and use a ballpoint needle if you’re sewing. Understanding these fabric characteristics helps you choose the right project for your skill level.
Transform Old T-Shirts into Trendy Tops
Old t-shirts offer endless possibilities for creative transformation. These five projects will show you how to turn basic tees into fashionable pieces. You’ll need minimal supplies and can complete most of these in under an hour.
1. Classic Crop Top Transformation

Creating a crop top from an oversized shirt takes just minutes. This project works perfectly if you’re looking to modernize old band tees or outdated promotional shirts. The simple cut-and-hem technique requires no advanced skills.
Start by trying on the shirt and marking where you want the new hemline. Leave an extra inch below your mark for the hem. Cut straight across, then fold the edge up half an inch twice and secure with fabric glue or simple stitches.
Difficulty Level: Beginner
Time Required: 20-30 minutes
Materials Needed: Old t-shirt, scissors, fabric glue or needle and thread, measuring tape
Perfect For: Oversized shirts, men’s shirts you want to upcycle
2. Off-Shoulder Slouchy Top

This trendy style works beautifully with loose-fitting tees. You’ll cut a wide neckline that sits just below your shoulders. The key is cutting the neckline evenly and making it wide enough to stay in place.
Mark the neckline by measuring equal distances from the shoulder seams on both sides. Cut slowly and try on frequently to ensure you get the desired fit. Roll the raw edge slightly and secure it with small stitches for a finished look.
3. Knotted Front Tee
Adding a front knot creates instant style without any sewing required. This DIY technique works on any t-shirt length. The knot draws in the fabric at your waist, creating a flattering silhouette.
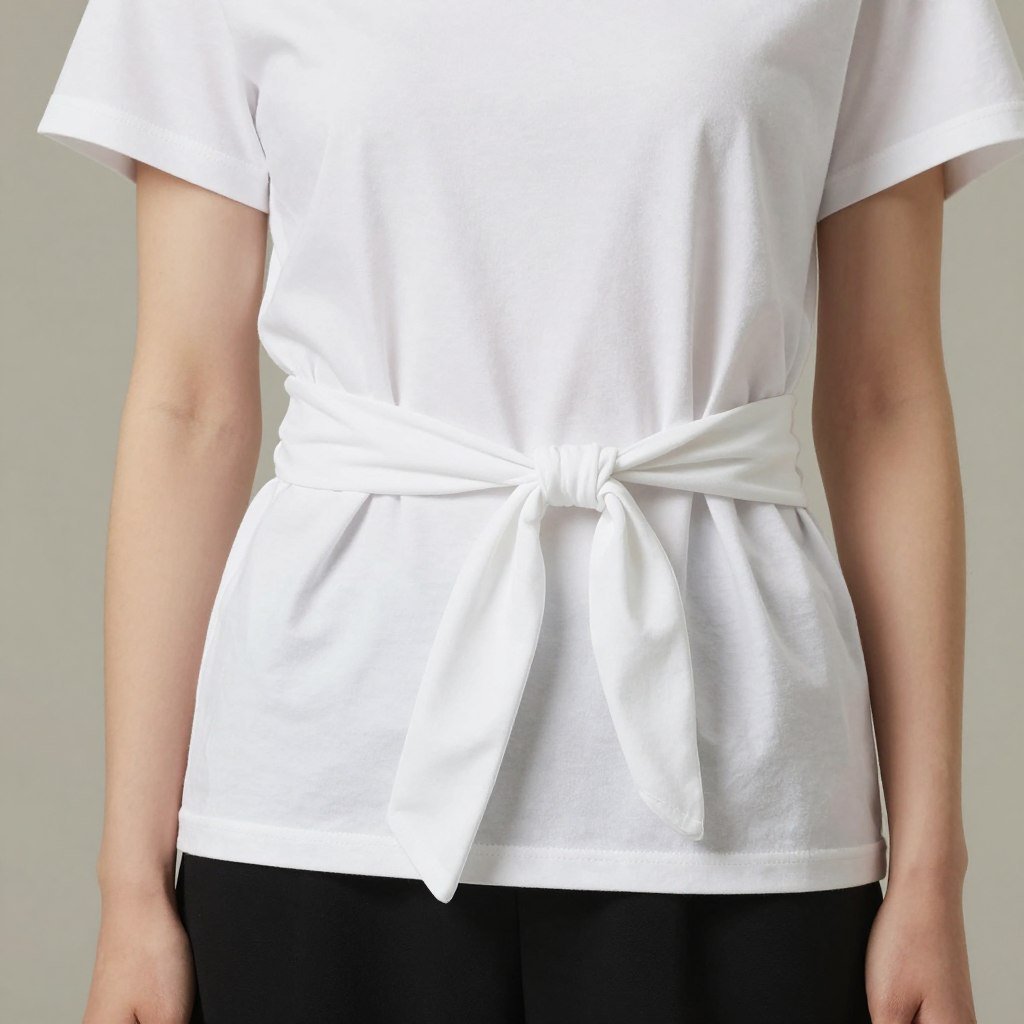
Gather the fabric at your desired waist point and twist it once or twice. Tie a simple knot and adjust the fabric around it for even gathers. This project takes less than a minute but completely transforms how a basic tee looks and fits.
4. Racerback Tank Conversion
Transform a regular tee into a sporty racerback tank perfect for workouts or summer wear. This project involves cutting away the sleeves and reshaping the back into a racerback style. You’ll need to cut and sew for the best results.
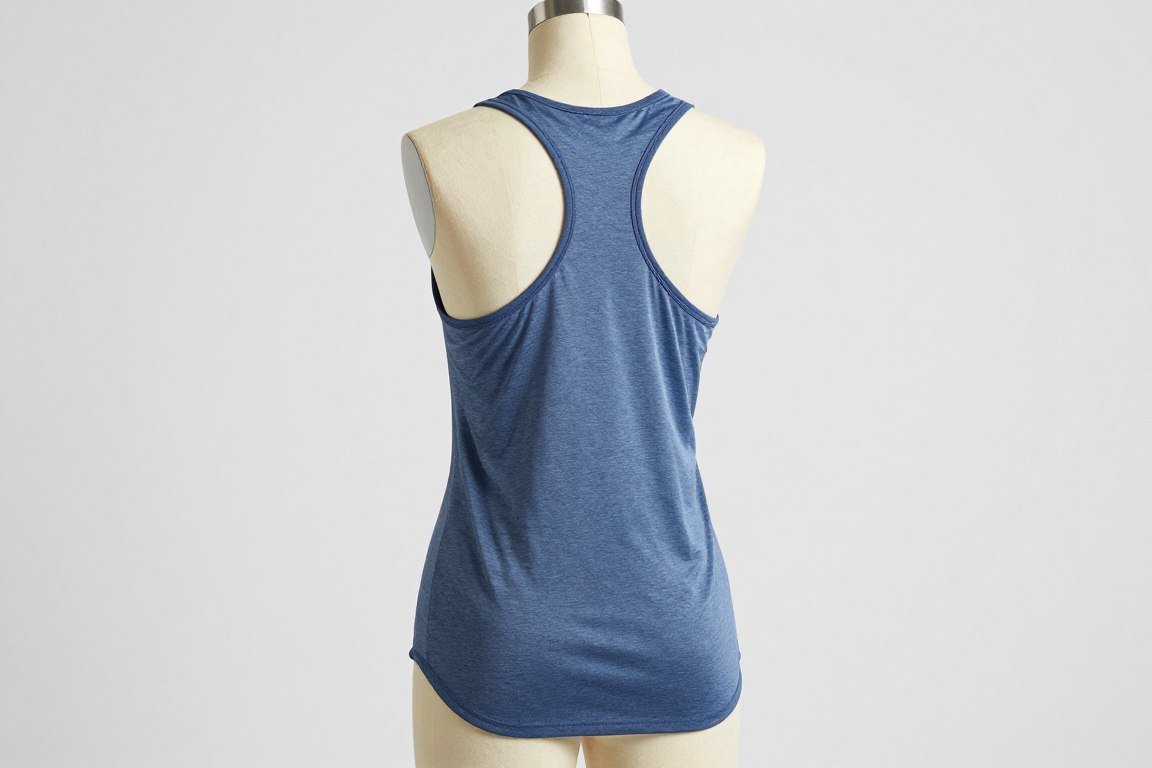
Cut the sleeves off first, leaving about an inch from the seam. Then cut a deep scoop in the back, creating the racerback shape. Hem all raw edges with a simple fold-and-stitch technique or use fabric glue for a no-sew option.
5. Braided Sleeve Detail
This creative technique adds visual interest to plain sleeves. You’ll cut vertical strips in the sleeves and braid them together. The result looks intricate but requires only basic cutting and braiding skills.
Mark three equal vertical lines on each sleeve from shoulder to hem. Cut along these lines, leaving the top and bottom intact. Braid the three strips together and secure the end with a few stitches. This technique works best on knit fabrics that won’t fray.
Creative Denim Upcycling Projects
Old jeans deserve a second life beyond the donation bin. Denim fabric is incredibly versatile and durable for DIY projects. These five ideas will help you transform worn jeans into completely new pieces you’ll love wearing.
6. Distressed Denim Shorts

Creating custom distressed shorts from old jeans gives you perfect summer wear. This project lets you control exactly where the distressing appears. You’ll use sandpaper, scissors, and a bit of creativity to achieve that coveted worn-in look.
Cut your jeans to the desired short length, adding an inch for fraying. Use sandpaper to create faded areas and rub along seams for authentic wear. Make small cuts with scissors and pull threads to create larger distressed areas. Wash the shorts to enhance the fraying effect.
Difficulty Level: Beginner
Time Required: 45-60 minutes
Materials Needed: Old jeans, scissors, sandpaper, tweezers, chalk
Pro Tip: Start with less distressing than you want – you can always add more but can’t undo cuts
7. Patchwork Denim Tote Bag
Transform multiple pairs of old jeans into a sturdy, stylish tote bag. This project uses various denim colors and washes to create visual interest. The patchwork technique hides any stains or worn areas in the original jeans.

Cut the jeans into squares or rectangles of equal size. Arrange them in a pleasing pattern before sewing them together. Add old jean pockets to the outside for extra storage. Line the bag with fabric for a polished finish.
8. Embellished Denim Jacket
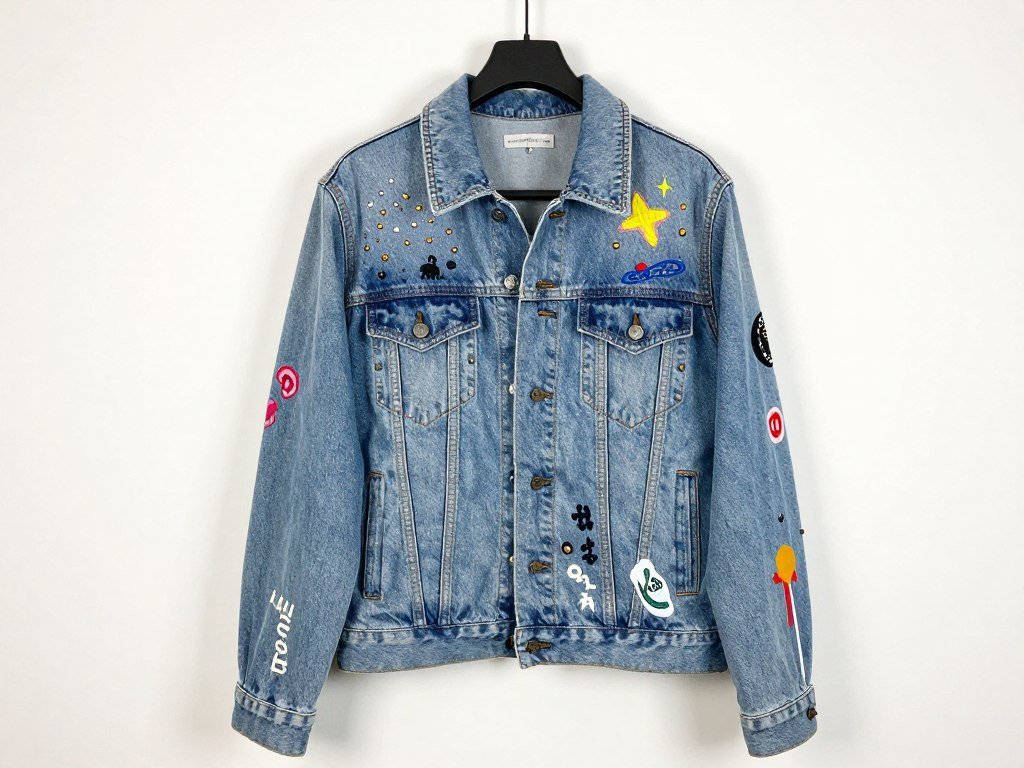
Personalize a plain denim jacket with embroidery, patches, or fabric paint. This DIY project lets your creativity shine through unique designs. You can create anything from subtle accents to bold statement pieces.
Plan your design layout before starting any permanent work. Pin patches in place and move them around until you’re satisfied. Use fabric paint for custom designs or try your hand at simple embroidery stitches. Iron-on patches offer the quickest way to add personality.
9. High-Waisted Jean Transformation
Convert low-rise jeans into trendy high-waisted ones with strategic cutting and sewing. This project requires more advanced skills but delivers impressive results. You’ll essentially be reconstructing the waistband area of the jeans.
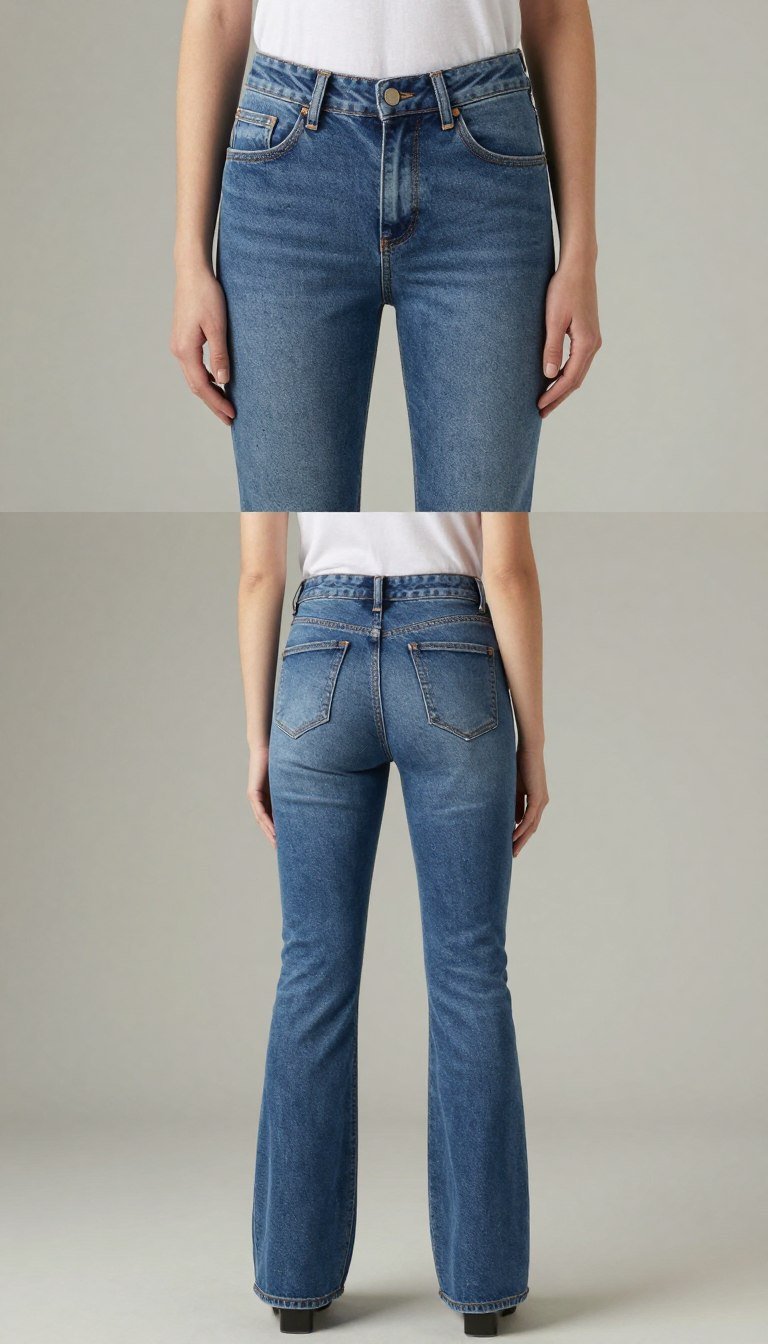
This transformation involves carefully removing the existing waistband and adding fabric to extend the rise. You’ll need matching or complementary denim fabric for the extension piece. Precise measuring and careful sewing create a seamless look that appears professionally done.
10. Denim Appliqué Repair
Turn holes and worn spots into design features using decorative appliqué patches. This technique extends the life of favorite jeans while adding unique style. You can use contrasting denim, patterned fabric, or embroidered patches.
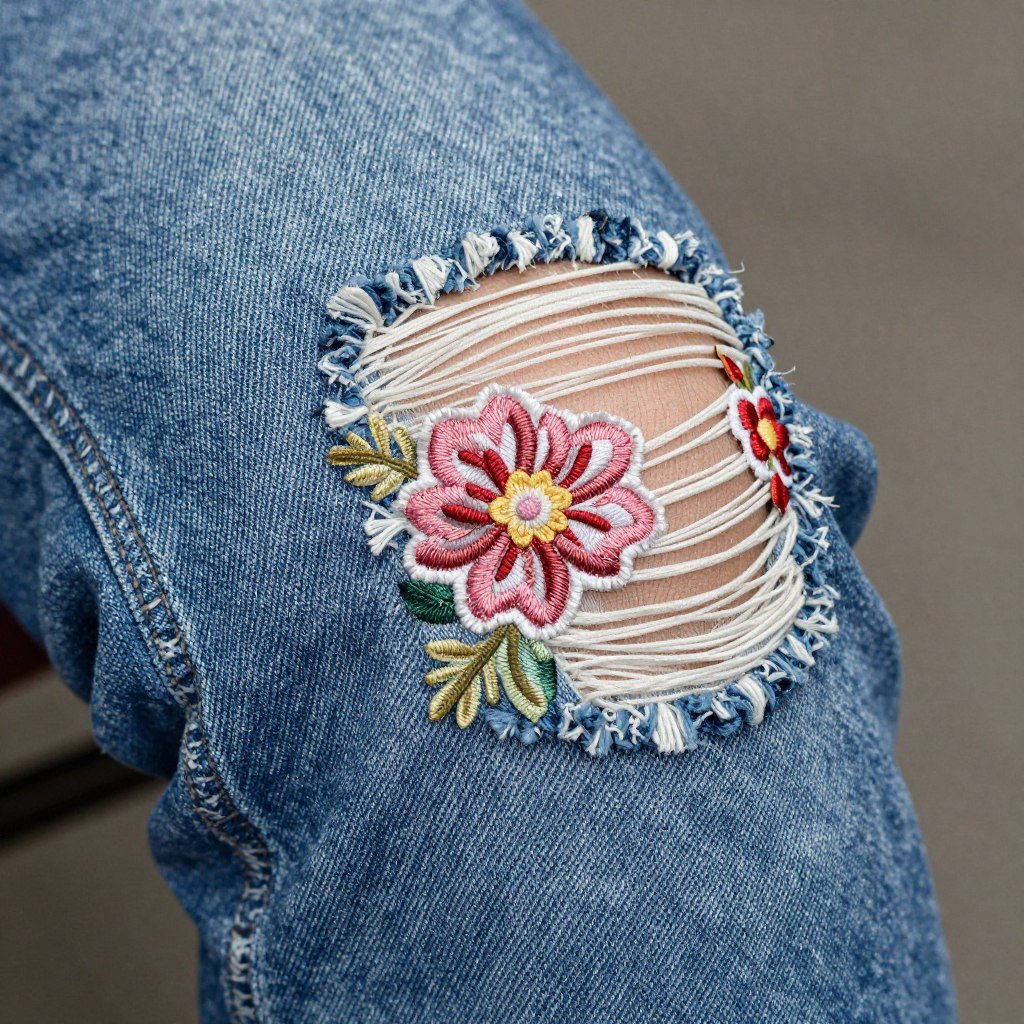
Cut your patch fabric slightly larger than the damaged area. Pin it in place from the inside of the jeans, then topstitch around the edges from the outside. Add decorative stitching or multiple patches to create an intentional design rather than just a repair.
No-Sew DIY Clothes Projects
Not everyone owns a sewing machine or enjoys hand-sewing. These no-sew projects use fabric glue, scissors, and creative folding techniques. You’ll achieve professional-looking results without threading a single needle.
11. No-Sew Infinity Scarf
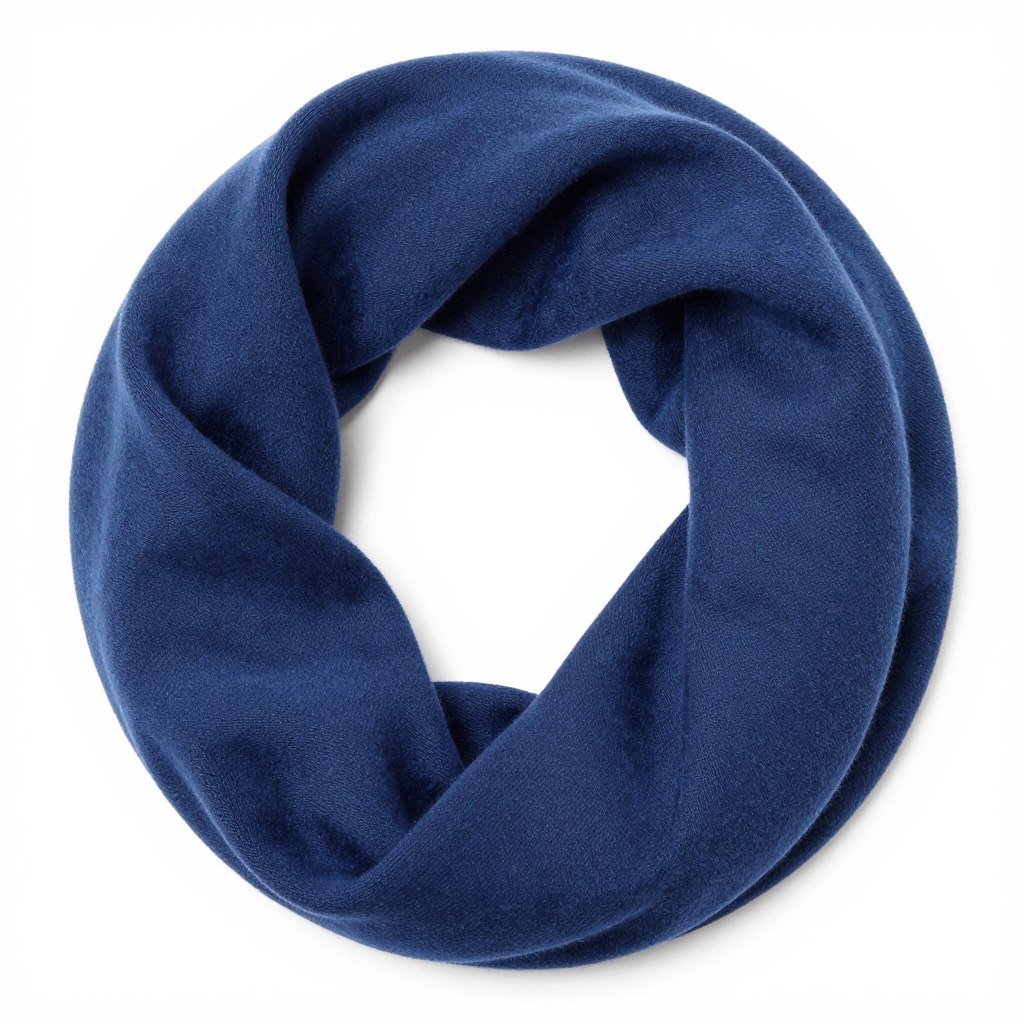
Create a cozy infinity scarf from a large t-shirt or jersey fabric. This quick project requires only scissors and takes about five minutes to complete. The result is a fashionable accessory perfect for gifts or personal use.
Cut straight across the shirt below the armpits to create a tube of fabric. Then cut the tube into loops about two inches wide. Gently stretch each loop until the edges curl inward. Link the loops together or wear them stacked for a chunky look.
Difficulty Level: Beginner
Time Required: 10-15 minutes
Materials Needed: Large t-shirt or 1 yard jersey fabric, scissors
Best Fabrics: Cotton jersey, knit fabrics that curl when stretched
12. Fabric Glue Hemming
Shorten pants, skirts, or dresses using fabric glue instead of sewing. This technique works perfectly for temporary hems or when you need a quick fix. Choose a high-quality fabric glue designed for washable garments.
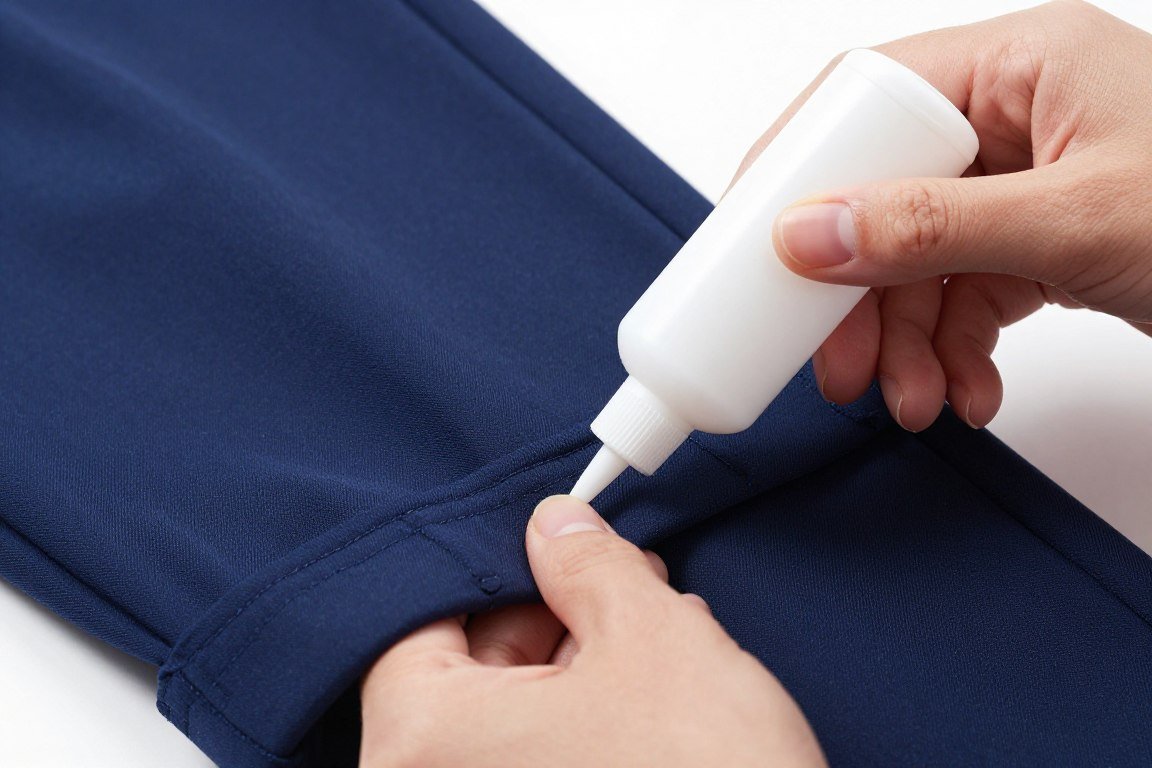
Mark the desired length and fold the fabric up evenly. Apply a thin line of fabric glue inside the fold. Press firmly and hold for the time specified on your glue bottle. Allow the glue to cure completely before wearing or washing.
13. Knotted Tank Top Makeover
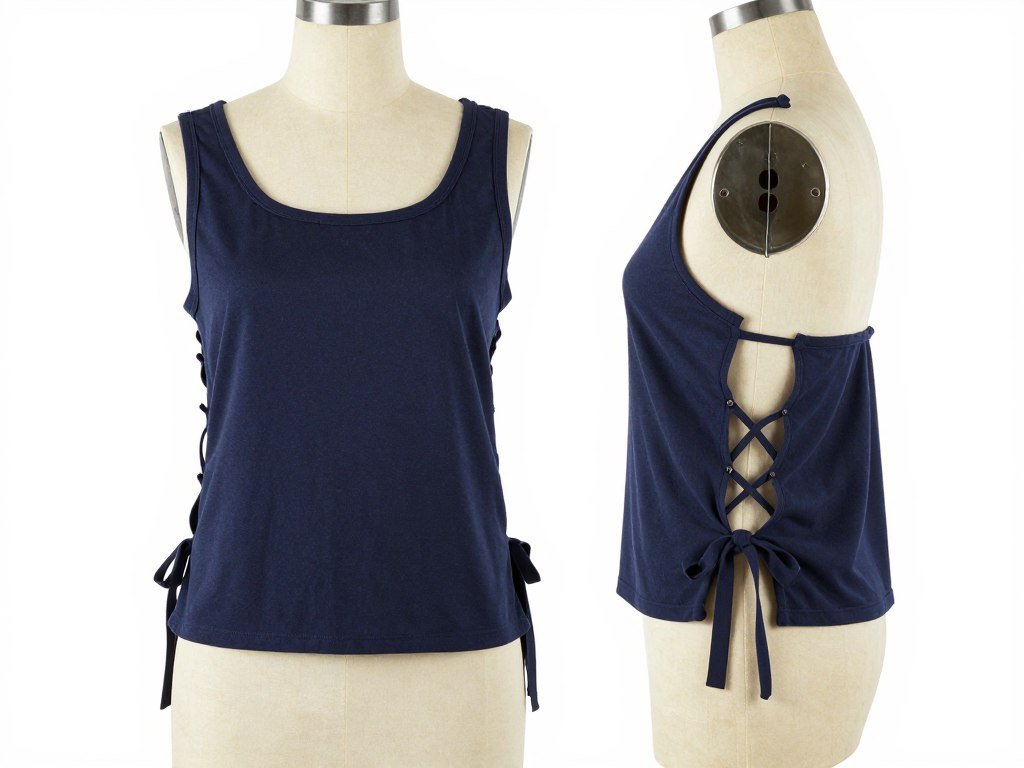
Transform a basic tank into a trendy knotted piece without any sewing. This project involves cutting vertical strips along the sides and tying them in decorative knots. The technique creates a fitted look with visual interest.
Cut evenly spaced vertical slits about four inches long up each side of the tank. Tie corresponding strips together in simple knots. Adjust the tightness of the knots to control how fitted the tank becomes. This works beautifully on loose tanks that need shaping.
14. Cut-Out Shoulder Detail
Add trendy shoulder cut-outs to t-shirts or sweaters using only scissors. This technique creates a peek-a-boo effect that’s both subtle and stylish. The key is cutting symmetrical shapes on both shoulders.

Mark your desired cut-out shape on both shoulders using chalk. Cut carefully, making smooth curves or straight lines as your design requires. The fabric edges will naturally curl slightly, creating a finished look without hemming. Test on a garment you don’t love first to perfect your technique.
15. Fringed Hem Transformation
Add movement and texture to any garment with a fringed hem. This no-sew technique works on t-shirts, dresses, scarves, and more. The fringe length and spacing can be customized to your preference.
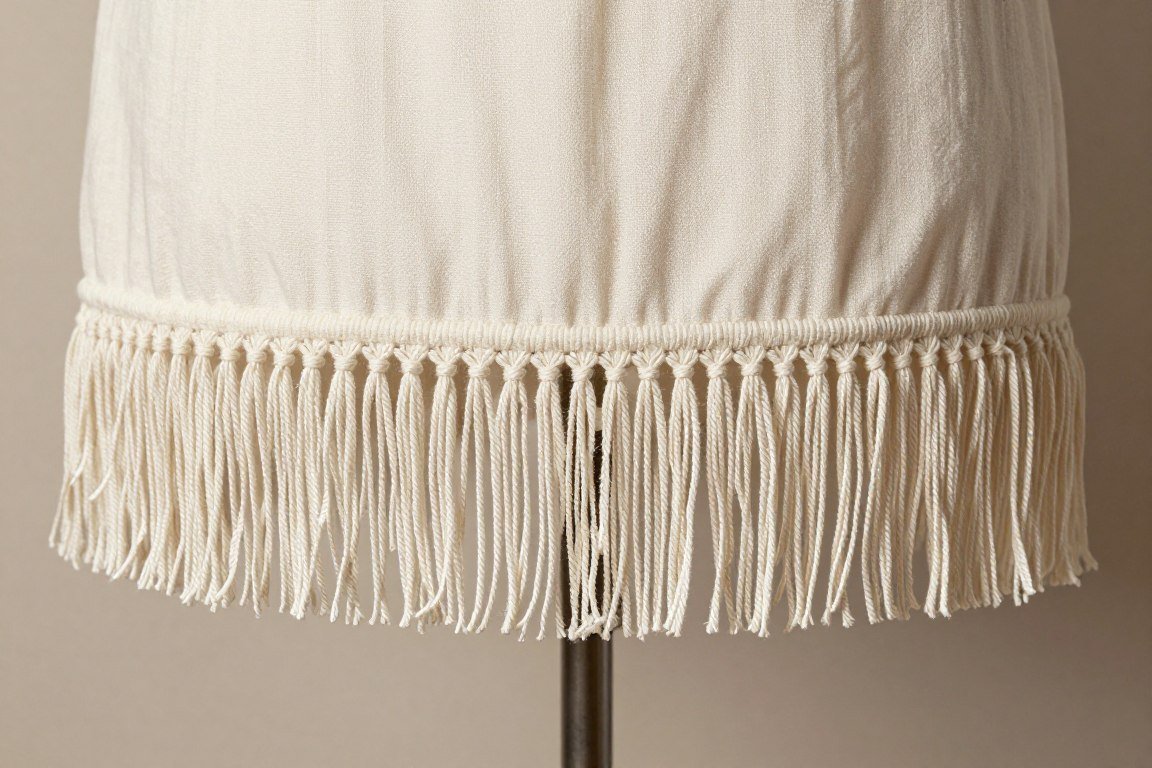
Measure and mark evenly spaced vertical lines along the bottom of your garment. Cut strips from the bottom edge up to your marked line. Gently stretch each fringe piece to make it curl. For extra detail, knot pairs of fringe together for a macramé effect.
Advanced DIY Clothes Transformations
Ready to tackle more challenging projects? These five ideas require intermediate sewing skills and more time investment. The results are worth the effort, creating unique pieces that look professionally made.
16. Maxi Dress from Oversized Shirt
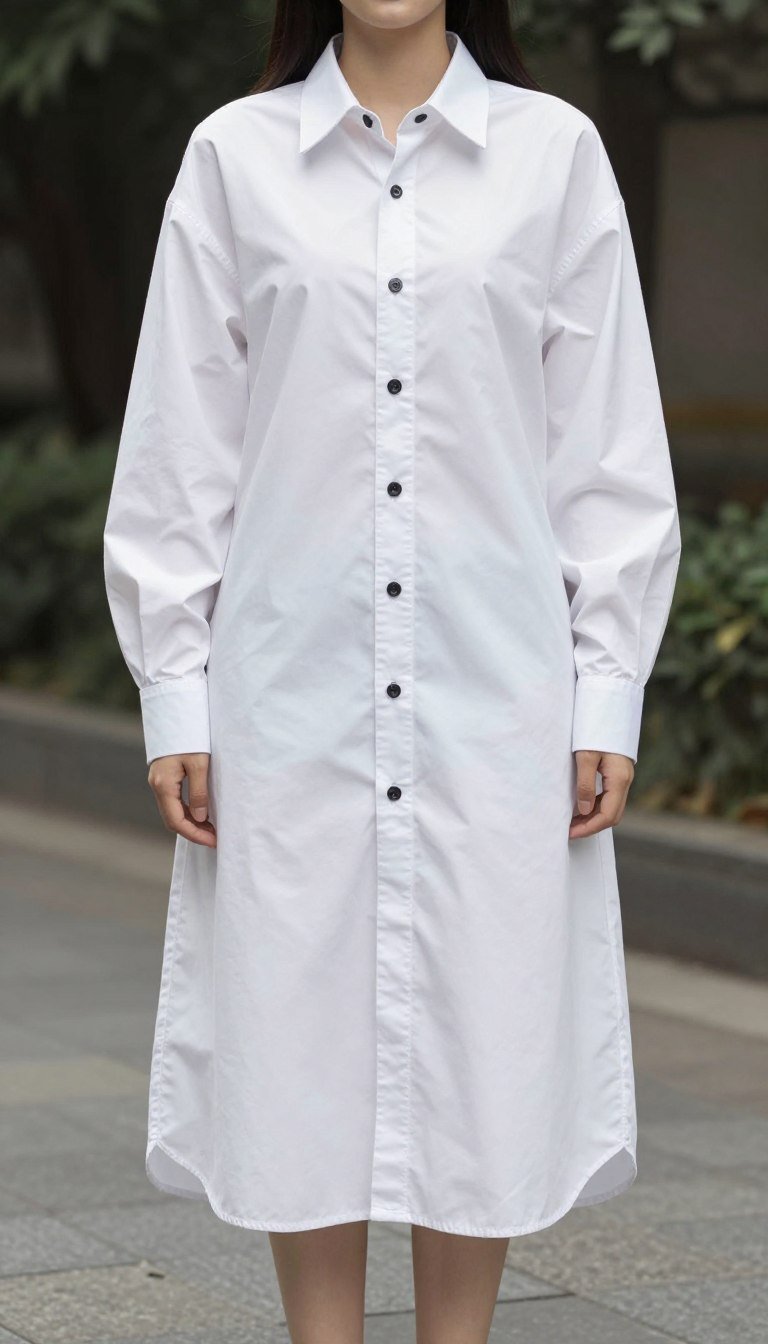
Transform an oversized men’s shirt into a flowing maxi dress perfect for summer. This project combines the shirt’s existing structure with additional fabric to create length. You’ll need a large shirt and coordinating fabric for the skirt portion.
Keep the shirt’s button placket and collar intact for the bodice. Cut the shirt at waist level and attach a gathered or pleated skirt made from lightweight fabric. This technique creates a unique dress that maintains the shirt’s character while offering feminine flair.
Difficulty Level: Intermediate
Time Required: 3-4 hours
Materials Needed: Oversized men’s shirt, 2-3 yards coordinating fabric, sewing machine, thread, pins
Skills Needed: Basic sewing, gathering or pleating fabric, attaching waistbands
17. Sweater to Cardigan Conversion
Give new life to a pullover sweater by converting it into an open-front cardigan. This transformation requires careful cutting and finishing work. The result is a versatile layering piece that works with multiple outfits.
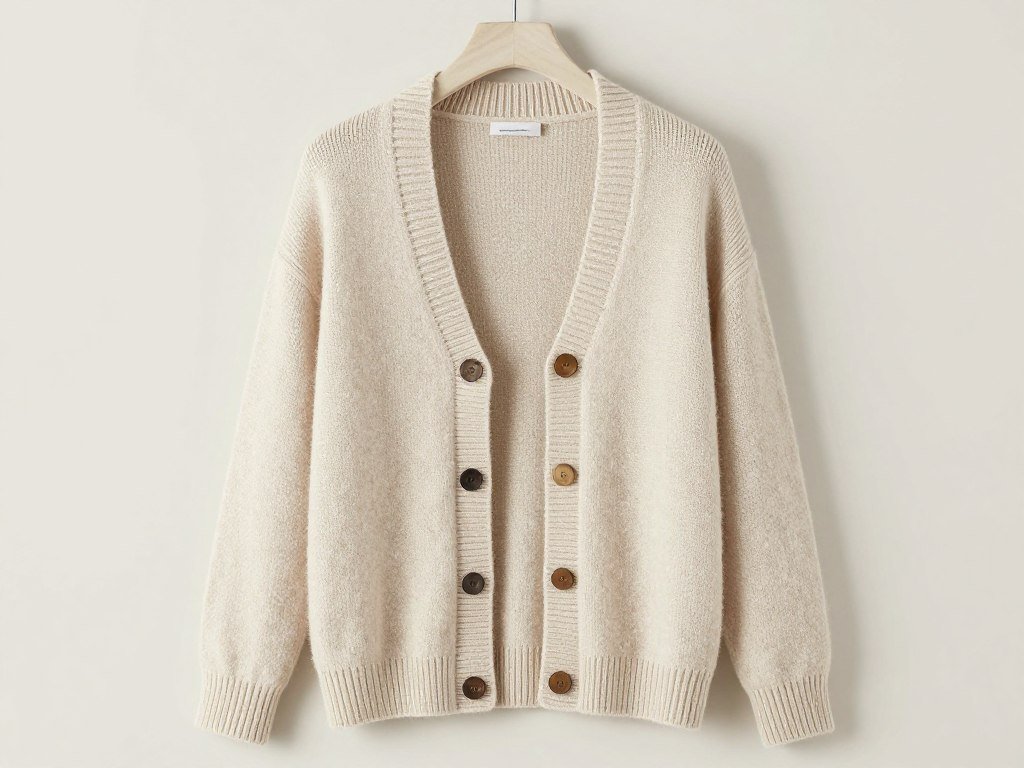
Mark a straight line down the center front of the sweater. Cut carefully along this line, then add a button band or ribbon trim to both edges. You can leave it open for a drapey look or add buttons and buttonholes for closures. Stabilize the cut edges with interfacing or bias tape to prevent stretching.
18. Kimono Style Wrap Top

Create an elegant kimono-style wrap top using old scarves, tablecloths, or fabric remnants. This project involves creating a pattern and cutting pieces that wrap around the body. The loose, flowing style flatters many body types.
You’ll need to create or download a simple kimono pattern that includes front panels, back panel, and sleeves. The wrap style eliminates the need for buttons or zippers. Add a fabric tie belt to secure the wrap and define the waist.
19. Pleated Midi Skirt from Fabric
Construct a classic pleated midi skirt using fabric from old curtains, sheets, or multiple garments sewn together. This project teaches valuable skills in creating pleats and attaching waistbands. The finished piece becomes a wardrobe staple.
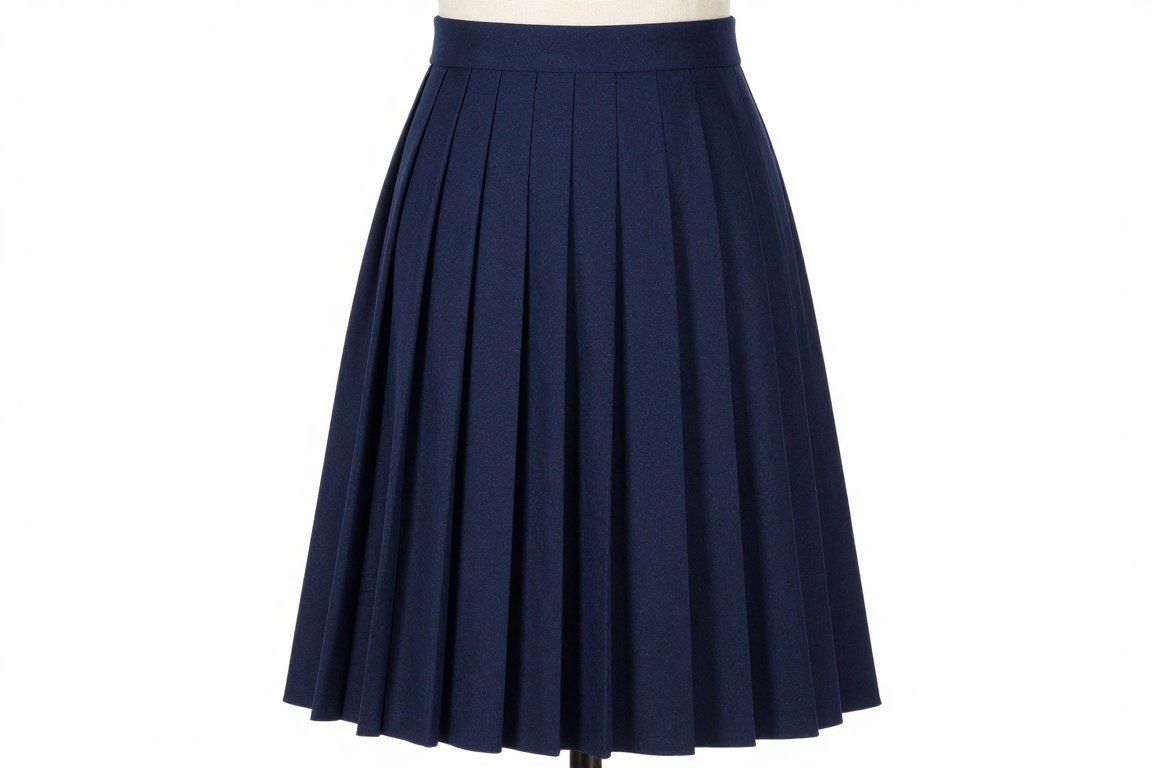
Measure your waist and desired skirt length to calculate fabric needs. Create evenly spaced pleats using pins and careful pressing. Attach a waistband and add a zipper or elastic closure. This project requires precision but rewards you with a professional-looking garment.
20. Patchwork Maxi Skirt
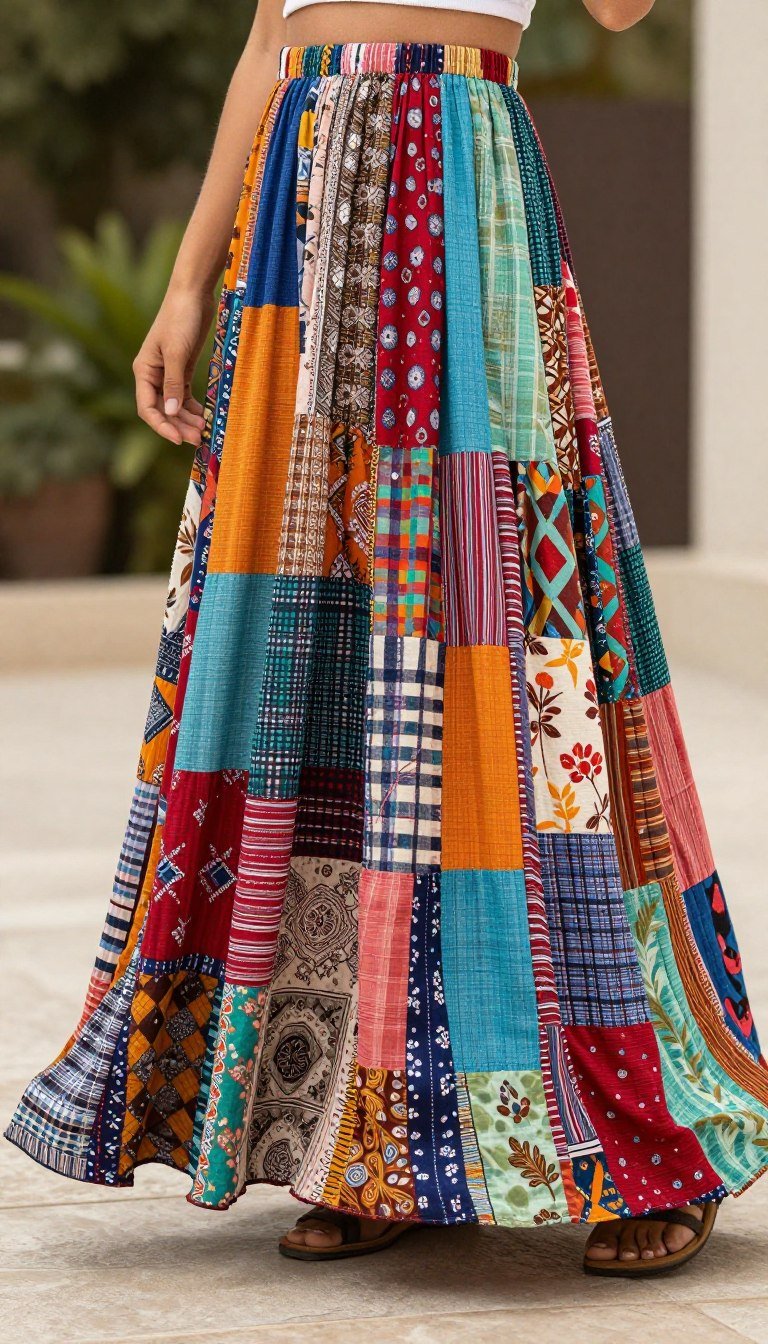
Combine fabric scraps, old clothes, and remnants into a bohemian-style patchwork maxi skirt. This project uses up fabric odds and ends while creating a one-of-a-kind piece. The random pattern of the patchwork makes this forgiving for beginners attempting their first skirt.
Cut fabric into squares or rectangles and arrange them in a pleasing pattern. Sew the pieces together to create panels wide enough to wrap around your body. Add an elastic waistband for easy wear. The beauty of patchwork is that imperfections add to the handmade charm.
Quick Weekend DIY Projects
These final five projects deliver maximum impact with minimal time investment. Perfect for weekend crafting sessions, each takes under two hours. You’ll create wearable pieces or accessories that refresh your style immediately.
21. Bow Sleeve Enhancement
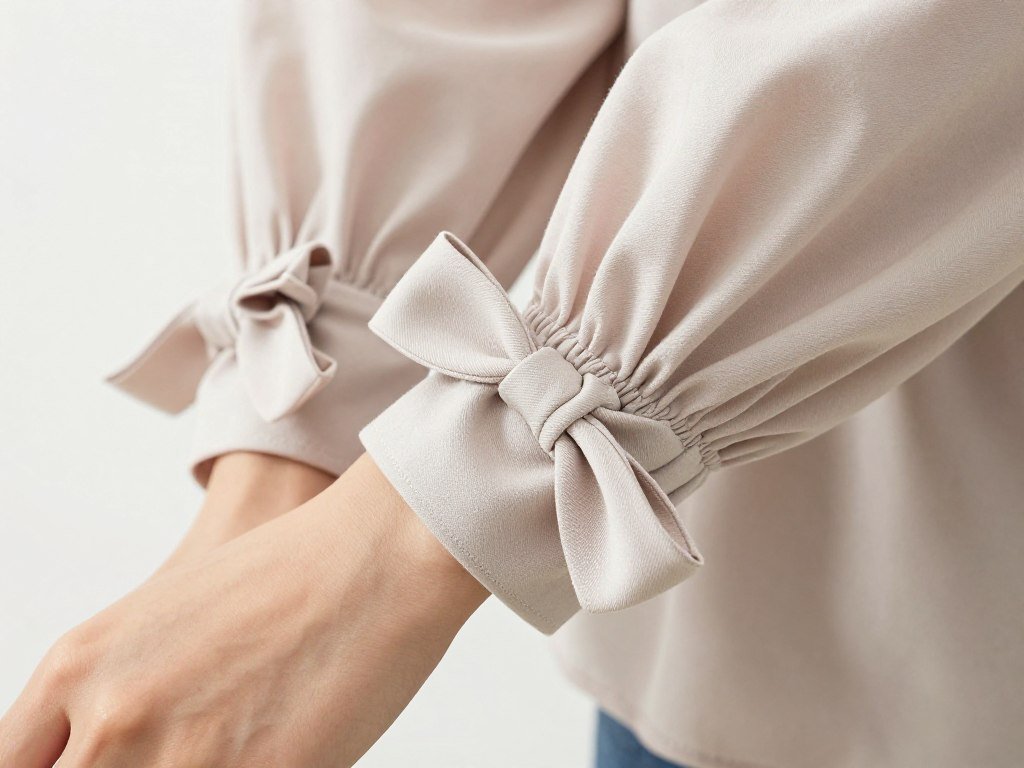
Add feminine bow details to plain sleeves using contrasting fabric ribbons or strips cut from coordinating fabric. This simple enhancement transforms basic tops into statement pieces. The bows can be sewn permanently or tied so you can remove them for washing.
Cut fabric strips about one inch wide and twelve inches long. Hem the long edges or use ribbon. Sew or tie these strips at the sleeve hems, shoulders, or cuffs. Position the bows where they’ll create the most visual interest and flatter your arm shape.
Difficulty Level: Beginner
Time Required: 30-45 minutes
Materials Needed: Contrasting fabric or ribbon, needle and thread or fabric glue, scissors
Works Best On: Simple tops, plain dresses, sleeveless shirts
22. Color Block T-Shirt Redesign
Create trendy color-blocked tops by combining pieces from different colored shirts. This project teaches you to mix colors and patterns while using clothes you already own. The geometric design looks modern and intentional.

Cut two or three t-shirts into horizontal or vertical sections. Mix and match the pieces, then sew them together to create a new shirt. Ensure the fabric weights are similar for the best drape. This technique works with solid colors or combines solids with patterns for extra visual interest.
23. Statement Collar Addition
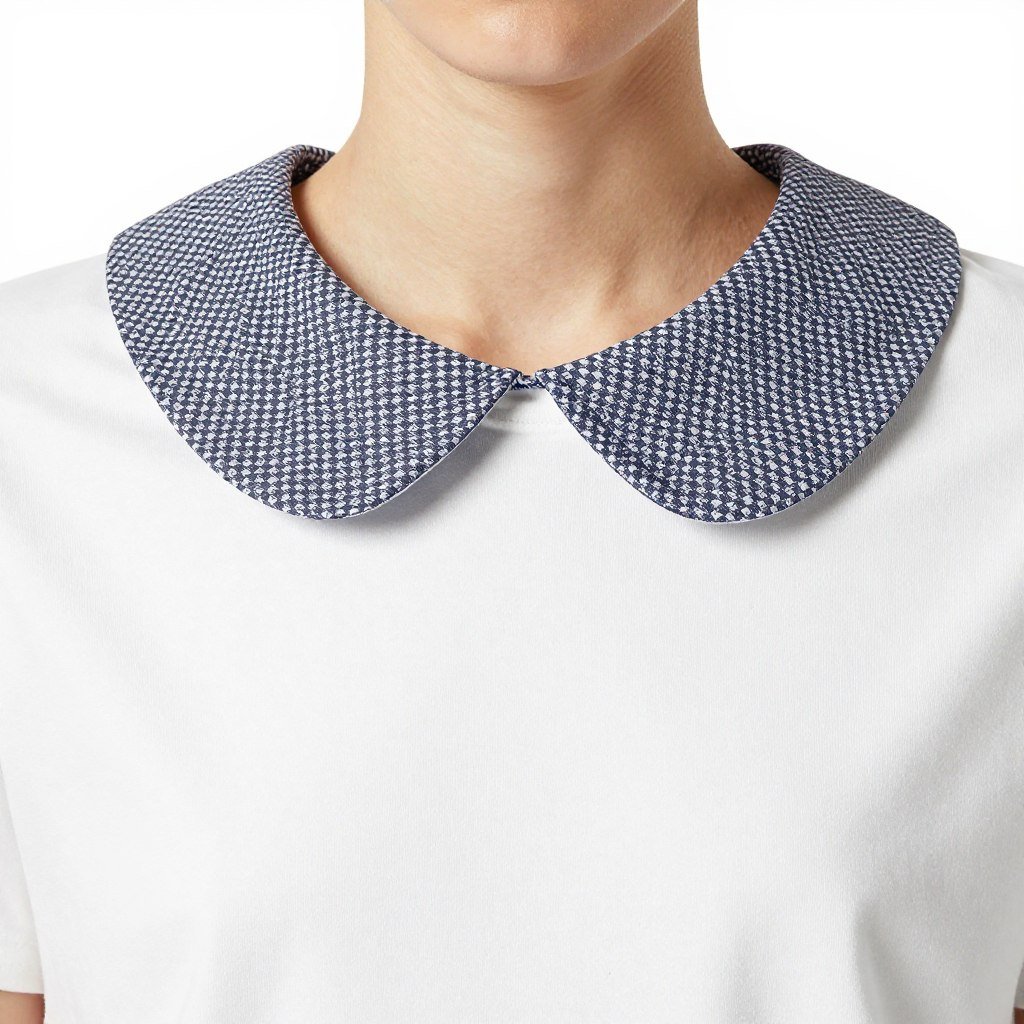
Transform a plain crew neck into something special by adding a decorative collar. Create the collar from contrasting fabric, lace, or embellished material. This project requires a simple collar pattern that you can find free online or draw yourself.
Trace and cut two collar pieces from your chosen fabric. Sew them together, turn right side out, and press flat. Attach the collar to your shirt’s neckline using hand stitches or your sewing machine. Choose bold patterns or textures that complement your shirt’s color.
24. Elastic Waist Skirt from Pants
Convert old pants into a comfortable elastic waist skirt by removing the center seam and reshaping the legs. This clever transformation gives completely new life to pants that no longer fit or suit your style. You’ll create a flattering A-line or straight skirt shape.
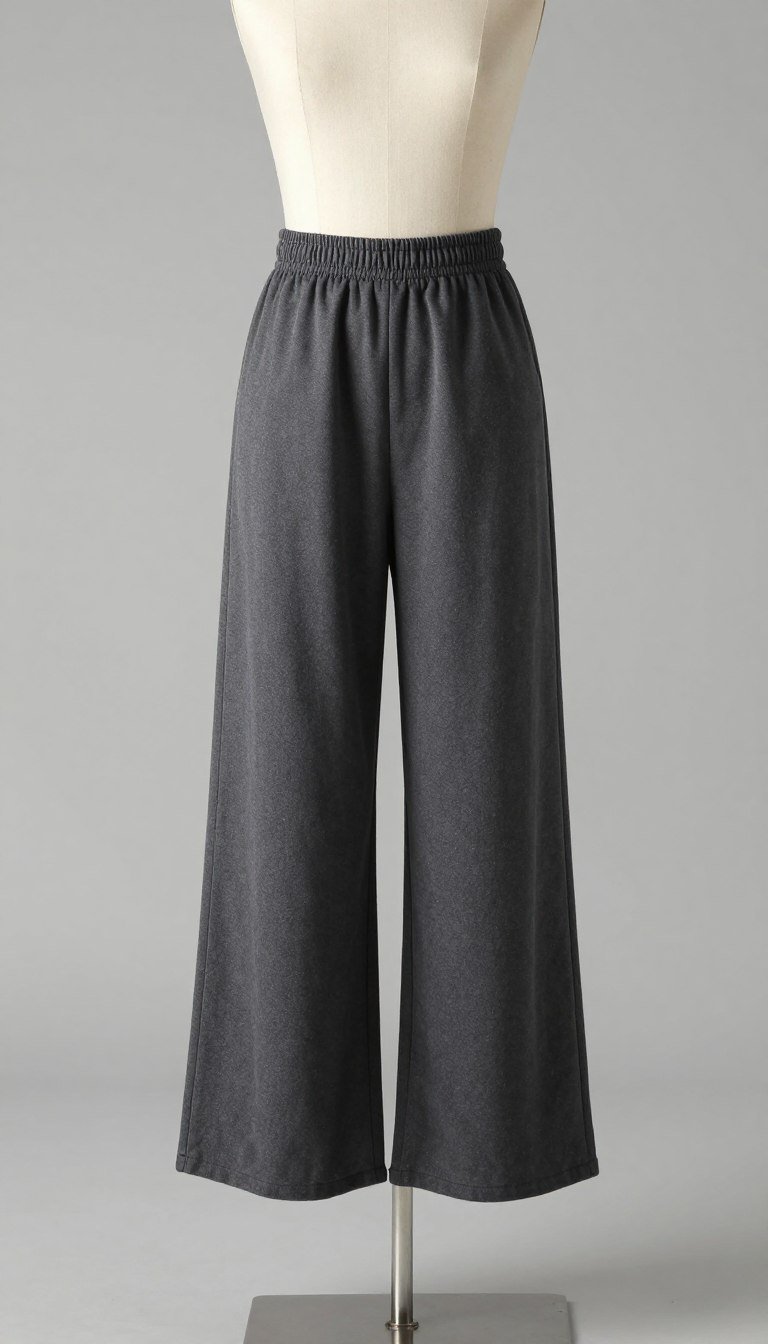
Remove the inseam of the pants completely and open them flat. Reshape the leg openings into a skirt shape by sewing a new center seam. Add elastic to the waistband for comfortable wear. This project works particularly well with wide-leg pants or palazzo pants.
25. Reversible Tote from Old Shirts
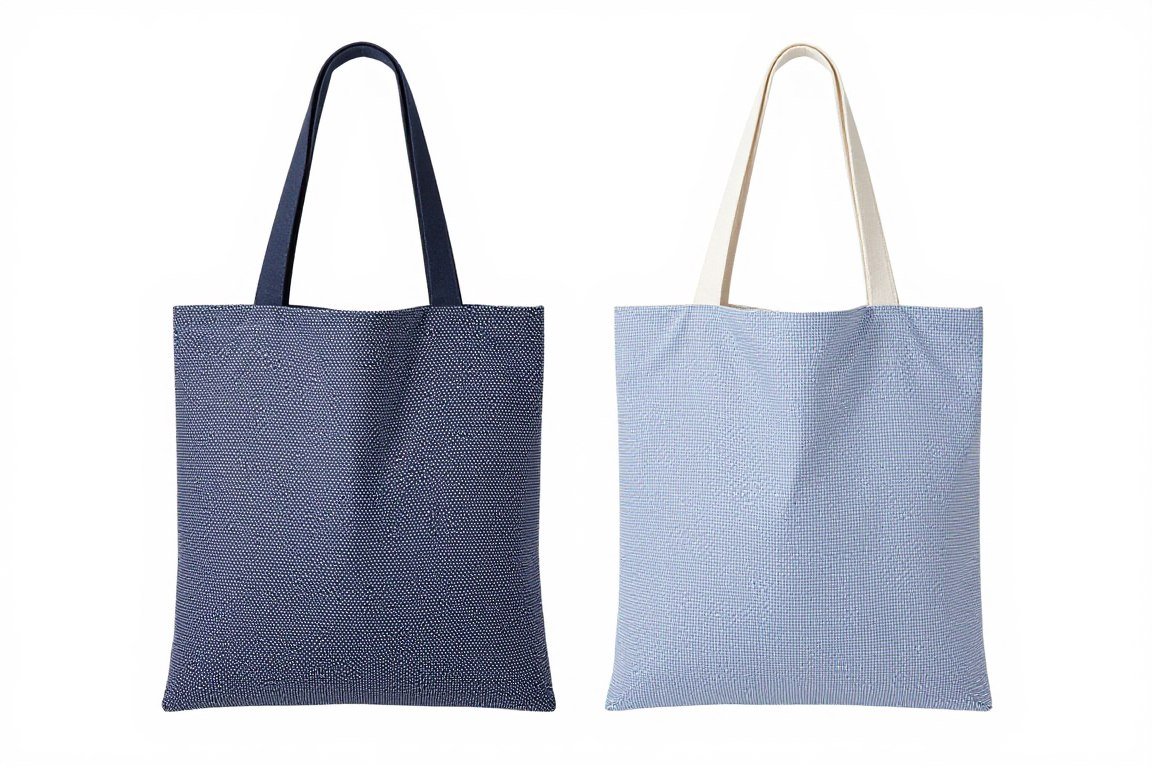
Create a practical reversible tote bag using two contrasting shirts. This project uses basic bag construction techniques while teaching you about lining and reversible designs. The finished bag serves as a reusable shopping bag or everyday carry-all.
Cut rectangles from both shirts for the bag body and straps. Sew the pieces together with the fabrics facing each other, leaving an opening to turn the bag right side out. Topstitch around the top edge and add the handles. The reversible feature means you get two bags in one, perfect for matching different outfits.
Difficulty Level: Intermediate
Time Required: 1.5-2 hours
Materials Needed: Two large shirts in contrasting colors or patterns, sewing machine, thread, pins, scissors
Finished Size: Approximately 14″ wide by 16″ tall with 20″ straps
Essential Tips for DIY Success
These proven strategies will help you achieve better results with every project you tackle. Learning from common mistakes saves time and reduces frustration. Apply these tips to improve your DIY clothes making skills quickly.
Start with Quality Base Materials

Not all old clothes make good DIY projects. Choose garments made from quality fabric that’s still in good condition. Worn-out fabric with holes or extreme fading limits what you can create. Look for pieces with interesting details, good colors, or quality construction worth preserving.
Natural fiber fabrics like cotton, linen, and wool typically work better than synthetic blends. They’re easier to cut, sew, and manipulate into new shapes. Save premium fabrics from expensive garments for projects where the quality will really shine through.
Always Make a Test Piece First
Before cutting into a favorite garment, practice your technique on something you don’t care about. This trial run reveals potential problems and helps you refine your process. You’ll gain confidence and avoid costly mistakes on the pieces you really want to transform.
Testing Helps You:
- Perfect cutting techniques before working on good fabric
- Understand how different fabrics behave during transformation
- Adjust measurements and fit without risking your favorite pieces
- Build confidence in your abilities through practice
- Identify needed tools or supplies before starting the real project
What to Test:
- Fabric glue strength and drying time on similar material
- How fabric responds to cutting and distressing techniques
- Whether your chosen colors or patterns work well together
- Fit and proportion of design elements before committing
- Washing and wearing durability of your transformation method
Invest in Proper Tools
Sharp fabric scissors make clean cuts that won’t fray excessively. Dull scissors create ragged edges and make your work look amateur. The same goes for sewing machine needles – replace them regularly for best results. Quality tools might cost more initially but they last longer and produce better outcomes.
Consider building your toolkit gradually rather than buying everything at once. Start with essentials like good scissors, measuring tape, and quality thread. Add specialty tools as you discover which types of projects you enjoy most. This approach prevents wasting money on tools you’ll never use.
Press as You Go
An iron becomes your secret weapon for professional-looking DIY clothes. Press seams after sewing them, press hems before stitching, and press finished projects before wearing. This simple step elevates homemade pieces to look store-bought. The difference between pressed and unpressed work is dramatic.
Pressing Pro Tips: Use a pressing cloth to protect delicate fabrics from direct heat. Set your iron to the appropriate temperature for your fabric type. Press, don’t slide the iron – lift and place it for crisp results. Use steam for stubborn wrinkles but let the fabric dry before continuing to work with it.
Troubleshooting Common DIY Problems
Even experienced crafters encounter challenges during projects. Knowing how to fix common issues prevents you from giving up on a piece halfway through. These solutions address the problems that most frequently frustrate DIY clothing makers.
Fixing Uneven Hems
Uneven hems happen to everyone, especially when working with stretchy fabrics. The key to fixing them is proper measuring before cutting. Use a hem gauge or ruler to mark an even line all the way around. Pin the hem in place while the garment lies flat, then try it on to verify the length before stitching.

If you’ve already cut an uneven hem, you have options. Cut it shorter to even it out, or add a decorative trim that hides the unevenness. Bias tape, ribbon, or lace applied to the hem edge disguises mistakes while adding a design element. Sometimes the fix becomes your favorite part of the finished piece.
Dealing with Fraying Fabric
Some fabrics fray aggressively when cut, creating messy edges that unravel quickly. Prevent this by applying fray check liquid to cut edges immediately after cutting. For larger projects, consider using pinking shears to cut the edges – the zigzag pattern reduces fraying significantly.
Important: Always test fray check on a hidden area first. Some fabrics may darken or stiffen when treated. Apply fray check sparingly – a little goes a long way. Allow it to dry completely before continuing to work with the fabric.
Correcting Sizing Mistakes
Made something too small? Add fabric panels to the sides for extra room. Lace inserts, contrasting fabric strips, or matching material can expand a garment that turned out smaller than intended. This technique works particularly well on tops and dresses where side panels create an intentional design element.
For pieces that turned out too large, taking in the sides or adding elastic creates better fit. Elastic at the waist or wrists gathers excess fabric while maintaining comfort. Strategic tucks or pleats can also reduce size while adding interesting design details. View sizing mistakes as opportunities for creative solutions rather than failures.
The Environmental Impact of DIY Fashion
Upcycling old clothes into new pieces contributes to a more sustainable fashion industry. Every garment you transform keeps textile waste out of landfills. The fashion industry generates massive amounts of waste annually, and your DIY projects make a genuine difference in reducing that impact.

Fast fashion encourages constant buying and discarding of clothes. DIY clothes ideas promote the opposite mindset – valuing what you own and extending its life through creativity. This shift in thinking reduces consumption while developing practical skills. You’ll find satisfaction in wearing something you made rather than just bought.
Reducing Your Fashion Footprint
Environmental Benefits
- Reduces textile waste in landfills significantly
- Decreases demand for new clothing production
- Saves water used in manufacturing processes
- Reduces chemical pollution from textile production
- Lowers carbon emissions from shipping and manufacturing
Personal Benefits
- Saves money compared to buying new clothes
- Creates unique pieces no one else will own
- Develops valuable practical skills for life
- Provides creative outlet and stress relief
- Builds confidence in your creative abilities
Community Impact
- Inspires others to try sustainable fashion choices
- Creates opportunities to share skills and knowledge
- Builds community through craft groups and workshops
- Generates thoughtful, handmade gifts for others
- Supports local thrift stores and donation centers
Making DIY a Lifestyle
Start viewing your closet as a resource library rather than just clothes you wear. Old items become materials for new projects. This mindset shift transforms how you shop and what you keep. Before donating or discarding clothing, consider whether it could become something else entirely.
Share your DIY clothes ideas and finished projects with friends and family. Your creations might inspire others to try upcycling instead of shopping for new items. The ripple effect of sustainable choices extends far beyond your personal impact. Teaching children these skills passes valuable knowledge to the next generation.
Building a Complete DIY Wardrobe
Creating an entire wardrobe through DIY projects might seem ambitious, but it’s entirely achievable. Start with basic pieces that work with multiple outfits. Focus on versatile items in neutral colors that you can dress up or down. Gradually add statement pieces and seasonal items to round out your collection.

Plan your projects strategically rather than randomly transforming whatever you find. Identify gaps in your current wardrobe and create pieces to fill those needs. This approach ensures you’ll actually wear what you make instead of creating items that sit unused. Consider your lifestyle and what you realistically need.
Essential Pieces to DIY First
Everyday Basics
- Simple t-shirts and tops you can wear weekly
- Comfortable casual pants or jeans variations
- Versatile cardigans or light jackets for layering
- Classic skirts in flattering lengths and cuts
- Basic dresses that work for multiple occasions
Statement Pieces
- Unique jackets with embellishments or special details
- Patterned or color-blocked tops for visual interest
- Special occasion dresses with distinctive features
- Artistic or bohemian-style flowing pieces
- Conversation-starting accessories and bags
Seasonal Items
- Lightweight summer tops and shorts for warm weather
- Cozy sweaters and warm layers for cold months
- Transitional pieces for spring and fall wearing
- Weather-appropriate outerwear and wraps
- Seasonal accessories like scarves and shawls
Maintaining Your DIY Wardrobe
Handmade and upcycled pieces often require more careful maintenance than store-bought clothes. Wash them inside out to protect embellishments and custom details. Use gentle cycles and air dry when possible to extend the life of your creations. Store them properly to prevent damage from hanging or folding.
Keep a small repair kit handy for quick fixes when seams come loose or embellishments fall off. Regular maintenance prevents small issues from becoming major problems. Set aside time monthly to check your DIY pieces for needed repairs. This proactive approach keeps your handmade wardrobe looking fresh and well-maintained.
Connecting with the DIY Fashion Community
Joining the broader DIY and upcycling community provides inspiration, support, and friendship. Online groups, local workshops, and craft meetups connect you with people who share your interests. These connections accelerate your learning while making the creative process more enjoyable and social.
Online Resources and Communities
Numerous online platforms host thriving DIY fashion communities. Share your projects, ask questions, and learn from others’ experiences. Many crafters post detailed tutorials and answer questions from beginners. This collective knowledge resource proves invaluable when you encounter challenges or want to try new techniques.
Follow DIY fashion bloggers and video creators who match your skill level and style preferences. Their regular content provides project ideas and keeps you motivated. Many offer free patterns and templates that simplify complex projects. Building a curated list of favorite resources saves time when seeking inspiration or instructions.
Local Workshops and Classes
In-person instruction accelerates skill development beyond what online tutorials can achieve. Local fabric stores, community centers, and libraries often host DIY and sewing classes. These hands-on sessions let you ask questions immediately and get personalized guidance. The social aspect makes learning more fun while building local friendships.
Finding Local Opportunities: Check community bulletin boards, local fabric stores, and library event calendars. Search social media for crafting groups in your area. Many cities have upcycling or sustainable fashion groups that meet regularly. Consider starting your own group if nothing exists locally – you’ll likely find others interested in joining.
Sharing Your Creations
Documenting and sharing your DIY projects inspires others while building your own creative portfolio. Take before and after photos of your transformations to track your progress. Write brief descriptions of techniques you used and challenges you overcame. This documentation helps you remember successful methods for future projects.
Consider creating a dedicated social media account or blog for your DIY fashion journey. This platform lets you connect with other makers worldwide and potentially inspire people you’ve never met. The positive feedback and encouragement from the community motivates you to keep creating and improving your skills.
Start Your DIY Fashion Journey Today
These 25 DIY clothes ideas provide a solid foundation for transforming your wardrobe creatively and sustainably. You’ve learned techniques ranging from simple no-sew projects to more advanced garment construction. Each project offers opportunities to develop new skills while creating unique pieces you’ll love wearing.

Remember that every expert crafter started as a beginner making mistakes and learning from them. Don’t let fear of imperfection prevent you from starting your first project. Choose one idea from this guide that excites you and gather the materials needed. The satisfaction of wearing something you created yourself is worth any initial struggles.
Your DIY fashion journey contributes to a more sustainable future while developing valuable skills. Each piece you upcycle instead of buying new reduces environmental impact. Share your knowledge with others and watch as your creative community grows. The transformation of old clothes into new treasures mirrors your own growth as a maker.