
Getting kids outside to play has never been more important. A mud kitchen provides the perfect outdoor space for children to explore nature, practice imaginative play, and develop motor skills. These creative cooking stations transform simple ingredients like mud, water, and grass into endless entertainment.
Building a DIY outdoor mud kitchen doesn’t require carpentry expertise or expensive materials. Many projects use recycled pallets, old furniture, or basic wood boards. Parents can create these magical play spaces in a weekend, giving little ones years of sensory-rich fun.
This guide shares fifteen practical mud kitchen ideas suitable for various skill levels and budgets. Each project includes materials lists, building steps, and safety considerations. Whether you have a large backyard or small patio, there’s a perfect mud kitchen design waiting for your family.
Table of Contents
Essential Supplies for Building Your Mud Kitchen
Every mud kitchen project starts with gathering the right materials. The basic supplies create a functional cooking space where kids can safely explore outdoor play. Understanding what you need helps parents plan their budget and timeline.
Most projects require wood as the primary building material. Pallets offer a cost-effective option, often available free from local businesses. New lumber provides more control over dimensions and quality. Weather-resistant wood like cedar naturally withstands outdoor conditions better than standard pine boards.
Building Materials
- Wooden pallets or lumber boards for the main structure
- Screws and nails rated for outdoor use
- Wood stain or outdoor paint for weather protection
- Sandpaper to smooth rough edges
- L-brackets for added stability
- Plastic or metal sink basin
Play Accessories
- Old pots and pans from thrift stores
- Plastic containers and bowls
- Kitchen utensils like wooden spoons and whisks
- Muffin tins and baking sheets
- Hooks or pegboard for hanging tools
- Small buckets for water and mud storage
Kitchen utensils and play accessories transform a wooden structure into an engaging play space. Metal pots and pans create authentic sounds during play. Plastic containers withstand weather better and cost less to replace. Mixing both types gives children variety in their outdoor kitchen adventures.
Safety equipment matters just as much as building supplies. Work gloves protect hands during construction. Safety glasses prevent sawdust from entering eyes. A power drill speeds up assembly time compared to manual tools. Having these items ready makes the building process smoother for parents.
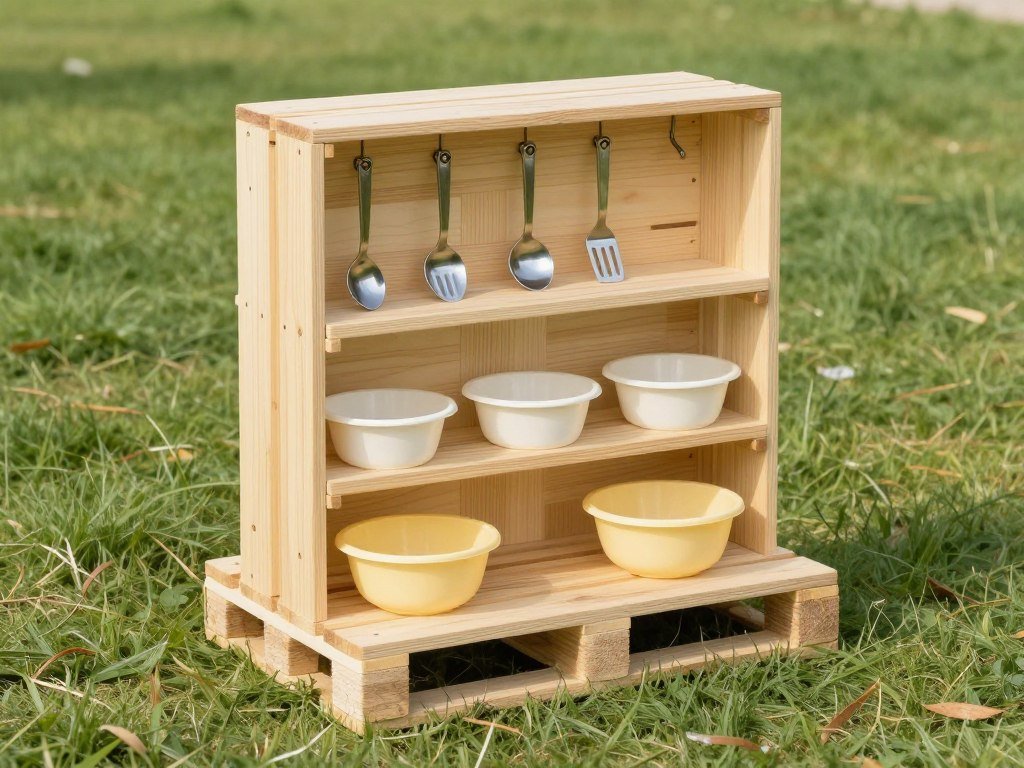
1. Basic Pallet Mud Kitchen
The single pallet mud kitchen offers the simplest entry point for DIY beginners. This design uses one wooden pallet stood upright to create an instant play surface. The natural shelf spacing in pallets provides perfect storage areas for pots, pans, and mud pie ingredients.
Materials Needed
- One standard wooden pallet (48 x 40 inches works best)
- Sandpaper or electric sander
- Outdoor wood sealant or paint
- 8-10 outdoor-rated screws
- Metal or plastic basin for sink (optional)
- S-hooks for hanging utensils
Step-by-Step Instructions
- Inspect the pallet for loose nails, splinters, or damaged wood boards that could cause injury.
- Sand all surfaces thoroughly, paying special attention to areas where children will touch frequently.
- Apply two coats of child-safe outdoor sealant or paint, allowing proper drying time between applications.
- Stand the pallet upright and secure it to a fence or wall using screws through the back slats.
- Attach S-hooks to the front slats for hanging pots, pans, and kitchen tools.
- Cut a hole in one shelf board if adding a sink basin, securing it with brackets underneath.
- Place containers on the shelves and hang utensils to complete the setup.
Age Recommendations and Safety
This basic design works perfectly for children ages 2 through 8 years. The lower shelves stay within reach of toddlers, while taller kids use the upper storage areas. Make sure the pallet is firmly anchored to prevent tipping during enthusiastic play.
Check the structure monthly for loose boards or protruding nails. Wood naturally expands and contracts with weather changes, so regular maintenance keeps the play space safe. Replace any damaged boards immediately to maintain structural integrity.
2. Double Pallet L-Shaped Kitchen
Two pallets create an L-shaped mud kitchen with significantly more workspace and storage. This expanded design gives multiple children room to play together. The corner configuration fits neatly against fences or house walls, maximizing limited outdoor space.

The additional pallet provides separate zones for different activities. One section becomes the cooking area while the other serves as prep space. This separation encourages cooperative play as children assign roles and work together on mud pie creations.
Materials Needed
- Two matching wooden pallets
- 16-20 outdoor wood screws
- 4 L-brackets for corner support
- Outdoor wood stain or paint
- Two small plastic tubs for dual sinks
- Pegboard section for tool organization
- Sandpaper for smoothing surfaces
Building Process
- Sand both pallets completely, removing any rough spots or splinters from all surfaces.
- Apply your chosen finish to both pallets and allow full drying time per product instructions.
- Position the first pallet upright against a fence or wall, securing with screws.
- Place the second pallet perpendicular to create the L-shape, connecting them with L-brackets at the corner.
- Install pegboard on one inside section for organized utensil storage.
- Cut sink holes in the top boards of each pallet section.
- Secure plastic tubs underneath the holes to create functional water basins.
- Add hooks along the outer edges for hanging additional tools and containers.
This design suits children ages 3 to 10 years old. The expanded workspace accommodates growing kids who want more elaborate play scenarios. Siblings can play side-by-side without competing for limited counter space.
Pro Tip: Leave one corner open to create a pass-through area. This opening allows children to move between sections easily during play, reducing congestion in the workspace.
3. Repurposed Furniture Mud Kitchen
Old dressers, entertainment centers, or nightstands transform into charming mud kitchens with minimal modification. This upcycling approach saves money while keeping furniture out of landfills. The existing drawers and shelves provide built-in storage that pallets can’t match.
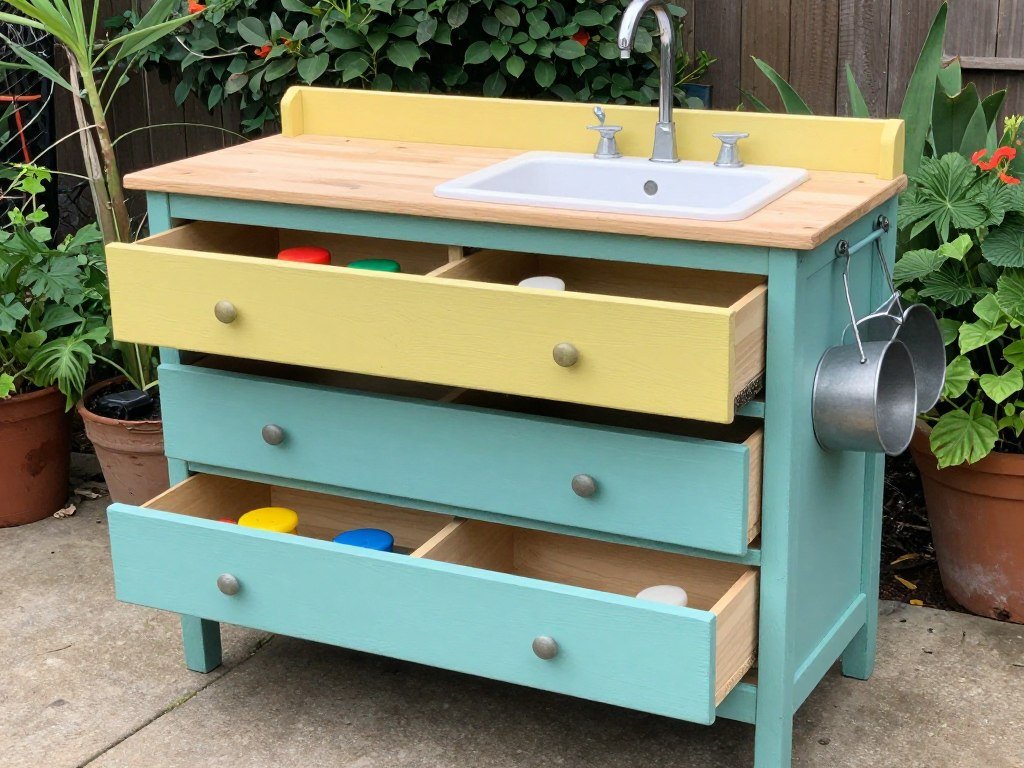
Furniture pieces bring character and personality to outdoor play spaces. A vintage dresser painted in bright colors becomes a focal point in the yard. The solid construction of real furniture typically outlasts pallet projects, making this option worth the initial effort.
Best Furniture Types for Conversion
- Short dressers and changing tables at kid-friendly heights
- Nightstands for compact spaces or younger toddlers
- TV stands with open shelving for easy access
- Small desks with drawers for tool storage
- Kitchen carts already designed for food prep
Conversion Steps
- Remove any damaged veneer, loose hardware, or broken drawer slides from the furniture piece.
- Sand the entire surface to prepare for outdoor paint application.
- Apply a primer coat designed for outdoor use on all exposed wood.
- Paint with two to three coats of exterior latex paint in your chosen colors.
- Seal with clear polyurethane rated for exterior applications to protect against weather.
- Mark and cut a circular opening in the top surface for the sink basin.
- Install the basin using construction adhesive and small brackets for support.
- Add decorative knobs, hooks, or a small backsplash to enhance the kitchen appearance.
- Replace drawer pulls with colorful, child-friendly knobs that are easy to grip.
This project works well for children ages 2 through 7. The closed drawers protect play materials from weather when not in use. Parents appreciate the tidier appearance compared to open-shelf designs.
Check thrift stores, garage sales, and online marketplaces for affordable furniture pieces. Solid wood furniture survives outdoor conditions better than particle board. Look for sturdy construction even if the finish appears worn or dated.
4. Wooden Crate Stack Kitchen
Wooden crates stack together like building blocks to create customizable mud kitchens. This modular approach lets parents adjust the configuration as children grow or space needs change. The open design encourages creative storage solutions and visual organization of play materials.
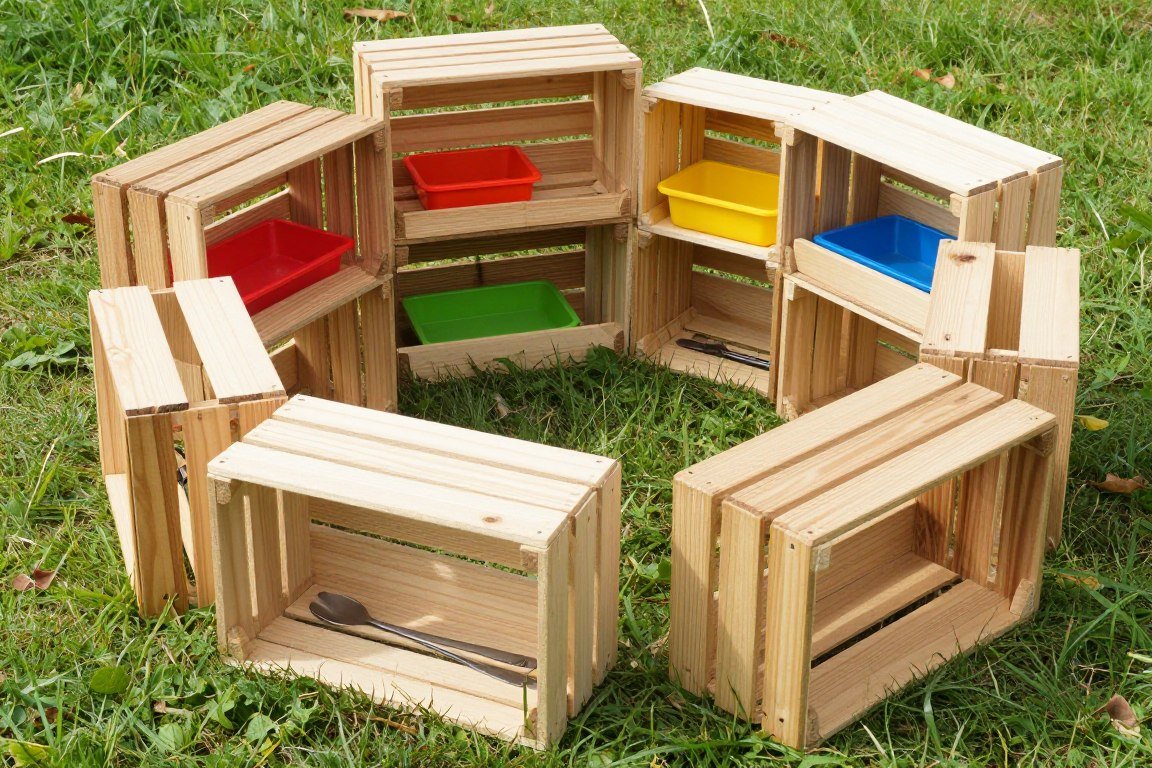
Children see exactly where everything belongs in the transparent storage system. This visibility reduces cleanup time and teaches organizational skills during play. Parents can rearrange crates seasonally to keep the play space feeling fresh and interesting.
Materials Needed
- 6-8 wooden crates in coordinating sizes
- Wood screws (2.5 inches) for connecting crates
- Outdoor wood stain in desired color
- Small plastic basin for washing station
- Foam brush for stain application
- Decorative fabric or contact paper for back panels (optional)
Assembly Instructions
- Clean all crates thoroughly and let them dry completely before starting.
- Sand any rough edges or splinters from the crate surfaces.
- Apply outdoor wood stain using a foam brush, following product directions for drying time.
- Arrange crates in your preferred configuration before securing them together.
- Connect crates by drilling pilot holes and inserting screws through adjoining sides.
- Create a countertop by placing one large crate horizontally across the top of vertical crates.
- Install the sink basin in the top crate by cutting an opening or leaving it as a drop-in surface.
- Add back panels to some crates using fabric or contact paper for visual interest.
This design suits ages 3 to 10 years. The modular nature means you can start small for toddlers and add more crates as children grow. The varying heights create natural zones for different activities during play.
Design Tip: Use different sized crates to create visual interest and functional variety. Large crates hold big mixing bowls while small crates organize utensils and flower ingredients perfectly.
Find Quality Wooden Crates
Wooden crates provide endless configuration possibilities. These sturdy options withstand outdoor weather while looking great in your yard.
5. Ladder Shelf Mud Kitchen
An old wooden ladder leans against a wall to create an instant vertical mud kitchen. This space-saving design works perfectly for small yards, patios, or balconies. The ladder rungs provide natural shelving at various heights, accommodating different container sizes and play materials.
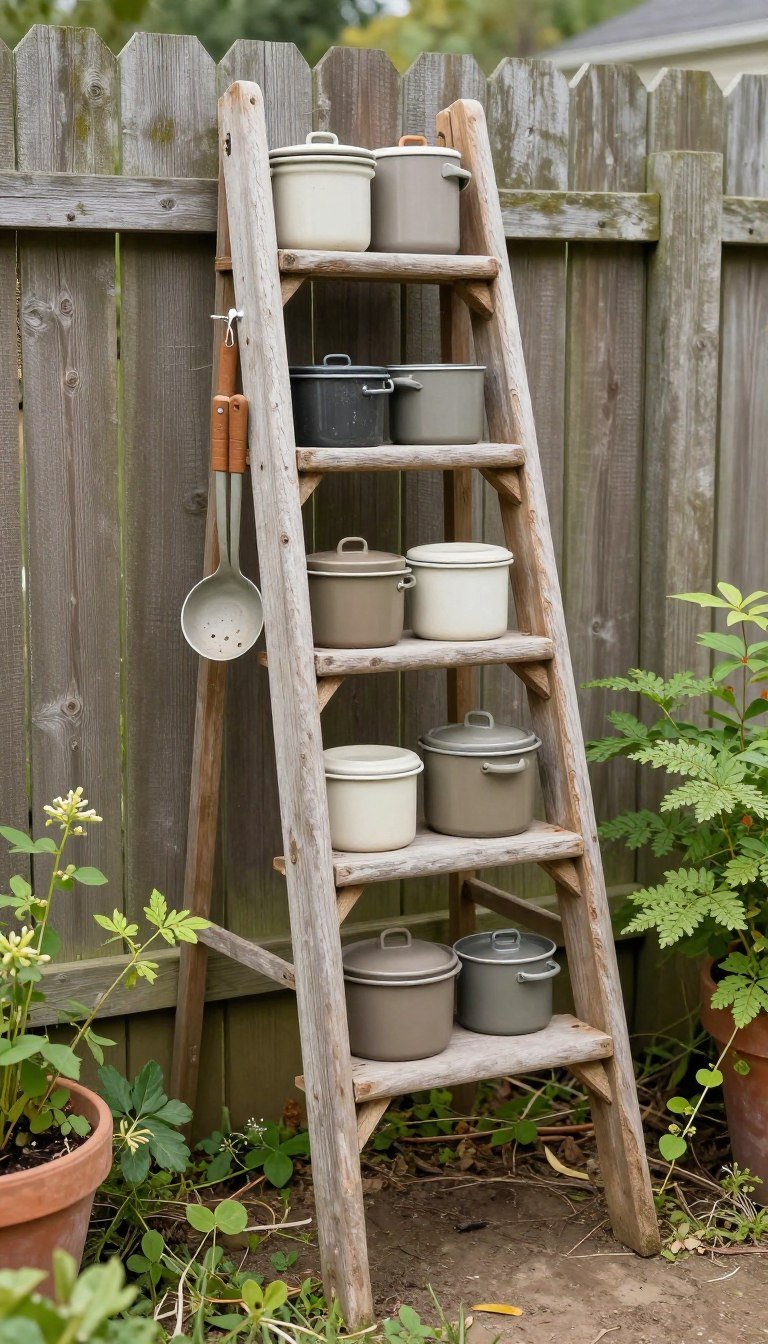
This vertical approach keeps mud kitchen supplies off the ground and away from grass or dirt. The angled position creates a unique work surface that children find engaging. Parents appreciate how easily the ladder moves for lawn maintenance or seasonal storage.
Materials Needed
- Wooden step ladder (4 to 6 feet tall)
- Outdoor paint or wood stain
- Small S-hooks for hanging items
- Wooden boards cut to fit between rungs (optional shelves)
- Rope or chain for securing to wall
- Small containers that fit on rungs
Setup Process
- Clean the ladder thoroughly and check for loose joints or damaged rungs.
- Tighten all connections and replace any weak or broken ladder parts.
- Sand the ladder surface to remove old paint or rough spots.
- Apply your chosen finish, covering all wood surfaces evenly.
- Let the ladder dry completely in a well-ventilated area.
- Position the ladder at a stable angle against a fence or wall.
- Secure the top of the ladder with rope or chain to prevent tipping.
- Add small wooden shelves between rungs if desired for more surface area.
- Attach S-hooks to the ladder sides for hanging utensils and containers.
- Place basins and bowls on the rungs at appropriate heights for your children.
This kitchen style works best for children ages 3 to 8 years. Younger kids use the lower rungs while older children reach higher levels. The vertical design naturally limits how many children can play simultaneously, making it ideal for families with one or two kids.
Position the ladder in a shaded area if possible to extend its lifespan. Direct sunlight accelerates wood deterioration even with protective finishes. Move the ladder to covered storage during harsh weather or winter months to maintain its condition.
6. Outdoor Table Mud Kitchen
A small outdoor table converts easily into a functional mud kitchen with minimal modifications. This approach works well for parents who want a quick weekend project. The existing table height usually matches perfectly with child ergonomics for comfortable play.

Tables provide stable work surfaces that resist wobbling during active play. The space underneath offers natural storage for larger items like buckets, watering cans, and mixing bowls. Children develop better coordination when working at proper table height versus crouching at ground level.
Materials Needed
- Small outdoor table or kids’ picnic table
- Plastic or metal dishpan for sink
- Jigsaw for cutting sink opening
- Outdoor acrylic paint in bright colors
- Hooks or small pegboard section
- Hanging baskets for under-table storage
- Clear polyurethane sealer
Conversion Steps
- Measure your sink basin and mark the cutting area on the table surface.
- Drill a starter hole inside the marked area for the jigsaw blade.
- Carefully cut along the marked lines to create the sink opening.
- Sand the cut edges smooth to prevent splinters during play.
- Paint the entire table in weather-resistant outdoor paint.
- Apply decorative details like stenciled designs or color blocking if desired.
- Seal the painted surface with clear polyurethane for added protection.
- Drop the basin into the cut opening, securing if needed with construction adhesive.
- Install hooks along the table edges or add a small pegboard to one end.
- Place storage baskets under the table for easy access to play materials.
This design accommodates children ages 2 to 7 years depending on table height. Shorter toddler tables work perfectly for younger kids. Standard height tables serve older preschoolers and early elementary students better.
Add a small shelf board underneath the table to create a lower storage level. This modification doubles the available space for organizing pots, pans, and nature ingredients. The extra shelf also provides a visual boundary that helps contain play materials.
7. Recycled Tire Mud Kitchen
Large tires from tractors or trucks create stable bases for unique mud kitchens. This creative approach repurposes materials that otherwise end up in landfills. The circular design encourages children to move around the workspace, creating natural flow during group play.
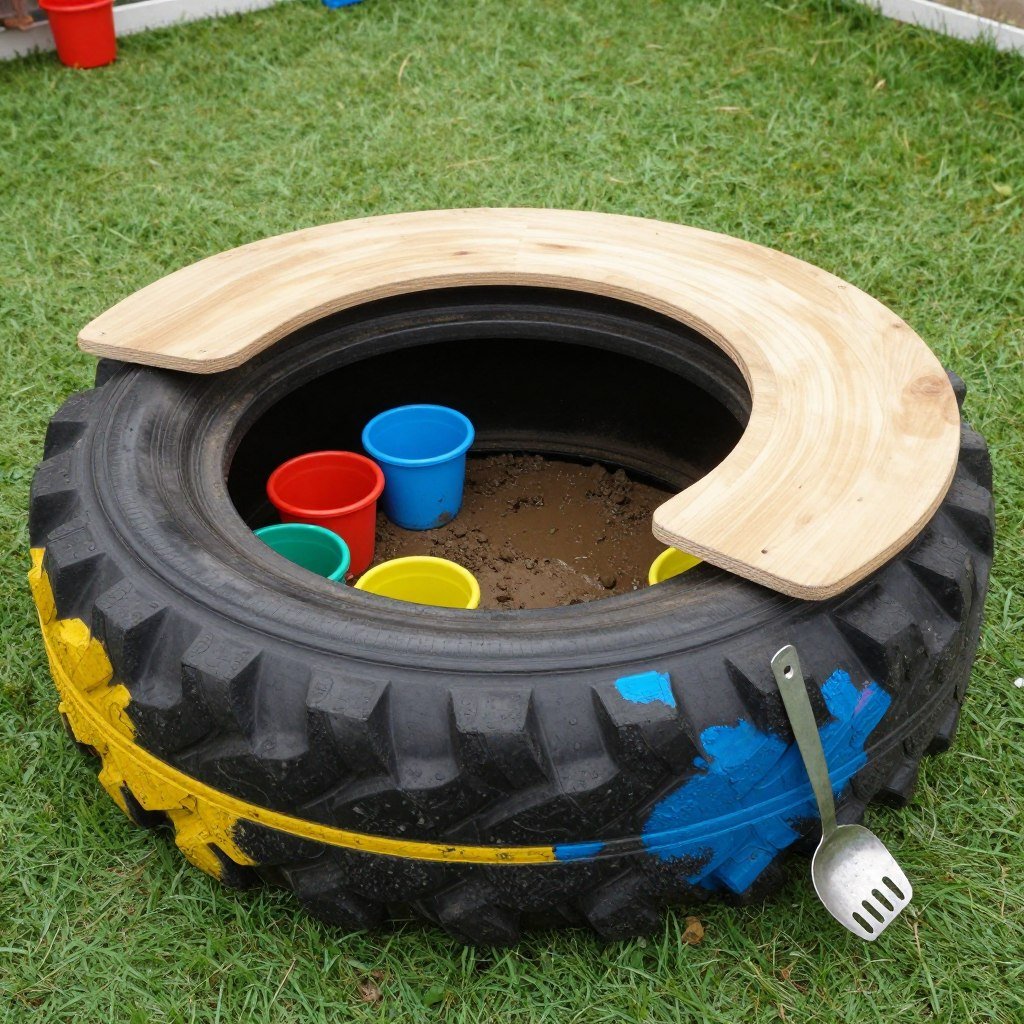
Tires provide excellent drainage when positioned directly on grass. Water and mud naturally flow through the center, preventing puddles that attract insects. The rubber material withstands all weather conditions without rotting or deteriorating like wood might over time.
Materials Needed
- One large tractor or truck tire
- Wooden board sized to fit across tire opening
- Outdoor paint for tire decoration
- Concrete mix for weighted stability (optional)
- Small plastic tub for sink area
- Metal or wooden stakes for securing board
Building Instructions
- Clean the tire thoroughly with soap and water, removing all dirt and debris.
- Let the tire dry completely in the sun for several hours.
- Paint the tire exterior with outdoor paint if desired for a more colorful appearance.
- Position the tire in your chosen play area on level ground.
- Fill the tire cavity partially with concrete mix for added stability if needed.
- Place the wooden board across the top of the tire opening.
- Secure the board by driving stakes through pre-drilled holes into the ground.
- Cut a hole in the board for a sink basin if adding this feature.
- Paint or stain the wooden top surface to protect it from weather.
- Add hooks to the board edges for hanging utensils and tools.
This kitchen suits children ages 3 to 9 years. The lower height works well for younger kids while the generous work surface accommodates older children’s more complex play. The tire’s circular shape naturally limits the number of children who can play comfortably at once.
Safety Note: Ensure tires come from a known source and haven’t been exposed to hazardous chemicals. Farm tires generally provide the safest option for children’s play areas.
8. Cinder Block and Board Kitchen
Cinder blocks and wooden boards stack together to create adjustable mud kitchens. This no-tools-required approach appeals to parents who want flexibility without permanent installation. The modular system grows or shrinks based on available space and changing play needs.
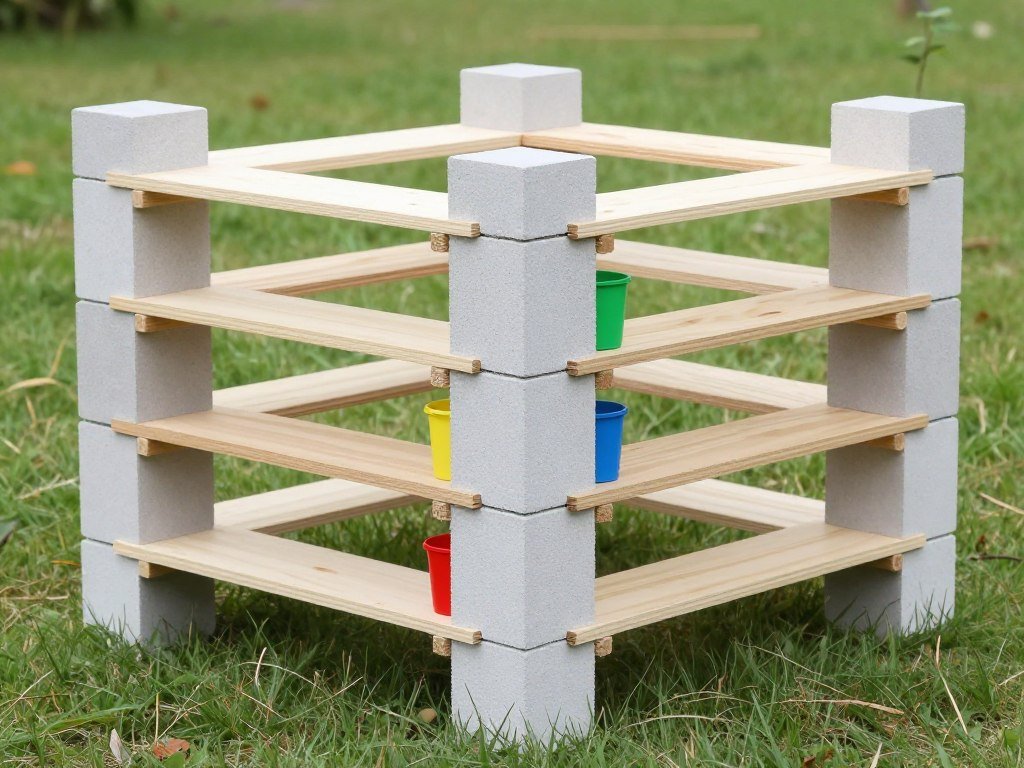
The weight of cinder blocks provides natural stability without anchoring or complicated assembly. Boards slide out easily for seasonal storage or relocation. Parents appreciate how simple this design is to disassemble when children outgrow the mud kitchen phase.
Materials Needed
- 8-12 cinder blocks depending on desired size
- 4-6 wooden boards (2×8 or 2×10 lumber)
- Outdoor wood stain or sealant
- Small plastic bins that fit in cinder block openings
- Sandpaper for board edges
Assembly Process
- Choose a level area in your yard for the mud kitchen location.
- Sand the wooden boards to remove rough edges and splinters.
- Apply outdoor stain or sealant to protect boards from moisture damage.
- Arrange cinder blocks in your preferred configuration with openings facing forward.
- Stack blocks to create two or three shelf levels based on child height.
- Place wooden boards across the blocks to form shelf surfaces.
- Adjust block spacing to fit your board lengths perfectly.
- Insert plastic bins into some cinder block openings for additional storage.
- Place the longest board on top as the main work surface.
- Add a small basin on the top surface for a washing station.
This design works for ages 2 to 8 years. Lower configurations serve toddlers while adding height accommodates growing children. The exposed cinder block holes provide natural cubbies for storing play ingredients and tools.
Place landscape fabric underneath the structure to prevent grass growth without creating permanent ground damage. This barrier keeps the play area tidier while allowing easy removal when desired. The fabric also provides cushioning underfoot during play.
9. Old Window Frame Kitchen
Vintage window frames add architectural charm to mud kitchen designs. The glass panes create a pretend storefront feel that enhances imaginative play scenarios. Children love looking through the windows while making their mud pies and nature concoctions.
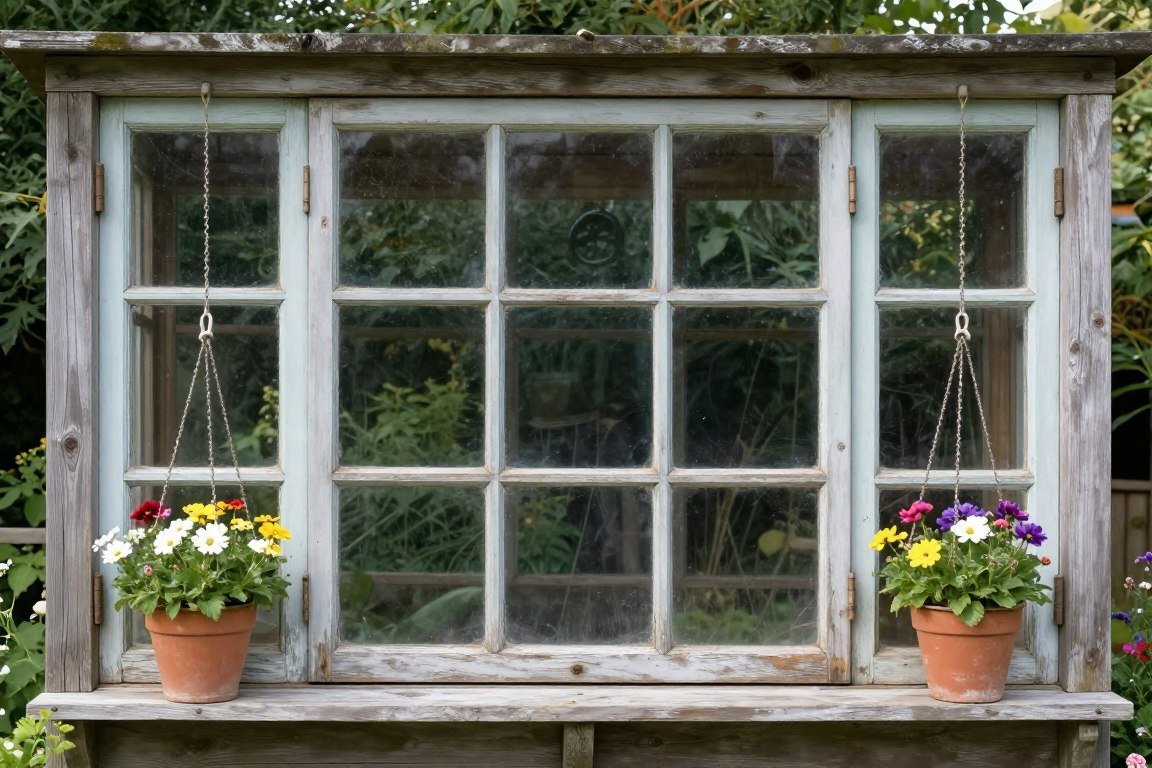
The frame structure provides built-in organization for hanging utensils and tools. Small hooks attach easily to the window mullions without additional hardware. The vertical element adds height to the play space, making it feel more like a real kitchen environment.
Materials Needed
- Old wooden window frame with multiple panes
- Small shelf board or table for base
- L-brackets for attaching frame to shelf
- Cup hooks for hanging items
- Outdoor paint for refreshing frame appearance
- Small flower box to mount on frame (optional)
Construction Steps
- Remove any loose or broken glass from the window frame for safety.
- Sand the frame to remove old paint chips and create a smooth surface.
- Paint the window frame in your preferred color using outdoor paint.
- Allow the paint to dry completely before handling the frame.
- Position a small shelf or table to serve as the kitchen base.
- Attach the window frame to the back of the shelf using L-brackets.
- Ensure the frame stands securely upright without wobbling.
- Install cup hooks along the window mullions for hanging utensils.
- Add a small flower box under the window if desired for growing herbs.
- Place containers and play materials on the shelf surface below.
This kitchen design suits ages 3 to 9 years. The visual interest keeps older children engaged longer than simple shelf designs. The window creates natural boundaries that help organize play areas without feeling restrictive.
Replace glass panes with plexiglass or remove them entirely for safer play. Children sometimes swing utensils enthusiastically during pretend cooking. The absence of glass eliminates worry about broken panes near the play area.
10. Fence-Mounted Mud Kitchen
Mounting a mud kitchen directly on an existing fence eliminates the need for a separate structure. This approach maximizes yard space by using vertical surfaces already present. The fence provides natural backing and stability for shelves and work surfaces.

Children work at a comfortable standing height without bending or kneeling. The elevated position keeps play materials cleaner and more organized. Parents find this permanent installation easy to maintain and unlikely to tip or shift during play.
Materials Needed
- Wooden shelf boards (various lengths)
- Heavy-duty shelf brackets
- Outdoor wood screws (3 inches)
- Pegboard section for tool organization
- Small plastic basin for sink
- Outdoor paint or stain
- Level for ensuring straight installation
Installation Instructions
- Measure and mark the desired height for your main work surface on the fence.
- Use a level to ensure your marks create a perfectly horizontal line.
- Install heavy-duty brackets at marked locations, securing them into fence posts if possible.
- Cut shelf boards to fit your desired kitchen width.
- Sand and finish the boards before installation for easier application.
- Place boards on the installed brackets and secure with screws from underneath.
- Add additional lower shelves for storage at different heights.
- Mount a pegboard section above the main work surface for hanging utensils.
- Cut an opening in the main shelf for your sink basin.
- Install hooks along the fence boards for hanging additional tools and containers.
This kitchen serves children ages 3 to 10 years effectively. Adjust shelf heights based on your children’s current size. Multiple shelf levels allow siblings of different ages to work comfortably together.
Consider adding a small roof or awning above the kitchen area to protect materials from rain and direct sun. This coverage extends the life of wooden components and keeps play accessories readily accessible. Simple corrugated plastic sheets attached to the fence create effective weather protection.
11. Water Table Conversion Kitchen
Existing water tables transform into mud kitchens with simple additions. The built-in basin already provides water access for mixing mud concoctions. Adding shelving and hooks around the table creates storage without major construction work.
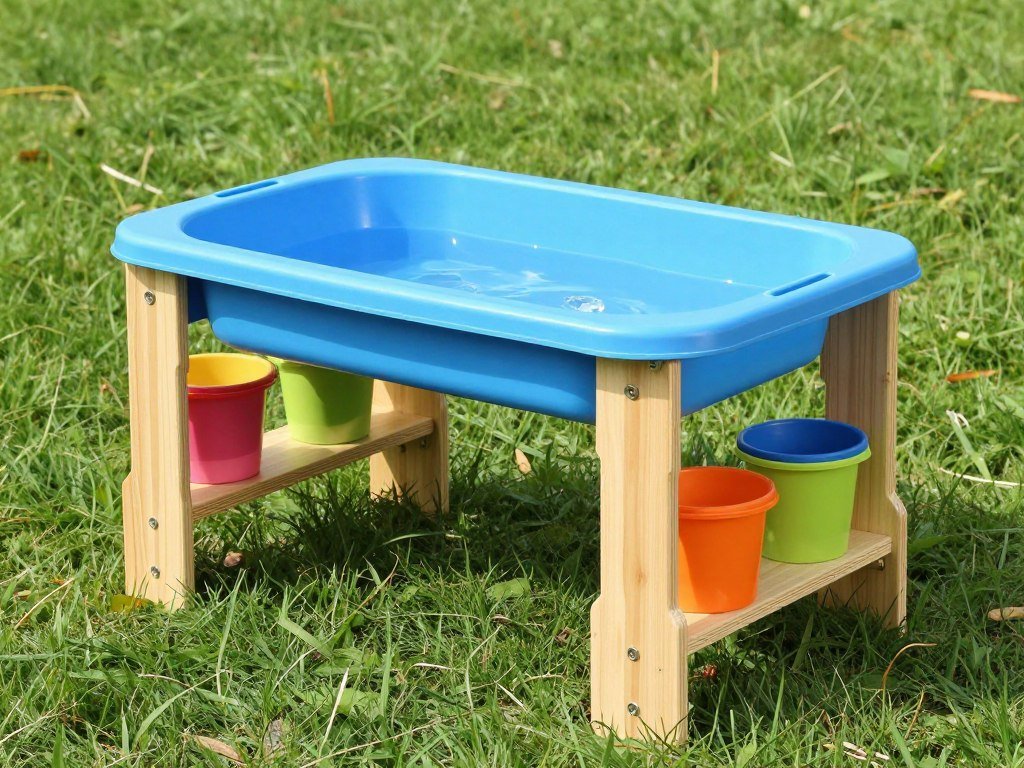
This approach works well for parents who already own a water table but want expanded play options. The conversion costs minimal money while significantly increasing play value. Children appreciate having water readily available for their mud kitchen experiments and cleanup.
Materials Needed
- Existing water or sand table
- Small wooden or plastic shelving units
- Adhesive hooks or zip ties
- Small baskets for organization
- PVC pipe and connectors for added rack (optional)
Conversion Process
- Clean the water table thoroughly and check for cracks or damage.
- Position small shelving units on either side of the table.
- Secure shelves to the table legs using zip ties or adhesive for stability.
- Install adhesive hooks along the table edges for hanging utensils.
- Create a simple overhead rack using PVC pipe if desired for additional hanging space.
- Place baskets on shelves for organizing small tools and accessories.
- Add a small bucket or container for holding mud ingredients near the basin.
- Arrange play materials in designated storage spots for easy access.
This kitchen suits ages 2 to 6 years perfectly. The lower table height matches toddler proportions better than taller structures. The familiar water table format makes the transition to mud play natural and comfortable for young children.
Rotate between water play and mud kitchen activities to maintain interest. Some days fill the basin with clean water for splashing, other times add dirt for making mud pies. This versatility extends the useful life of a single play structure significantly.
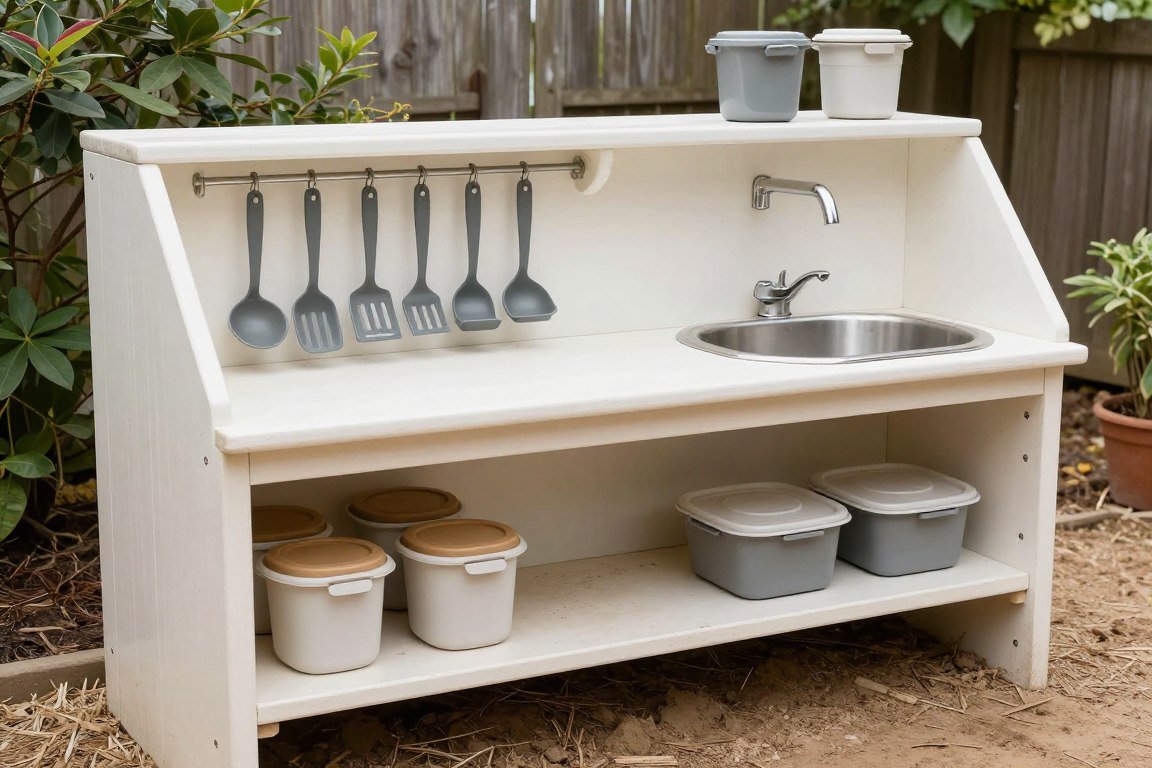
12. Bookshelf Mud Kitchen
Short bookcases become excellent mud kitchens with thoughtful modifications. The multiple shelf levels naturally organize different play categories. The solid back panel provides a surface for mounting pegboard or hanging additional storage solutions.

Bookcases offer more structural integrity than homemade pallet kitchens. The manufactured joints and proper hardware ensure stability during years of active play. Children benefit from the clearly defined spaces that encourage organization and cleanup habits.
Materials Needed
- Short bookcase (30-36 inches tall)
- Outdoor primer and paint
- Clear weatherproof sealant
- Small plastic basin for sink
- Decorative hardware like colorful knobs
- Pegboard for back panel
- Small containers that fit on shelves
Modification Steps
- Remove any backing material from the bookcase if present.
- Sand all surfaces lightly to help paint adhere properly.
- Apply outdoor primer to all exposed wood surfaces.
- Paint the bookcase with weather-resistant exterior paint in your chosen colors.
- Add decorative paint details like stripes or patterns if desired.
- Apply two coats of clear sealant to protect the finish.
- Cut an opening in the top shelf for your sink basin.
- Install the basin using construction adhesive and brackets for support.
- Mount pegboard on the back panel for utensil organization.
- Add colorful knobs or hooks to shelf edges for hanging items.
This design works for children ages 3 to 8 years. The lower profile matches preschooler heights perfectly. The contained structure naturally limits the mess zone, keeping play materials from spreading across the entire yard.
Consider adding small curtains or fabric panels to cover some shelves. This detail increases the realistic kitchen appearance while protecting certain materials from weather exposure. Children enjoy opening and closing the curtains during their pretend cooking activities.
13. Leaning Garden Shed Kitchen
A small lean-to structure creates a covered mud kitchen area. This permanent installation protects children from sun and light rain during play. The overhead coverage keeps play materials dry and ready for spontaneous outdoor adventures.
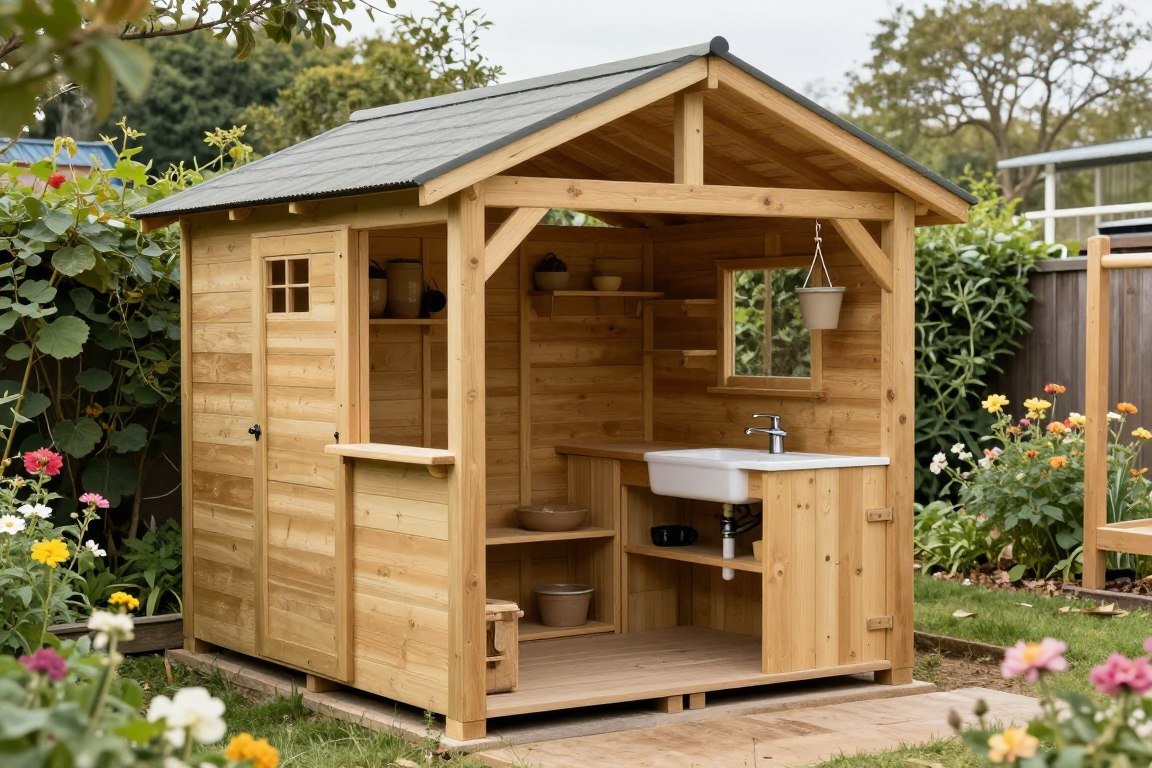
The enclosed sides reduce wind interference with lightweight play materials. Plastic containers stay in place instead of blowing away during breezy days. Parents appreciate the dedicated play zone that contains the activity in one area.
Materials Needed
- Wooden posts (4×4 lumber) for corner supports
- Plywood or boards for roof and back panel
- Roofing material (corrugated plastic or shingles)
- Shelf boards and brackets
- Concrete for setting posts
- Outdoor wood screws and nails
- Paint or stain for finishing
- Small sink basin
Building Instructions
- Mark the location for your four corner posts in a rectangular pattern.
- Dig post holes approximately 2 feet deep for stability.
- Set posts in concrete and allow proper curing time per product instructions.
- Attach horizontal boards between back posts to create the rear wall.
- Install angled supports from back posts to front posts for the roof frame.
- Attach plywood or boards across the roof frame.
- Install your chosen roofing material over the wood base.
- Add shelf boards between posts at appropriate heights for your children.
- Paint or stain all wood surfaces for weather protection.
- Install sink basin on one shelf and add hooks for hanging utensils.
This substantial project suits children ages 3 to 12 years. The protected space remains comfortable during various weather conditions, encouraging year-round outdoor play. The permanent nature makes this kitchen ideal for families planning to stay in their home long-term.
Include electrical conduit during construction if you might want to add lighting later. Battery-powered LED strips work well for extending play time into evening hours. Proper lighting increases safety while creating a cozy atmosphere that children find inviting.
Building Tip: Check local building codes before constructing permanent structures. Some areas require permits for sheds over certain sizes, even play structures in residential yards.
14. PVC Pipe Frame Kitchen
PVC pipes connect together to create lightweight, portable mud kitchens. This modern approach appeals to families who rent homes or move frequently. The modular design disassembles quickly for storage or transportation to new locations.
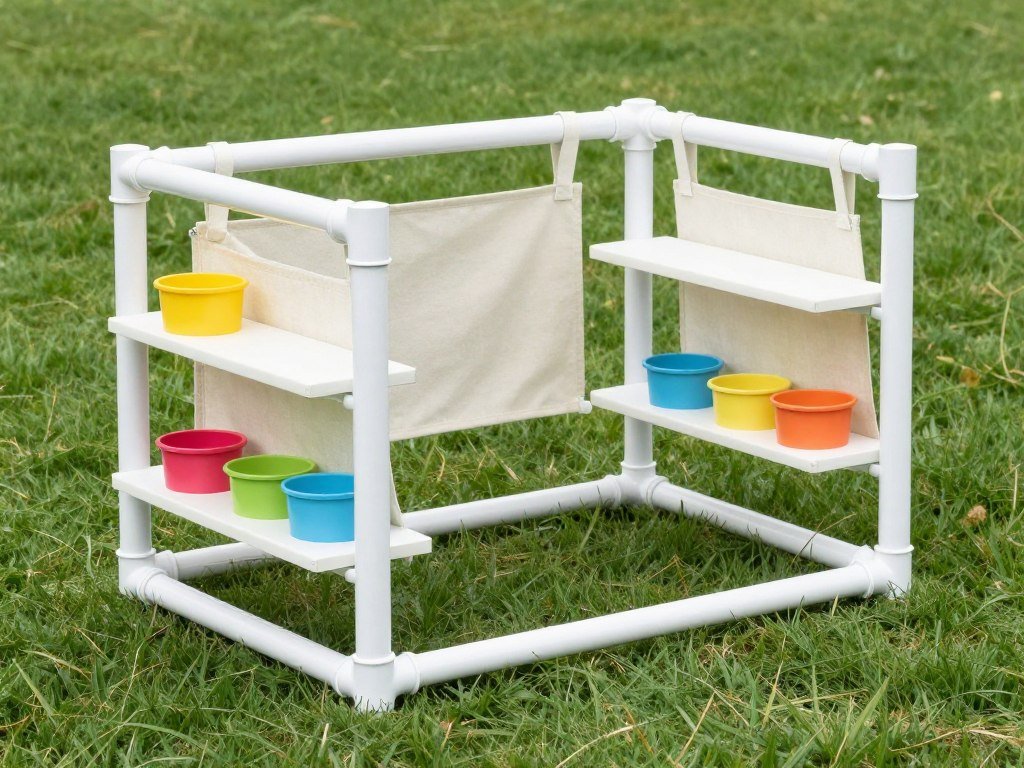
The pipe framework weighs significantly less than wooden structures while maintaining good stability. Parents find PVC easy to cut to custom lengths without power tools. The smooth plastic surface resists weather damage and cleans easily with soap and water.
Materials Needed
- PVC pipe (1-inch diameter) in 10-foot sections
- PVC connectors (elbows, T-joints, cross joints)
- PVC primer and cement for permanent joints
- Fabric or mesh for shelf surfaces
- Zip ties for attaching accessories
- Small basin for sink area
- Spray paint for decorating pipes (optional)
Assembly Process
- Plan your design and create a list of pipe lengths needed for each section.
- Cut PVC pipes to required lengths using a PVC cutter or fine-tooth saw.
- Sand the cut edges smooth to remove any rough burrs.
- Dry-fit all pieces together without glue to verify proper dimensions.
- Apply PVC primer to joints that will be permanent, followed by PVC cement.
- Connect the base frame first, ensuring it sits level on the ground.
- Add vertical posts and connect the top frame sections.
- Install cross-supports for shelf areas where needed.
- Attach fabric or mesh shelves using zip ties threaded through grommets.
- Spray paint the structure if desired after assembly is complete.
This kitchen works for ages 3 to 9 years. The lightweight construction means even young children can help with assembly. The see-through frame design keeps the play area feeling open rather than enclosed.
Leave some joints unglued for easy disassembly and modifications. This flexibility lets you adjust the configuration as play needs change. The unglued connections stay secure during normal play but separate easily when intentionally taken apart.
15. Natural Wood Stump Kitchen
Tree stumps and logs create rustic mud kitchens that blend naturally into landscape settings. This organic approach costs nothing if you have access to fallen trees or trimmed branches. The natural materials connect children more deeply with the outdoor environment during play.

Stumps provide different work heights naturally based on their original sizes. The varied levels create interest and accommodate multiple children simultaneously. The rough bark texture adds sensory elements that processed lumber cannot match.
Materials Needed
- Large tree stumps (12-18 inches diameter)
- Smaller logs for additional surfaces
- Branches for hanging racks
- Outdoor wood preservative
- Sandpaper for smoothing sitting surfaces
- Metal brackets if connecting pieces
Setup Instructions
- Select stumps with flat, stable tops that won’t wobble during play.
- Sand the top surfaces smooth while leaving bark on sides for natural appearance.
- Apply wood preservative to cut surfaces to slow decomposition.
- Position stumps in your chosen arrangement with varying heights.
- Place taller stumps at the back and shorter ones in front for tiered effect.
- Set stumps partially into the ground for added stability if needed.
- Add smaller logs between large stumps to create additional work surfaces.
- Lean sturdy branches against stumps to create hanging areas for utensils.
- Place natural items like flat rocks on stumps as preparation surfaces.
- Create a natural sink area using a hollowed log section or large flat rock.
This completely natural kitchen suits ages 3 to 10 years. The irregular surfaces challenge balance and coordination in beneficial ways. Children engage more thoughtfully with this natural setup compared to manufactured play equipment.
Expect natural materials to decompose over time as part of the organic cycle. This impermanence teaches children about nature’s processes. Replace pieces as needed, involving kids in the gathering and arrangement of new natural materials.
Nature Connection: Natural wood kitchens attract beneficial insects and wildlife. Children observe butterflies, beetles, and other creatures during play, creating spontaneous nature education opportunities.
Safety Considerations for Mud Kitchens
Safety planning ensures mud kitchens provide years of worry-free outdoor play. Parents must evaluate materials, placement, and maintenance to create secure environments. Understanding common hazards helps prevent injuries before they occur.

Material Safety
All wood surfaces require thorough sanding before children begin playing. Splinters cause painful injuries and may become infected if not removed properly. Check wooden elements monthly for new rough spots that develop as materials age and weather.
Use only outdoor-rated, child-safe finishes on all painted or stained surfaces. Many standard wood treatments contain chemicals harmful to children. Look for products specifically labeled as non-toxic and safe for children’s toys or playground equipment.
Avoid treated lumber that contains arsenic or other preservatives. These chemicals leach into soil and transfer to children’s hands during play. Natural cedar or redwood resist rot without chemical treatment, making them safer choices for outdoor projects.
Structural Stability
- Anchor tall structures to fences or walls to prevent tipping
- Use concrete footings for permanent installations
- Check all screws and connections regularly for looseness
- Ensure all shelves can support expected weight loads
- Test stability by applying pressure before allowing children to play
- Remove or repair wobbly components immediately
Location Considerations
Position mud kitchens away from areas where children run or play ball games. The fixed structure creates collision hazards during active play. Adequate clearance around all sides prevents accidental impacts and allows comfortable movement during cooking activities.
Choose locations with natural shade or add canopy coverage to prevent heat-related issues. Metal components become extremely hot in direct summer sun. Children can burn themselves on heated surfaces without realizing the danger immediately.
Avoid placement near poisonous plants, bee nests, or ant hills. Children gather natural ingredients from surrounding areas during play. Proximity to hazardous plants increases the risk of toxic materials entering play scenarios or causing skin reactions.
Ongoing Maintenance
- Inspect the structure weekly for loose parts, splinters, or damage.
- Tighten screws and replace worn hardware as soon as issues appear.
- Clean play surfaces and accessories regularly to prevent mold growth.
- Remove standing water after rain to discourage mosquito breeding.
- Check for wasp nests or spider webs before children begin playing.
- Reapply protective finishes annually or as recommended by product guidelines.
- Replace rotted or deteriorating wood components promptly.
Important: Supervise young children during mud kitchen play, especially when water is present. Standing water poses drowning risks even in shallow containers for toddlers under three years old.
Educational Benefits of Mud Kitchen Play
Mud kitchens provide more than entertainment value for children. These outdoor play spaces support development across multiple skill areas. Understanding the educational benefits helps parents appreciate the time children spend making mud pies and nature concoctions.
Sensory Development
Working with mud engages all five senses simultaneously. Children feel different textures as they mix water with dirt and sand. They smell the earthy scent of fresh mud and grass clippings added to their recipes.
The sounds of water pouring and utensils clanking provide auditory feedback. Visual learning occurs as kids observe how ingredients combine and change consistency. Some brave little ones even taste test their mud creations, though parents typically discourage this.
Sensory-rich experiences build neural pathways in developing brains. The varied inputs help children process information and regulate responses to sensory stimulation. Kids who play regularly in mud kitchens often show improved focus and emotional regulation.
Motor Skill Development
Mud kitchen activities strengthen both fine and gross motor skills. Pouring water between containers improves hand-eye coordination and muscle control. Stirring thick mud mixtures builds arm strength and endurance.
Grasping small utensils and manipulating tools refines finger dexterity. These precise movements prepare children for handwriting and other detailed tasks. Reaching for ingredients on different shelves enhances spatial awareness and body control.
Balancing containers and transporting materials develops core stability. Children naturally practice movements that physical therapists specifically target in therapy sessions. The playful context makes skill development feel like fun rather than work.

Social and Emotional Growth
Mud kitchens naturally encourage cooperative play between siblings and friends. Children must negotiate roles, share materials, and communicate their ideas. These interactions build essential social skills that transfer to school and other settings.
Taking turns at the sink or sharing favorite utensils teaches patience and compromise. Kids learn to express needs verbally rather than grabbing or pushing. Conflicts that arise during play provide real-world practice in problem-solving and conflict resolution.
The open-ended nature of mud play reduces performance pressure compared to structured activities. There are no right or wrong recipes in a mud kitchen. This freedom allows children to experiment without fear of failure, building confidence and creativity.
Scientific Thinking
- Children observe how water changes dirt consistency and texture
- They experiment with ratios to achieve desired mud thickness
- Kids discover which natural materials dissolve or stay intact in water
- Temperature differences between sun-warmed and shaded mud become apparent
- Evaporation concepts emerge as water disappears from containers
- Gravity lessons occur through pouring and draining activities
Language Development
Pretend cooking scenarios generate rich vocabulary practice. Children describe their ingredients, explain cooking processes, and invent creative recipe names. This narrative play builds language complexity and verbal expression skills.
Kids practice following sequential directions when parents suggest specific mud pie recipes. They learn descriptive words for textures like squishy, crumbly, or smooth. Time concepts emerge through discussions of cooking duration and when foods will be ready.
The social interaction inherent in mud kitchen play encourages conversation practice. Children ask questions, make requests, and respond to peers. These exchanges develop communication competence in natural, meaningful contexts.
Ideas for Extending Mud Kitchen Play
Keeping mud kitchen play fresh and engaging requires occasional new elements and activities. Parents can introduce simple additions that spark renewed interest. These enhancements extend the useful life of the play space significantly.
Seasonal Additions
Spring brings flower petals perfect for decorating mud pies and concoctions. Children gather blossoms from dandelions, clover, and other yard flowers. These colorful ingredients make creations more visually appealing and introduce botany concepts naturally.
Summer offers berries and leaves that stain mud interesting colors. Crushed grass creates green hues while berry juice adds purples and reds. Kids experiment with natural dyes and learn about pigments through hands-on exploration.
Fall provides pinecones, acorns, and colorful leaves as recipe ingredients. The varied textures and shapes inspire new concoctions and decorative techniques. Children sort and categorize these materials, practicing early math skills through play.
Winter mud play happens on warmer days when ground isn’t frozen solid. Snow mixes with mud to create new consistencies and temperatures. The seasonal variety keeps outdoor play interesting throughout the entire year.
Themed Play Scenarios
- Restaurant play with laminated menus and order pads
- Bakery theme focusing on mud pies and cakes
- Pizza parlor with flat mud bases and topping ingredients
- Ice cream shop using scoops and cone holders
- Potion making for wizard and fairy themed adventures
- Science lab for making experimental mixtures
- Soup kitchen serving nature stew to stuffed animals
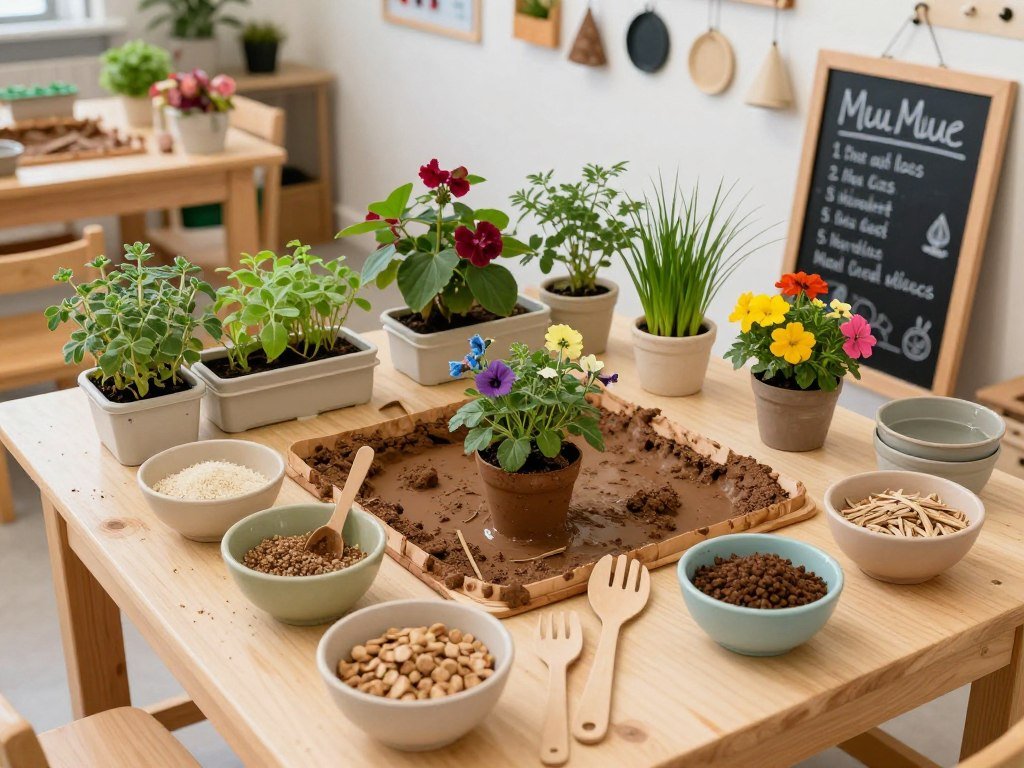
Educational Enhancements
Add measuring cups and spoons to introduce early math concepts during play. Children practice counting scoops and comparing quantities. These tools make mathematical thinking concrete and relevant to their activities.
Include a small chalkboard or whiteboard for writing recipe lists and menus. Literacy skills develop as kids attempt to spell ingredient names and dish titles. The authentic purpose motivates writing practice more effectively than workbook exercises.
Provide field guides to local plants and insects found near the kitchen area. Children look up items they discover during ingredient gathering. This reference habit builds research skills and scientific observation practices.
Parent Participation: Join children occasionally in their mud kitchen adventures. Model new vocabulary, suggest recipe combinations, and demonstrate cooking techniques. Adult involvement enriches play while strengthening parent-child bonds.
Rotating Accessories
Store some kitchen items away and rotate them into play every few weeks. The return of favorite tools feels exciting and new after absence. This strategy maintains interest without constantly purchasing new materials.
Introduce specialized tools like garlic presses, potato mashers, or egg separators. Children explore how different tools create varied effects in their mud mixtures. The novel equipment inspires experimentation and creative problem-solving.
Visit thrift stores regularly to find inexpensive muffin tins, unusual containers, or vintage kitchen gadgets. The low cost makes replacement easy when items break or wear out. The variety keeps the play space feeling fresh and interesting.
Cleanup and Maintenance Tips
Proper maintenance extends the life of mud kitchen structures and accessories. Simple routines keep play areas safe and inviting. Understanding basic care requirements saves money on repairs and replacements over time.
Daily Cleanup Routine
Establish a simple end-of-play cleanup routine that children can manage independently. This habit teaches responsibility while preventing overwhelming messes. Make cleanup part of the play experience rather than a separate chore.
- Rinse all utensils and containers with clean water from a hose or bucket.
- Return items to their designated storage spots on shelves or hooks.
- Dump standing water from containers to prevent mosquito breeding.
- Wipe down work surfaces with a damp cloth or sponge.
- Sweep any loose dirt or debris from around the kitchen area.
- Cover the sink basin or turn containers upside down to keep them dry.
Weekly Maintenance Tasks
Set aside time each week for more thorough cleaning and inspection. These regular checks catch small problems before they become major issues. Consistent maintenance requires less time than infrequent deep cleaning sessions.
Scrub all wooden surfaces with mild soap and water to remove built-up grime. Pay special attention to corners and crevices where dirt accumulates. Rinse thoroughly and allow surfaces to dry completely in the sun.
Check all connections, screws, and brackets for tightness and stability. Weather changes cause wood to expand and contract, loosening hardware over time. Tightening loose components takes minutes but prevents structural failures.
Inspect for signs of insect activity like carpenter ants or termites. Look for small holes, sawdust piles, or hollow-sounding wood. Early detection allows treatment before insects cause significant damage to the structure.
Seasonal Care
Spring Preparation
- Deep clean all surfaces after winter dormancy
- Reapply outdoor sealant to wood surfaces
- Replace any accessories damaged during storage
- Check for pest nests built during winter months
- Tighten all hardware and replace rusted screws
Fall Winterization
- Apply extra coat of sealant before cold weather
- Store fabric elements and removable accessories indoors
- Drain all containers and basins completely
- Cover wooden structures with tarps if possible
- Remove items that may crack in freezing temperatures
Extending Material Life
Move portable mud kitchens to covered areas during harsh weather. Even weather-resistant materials last longer with protection from constant exposure. Simple coverage prevents many maintenance problems from developing.
Replace worn accessories before they break completely. Cracked containers can cut small hands during enthusiastic play. Catching wear early prevents injuries while maintaining a well-equipped play space.
Store metal utensils indoors when not in use to prevent rust formation. Outdoor humidity causes rapid oxidation even on stainless steel items. Bringing tools inside between play sessions dramatically extends their useful life.
Shopping Guide for Essential Materials
Finding quality materials at reasonable prices makes mud kitchen projects more accessible. Knowing where to source different components saves time and money. This comprehensive shopping guide points parents toward the best options for their needs.
Building Materials
Home improvement stores provide the most reliable lumber selection. Look for outdoor-rated wood that resists rot and insect damage naturally. Cedar and redwood cost more but require less maintenance than treated pine.
Local lumberyards often offer better prices on bulk orders than retail chains. Ask about scrap bins where you can find smaller pieces perfect for shelves. Building relationships with staff can lead to discounts on future projects.
Play Accessories
Thrift stores offer the best value for pots, pans, and kitchen utensils. Visit regularly as inventory changes constantly with donations. Look for metal items that withstand outdoor conditions better than plastic alternatives.
Dollar stores stock inexpensive containers, measuring cups, and small tools. These items work perfectly for mud play where breakage and loss commonly occur. The low cost makes replacement easy without budget concerns.
Hardware and Tools
Invest in quality outdoor-rated screws and brackets that resist rust. Cheap hardware corrodes quickly, requiring frequent replacement. Stainless steel or coated options last years longer despite higher initial costs.
Borrow or rent specialized tools like jigsaws if you won’t use them regularly. Tool libraries and community makerspaces provide access without purchase requirements. This approach saves money while ensuring proper equipment for projects.
Free and Recycled Material Sources
Pallets come free from many businesses that receive frequent shipments. Call local stores, warehouses, or distribution centers to ask about pallet availability. Choose pallets marked HT rather than MB to avoid chemical treatment concerns.
Freecycle groups and online community boards frequently list furniture and building materials. People give away items they no longer need rather than hauling them to disposal sites. These sources provide materials at no cost beyond pickup time.
Construction sites sometimes have scrap wood suitable for mud kitchen projects. Ask foremen for permission before taking materials from dumpsters or scrap piles. Building relationships with contractors can lead to ongoing material sources.
Budget-Friendly Shopping Strategies
- Shop end-of-season clearance sales for outdoor furniture conversions
- Compare prices between online retailers and local stores before purchasing
- Buy paint and sealant in larger quantities for better per-unit pricing
- Join store loyalty programs to receive exclusive discounts and coupons
- Purchase generic or store brands that perform identically to name brands
- Wait for holiday weekend sales at major home improvement retailers
Creating Lasting Outdoor Play Memories
Building a DIY outdoor mud kitchen creates more than a play structure. These projects give children space to explore nature, develop skills, and make childhood memories. The time invested in construction pays dividends through years of imaginative outdoor play.
Every family can find a mud kitchen design matching their space, budget, and skill level. Simple pallet projects take a single afternoon while elaborate structures provide weekend bonding opportunities. The variety of options ensures success regardless of construction experience.

The educational benefits extend far beyond the obvious fun children experience. Mud kitchens support development across physical, cognitive, social, and emotional domains. Parents can feel confident that playtime contributes meaningfully to their children’s growth.
Start with materials you already have or can acquire inexpensively. Perfection matters less than creating functional space where kids feel comfortable exploring. The best mud kitchen is the one children actually use regularly.
Safety considerations ensure worry-free play experiences for everyone. Regular maintenance keeps structures secure while modeling responsibility and care for belongings. Teaching children to help with upkeep builds valuable life skills alongside play opportunities.
These fifteen ideas provide starting points for creativity rather than rigid instructions. Adapt designs to match your yard conditions, available materials, and children’s preferences. The most successful projects blend parent planning with kid input and participation.
Transform your outdoor space into an adventure zone where mud pies become culinary masterpieces. Watch as simple ingredients like dirt, water, and nature items fuel hours of engagement. Your backyard mud kitchen awaits construction, promising seasons of laughter and learning.