
Building your own chicken coop doesn’t have to drain your wallet or test your patience. Whether you’re housing three hens or a dozen feathered friends, the right plan makes all the difference.
This guide brings together 25 practical DIY chicken coop plans designed for real backyards and real budgets. Each design includes material lists, estimated costs, and difficulty ratings.
You’ll find coops for small urban spaces and larger rural properties. Some take a weekend to build. Others need more time but deliver professional results.
Table of Contents
Getting Started: Essential Considerations Before You Build
Before you grab your hammer and start construction, a few key factors will shape your coop plan choice. These decisions affect everything from material costs to daily maintenance.
Check Local Ordinances and Zoning Rules
Your city or county likely has specific rules about backyard chickens. Some areas limit flock size or require minimum distances from property lines.
Many municipalities restrict roosters entirely due to noise concerns. Visit your local planning office or check their website for current ordinances before breaking ground.
Determine Your Flock Size
Each chicken needs adequate space to stay healthy and productive. Plan for at least 3-4 square feet of interior coop space per bird.
The outdoor run should provide another 8-10 square feet per chicken. Overcrowding leads to stress, pecking problems, and reduced egg production.
Climate and Weather Protection
Your location’s weather patterns dictate critical design elements. Hot climates need excellent ventilation and shade areas.
Cold regions require insulated walls and draft-free roosting areas. Rain and snow necessitate proper roof slopes and waterproofing.
Budget and Time Commitment
Coop costs range from under one hundred dollars for basic builds to several thousand for elaborate designs. Consider both materials and tools you’ll need.
Simple projects take a weekend. Complex builds might span several weeks of work.
Essential Coop Features Every Design Needs
- Adequate ventilation to prevent moisture buildup and ammonia accumulation
- Secure nesting boxes providing privacy for egg-laying hens
- Roosting bars positioned higher than nesting areas
- Predator-proof construction with sturdy latches and buried wire
- Easy access doors for cleaning and egg collection
- Proper drainage to keep the floor dry and sanitary
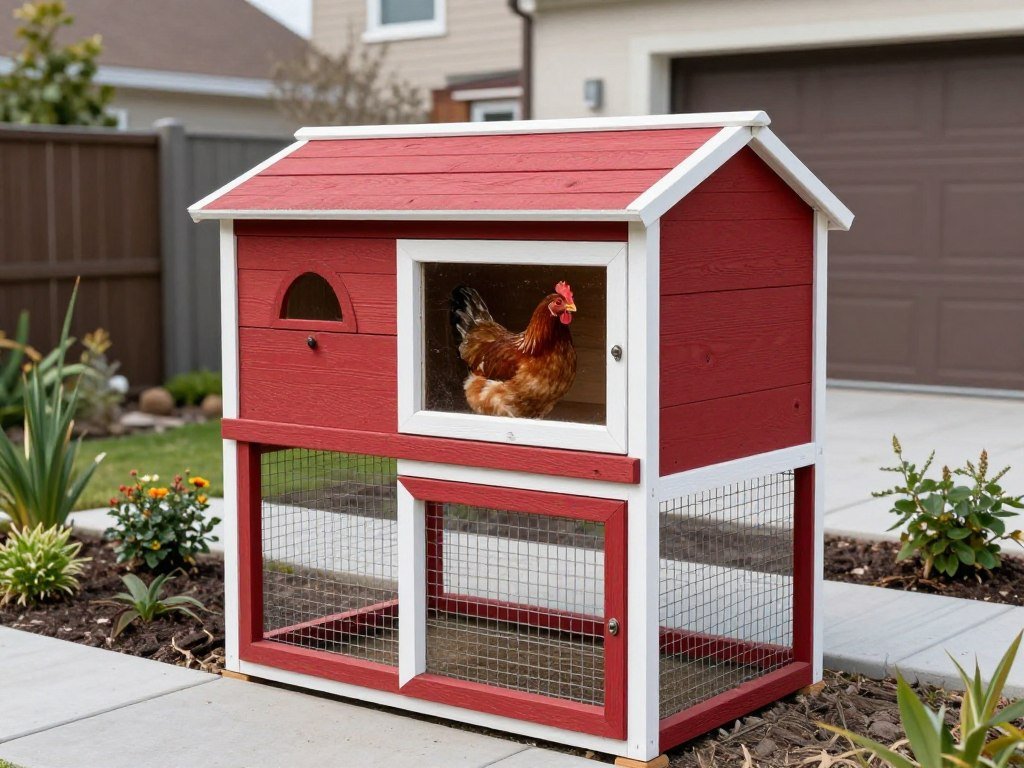
Plans 1-5: Compact Coops for Small Flocks
These space-efficient designs work perfectly for urban backyards or those just starting with chickens. Each plan accommodates 3-4 hens comfortably.
Plan 1: The Weekend Warrior Coop
Difficulty: Beginner | Cost: $150-$200 | Capacity: 3-4 chickens
This elevated design keeps predators at bay while maximizing limited space. The raised structure creates covered storage or a shaded run area underneath.
Key Materials: Pressure-treated lumber, chicken wire, roofing shingles, basic hardware
Build Time: 1-2 weekends
Special Features: Pull-out dropping tray for easy cleaning, external nesting box access
Plan 2: The Urban Minimalist
Difficulty: Beginner | Cost: $125-$175 | Capacity: 3 chickens
Clean lines and simple construction make this coop ideal for modern backyards. The compact footprint fits tight spaces without sacrificing chicken comfort.
Key Materials: Cedar boards, hardware cloth, metal roofing, eco-friendly stain
Build Time: 1 weekend
Special Features: Sliding side door, removable roof panels, integrated planter boxes
Plan 3: The Recycled Pallet Coop
Difficulty: Beginner | Cost: $75-$100 | Capacity: 3-4 chickens
Budget-friendly and environmentally conscious, this plan transforms free shipping pallets into a functional home for your chickens.
Key Materials: Wooden pallets, reclaimed wood, basic hardware, recycled roofing materials
Build Time: 2-3 days
Special Features: Upcycled materials reduce cost, simple assembly, rustic aesthetic
Plan 4: The A-Frame Classic
Difficulty: Beginner | Cost: $180-$225 | Capacity: 4 chickens
The triangular design naturally sheds rain and snow while providing excellent ventilation. This timeless style has housed chickens for generations.
Key Materials: Dimensional lumber, corrugated metal roofing, hardware cloth, hinges
Build Time: 1.5 weekends
Special Features: Self-draining roof design, ground-level run, easy-clean dropping board
Plan 5: The Mobile Tractor Coop
Difficulty: Intermediate | Cost: $200-$275 | Capacity: 3-4 chickens
Wheels and handles let you move this coop around your yard, giving chickens fresh grass daily while naturally fertilizing your lawn.
Key Materials: Lightweight lumber, PVC panels, wheels, handles, wire mesh
Build Time: 2 weekends
Special Features: Portable design, integrated handles, bottom-free for direct ground access
Pro Tip: Small coops require more frequent cleaning due to limited space. Plan for easy access to all areas during your build to make routine maintenance quicker.
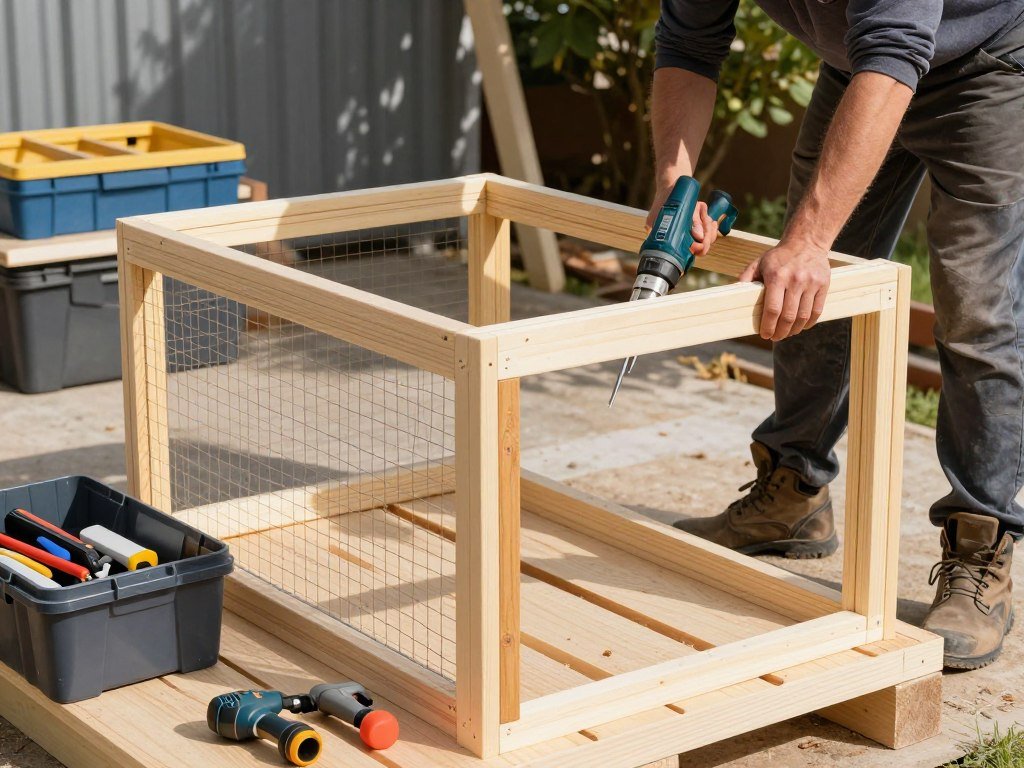
Essential Tools and Materials for Your Build
Having the right tools on hand makes any DIY chicken coop project go smoother. You don’t need a professional workshop, but certain items are essential.
Power Tools
- Circular saw or miter saw for precise cuts
- Power drill with assorted bits
- Impact driver for deck screws
- Jigsaw for curved cuts
Hand Tools
- Tape measure and carpenter’s square
- Level for proper alignment
- Hammer and nail set
- Wire cutters and staple gun
Safety Equipment
- Safety glasses for eye protection
- Work gloves for hand safety
- Dust mask for sawing operations
- Hearing protection for power tools
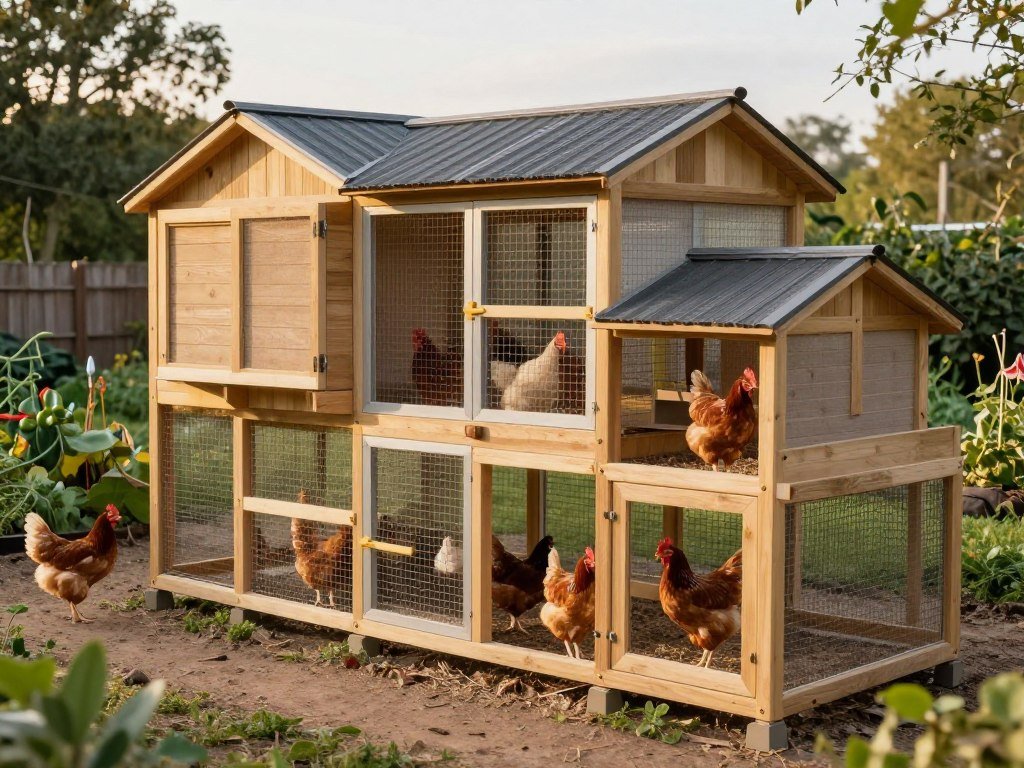
Plans 6-10: Medium-Sized Coops for Growing Flocks
These mid-range designs accommodate 5-8 chickens comfortably. They balance construction complexity with practical features for active egg production.

Plan 6: The Garden Shed Combo
Difficulty: Intermediate | Cost: $400-$550 | Capacity: 6-8 chickens
Dual-purpose design combines chicken housing with garden tool storage. The shared roof and walls reduce material costs while maximizing functionality.
Key Materials: Treated plywood, T1-11 siding, asphalt shingles, partition wall materials
Build Time: 3-4 weekends
Special Features: Separate human door, shared ventilation system, tool storage area
Plan 7: The Walk-In Design
Difficulty: Intermediate | Cost: $500-$650 | Capacity: 8 chickens
Full human height access makes daily chores comfortable. No more bending or kneeling to collect eggs or clean the coop.
Key Materials: 2×4 framing, exterior plywood, conventional door, windows for light
Build Time: 4 weekends
Special Features: Standing room inside, ample nesting boxes, roosting ladder system
Plan 8: The Barn-Style Classic
Difficulty: Intermediate | Cost: $450-$600 | Capacity: 6-7 chickens
Traditional gambrel roof provides extra storage in the upper area. This iconic design adds rustic charm to any backyard.
Key Materials: Pine boards, barn-style hardware, metal roofing, paint or stain
Build Time: 3-4 weekends
Special Features: Loft storage space, decorative cupola for ventilation, classic aesthetics
Plan 9: The All-Season Insulated Coop
Difficulty: Advanced | Cost: $600-$800 | Capacity: 6-8 chickens
Insulated walls and ceiling keep birds comfortable year-round. Perfect for regions with extreme temperature swings.
Key Materials: Insulated panels, double-wall construction, weatherstripping, thermal windows
Build Time: 4-5 weekends
Special Features: Climate control capability, energy-efficient design, superior weather protection
Plan 10: The Lean-To Space Saver
Difficulty: Beginner-Intermediate | Cost: $350-$475 | Capacity: 5-6 chickens
Attach this design to an existing structure like your garage or shed. Share one wall to cut material costs and construction time.
Key Materials: Lumber for three walls, slanted roof materials, attachment hardware
Build Time: 2-3 weekends
Special Features: Space-efficient footprint, reduced material costs, weather protection from main building
Nesting Boxes: Design and Placement Essentials
Proper nesting boxes encourage hens to lay eggs in designated spots rather than random locations. The right setup keeps eggs clean and makes collection effortless.
Sizing and Quantity Guidelines
Each nesting box should measure approximately 12 inches wide, 12 inches deep, and 12 inches tall. One box serves 3-4 hens adequately.
Chickens often share favorite boxes rather than using all available options. Provide at least 4-5 nesting boxes for a flock of 12 birds.
Optimal Placement Strategy
- Position boxes lower than roosting bars to discourage sleeping in nests
- Place in darker, quieter coop areas for privacy
- Allow external access for easy egg collection
- Keep boxes off the ground to prevent dampness
Bedding Material Options
- Pine shavings provide cushioning and absorb moisture
- Straw creates soft nests but can harbor mites
- Nesting pads offer easy cleaning and reusability
- Hemp bedding resists mold and controls odors
Important: Add a small lip (3-4 inches) at the front of each box to keep bedding and eggs from rolling out. This simple feature prevents broken eggs and maintains neat nests.
Featured Plan: The Complete Homesteader Coop
Plans 11-15: Large Coops for Serious Production
These substantial designs support flocks of 10-15 chickens. Built for homesteaders and serious egg producers who need reliable, spacious housing.
Plan 11: The Double-Decker Design
Difficulty: Advanced | Cost: $800-$1,100 | Capacity: 12-15 chickens
Two-story construction maximizes vertical space. The upper level houses roosting areas while the ground floor provides nesting boxes and activity space.
Key Materials: Heavy-duty framing lumber, stair components, reinforced flooring, extra ventilation
Build Time: 5-6 weekends
Special Features: Chicken ladder system, dual-level cleaning access, superior predator protection
Plan 12: The Solar-Powered Smart Coop
Difficulty: Advanced | Cost: $1,200-$1,600 | Capacity: 10-12 chickens
Integrated solar panels power automatic doors, lighting, and water heaters. Modern technology meets traditional chicken keeping.
Key Materials: Solar panel kit, automatic door system, LED lighting, heated waterers
Build Time: 6-8 weekends
Special Features: Automated systems, remote monitoring capability, year-round water access
Plan 13: The Enclosed Run Fortress
Difficulty: Advanced | Cost: $900-$1,300 | Capacity: 12-14 chickens
Fully covered run area protects against aerial predators while giving birds ample outdoor space. Maximum security meets free-range benefits.
Key Materials: Heavy-gauge wire, buried predator barrier, covered run framing, reinforced doors
Build Time: 5-7 weekends
Special Features: 360-degree predator protection, all-weather outdoor access, spacious design
Plan 14: The Modular Expansion Coop
Difficulty: Intermediate-Advanced | Cost: $700-$950 | Capacity: 10-12 chickens (expandable)
Start with the base unit and add sections as your flock grows. This flexible design adapts to changing needs without rebuilding.
Key Materials: Standardized panel system, connection hardware, modular components
Build Time: 4-5 weekends for base unit
Special Features: Add-on capability, standardized components, scalable design
Plan 15: The Heritage Barn Conversion
Difficulty: Advanced | Cost: $600-$900 | Capacity: 14-16 chickens
Transform a small storage shed or play structure into a functional chicken coop. Repurposing existing structures saves money and time.
Key Materials: Retrofit components, ventilation additions, interior modifications, roosting hardware
Build Time: 3-4 weekends
Special Features: Upcycled construction, existing roof and walls, character and history
Predator Protection: Building for Maximum Security
Predators pose constant threats to backyard chickens. Raccoons, foxes, hawks, and even neighborhood dogs can devastate a flock overnight.

Hardware Cloth vs. Chicken Wire
Hardware cloth with half-inch or quarter-inch spacing provides superior protection. The welded wire construction resists tearing and chewing.
Chicken wire works for keeping chickens contained but fails against determined predators. Raccoons easily tear through the thin, twisted wire.
Critical Security Points
- Bury wire 12-18 inches deep around the perimeter
- Use raccoon-proof latches requiring two-step operation
- Cover all ventilation openings with hardware cloth
- Install automatic doors for consistent night protection
- Eliminate gaps larger than one inch anywhere
Common Predator Entry Points
- Gaps under doors where predators can dig
- Loose or missing wire sections in older coops
- Simple hook-and-eye latches raccoons open easily
- Unprotected ventilation areas near the roofline
- Weak flooring in raised coops
Safety Alert: Predators are most active at dawn and dusk. Automatic doors timed to close after dark provide consistent protection even when you’re away from home.
Plans 16-20: Specialty and Unique Designs
These creative plans solve specific challenges or add visual interest to your property. Each offers unique advantages for particular situations.
Plan 16: The Rooftop Urban Coop
Difficulty: Advanced | Cost: $850-$1,200 | Capacity: 4-6 chickens
Designed for flat rooftops and balconies in city environments. Lightweight construction meets strict weight limits while maintaining durability.
Key Materials: Lightweight composite panels, aluminum framing, rooftop-safe flooring
Build Time: 4-5 weekends
Special Features: Reduced weight design, wind-resistant construction, noise dampening
Difficulty: Advanced | Cost: $1,000-$1,400 | Capacity: 8-10 chickens
Engineered for harsh winters with heavy insulation and heated components. Your birds stay productive even during freezing temperatures.
Key Materials: R-13 insulation, heated water systems, deep bedding floor, thermal windows
Build Time: 6-7 weekends
Special Features: Superior insulation, draft-free design, winter egg production optimization
Plan 18: The Hot Climate Breezeway
Difficulty: Intermediate | Cost: $550-$750 | Capacity: 6-8 chickens
Maximize airflow with open design elements perfect for hot, humid regions. Strategic shading keeps interior temperatures comfortable.
Key Materials: Shade cloth, wide eave overhangs, screened walls, reflective roofing
Build Time: 3-4 weekends
Special Features: Cross-ventilation design, shade structures, heat-reflective materials
Plan 19: The Wheelchair-Accessible Design
Difficulty: Intermediate-Advanced | Cost: $800-$1,100 | Capacity: 6-8 chickens
Thoughtful design enables chicken keeping for those with mobility challenges. Raised beds, wide doors, and accessible features make daily care easy.
Key Materials: Ramp materials, wide-clearance doors, raised platforms, accessible hardware
Build Time: 4-5 weekends
Special Features: ADA-compliant features, comfortable access heights, easy-reach components
Plan 20: The Decorative Cottage Style
Difficulty: Intermediate | Cost: $700-$950 | Capacity: 5-7 chickens
This charming design resembles a miniature cottage complete with window boxes and decorative trim. Function meets curb appeal.
Key Materials: Premium siding, decorative trim pieces, window boxes, paint colors
Build Time: 4-5 weekends
Special Features: Aesthetic appeal, garden integration, property value enhancement
Proper Ventilation: The Key to Healthy Birds
Good air circulation removes moisture, ammonia fumes, and excess heat. Proper ventilation prevents respiratory issues and keeps your flock healthy year-round.
Understanding Ventilation Principles
Warm, moist air rises naturally. Position upper vents near the roof peak to exhaust stale air while lower openings allow fresh air intake.
Avoid creating drafts directly on roosting chickens. Place vents above bird level to maintain air exchange without chilling your flock.
Summer Ventilation Needs
Hot weather demands maximum airflow. Open additional vents and doors to create cross-breezes.
Consider installing fans for extreme heat situations. Chickens tolerate cold better than excessive heat.
Shade structures over outdoor runs reduce heat stress. Provide multiple water stations to prevent dehydration.
Winter Ventilation Strategy
Cold months still require air exchange despite closed doors. Moisture from breathing and droppings creates humidity.
Keep upper vents open even in freezing weather. The key is ventilation without drafts on the birds.
Ice forming inside the coop signals inadequate ventilation. Add more upper vents if you notice frost buildup.
Recommended Ventilation Ratio
Aim for at least one square foot of ventilation per ten square feet of floor space. More is better in most climates.
Adjustable vents give you control for different seasons. Louvers or sliding panels let you regulate airflow as needed.
Plans 21-25: Budget-Friendly and Premium Options
This final set includes bare-bones budget builds and high-end luxury coops. Find the right balance of cost and features for your specific needs.

Plan 21: The Bare-Bones Budget Build
Difficulty: Beginner | Cost: $50-$75 | Capacity: 2-3 chickens
Absolute minimum design using scrap and salvaged materials. Perfect for those testing chicken keeping before major investment.
Key Materials: Reclaimed lumber, salvaged wire, basic hardware, recycled roofing
Build Time: 1 weekend
Special Features: Minimal cost, quick construction, upgradeable over time
Plan 22: The Simple Starter Coop
Difficulty: Beginner | Cost: $175-$250 | Capacity: 4-5 chickens
Straightforward design with all essential features but no frills. A solid foundation for first-time chicken keepers.
Key Materials: Basic dimensional lumber, standard hardware cloth, economy roofing
Build Time: 2 weekends
Special Features: All fundamentals covered, room to add features later, proven design
Plan 23: The Mid-Range All-Arounder
Difficulty: Intermediate | Cost: $500-$700 | Capacity: 6-8 chickens
Balanced approach combining quality materials with practical features. This versatile design handles most situations well.
Key Materials: Quality lumber, durable hardware, proper roofing, finishing details
Build Time: 3-4 weekends
Special Features: Well-rounded capabilities, good longevity, comfortable working conditions
Plan 24: The Premium Craftsman Coop
Difficulty: Advanced | Cost: $1,500-$2,000 | Capacity: 8-10 chickens
High-end materials and thoughtful details create a showcase piece. This coop becomes a backyard focal point while serving your flock.
Key Materials: Cedar or redwood, copper accents, architectural shingles, custom hardware
Build Time: 6-8 weekends
Special Features: Premium aesthetics, superior durability, property value addition
Plan 25: The Luxury Estate Coop
Difficulty: Expert | Cost: $2,500-$3,500 | Capacity: 10-15 chickens
Top-tier construction with every convenience and upgrade. Automated systems, premium finishes, and exceptional craftsmanship throughout.
Key Materials: Premium lumber, automated systems, designer finishes, high-end components
Build Time: 8-12 weekends
Special Features: Automated climate control, remote monitoring, architectural design, maximum comfort
| Budget Level | Cost Range | Best For | Expected Lifespan |
| Ultra-Budget | $50-$150 | Testing chicken keeping, temporary housing | 1-3 years |
| Budget-Friendly | $150-$400 | First-time builders, small flocks | 3-5 years |
| Mid-Range | $400-$800 | Serious hobbyists, medium flocks | 7-10 years |
| Premium | $800-$1,500 | Long-term investment, larger operations | 10-15 years |
| Luxury | $1,500+ | Showcase builds, maximum features | 15+ years |
Material Selection Guide for Long-Lasting Construction
Choosing the right materials balances upfront cost with long-term durability. Quality materials reduce maintenance and extend your coop’s lifespan.
Lumber Options and Treatment
Pressure-treated lumber resists rot and insects for ground-contact applications. Use it for skids, floor framing, and any wood touching soil.
Avoid treated wood inside the coop where chickens might peck it. Standard pine or cedar works well for interior framing and roosting bars.
Exterior Cladding
- T1-11 plywood offers economical coverage
- Cedar siding provides natural rot resistance
- Vinyl siding requires minimal maintenance
- Metal panels withstand weather extremes
Roofing Materials
- Asphalt shingles balance cost and durability
- Metal roofing lasts decades with no maintenance
- Rubber roofing works for flat or low-slope designs
- Corrugated panels provide budget-friendly coverage
Hardware and Fasteners
- Galvanized screws prevent rust in outdoor conditions
- Stainless hinges last longer in harsh weather
- Coated wire resists corrosion better than bare steel
- Quality latches justify their higher cost
Wire Mesh Specifications
Half-inch hardware cloth provides excellent predator protection. The smaller the mesh opening, the better the security against small predators.
Galvanized-after-welding wire lasts longer than galvanized-before-welding. The coating stays intact at weld points for superior rust resistance.
Construction Tips and Common Mistakes to Avoid
Learning from others’ experiences saves time and frustration. These insights help you avoid typical pitfalls in chicken coop construction.
Best Practices
- Build bigger than you think you need for flock expansion
- Install removable dropping boards for easier cleaning
- Use exterior-grade plywood rated for weather exposure
- Plan for human access before finalizing the design
- Test door operation before attaching hardware cloth
- Create a detailed cut list before purchasing lumber
Common Mistakes
- Building too small and regretting it within months
- Inadequate ventilation causing moisture problems
- Using chicken wire instead of hardware cloth
- Forgetting to consider snow load on the roof
- Poor door placement making daily access difficult
- Skipping the buried predator barrier
Time-Saving Construction Shortcuts
- Pre-assemble wall sections on the ground before raising them
- Use pocket hole joinery for faster, stronger connections
- Buy pre-cut lumber when available to reduce cutting time
- Install hardware cloth before raising walls when possible
- Paint or stain components before final assembly
Safety Considerations During Construction
Always wear safety glasses when cutting or drilling. Flying debris can cause serious eye injuries.
Use hearing protection with power tools. Prolonged exposure to loud equipment damages hearing permanently.
Keep your work area organized and free of trip hazards. Most construction injuries happen from simple falls.
Seasonal Considerations for Year-Round Comfort
Your coop design should address the specific climate challenges in your region. Consider the most extreme conditions your area experiences.
Winter Preparation Elements
Deep bedding methods provide natural insulation in cold climates. Build up layers of bedding material that compost slowly, generating warmth.
Heated water systems prevent freezing and ensure constant hydration. Chickens need access to unfrozen water even in sub-zero temperatures.
Cold Climate Features
- Insulated walls and ceiling reduce heat loss
- Smaller windows minimize drafts while providing light
- South-facing windows capture solar heat
- Deeper bedding for insulation and composting
- Wind-breaking walls or structures
Hot Climate Features
- Maximum ventilation with screened openings
- Shade structures over runs and windows
- Reflective roofing to reduce heat absorption
- Shallow bedding that doesn’t trap heat
- Multiple water stations to encourage hydration
Transitional Season Adjustments
Spring brings increased egg production as daylight hours increase. Ensure adequate nesting boxes are clean and ready.
Fall requires thorough coop inspection before winter. Repair any damage, replace worn weatherstripping, and check roof integrity.
Maintenance Schedule for Optimal Coop Health
Regular maintenance prevents small issues from becoming major problems. A consistent schedule keeps your coop functional for years.
Daily Tasks
- Collect eggs from nesting boxes at least once daily
- Check water supply and refill as needed
- Provide fresh food and inspect feeder operation
- Perform visual health check on all birds
- Secure all doors and latches at night
Weekly Responsibilities
- Remove dropping boards and replace bedding
- Refresh nesting box material if soiled
- Inspect for signs of predator attempts
- Check ventilation effectiveness
- Clean and refill dust bath area
Monthly Maintenance
- Deep clean entire coop interior thoroughly
- Inspect all hardware and tighten loose fasteners
- Check roof for leaks or damage
- Examine wire for holes or weak spots
- Test automatic systems if installed
Seasonal Deep Cleaning
Spring and fall require complete coop cleanouts. Remove all bedding, scrub surfaces, and apply fresh bedding throughout.
Use this opportunity to inspect structural integrity. Look for rot in wood, rust in metal, and wear in moving parts.
Frequently Asked Questions About DIY Chicken Coops
How much space does each chicken really need?
Minimum recommendations suggest 3-4 square feet per bird inside the coop and 8-10 square feet per bird in the outdoor run. Larger breeds need more space than bantams. More space reduces stress, pecking problems, and disease transmission. If you can build bigger, your chickens will be healthier and happier.
Can I use regular chicken wire for predator protection?
Chicken wire keeps chickens contained but provides minimal predator protection. Raccoons, foxes, and other predators easily tear through the thin wire. Use hardware cloth with half-inch or quarter-inch openings for areas where predators might gain access. Save chicken wire only for interior partitions where security isn’t critical.
Do I need electricity in my chicken coop?
Electricity isn’t essential but adds convenience and safety. Automated door openers ensure birds are locked in at night. Heated water prevents freezing in winter. Lighting can extend egg production during short winter days. Solar panels offer an alternative to running electrical lines. Many successful coops operate without any power source.
What’s the best flooring material for a chicken coop?
Options include dirt floors, wood floors, and concrete slabs. Dirt floors provide natural drainage but can become muddy. Wood floors keep things dry but require more maintenance and eventual replacement. Concrete slabs last longest and clean easily but cost more initially. Many builders use wood floors with removable sections for dropping boards.
How often should I clean the chicken coop?
Daily egg collection and water checks are essential. Remove dropping boards weekly. Deep clean the entire coop monthly in warm weather, every 6-8 weeks in winter when birds spend more time inside. Seasonal deep cleanouts twice yearly maintain optimal health. The deep litter method requires less frequent cleaning but needs proper management.
Should I paint or stain my chicken coop?
Exterior finishes protect wood from weather damage and extend coop lifespan. Paint offers the most protection and widest color choices. Stain highlights natural wood grain but may need more frequent reapplication. Use only exterior-grade, non-toxic finishes. Avoid treating interior surfaces where chickens might peck, as some chemicals pose health risks.
Conclusion: Choosing the Right Plan for Your Situation

Building a chicken coop ranks among the most rewarding DIY projects. You create a safe home for your feathered friends while enjoying fresh eggs daily.
The right plan depends on your specific situation. Consider your available space, budget, skill level, and flock size when choosing a design.
Start with a solid foundation and quality materials. These investments pay dividends through reduced maintenance and longer coop lifespan.
Remember that chickens are remarkably adaptable. They’ll thrive in various housing styles as long as basic needs are met.
Focus on proper ventilation, predator protection, and adequate space. These three elements matter more than decorative details or complex features.
Take your time during construction. Rushing leads to mistakes that create ongoing problems. A few extra hours of careful work prevents years of frustration.
Your first coop doesn’t need to be perfect. Many successful chicken keepers started with simple builds and upgraded over time.
The most important step is getting started. Choose a plan that matches your current abilities and available resources.
Build it well, maintain it regularly, and your coop will house happy, productive chickens for many years. Welcome to the rewarding world of backyard chicken keeping.