
This beginner-friendly tutorial will walk you through each step. You’ll discover exactly how to make solid granny squares that look professional and feel sturdy.
The traditional granny square pattern creates beautiful lacy designs. But sometimes you need something more substantial. That’s where solid granny square patterns shine.
Whether you’re making a baby blanket, tote bag, or cozy afghan, solid granny squares give your project structure and durability. Let’s get started.
Table of Contents
What Makes a Granny Square “Solid”?
A solid granny square differs from traditional granny squares in one key way. Traditional granny square patterns use chain spaces between stitch clusters. This creates the classic lacy appearance with visible gaps.
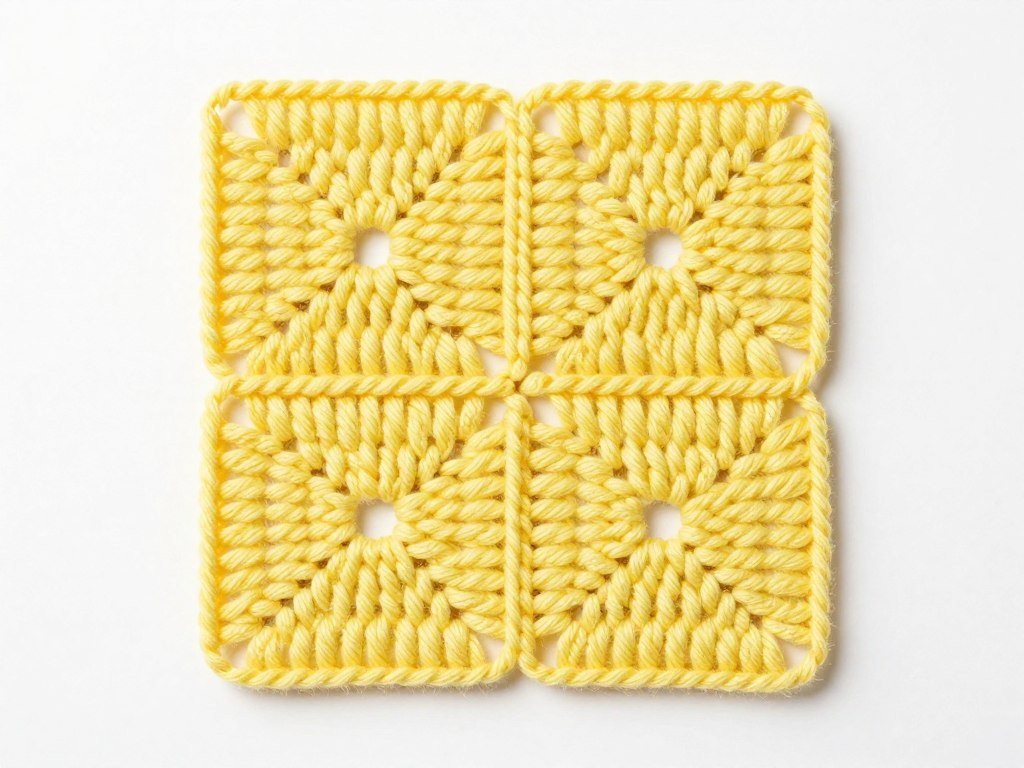
Solid granny squares eliminate those chain spaces. Instead, you work stitches directly into the stitches from the previous round. This technique fills in all the gaps and creates a dense, sturdy fabric.
The result is a granny square with no holes. Your finished square feels more like regular crochet fabric. It’s perfect for items that need structure or warmth.

Many crocheters prefer solid granny squares for baby items. The closed stitches mean tiny fingers can’t get caught. They also work beautifully for bags, pillow covers, and garments.
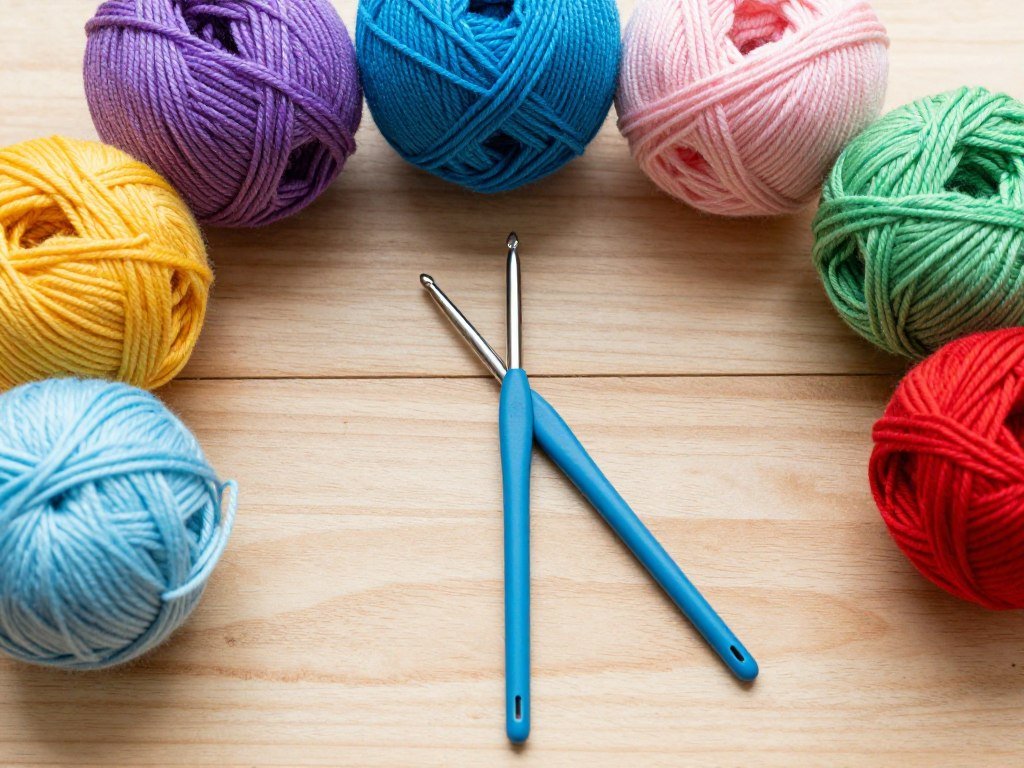
Materials You’ll Need for Your Solid Granny Square
Gathering the right supplies makes your crochet project smoother. Here’s everything you need to create perfect solid granny squares.
Essential Supplies
- Worsted weight yarn in your chosen color (approximately 50 yards per square)
- Crochet hook size H/8 (5.0mm) or size needed to match yarn weight
- Scissors for cutting yarn
- Yarn needle for weaving in ends
- Stitch markers (optional but helpful for beginners)
Choosing the Right Yarn and Hook Size
Worsted weight yarn works best for learning this pattern. It’s easy to see your stitches and the finished square has nice structure. Any worsted weight yarn will work beautifully.
Your crochet hook size should match your yarn weight. Most worsted weight yarns work well with an H/8 (5.0mm) hook. Check your yarn label for the recommended hook size.
Using the correct hook size prevents your squares from being too tight or too loose. A hook that’s too small creates stiff fabric. A hook that’s too large makes floppy squares with visible gaps.
Our Top Recommended Materials for Gap-Free Squares
After making hundreds of solid granny squares, we’ve found these materials give the most consistent results. These are the exact products we reach for every time.
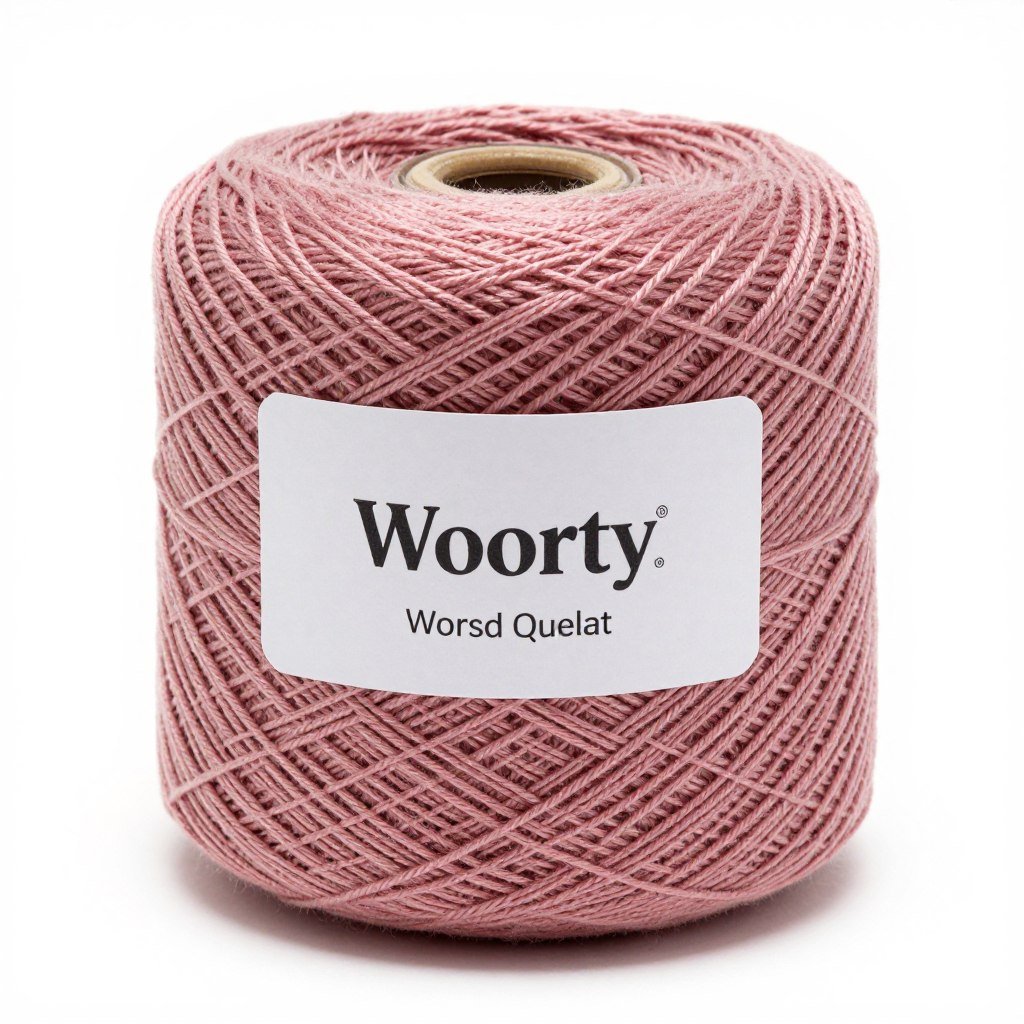
Best Yarn for Solid Granny Squares
We love Red Heart Super Saver for its consistency and wide color range. The medium weight creates perfect stitch definition without splitting. Each skein gives you enough yarn for multiple squares.
- Excellent stitch definition
- Won’t split easily
- Machine washable and durable
- Budget-friendly for large projects
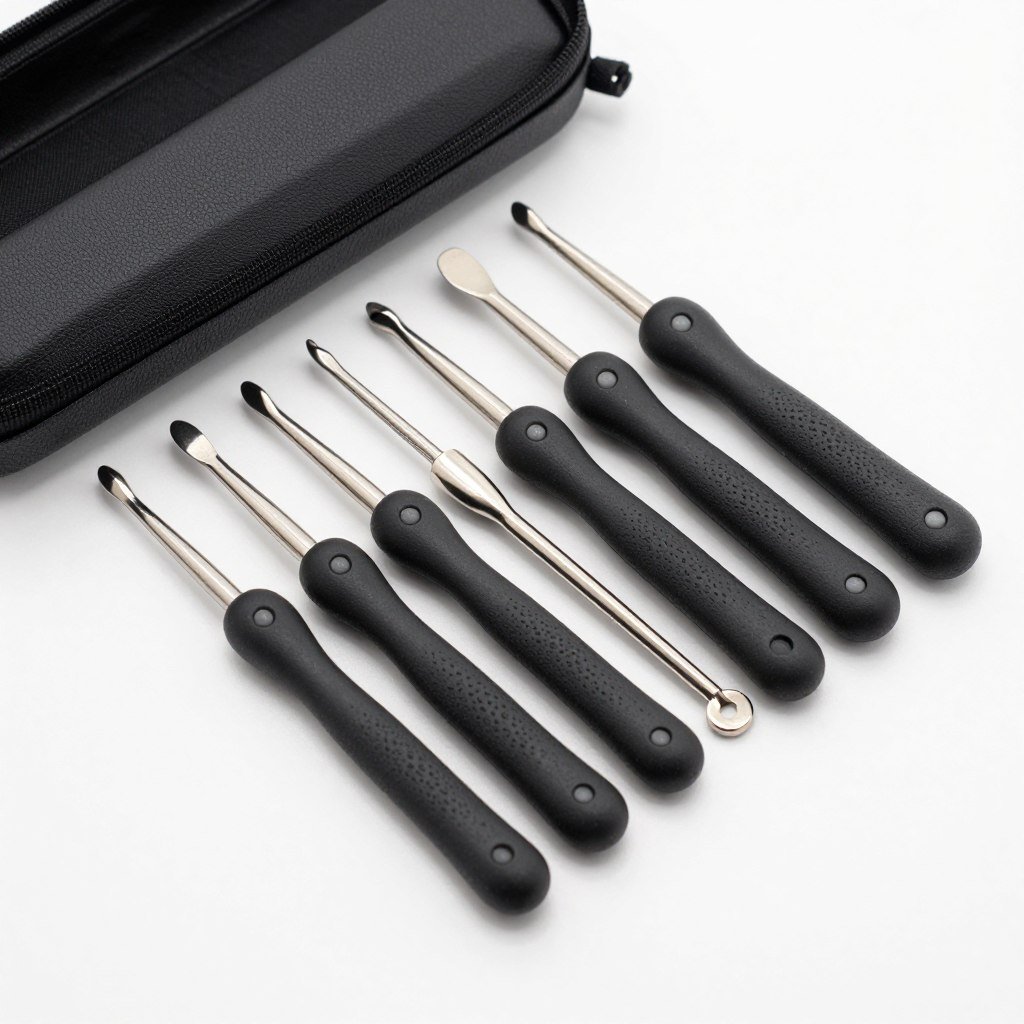
Best Crochet Hook for Beginners
Clover Amour hooks make learning solid granny square patterns easier. The ergonomic handle reduces hand fatigue. The smooth hook glides through stitches effortlessly.
- Comfortable soft-grip handle
- Color-coded by size
- Smooth hook point
- Reduces hand cramping
Helpful Stitch Markers
Stitch markers help you track rounds and corners in your solid granny square. Locking markers won’t slip out of your work. They’re especially helpful when learning the pattern.
- Mark beginning of rounds
- Identify corner spaces
- Prevent mistakes
- Reusable for all projects
Crochet Abbreviations Used in This Pattern
Understanding these common crochet terms will help you follow the pattern easily. Don’t worry if you’re new to crochet terminology. We’ll explain each step in plain language too.
| Abbreviation | Meaning | Description |
| ch | chain | Basic foundation stitch that creates loops |
| sl st | slip stitch | Joining stitch used to connect rounds |
| dc | double crochet | Main stitch used throughout the pattern |
| st(s) | stitch(es) | Individual crochet stitch or multiple stitches |
| sp | space | Gap between stitches where you insert hook |
| rep | repeat | Indicates pattern section to repeat |
Step-by-Step Solid Granny Square Pattern Instructions
This complete pattern creates a solid granny square with no gaps. Each round builds on the previous one. Take your time and check your work after each round.

Starting Your Solid Granny Square: The Magic Ring
The magic ring method creates a tight center with no hole. This gives your granny square a professional finish right from the start.
- Wrap yarn around your fingers to form a loop
- Insert hook through the ring from front to back
- Grab the working yarn with your hook
- Pull yarn through the ring to create your first loop
- Chain one to secure (this doesn’t count as a stitch)
Some crocheters prefer starting with a chain four joined with a slip stitch. Both methods work perfectly. The magic ring creates a tighter center.
Round 1: Creating the Foundation
Round one establishes the four corners of your solid granny square. Pay attention to stitch placement. This round sets up everything that follows.
- Chain 3 (counts as first double crochet throughout pattern)
- Work 2 dc into the magic ring
- Chain 2 for corner space
- Work 3 dc into ring, chain 2 (second corner made)
- Repeat step 4 two more times (total of 4 corners)
- Slip stitch to top of beginning chain 3 to join round
Pull your magic ring tight now. You should have four groups of three double crochet stitches. Each group is separated by a chain-2 corner space.
Round 2: Building the Square Shape
Round two is where your solid granny square really takes shape. You’ll work into both corners and sides. This creates the characteristic square form.
- Slip stitch into the next two stitches to reach first corner space
- Chain 3 (counts as first dc)
- Work 2 dc, chain 2, and 3 dc all into same corner space
- Work 3 dc into next corner space (this fills the side)
- Work 3 dc, chain 2, and 3 dc into following corner space
- Repeat around all four corners, working 3 dc between each corner
- Slip stitch to top of beginning chain 3
Count your stitches carefully. You should see clear corners forming. Each side should have two groups of three double crochet stitches.
Round 3 and Beyond: Expanding Your Square
Each additional round follows the same pattern. You work corner increases and fill in the sides with stitch groups. This makes your granny square larger.
- Slip stitch to reach first corner space
- Work corner (3 dc, chain 2, 3 dc) into corner space
- Work 3 dc into each space along side until next corner
- Repeat around all four corners
- Join with slip stitch

Continue adding rounds until your square reaches the desired size. Each round adds approximately one inch to each side. Most projects use squares between four and six inches.
Finishing Your Solid Granny Square
When your square reaches the right size, it’s time to finish off. Proper finishing prevents your work from unraveling.
- After joining final round, cut yarn leaving 6-inch tail
- Pull tail through last loop on hook
- Thread yarn tail onto tapestry needle
- Weave tail through several stitches on wrong side
- Weave beginning tail in same way
- Trim excess yarn close to work
Your solid granny square is complete. Block it gently with steam if needed. This helps square up the corners and even out stitches.
Tips for Making Perfect Solid Granny Squares Every Time
These expert tips help you create consistently beautiful solid granny squares. Small adjustments make a big difference in your finished project.
Maintaining Consistent Tension
Tension refers to how tightly you hold your yarn while crocheting. Consistent tension creates even stitches throughout your square. Your finished piece looks more professional.
Practice holding your yarn the same way for every stitch. Some crocheters wrap yarn around their pinky finger. Others prefer threading it through multiple fingers. Find what feels comfortable and stick with it.
Signs Your Tension Is Too Tight
- Difficulty inserting hook into stitches
- Fabric feels stiff and rigid
- Hand cramps after short periods
- Square measures smaller than pattern indicates
Signs Your Tension Is Too Loose
- Stitches look uneven and sloppy
- Gaps appear between stitches
- Square feels floppy and unstable
- Finished size larger than pattern specifies
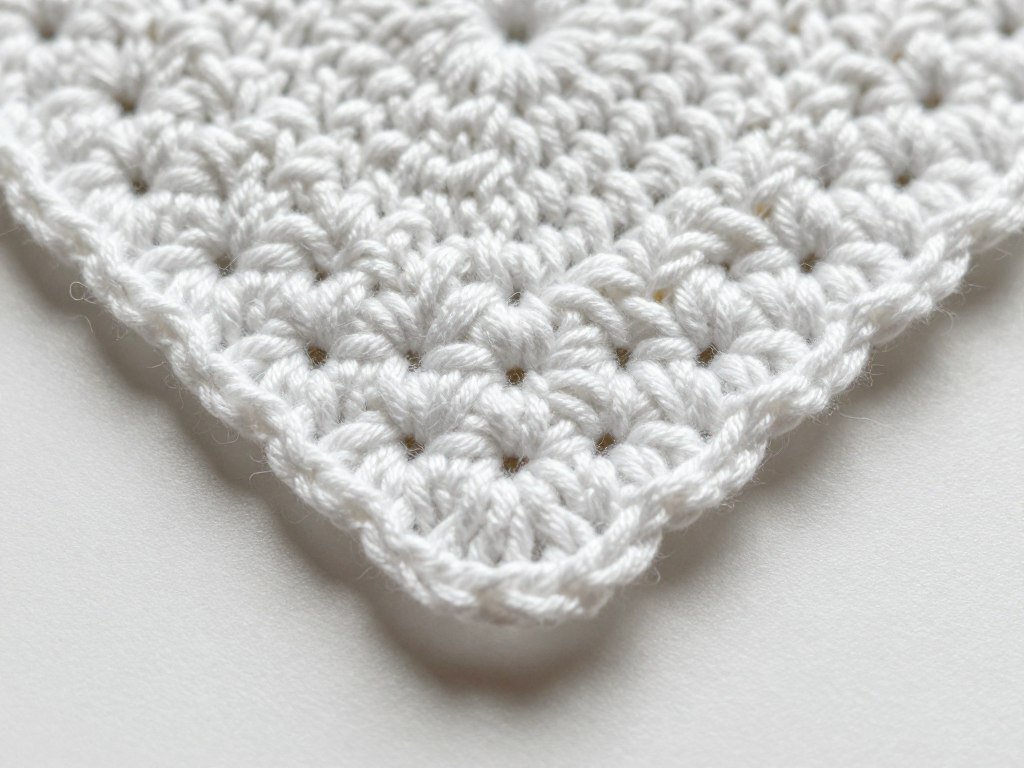
Keeping Your Corners Square
Sharp, defined corners make the difference between amateur and professional-looking granny squares. The corner space chain is crucial. Always use exactly two chains in each corner space.
Count your stitches carefully around corners. Each corner should have two groups of three double crochet stitches. These stitch groups sit on either side of the chain-2 corner space.
Block your finished squares if corners aren’t quite square. Pin each corner to a blocking board. Spray lightly with water. Let dry completely before unpinning.
Working Into the Right Spaces
Understanding where to insert your hook prevents gaps and mistakes. In solid granny squares, you work into stitches themselves, not chain spaces. This creates the dense, gap-free fabric.
For side stitches, insert your hook under both loops of the stitch from the previous round. For corners, work into the chain-2 corner space itself. This distinction is important.
Counting Stitches for Each Round
Accurate stitch counts prevent your square from becoming wonky. After each round, count to verify you have the right number of stitch groups.
| Round Number | Stitch Groups Per Side | Total Corners | Total Stitch Groups |
| Round 1 | 1 | 4 | 4 |
| Round 2 | 2 | 4 | 8 |
| Round 3 | 3 | 4 | 12 |
| Round 4 | 4 | 4 | 16 |
| Round 5 | 5 | 4 | 20 |
Notice the pattern? Each round adds one more stitch group per side. This creates the spiral growth that forms your square shape.
Troubleshooting Common Solid Granny Square Problems
Even experienced crocheters encounter issues sometimes. Here’s how to identify and fix the most common problems with solid granny squares.
My Square Has Gaps Between Stitches
Gaps in solid granny squares usually come from one of three issues. First, your hook might be too large for your yarn weight. Try going down one hook size.
Second, you might be accidentally skipping stitches. Count carefully as you work each round. Each space from the previous round should have exactly three double crochet stitches worked into it.
Third, loose tension can create small gaps. Practice holding your yarn more firmly. The yarn should have slight resistance as it feeds through your fingers.
Quick Fix: If you notice gaps after completing several rounds, try going down one hook size for the next square. Keep the rest of your technique the same. This simple adjustment often solves the problem completely.
My Square Won’t Lay Flat
Squares that cup or ruffle have a stitch count problem. Cupping means you need more stitches. Ruffling means you have too many stitches.
Check your corner increases. Each corner should have two separate groups of three double crochet stitches. If you’re working six stitches into the corner as one group, that causes cupping.
Ruffling often happens when you add extra stitches along the sides. Stick strictly to three double crochet stitches in each space. No more, no less.
My Corners Aren’t Square
Rounded corners indicate problems with your corner chain space. Always use exactly two chains for each corner. One chain creates tight, rounded corners. Three chains create floppy, over-sized corners.
Make sure you’re working corner increases correctly. The pattern is always: three double crochet, chain two, three double crochet, all into the same corner space.

I Keep Losing Track of Where Rounds Start
Use a stitch marker to mark the beginning of each round. Place it in the top of your starting chain-3. Move it up each round as you work.
Alternatively, use a different colored yarn as a marker. Thread a six-inch piece through the stitch at the beginning of the round. Pull it out when you reach that spot again.
My Square Edges Look Messy
Messy edges usually come from inconsistent starting chains. Your chain-3 at the beginning of each round should match the height of your double crochet stitches. If it’s too tight or too loose, edges look uneven.
Practice making relaxed starting chains. Some crocheters chain four instead of three, then work into the second chain from hook. This creates a neater edge for them.
Creative Variations for Your Solid Granny Square Pattern
Once you master the basic solid granny square, endless possibilities open up. These variations add interest while maintaining the gap-free construction.
Color Changing Techniques
Changing colors transforms simple solid granny squares into stunning focal points. You can change colors every round for a rainbow effect. Or use two alternating colors for a striped look.
To change colors neatly, work the last yarn over of your joining slip stitch with the new color. This creates a seamless transition. Leave six-inch tails to weave in later.
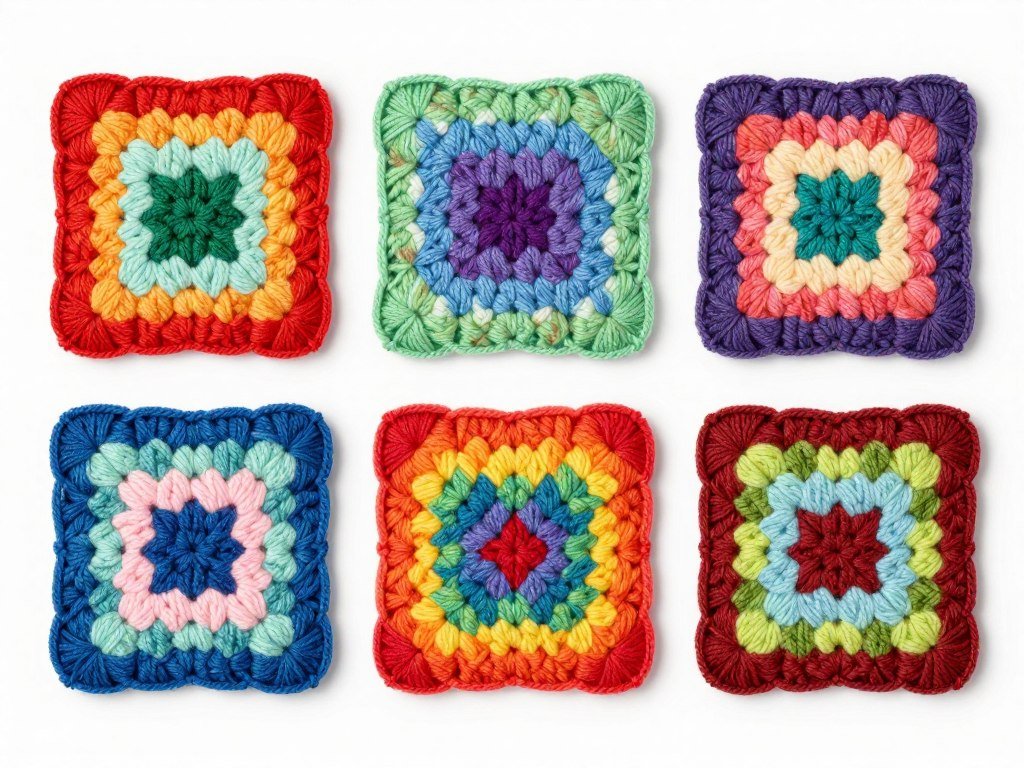
Try gradient color transitions using yarn in the same color family. Start with the darkest shade in the center. Progress to lighter shades with each round. This creates beautiful ombre granny squares.
Size Adjustments for Different Projects
Adjust your solid granny square size by adding or removing rounds. Each round adds approximately one inch to each side of your square. This measurement varies slightly based on yarn weight and hook size.
Small Squares (3-4 inches)
- Perfect for coasters
- Patchwork blankets
- Decorative bunting
- Typically 3-4 rounds total
Large Squares (8-10 inches)
- Great for pillow covers
- Tote bag panels
- Quick baby blankets
- Usually 8-10 rounds total
Texture Variations
Experiment with different stitches while keeping the solid granny square structure. Try using half double crochet instead of double crochet for a denser fabric. Or use treble crochet for a more open, drapey square.
Front post and back post stitches create raised textures. Work round three in front post double crochet. This creates subtle ribbing across your solid granny square.
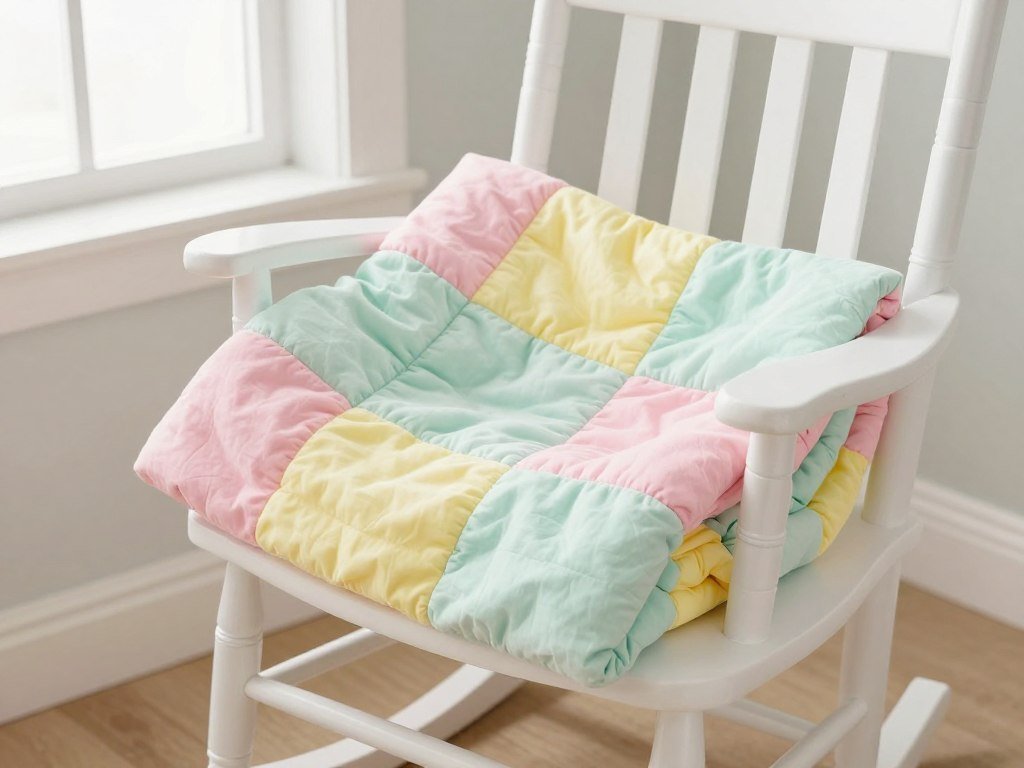
Project Ideas Using Solid Granny Squares
Solid granny squares work beautifully in countless projects. Their sturdy construction makes them ideal for items that need structure. Here are some inspiring ways to use your squares.
Baby Blankets
Solid granny squares make safe, cozy baby blankets. The gap-free design means no tiny fingers get stuck. Make 48 small squares and join them for a perfect crib-size blanket.
Choose soft, washable yarn like acrylic or cotton. Babies need frequent washing, and these yarns hold up beautifully. Pastel colors work wonderfully for nursery decor.
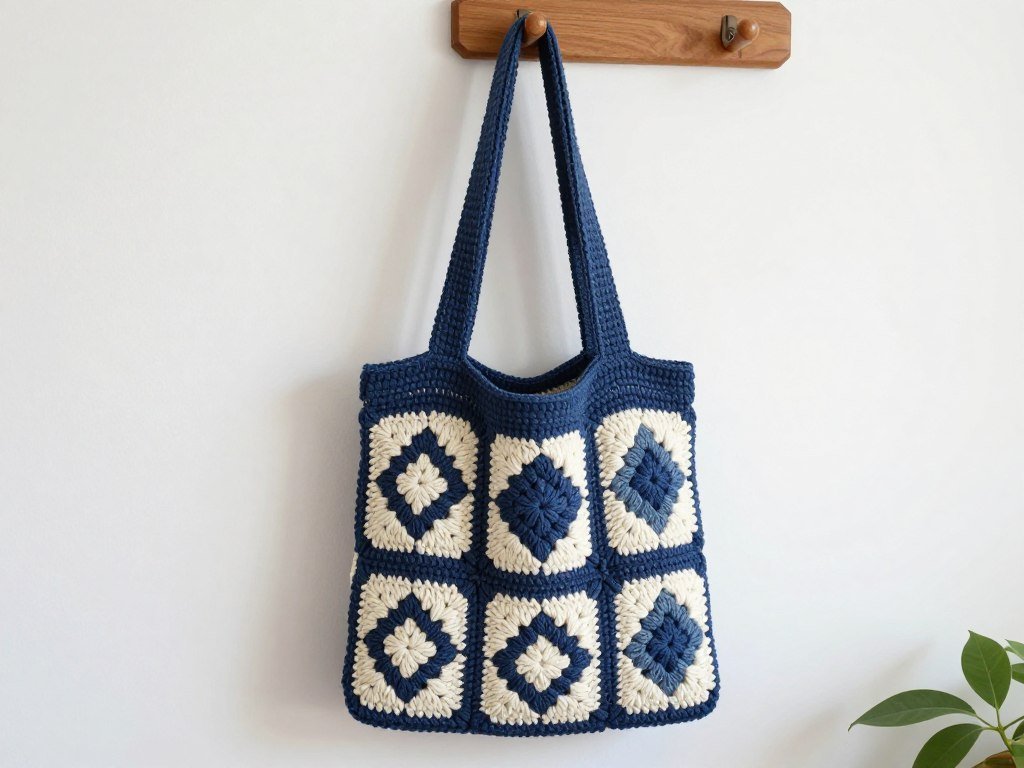
Sturdy Tote Bags
The dense fabric of solid granny squares creates durable tote bags. Make six large squares. Sew four together for the body, and two for the base and lining.
Add fabric lining for extra strength. Cotton yarn works best for bags that hold groceries or books. The solid construction prevents items from poking through.
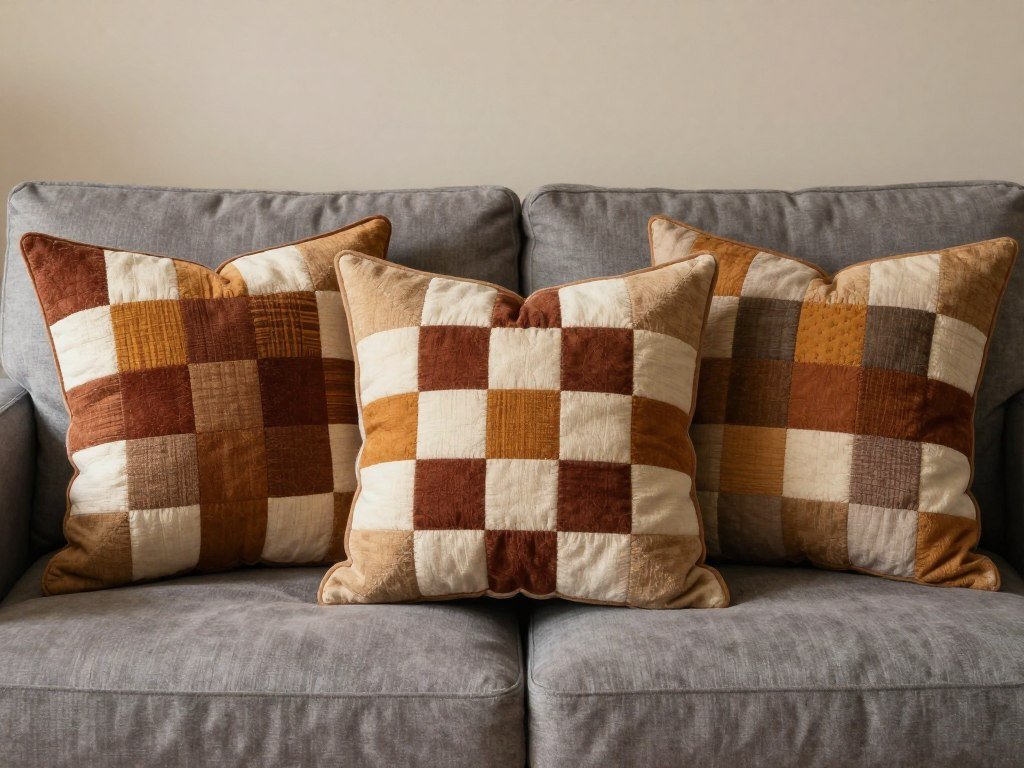
Decorative Pillows
Transform solid granny squares into beautiful accent pillows. Two large squares sewn together create the perfect pillow cover. Leave one side partially open for inserting a pillow form.
Mix and match colors to complement your home decor. Seasonal color combinations let you update your space affordably. Add buttons or tassels for extra flair.
How to Join Your Solid Granny Squares
Joining squares correctly creates a professional-looking finished project. Several methods work well with solid granny squares. Choose based on your project and preference.
Whip Stitch Joining Method
The whip stitch creates an invisible join perfect for blankets and afghans. Hold two squares with wrong sides together. Thread a yarn needle with matching yarn.
Insert needle through corresponding stitches on both squares. Pull yarn through gently. Continue across the entire edge. This method creates a flat, flexible seam.
Slip Stitch Joining
Slip stitch joining works up quickly and creates a decorative ridge. Hold squares right sides together for an invisible ridge. Or hold wrong sides together for a visible decorative seam.
Insert hook through both squares’ corresponding stitches. Yarn over and pull through both squares and loop on hook. Continue across. This crochet method feels natural for crocheters.

Join As You Go Method
This advanced technique joins squares as you crochet them. On the last round of your square, join to previously completed squares with slip stitches. This eliminates separate seaming time.
Join as you go requires planning your layout first. Map out which squares connect to which. The time savings make it worthwhile for large projects like afghans.
Frequently Asked Questions About Solid Granny Squares
What’s the difference between a solid granny square and a traditional granny square?
Traditional granny squares have chain spaces between stitch clusters that create a lacy, open pattern with visible gaps. Solid granny squares eliminate those chain spaces by working stitches directly into stitches from the previous round. This creates dense, gap-free fabric perfect for items needing structure like bags, baby items, and garments.
How many rounds do I need for a standard sized granny square?
A standard solid granny square measures about four to five inches and requires five to six rounds with worsted weight yarn and an H/8 hook. Each round adds approximately one inch to your square’s dimensions. Adjust the number of rounds based on your desired finished size.
Can I use different yarn weights for this pattern?
Yes, solid granny square patterns work with any yarn weight. Simply adjust your crochet hook size to match your yarn. Bulky weight yarn with a larger hook creates quick, oversized squares. Fingering weight yarn with a smaller hook makes delicate, detailed squares. Always check your yarn label for recommended hook size.
Why does my solid granny square curl or not lay flat?
Squares that curl or ruffle have incorrect stitch counts. Curling indicates too few stitches (missing corner increases or side stitches). Ruffling means too many stitches (adding extra stitches or using too many chains in corners). Count carefully and use exactly two chains for corner spaces and three double crochet stitches in each space along sides.
How much yarn do I need for one solid granny square?
A standard five-inch solid granny square uses approximately 50 yards of worsted weight yarn. Smaller squares need less, larger squares need more. For blanket projects, multiply the number of squares by 50 yards, then add 10 percent extra for joining and weaving in ends.
Can I make solid granny squares in different shapes?
While the pattern creates squares, you can adapt the technique for other shapes. Use five corner increases for pentagons, six for hexagons. The solid stitch technique (working into stitches rather than chain spaces) works for any granny-style shape. The key principle stays the same regardless of the number of sides.
Start Creating Beautiful Solid Granny Squares Today
You now have everything you need to make perfect solid granny squares with no gaps. This versatile pattern opens up countless project possibilities.
Remember the key points for success. Use the correct hook size for your yarn weight. Maintain consistent tension throughout your work. Count your stitches carefully after each round.

Work your corner increases correctly with exactly two chain spaces. This keeps your corners square and your edges straight. These small details make the difference between good and great results.
Start with one square to practice the pattern. Then make as many as your project requires. Before you know it, you’ll be creating solid granny squares without even thinking about the steps.
The solid granny square pattern becomes second nature with practice. Soon you’ll crochet while watching TV or chatting with friends. Your hands will know the pattern by heart.
Share your finished solid granny square projects with fellow crocheters. Join online crochet communities to get inspired by others’ creations. You’ll discover new color combinations and project ideas.
Happy crocheting, and enjoy making beautiful solid granny squares for all your projects!